Section 4: Run data quality
Now that you have a data product available in the catalog, running data quality rules will tell everyone that the data is in good shape and ready to be used. As more is learned about the data new data quality rules can be added to make sure it's fit for all use cases. Ensuring data products are of the highest quality will help to build trust in your data and tell others that it's being monitored an improved. As the value of data increases, the quality of that data will have to be more closely monitored and controlled as data quality issues can cause massive impacts if poorly managed.
Prerequisites
- Data quality rules can only be run on delta format tables in ADLS Gen2 and Microsoft Fabric.
- The Managed Identity from Microsoft Purview must be enabled to read the data source as it is the only supported credential for data quality today.
- You must have the data quality steward role in the business domain you're running data quality in.
- You must be the owner or have user access administrator access to the data source you're connecting data quality scanning to ensure proper security authorization to scan the data.
- You must have the data profile steward role to run profiles on your data.
Create and run data quality rules
Open the Microsoft Purview portal.
Select the Data Catalog.
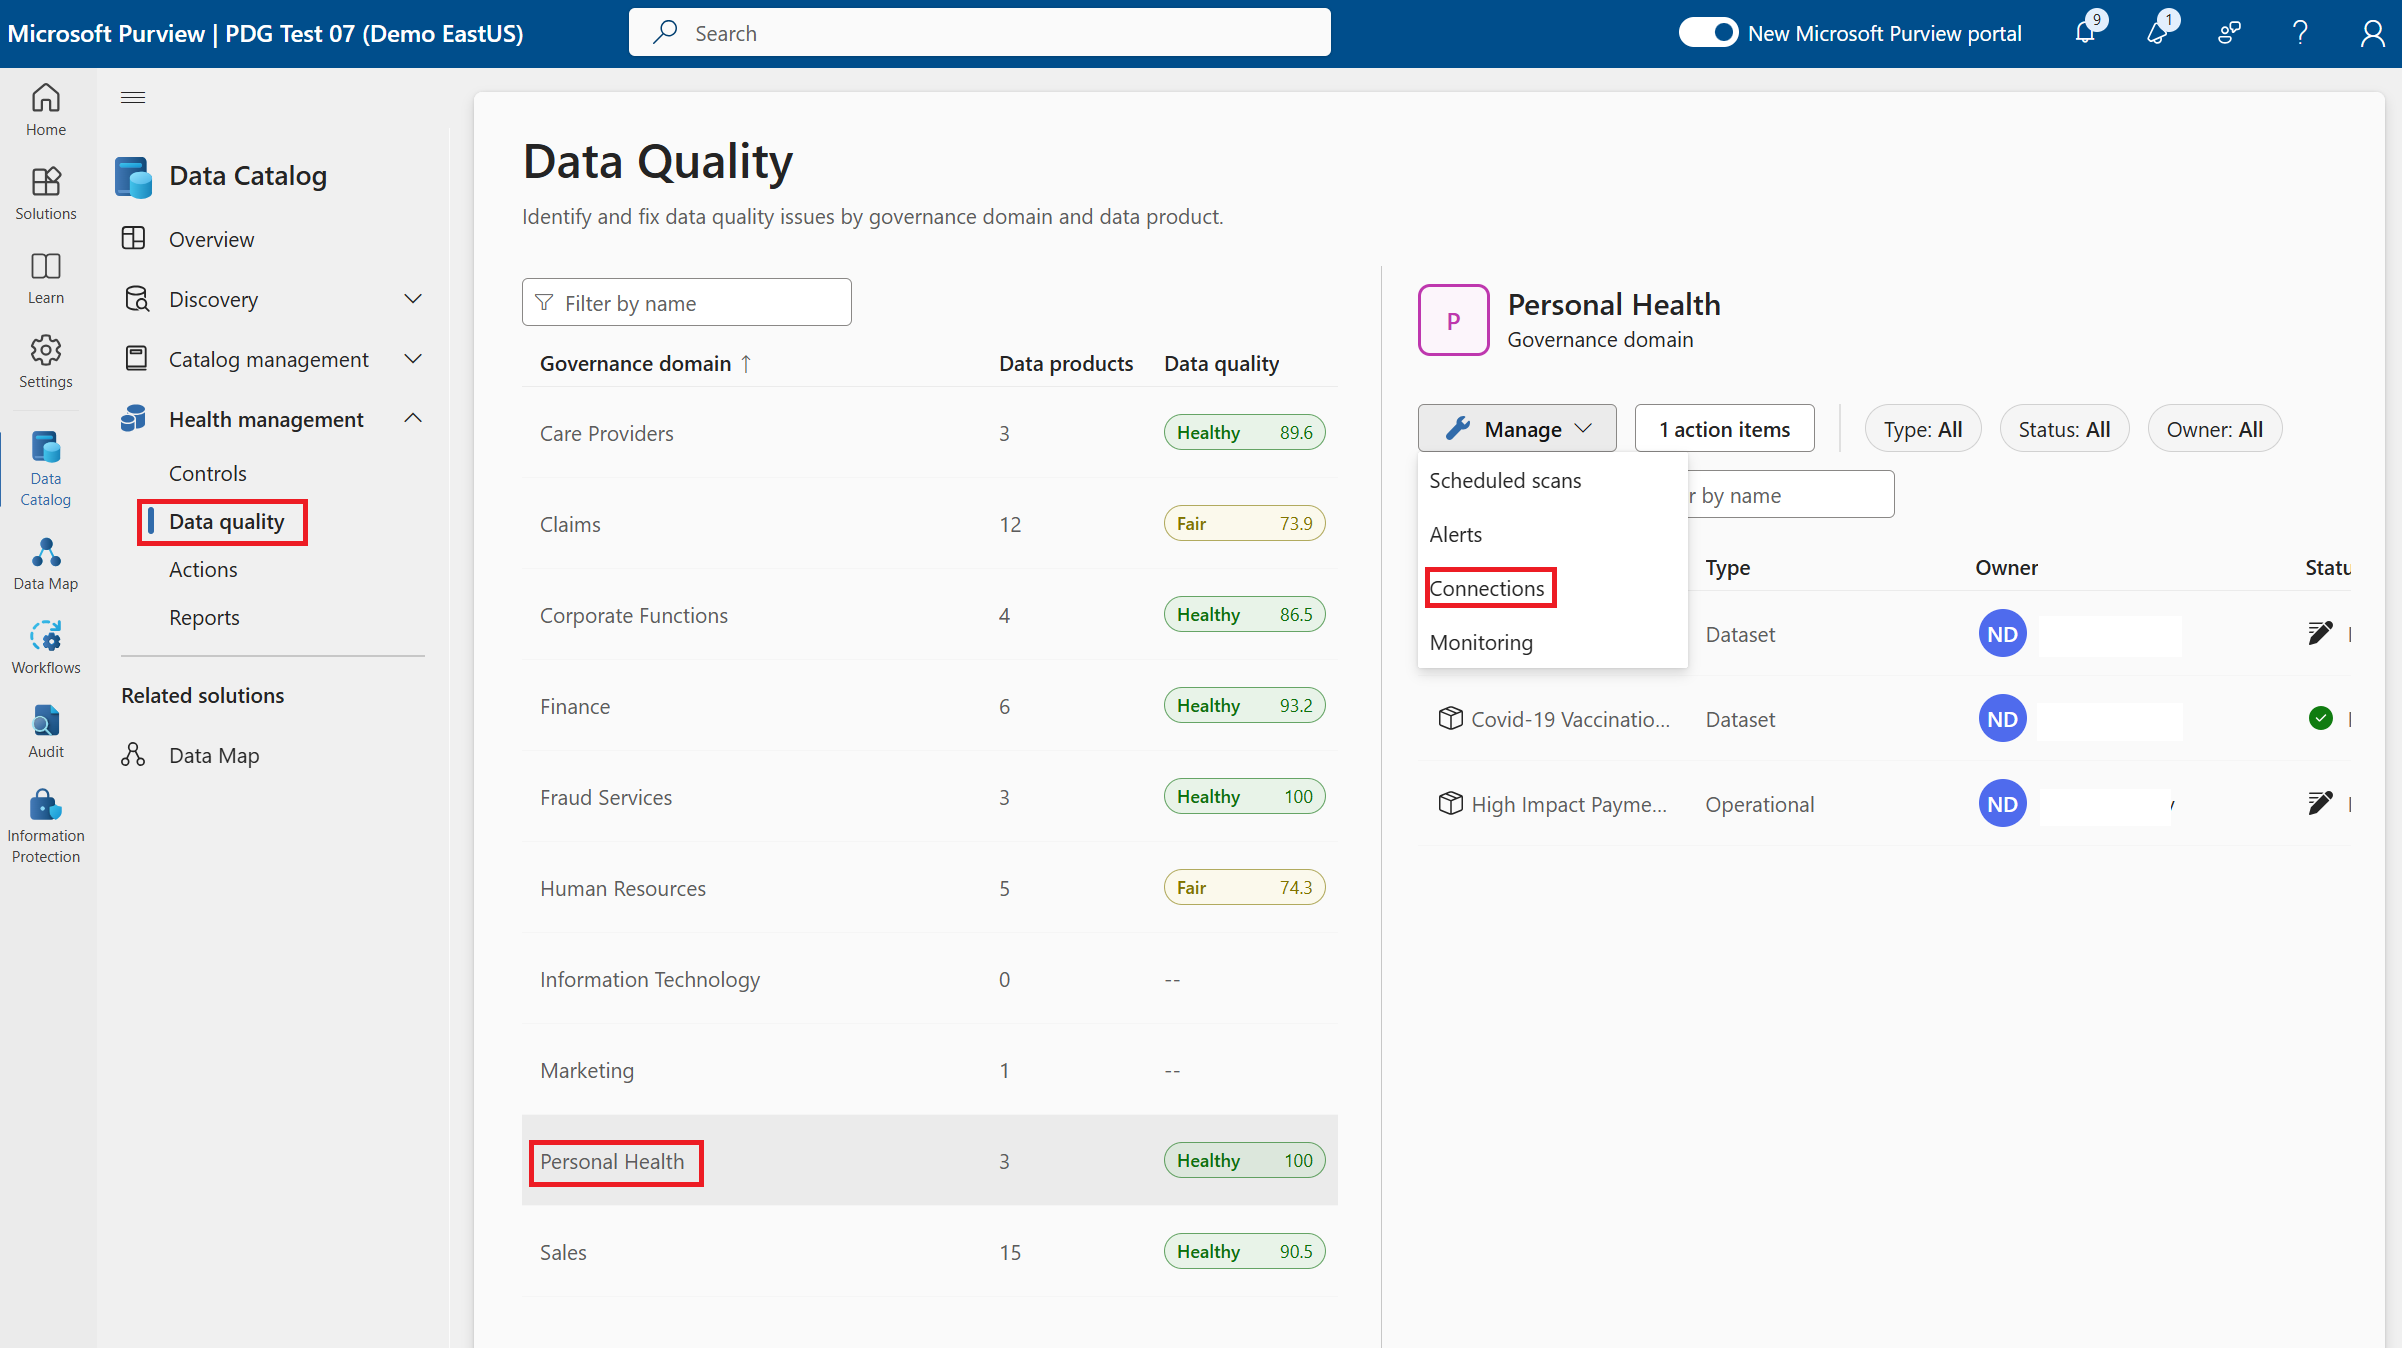
Select the Data quality tab under Data management.
Select the Personal Health Domain created in section 1.
Select the Manage button and pick Connections from the menu. Building this connection will ensure that you're able to run data quality scans on your data source in that business domain, preventing teams from gaining access to knowledge of the data without proper authorization.
Select + New on the connections screen to create a new connection:
- Provide the display name 'Personal Health ADLSg2 DQ'.
- Select source type of Azure Data Lake Storage Gen2.
- Provide details of the data source created in section 2.
Note
Credential must be Microsoft Purview MSI (system) for a data quality connection
- Select Test connection
- Once the connection is tested, select Submit
- Provide details of the data source created in section 2.

Once the connection is established, you're ready to run profiles and start building data quality rules. This ensures that the experts that know the business rules and appropriate rules are running on the most important data products.
- Go back to the Data quality page.
- Select the Personal Health business domain.
- Select the Covid-19 Vaccination and Case Trending by Age data product built in section 3.
- Select the asset that was added to the data product. (It must be in delta format from section 2 or data quality won't run).
- Apply data quality rules to the columns of the data to measure if it's meeting your expectation of quality:
- Select Rules tab on the asset selected.
- Select + New rule
- Select Empty/blank fields rule
- Provide details:
- Select AgeGroupVacc column from the column drop-down
- Rule Name: Confirm Vaccination Age Group Exists
- Select Create
- Select + New rule
- Select Data type match
- Provide details
- Select DateAdministered column
- Select Create
- Select Run Data quality scan
Profile Data
Create a profile for your data to see the high level statics of each column and discover any anomalies that could have a new rule.
- Open the Microsoft Purview portal.
- Select the Data Catalog.
- Select the Data quality tab under Data management.
- Select Profile data
- Check the top box next to Column name to profile all columns. Microsoft Purview will recommend which columns to profile, and you can select columns that you know are worth profiling to help prevent profiles on highly sensitive data or data you know will be sparsely populated.
- Select Run profile
When the scan is complete, you'll be able to review the data quality score and profile for your new data product and the data quality score will be available to all users of the catalog ensuring that all know the status of the data.
Create a schedule for your data quality scans to ensure you're continuously monitoring for data quality issues. Set alerts to make sure you're addressing data quality issues before consumers are affected.
- Start by selecting the Data quality tab in the left navigation menu under Data management.
- Select the Personal Health domain where we configured the data quality rules.
- Select the Manage button and pick Scheduled scans from the drop-down menu.
- Select + New
- Add Overview details
- Name: Personal Health DQ Monthly Evaluation
- Description: Monthly scan of DQ rules for continuous improvement.
- Select Continue
- Select the scope of the scan
- Check the box next to Covid-19 Vaccination and Case Trending by Age data product
- Select Continue
- Schedule the scan to ensure it runs on the last day of every month
- Select Recurring
- Recurrence: Every one Month
- Month days: Last
- Schedule scan time (UTC): 12:00:00
- Start recurrence at (UTC): leave as default
- Select Continue
- Review details of the scan to see if there are any changes you would like to make before saving.
- Select Save. Because we triggered a manual scan earlier we don't need to trigger another scan now but if a new scan is needed, select Save and run.
Configure alerts
Once data quality has scheduled scans, there are alerts that can be triggered to let stewards know if there are issues or attention needed because of data quality issues or scan failures. Configure a data quality alert for failed scans and when the score decreases by more than 5%.
- Go back to the Personal Health domain in the Data quality tab
- Select the Manage button and select Alerts from the drop-down menu
- Select + New
- Enter alert details
- Display Name: Personal Health DQ Monthly Scan
- Description: To ensure minimum DQ thresholds are meeting consumer expectations.
- Target: Score decreases by more than
- Threshold: 5
- Turn off notifications: leave unchecked
- Turn on notification for failed quality scans: leave checked
- Recipient: enter your name
- Select Continue
Tip
When implementing in your data catalog you will want to send the alerts to the stewards that can notify consumers of the issue and work with the technical owner of the data to make corrections.
At the end of this section, you'll now have a functioning data catalog with operational data quality to manage the data you're offering to organizational data consumers. Everything has been to get the most valuable data to the consumer and build trust in the data that they would be using. As value of the data grows and new data strategies emerge the next section will help to show how you can manage the entire catalog or go deeper into specific data management with Master Data.