Come aggiungere effetti di disegno client a un layout di testo
Fornisce una breve esercitazione sull'aggiunta di effetti di disegno client a un'applicazione DirectWrite che visualizza il testo usando l'interfaccia IDWriteTextLayout e un renderer di testo personalizzato.
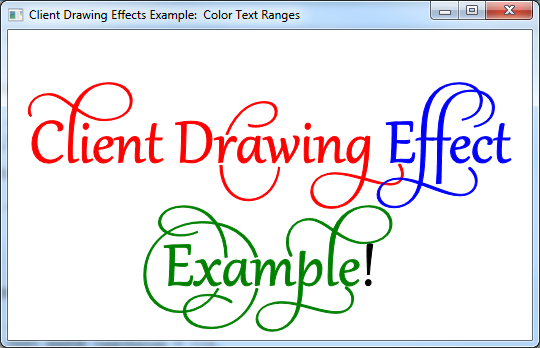
Il prodotto finale di questa esercitazione è un'applicazione che visualizza testo con intervalli di testo con un effetto di disegno a colori diverso su ognuno, come illustrato nella schermata seguente.
Nota
Questa esercitazione è destinata a essere un esempio semplificato di come creare effetti di disegno client personalizzati, non un esempio di un semplice metodo per il disegno del testo del colore. Per altre informazioni, vedere la pagina di riferimento IDWriteTextLayout::SetDrawingEffect .
Questa esercitazione contiene le parti seguenti:
- Passaggio 1: Creare un layout di testo
- Passaggio 2: Implementare una classe di effetto disegno personalizzato
- Passaggio 3: Implementare una classe renderer di testo personalizzata
- Passaggio 4: Creare il renderer di testo
- Passaggio 5: Creare un'istanza degli oggetti effetto disegno colore
- Passaggio 6: Impostare l'effetto disegno per intervalli di testo specifici
- Passaggio 7: Disegnare il layout di testo usando il renderer personalizzato
- Passaggio 8: Pulizia
Passaggio 1: Creare un layout di testo
Per iniziare, sarà necessaria un'applicazione con un oggetto IDWriteTextLayout . Se si dispone già di un'applicazione che visualizza testo con un layout di testo oppure si usa il codice di esempio di disegno personalizzato, passare al passaggio 2.
Per aggiungere un layout di testo, è necessario eseguire le operazioni seguenti:
Dichiarare un puntatore a un'interfaccia IDWriteTextLayout come membro della classe.
IDWriteTextLayout* pTextLayout_;Alla fine del metodo CreateDeviceIndependentResources creare un oggetto interfaccia IDWriteTextLayout chiamando il metodo CreateTextLayout .
// Create a text layout using the text format.
if (SUCCEEDED(hr))
{
    RECT rect;
    GetClientRect(hwnd_, &rect);
    float width  = rect.right  / dpiScaleX_;
    float height = rect.bottom / dpiScaleY_;

    hr = pDWriteFactory_->CreateTextLayout(
        wszText_,      // The string to be laid out and formatted.
        cTextLength_,  // The length of the string.
        pTextFormat_,  // The text format to apply to the string (contains font information, etc).
        width,         // The width of the layout box.
        height,        // The height of the layout box.
        &pTextLayout_  // The IDWriteTextLayout interface pointer.
        );
}
Infine, ricordarsi di rilasciare il layout di testo nel distruttore.
SafeRelease(&pTextLayout_);
Passaggio 2: Implementare una classe di effetto disegno personalizzato
Oltre ai metodi ereditati da IUnknown, un'interfaccia dell'effetto disegno client personalizzato non ha requisiti per quanto necessario implementare. In questo caso, la classe ColorDrawingEffect contiene semplicemente un valore D2D1_COLOR_F e dichiara i metodi per ottenere e impostare questo valore, nonché un costruttore che può impostare inizialmente il colore.
Dopo l'applicazione di un effetto di disegno client a un intervallo di testo in un oggetto IDWriteTextLayout , l'effetto di disegno viene passato al metodo IDWriteTextRenderer::D rawGlyphRun di qualsiasi esecuzione del glifo da eseguire. I metodi dell'effetto disegno sono quindi disponibili per il renderer di testo.
Un effetto di disegno client può essere complesso come si vuole renderlo, portando più informazioni rispetto a questo esempio, oltre a fornire metodi per modificare glifi, creare oggetti da usare per il disegno e così via.
Passaggio 3: Implementare una classe renderer di testo personalizzata
Per sfruttare l'effetto di disegno client, è necessario implementare un renderer di testo personalizzato. Questo renderer di testo applicherà l'effetto di disegno passato dal metodo IDWriteTextLayout::D raw all'esecuzione del glifo da disegnare.
Costruttore
Il costruttore per il renderer di testo personalizzato archivia l'oggetto ID2D1Factory che verrà usato per creare oggetti Direct2D e la destinazione di rendering Direct2D a cui verrà disegnato il testo.
CustomTextRenderer::CustomTextRenderer(
    ID2D1Factory* pD2DFactory,
    ID2D1HwndRenderTarget* pRT
    )
:
cRefCount_(0),
pD2DFactory_(pD2DFactory),
pRT_(pRT)
{
    pD2DFactory_->AddRef();
    pRT_->AddRef();
}
Metodo DrawGlyphRun
Un'esecuzione del glifo è un set di glifi che condividono lo stesso formato, incluso l'effetto di disegno client. Il metodo DrawGlyphRun si occupa del rendering del testo per un'esecuzione del glifo specificata.
Prima di tutto, creare un ID2D1PathGeometry e un ID2D1GeometrySink e quindi recuperare la struttura dell'esecuzione del glifo usando IDWriteFontFace::GetGlyphRunOutline. Trasformare quindi l'origine della geometria usando il metodo Direct2DID2D1Factory::CreateTransformedGeometry , come illustrato nel codice seguente.
HRESULT hr = S_OK;

// Create the path geometry.
ID2D1PathGeometry* pPathGeometry = NULL;
hr = pD2DFactory_->CreatePathGeometry(
        &pPathGeometry
        );

// Write to the path geometry using the geometry sink.
ID2D1GeometrySink* pSink = NULL;
if (SUCCEEDED(hr))
{
    hr = pPathGeometry->Open(
        &pSink
        );
}

// Get the glyph run outline geometries back from DirectWrite and place them within the
// geometry sink.
if (SUCCEEDED(hr))
{
    hr = glyphRun->fontFace->GetGlyphRunOutline(
        glyphRun->fontEmSize,
        glyphRun->glyphIndices,
        glyphRun->glyphAdvances,
        glyphRun->glyphOffsets,
        glyphRun->glyphCount,
        glyphRun->isSideways,
        glyphRun->bidiLevel%2,
        pSink
        );
}

// Close the geometry sink
if (SUCCEEDED(hr))
{
    hr = pSink->Close();
}

// Initialize a matrix to translate the origin of the glyph run.
D2D1::Matrix3x2F const matrix = D2D1::Matrix3x2F(
    1.0f, 0.0f,
    0.0f, 1.0f,
    baselineOriginX, baselineOriginY
    );

// Create the transformed geometry
ID2D1TransformedGeometry* pTransformedGeometry = NULL;
if (SUCCEEDED(hr))
{
    hr = pD2DFactory_->CreateTransformedGeometry(
        pPathGeometry,
        &matrix,
        &pTransformedGeometry
        );
}
Dichiarare quindi un oggetto pennello solido Direct2D .
ID2D1SolidColorBrush* pBrush = NULL;
Se il parametro clientDrawingEffect non è NULL, eseguire una query sull'oggetto per l'interfaccia ColorDrawingEffect . Questa operazione funzionerà perché questa classe verrà impostata come effetto di disegno client sugli intervalli di testo dell'oggetto layout di testo.
Dopo avere un puntatore all'interfaccia ColorDrawingEffect , è possibile recuperare il valore D2D1_COLOR_F archiviato usando il metodo GetColor . Usare quindi la D2D1_COLOR_F per creare un ID2D1SolidColorBrush in tale colore.
Se il parametro clientDrawingEffect è NULL, è sufficiente creare un ID 2D1SolidColorBrush nero.
// If there is a drawing effect create a color brush using it, otherwise create a black brush.
if (clientDrawingEffect != NULL)
{
    // Go from IUnknown to ColorDrawingEffect.
    ColorDrawingEffect *colorDrawingEffect;

    clientDrawingEffect->QueryInterface(__uuidof(ColorDrawingEffect), reinterpret_cast<void**>(&colorDrawingEffect));

    // Get the color from the ColorDrawingEffect object.
    D2D1_COLOR_F color;

    colorDrawingEffect->GetColor(&color);

    // Create the brush using the color specified by our ColorDrawingEffect object.
    if (SUCCEEDED(hr))
    {
        hr = pRT_->CreateSolidColorBrush(
            color,
            &pBrush);
    }

    SafeRelease(&colorDrawingEffect);
}
else
{
    // Create a black brush.
    if (SUCCEEDED(hr))
    {
        hr = pRT_->CreateSolidColorBrush(
            D2D1::ColorF(
            D2D1::ColorF::Black
            ),
            &pBrush);
    }
}
Infine, disegnare la geometria della struttura e riempirla usando il pennello a colori a tinta unita appena creato.
if (SUCCEEDED(hr))
{
    // Draw the outline of the glyph run
    pRT_->DrawGeometry(
        pTransformedGeometry,
        pBrush
        );

    // Fill in the glyph run
    pRT_->FillGeometry(
        pTransformedGeometry,
        pBrush
        );
}
Distruttore
Non dimenticare di rilasciare la factory Direct2D e di eseguire il rendering della destinazione nel distruttore.
CustomTextRenderer::~CustomTextRenderer()
{
    SafeRelease(&pD2DFactory_);
    SafeRelease(&pRT_);
}
Passaggio 4: Creare il renderer di testo
Nelle risorse CreateDeviceDependent creare l'oggetto renderer di testo personalizzato. Dipende dal dispositivo perché usa l'ID2D1RenderTarget, che dipende dal dispositivo stesso.
// Create the text renderer
pTextRenderer_ = new CustomTextRenderer(
                        pD2DFactory_,
                        pRT_
                        );
Passaggio 5: Creare un'istanza degli oggetti effetto disegno colore
Creare un'istanza di oggetti ColorDrawingEffect in rosso, verde e blu.
// Instantiate some custom color drawing effects.
redDrawingEffect_ = new ColorDrawingEffect(
    D2D1::ColorF(
        D2D1::ColorF::Red
        )
    );

blueDrawingEffect_ = new ColorDrawingEffect(
    D2D1::ColorF(
        D2D1::ColorF::Blue
        )
    );

greenDrawingEffect_ = new ColorDrawingEffect(
    D2D1::ColorF(
        D2D1::ColorF::Green
        )
    );
Passaggio 6: Impostare l'effetto disegno per intervalli di testo specifici
Impostare l'effetto di disegno per intervalli di testo specifici usando il metodo IDWriteTextLayou::SetDrawingEffect e uno struct DWRITE_TEXT_RANGE .
// Set the drawing effects.

// Red.
if (SUCCEEDED(hr))
{
    // Set the drawing effect for the specified range.
    DWRITE_TEXT_RANGE textRange = {0,
                                   14};
    if (SUCCEEDED(hr))
    {
        hr = pTextLayout_->SetDrawingEffect(redDrawingEffect_, textRange);
    }
}

// Blue.
if (SUCCEEDED(hr))
{
    // Set the drawing effect for the specified range.
    DWRITE_TEXT_RANGE textRange = {14,
                                   7};
    if (SUCCEEDED(hr))
    {
        hr = pTextLayout_->SetDrawingEffect(blueDrawingEffect_, textRange);
    }
}

// Green.
if (SUCCEEDED(hr))
{
    // Set the drawing effect for the specified range.
    DWRITE_TEXT_RANGE textRange = {21,
                                   8};
    if (SUCCEEDED(hr))
    {
        hr = pTextLayout_->SetDrawingEffect(greenDrawingEffect_, textRange);
    }
}
Passaggio 7: Disegnare il layout di testo usando il renderer personalizzato
È necessario chiamare il metodo IDWriteTextLayout::D raw anziché i metodi ID2D1RenderTarget::D rawText o ID2D1RenderTarget::D rawTextLayout.
// Draw the text layout using DirectWrite and the CustomTextRenderer class.
hr = pTextLayout_->Draw(
        NULL,
        pTextRenderer_,  // Custom text renderer.
        origin.x,
        origin.y
        );
Passaggio 8: Pulizia
Nel distruttore DemoApp rilasciare il renderer di testo personalizzato.
SafeRelease(&pTextRenderer_);
Successivamente, aggiungere codice per rilasciare le classi di effetto di disegno client.
SafeRelease(&redDrawingEffect_);
SafeRelease(&blueDrawingEffect_);
SafeRelease(&greenDrawingEffect_);
Commenti e suggerimenti
Presto disponibile: Nel corso del 2024 verranno gradualmente disattivati i problemi di GitHub come meccanismo di feedback per il contenuto e ciò verrà sostituito con un nuovo sistema di feedback. Per altre informazioni, vedere https://aka.ms/ContentUserFeedback.
Invia e visualizza il feedback per