Nota
L'accesso a questa pagina richiede l'autorizzazione. È possibile provare ad accedere o modificare le directory.
L'accesso a questa pagina richiede l'autorizzazione. È possibile provare a modificare le directory.
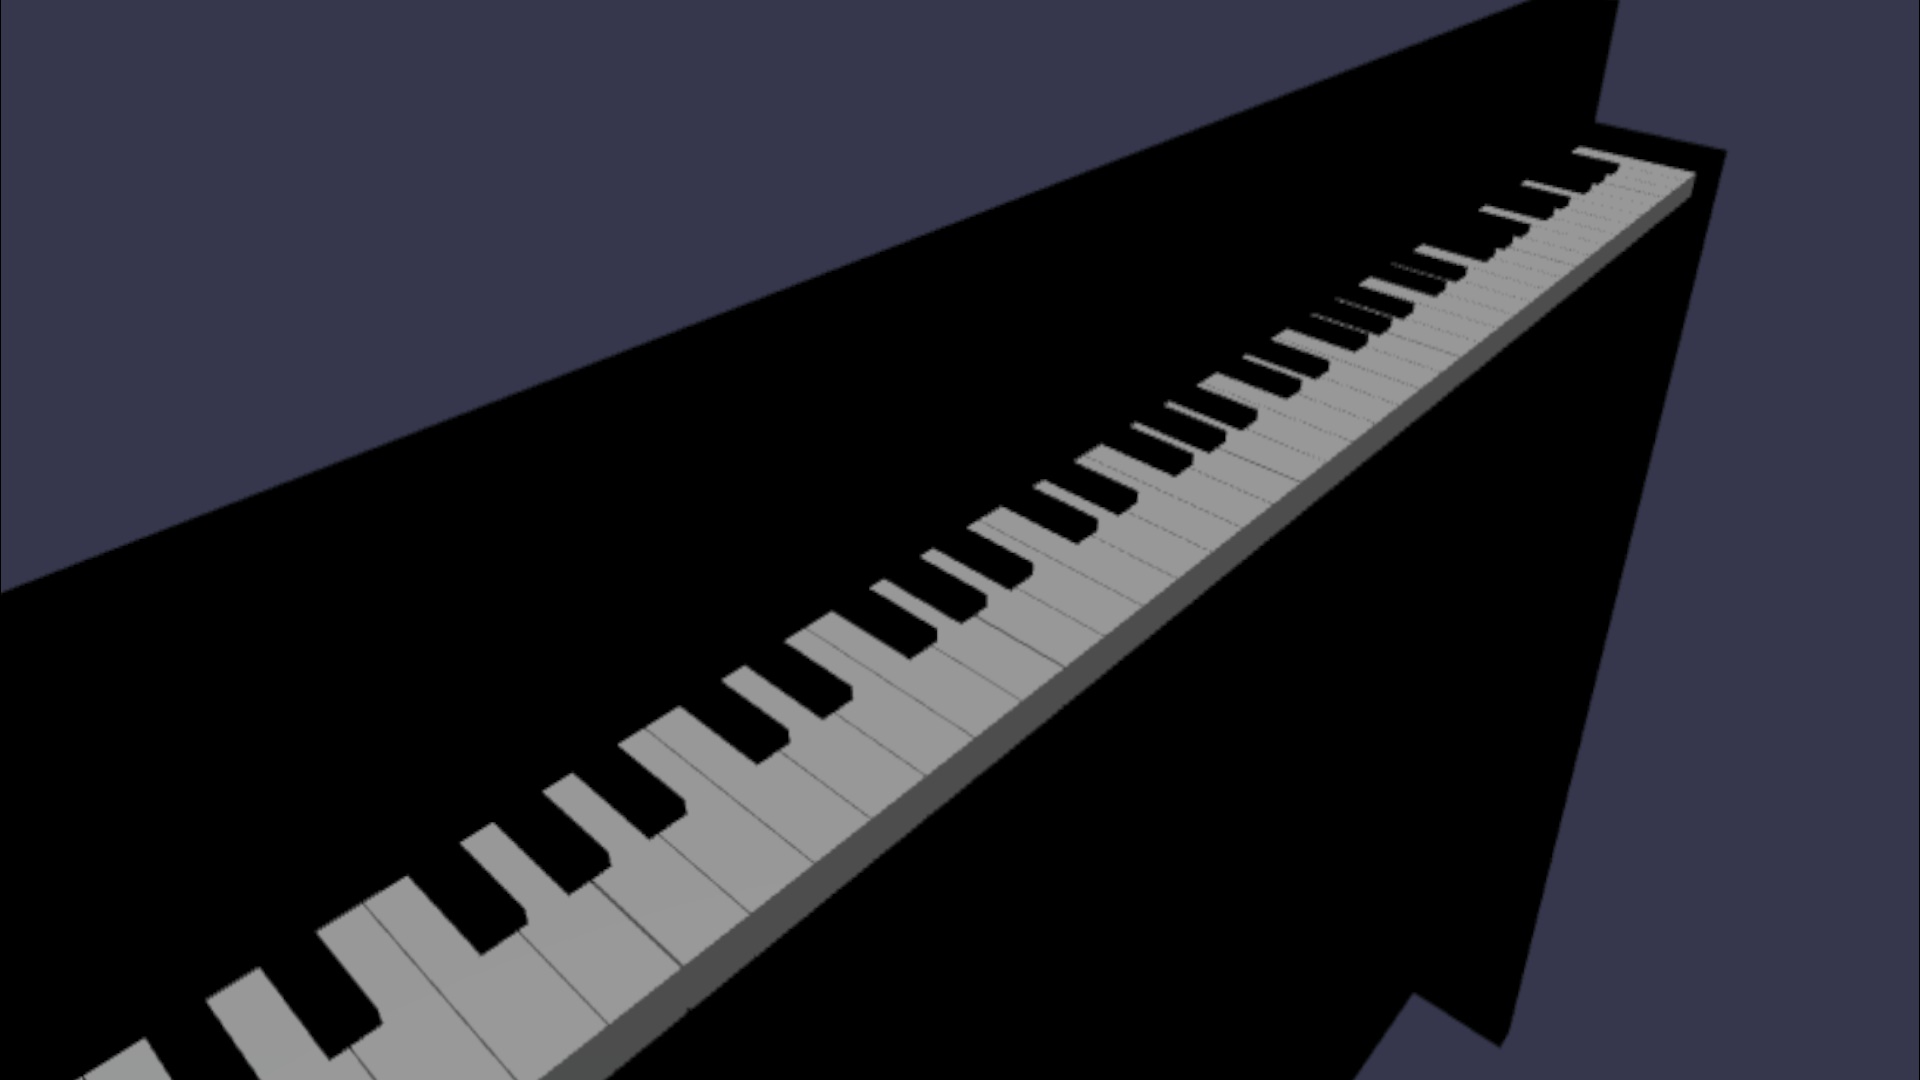
Nell'esercitazione precedente è stato creato un modello di tastiera per pianoforte a 88 tasti completa. Ora, lo si rende giocabile nello spazio XR.
In questa esercitazione si apprenderà come:
- Aggiungere funzionalità interattive del pianoforte usando gli eventi puntatore
- Ridimensionare le mesh in base a dimensioni diverse
- Abilitare il teletrasporto e il supporto multi puntatore in XR
Prima di iniziare
Assicurarsi di completare l'esercitazione precedente nella serie e di essere pronti per continuare ad aggiungere al codice.
index.html
<html>
    <head>
        <title>Piano in BabylonJS</title>
        <script src="https://cdn.babylonjs.com/babylon.js"></script>
        <script src="scene.js"></script>
        <style>
            body,#renderCanvas { width: 100%; height: 100%;}
        </style>
    </head>
    <body>
        <canvas id="renderCanvas"></canvas>
        <script type="text/javascript">
            const canvas = document.getElementById("renderCanvas");
            const engine = new BABYLON.Engine(canvas, true);

            createScene(engine).then(sceneToRender => {
                engine.runRenderLoop(() => sceneToRender.render());
            });

            // Watch for browser/canvas resize events
            window.addEventListener("resize", function () {
                engine.resize();
            });
        </script>
    </body>
</html>
scene.js
const buildKey = function (scene, parent, props) {
    if (props.type === "white") {
        /*
        Props for building a white key should contain:
        note, topWidth, bottomWidth, topPositionX, wholePositionX, register, referencePositionX

        As an example, the props for building the middle C white key would be
        {type: "white", note: "C", topWidth: 1.4, bottomWidth: 2.3, topPositionX: -0.45, wholePositionX: -14.4, register: 4, referencePositionX: 0}
        */

        // Create bottom part
        const bottom = BABYLON.MeshBuilder.CreateBox("whiteKeyBottom", {width: props.bottomWidth, height: 1.5, depth: 4.5}, scene);

        // Create top part
        const top = BABYLON.MeshBuilder.CreateBox("whiteKeyTop", {width: props.topWidth, height: 1.5, depth: 5}, scene);
        top.position.z =  4.75;
        top.position.x += props.topPositionX;

        // Merge bottom and top parts
        // Parameters of BABYLON.Mesh.MergeMeshes: (arrayOfMeshes, disposeSource, allow32BitsIndices, meshSubclass, subdivideWithSubMeshes, multiMultiMaterials)
        const key = BABYLON.Mesh.MergeMeshes([bottom, top], true, false, null, false, false);
        key.position.x = props.referencePositionX + props.wholePositionX;
        key.name = props.note + props.register;
        key.parent = parent;

        return key;
    }
    else if (props.type === "black") {
        /*
        Props for building a black key should contain:
        note, wholePositionX, register, referencePositionX

        As an example, the props for building the C#4 black key would be
        {type: "black", note: "C#", wholePositionX: -13.45, register: 4, referencePositionX: 0}
        */

        // Create black color material
        const blackMat = new BABYLON.StandardMaterial("black");
        blackMat.diffuseColor = new BABYLON.Color3(0, 0, 0);

        // Create black key
        const key = BABYLON.MeshBuilder.CreateBox(props.note + props.register, {width: 1.4, height: 2, depth: 5}, scene);
        key.position.z += 4.75;
        key.position.y += 0.25;
        key.position.x = props.referencePositionX + props.wholePositionX;
        key.material = blackMat;
        key.parent = parent;

        return key;
    }
}

const createScene = async function(engine) {
    const scene = new BABYLON.Scene(engine);

    const alpha =  3*Math.PI/2;
    const beta = Math.PI/50;
    const radius = 220;
    const target = new BABYLON.Vector3(0, 0, 0);

    const camera = new BABYLON.ArcRotateCamera("Camera", alpha, beta, radius, target, scene);
    camera.attachControl(canvas, true);

    const light = new BABYLON.HemisphericLight("light", new BABYLON.Vector3(0, 1, 0), scene);
    light.intensity = 0.6;

    const keyParams = [
        {type: "white", note: "C", topWidth: 1.4, bottomWidth: 2.3, topPositionX: -0.45, wholePositionX: -14.4},
        {type: "black", note: "C#", wholePositionX: -13.45},
        {type: "white", note: "D", topWidth: 1.4, bottomWidth: 2.4, topPositionX: 0, wholePositionX: -12},
        {type: "black", note: "D#", wholePositionX: -10.6},
        {type: "white", note: "E", topWidth: 1.4, bottomWidth: 2.3, topPositionX: 0.45, wholePositionX: -9.6},
        {type: "white", note: "F", topWidth: 1.3, bottomWidth: 2.4, topPositionX: -0.55, wholePositionX: -7.2},
        {type: "black", note: "F#", wholePositionX: -6.35},
        {type: "white", note: "G", topWidth: 1.3, bottomWidth: 2.3, topPositionX: -0.2, wholePositionX: -4.8},
        {type: "black", note: "G#", wholePositionX: -3.6},
        {type: "white", note: "A", topWidth: 1.3, bottomWidth: 2.3, topPositionX: 0.2, wholePositionX: -2.4},
        {type: "black", note: "A#", wholePositionX: -0.85},
        {type: "white", note: "B", topWidth: 1.3, bottomWidth: 2.4, topPositionX: 0.55, wholePositionX: 0},
    ]

    // Transform Node that acts as the parent of all piano keys
    const keyboard = new BABYLON.TransformNode("keyboard");

    // Register 1 through 7
    var referencePositionX = -2.4*14;
    for (let register = 1; register <= 7; register++) {
        keyParams.forEach(key => {
            buildKey(scene, keyboard, Object.assign({register: register, referencePositionX: referencePositionX}, key));
        })
        referencePositionX += 2.4*7;
    }

    // Register 0
    buildKey(scene, keyboard, {type: "white", note: "A", topWidth: 1.9, bottomWidth: 2.3, topPositionX: -0.20, wholePositionX: -2.4, register: 0, referencePositionX: -2.4*21});
    keyParams.slice(10, 12).forEach(key => {
        buildKey(scene, keyboard, Object.assign({register: 0, referencePositionX: -2.4*21}, key));
    })

    // Register 8
    buildKey(scene, keyboard, {type: "white", note: "C", topWidth: 2.3, bottomWidth: 2.3, topPositionX: 0, wholePositionX: -2.4*6, register: 8, referencePositionX: 84});

    // Transform node that acts as the parent of all piano components
    const piano = new BABYLON.TransformNode("piano");
    keyboard.parent = piano;

    // Import and scale piano frame
    BABYLON.SceneLoader.ImportMesh("frame", "https://raw.githubusercontent.com/MicrosoftDocs/mixed-reality/docs/mixed-reality-docs/mr-dev-docs/develop/javascript/tutorials/babylonjs-webxr-piano/files/", "pianoFrame.babylon", scene, function(meshes) {
        const frame = meshes[0];
        frame.parent = piano;
    });

    // Lift the piano keyboard
    keyboard.position.y += 80;

    const xrHelper = await scene.createDefaultXRExperienceAsync();

    return scene;
}
Rendere riproducibile la tastiera del pianoforte
Al momento, la tastiera per pianoforte creata è un modello statico che non risponde ad alcuna interazione utente. In questa sezione verranno programmati i tasti per spostarsi verso il basso e riprodurre un suono quando qualcuno preme su di essi.
Babylon.js fornisce diversi tipi di eventi, o osservabili, con cui è possibile interagire. Nel nostro caso, abbiamo a che fare con il
onPointerObservabledal momento che vogliamo programmare i tasti per eseguire azioni quando qualcuno preme su di loro attraverso un puntatore, che può essere un clic del mouse, tocco, XR pulsante del controller clic, ecc.Ecco la struttura di base di come aggiungere qualsiasi comportamento a un oggetto
onPointerObservable:scene.onPointerObservable.add((pointerInfo) => { // do something });Anche se Babylon.js fornisce molti tipi diversi di eventi puntatore, verranno usati solo gli
POINTERDOWNeventi ePOINTERUPper programmare il comportamento dei tasti di pianoforte, usando la struttura seguente:scene.onPointerObservable.add((pointerInfo) => { switch (pointerInfo.type) { case BABYLON.PointerEventTypes.POINTERDOWN: // When the pointer is down on a piano key, // move the piano key downward (to show that it is pressed) // and play the sound of the note break; case BABYLON.PointerEventTypes.POINTERUP: // When the pointer is released, // move the piano key upward to its original position // and stop the sound of the note of the key that is released break; } });Si inizierà a spostare il tasto del pianoforte verso il basso e verso l'alto quando si preme e si rilascia il tasto.
All'evento puntatore verso il basso, è necessario rilevare la mesh su cui si fa clic, assicurarsi che si tratti di un tasto per pianoforte e modificare negativamente la coordinata y della mesh di una piccola quantità per far sembrare che il tasto sia stato premuto.
Per l'evento puntatore verso l'alto, è un po ' più complicato perché il puntatore che ha premuto sul tasto potrebbe non essere rilasciato sul tasto. Ad esempio, qualcuno potrebbe fare clic sul tasto C4, trascinare il mouse su E4 e quindi rilasciare il clic. In questo caso, si vuole comunque rilasciare il tasto premuto (C4) anziché la posizione in cui si verifica l'evento
pointerUp(E4).Di seguito viene illustrato il modo in cui il codice seguente ottiene ciò che si vuole:
const pointerToKey = new Map();
scene.onPointerObservable.add((pointerInfo) => {
    switch (pointerInfo.type) {
        case BABYLON.PointerEventTypes.POINTERDOWN:
            if(pointerInfo.pickInfo.hit) {
                const pickedMesh = pointerInfo.pickInfo.pickedMesh;
                const pointerId = pointerInfo.event.pointerId;
                if (pickedMesh.parent === keyboard) {
                    pickedMesh.position.y -= 0.5;
                    // play the sound of the note
                    pointerToKey.set(pointerId, {
                        mesh: pickedMesh
                    });
                }
            }
            break;
        case BABYLON.PointerEventTypes.POINTERUP:
            const pointerId = pointerInfo.event.pointerId;
            if (pointerToKey.has(pointerId)) {
                pointerToKey.get(pointerId).mesh.position.y += 0.5;
                // stop the sound of the note of the key that is released
                pointerToKey.delete(pointerId);
            }
            break;
    }
});
È
pointerIdunivoco per ogni puntatore e può essere utile per identificare un puntatore quando sono presenti più controller o se si usa un touchscreen. In questo caso è stato inizializzato unMapoggetto denominatopointerToKeyper archiviare la relazione di quale puntatore ha premuto su quale tasto, in modo da sapere quale chiave rilasciare quando viene rilasciato il puntatore, indipendentemente dalla posizione in cui si verifica la versione.Ecco l'aspetto dell'interazione con il codice precedente:

Ora lavoriamo sulla riproduzione e l'arresto di un suono quando un tasto viene premuto e rilasciato. A questo scopo, useremo una libreria Javascript denominata soundfont-player, che ci consente di riprodurre facilmente i suoni MIDI di uno strumento scelto.
Scaricare il codice minimizzato della libreria, salvarlo nella stessa cartella di index.htmle includerlo nel
<header>tag in index.html:<head> <title>Babylon Template</title> <script src="https://cdn.babylonjs.com/babylon.js"></script> <script src="scene.js"></script> <script src="soundfont-player.min.js"></script> <style> body,#renderCanvas { width: 100%; height: 100%;} </style> </head>Una volta importata la libreria, ecco come inizializzare uno strumento e riprodurre/arrestare i suoni MIDI usando la libreria:
const pianoSound = await Soundfont.instrument(new AudioContext(), 'acoustic_grand_piano'); const C4 = piano.play("C4"); // Play note C4 C4.stop(); // Stop note C4A questo punto è possibile incorporarlo negli eventi del puntatore e finalizzare il codice per questa sezione:
const pointerToKey = new Map() const piano = await Soundfont.instrument(new AudioContext(), 'acoustic_grand_piano'); scene.onPointerObservable.add((pointerInfo) => { switch (pointerInfo.type) { case BABYLON.PointerEventTypes.POINTERDOWN: if(pointerInfo.pickInfo.hit) { let pickedMesh = pointerInfo.pickInfo.pickedMesh; let pointerId = pointerInfo.event.pointerId; if (keys.has(pickedMesh)) { pickedMesh.position.y -= 0.5; // Move the key downward pointerToKey.set(pointerId, { mesh: pickedMesh, note: pianoSound.play(pointerInfo.pickInfo.pickedMesh.name) // Play the sound of the note }); } } break; case BABYLON.PointerEventTypes.POINTERUP: let pointerId = pointerInfo.event.pointerId; if (pointerToKey.has(pointerId)) { pointerToKey.get(pointerId).mesh.position.y += 0.5; // Move the key upward pointerToKey.get(pointerId).note.stop(); // Stop the sound of the note pointerToKey.delete(pointerId); } break; } });Poiché la mesh di ogni chiave è stata denominata dalla nota che rappresenta, è possibile indicare facilmente quale nota riprodurre passando il nome della mesh alla
pianoSound.play()funzione. Si noti anche che il suono viene archiviato nellapointerToKeymappa in modo da sapere quale suono arrestare quando viene rilasciata una chiave.
Ridimensionamento del pianoforte per la modalità VR immersiva
A questo punto, probabilmente hai già suonato con il pianoforte con il mouse (o anche con un touch screen) quando hai aggiunto le funzionalità interattive. In questa sezione si passerà allo spazio VR immersivo.
Per aprire la pagina nel visore VR immersivo, è prima necessario connettere l'auricolare al computer sviluppatore e assicurarsi che sia configurato per l'uso nell'app Windows Mixed Reality. Se si usa il simulatore di Windows Mixed Reality, assicurarsi che sia abilitato.
Verrà ora visualizzato un pulsante Vr immersiva nella parte inferiore destra della pagina Web. Fai clic su di esso e potrai vedere il pianoforte nel dispositivo XR a cui sei connesso.

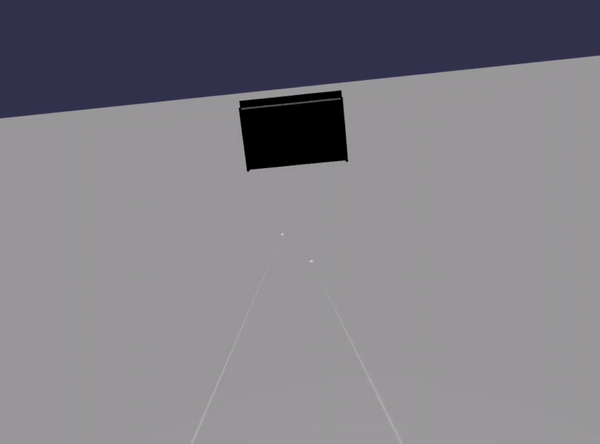
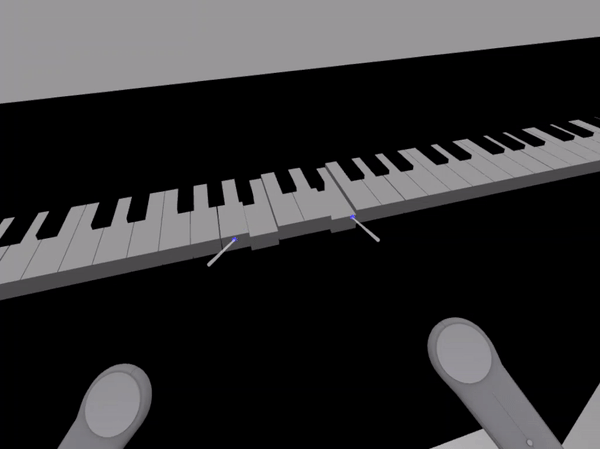
Una volta che sei nello spazio virtuale, potresti notare che il pianoforte che abbiamo costruito è estremamente grande. Nel mondo vr, possiamo stare in piedi solo nella parte inferiore di esso e giocare puntando il puntatore ai tasti in distanza.

Ridurre il piano in modo che le sue dimensioni siano più simili a un normale pianoforte in piedi nella vita reale. A tale scopo, è necessario usare una funzione di utilità che consenta di ridimensionare una mesh rispetto a un punto nello spazio. Aggiungere questa funzione a scene.js (all'esterno di
createScene()):const scaleFromPivot = function(transformNode, pivotPoint, scale) { const _sx = scale / transformNode.scaling.x; const _sy = scale / transformNode.scaling.y; const _sz = scale / transformNode.scaling.z; transformNode.scaling = new BABYLON.Vector3(_sx, _sy, _sz); transformNode.position = new BABYLON.Vector3(pivotPoint.x + _sx * (transformNode.position.x - pivotPoint.x), pivotPoint.y + _sy * (transformNode.position.y - pivotPoint.y), pivotPoint.z + _sz * (transformNode.position.z - pivotPoint.z)); }Questa funzione accetta 3 parametri:
-
transformNode: oggetto
TransformNodeda ridimensionare -
pivotPoint: un
Vector3oggetto che indica il punto in cui il ridimensionamento è relativo a - scale: il fattore di scala
-
transformNode: oggetto
Questa funzione verrà usata per ridimensionare la cornice e i tasti del pianoforte di un fattore di 0,015, con un punto pivot all'origine. Accodare la chiamata di funzione alla
createScene()funzione inserendola dopokeyboard.position.y += 80;:// Put this line at the beginning of createScene() const scale = 0.015;// Put this function call after keyboard.position.y += 80; // Scale the entire piano scaleFromPivot(piano, new BABYLON.Vector3(0, 0, 0), scale);Non dimenticate di ridimensionare anche la posizione della fotocamera:
const alpha = 3*Math.PI/2; const beta = Math.PI/50; const radius = 220*scale; // scale the radius const target = new BABYLON.Vector3(0, 0, 0); const camera = new BABYLON.ArcRotateCamera("Camera", alpha, beta, radius, target, scene); camera.attachControl(canvas, true);Ora, quando entriamo di nuovo nello spazio VR, il pianoforte sarebbe della dimensione di un normale pianoforte standup.
Abilitazione delle funzionalità WebXR
Ora che abbiamo ridimensionato il pianoforte alla giusta dimensione nello spazio VR, abilitiamo alcune interessanti funzionalità WebXR per migliorare la nostra esperienza di riproduzione del pianoforte nello spazio.
Se hai suonato il pianoforte usando i controller VR immersivi, potresti aver notato che puoi usare un solo controller alla volta. Abilitare il supporto multi puntatore nello spazio XR usando la gestione delle funzionalità WebXR di Babylon.js.
Aggiungere il codice seguente alla
createScene()funzione, dopo la riga dixrHelperinizializzazione:const featuresManager = xrHelper.baseExperience.featuresManager; const pointerSelection = featuresManager.enableFeature(BABYLON.WebXRFeatureName.POINTER_SELECTION, "stable", { xrInput: xrHelper.input, enablePointerSelectionOnAllControllers: true });Inoltre, a seconda di dove si trova il punto di partenza, potrebbe essere difficile posizionarsi davanti al pianoforte. Se hai familiarità con l'ambiente VR immersivo, potresti già conoscere il teletrasporto, che è una funzionalità che ti consente di spostarti immediatamente in un altro punto dello spazio puntandolo verso di esso.
Per usare la funzionalità di teletrasporto di Babylon.js, è prima necessario avere una rete a terra che possiamo "stare" nello spazio VR. Aggiungere il codice seguente alla
createScene()funzione per creare una base:const ground = BABYLON.MeshBuilder.CreateGround("ground", {width: 400, height: 400});Il supporto per il teletrasporto include anche una funzionalità molto utile denominata posizioni snap-to. In breve, le posizioni di snap-to sono posizioni specifiche a cui vogliamo che gli utenti atterrano.
Ad esempio, è possibile impostare una posizione snap-to davanti al pianoforte in modo che gli utenti possano teletrasportarsi facilmente in tale posizione quando puntano i puntatori vicino al pianoforte.
Aggiungere il codice seguente per abilitare la funzionalità di teletrasporto e specificare un punto di allineamento:
const teleportation = featuresManager.enableFeature(BABYLON.WebXRFeatureName.TELEPORTATION, "stable", { xrInput: xrHelper.input, floorMeshes: [ground], snapPositions: [new BABYLON.Vector3(2.4*3.5*scale, 0, -10*scale)], });Ora, dovresti essere in grado di posizionarti facilmente davanti al pianoforte teletrasportandosi al punto snap-to davanti al pianoforte, e dovresti essere in grado di suonare due tasti alla volta usando entrambi i controller.
Riepilogo
Congratulazioni! È stata completata la serie dell'esercitazione sulla costruzione di piano Babylon.js e si è appreso come:
- Creare, posizionare e unire mesh per creare un modello di tastiera per pianoforte
- Importare un modello Babylon.js di una cornice per pianoforte in piedi
- Aggiungere interazioni puntatore a ogni tasto del pianoforte
- Ridimensionare le dimensioni delle mesh in base a un punto pivot
- Abilitare le principali funzionalità WebXR, ad esempio il teletrasporto e il supporto multipointer
Ecco il codice finale per scene.js e index.html:
scene.js
const buildKey = function (scene, parent, props) {
if (props.type === "white") {
/*
Props for building a white key should contain:
note, topWidth, bottomWidth, topPositionX, wholePositionX, register, referencePositionX
As an example, the props for building the middle C white key would be
{type: "white", note: "C", topWidth: 1.4, bottomWidth: 2.3, topPositionX: -0.45, wholePositionX: -14.4, register: 4, referencePositionX: 0}
*/
// Create bottom part
const bottom = BABYLON.MeshBuilder.CreateBox("whiteKeyBottom", {width: props.bottomWidth, height: 1.5, depth: 4.5}, scene);
// Create top part
const top = BABYLON.MeshBuilder.CreateBox("whiteKeyTop", {width: props.topWidth, height: 1.5, depth: 5}, scene);
top.position.z = 4.75;
top.position.x += props.topPositionX;
// Merge bottom and top parts
// Parameters of BABYLON.Mesh.MergeMeshes: (arrayOfMeshes, disposeSource, allow32BitsIndices, meshSubclass, subdivideWithSubMeshes, multiMultiMaterials)
const key = BABYLON.Mesh.MergeMeshes([bottom, top], true, false, null, false, false);
key.position.x = props.referencePositionX + props.wholePositionX;
key.name = props.note + props.register;
key.parent = parent;
return key;
}
else if (props.type === "black") {
/*
Props for building a black key should contain:
note, wholePositionX, register, referencePositionX
As an example, the props for building the C#4 black key would be
{type: "black", note: "C#", wholePositionX: -13.45, register: 4, referencePositionX: 0}
*/
// Create black color material
const blackMat = new BABYLON.StandardMaterial("black");
blackMat.diffuseColor = new BABYLON.Color3(0, 0, 0);
// Create black key
const key = BABYLON.MeshBuilder.CreateBox(props.note + props.register, {width: 1.4, height: 2, depth: 5}, scene);
key.position.z += 4.75;
key.position.y += 0.25;
key.position.x = props.referencePositionX + props.wholePositionX;
key.material = blackMat;
key.parent = parent;
return key;
}
}
const scaleFromPivot = function(transformNode, pivotPoint, scale) {
const _sx = scale / transformNode.scaling.x;
const _sy = scale / transformNode.scaling.y;
const _sz = scale / transformNode.scaling.z;
transformNode.scaling = new BABYLON.Vector3(_sx, _sy, _sz);
transformNode.position = new BABYLON.Vector3(pivotPoint.x + _sx * (transformNode.position.x - pivotPoint.x), pivotPoint.y + _sy * (transformNode.position.y - pivotPoint.y), pivotPoint.z + _sz * (transformNode.position.z - pivotPoint.z));
}
const createScene = async function(engine) {
const scale = 0.015;
const scene = new BABYLON.Scene(engine);
const alpha = 3*Math.PI/2;
const beta = Math.PI/50;
const radius = 220*scale;
const target = new BABYLON.Vector3(0, 0, 0);
const camera = new BABYLON.ArcRotateCamera("Camera", alpha, beta, radius, target, scene);
camera.attachControl(canvas, true);
const light = new BABYLON.HemisphericLight("light", new BABYLON.Vector3(0, 1, 0), scene);
light.intensity = 0.6;
const keyParams = [
{type: "white", note: "C", topWidth: 1.4, bottomWidth: 2.3, topPositionX: -0.45, wholePositionX: -14.4},
{type: "black", note: "C#", wholePositionX: -13.45},
{type: "white", note: "D", topWidth: 1.4, bottomWidth: 2.4, topPositionX: 0, wholePositionX: -12},
{type: "black", note: "D#", wholePositionX: -10.6},
{type: "white", note: "E", topWidth: 1.4, bottomWidth: 2.3, topPositionX: 0.45, wholePositionX: -9.6},
{type: "white", note: "F", topWidth: 1.3, bottomWidth: 2.4, topPositionX: -0.55, wholePositionX: -7.2},
{type: "black", note: "F#", wholePositionX: -6.35},
{type: "white", note: "G", topWidth: 1.3, bottomWidth: 2.3, topPositionX: -0.2, wholePositionX: -4.8},
{type: "black", note: "G#", wholePositionX: -3.6},
{type: "white", note: "A", topWidth: 1.3, bottomWidth: 2.3, topPositionX: 0.2, wholePositionX: -2.4},
{type: "black", note: "A#", wholePositionX: -0.85},
{type: "white", note: "B", topWidth: 1.3, bottomWidth: 2.4, topPositionX: 0.55, wholePositionX: 0},
]
// Transform Node that acts as the parent of all piano keys
const keyboard = new BABYLON.TransformNode("keyboard");
// Register 1 through 7
var referencePositionX = -2.4*14;
for (let register = 1; register <= 7; register++) {
keyParams.forEach(key => {
buildKey(scene, keyboard, Object.assign({register: register, referencePositionX: referencePositionX}, key));
})
referencePositionX += 2.4*7;
}
// Register 0
buildKey(scene, keyboard, {type: "white", note: "A", topWidth: 1.9, bottomWidth: 2.3, topPositionX: -0.20, wholePositionX: -2.4, register: 0, referencePositionX: -2.4*21});
keyParams.slice(10, 12).forEach(key => {
buildKey(scene, keyboard, Object.assign({register: 0, referencePositionX: -2.4*21}, key));
})
// Register 8
buildKey(scene, keyboard, {type: "white", note: "C", topWidth: 2.3, bottomWidth: 2.3, topPositionX: 0, wholePositionX: -2.4*6, register: 8, referencePositionX: 84});
// Transform node that acts as the parent of all piano components
const piano = new BABYLON.TransformNode("piano");
keyboard.parent = piano;
// Import and scale piano frame
BABYLON.SceneLoader.ImportMesh("frame", "https://raw.githubusercontent.com/MicrosoftDocs/mixed-reality/docs/mixed-reality-docs/mr-dev-docs/develop/javascript/tutorials/babylonjs-webxr-piano/files/", "pianoFrame.babylon", scene, function(meshes) {
const frame = meshes[0];
frame.parent = piano;
});
// Lift the piano keyboard
keyboard.position.y += 80;
// Scale the entire piano
scaleFromPivot(piano, new BABYLON.Vector3(0, 0, 0), scale);
const pointerToKey = new Map()
const pianoSound = await Soundfont.instrument(new AudioContext(), 'acoustic_grand_piano');
scene.onPointerObservable.add((pointerInfo) => {
switch (pointerInfo.type) {
case BABYLON.PointerEventTypes.POINTERDOWN:
// Only take action if the pointer is down on a mesh
if(pointerInfo.pickInfo.hit) {
let pickedMesh = pointerInfo.pickInfo.pickedMesh;
let pointerId = pointerInfo.event.pointerId;
if (pickedMesh.parent === keyboard) {
pickedMesh.position.y -= 0.5; // Move the key downward
pointerToKey.set(pointerId, {
mesh: pickedMesh,
note: pianoSound.play(pointerInfo.pickInfo.pickedMesh.name) // Play the sound of the note
});
}
}
break;
case BABYLON.PointerEventTypes.POINTERUP:
let pointerId = pointerInfo.event.pointerId;
// Only take action if the released pointer was recorded in pointerToKey
if (pointerToKey.has(pointerId)) {
pointerToKey.get(pointerId).mesh.position.y += 0.5; // Move the key upward
pointerToKey.get(pointerId).note.stop(); // Stop the sound of the note
pointerToKey.delete(pointerId);
}
break;
}
});
const xrHelper = await scene.createDefaultXRExperienceAsync();
const featuresManager = xrHelper.baseExperience.featuresManager;
featuresManager.enableFeature(BABYLON.WebXRFeatureName.POINTER_SELECTION, "stable", {
xrInput: xrHelper.input,
enablePointerSelectionOnAllControllers: true
});
const ground = BABYLON.MeshBuilder.CreateGround("ground", {width: 400, height: 400});
featuresManager.enableFeature(BABYLON.WebXRFeatureName.TELEPORTATION, "stable", {
xrInput: xrHelper.input,
floorMeshes: [ground],
snapPositions: [new BABYLON.Vector3(2.4*3.5*scale, 0, -10*scale)],
});
return scene;
}
index.html
<html>
<head>
    <title>Babylon Template</title>
    <script src="https://cdn.babylonjs.com/babylon.js"></script>
    <script src="scene.js"></script>
    <script src="soundfont-player.min.js"></script>
    <style>
            body,#renderCanvas { width: 100%; height: 100%;}
    </style>
</head>
<body>
<canvas id="renderCanvas"></canvas>
<script>
const canvas = document.getElementById("renderCanvas"); // Get the canvas element
const engine = new BABYLON.Engine(canvas, true); // Generate the BABYLON 3D engine
// Register a render loop to repeatedly render the scene
createScene(engine).then(sceneToRender => {
engine.runRenderLoop(() => sceneToRender.render());
});
// Watch for browser/canvas resize events
window.addEventListener("resize", function () {
engine.resize();
});
</script>
</body>
</html>
Passaggi successivi
Per altre informazioni sullo sviluppo di Realtà mista JavaScript, vedere Panoramica dello sviluppo JavaScript.