Mike Wasson による
このチュートリアルでは、ASP.NET 4.x の従来の ASP.NET Web フォーム アプリケーションに Web API を追加する手順について説明します。
概要
ASP.NET Web API は ASP.NET MVC と共にパッケージ化されていますが、従来の ASP.NET Web フォーム アプリケーションに Web API を簡単に追加できます。
Web フォーム アプリケーションで Web API を使用するには、主に次の 2 つの手順があります。
- ApiController クラスから派生する Web API コントローラーを追加します。
- ルート テーブルを Application_Start メソッドに追加します。
Web フォーム プロジェクトを作成する
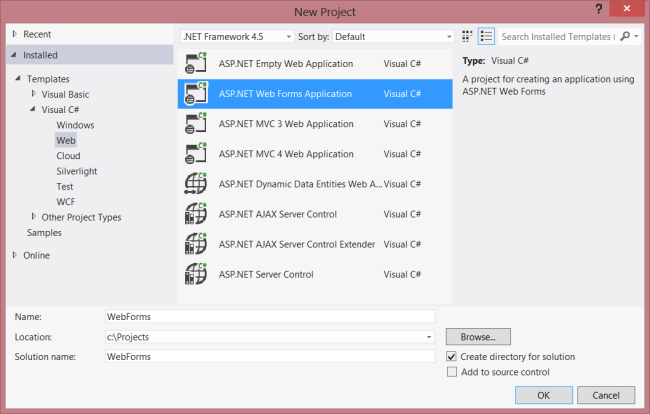
Visual Studio を起動し、[スタート] ページから [新しいプロジェクト] を選択します。 または、[ ファイル ] メニューの [ 新規作成 ] を選択し、[ プロジェクト] を選択します。
[テンプレート] ウィンドウ で 、[ インストールされているテンプレート ] を選択し、[ Visual C# ] ノードを展開します。 [Visual C#] で [Web] を選択します。 プロジェクト テンプレートの一覧で、[ Web フォーム アプリケーション ASP.NET 選択します。 プロジェクトの名前を入力し、[ OK] をクリックします。
モデルとコントローラーを作成する
このチュートリアルでは、 入門 チュートリアルと同じモデル クラスとコントローラー クラスを使用します。
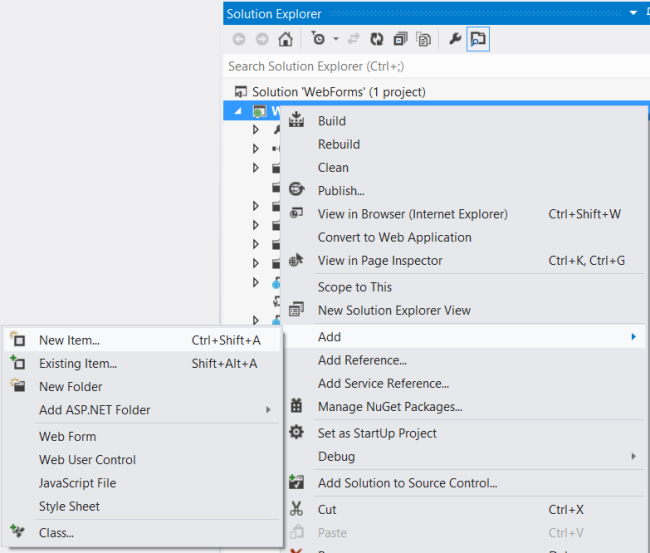
まず、モデル クラスを追加します。 ソリューション エクスプローラーで、プロジェクトを右クリックし、[クラスの追加] を選択します。 クラスに Product という名前を付け、次の実装を追加します。
public class Product
{
    public int Id { get; set; }
    public string Name { get; set; }
    public decimal Price { get; set; }
    public string Category { get; set; }
}
次に、Web API コントローラーをプロジェクトに追加します。 コントローラー は、Web API の HTTP 要求を処理するオブジェクトです。
ソリューション エクスプローラー で、プロジェクトを右クリックします。 [ 新しい項目の追加] を選択します。
[ インストールされているテンプレート] で、[ Visual C# ] を展開し、[Web] を選択 します。 次に、テンプレートの一覧から [ Web API コントローラー クラス] を選択します。 コントローラーに "ProductsController" という名前を付 け、[追加] をクリックします。
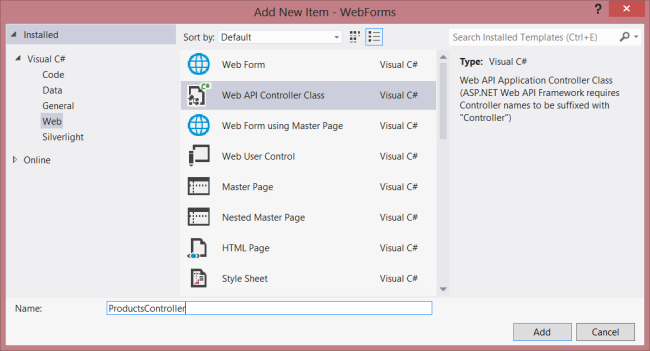
新しい項目の追加ウィザードでは、ProductsController.csという名前のファイルが作成されます。 ウィザードに含まれているメソッドを削除し、次のメソッドを追加します。
namespace WebForms
{
    using System;
    using System.Collections.Generic;
    using System.Linq;
    using System.Net;
    using System.Net.Http;
    using System.Web.Http;

    public class ProductsController : ApiController
    {

        Product[] products = new Product[]
        {
            new Product { Id = 1, Name = "Tomato Soup", Category = "Groceries", Price = 1 },
            new Product { Id = 2, Name = "Yo-yo", Category = "Toys", Price = 3.75M },
            new Product { Id = 3, Name = "Hammer", Category = "Hardware", Price = 16.99M }
        };

        public IEnumerable<Product> GetAllProducts()
        {
            return products;
        }

        public Product GetProductById(int id)
        {
            var product = products.FirstOrDefault((p) => p.Id == id);
            if (product == null)
            {
                throw new HttpResponseException(HttpStatusCode.NotFound);
            }
            return product;
        }

        public IEnumerable<Product> GetProductsByCategory(string category)
        {
            return products.Where(
                (p) => string.Equals(p.Category, category,
                    StringComparison.OrdinalIgnoreCase));
        }
    }
}
このコントローラーのコードの詳細については、 作業の開始 に関するチュートリアルを参照してください。
ルーティング情報の追加
次に、"/api/products/" という形式の URI がコントローラーにルーティングされるように URI ルートを追加します。
ソリューション エクスプローラーで Global.asax をダブルクリックし、分離コード ファイルGlobal.asax.csを開きます。 次の using ステートメントを 追加します。
using System.Web.Http;
次に、 Application_Start メソッドに 次のコードを追加します。
RouteTable.Routes.MapHttpRoute(
    name: "DefaultApi",
    routeTemplate: "api/{controller}/{id}",
    defaults: new { id = System.Web.Http.RouteParameter.Optional }
);
ルーティング テーブルの詳細については、「 ASP.NET Web API でのルーティング」を参照してください。
クライアントサイドAJAXを追加する
これで、クライアントがアクセスできる Web API を作成する必要があります。 次に、jQuery を使用して API を呼び出す HTML ページを追加します。
マスター ページ (Site.Master など) に、ContentPlaceHolderを含むID="HeadContent"が含まれていることを確認します。
<asp:ContentPlaceHolder runat="server" ID="HeadContent"></asp:ContentPlaceHolder>
ファイル Default.aspxを開きます。 次に示すように、メイン コンテンツ セクションにある定型テキストを置き換えます。
<%@ Page Title="Home Page" Language="C#" MasterPageFile="~/Site.Master"
AutoEventWireup="true" CodeBehind="Default.aspx.cs" Inherits="WebForms._Default" %>
<asp:Content ID="HeaderContent" runat="server" ContentPlaceHolderID="HeadContent">
</asp:Content>
<asp:Content ID="BodyContent" runat="server" ContentPlaceHolderID="MainContent">
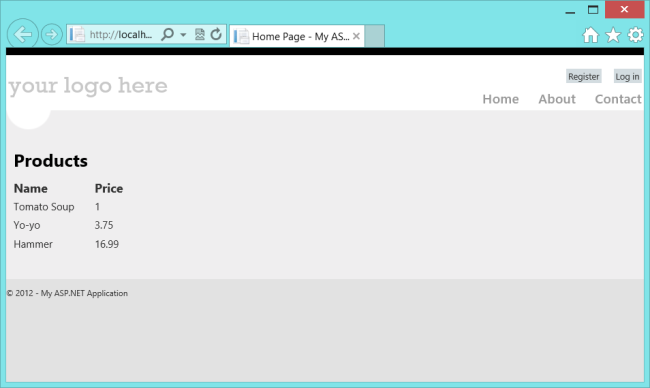
<h2>Products</h2>
<table>
<thead>
<tr><th>Name</th><th>Price</th></tr>
</thead>
<tbody id="products">
</tbody>
</table>
</asp:Content>
次に、 HeaderContent セクションで jQuery ソース ファイルへの参照を追加します。
<asp:Content ID="HeaderContent" runat="server" ContentPlaceHolderID="HeadContent">
    <script src="Scripts/jquery-1.10.2.min.js" type="text/javascript"></script>
</asp:Content>
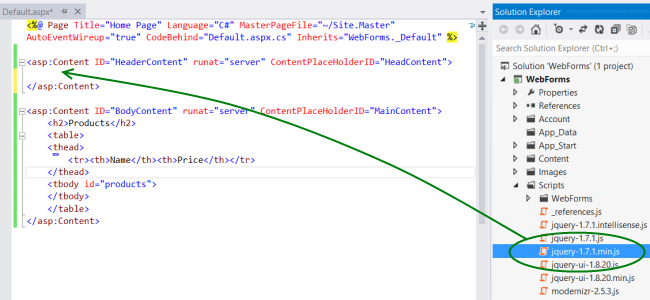
注: ソリューション エクスプローラー からコード エディター ウィンドウにファイルをドラッグ アンド ドロップすることで、スクリプト参照を簡単に追加できます。
jQuery スクリプト タグの下に、次のスクリプト ブロックを追加します。
<script type="text/javascript">
    function getProducts() {
        $.getJSON("api/products",
            function (data) {
                $('#products').empty(); // Clear the table body.

                // Loop through the list of products.
                $.each(data, function (key, val) {
                    // Add a table row for the product.
                    var row = '<td>' + val.Name + '</td><td>' + val.Price + '</td>';
                    $('<tr/>', { html: row })  // Append the name.
                        .appendTo($('#products'));
                });
            });
        }

        $(document).ready(getProducts);
</script>
ドキュメントが読み込まれると、このスクリプトは "api/products" に対して AJAX 要求を行います。 要求は、JSON 形式の製品の一覧を返します。 このスクリプトは、HTML テーブルに製品情報を追加します。
アプリケーションを実行すると、次のようになります。