REST API を使用して LUIS モデルを更新する方法
重要
LUIS は 2025 年 10 月 1 日に廃止され、2023 年 4 月 1 日から新しい LUIS リソースを作成できなくなります。 継続的な製品サポートと多言語機能のベネフィットを得るために、LUIS アプリケーションを会話言語理解に移行することをお勧めします。
この記事では、Pizza アプリに発話の例を追加してアプリをトレーニングします。 発話の例は、意図にマッピングされる会話形式のユーザー テキストです。 意図に対する発話の例を与えるには、ユーザーによって入力されるどのようなテキストが、どの意図に属しているかを LUIS に学習させます。
前提条件
発話の例の JSON ファイル
発話の例は、特定の形式に従っています。
text フィールドには、サンプルの発話テキストが含まれています。 intentName フィールドは、LUIS アプリの既存の意図の名前と対応している必要があります。 entityLabels フィールドは必須です。 どのエンティティもラベル付けしない場合は、空の配列を指定します。
entityLabels 配列が空でない場合、entityName フィールドで示されるエンティティを startCharIndex および endCharIndex で指定する必要があります。 インデックスは 0 から始まります。 テキスト内のスペースでラベルを開始または終了すると、発話を追加する API 呼び出しは失敗します。
[
  {
    "text": "order a pizza",
    "intentName": "ModifyOrder",
    "entityLabels": [
      {
        "entityName": "Order",
        "startCharIndex": 6,
        "endCharIndex": 12
      }
    ]
  },
  {
    "text": "order a large pepperoni pizza",
    "intentName": "ModifyOrder",
    "entityLabels": [
      {
        "entityName": "Order",
        "startCharIndex": 6,
        "endCharIndex": 28
      },
      {
        "entityName": "FullPizzaWithModifiers",
        "startCharIndex": 6,
        "endCharIndex": 28
      },
      {
        "entityName": "PizzaType",
        "startCharIndex": 14,
        "endCharIndex": 28
      },
      {
        "entityName": "Size",
        "startCharIndex": 8,
        "endCharIndex": 12
      }
    ]
  },
  {
    "text": "I want two large pepperoni pizzas on thin crust",
    "intentName": "ModifyOrder",
    "entityLabels": [
      {
        "entityName": "Order",
        "startCharIndex": 7,
        "endCharIndex": 46
      },
      {
        "entityName": "FullPizzaWithModifiers",
        "startCharIndex": 7,
        "endCharIndex": 46
      },
      {
        "entityName": "PizzaType",
        "startCharIndex": 17,
        "endCharIndex": 32
      },
      {
        "entityName": "Size",
        "startCharIndex": 11,
        "endCharIndex": 15
      },
      {
        "entityName": "Quantity",
        "startCharIndex": 7,
        "endCharIndex": 9
      },
      {
        "entityName": "Crust",
        "startCharIndex": 37,
        "endCharIndex": 46
      }
    ]
  }
]
Pizza アプリを作成する
pizza アプリを作成します。
- pizza-app-for-luis-v6.json を選択し、
pizza-app-for-luis.jsonファイルの GitHub ページを表示します。 - [Raw] ボタンを右クリックするか長押しし、[名前を付けてリンク先を保存] を選択して
pizza-app-for-luis.jsonをコンピューターに保存します。 - LUIS ポータルにサインインします。
- [マイ アプリ] を選択します。
- [マイアプリ] ページで、 [+ New app for conversation](+ 会話用の新しいアプリ) を選択します。
- [JSON としてインポート] を選択します。
- [Import new app](新しいアプリのインポート) ダイアログで、 [ファイルの選択] ボタンを選択します。
- ダウンロードした
pizza-app-for-luis.jsonファイルを選択し、pizza-app-for-luis.jsonを選択します。 - [新しいアプリのインポート] ダイアログの [名前] フィールドに Pizza アプリの名前を入力し、 [完了] ボタンを選択します。
アプリがインポートされます。
[How to create an effective LUIS app](効果的な LUIS アプリを作成する方法) ダイアログが表示されたら閉じます。
Pizza アプリをトレーニングして発行する
[意図] ページに Pizza アプリの意図一覧が表示されるはずです。
LUIS Web サイトの右上にある [Train](トレーニング) ボタンを選択します。
![[Train]\(トレーニング\) ボタン](media/train-button-preview.png)
[トレーニング] ボタンが無効になると、トレーニングが完了します。
チャットボットや他のクライアント アプリケーションで LUIS の予測を受け取るには、アプリを予測エンドポイントに公開する必要があります。
右上のナビゲーションで [公開] を選択します。

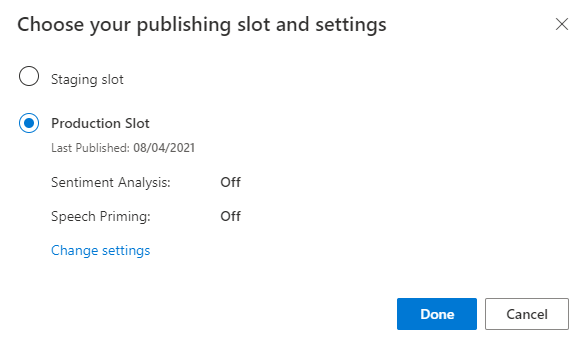
[運用] スロットを選択し、 [完了] を選択します。
通知の [エンドポイントの URL にアクセス] を選択して [Azure リソース] ページに移動します。 アプリに関連付けられている予測リソースがある場合にのみ、URL が表示されます。 また、 [管理] ページをクリックして [Azure リソース] ページを表示することもできます。

作成リソースを Pizza アプリに追加する
- [管理] を選択します。
- [Azure リソース] を選択します。
- [Authoring Resource](作成リソース) を選択します。
- [Change authoring resource](作成リソースを変更する) を選択します。
作成リソースがある場合は、作成リソースの [テナント名] 、 [サブスクリプション名] 、および [LUIS リソース名] を入力します。
作成リソースがない場合は、次のようにします。
- [新しいリソースの作成] を選択します。
- [テナント名] 、 [リソース名] 、 [サブスクリプション名] 、 [Azure リソース グループ名] を入力します。
これで Pizza アプリを使用する準備ができました。
Pizza アプリのアクセス値を記録する
新しい Pizza アプリを使用するには、Pizza アプリのアプリ ID、オーサリング キー、作成エンドポイントが必要です。 予測を取得するには、個別の予測エンドポイントと予測キーが必要です。
これらの値を見つけるには:
- [意図] ページから [管理] を選択します。
- [アプリケーション設定] ページから [アプリ ID] を記録します。
- [Azure リソース] を選択します。
- [Authoring Resource](作成リソース) を選択します。
- [Authoring Resource](作成リソース) と [予測リソース] タブで、主キーを記録します。 この値が、オーサリング キーです。
- [エンドポイント URL] を記録します。 この値が、作成エンドポイントです。
プログラムを使用してモデルを変更する
csharp-model-with-restのプロジェクト名とフォルダー名を使用して、C# 言語をターゲットとした新しいコンソール アプリケーションを作成します。dotnet new console -lang C# -n csharp-model-with-rest作成した
csharp-model-with-restディレクトリに移動し、次のコマンドを使用して必要な依存関係をインストールします。cd csharp-model-with-rest dotnet add package System.Net.Http dotnet add package JsonFormatterPlusProgram.cs を次のコードで上書きします。
// // This quickstart shows how to add utterances to a LUIS model using the REST APIs. // using System; using System.IO; using System.Net.Http; using System.Text; using System.Threading.Tasks; using System.Collections.Generic; using System.Linq; // 3rd party NuGet packages using JsonFormatterPlus; namespace AddUtterances { class Program { ////////// // Values to modify. // YOUR-APP-ID: The App ID GUID found on the www.luis.ai Application Settings page. static string appID = "PASTE_YOUR_LUIS_APP_ID_HERE"; // YOUR-AUTHORING-KEY: Your LUIS authoring key, 32 character value. static string authoringKey = "PASTE_YOUR_LUIS_AUTHORING_SUBSCRIPTION_KEY_HERE"; // YOUR-AUTHORING-ENDPOINT: Replace this endpoint with your authoring key endpoint. // For example, "https://your-resource-name.cognitiveservices.azure.com/" static string authoringEndpoint = "PASTE_YOUR_LUIS_AUTHORING_ENDPOINT_HERE"; // NOTE: Replace this your version number. static string appVersion = "0.1"; ////////// static string host = String.Format("{0}luis/authoring/v3.0-preview/apps/{1}/versions/{2}/", authoringEndpoint, appID, appVersion); // GET request with authentication async static Task<HttpResponseMessage> SendGet(string uri) { using (var client = new HttpClient()) using (var request = new HttpRequestMessage()) { request.Method = HttpMethod.Get; request.RequestUri = new Uri(uri); request.Headers.Add("Ocp-Apim-Subscription-Key", authoringKey); return await client.SendAsync(request); } } // POST request with authentication async static Task<HttpResponseMessage> SendPost(string uri, string requestBody) { using (var client = new HttpClient()) using (var request = new HttpRequestMessage()) { request.Method = HttpMethod.Post; request.RequestUri = new Uri(uri); if (!String.IsNullOrEmpty(requestBody)) { request.Content = new StringContent(requestBody, Encoding.UTF8, "text/json"); } request.Headers.Add("Ocp-Apim-Subscription-Key", authoringKey); return await client.SendAsync(request); } } // Add utterances as string with POST request async static Task AddUtterances(string utterances) { string uri = host + "examples"; var response = await SendPost(uri, utterances); var result = await response.Content.ReadAsStringAsync(); Console.WriteLine("Added utterances."); Console.WriteLine(JsonFormatter.Format(result)); } // Train app after adding utterances async static Task Train() { string uri = host + "train"; var response = await SendPost(uri, null); var result = await response.Content.ReadAsStringAsync(); Console.WriteLine("Sent training request."); Console.WriteLine(JsonFormatter.Format(result)); } // Check status of training async static Task Status() { var response = await SendGet(host + "train"); var result = await response.Content.ReadAsStringAsync(); Console.WriteLine("Requested training status."); Console.WriteLine(JsonFormatter.Format(result)); } // Add utterances, train, check status static void Main(string[] args) { string utterances = @" [ { 'text': 'order a pizza', 'intentName': 'ModifyOrder', 'entityLabels': [ { 'entityName': 'Order', 'startCharIndex': 6, 'endCharIndex': 12 } ] }, { 'text': 'order a large pepperoni pizza', 'intentName': 'ModifyOrder', 'entityLabels': [ { 'entityName': 'Order', 'startCharIndex': 6, 'endCharIndex': 28 }, { 'entityName': 'FullPizzaWithModifiers', 'startCharIndex': 6, 'endCharIndex': 28 }, { 'entityName': 'PizzaType', 'startCharIndex': 14, 'endCharIndex': 28 }, { 'entityName': 'Size', 'startCharIndex': 8, 'endCharIndex': 12 } ] }, { 'text': 'I want two large pepperoni pizzas on thin crust', 'intentName': 'ModifyOrder', 'entityLabels': [ { 'entityName': 'Order', 'startCharIndex': 7, 'endCharIndex': 46 }, { 'entityName': 'FullPizzaWithModifiers', 'startCharIndex': 7, 'endCharIndex': 46 }, { 'entityName': 'PizzaType', 'startCharIndex': 17, 'endCharIndex': 32 }, { 'entityName': 'Size', 'startCharIndex': 11, 'endCharIndex': 15 }, { 'entityName': 'Quantity', 'startCharIndex': 7, 'endCharIndex': 9 }, { 'entityName': 'Crust', 'startCharIndex': 37, 'endCharIndex': 46 } ] } ] "; AddUtterances(utterances).Wait(); Train().Wait(); Status().Wait(); } } }YOUR-で始まる値を実際の値に置き換えます。Information 目的 YOUR-APP-IDLUIS アプリ ID。 YOUR-AUTHORING-KEY32 文字の実際の作成キー。 YOUR-AUTHORING-ENDPOINT作成 URL エンドポイント。 たとえば、「 https://replace-with-your-resource-name.api.cognitive.microsoft.com/」のように入力します。 リソース名は、リソースの作成時に設定します。割り当てられたキーとリソースは、LUIS ポータルの [Manage](管理) セクションの [Azure リソース] ページで確認できます。 アプリ ID は、同じ [Manage](管理) セクションの [アプリケーションの設定] ページで入手できます。
重要
終わったらコードからキーを削除し、公開しないよう注意してください。 運用環境では、Azure Key Vault などの資格情報を格納してアクセスする安全な方法を使用します。 詳細については、Azure AI サービスのセキュリティに関する記事を参照してください。
コンソール アプリケーションをビルドします。
dotnet buildコンソール アプリケーションを実行します。
dotnet run作成の応答を確認します。
Added utterances.
[
    {
        "value": {
            "ExampleId": 1137150691,
            "UtteranceText": "order a pizza"
        },
        "hasError": false
    },
    {
        "value": {
            "ExampleId": 1137150692,
            "UtteranceText": "order a large pepperoni pizza"
        },
        "hasError": false
    },
    {
        "value": {
            "ExampleId": 1137150693,
            "UtteranceText": "i want two large pepperoni pizzas on thin crust"
        },
        "hasError": false
    }
]
Sent training request.
{
    "statusId": 9,
    "status": "Queued"
}
Requested training status.
[
    {
        "modelId": "edb46abf-0000-41ab-beb2-a41a0fe1630f",
        "details": {
            "statusId": 9,
            "status": "Queued",
            "exampleCount": 0
        }
    },
    {
        "modelId": "a5030be2-616c-4648-bf2f-380fa9417d37",
        "details": {
            "statusId": 9,
            "status": "Queued",
            "exampleCount": 0
        }
    },
    {
        "modelId": "3f2b1f31-a3c3-4fbd-8182-e9d9dbc120b9",
        "details": {
            "statusId": 9,
            "status": "Queued",
            "exampleCount": 0
        }
    },
    {
        "modelId": "e4b6704b-1636-474c-9459-fe9ccbeba51c",
        "details": {
            "statusId": 9,
            "status": "Queued",
            "exampleCount": 0
        }
    },
    {
        "modelId": "031d3777-2a00-4a7a-9323-9a3280a30000",
        "details": {
            "statusId": 9,
            "status": "Queued",
            "exampleCount": 0
        }
    },
    {
        "modelId": "9250e7a1-06eb-4413-9432-ae132ed32583",
        "details": {
            "statusId": 9,
            "status": "Queued",
            "exampleCount": 0
        }
    }
]
リソースをクリーンアップする
このクイックスタートを完了したら、ファイル システムからプロジェクト フォルダーを削除します。
次のステップ
前提条件
- JDK SE (Java Development Kit、Standard Edition)
- Visual Studio Code または任意の IDE。
発話の例の JSON ファイル
発話の例は、特定の形式に従っています。
text フィールドには、サンプルの発話テキストが含まれています。 intentName フィールドは、LUIS アプリの既存の意図の名前と対応している必要があります。 entityLabels フィールドは必須です。 どのエンティティもラベル付けしない場合は、空の配列を指定します。
entityLabels 配列が空でない場合、entityName フィールドで示されるエンティティを startCharIndex および endCharIndex で指定する必要があります。 インデックスは 0 から始まります。 テキスト内のスペースでラベルを開始または終了すると、発話を追加する API 呼び出しは失敗します。
[
  {
    "text": "order a pizza",
    "intentName": "ModifyOrder",
    "entityLabels": [
      {
        "entityName": "Order",
        "startCharIndex": 6,
        "endCharIndex": 12
      }
    ]
  },
  {
    "text": "order a large pepperoni pizza",
    "intentName": "ModifyOrder",
    "entityLabels": [
      {
        "entityName": "Order",
        "startCharIndex": 6,
        "endCharIndex": 28
      },
      {
        "entityName": "FullPizzaWithModifiers",
        "startCharIndex": 6,
        "endCharIndex": 28
      },
      {
        "entityName": "PizzaType",
        "startCharIndex": 14,
        "endCharIndex": 28
      },
      {
        "entityName": "Size",
        "startCharIndex": 8,
        "endCharIndex": 12
      }
    ]
  },
  {
    "text": "I want two large pepperoni pizzas on thin crust",
    "intentName": "ModifyOrder",
    "entityLabels": [
      {
        "entityName": "Order",
        "startCharIndex": 7,
        "endCharIndex": 46
      },
      {
        "entityName": "FullPizzaWithModifiers",
        "startCharIndex": 7,
        "endCharIndex": 46
      },
      {
        "entityName": "PizzaType",
        "startCharIndex": 17,
        "endCharIndex": 32
      },
      {
        "entityName": "Size",
        "startCharIndex": 11,
        "endCharIndex": 15
      },
      {
        "entityName": "Quantity",
        "startCharIndex": 7,
        "endCharIndex": 9
      },
      {
        "entityName": "Crust",
        "startCharIndex": 37,
        "endCharIndex": 46
      }
    ]
  }
]
プログラムを使用してモデルを変更する
java-model-with-restなど、Java プロジェクトを保持する新しいフォルダーを作成します。libという名前のサブディレクトリを作成し、次の Java ライブラリをlibサブディレクトリにコピーします。Model.javaという名前で新しいファイルを作成します。 次のコードを追加します。// // This quickstart shows how to add utterances to a LUIS model using the REST APIs. // import java.io.*; import java.net.URI; import org.apache.http.HttpEntity; import org.apache.http.HttpResponse; import org.apache.http.client.HttpClient; import org.apache.http.client.methods.HttpGet; import org.apache.http.client.methods.HttpPost; import org.apache.http.client.utils.URIBuilder; import org.apache.http.entity.StringEntity; import org.apache.http.impl.client.HttpClients; import org.apache.http.util.EntityUtils; // To compile, execute this command at the console: // Windows: javac -cp ";lib/*" Model.java // macOs: javac -cp ":lib/*" Model.java // Linux: javac -cp ":lib/*" Model.java // To run, execute this command at the console: // Windows: java -cp ";lib/*" Model // macOs: java -cp ":lib/*" Model // Linux: java -cp ":lib/*" Model public class Model { public static void main(String[] args) { try { ////////// // Values to modify. // YOUR-APP-ID: The App ID GUID found on the www.luis.ai Application Settings page. String AppId = "PASTE_YOUR_LUIS_APP_ID_HERE"; // YOUR-AUTHORING-KEY: Your LUIS authoring key, 32 character value. String Key = "PASTE_YOUR_LUIS_AUTHORING_SUBSCRIPTION_KEY_HERE"; // YOUR-AUTHORING-ENDPOINT: Replace this with your authoring key endpoint. // For example, "https://your-resource-name.cognitiveservices.azure.com/" String Endpoint = "PASTE_YOUR_LUIS_AUTHORING_ENDPOINT_HERE"; // NOTE: Replace this your version number. The Pizza app uses a version number of "0.1". String Version = "0.1"; ////////// // The list of utterances to add, in JSON format. String Utterances = "[{'text': 'order a pizza', 'intentName': 'ModifyOrder', 'entityLabels': [{'entityName': 'Order', 'startCharIndex': 6, 'endCharIndex': 12}]}, {'text': 'order a large pepperoni pizza', 'intentName': 'ModifyOrder', 'entityLabels': [{'entityName': 'Order', 'startCharIndex': 6, 'endCharIndex': 28}, {'entityName': 'FullPizzaWithModifiers', 'startCharIndex': 6, 'endCharIndex': 28}, {'entityName': 'PizzaType', 'startCharIndex': 14, 'endCharIndex': 28}, {'entityName': 'Size', 'startCharIndex': 8, 'endCharIndex': 12}]}, {'text': 'I want two large pepperoni pizzas on thin crust', 'intentName': 'ModifyOrder', 'entityLabels': [{'entityName': 'Order', 'startCharIndex': 7, 'endCharIndex': 46}, {'entityName': 'FullPizzaWithModifiers', 'startCharIndex': 7, 'endCharIndex': 46}, {'entityName': 'PizzaType', 'startCharIndex': 17, 'endCharIndex': 32}, {'entityName': 'Size', 'startCharIndex': 11, 'endCharIndex': 15}, {'entityName': 'Quantity', 'startCharIndex': 7, 'endCharIndex': 9}, {'entityName': 'Crust', 'startCharIndex': 37, 'endCharIndex': 46}]}]"; // Create the URLs for uploading example utterances and for training. URIBuilder addUtteranceURL = new URIBuilder(Endpoint + "luis/authoring/v3.0-preview/apps/" + AppId + "/versions/" + Version + "/examples"); URIBuilder trainURL = new URIBuilder(Endpoint + "luis/authoring/v3.0-preview/apps/" + AppId + "/versions/" + Version + "/train"); URI addUtterancesURI = addUtteranceURL.build(); URI trainURI = trainURL.build(); // Add the utterances. // Create the request. HttpClient addUtterancesClient = HttpClients.createDefault(); HttpPost addUtterancesRequest = new HttpPost(addUtterancesURI); // Add the headers. addUtterancesRequest.setHeader("Ocp-Apim-Subscription-Key",Key); addUtterancesRequest.setHeader("Content-type","application/json"); // Add the body. StringEntity stringEntity = new StringEntity(Utterances); addUtterancesRequest.setEntity(stringEntity); // Execute the request and obtain the response. HttpResponse addUtterancesResponse = addUtterancesClient.execute(addUtterancesRequest); HttpEntity addUtterancesEntity = addUtterancesResponse.getEntity(); // Print the response on the console. if (addUtterancesEntity != null) { System.out.println(EntityUtils.toString(addUtterancesEntity)); } // Train the model. // Create the request. HttpClient trainClient = HttpClients.createDefault(); HttpPost trainRequest = new HttpPost(trainURI); // Add the headers. trainRequest.setHeader("Ocp-Apim-Subscription-Key",Key); trainRequest.setHeader("Content-type","application/json"); // Execute the request and obtain the response. HttpResponse trainResponse = trainClient.execute(trainRequest); HttpEntity trainEntity = trainResponse.getEntity(); // Print the response on the console. if (trainEntity != null) { System.out.println(EntityUtils.toString(trainEntity)); } // Get the training status. // Create the request. HttpClient trainStatusClient = HttpClients.createDefault(); HttpGet trainStatusRequest = new HttpGet(trainURI); // Add the headers. trainStatusRequest.setHeader("Ocp-Apim-Subscription-Key",Key); trainStatusRequest.setHeader("Content-type","application/json"); // Execute the request and obtain the response. HttpResponse trainStatusResponse = trainStatusClient.execute(trainStatusRequest); HttpEntity trainStatusEntity = trainStatusResponse.getEntity(); // Print the response on the console. if (trainStatusEntity != null) { System.out.println(EntityUtils.toString(trainStatusEntity)); } } // Display errors if they occur. catch (Exception e) { System.out.println(e.getMessage()); } } }YOUR-で始まる値を実際の値に置き換えます。Information 目的 YOUR-APP-IDLUIS アプリ ID。 YOUR-AUTHORING-KEY32 文字の実際の作成キー。 YOUR-AUTHORING-ENDPOINT作成 URL エンドポイント。 たとえば、「 https://replace-with-your-resource-name.api.cognitive.microsoft.com/」のように入力します。 リソース名は、リソースの作成時に設定します。割り当てられたキーとリソースは、LUIS ポータルの [Manage](管理) セクションの [Azure リソース] ページで確認できます。 アプリ ID は、同じ [Manage](管理) セクションの [アプリケーションの設定] ページで入手できます。
重要
終わったらコードからキーを削除し、公開しないよう注意してください。 運用環境では、Azure Key Vault などの資格情報を格納してアクセスする安全な方法を使用します。 詳細については、Azure AI サービスのセキュリティに関する記事を参照してください。
コマンド プロンプトを使用して、
Model.javaファイルを作成したのと同じディレクトリで、次のコマンドを入力して Java ファイルをコンパイルします。- Windows を使用している場合は、次のコマンドを使用します。
javac -cp ";lib/*" Model.java - macOS または Linux を使用している場合は、次のコマンドを使用します。
javac -cp ":lib/*" Model.java
- Windows を使用している場合は、次のコマンドを使用します。
コマンド プロンプトに次のテキストを入力して、コマンド ラインから Java アプリケーションを実行します。
- Windows を使用している場合は、次のコマンドを使用します。
java -cp ";lib/*" Model - macOS または Linux を使用している場合は、次のコマンドを使用します。
java -cp ":lib/*" Model
- Windows を使用している場合は、次のコマンドを使用します。
作成の応答を確認します。
[{"value":{"ExampleId":1137150691,"UtteranceText":"order a pizza"},"hasError":false},{"value":{"ExampleId":1137150692,"UtteranceText":"order a large pepperoni pizza"},"hasError":false},{"value":{"ExampleId":1137150693,"UtteranceText":"i want two large pepperoni pizzas on thin crust"},"hasError":false}]
{"statusId":9,"status":"Queued"}
[{"modelId":"edb46abf-0000-41ab-beb2-a41a0fe1630f","details":{"statusId":9,"status":"Queued","exampleCount":0}},{"modelId":"a5030be2-616c-4648-bf2f-380fa9417d37","details":{"statusId":9,"status":"Queued","exampleCount":0}},{"modelId":"3f2b1f31-a3c3-4fbd-8182-e9d9dbc120b9","details":{"statusId":9,"status":"Queued","exampleCount":0}},{"modelId":"e4b6704b-1636-474c-9459-fe9ccbeba51c","details":{"statusId":9,"status":"Queued","exampleCount":0}},{"modelId":"031d3777-2a00-4a7a-9323-9a3280a30000","details":{"statusId":9,"status":"Queued","exampleCount":0}},{"modelId":"9250e7a1-06eb-4413-9432-ae132ed32583","details":{"statusId":3,"status":"InProgress","exampleCount":0,"progressSubstatus":"CollectingData"}}]
読みやすいように書式設定された出力を次に示します。
[
  {
    "value": {
      "ExampleId": 1137150691,
      "UtteranceText": "order a pizza"
    },
    "hasError": false
  },
  {
    "value": {
      "ExampleId": 1137150692,
      "UtteranceText": "order a large pepperoni pizza"
    },
    "hasError": false
  },
  {
    "value": {
      "ExampleId": 1137150693,
      "UtteranceText": "i want two large pepperoni pizzas on thin crust"
    },
    "hasError": false
  }
]
{
  "statusId": 9,
  "status": "Queued"
}
[
  {
    "modelId": "edb46abf-0000-41ab-beb2-a41a0fe1630f",
    "details": {
      "statusId": 9,
      "status": "Queued",
      "exampleCount": 0
    }
  },
  {
    "modelId": "a5030be2-616c-4648-bf2f-380fa9417d37",
    "details": {
      "statusId": 9,
      "status": "Queued",
      "exampleCount": 0
    }
  },
  {
    "modelId": "3f2b1f31-a3c3-4fbd-8182-e9d9dbc120b9",
    "details": {
      "statusId": 9,
      "status": "Queued",
      "exampleCount": 0
    }
  },
  {
    "modelId": "e4b6704b-1636-474c-9459-fe9ccbeba51c",
    "details": {
      "statusId": 9,
      "status": "Queued",
      "exampleCount": 0
    }
  },
  {
    "modelId": "031d3777-2a00-4a7a-9323-9a3280a30000",
    "details": {
      "statusId": 9,
      "status": "Queued",
      "exampleCount": 0
    }
  },
  {
    "modelId": "9250e7a1-06eb-4413-9432-ae132ed32583",
    "details": {
      "statusId": 3,
      "status": "InProgress",
      "exampleCount": 0,
      "progressSubstatus": "CollectingData"
    }
  }
]
リソースをクリーンアップする
このクイックスタートを完了したら、ファイル システムからプロジェクト フォルダーを削除します。
次のステップ
前提条件
- Go プログラミング言語
- Visual Studio Code
発話の例の JSON ファイル
発話の例は、特定の形式に従っています。
text フィールドには、サンプルの発話テキストが含まれています。 intentName フィールドは、LUIS アプリの既存の意図の名前と対応している必要があります。 entityLabels フィールドは必須です。 どのエンティティもラベル付けしない場合は、空の配列を指定します。
entityLabels 配列が空でない場合、entityName フィールドで示されるエンティティを startCharIndex および endCharIndex で指定する必要があります。 インデックスは 0 から始まります。 テキスト内のスペースでラベルを開始または終了すると、発話を追加する API 呼び出しは失敗します。
[
  {
    "text": "order a pizza",
    "intentName": "ModifyOrder",
    "entityLabels": [
      {
        "entityName": "Order",
        "startCharIndex": 6,
        "endCharIndex": 12
      }
    ]
  },
  {
    "text": "order a large pepperoni pizza",
    "intentName": "ModifyOrder",
    "entityLabels": [
      {
        "entityName": "Order",
        "startCharIndex": 6,
        "endCharIndex": 28
      },
      {
        "entityName": "FullPizzaWithModifiers",
        "startCharIndex": 6,
        "endCharIndex": 28
      },
      {
        "entityName": "PizzaType",
        "startCharIndex": 14,
        "endCharIndex": 28
      },
      {
        "entityName": "Size",
        "startCharIndex": 8,
        "endCharIndex": 12
      }
    ]
  },
  {
    "text": "I want two large pepperoni pizzas on thin crust",
    "intentName": "ModifyOrder",
    "entityLabels": [
      {
        "entityName": "Order",
        "startCharIndex": 7,
        "endCharIndex": 46
      },
      {
        "entityName": "FullPizzaWithModifiers",
        "startCharIndex": 7,
        "endCharIndex": 46
      },
      {
        "entityName": "PizzaType",
        "startCharIndex": 17,
        "endCharIndex": 32
      },
      {
        "entityName": "Size",
        "startCharIndex": 11,
        "endCharIndex": 15
      },
      {
        "entityName": "Quantity",
        "startCharIndex": 7,
        "endCharIndex": 9
      },
      {
        "entityName": "Crust",
        "startCharIndex": 37,
        "endCharIndex": 46
      }
    ]
  }
]
Pizza アプリを作成する
pizza アプリを作成します。
- pizza-app-for-luis-v6.json を選択し、
pizza-app-for-luis.jsonファイルの GitHub ページを表示します。 - [Raw] ボタンを右クリックするか長押しし、[名前を付けてリンク先を保存] を選択して
pizza-app-for-luis.jsonをコンピューターに保存します。 - LUIS ポータルにサインインします。
- [マイ アプリ] を選択します。
- [マイアプリ] ページで、 [+ New app for conversation](+ 会話用の新しいアプリ) を選択します。
- [JSON としてインポート] を選択します。
- [Import new app](新しいアプリのインポート) ダイアログで、 [ファイルの選択] ボタンを選択します。
- ダウンロードした
pizza-app-for-luis.jsonファイルを選択し、pizza-app-for-luis.jsonを選択します。 - [新しいアプリのインポート] ダイアログの [名前] フィールドに Pizza アプリの名前を入力し、 [完了] ボタンを選択します。
アプリがインポートされます。
[How to create an effective LUIS app](効果的な LUIS アプリを作成する方法) ダイアログが表示されたら閉じます。
Pizza アプリをトレーニングして発行する
[意図] ページに Pizza アプリの意図一覧が表示されるはずです。
LUIS Web サイトの右上にある [Train](トレーニング) ボタンを選択します。
[トレーニング] ボタンが無効になると、トレーニングが完了します。
チャットボットや他のクライアント アプリケーションで LUIS の予測を受け取るには、アプリを予測エンドポイントに公開する必要があります。
右上のナビゲーションで [公開] を選択します。
[運用] スロットを選択し、 [完了] を選択します。
通知の [エンドポイントの URL にアクセス] を選択して [Azure リソース] ページに移動します。 アプリに関連付けられている予測リソースがある場合にのみ、URL が表示されます。 また、 [管理] ページをクリックして [Azure リソース] ページを表示することもできます。
作成リソースを Pizza アプリに追加する
- [管理] を選択します。
- [Azure リソース] を選択します。
- [Authoring Resource](作成リソース) を選択します。
- [Change authoring resource](作成リソースを変更する) を選択します。
作成リソースがある場合は、作成リソースの [テナント名] 、 [サブスクリプション名] 、および [LUIS リソース名] を入力します。
作成リソースがない場合は、次のようにします。
- [新しいリソースの作成] を選択します。
- [テナント名] 、 [リソース名] 、 [サブスクリプション名] 、 [Azure リソース グループ名] を入力します。
これで Pizza アプリを使用する準備ができました。
Pizza アプリのアクセス値を記録する
新しい Pizza アプリを使用するには、Pizza アプリのアプリ ID、オーサリング キー、作成エンドポイントが必要です。 予測を取得するには、個別の予測エンドポイントと予測キーが必要です。
これらの値を見つけるには:
- [意図] ページから [管理] を選択します。
- [アプリケーション設定] ページから [アプリ ID] を記録します。
- [Azure リソース] を選択します。
- [Authoring Resource](作成リソース) を選択します。
- [Authoring Resource](作成リソース) と [予測リソース] タブで、主キーを記録します。 この値が、オーサリング キーです。
- [エンドポイント URL] を記録します。 この値が、作成エンドポイントです。
プログラムを使用してモデルを変更する
predict.goという名前で新しいファイルを作成します。 次のコードを追加します。// // This quickstart shows how to add utterances to a LUIS model using the REST APIs. // // dependencies package main import ( "fmt" "net/http" "io/ioutil" "log" "strings" ) // main function func main() { ////////// // Values to modify. // YOUR-APP-ID: The App ID GUID found on the www.luis.ai Application Settings page. var appID = "PASTE_YOUR_LUIS_APP_ID_HERE" // YOUR-AUTHORING-KEY: Your LUIS authoring key, 32 character value. var authoringKey = "PASTE_YOUR_LUIS_AUTHORING_SUBSCRIPTION_KEY_HERE" // YOUR-AUTHORING-ENDPOINT: Replace this with your authoring key endpoint. // For example, "https://your-resource-name.cognitiveservices.azure.com/" var endpoint = "PASTE_YOUR_LUIS_AUTHORING_ENDPOINT_HERE" // NOTE: Replace this your version number. The Pizza app uses a version number of "0.1". var version = "0.1" ////////// var exampleUtterances = "[{'text': 'order a pizza', 'intentName': 'ModifyOrder', 'entityLabels': [{'entityName': 'Order', 'startCharIndex': 6, 'endCharIndex': 12}]}, {'text': 'order a large pepperoni pizza', 'intentName': 'ModifyOrder', 'entityLabels': [{'entityName': 'Order', 'startCharIndex': 6, 'endCharIndex': 28}, {'entityName': 'FullPizzaWithModifiers', 'startCharIndex': 6, 'endCharIndex': 28}, {'entityName': 'PizzaType', 'startCharIndex': 14, 'endCharIndex': 28}, {'entityName': 'Size', 'startCharIndex': 8, 'endCharIndex': 12}]}, {'text': 'I want two large pepperoni pizzas on thin crust', 'intentName': 'ModifyOrder', 'entityLabels': [{'entityName': 'Order', 'startCharIndex': 7, 'endCharIndex': 46}, {'entityName': 'FullPizzaWithModifiers', 'startCharIndex': 7, 'endCharIndex': 46}, {'entityName': 'PizzaType', 'startCharIndex': 17, 'endCharIndex': 32}, {'entityName': 'Size', 'startCharIndex': 11, 'endCharIndex': 15}, {'entityName': 'Quantity', 'startCharIndex': 7, 'endCharIndex': 9}, {'entityName': 'Crust', 'startCharIndex': 37, 'endCharIndex': 46}]}]" fmt.Println("add example utterances requested") addUtterance(authoringKey, appID, version, exampleUtterances, endpoint) fmt.Println("training selected") requestTraining(authoringKey, appID, version, endpoint) fmt.Println("training status selected") getTrainingStatus(authoringKey, appID, version, endpoint) } // Send the list of utterances to the model. func addUtterance(authoringKey string, appID string, version string, labeledExampleUtterances string, endpoint string){ var authoringUrl = fmt.Sprintf("%sluis/authoring/v3.0-preview/apps/%s/versions/%s/examples", endpoint, appID, version) httpRequest("POST", authoringUrl, authoringKey, labeledExampleUtterances) } // Request training. func requestTraining(authoringKey string, appID string, version string, endpoint string){ trainApp("POST", authoringKey, appID, version, endpoint) } func trainApp(httpVerb string, authoringKey string, appID string, version string, endpoint string){ var authoringUrl = fmt.Sprintf("%sluis/authoring/v3.0-preview/apps/%s/versions/%s/train", endpoint, appID, version) httpRequest(httpVerb,authoringUrl, authoringKey, "") } func getTrainingStatus(authoringKey string, appID string, version string, endpoint string){ trainApp("GET", authoringKey, appID, version, endpoint) } // generic HTTP request // includes setting header with authoring key func httpRequest(httpVerb string, url string, authoringKey string, body string){ client := &http.Client{} request, err := http.NewRequest(httpVerb, url, strings.NewReader(body)) request.Header.Add("Ocp-Apim-Subscription-Key", authoringKey) fmt.Println("body") fmt.Println(body) response, err := client.Do(request) if err != nil { log.Fatal(err) } else { defer response.Body.Close() contents, err := ioutil.ReadAll(response.Body) if err != nil { log.Fatal(err) } fmt.Println(" ", response.StatusCode) fmt.Println(string(contents)) } }YOUR-で始まる値を実際の値に置き換えます。Information 目的 YOUR-APP-IDLUIS アプリ ID。 YOUR-AUTHORING-KEY32 文字の実際の作成キー。 YOUR-AUTHORING-ENDPOINT作成 URL エンドポイント。 たとえば、「 https://replace-with-your-resource-name.api.cognitive.microsoft.com/」のように入力します。 リソース名は、リソースの作成時に設定します。割り当てられたキーとリソースは、LUIS ポータルの [Manage](管理) セクションの [Azure リソース] ページで確認できます。 アプリ ID は、同じ [Manage](管理) セクションの [アプリケーションの設定] ページで入手できます。
重要
終わったらコードからキーを削除し、公開しないよう注意してください。 運用環境では、Azure Key Vault などの資格情報を格納してアクセスする安全な方法を使用します。 詳細については、Azure AI サービスのセキュリティに関する記事を参照してください。
このファイルを作成したのと同じディレクトリからコマンド プロンプトで次のコマンドを入力し、Go ファイルをコンパイルします。
go build model.goコマンド プロンプトに次のテキストを入力して、コマンド ラインから Go アプリケーションを実行します。
go run model.go作成の応答を確認します。
add example utterances requested
body
[{'text': 'order a pizza', 'intentName': 'ModifyOrder', 'entityLabels': [{'entityName': 'Order', 'startCharIndex': 6, 'endCharIndex': 12}]}, {'text': 'order a large pepperoni pizza', 'intentName': 'ModifyOrder', 'entityLabels': [{'entityName': 'Order', 'startCharIndex': 6, 'endCharIndex': 28}, {'entityName': 'FullPizzaWithModifiers', 'startCharIndex': 6, 'endCharIndex': 28}, {'entityName': 'PizzaType', 'startCharIndex': 14, 'endCharIndex': 28}, {'entityName': 'Size', 'startCharIndex': 8, 'endCharIndex': 12}]}, {'text': 'I want two large pepperoni pizzas on thin crust', 'intentName': 'ModifyOrder', 'entityLabels': [{'entityName': 'Order', 'startCharIndex': 7, 'endCharIndex': 46}, {'entityName': 'FullPizzaWithModifiers', 'startCharIndex': 7, 'endCharIndex': 46}, {'entityName': 'PizzaType', 'startCharIndex': 17, 'endCharIndex': 32}, {'entityName': 'Size', 'startCharIndex': 11, 'endCharIndex': 15}, {'entityName': 'Quantity', 'startCharIndex': 7, 'endCharIndex': 9}, {'entityName': 'Crust', 'startCharIndex': 37, 'endCharIndex': 46}]}]
    201
[{"value":{"ExampleId":1137150691,"UtteranceText":"order a pizza"},"hasError":false},{"value":{"ExampleId":1137150692,"UtteranceText":"order a large pepperoni pizza"},"hasError":false},{"value":{"ExampleId":1137150693,"UtteranceText":"i want two large pepperoni pizzas on thin crust"},"hasError":false}]
training selected
body

    202
{"statusId":9,"status":"Queued"}
training status selected
body

    200
[{"modelId":"edb46abf-0000-41ab-beb2-a41a0fe1630f","details":{"statusId":9,"status":"Queued","exampleCount":0}},{"modelId":"a5030be2-616c-4648-bf2f-380fa9417d37","details":{"statusId":9,"status":"Queued","exampleCount":0}},{"modelId":"3f2b1f31-a3c3-4fbd-8182-e9d9dbc120b9","details":{"statusId":9,"status":"Queued","exampleCount":0}},{"modelId":"e4b6704b-1636-474c-9459-fe9ccbeba51c","details":{"statusId":9,"status":"Queued","exampleCount":0}},{"modelId":"031d3777-2a00-4a7a-9323-9a3280a30000","details":{"statusId":9,"status":"Queued","exampleCount":0}},{"modelId":"9250e7a1-06eb-4413-9432-ae132ed32583","details":{"statusId":9,"status":"Queued","exampleCount":0}}]
読みやすいように書式設定された出力を次に示します。
add example utterances requested
body
[
  {
    'text': 'order a pizza',
    'intentName': 'ModifyOrder',
    'entityLabels': [
      {
        'entityName': 'Order',
        'startCharIndex': 6,
        'endCharIndex': 12
      }
    ]
  },
  {
    'text': 'order a large pepperoni pizza',
    'intentName': 'ModifyOrder',
    'entityLabels': [
      {
        'entityName': 'Order',
        'startCharIndex': 6,
        'endCharIndex': 28
      },
      {
        'entityName': 'FullPizzaWithModifiers',
        'startCharIndex': 6,
        'endCharIndex': 28
      },
      {
        'entityName': 'PizzaType',
        'startCharIndex': 14,
        'endCharIndex': 28
      },
      {
        'entityName': 'Size',
        'startCharIndex': 8,
        'endCharIndex': 12
      }
    ]
  },
  {
    'text': 'I want two large pepperoni pizzas on thin crust',
    'intentName': 'ModifyOrder',
    'entityLabels': [
      {
        'entityName': 'Order',
        'startCharIndex': 7,
        'endCharIndex': 46
      },
      {
        'entityName': 'FullPizzaWithModifiers',
        'startCharIndex': 7,
        'endCharIndex': 46
      },
      {
        'entityName': 'PizzaType',
        'startCharIndex': 17,
        'endCharIndex': 32
      },
      {
        'entityName': 'Size',
        'startCharIndex': 11,
        'endCharIndex': 15
      },
      {
        'entityName': 'Quantity',
        'startCharIndex': 7,
        'endCharIndex': 9
      },
      {
        'entityName': 'Crust',
        'startCharIndex': 37,
        'endCharIndex': 46
      }
    ]
  }
]

    201
[
  {
    "value": {
      "ExampleId": 1137150691,
      "UtteranceText": "order a pizza"
    },
    "hasError": false
  },
  {
    "value": {
      "ExampleId": 1137150692,
      "UtteranceText": "order a large pepperoni pizza"
    },
    "hasError": false
  },
  {
    "value": {
      "ExampleId": 1137150693,
      "UtteranceText": "i want two large pepperoni pizzas on thin crust"
    },
    "hasError": false
  }
]
training selected
body

    202
{
  "statusId": 9,
  "status": "Queued"
}
training status selected
body

    200
[
  {
    "modelId": "edb46abf-0000-41ab-beb2-a41a0fe1630f",
    "details": {
      "statusId": 9,
      "status": "Queued",
      "exampleCount": 0
    }
  },
  {
    "modelId": "a5030be2-616c-4648-bf2f-380fa9417d37",
    "details": {
      "statusId": 9,
      "status": "Queued",
      "exampleCount": 0
    }
  },
  {
    "modelId": "3f2b1f31-a3c3-4fbd-8182-e9d9dbc120b9",
    "details": {
      "statusId": 9,
      "status": "Queued",
      "exampleCount": 0
    }
  },
  {
    "modelId": "e4b6704b-1636-474c-9459-fe9ccbeba51c",
    "details": {
      "statusId": 9,
      "status": "Queued",
      "exampleCount": 0
    }
  },
  {
    "modelId": "031d3777-2a00-4a7a-9323-9a3280a30000",
    "details": {
      "statusId": 9,
      "status": "Queued",
      "exampleCount": 0
    }
  },
  {
    "modelId": "9250e7a1-06eb-4413-9432-ae132ed32583",
    "details": {
      "statusId": 9,
      "status": "Queued",
      "exampleCount": 0
    }
  }
]
リソースをクリーンアップする
このクイックスタートを使用して完了したときに、ファイル システムからファイルを削除します。
次のステップ
前提条件
- Node.js プログラミング言語
- Visual Studio Code
発話の例の JSON ファイル
発話の例は、特定の形式に従っています。
text フィールドには、サンプルの発話テキストが含まれています。 intentName フィールドは、LUIS アプリの既存の意図の名前と対応している必要があります。 entityLabels フィールドは必須です。 どのエンティティもラベル付けしない場合は、空の配列を指定します。
entityLabels 配列が空でない場合、entityName フィールドで示されるエンティティを startCharIndex および endCharIndex で指定する必要があります。 インデックスは 0 から始まります。 テキスト内のスペースでラベルを開始または終了すると、発話を追加する API 呼び出しは失敗します。
[
  {
    "text": "order a pizza",
    "intentName": "ModifyOrder",
    "entityLabels": [
      {
        "entityName": "Order",
        "startCharIndex": 6,
        "endCharIndex": 12
      }
    ]
  },
  {
    "text": "order a large pepperoni pizza",
    "intentName": "ModifyOrder",
    "entityLabels": [
      {
        "entityName": "Order",
        "startCharIndex": 6,
        "endCharIndex": 28
      },
      {
        "entityName": "FullPizzaWithModifiers",
        "startCharIndex": 6,
        "endCharIndex": 28
      },
      {
        "entityName": "PizzaType",
        "startCharIndex": 14,
        "endCharIndex": 28
      },
      {
        "entityName": "Size",
        "startCharIndex": 8,
        "endCharIndex": 12
      }
    ]
  },
  {
    "text": "I want two large pepperoni pizzas on thin crust",
    "intentName": "ModifyOrder",
    "entityLabels": [
      {
        "entityName": "Order",
        "startCharIndex": 7,
        "endCharIndex": 46
      },
      {
        "entityName": "FullPizzaWithModifiers",
        "startCharIndex": 7,
        "endCharIndex": 46
      },
      {
        "entityName": "PizzaType",
        "startCharIndex": 17,
        "endCharIndex": 32
      },
      {
        "entityName": "Size",
        "startCharIndex": 11,
        "endCharIndex": 15
      },
      {
        "entityName": "Quantity",
        "startCharIndex": 7,
        "endCharIndex": 9
      },
      {
        "entityName": "Crust",
        "startCharIndex": 37,
        "endCharIndex": 46
      }
    ]
  }
]
Node.js プロジェクトの作成
node-model-with-restなど、Node.js プロジェクトを保持する新しいフォルダーを作成します。新しいコマンド プロンプトを開き、作成したフォルダーに移動して、次のコマンドを実行します。
npm init各プロンプトで Enter キーを押して、既定の設定をそのまま使用します。
次のコマンドを入力して request-promise モジュールをインストールします。
npm install --save request
npm install --save request-promise
npm install --save querystring
プログラムを使用してモデルを変更する
model.jsという名前で新しいファイルを作成します。 次のコードを追加します。// // This quickstart shows how to add utterances to a LUIS model using the REST APIs. // var request = require('request-promise'); ////////// // Values to modify. // YOUR-APP-ID: The App ID GUID found on the www.luis.ai Application Settings page. const LUIS_appId = "PASTE_YOUR_LUIS_APP_ID_HERE"; // YOUR-AUTHORING-KEY: Your LUIS authoring key, 32 character value. const LUIS_authoringKey = "PASTE_YOUR_LUIS_AUTHORING_SUBSCRIPTION_KEY_HERE"; // YOUR-AUTHORING-ENDPOINT: Replace this with your authoring key endpoint. // For example, "https://your-resource-name.cognitiveservices.azure.com/" const LUIS_endpoint = "PASTE_YOUR_LUIS_AUTHORING_ENDPOINT_HERE"; // NOTE: Replace this your version number. The Pizza app uses a version number of "0.1". const LUIS_versionId = "0.1"; ////////// const addUtterancesURI = `${LUIS_endpoint}luis/authoring/v3.0-preview/apps/${LUIS_appId}/versions/${LUIS_versionId}/examples`; const addTrainURI = `${LUIS_endpoint}luis/authoring/v3.0-preview/apps/${LUIS_appId}/versions/${LUIS_versionId}/train`; const utterances = [ { 'text': 'order a pizza', 'intentName': 'ModifyOrder', 'entityLabels': [ { 'entityName': 'Order', 'startCharIndex': 6, 'endCharIndex': 12 } ] }, { 'text': 'order a large pepperoni pizza', 'intentName': 'ModifyOrder', 'entityLabels': [ { 'entityName': 'Order', 'startCharIndex': 6, 'endCharIndex': 28 }, { 'entityName': 'FullPizzaWithModifiers', 'startCharIndex': 6, 'endCharIndex': 28 }, { 'entityName': 'PizzaType', 'startCharIndex': 14, 'endCharIndex': 28 }, { 'entityName': 'Size', 'startCharIndex': 8, 'endCharIndex': 12 } ] }, { 'text': 'I want two large pepperoni pizzas on thin crust', 'intentName': 'ModifyOrder', 'entityLabels': [ { 'entityName': 'Order', 'startCharIndex': 7, 'endCharIndex': 46 }, { 'entityName': 'FullPizzaWithModifiers', 'startCharIndex': 7, 'endCharIndex': 46 }, { 'entityName': 'PizzaType', 'startCharIndex': 17, 'endCharIndex': 32 }, { 'entityName': 'Size', 'startCharIndex': 11, 'endCharIndex': 15 }, { 'entityName': 'Quantity', 'startCharIndex': 7, 'endCharIndex': 9 }, { 'entityName': 'Crust', 'startCharIndex': 37, 'endCharIndex': 46 } ] } ]; // Main function. const main = async() =>{ await addUtterances(utterances); await train("POST"); await train("GET"); } // Adds the utterances to the model. const addUtterances = async (utterances) => { const options = { uri: addUtterancesURI, method: 'POST', headers: { 'Ocp-Apim-Subscription-Key': LUIS_authoringKey }, json: true, body: utterances }; const response = await request(options) console.log("addUtterance:\n" + JSON.stringify(response, null, 2)); } // With verb === "POST", sends a training request. // With verb === "GET", obtains the training status. const train = async (verb) => { const options = { uri: addTrainURI, method: verb, headers: { 'Ocp-Apim-Subscription-Key': LUIS_authoringKey }, json: true, body: null // The body can be empty for a training request }; const response = await request(options) console.log("train " + verb + ":\n" + JSON.stringify(response, null, 2)); } // MAIN main().then(() => console.log("done")).catch((err)=> console.log(err));YOUR-で始まる値を実際の値に置き換えます。Information 目的 YOUR-APP-IDLUIS アプリ ID。 YOUR-AUTHORING-KEY32 文字の実際の作成キー。 YOUR-AUTHORING-ENDPOINT作成 URL エンドポイント。 たとえば、「 https://replace-with-your-resource-name.api.cognitive.microsoft.com/」のように入力します。 リソース名は、リソースの作成時に設定します。割り当てられたキーとリソースは、LUIS ポータルの [Manage](管理) セクションの [Azure リソース] ページで確認できます。 アプリ ID は、同じ [Manage](管理) セクションの [アプリケーションの設定] ページで入手できます。
重要
終わったらコードからキーを削除し、公開しないよう注意してください。 運用環境では、Azure Key Vault などの資格情報を格納してアクセスする安全な方法を使用します。 詳細については、Azure AI サービスのセキュリティに関する記事を参照してください。
コマンド プロンプトに次のコマンドを入力してプロジェクトを実行します。
node model.js作成の応答を確認します。
addUtterance:
[
  {
    "value": {
      "ExampleId": 1137150691,
      "UtteranceText": "order a pizza"
    },
    "hasError": false
  },
  {
    "value": {
      "ExampleId": 1137150692,
      "UtteranceText": "order a large pepperoni pizza"
    },
    "hasError": false
  },
  {
    "value": {
      "ExampleId": 1137150693,
      "UtteranceText": "i want two large pepperoni pizzas on thin crust"
    },
    "hasError": false
  }
]
train POST:
{
  "statusId": 9,
  "status": "Queued"
}
train GET:
[
  {
    "modelId": "edb46abf-0000-41ab-beb2-a41a0fe1630f",
    "details": {
      "statusId": 9,
      "status": "Queued",
      "exampleCount": 0
    }
  },
  {
    "modelId": "a5030be2-616c-4648-bf2f-380fa9417d37",
    "details": {
      "statusId": 9,
      "status": "Queued",
      "exampleCount": 0
    }
  },
  {
    "modelId": "3f2b1f31-a3c3-4fbd-8182-e9d9dbc120b9",
    "details": {
      "statusId": 9,
      "status": "Queued",
      "exampleCount": 0
    }
  },
  {
    "modelId": "e4b6704b-1636-474c-9459-fe9ccbeba51c",
    "details": {
      "statusId": 9,
      "status": "Queued",
      "exampleCount": 0
    }
  },
  {
    "modelId": "031d3777-2a00-4a7a-9323-9a3280a30000",
    "details": {
      "statusId": 9,
      "status": "Queued",
      "exampleCount": 0
    }
  },
  {
    "modelId": "9250e7a1-06eb-4413-9432-ae132ed32583",
    "details": {
      "statusId": 9,
      "status": "Queued",
      "exampleCount": 0
    }
  }
]
done
リソースをクリーンアップする
このクイックスタートを完了したら、ファイル システムからプロジェクト フォルダーを削除します。
次のステップ
前提条件
発話の例の JSON ファイル
発話の例は、特定の形式に従っています。
text フィールドには、サンプルの発話テキストが含まれています。 intentName フィールドは、LUIS アプリの既存の意図の名前と対応している必要があります。 entityLabels フィールドは必須です。 どのエンティティもラベル付けしない場合は、空の配列を指定します。
entityLabels 配列が空でない場合、entityName フィールドで示されるエンティティを startCharIndex および endCharIndex で指定する必要があります。 インデックスは 0 から始まります。 テキスト内のスペースでラベルを開始または終了すると、発話を追加する API 呼び出しは失敗します。
[
  {
    "text": "order a pizza",
    "intentName": "ModifyOrder",
    "entityLabels": [
      {
        "entityName": "Order",
        "startCharIndex": 6,
        "endCharIndex": 12
      }
    ]
  },
  {
    "text": "order a large pepperoni pizza",
    "intentName": "ModifyOrder",
    "entityLabels": [
      {
        "entityName": "Order",
        "startCharIndex": 6,
        "endCharIndex": 28
      },
      {
        "entityName": "FullPizzaWithModifiers",
        "startCharIndex": 6,
        "endCharIndex": 28
      },
      {
        "entityName": "PizzaType",
        "startCharIndex": 14,
        "endCharIndex": 28
      },
      {
        "entityName": "Size",
        "startCharIndex": 8,
        "endCharIndex": 12
      }
    ]
  },
  {
    "text": "I want two large pepperoni pizzas on thin crust",
    "intentName": "ModifyOrder",
    "entityLabels": [
      {
        "entityName": "Order",
        "startCharIndex": 7,
        "endCharIndex": 46
      },
      {
        "entityName": "FullPizzaWithModifiers",
        "startCharIndex": 7,
        "endCharIndex": 46
      },
      {
        "entityName": "PizzaType",
        "startCharIndex": 17,
        "endCharIndex": 32
      },
      {
        "entityName": "Size",
        "startCharIndex": 11,
        "endCharIndex": 15
      },
      {
        "entityName": "Quantity",
        "startCharIndex": 7,
        "endCharIndex": 9
      },
      {
        "entityName": "Crust",
        "startCharIndex": 37,
        "endCharIndex": 46
      }
    ]
  }
]
Pizza アプリを作成する
pizza アプリを作成します。
- pizza-app-for-luis-v6.json を選択し、
pizza-app-for-luis.jsonファイルの GitHub ページを表示します。 - [Raw] ボタンを右クリックするか長押しし、[名前を付けてリンク先を保存] を選択して
pizza-app-for-luis.jsonをコンピューターに保存します。 - LUIS ポータルにサインインします。
- [マイ アプリ] を選択します。
- [マイアプリ] ページで、 [+ New app for conversation](+ 会話用の新しいアプリ) を選択します。
- [JSON としてインポート] を選択します。
- [Import new app](新しいアプリのインポート) ダイアログで、 [ファイルの選択] ボタンを選択します。
- ダウンロードした
pizza-app-for-luis.jsonファイルを選択し、pizza-app-for-luis.jsonを選択します。 - [新しいアプリのインポート] ダイアログの [名前] フィールドに Pizza アプリの名前を入力し、 [完了] ボタンを選択します。
アプリがインポートされます。
[How to create an effective LUIS app](効果的な LUIS アプリを作成する方法) ダイアログが表示されたら閉じます。
Pizza アプリをトレーニングして発行する
[意図] ページに Pizza アプリの意図一覧が表示されるはずです。
LUIS Web サイトの右上にある [Train](トレーニング) ボタンを選択します。
[トレーニング] ボタンが無効になると、トレーニングが完了します。
チャットボットや他のクライアント アプリケーションで LUIS の予測を受け取るには、アプリを予測エンドポイントに公開する必要があります。
右上のナビゲーションで [公開] を選択します。
[運用] スロットを選択し、 [完了] を選択します。
通知の [エンドポイントの URL にアクセス] を選択して [Azure リソース] ページに移動します。 アプリに関連付けられている予測リソースがある場合にのみ、URL が表示されます。 また、 [管理] ページをクリックして [Azure リソース] ページを表示することもできます。
作成リソースを Pizza アプリに追加する
- [管理] を選択します。
- [Azure リソース] を選択します。
- [Authoring Resource](作成リソース) を選択します。
- [Change authoring resource](作成リソースを変更する) を選択します。
作成リソースがある場合は、作成リソースの [テナント名] 、 [サブスクリプション名] 、および [LUIS リソース名] を入力します。
作成リソースがない場合は、次のようにします。
- [新しいリソースの作成] を選択します。
- [テナント名] 、 [リソース名] 、 [サブスクリプション名] 、 [Azure リソース グループ名] を入力します。
これで Pizza アプリを使用する準備ができました。
Pizza アプリのアクセス値を記録する
新しい Pizza アプリを使用するには、Pizza アプリのアプリ ID、オーサリング キー、作成エンドポイントが必要です。 予測を取得するには、個別の予測エンドポイントと予測キーが必要です。
これらの値を見つけるには:
- [意図] ページから [管理] を選択します。
- [アプリケーション設定] ページから [アプリ ID] を記録します。
- [Azure リソース] を選択します。
- [Authoring Resource](作成リソース) を選択します。
- [Authoring Resource](作成リソース) と [予測リソース] タブで、主キーを記録します。 この値が、オーサリング キーです。
- [エンドポイント URL] を記録します。 この値が、作成エンドポイントです。
プログラムを使用してモデルを変更する
model.pyという名前で新しいファイルを作成します。 次のコードを追加します。########### Python 3.6 ############# # # This quickstart shows how to add utterances to a LUIS model using the REST APIs. # import requests try: ########## # Values to modify. # YOUR-APP-ID: The App ID GUID found on the www.luis.ai Application Settings page. appId = "PASTE_YOUR_LUIS_APP_ID_HERE" # YOUR-AUTHORING-KEY: Your LUIS authoring key, 32 character value. authoring_key = "PASTE_YOUR_LUIS_AUTHORING_SUBSCRIPTION_KEY_HERE" # YOUR-AUTHORING-ENDPOINT: Replace this with your authoring key endpoint. # For example, "https://your-resource-name.cognitiveservices.azure.com/" authoring_endpoint = "PASTE_YOUR_LUIS_AUTHORING_ENDPOINT_HERE" # The version number of your LUIS app app_version = "0.1" ########## # The headers to use in this REST call. headers = {'Ocp-Apim-Subscription-Key': authoring_key} # The URL parameters to use in this REST call. params ={ #'timezoneOffset': '0', #'verbose': 'true', #'show-all-intents': 'true', #'spellCheck': 'false', #'staging': 'false' } # List of example utterances to send to the LUIS app. data = """[ { 'text': 'order a pizza', 'intentName': 'ModifyOrder', 'entityLabels': [ { 'entityName': 'Order', 'startCharIndex': 6, 'endCharIndex': 12 } ] }, { 'text': 'order a large pepperoni pizza', 'intentName': 'ModifyOrder', 'entityLabels': [ { 'entityName': 'Order', 'startCharIndex': 6, 'endCharIndex': 28 }, { 'entityName': 'FullPizzaWithModifiers', 'startCharIndex': 6, 'endCharIndex': 28 }, { 'entityName': 'PizzaType', 'startCharIndex': 14, 'endCharIndex': 28 }, { 'entityName': 'Size', 'startCharIndex': 8, 'endCharIndex': 12 } ] }, { 'text': 'I want two large pepperoni pizzas on thin crust', 'intentName': 'ModifyOrder', 'entityLabels': [ { 'entityName': 'Order', 'startCharIndex': 7, 'endCharIndex': 46 }, { 'entityName': 'FullPizzaWithModifiers', 'startCharIndex': 7, 'endCharIndex': 46 }, { 'entityName': 'PizzaType', 'startCharIndex': 17, 'endCharIndex': 32 }, { 'entityName': 'Size', 'startCharIndex': 11, 'endCharIndex': 15 }, { 'entityName': 'Quantity', 'startCharIndex': 7, 'endCharIndex': 9 }, { 'entityName': 'Crust', 'startCharIndex': 37, 'endCharIndex': 46 } ] } ] """ # Make the REST call to POST the list of example utterances. response = requests.post(f'{authoring_endpoint}luis/authoring/v3.0-preview/apps/{appId}/versions/{app_version}/examples', headers=headers, params=params, data=data) # Display the results on the console. print('Add the list of utterances:') print(response.json()) # Make the REST call to initiate a training session. response = requests.post(f'{authoring_endpoint}luis/authoring/v3.0-preview/apps/{appId}/versions/{app_version}/train', headers=headers, params=params, data=None) # Display the results on the console. print('Request training:') print(response.json()) # Make the REST call to request the status of training. response = requests.get(f'{authoring_endpoint}luis/authoring/v3.0-preview/apps/{appId}/versions/{app_version}/train', headers=headers, params=params, data=None) # Display the results on the console. print('Request training status:') print(response.json()) except Exception as e: # Display the error string. print(f'{e}')YOUR-で始まる値を実際の値に置き換えます。Information 目的 YOUR-APP-IDLUIS アプリ ID。 YOUR-AUTHORING-KEY32 文字の実際の作成キー。 YOUR-AUTHORING-ENDPOINT作成 URL エンドポイント。 たとえば、「 https://replace-with-your-resource-name.api.cognitive.microsoft.com/」のように入力します。 リソース名は、リソースの作成時に設定します。割り当てられたキーとリソースは、LUIS ポータルの [Manage](管理) セクションの [Azure リソース] ページで確認できます。 アプリ ID は、同じ [Manage](管理) セクションの [アプリケーションの設定] ページで入手できます。
重要
終わったらコードからキーを削除し、公開しないよう注意してください。 運用環境では、Azure Key Vault などの資格情報を格納してアクセスする安全な方法を使用します。 詳細については、Azure AI サービスのセキュリティに関する記事を参照してください。
このファイルを作成したときと同じディレクトリからコマンド プロンプトで次のコマンドを入力し、ファイルを実行します。
python model.py作成の応答を確認します。
Add the list of utterances:
[{'value': {'ExampleId': 1137150691, 'UtteranceText': 'order a pizza'}, 'hasError': False}, {'value': {'ExampleId': 1137150692, 'UtteranceText': 'order a large pepperoni pizza'}, 'hasError': False}, {'value': {'ExampleId': 1137150693, 'UtteranceText': 'i want two large pepperoni pizzas on thin crust'}, 'hasError': False}]
Request training:
{'statusId': 9, 'status': 'Queued'}
Request training status:
[{'modelId': 'edb46abf-0000-41ab-beb2-a41a0fe1630f', 'details': {'statusId': 3, 'status': 'InProgress', 'exampleCount': 0, 'progressSubstatus': 'CollectingData'}}, {'modelId': 'a5030be2-616c-4648-bf2f-380fa9417d37', 'details': {'statusId': 3, 'status': 'InProgress', 'exampleCount': 0, 'progressSubstatus': 'CollectingData'}}, {'modelId': '3f2b1f31-a3c3-4fbd-8182-e9d9dbc120b9', 'details': {'statusId': 3, 'status': 'InProgress', 'exampleCount': 0, 'progressSubstatus': 'CollectingData'}}, {'modelId': 'e4b6704b-1636-474c-9459-fe9ccbeba51c', 'details': {'statusId': 3, 'status': 'InProgress', 'exampleCount': 0, 'progressSubstatus': 'CollectingData'}}, {'modelId': '031d3777-2a00-4a7a-9323-9a3280a30000', 'details': {'statusId': 3, 'status': 'InProgress', 'exampleCount': 0, 'progressSubstatus': 'CollectingData'}}, {'modelId': '9250e7a1-06eb-4413-9432-ae132ed32583', 'details': {'statusId': 3, 'status': 'InProgress', 'exampleCount': 0, 'progressSubstatus': 'CollectingData'}}]
読みやすいように書式設定された出力を次に示します。
Add the list of utterances:
[
  {
    'value': {
      'ExampleId': 1137150691,
      'UtteranceText': 'order a pizza'
    },
    'hasError': False
  },
  {
    'value': {
      'ExampleId': 1137150692,
      'UtteranceText': 'order a large pepperoni pizza'
    },
    'hasError': False
  },
  {
    'value': {
      'ExampleId': 1137150693,
      'UtteranceText': 'i want two large pepperoni pizzas on thin crust'
    },
    'hasError': False
  }
]

Request training:
{
  'statusId': 9,
  'status': 'Queued'
}

Request training status:
[
  {
    'modelId': 'edb46abf-0000-41ab-beb2-a41a0fe1630f',
    'details': {
      'statusId': 3,
      'status': 'InProgress',
      'exampleCount': 0,
      'progressSubstatus': 'CollectingData'
    }
  },
  {
    'modelId': 'a5030be2-616c-4648-bf2f-380fa9417d37',
    'details': {
      'statusId': 3,
      'status': 'InProgress',
      'exampleCount': 0,
      'progressSubstatus': 'CollectingData'
    }
  },
  {
    'modelId': '3f2b1f31-a3c3-4fbd-8182-e9d9dbc120b9',
    'details': {
      'statusId': 3,
      'status': 'InProgress',
      'exampleCount': 0,
      'progressSubstatus': 'CollectingData'
    }
  },
  {
    'modelId': 'e4b6704b-1636-474c-9459-fe9ccbeba51c',
    'details': {
      'statusId': 3,
      'status': 'InProgress',
      'exampleCount': 0,
      'progressSubstatus': 'CollectingData'
    }
  },
  {
    'modelId': '031d3777-2a00-4a7a-9323-9a3280a30000',
    'details': {
      'statusId': 3,
      'status': 'InProgress',
      'exampleCount': 0,
      'progressSubstatus': 'CollectingData'
    }
  },
  {
    'modelId': '9250e7a1-06eb-4413-9432-ae132ed32583',
    'details': {
      'statusId': 3,
      'status': 'InProgress',
      'exampleCount': 0,
      'progressSubstatus': 'CollectingData'
    }
  }
]
リソースをクリーンアップする
このクイックスタートを使用して完了したときに、ファイル システムからファイルを削除します。