Azure Communication Services を使用した最初の作業として、Communication Services Calling SDK を使用して、1 対 1 の音声およびビデオ通話をアプリに追加します。 JavaScript 用の Azure Communication Services Calling SDK を使用して、ビデオ通話を開始および応答する方法について説明します。
サンプル コード
最後までスキップしたい場合は、GitHub のサンプルとしてこのクイックスタートをダウンロードできます。
前提条件
- アクティブなサブスクリプションが含まれる Azure アカウントを取得します。 無料でアカウントを作成できます。
- Node.js 18 が必要です。 msi インストーラーを使用してインストールできます。
- アクティブな Communication Services リソースを作成します。 Communication Services のリソースを作成する。
- 通話クライアントのインスタンスを作成するためのユーザー アクセス トークンを作成します。 ユーザー アクセス トークンを作成および管理する方法に関するページを参照してください。
- Graph エクスプローラーを使用して、通話操作のために Teams スレッド ID を取得します。 チャット スレッド ID の作成方法の詳細を参照してください。
設定
新しい Node.js アプリケーションを作成する
ターミナルまたはコマンド ウィンドウを開き、自分のアプリ用に新しいディレクトリを作成して、そのディレクトリに移動します。
mkdir calling-quickstart && cd calling-quickstart
既定の設定で npm init -y を実行して、package.json ファイルを作成します。
npm init -y
パッケージをインストールする
npm install コマンドを使用して、JavaScript 用の Azure Communication Services Calling SDK をインストールします。
重要
このクイックスタートでは、最新の Azure Communication Services Calling SDK バージョンを使用します。
npm install @azure/communication-common --save
npm install @azure/communication-calling --save
アプリのフレームワークを設定する
このクイックスタートでは、webpack を使用してアプリケーション資産をバンドルします。 次のコマンドを実行して webpack、webpack-cli、webpack-dev-server の 3 つの npm パッケージをインストールし、開発の依存関係として package.json 内でリスト化します。
npm install copy-webpack-plugin@^11.0.0 webpack@^5.88.2 webpack-cli@^5.1.4 webpack-dev-server@^4.15.1 --save-dev
自分のプロジェクトのルート ディレクトリに、index.html ファイルを作成します。 このファイルを使用して、ユーザーが 1 対 1 のビデオ通話を開始できるようにする基本的なレイアウトを構成します。
コードは次のとおりです。
<!-- index.html -->
<!DOCTYPE html>
<html>
    <head>
        <title>Azure Communication Services - Teams Calling Web Application</title>
    </head>
    <body>
        <h4>Azure Communication Services - Teams Calling Web Application</h4>
        <input id="user-access-token"
            type="text"
            placeholder="User access token"
            style="margin-bottom:1em; width: 500px;"/>
        <button id="initialize-teams-call-agent" type="button">Login</button>
        <br>
        <br>
        <input id="callee-teams-user-id"
            type="text"
            placeholder="Microsoft Teams callee's id (xxxxxxxx-xxxx-xxxx-xxxx-xxxxxxxxxxxx)"
            style="margin-bottom:1em; width: 500px; display: block;"/>
        <button id="start-call-button" type="button" disabled="true">Start Call</button>
        <button id="hangup-call-button" type="button" disabled="true">Hang up Call</button>
        <button id="accept-call-button" type="button" disabled="true">Accept Call</button>
        <button id="start-video-button" type="button" disabled="true">Start Video</button>
        <button id="stop-video-button" type="button" disabled="true">Stop Video</button>
        <br>
        <br>
        <div id="connectedLabel" style="color: #13bb13;" hidden>Call is connected!</div>
        <br>
        <div id="remoteVideoContainer" style="width: 40%;" hidden>Remote participants' video streams:</div>
        <br>
        <div id="localVideoContainer" style="width: 30%;" hidden>Local video stream:</div>
        <!-- points to the bundle generated from client.js -->
        <script src="./main.js"></script>
    </body>
</html>
Azure Communication Services Calling Web SDK オブジェクト モデル
Azure Communication Services Calling SDK の主な機能のいくつかは、次のクラスとインターフェイスによって処理されます。
| 名前 | 説明 |
|---|---|
CallClient |
Calling SDK へのメイン エントリ ポイント。 |
AzureCommunicationTokenCredential |
teamsCallAgent のインスタンス化に使用される CommunicationTokenCredential インターフェイスを実装します。 |
TeamsCallAgent |
Teams 通話を開始したり、管理したりするために使用されます。 |
DeviceManager |
メディア デバイスを管理するために使用されます。 |
TeamsCall |
Teams 通話を表すために使用します |
LocalVideoStream |
ローカル システム上のカメラ デバイスのローカル ビデオ ストリームを作成するために使用します。 |
RemoteParticipant |
通話のリモート参加者を表すために使用します |
RemoteVideoStream |
リモート参加者からのリモート ビデオ ストリームを表すために使用します。 |
このクイックスタートのアプリケーション ロジックを格納するために、index.js という名前のファイルを自分のプロジェクトのルート ディレクトリに作成します。 次のコードを index.js に追加します。
// Make sure to install the necessary dependencies
const { CallClient, VideoStreamRenderer, LocalVideoStream } = require('@azure/communication-calling');
const { AzureCommunicationTokenCredential } = require('@azure/communication-common');
const { AzureLogger, setLogLevel } = require("@azure/logger");
// Set the log level and output
setLogLevel('verbose');
AzureLogger.log = (...args) => {
    console.log(...args);
};
// Calling web sdk objects
let teamsCallAgent;
let deviceManager;
let call;
let incomingCall;
let localVideoStream;
let localVideoStreamRenderer;
// UI widgets
let userAccessToken = document.getElementById('user-access-token');
let calleeTeamsUserId = document.getElementById('callee-teams-user-id');
let initializeCallAgentButton = document.getElementById('initialize-teams-call-agent');
let startCallButton = document.getElementById('start-call-button');
let hangUpCallButton = document.getElementById('hangup-call-button');
let acceptCallButton = document.getElementById('accept-call-button');
let startVideoButton = document.getElementById('start-video-button');
let stopVideoButton = document.getElementById('stop-video-button');
let connectedLabel = document.getElementById('connectedLabel');
let remoteVideoContainer = document.getElementById('remoteVideoContainer');
let localVideoContainer = document.getElementById('localVideoContainer');
/**
 * Create an instance of CallClient. Initialize a TeamsCallAgent instance with a CommunicationUserCredential via created CallClient. TeamsCallAgent enables us to make outgoing calls and receive incoming calls.
 * You can then use the CallClient.getDeviceManager() API instance to get the DeviceManager.
 */
initializeCallAgentButton.onclick = async () => {
    try {
        const callClient = new CallClient();
        tokenCredential = new AzureCommunicationTokenCredential(userAccessToken.value.trim());
        teamsCallAgent = await callClient.createTeamsCallAgent(tokenCredential)
        // Set up a camera device to use.
        deviceManager = await callClient.getDeviceManager();
        await deviceManager.askDevicePermission({ video: true });
        await deviceManager.askDevicePermission({ audio: true });
        // Listen for an incoming call to accept.
        teamsCallAgent.on('incomingCall', async (args) => {
            try {
                incomingCall = args.incomingCall;
                acceptCallButton.disabled = false;
                startCallButton.disabled = true;
            } catch (error) {
                console.error(error);
            }
        });
        startCallButton.disabled = false;
        initializeCallAgentButton.disabled = true;
    } catch(error) {
        console.error(error);
    }
}
/**
 * Place a 1:1 outgoing video call to a user
 * Add an event listener to initiate a call when the `startCallButton` is selected.
 * Enumerate local cameras using the deviceManager `getCameraList` API.
 * In this quickstart, we're using the first camera in the collection. Once the desired camera is selected, a
 * LocalVideoStream instance will be constructed and passed within `videoOptions` as an item within the
 * localVideoStream array to the call method. When the call connects, your application will be sending a video stream to the other participant.
 */
startCallButton.onclick = async () => {
    try {
        const localVideoStream = await createLocalVideoStream();
        const videoOptions = localVideoStream ? { localVideoStreams: [localVideoStream] } : undefined;
        call = teamsCallAgent.startCall({ microsoftTeamsUserId: calleeTeamsUserId.value.trim() }, { videoOptions: videoOptions });
        // Subscribe to the call's properties and events.
        subscribeToCall(call);
    } catch (error) {
        console.error(error);
    }
}
/**
 * Accepting an incoming call with a video
 * Add an event listener to accept a call when the `acceptCallButton` is selected.
 * You can accept incoming calls after subscribing to the `TeamsCallAgent.on('incomingCall')` event.
 * You can pass the local video stream to accept the call with the following code.
 */
acceptCallButton.onclick = async () => {
    try {
        const localVideoStream = await createLocalVideoStream();
        const videoOptions = localVideoStream ? { localVideoStreams: [localVideoStream] } : undefined;
        call = await incomingCall.accept({ videoOptions });
        // Subscribe to the call's properties and events.
        subscribeToCall(call);
    } catch (error) {
        console.error(error);
    }
}
// Subscribe to a call obj.
// Listen for property changes and collection updates.
subscribeToCall = (call) => {
    try {
        // Inspect the initial call.id value.
        console.log(`Call Id: ${call.id}`);
        //Subscribe to call's 'idChanged' event for value changes.
        call.on('idChanged', () => {
            console.log(`Call ID changed: ${call.id}`);
        });
        // Inspect the initial call.state value.
        console.log(`Call state: ${call.state}`);
        // Subscribe to call's 'stateChanged' event for value changes.
        call.on('stateChanged', async () => {
            console.log(`Call state changed: ${call.state}`);
            if(call.state === 'Connected') {
                connectedLabel.hidden = false;
                acceptCallButton.disabled = true;
                startCallButton.disabled = true;
                hangUpCallButton.disabled = false;
                startVideoButton.disabled = false;
                stopVideoButton.disabled = false;
            } else if (call.state === 'Disconnected') {
                connectedLabel.hidden = true;
                startCallButton.disabled = false;
                hangUpCallButton.disabled = true;
                startVideoButton.disabled = true;
                stopVideoButton.disabled = true;
                console.log(`Call ended, call end reason={code=${call.callEndReason.code}, subCode=${call.callEndReason.subCode}}`);
            }
        });
        call.on('isLocalVideoStartedChanged', () => {
            console.log(`isLocalVideoStarted changed: ${call.isLocalVideoStarted}`);
        });
        console.log(`isLocalVideoStarted: ${call.isLocalVideoStarted}`);
        call.localVideoStreams.forEach(async (lvs) => {
            localVideoStream = lvs;
            await displayLocalVideoStream();
        });
        call.on('localVideoStreamsUpdated', e => {
            e.added.forEach(async (lvs) => {
                localVideoStream = lvs;
                await displayLocalVideoStream();
            });
            e.removed.forEach(lvs => {
               removeLocalVideoStream();
            });
        });

        // Inspect the call's current remote participants and subscribe to them.
        call.remoteParticipants.forEach(remoteParticipant => {
            subscribeToRemoteParticipant(remoteParticipant);
        });
        // Subscribe to the call's 'remoteParticipantsUpdated' event to be
        // notified when new participants are added to the call or removed from the call.
        call.on('remoteParticipantsUpdated', e => {
            // Subscribe to new remote participants that are added to the call.
            e.added.forEach(remoteParticipant => {
                subscribeToRemoteParticipant(remoteParticipant)
            });
            // Unsubscribe from participants that are removed from the call
            e.removed.forEach(remoteParticipant => {
                console.log('Remote participant removed from the call.');
            });
        });
    } catch (error) {
        console.error(error);
    }
}
// Subscribe to a remote participant obj.
// Listen for property changes and collection updates.
subscribeToRemoteParticipant = (remoteParticipant) => {
    try {
        // Inspect the initial remoteParticipant.state value.
        console.log(`Remote participant state: ${remoteParticipant.state}`);
        // Subscribe to remoteParticipant's 'stateChanged' event for value changes.
        remoteParticipant.on('stateChanged', () => {
            console.log(`Remote participant state changed: ${remoteParticipant.state}`);
        });
        // Inspect the remoteParticipants's current videoStreams and subscribe to them.
        remoteParticipant.videoStreams.forEach(remoteVideoStream => {
            subscribeToRemoteVideoStream(remoteVideoStream)
        });
        // Subscribe to the remoteParticipant's 'videoStreamsUpdated' event to be
        // notified when the remoteParticipant adds new videoStreams and removes video streams.
        remoteParticipant.on('videoStreamsUpdated', e => {
            // Subscribe to newly added remote participant's video streams.
            e.added.forEach(remoteVideoStream => {
                subscribeToRemoteVideoStream(remoteVideoStream)
            });
            // Unsubscribe from newly removed remote participants' video streams.
            e.removed.forEach(remoteVideoStream => {
                console.log('Remote participant video stream was removed.');
            })
        });
    } catch (error) {
        console.error(error);
    }
}
/**
 * Subscribe to a remote participant's remote video stream obj.
 * You have to subscribe to the 'isAvailableChanged' event to render the remoteVideoStream. If the 'isAvailable' property
 * changes to 'true' a remote participant is sending a stream. Whenever the availability of a remote stream changes
 * you can choose to destroy the whole 'Renderer' a specific 'RendererView' or keep them. Displaying RendererView without a video stream will result in a blank video frame.
 */
subscribeToRemoteVideoStream = async (remoteVideoStream) => {
    // Create a video stream renderer for the remote video stream.
    let videoStreamRenderer = new VideoStreamRenderer(remoteVideoStream);
    let view;
    const renderVideo = async () => {
        try {
            // Create a renderer view for the remote video stream.
            view = await videoStreamRenderer.createView();
            // Attach the renderer view to the UI.
            remoteVideoContainer.hidden = false;
            remoteVideoContainer.appendChild(view.target);
        } catch (e) {
            console.warn(`Failed to createView, reason=${e.message}, code=${e.code}`);
        }
    }

    remoteVideoStream.on('isAvailableChanged', async () => {
        // Participant has switched video on.
        if (remoteVideoStream.isAvailable) {
            await renderVideo();
        // Participant has switched video off.
        } else {
            if (view) {
                view.dispose();
                view = undefined;
            }
        }
    });
    // Participant has video on initially.
    if (remoteVideoStream.isAvailable) {
        await renderVideo();
    }
}
// Start your local video stream.
// This will send your local video stream to remote participants so they can view it.
startVideoButton.onclick = async () => {
    try {
        const localVideoStream = await createLocalVideoStream();
        await call.startVideo(localVideoStream);
    } catch (error) {
        console.error(error);
    }
}
// Stop your local video stream.
// This will stop your local video stream from being sent to remote participants.
stopVideoButton.onclick = async () => {
    try {
        await call.stopVideo(localVideoStream);
    } catch (error) {
        console.error(error);
    }
}
/**
 * To render a LocalVideoStream, you need to create a new instance of VideoStreamRenderer, and then
 * create a new VideoStreamRendererView instance using the asynchronous createView() method.
 * You may then attach view.target to any UI element.
 */
// Create a local video stream for your camera device
createLocalVideoStream = async () => {
    const camera = (await deviceManager.getCameras())[0];
    if (camera) {
        return new LocalVideoStream(camera);
    } else {
        console.error(`No camera device found on the system`);
    }
}
// Display your local video stream preview in your UI
displayLocalVideoStream = async () => {
    try {
        localVideoStreamRenderer = new VideoStreamRenderer(localVideoStream);
        const view = await localVideoStreamRenderer.createView();
        localVideoContainer.hidden = false;
        localVideoContainer.appendChild(view.target);
    } catch (error) {
        console.error(error);
    }
}
// Remove your local video stream preview from your UI
removeLocalVideoStream = async() => {
    try {
        localVideoStreamRenderer.dispose();
        localVideoContainer.hidden = true;
    } catch (error) {
        console.error(error);
    }
}
// End the current call
hangUpCallButton.addEventListener("click", async () => {
    // end the current call
    await call.hangUp();
});
webpack ローカル サーバー コードを追加する
このクイックスタートのローカル サーバー ロジックを格納するために、webpack.config.js という名前のファイルを自分のプロジェクトのルート ディレクトリに作成します。 次のコードを webpack.config.js ファイルに追加します。
const path = require('path');
const CopyPlugin = require("copy-webpack-plugin");

module.exports = {
    mode: 'development',
    entry: './index.js',
    output: {
        filename: 'main.js',
        path: path.resolve(__dirname, 'dist'),
    },
    devServer: {
        static: {
            directory: path.join(__dirname, './')
        },
    },
    plugins: [
        new CopyPlugin({
            patterns: [
                './index.html'
            ]
        }),
    ]
};
コードの実行
アプリをビルドして実行するには、webpack-dev-server を使用します。 次のコマンドを実行して、ローカルの Web サーバーにアプリケーション ホストをバンドルします。
`npx webpack serve --config webpack.config.js`
ブラウザーを開き、2 つのタブで http://localhost:8080/. に移動します。 タブには次の画像に似た結果が表示されます。
最初のタブで、有効なユーザー アクセス トークンを入力します。 2 番目のタブで、別の有効なユーザー アクセス トークンを入力します。 使用可能なトークンをまだ入手していない場合は、ユーザー アクセス トークンに関するドキュメントを参照してください。
両方のタブで、[Initialize Call Agent] ボタンをクリックします。 タブには次の画像に似た結果が表示されます。
1 番目のタブで、2 番目のタブの Azure Communication Services ユーザー ID を入力し、[Start Call] ボタンを選択します。 1 番目のタブで 2 番目のタブへの発信が開始され、2 番目のタブの [Accept Call] ボタンが有効になります。
2番目のタブで、[Accept Call] ボタンを選択します。 通話に応答し、接続されます。 タブには次の画像に似た結果が表示されます。
両方のタブが 1 対 1 のビデオ通話に正常に接続されました。 どちらのユーザーも、互いのオーディオを聞き、互いのビデオ ストリームを見ることができます。
Azure Communication Services を使用した最初の作業として、Communication Services Calling SDK を使用して、1 対 1 の音声およびビデオ通話をアプリに追加します。 Windows 用の Azure Communication Services Calling SDK を使用して、ビデオ通話を開始および応答する方法について説明します。
サンプル コード
最後までスキップしたい場合は、GitHub のサンプルとしてこのクイックスタートをダウンロードできます。
前提条件
このチュートリアルを完了するには、次の前提条件を用意しておく必要があります。
- アクティブなサブスクリプションが含まれる Azure アカウント。 無料でアカウントを作成できます。
- [ユニバーサル Windows プラットフォーム開発] ワークロードを指定した Visual Studio 2022 のインストール。
- デプロイ済みの Communication Services リソース。 Communication Services リソースを作成します。 このクイックスタートで使用する接続文字列を記録する必要があります。
- Azure Communication Service のユーザー アクセス トークン。
- Graph エクスプローラーを使用して、通話操作のために Teams スレッド ID を取得します。 チャット スレッド ID の作成方法の詳細を参照してください。
設定
プロジェクトの作成
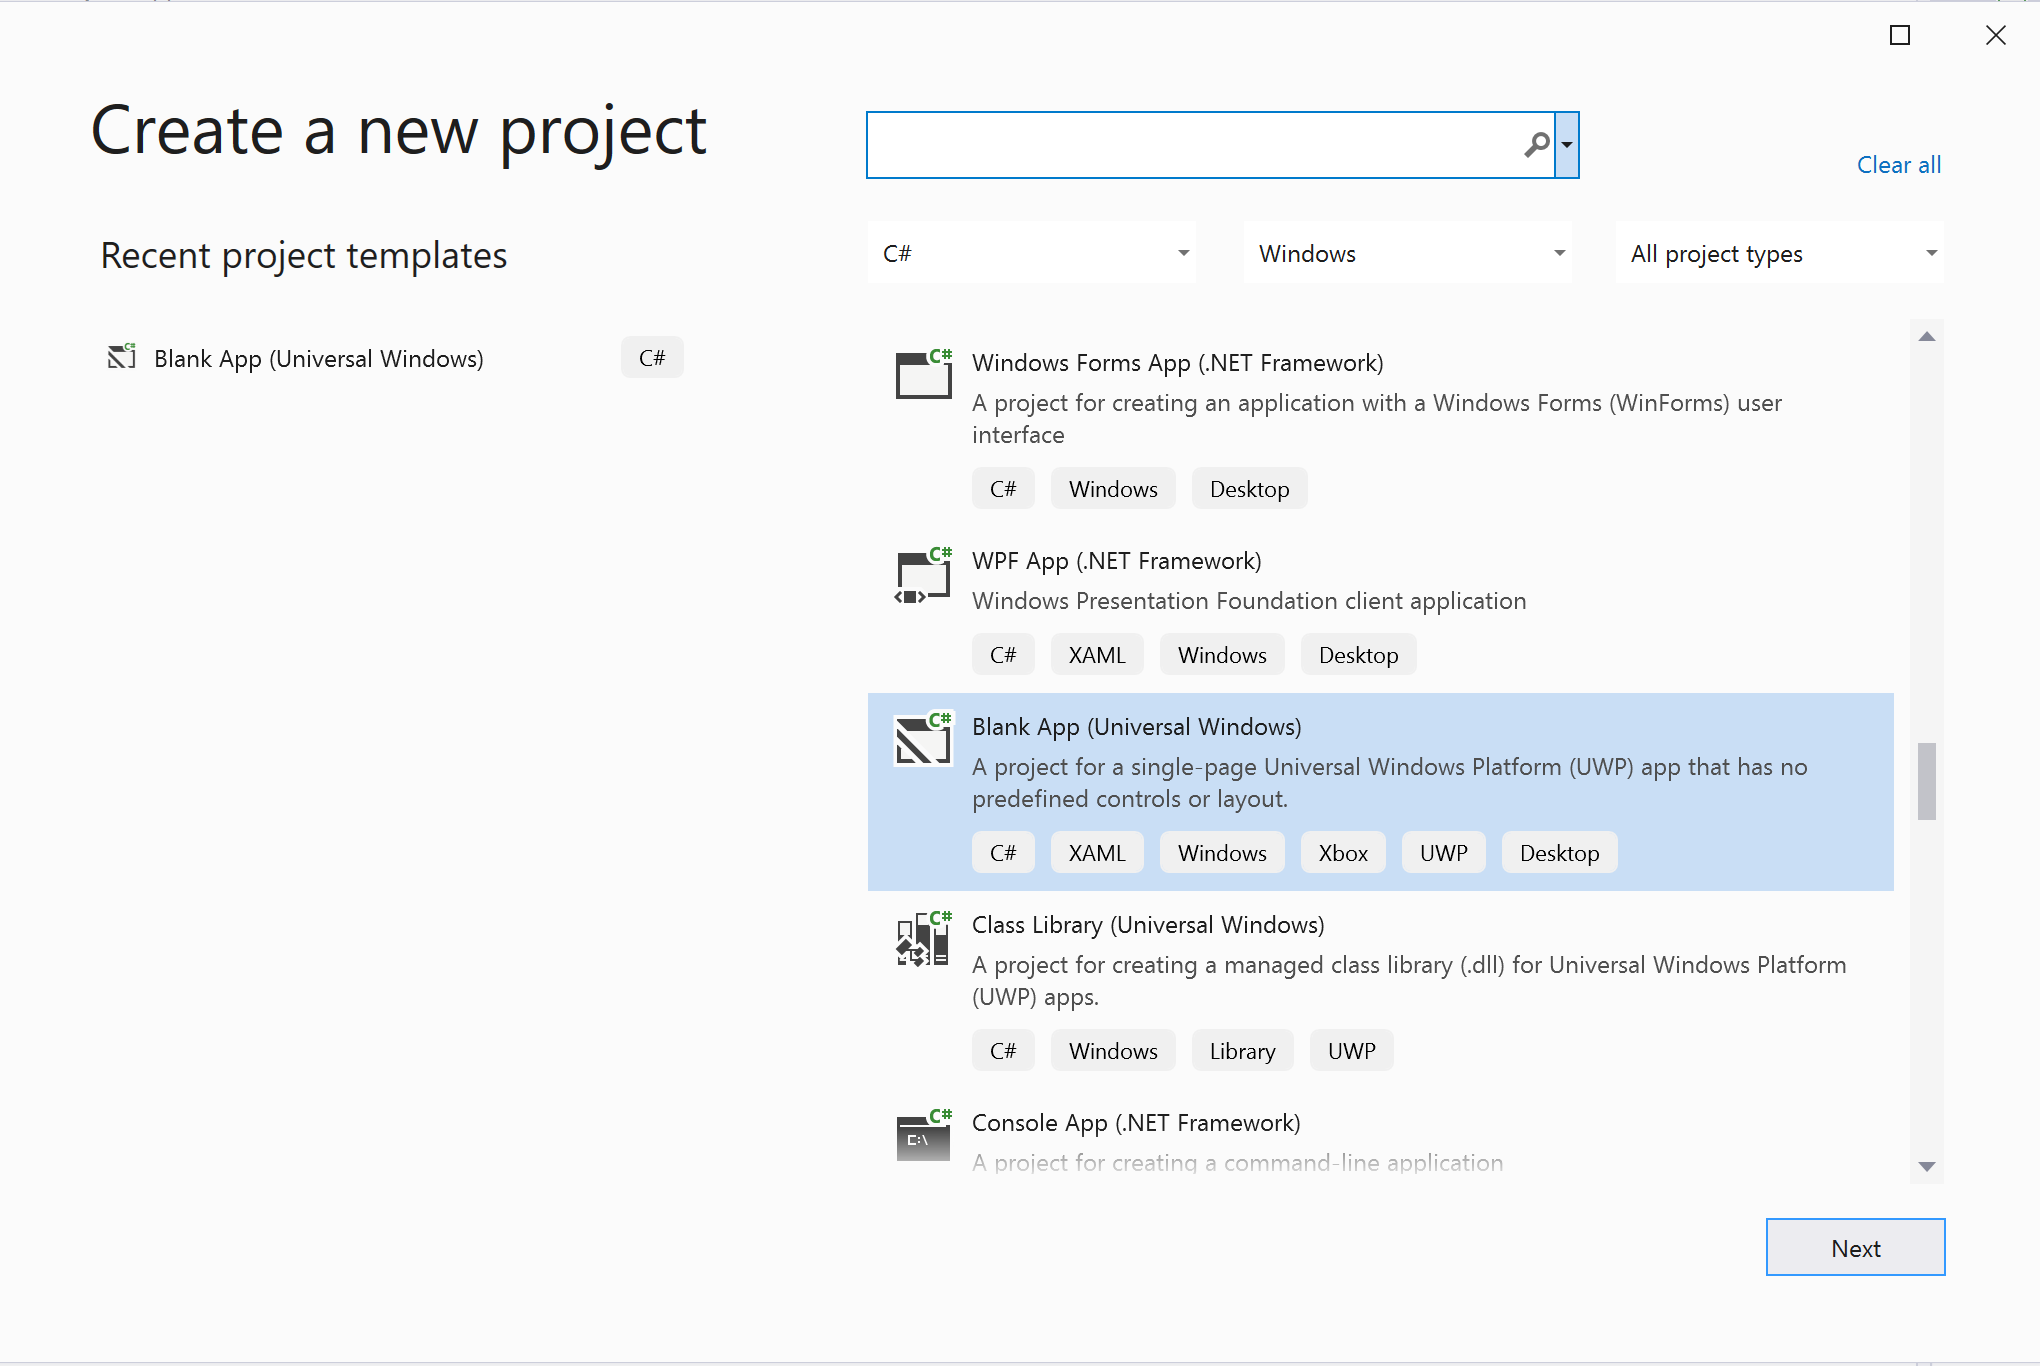
Visual Studio の [空白のアプリ (ユニバーサル Windows)] テンプレートを使用して新しいプロジェクトを作成し、シングルページ ユニバーサル Windows プラットフォーム (UWP) アプリをセットアップします。
パッケージをインストールする
プロジェクトを右クリックして [Manage Nuget Packages] に移動し、Azure.Communication.Calling.WindowsClient1.2.0-beta.1 以降をインストールします。 [プレリリースを含める] がオンになっていることを確認します。
アクセスの要求
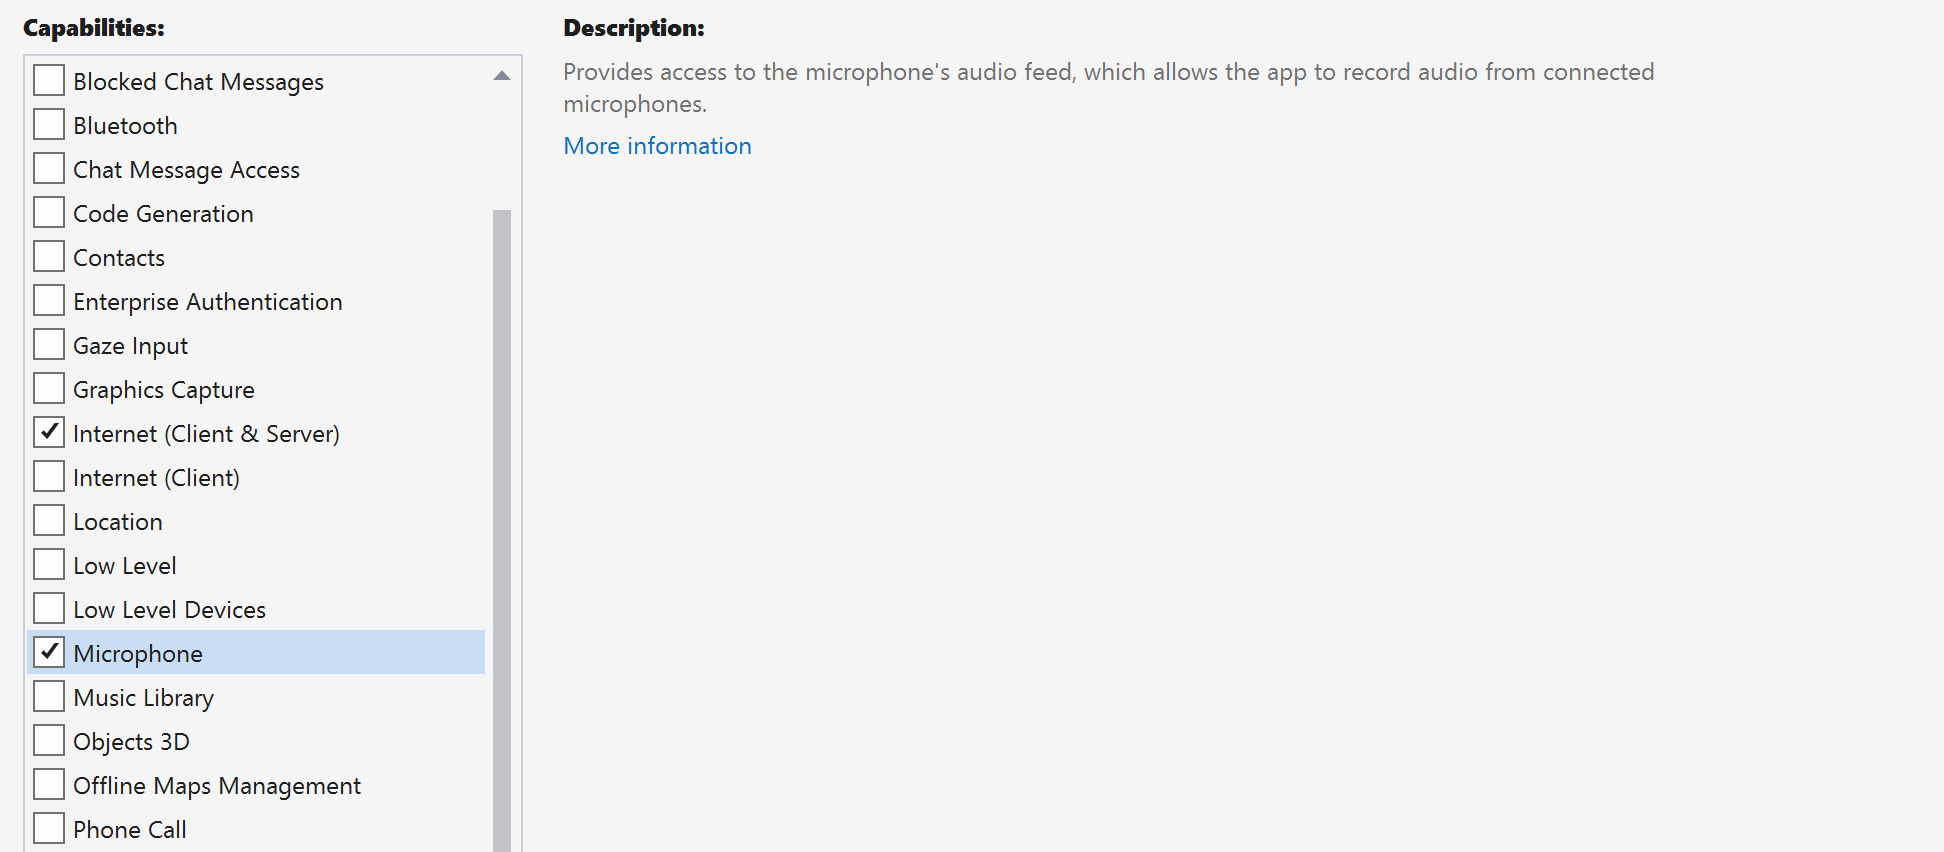
Package.appxmanifest に移動し、Capabilities を選択します。
インターネットへの着信と発信のアクセスを取得するためめに Internet (Client) と Internet (Client & Server) をオンにします。 マイクのオーディオ フィードにアクセスするために Microphone を、カメラのビデオ フィードにアクセスするために Webcam をオンにします。
アプリのフレームワークを設定する
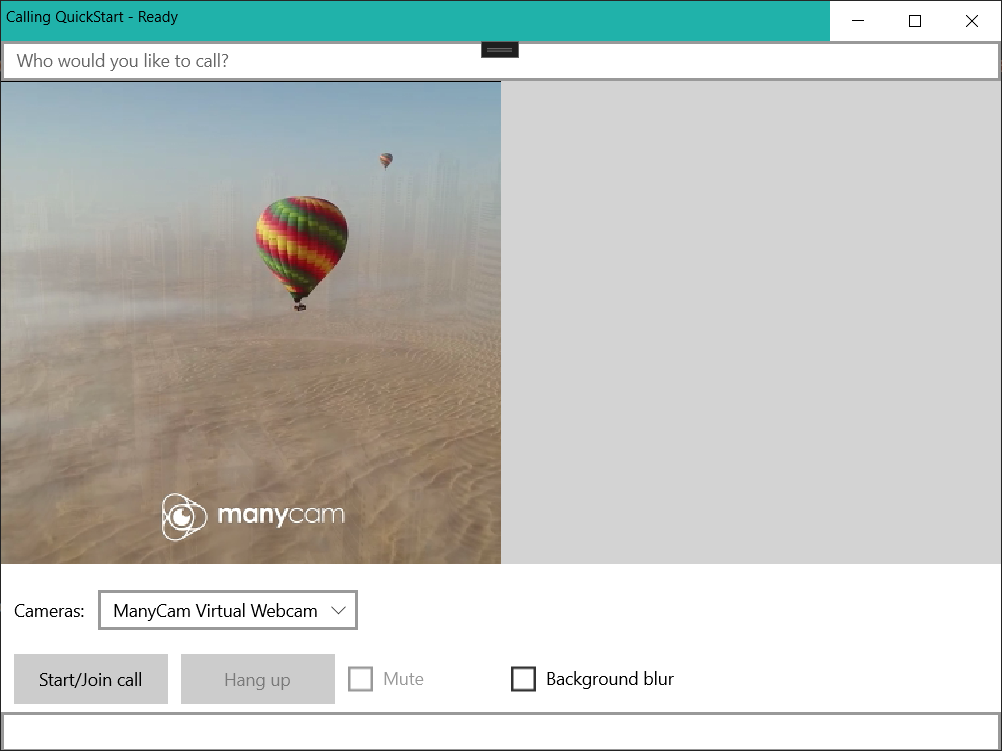
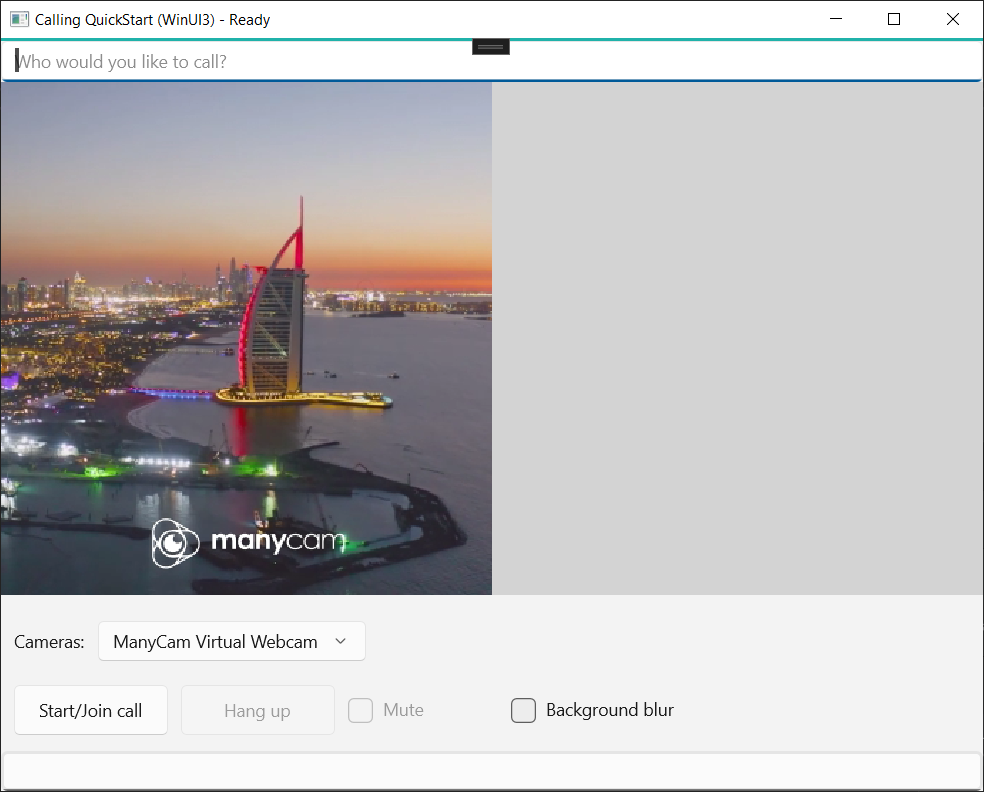
ロジックをアタッチするには、基本的なレイアウトを構成する必要があります。 発信通話を行うには、呼び出し先のユーザー ID を指定するための TextBox が必要です。 また、[Start/Join call](通話を開始) ボタンと [Hang up](通話終了) ボタンも必要となります。 オーディオの状態とビデオ効果を切り替える機能を示すために、このサンプルには Mute と BackgroundBlur チェック ボックスも含まれています。
プロジェクトの MainPage.xaml を開き、Page に Grid ノードを追加します。
<Page
    x:Class="CallingQuickstart.MainPage"
    xmlns="http://schemas.microsoft.com/winfx/2006/xaml/presentation"
    xmlns:x="http://schemas.microsoft.com/winfx/2006/xaml"
    xmlns:local="using:CallingQuickstart"
    xmlns:d="http://schemas.microsoft.com/expression/blend/2008"
    xmlns:mc="http://schemas.openxmlformats.org/markup-compatibility/2006"
    mc:Ignorable="d"
    Background="{ThemeResource ApplicationPageBackgroundThemeBrush}" Width="800" Height="600">

    <Grid>
        <Grid.RowDefinitions>
            <RowDefinition Height="16*"/>
            <RowDefinition Height="30*"/>
            <RowDefinition Height="200*"/>
            <RowDefinition Height="60*"/>
            <RowDefinition Height="16*"/>
        </Grid.RowDefinitions>
        <TextBox Grid.Row="1" x:Name="CalleeTextBox" PlaceholderText="Who would you like to call?" TextWrapping="Wrap" VerticalAlignment="Center" Height="30" Margin="10,10,10,10" />

        <Grid x:Name="AppTitleBar" Background="LightSeaGreen">
            <TextBlock x:Name="QuickstartTitle" Text="Calling Quickstart sample title bar" Style="{StaticResource CaptionTextBlockStyle}" Padding="7,7,0,0"/>
        </Grid>

        <Grid Grid.Row="2">
            <Grid.RowDefinitions>
                <RowDefinition/>
            </Grid.RowDefinitions>
            <Grid.ColumnDefinitions>
                <ColumnDefinition Width="*"/>
                <ColumnDefinition Width="*"/>
            </Grid.ColumnDefinitions>
            <MediaPlayerElement x:Name="LocalVideo" HorizontalAlignment="Center" Stretch="UniformToFill" Grid.Column="0" VerticalAlignment="Center" AutoPlay="True" />
            <MediaPlayerElement x:Name="RemoteVideo" HorizontalAlignment="Center" Stretch="UniformToFill" Grid.Column="1" VerticalAlignment="Center" AutoPlay="True" />
        </Grid>
        <StackPanel Grid.Row="3" Orientation="Vertical" Grid.RowSpan="2">
            <StackPanel Orientation="Horizontal">
                <Button x:Name="CallButton" Content="Start/Join call" Click="CallButton_Click" VerticalAlignment="Center" Margin="10,0,0,0" Height="40" Width="123"/>
                <Button x:Name="HangupButton" Content="Hang up" Click="HangupButton_Click" VerticalAlignment="Center" Margin="10,0,0,0" Height="40" Width="123"/>
                <CheckBox x:Name="MuteLocal" Content="Mute" Margin="10,0,0,0" Click="MuteLocal_Click" Width="74"/>
            </StackPanel>
        </StackPanel>
        <TextBox Grid.Row="5" x:Name="Stats" Text="" TextWrapping="Wrap" VerticalAlignment="Center" Height="30" Margin="0,2,0,0" BorderThickness="2" IsReadOnly="True" Foreground="LightSlateGray" />
    </Grid>
</Page>
MainPage.xaml.cs を開き、その内容を次の実装に置き換えます。
using Azure.Communication.Calling.WindowsClient;
using System;
using System.Collections.Generic;
using System.ComponentModel;
using System.Linq;
using System.Threading.Tasks;
using Windows.ApplicationModel;
using Windows.ApplicationModel.Core;
using Windows.Media.Core;
using Windows.Networking.PushNotifications;
using Windows.UI;
using Windows.UI.ViewManagement;
using Windows.UI.Xaml;
using Windows.UI.Xaml.Controls;
using Windows.UI.Xaml.Media;
using Windows.UI.Xaml.Navigation;

namespace CallingQuickstart
{
    public sealed partial class MainPage : Page
    {
        private const string authToken = "<AUTHENTICATION_TOKEN>";

        private CallClient callClient;
        private CallTokenRefreshOptions callTokenRefreshOptions = new CallTokenRefreshOptions(false);
        private TeamsCallAgent teamsCallAgent;
        private TeamsCommunicationCall teamsCall;

        private LocalOutgoingAudioStream micStream;
        private LocalOutgoingVideoStream cameraStream;

        #region Page initialization
        public MainPage()
        {
            this.InitializeComponent();
            // Additional UI customization code goes here
        }

        protected override async void OnNavigatedTo(NavigationEventArgs e)
        {
            base.OnNavigatedTo(e);
        }
        #endregion

        #region UI event handlers
        private async void CallButton_Click(object sender, RoutedEventArgs e)
        {
            // Start a call
        }

        private async void HangupButton_Click(object sender, RoutedEventArgs e)
        {
            // Hang up a call
        }

        private async void MuteLocal_Click(object sender, RoutedEventArgs e)
        {
            // Toggle mute/unmute audio state of a call
        }
        #endregion

        #region API event handlers
        private async void OnIncomingCallAsync(object sender, TeamsIncomingCallReceivedEventArgs args)
        {
            // Handle incoming call event
        }

        private async void OnStateChangedAsync(object sender, PropertyChangedEventArgs args)
        {
            // Handle connected and disconnected state change of a call
        }
        #endregion
    }
}
オブジェクト モデル
次の表に、Azure Communication Services Calling SDK の主要な機能の一部を処理するクラスとインターフェイスを示します。
| 名前 | 説明 |
|---|---|
CallClient |
CallClient は、Calling SDK へのメイン エントリ ポイントです。 |
TeamsCallAgent |
TeamsCallAgent は、通話を開始および管理するために使用されます。 |
TeamsCommunicationCall |
TeamsCommunicationCall は、進行中の通話を管理するために使用されます。 |
CallTokenCredential |
CallTokenCredential は、TeamsCallAgent をインスタンス化するためのトークン資格情報として使用されます。 |
CallIdentifier |
CallIdentifier はユーザーの ID を表すために使用されます。これは、MicrosoftTeamsUserCallIdentifier、UserCallIdentifier、PhoneNumberCallIdentifier などのオプションになります。 |
クライアントを認証する
通話を発信および受信できるようにするユーザー アクセス トークンで TeamsCallAgent インスタンスを初期化し、必要に応じてクライアント デバイス構成のクエリを実行するための DeviceManager インスタンスを取得します。
コードで、<AUTHENTICATION_TOKEN> をユーザー アクセス トークンに置き換えます。 まだトークンを入手していない場合は、ユーザー アクセス トークンに関するドキュメントを参照してください。
SDK をブートストラップする InitCallAgentAndDeviceManagerAsync 関数を追加します。 このヘルパーは、アプリケーションの要件を満たすようにカスタマイズできます。
        private async Task InitCallAgentAndDeviceManagerAsync()
        {
            this.callClient = new CallClient(new CallClientOptions() {
                Diagnostics = new CallDiagnosticsOptions() {
                    AppName = "CallingQuickstart",
                    AppVersion="1.0",
                    Tags = new[] { "Calling", "CTE", "Windows" }
                    }
                });

            // Set up local video stream using the first camera enumerated
            var deviceManager = await this.callClient.GetDeviceManagerAsync();
            var camera = deviceManager?.Cameras?.FirstOrDefault();
            var mic = deviceManager?.Microphones?.FirstOrDefault();
            micStream = new LocalOutgoingAudioStream();

            var tokenCredential = new CallTokenCredential(authToken, callTokenRefreshOptions);

            this.teamsCallAgent = await this.callClient.CreateTeamsCallAgentAsync(tokenCredential);
            this.teamsCallAgent.IncomingCallReceived += OnIncomingCallAsync;
        }
通話を開始する
作成した teamsCallAgent オブジェクトでさまざまな種類の通話を開始し、TeamsCommunicationCall オブジェクトに対する RemoteParticipantsUpdated と StateChanged イベント ハンドラーをフックする実装を CallButton_Click に追加しします。
        private async void CallButton_Click(object sender, RoutedEventArgs e)
        {
            var callString = CalleeTextBox.Text.Trim();

            teamsCall = await StartCteCallAsync(callString);
            if (teamsCall != null)
            {
                teamsCall.StateChanged += OnStateChangedAsync;
            }
        }
通話を終了する
[Hang up](通話終了) ボタンがクリックされたら、現在の通話を終了します。 通話を終了し、プレビューとビデオのストリームを停止する実装を HangupButton_Click に追加します。
        private async void HangupButton_Click(object sender, RoutedEventArgs e)
        {
            var teamsCall = this.teamsCallAgent?.Calls?.FirstOrDefault();
            if (teamsCall != null)
            {
                await teamsCall.HangUpAsync(new HangUpOptions() { ForEveryone = false });
            }
        }
オーディオのミュート/ミュート解除を切り替える
Mute ボタンがクリックされたときに発信オーディオをミュートします。 通話をミュートする実装を MuteLocal_Click に追加します。
        private async void MuteLocal_Click(object sender, RoutedEventArgs e)
        {
            var muteCheckbox = sender as CheckBox;

            if (muteCheckbox != null)
            {
                var teamsCall = this.teamsCallAgent?.Calls?.FirstOrDefault();
                if (teamsCall != null)
                {
                    if ((bool)muteCheckbox.IsChecked)
                    {
                        await teamsCall.MuteOutgoingAudioAsync();
                    }
                    else
                    {
                        await teamsCall.UnmuteOutgoingAudioAsync();
                    }
                }

                // Update the UI to reflect the state
            }
        }
通話を開始する
StartTeamsCallOptions オブジェクトが取得されたら、TeamsCallAgent を使用して Teams 通話を開始できます。
        private async Task<TeamsCommunicationCall> StartCteCallAsync(string cteCallee)
        {
            var options = new StartTeamsCallOptions();
            var teamsCall = await this.teamsCallAgent.StartCallAsync( new MicrosoftTeamsUserCallIdentifier(cteCallee), options);
            return call;
        }
電話の着信を受け入れる
TeamsIncomingCallReceived イベント シンクは、SDK ブートストラップ ヘルパー InitCallAgentAndDeviceManagerAsync で設定されます。
this.teamsCallAgent.IncomingCallReceived += OnIncomingCallAsync;
ビデオやオーディオのストリームの種類などの、着信通話を受け入れる方法をアプリケーションに構成できます。
        private async void OnIncomingCallAsync(object sender, TeamsIncomingCallReceivedEventArgs args)
        {
            var teamsIncomingCall = args.IncomingCall;

            var acceptteamsCallOptions = new AcceptTeamsCallOptions() { };

            teamsCall = await teamsIncomingCall.AcceptAsync(acceptteamsCallOptions);
            teamsCall.StateChanged += OnStateChangedAsync;
        }
Teams 通話に参加する
ユーザーは、リンクを渡すことで既存の呼び出しに参加することもできます
TeamsMeetingLinkLocator link = new TeamsMeetingLinkLocator("meetingLink");
JoinTeamsCallOptions options = new JoinTeamsCallOptions();
TeamsCall call = await teamsCallAgent.JoinAsync(link, options);
通話状態変更イベントを監視して応答する
TeamsCommunicationCall オブジェクトの StateChanged イベントは、進行中の通話トランザクションがある状態から別の状態に変化したときに発生します。 アプリケーションには、UI に状態の変更を反映したり、ビジネス ロジックを挿入したりする機会が用意されています。
        private async void OnStateChangedAsync(object sender, PropertyChangedEventArgs args)
        {
            var teamsCall = sender as TeamsCommunicationCall;

            if (teamsCall != null)
            {
                var state = teamsCall.State;

                // Update the UI

                switch (state)
                {
                    case CallState.Connected:
                        {
                            await teamsCall.StartAudioAsync(micStream);

                            break;
                        }
                    case CallState.Disconnected:
                        {
                            teamsCall.StateChanged -= OnStateChangedAsync;

                            teamsCall.Dispose();

                            break;
                        }
                    default: break;
                }
            }
        }
コードの実行
コードは、Visual Studio でビルドして実行できます。 ソリューションのプラットフォームに関しては、ARM64、x64、x86 がサポートされます。
発信通話を行うには、テキスト フィールドにユーザー ID を指定し、[Start Call/Join](通話を開始) ボタンをクリックします。
8:echo123 を呼び出すとエコー ボットに接続されます。この機能は、オーディオ デバイスを起動し、デバイスが機能していることを確認する場合に役立ちます。

Azure Communication Services を使用した最初の作業として、Communication Services Calling SDK を使用して、1 対 1 の音声およびビデオ通話をアプリに追加します。 Java 用の Azure Communication Services Calling SDK を使用して、ビデオ通話を開始および応答する方法について説明します。
サンプル コード
最後までスキップしたい場合は、GitHub のサンプルとしてこのクイックスタートをダウンロードできます。
前提条件
- アクティブなサブスクリプションが含まれる Azure アカウント。 無料でアカウントを作成できます。
- Android アプリケーションを作成するための Android Studio。
- デプロイ済みの Communication Services リソース。 Communication Services リソースを作成します。 このクイックスタートで使用する接続文字列を記録する必要があります。
- Azure Communication Service のユーザー アクセス トークン。
- Graph エクスプローラーを使用して、通話操作のために Teams スレッド ID を取得します。 チャット スレッド ID の作成方法の詳細を参照してください。
設定
空のアクティビティで Android アプリを作成する
Android Studio で、[Start a new Android Studio project](新しい Android Studio プロジェクトを開始する) を選択します。
![Android Studio で [Start a new Android Studio project]\(新しい Android Studio プロジェクトを開始する\) ボタンが選択された状態を示すスクリーンショット。](media/android/studio-new-project.png)
[Phone and Tablet](電話およびタブレット) で、[Empty Activity](空のアクティビティ) プロジェクト テンプレートを選択します。
![プロジェクト テンプレート画面で [Empty Activity]\(空のアクティビティ\) オプションが選択された状態を示すスクリーンショット。](media/android/studio-blank-activity.png)
[Minimum SDK](最小 SDK) として "API 26: Android 8.0 (Oreo)" 以上を選択します。
![プロジェクト テンプレート画面 2 で [Empty Activity]\(空のアクティビティ\) オプションが選択された状態を示すスクリーンショット。](media/android/studio-calling-min-api.png)
パッケージをインストールする
プロジェクト レベルの build.gradle を見つけて、buildscript および allprojects の下のリポジトリの一覧に mavenCentral() を追加します
buildscript {
    repositories {
    ...
        mavenCentral()
    ...
    }
}
allprojects {
    repositories {
    ...
        mavenCentral()
    ...
    }
}
次に、モジュール レベルの build.gradle で、次の行を dependencies および android セクションに追加します
android {
    ...
    packagingOptions {
        pickFirst  'META-INF/*'
    }
    compileOptions {
        sourceCompatibility JavaVersion.VERSION_1_8
        targetCompatibility JavaVersion.VERSION_1_8
    }
}

dependencies {
    ...
    implementation 'com.azure.android:azure-communication-calling:1.0.0-beta.8'
    ...
}
アプリケーション マニフェストにアクセス許可を追加する
通話を行うために必要なアクセス許可を要求するには、アプリケーション マニフェスト (app/src/main/AndroidManifest.xml) でそれを宣言する必要があります。 ファイルの内容を次のコードに置き換えます。
    <?xml version="1.0" encoding="utf-8"?>
<manifest xmlns:android="http://schemas.android.com/apk/res/android"
    package="com.contoso.ctequickstart">

    <uses-permission android:name="android.permission.INTERNET" />
    <uses-permission android:name="android.permission.ACCESS_NETWORK_STATE" />
    <uses-permission android:name="android.permission.ACCESS_WIFI_STATE" />
    <uses-permission android:name="android.permission.RECORD_AUDIO" />
    <uses-permission android:name="android.permission.CAMERA" />
    <uses-permission android:name="android.permission.WRITE_EXTERNAL_STORAGE" />
    <uses-permission android:name="android.permission.READ_PHONE_STATE" />

    <application
        android:allowBackup="true"
        android:icon="@mipmap/ic_launcher"
        android:label="@string/app_name"
        android:roundIcon="@mipmap/ic_launcher_round"
        android:supportsRtl="true"
        android:theme="@style/AppTheme">
        <!--Our Calling SDK depends on the Apache HTTP SDK.
When targeting Android SDK 28+, this library needs to be explicitly referenced.
See https://developer.android.com/about/versions/pie/android-9.0-changes-28#apache-p-->
        <uses-library android:name="org.apache.http.legacy" android:required="false"/>
        <activity android:name=".MainActivity">
            <intent-filter>
                <action android:name="android.intent.action.MAIN" />

                <category android:name="android.intent.category.LAUNCHER" />
            </intent-filter>
        </activity>
    </application>

</manifest>
アプリのレイアウトを設定する
必要な入力は、通話先 ID のテキスト入力と電話を掛けるためのボタンの 2 つです。 これらの入力は、デザイナーを使用するかレイアウトの xml を編集して追加できます。 ID に call_button、テキスト入力に callee_id を使用してボタンを作成します。 (app/src/main/res/layout/activity_main.xml) に移動して、ファイルの内容を以下のコードに置き換えます。
<?xml version="1.0" encoding="utf-8"?>
<androidx.constraintlayout.widget.ConstraintLayout xmlns:android="http://schemas.android.com/apk/res/android"
    xmlns:app="http://schemas.android.com/apk/res-auto"
    xmlns:tools="http://schemas.android.com/tools"
    android:layout_width="match_parent"
    android:layout_height="match_parent"
    tools:context=".MainActivity">

    <Button
        android:id="@+id/call_button"
        android:layout_width="wrap_content"
        android:layout_height="wrap_content"
        android:layout_marginBottom="16dp"
        android:text="Call"
        app:layout_constraintBottom_toBottomOf="parent"
        app:layout_constraintEnd_toEndOf="parent"
        app:layout_constraintStart_toStartOf="parent" />

    <EditText
        android:id="@+id/callee_id"
        android:layout_width="wrap_content"
        android:layout_height="wrap_content"
        android:ems="10"
        android:hint="Callee Id"
        android:inputType="textPersonName"
        app:layout_constraintBottom_toTopOf="@+id/call_button"
        app:layout_constraintEnd_toEndOf="parent"
        app:layout_constraintStart_toStartOf="parent"
        app:layout_constraintTop_toTopOf="parent" />
</androidx.constraintlayout.widget.ConstraintLayout>
メイン アクティビティのスキャフォールディングとバインドを作成する
レイアウトを作成したら、バインドと、アクティビティの基本的なスキャフォールディングを追加できます。 このアクティビティを使用して、実行時のアクセス許可の要求、Teams 通話エージェントの作成、ボタンが押されたときの通話の発信を行います。 それぞれについては、その独自のセクションに説明があります。
onCreate メソッドがオーバーライドされて、getAllPermissions と createTeamsAgent が呼び出され、通話ボタンのバインドが追加されます。 このイベントは、アクティビティの作成時に 1 回だけ行われます。
onCreate の詳細については、ガイド「アクティビティのライフサイクルについて」を参照してください。
MainActivity.java に移動し、内容を次のコードに置き換えます。
package com.contoso.ctequickstart;

import androidx.appcompat.app.AppCompatActivity;
import androidx.core.app.ActivityCompat;
import android.media.AudioManager;
import android.Manifest;
import android.content.pm.PackageManager;

import android.os.Bundle;
import android.widget.Button;
import android.widget.EditText;
import android.widget.Toast;

import com.azure.android.communication.common.CommunicationUserIdentifier;
import com.azure.android.communication.common.CommunicationTokenCredential;
import com.azure.android.communication.calling.TeamsCallAgent;
import com.azure.android.communication.calling.CallClient;
import com.azure.android.communication.calling.StartTeamsCallOptions;


import java.util.ArrayList;

public class MainActivity extends AppCompatActivity {

    private TeamsCallAgent teamsCallAgent;

    @Override
    protected void onCreate(Bundle savedInstanceState) {
        super.onCreate(savedInstanceState);
        setContentView(R.layout.activity_main);

        getAllPermissions();
        createTeamsAgent();

        // Bind call button to call `startCall`
        Button callButton = findViewById(R.id.call_button);
        callButton.setOnClickListener(l -> startCall());

        setVolumeControlStream(AudioManager.STREAM_VOICE_CALL);
    }

    /**
     * Request each required permission if the app doesn't already have it.
     */
    private void getAllPermissions() {
        // See section on requesting permissions
    }

    /**
      * Create the call agent for placing calls
      */
    private void createTeamsAgent() {
        // See section on creating the call agent
    }

    /**
     * Place a call to the callee id provided in `callee_id` text input.
     */
    private void startCall() {
        // See section on starting the call
    }
}
実行時にアクセス許可を要求する
Android 6.0 以上 (API レベル 23) と targetSdkVersion 23 以上では、アプリのインストール時ではなく、実行時にアクセス許可が付与されます。 これをサポートするために、getAllPermissions を実装して、必要なアクセス許可ごとに ActivityCompat.checkSelfPermission と ActivityCompat.requestPermissions を呼び出すことができます。
/**
 * Request each required permission if the app doesn't already have it.
 */
private void getAllPermissions() {
    String[] requiredPermissions = new String[]{Manifest.permission.RECORD_AUDIO, Manifest.permission.CAMERA, Manifest.permission.WRITE_EXTERNAL_STORAGE, Manifest.permission.READ_PHONE_STATE};
    ArrayList<String> permissionsToAskFor = new ArrayList<>();
    for (String permission : requiredPermissions) {
        if (ActivityCompat.checkSelfPermission(this, permission) != PackageManager.PERMISSION_GRANTED) {
            permissionsToAskFor.add(permission);
        }
    }
    if (!permissionsToAskFor.isEmpty()) {
        ActivityCompat.requestPermissions(this, permissionsToAskFor.toArray(new String[0]), 1);
    }
}
Note
アプリを設計するときは、これらのアクセス許可を要求するタイミングを検討してください。 アクセス許可は、事前に要求するのではなく、必要が生じたときに要求する必要があります。 詳細については、Android のアクセス許可のガイドを参照してください。
オブジェクト モデル
Azure Communication Services Calling SDK の主な機能のいくつかは、次のクラスとインターフェイスによって処理されます。
| 名前 | 説明 |
|---|---|
CallClient |
CallClient は、Calling SDK へのメイン エントリ ポイントです。 |
TeamsCallAgent |
TeamsCallAgent は、通話を開始および管理するために使用されます。 |
TeamsCall |
Teams 通話を表すために使用される TeamsCall。 |
CommunicationTokenCredential |
CommunicationTokenCredential は、TeamsCallAgent をインスタンス化するためのトークン資格情報として使用されます。 |
CommunicationIdentifier |
CommunicationIdentifier は、通話の一部となる可能性があるさまざまな種類の参加者として使用されます。 |
ユーザー アクセス トークンからエージェントを作成する
認証された通話エージェントは、ユーザー トークンを使用してインスタンス化できます。 通常、このトークンは、アプリケーション固有の認証を使用してサービスから生成されます。 ユーザー アクセス トークンの詳細については、ユーザー アクセス トークンのガイドを参照してください。
クイック スタートでは、<User_Access_Token> を Azure Communication Service リソース用に生成されたユーザー アクセス トークンに置き換えます。
/**
 * Create the teams call agent for placing calls
 */
private void createAgent() {
    String userToken = "<User_Access_Token>";

    try {
        CommunicationTokenCredential credential = new CommunicationTokenCredential(userToken);
        teamsCallAgent = new CallClient().createTeamsCallAgent(getApplicationContext(), credential).get();
    } catch (Exception ex) {
        Toast.makeText(getApplicationContext(), "Failed to create teams call agent.", Toast.LENGTH_SHORT).show();
    }
}
通話エージェントを使用して通話を開始する
電話の発信は Teams 通話エージェントを使用して行うことができ、必要となるのは、通話先 ID の一覧と通話オプションを指定することだけです。 クイック スタートでは、動画を含まない既定の通話オプションと、テキスト入力による 1 つの通話先 ID が使用されます。
/**
 * Place a call to the callee id provided in `callee_id` text input.
 */
private void startCall() {
    EditText calleeIdView = findViewById(R.id.callee_id);
    String calleeId = calleeIdView.getText().toString();

    StartTeamsCallOptions options = new StartTeamsCallOptions();

    teamsCallAgent.startCall(
        getApplicationContext(),
        new MicrosoftTeamsUserCallIdentifier(calleeId),
        options);
}
通話に応答する
通話の受け入れは、現在のコンテキストへの参照のみを使用して、Teams 通話エージェントを使用して行うことができます。
public void acceptACall(TeamsIncomingCall teamsIncomingCall){
	teamsIncomingCall.accept(this);
}
Teams 通話に参加する
ユーザーは、リンクを渡すことで、既存の呼び出しに参加できます。
/**
 * Join a call using a teams meeting link.
 */
public TeamsCall joinTeamsCall(TeamsCallAgent teamsCallAgent){
	TeamsMeetingLinkLocator link = new TeamsMeetingLinkLocator("meetingLink");
	TeamsCall call = teamsCallAgent.join(this, link);
}
オプションを使用して Teams 通話に参加する
ミュートなどのプリセット オプションを使用して、既存の呼び出しに参加することもできます。
/**
 * Join a call using a teams meeting link while muted.
 */
public TeamsCall joinTeamsCall(TeamsCallAgent teamsCallAgent){
	TeamsMeetingLinkLocator link = new TeamsMeetingLinkLocator("meetingLink");
	OutgoingAudioOptions audioOptions = new OutgoingAudioOptions().setMuted(true);
	JoinTeamsCallOptions options = new JoinTeamsCallOptions().setAudioOptions(audioOptions);
	TeamsCall call = teamsCallAgent.join(this, link, options);
}
着信リスナーのセットアップ
このユーザーが行わない着信やその他のアクションを検出できるようにするには、リスナーをセットアップする必要があります。
private TeamsIncomingCall teamsincomingCall;
teamsCallAgent.addOnIncomingCallListener(this::handleIncomingCall);

private void handleIncomingCall(TeamsIncomingCall incomingCall) {
	this.teamsincomingCall = incomingCall;
}
アプリを起動してエコー ボットを呼び出す
ツール バーの [Run App](アプリの実行) ボタン (Shift + F10) を使用してアプリを起動できるようになりました。
8:echo123 を呼び出して電話を発信できることを確認してください。 事前に録音したメッセージが再生された後、そのメッセージがもう一度繰り返されます。

Azure Communication Services を使用した最初の作業として、Communication Services Calling SDK を使用して、1 対 1 のビデオ通話をアプリに追加します。 Teams ID を使用する iOS 用の Azure Communication Services Calling SDK を使用して、ビデオ通話を開始および応答する方法について説明します。
サンプル コード
最後までスキップしたい場合は、GitHub のサンプルとしてこのクイックスタートをダウンロードできます。
前提条件
- アクティブなサブスクリプションが含まれる Azure アカウントを取得します。 無料でアカウントを作成できます。
- Xcode を実行しており、有効な開発者証明書がキーチェーンにインストールされている Mac。
- アクティブな Communication Services リソースを作成します。 Communication Services のリソースを作成する。 このクイックスタートで使用する接続文字列を記録する必要があります。
- Azure Communication Service のユーザー アクセス トークン。
- Graph エクスプローラーを使用して、通話操作のために Teams スレッド ID を取得します。 チャット スレッド ID の作成方法の詳細を参照してください
設定
Xcode プロジェクトを作成する
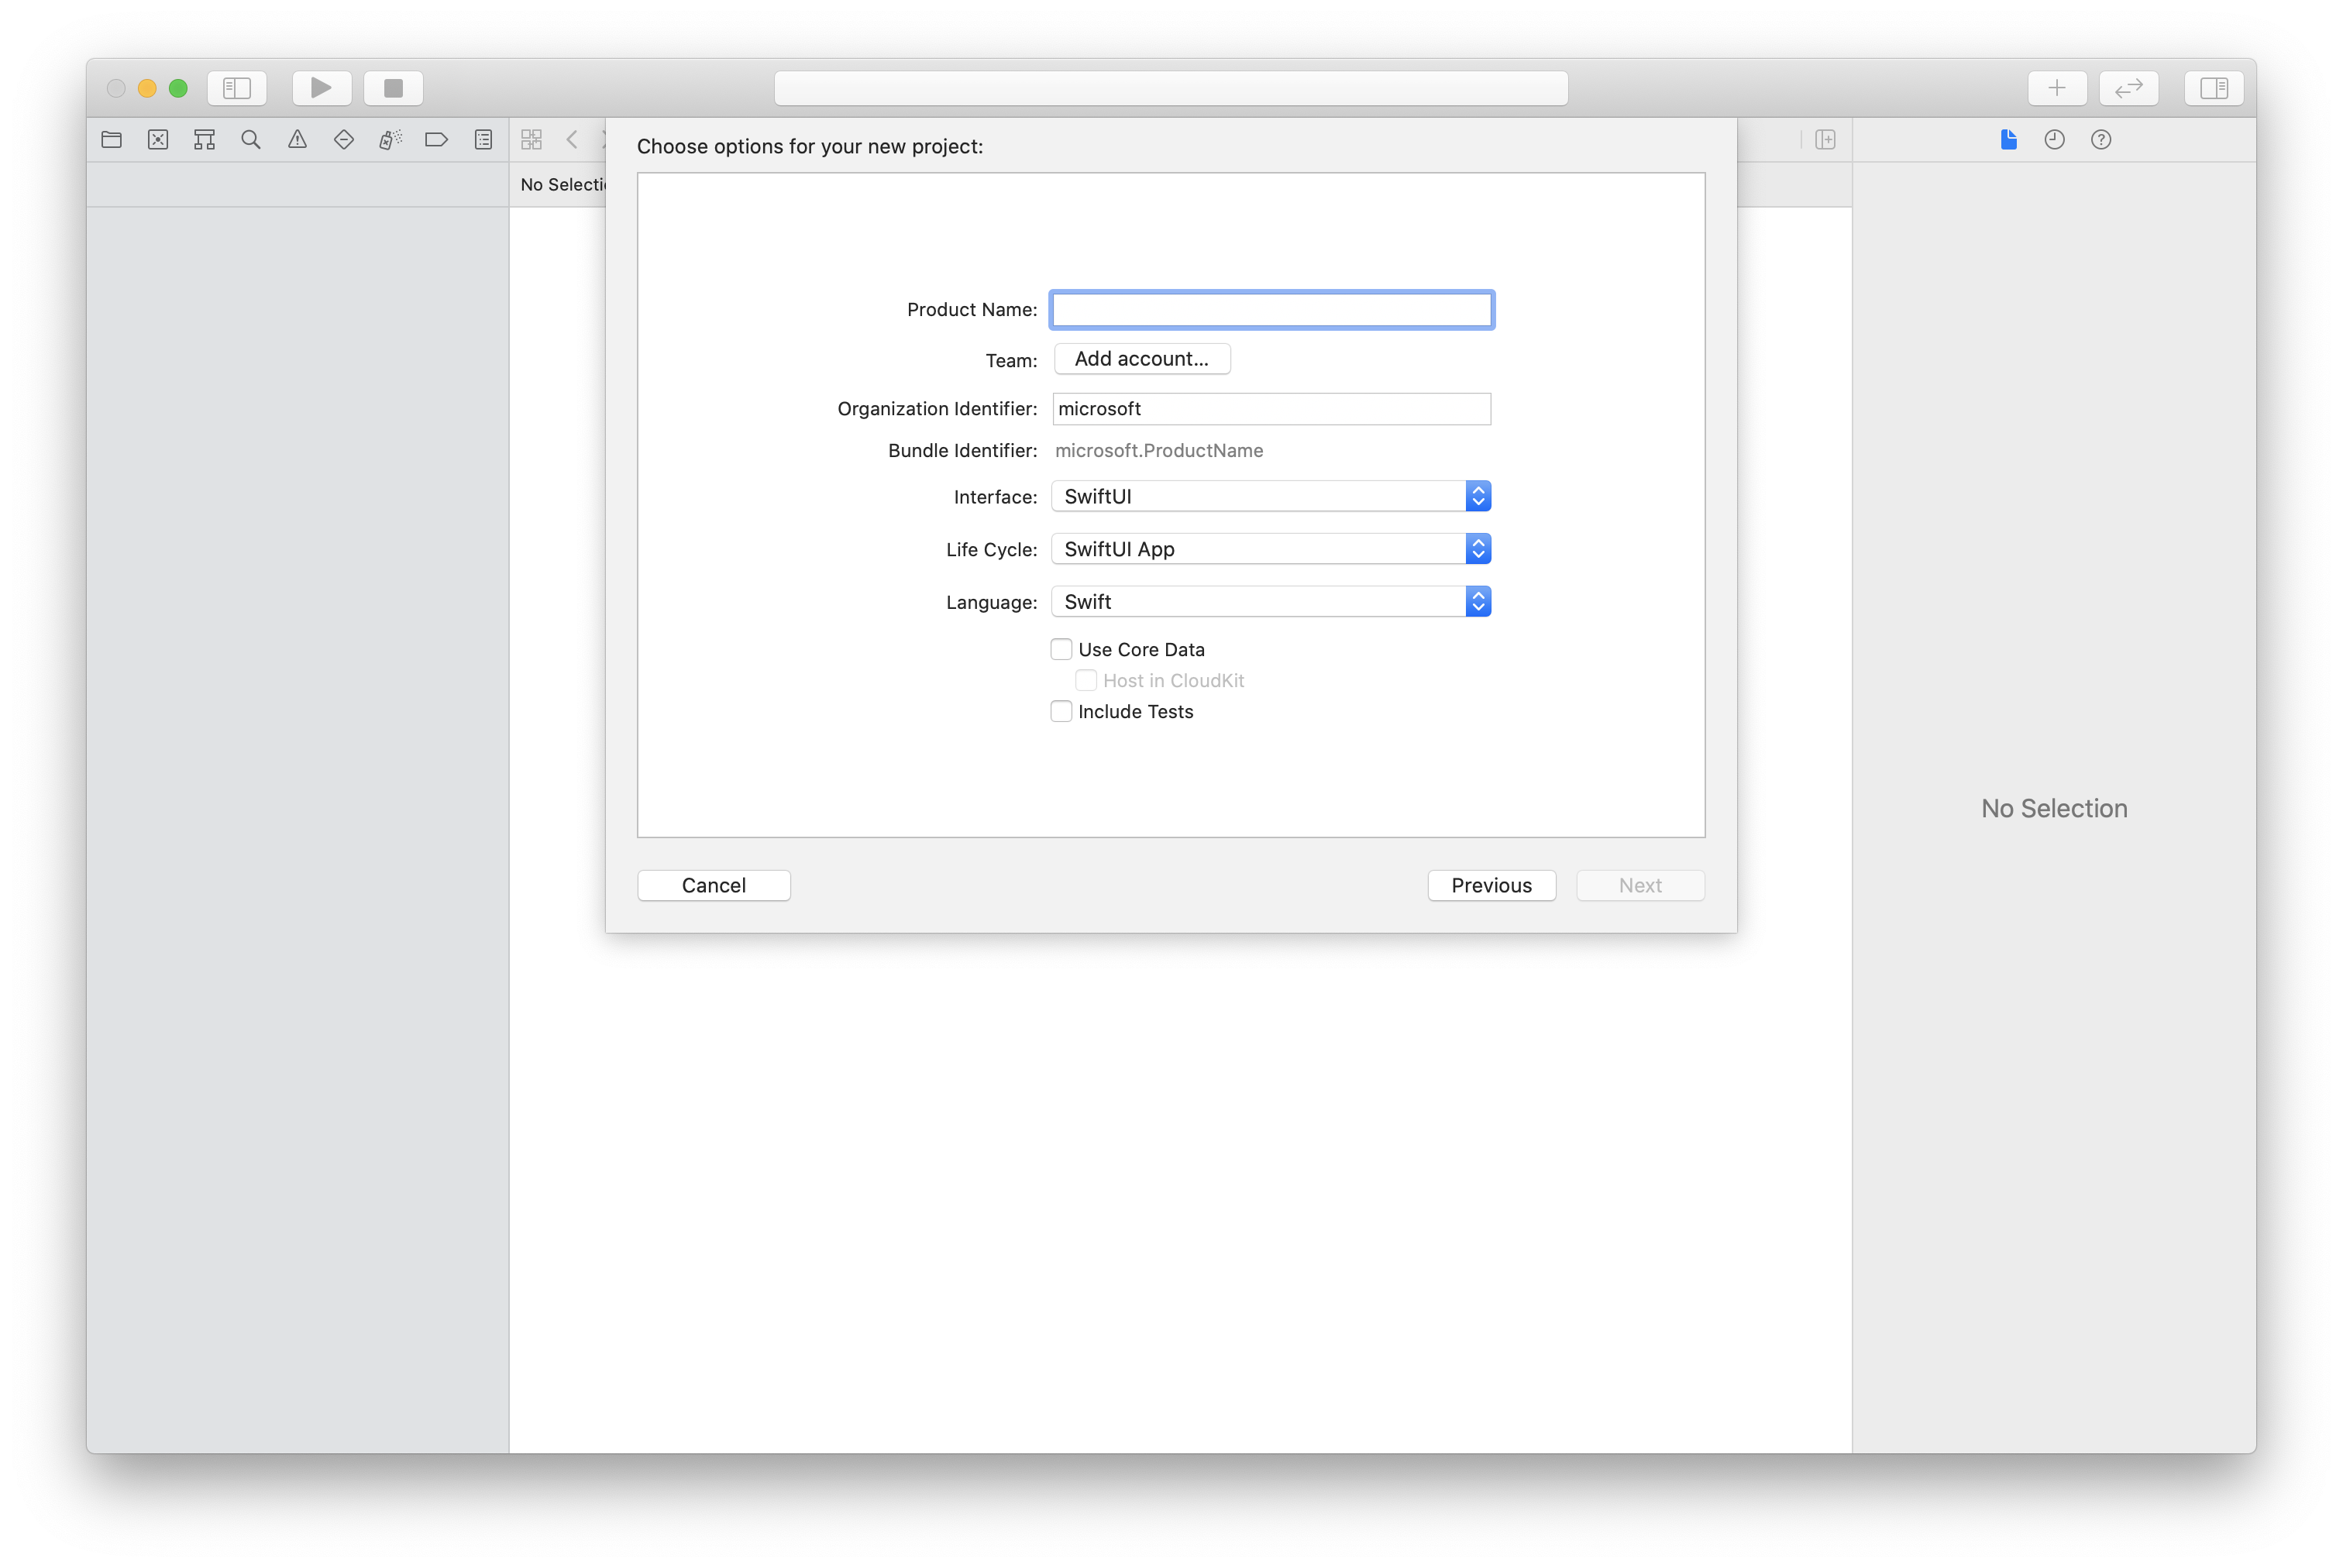
Xcode で、新しい iOS プロジェクトを作成し、 [単一ビュー アプリ] テンプレートを選択します。 このチュートリアルでは SwiftUI フレームワークを使用します。そのため、[Language](言語) を [Swift] に設定し、[User Interface](ユーザー インターフェイス) を [SwiftUI] に設定する必要があります。 このクイック スタートでは、テストは作成しません。 [Include Tests](テストを含める) チェック ボックスはオフにしてかまいません。
CocoaPods のインストール
このガイドを使用して、お使いの Mac に CocoaPods をインストールしてください。
CocoaPods でパッケージと依存関係をインストールする
アプリケーションの
Podfileを作成するために、ターミナルを開いてプロジェクト フォルダーに移動し、pod init を実行します。次のコードを
Podfileに追加して保存します。 SDK のサポート バージョンに関するページを参照してください。
platform :ios, '13.0'
use_frameworks!

target 'VideoCallingQuickstart' do
  pod 'AzureCommunicationCalling', '~> 2.10.0'
end
pod install を実行します。
Xcode を使用して
.xcworkspaceを開きます。
マイクとカメラへのアクセスを要求する
デバイスのマイクとカメラにアクセスするには、アプリの情報プロパティ リストを NSMicrophoneUsageDescription と NSCameraUsageDescription で更新する必要があります。 関連付けられた値を文字列に設定します。ここには、ユーザーからのアクセスを要求するためにシステムによって使用されるダイアログが含まれます。
プロジェクト ツリーの Info.plist のエントリを右クリックし、[Open As](形式を指定して開く) > [Source Code](ソース コード ) を選択します。 最上位の <dict> セクションに以下の行を追加してから、ファイルを保存します。
<key>NSMicrophoneUsageDescription</key>
<string>Need microphone access for VOIP calling.</string>
<key>NSCameraUsageDescription</key>
<string>Need camera access for video calling</string>
アプリのフレームワークを設定する
プロジェクトの ContentView.swift ファイルを開き、そのファイルの先頭に import 宣言を追加して、AzureCommunicationCalling ライブラリと AVFoundation をインポートします。 AVFoundation は、コードからオーディオ アクセス許可を取得するために使用されます。
import AzureCommunicationCalling
import AVFoundation
オブジェクト モデル
Azure Communication Services Calling SDK for iOS の主な機能のいくつかは、以下のクラスとインターフェイスにより処理されます。
| Name | 説明 |
|---|---|
CallClient |
CallClient は、Calling SDK へのメイン エントリ ポイントです。 |
TeamsCallAgent |
TeamsCallAgent は、通話を開始および管理するために使用されます。 |
TeamsIncomingCall |
TeamsIncomingCall は、着信した Teams 通話を受け入れるか拒否するために使用されます。 |
CommunicationTokenCredential |
CommunicationTokenCredential は、TeamsCallAgent をインスタンス化するためのトークン資格情報として使用されます。 |
CommunicationIdentifier |
CommunicationIdentifier はユーザーの ID を表すために使用され、オプション CommunicationUserIdentifier、PhoneNumberIdentifier、CallingApplication のいずれかになります。 |
Teams 通話エージェントを作成する
ContentView struct の実装を、ユーザーが通話を開始および終了できるようにする、いくつかの単純な UI コントロールに置き換えます。 このクイック スタートでは、これらのコントロールにビジネス ロジックを追加します。
struct ContentView: View {
    @State var callee: String = ""
    @State var callClient: CallClient?
    @State var teamsCallAgent: TeamsCallAgent?
    @State var teamsCall: TeamsCall?
    @State var deviceManager: DeviceManager?
    @State var localVideoStream:[LocalVideoStream]?
    @State var teamsIncomingCall: TeamsIncomingCall?
    @State var sendingVideo:Bool = false
    @State var errorMessage:String = "Unknown"

    @State var remoteVideoStreamData:[Int32:RemoteVideoStreamData] = [:]
    @State var previewRenderer:VideoStreamRenderer? = nil
    @State var previewView:RendererView? = nil
    @State var remoteRenderer:VideoStreamRenderer? = nil
    @State var remoteViews:[RendererView] = []
    @State var remoteParticipant: RemoteParticipant?
    @State var remoteVideoSize:String = "Unknown"
    @State var isIncomingCall:Bool = false

    @State var callObserver:CallObserver?
    @State var remoteParticipantObserver:RemoteParticipantObserver?

    var body: some View {
        NavigationView {
            ZStack{
                Form {
                    Section {
                        TextField("Who would you like to call?", text: $callee)
                        Button(action: startCall) {
                            Text("Start Teams Call")
                        }.disabled(teamsCallAgent == nil)
                        Button(action: endCall) {
                            Text("End Teams Call")
                        }.disabled(teamsCall == nil)
                        Button(action: toggleLocalVideo) {
                            HStack {
                                Text(sendingVideo ? "Turn Off Video" : "Turn On Video")
                            }
                        }
                    }
                }
                // Show incoming call banner
                if (isIncomingCall) {
                    HStack() {
                        VStack {
                            Text("Incoming call")
                                .padding(10)
                                .frame(maxWidth: .infinity, alignment: .topLeading)
                        }
                        Button(action: answerIncomingCall) {
                            HStack {
                                Text("Answer")
                            }
                            .frame(width:80)
                            .padding(.vertical, 10)
                            .background(Color(.green))
                        }
                        Button(action: declineIncomingCall) {
                            HStack {
                                Text("Decline")
                            }
                            .frame(width:80)
                            .padding(.vertical, 10)
                            .background(Color(.red))
                        }
                    }
                    .frame(maxWidth: .infinity, alignment: .topLeading)
                    .padding(10)
                    .background(Color.gray)
                }
                ZStack{
                    VStack{
                        ForEach(remoteViews, id:\.self) { renderer in
                            ZStack{
                                VStack{
                                    RemoteVideoView(view: renderer)
                                        .frame(width: .infinity, height: .infinity)
                                        .background(Color(.lightGray))
                                }
                            }
                            Button(action: endCall) {
                                Text("End Call")
                            }.disabled(teamsCall == nil)
                            Button(action: toggleLocalVideo) {
                                HStack {
                                    Text(sendingVideo ? "Turn Off Video" : "Turn On Video")
                                }
                            }
                        }

                    }.frame(maxWidth: .infinity, maxHeight: .infinity, alignment: .topLeading)
                    VStack{
                        if(sendingVideo)
                        {
                            VStack{
                                PreviewVideoStream(view: previewView!)
                                    .frame(width: 135, height: 240)
                                    .background(Color(.lightGray))
                            }
                        }
                    }.frame(maxWidth:.infinity, maxHeight:.infinity,alignment: .bottomTrailing)
                }
            }
     .navigationBarTitle("Video Calling Quickstart")
        }.onAppear{
            // Authenticate the client

            // Initialize the TeamsCallAgent and access Device Manager

            // Ask for permissions
        }
    }
}

//Functions and Observers

struct PreviewVideoStream: UIViewRepresentable {
    let view:RendererView
    func makeUIView(context: Context) -> UIView {
        return view
    }
    func updateUIView(_ uiView: UIView, context: Context) {}
}

struct RemoteVideoView: UIViewRepresentable {
    let view:RendererView
    func makeUIView(context: Context) -> UIView {
        return view
    }
    func updateUIView(_ uiView: UIView, context: Context) {}
}

struct ContentView_Previews: PreviewProvider {
    static var previews: some View {
        ContentView()
    }
}
クライアントを認証する
TeamsCallAgent インスタンスを初期化するには、通話を発信したり受信したりできるようにするユーザー アクセス トークンが必要です。 トークンを入手していない場合は、ユーザー アクセス トークンに関するドキュメントを参照してください。
トークンを入手したら、ContentView.swift の onAppear コールバックに次のコードを追加します。
<USER ACCESS TOKEN> を、リソース用の有効なユーザー アクセス トークンに置き換える必要があります。
var userCredential: CommunicationTokenCredential?
do {
    userCredential = try CommunicationTokenCredential(token: "<USER ACCESS TOKEN>")
} catch {
    print("ERROR: It was not possible to create user credential.")
    return
}
Teams CallAgent を初期化し、デバイス マネージャーにアクセスする
CallClient から TeamsCallAgent インスタンスを作成するには、初期化されると TeamsCallAgent オブジェクトを非同期に返す callClient.createTeamsCallAgent メソッドを使用します。
DeviceManager を使用すると、オーディオと動画のストリームを送信するために通話内で使用できるローカル デバイスを列挙できます。 また、マイクやカメラにアクセスするための許可をユーザーに要求することもできます。
self.callClient = CallClient()
let options = TeamsCallAgentOptions()
// Enable CallKit in the SDK
options.callKitOptions = CallKitOptions(with: createCXProvideConfiguration())
self.callClient?.createTeamsCallAgent(userCredential: userCredential, options: options) { (agent, error) in
    if error != nil {
        print("ERROR: It was not possible to create a Teams call agent.")
        return
    } else {
        self.teamsCallAgent = agent
        print("Teams Call agent successfully created.")
        self.teamsCallAgent!.delegate = teamsIncomingCallHandler
        self.callClient?.getDeviceManager { (deviceManager, error) in
            if (error == nil) {
                print("Got device manager instance")
                self.deviceManager = deviceManager
            } else {
                print("Failed to get device manager instance")
            }
        }
    }
}
アクセス許可を求める
オーディオとビデオのアクセス許可を求めるには、次のコードを onAppear コールバックに追加する必要があります。
AVAudioSession.sharedInstance().requestRecordPermission { (granted) in
    if granted {
        AVCaptureDevice.requestAccess(for: .video) { (videoGranted) in
            /* NO OPERATION */
        }
    }
}
発信通話を行う
startCall メソッドは、[Start Call] (通話の開始) ボタンがタップされたときに実行されるアクションとして設定されます。 このクイックスタートでは、発信通話は既定で音声のみです。 ビデオを使用して通話を開始するには、VideoOptions に LocalVideoStream を設定し、それを startCallOptions に渡して、通話の初期オプションを設定する必要があります。
let startTeamsCallOptions = StartTeamsCallOptions()
if sendingVideo  {
    if self.localVideoStream == nil  {
        self.localVideoStream = [LocalVideoStream]()
    }
    let videoOptions = VideoOptions(localVideoStreams: localVideoStream!)
    startTeamsCallOptions.videoOptions = videoOptions
}
let callees: [CommunicationIdentifier] = [CommunicationUserIdentifier(self.callee)]
self.teamsCallAgent?.startCall(participants: callees, options: startTeamsCallOptions) { (call, error) in
    // Handle call object if successful or an error.
}
Teams 会議に参加する
join メソッドを使用すると、ユーザーはチーム会議に参加できます。
let joinTeamsCallOptions = JoinTeamsCallOptions()
if sendingVideo
{
    if self.localVideoStream == nil {
        self.localVideoStream = [LocalVideoStream]()
    }
    let videoOptions = VideoOptions(localVideoStreams: localVideoStream!)
    joinTeamsCallOptions.videoOptions = videoOptions
}

// Join the Teams meeting muted
if isMuted
{
    let outgoingAudioOptions = OutgoingAudioOptions()
    outgoingAudioOptions.muted = true
    joinTeamsCallOptions.outgoingAudioOptions = outgoingAudioOptions
}

let teamsMeetingLinkLocator = TeamsMeetingLinkLocator(meetingLink: "https://meeting_link")

self.teamsCallAgent?.join(with: teamsMeetingLinkLocator, options: joinTeamsCallOptions) { (call, error) in
    // Handle call object if successful or an error.
}
TeamsCallObserver と RemoteParticipantObserver は、通話中のイベントとリモート参加者を管理するために使用されます。
setTeamsCallAndObserver 関数でオブザーバーを設定します。
func setTeamsCallAndObserver(call:TeamsCall, error:Error?) {
    if (error == nil) {
        self.teamsCall = call
        self.teamsCallObserver = TeamsCallObserver(self)
        self.teamsCall!.delegate = self.teamsCallObserver
        // Attach a RemoteParticipant observer
        self.remoteParticipantObserver = RemoteParticipantObserver(self)
    } else {
        print("Failed to get teams call object")
    }
}
着信に応答する
着信に応答するには、TeamsIncomingCallHandler を実装して、着信に応答または拒否するための着信バナーを表示します。 次の実装を TeamsIncomingCallHandler.swift に挿入します。
final class TeamsIncomingCallHandler: NSObject, TeamsCallAgentDelegate, TeamsIncomingCallDelegate {
    public var contentView: ContentView?
    private var teamsIncomingCall: TeamsIncomingCall?

    private static var instance: TeamsIncomingCallHandler?
    static func getOrCreateInstance() -> TeamsIncomingCallHandler {
        if let c = instance {
            return c
        }
        instance = TeamsIncomingCallHandler()
        return instance!
    }

    private override init() {}

    func teamsCallAgent(_ teamsCallAgent: TeamsCallAgent, didReceiveIncomingCall incomingCall: TeamsIncomingCall) {
        self.teamsIncomingCall = incomingCall
        self.teamsIncomingCall.delegate = self
        contentView?.showIncomingCallBanner(self.teamsIncomingCall!)
    }

    func teamsCallAgent(_ teamsCallAgent: TeamsCallAgent, didUpdateCalls args: TeamsCallsUpdatedEventArgs) {
        if let removedCall = args.removedCalls.first {
            contentView?.callRemoved(removedCall)
            self.teamsIncomingCall = nil
        }
    }
}
ContentView.swift の onAppear コールバックに次のコードを追加して、TeamsIncomingCallHandler のインスタンスを作成する必要があります。
TeamsCallAgent が正常に作成された後、TeamsCallAgent にデリゲートを設定します。
self.teamsCallAgent!.delegate = incomingCallHandler
着信があると、TeamsIncomingCallHandler で showIncomingCallBanner 関数が呼び出され、answer ボタンと decline ボタンが表示されます。
func showIncomingCallBanner(_ incomingCall: TeamsIncomingCall) {
    self.teamsIncomingCall = incomingCall
}
answer と decline に関連付けられるアクションは、次のコードのように実装されます。 ビデオを使用して通話に応答するには、ローカル ビデオをオンにして、AcceptCallOptions のオプションに localVideoStream を設定する必要があります。
func answerIncomingCall() {
    let options = AcceptTeamsCallOptions()
    guard let teamsIncomingCall = self.teamsIncomingCall else {
      print("No active incoming call")
      return
    }

    guard let deviceManager = deviceManager else {
      print("No device manager instance")
      return
    }

    if self.localVideoStreams == nil {
        self.localVideoStreams = [LocalVideoStream]()
    }

    if sendingVideo
    {
        guard let camera = deviceManager.cameras.first else {
            // Handle failure
            return
        }
        self.localVideoStreams?.append( LocalVideoStream(camera: camera))
        let videoOptions = VideoOptions(localVideoStreams: localVideosStreams!)
        options.videoOptions = videoOptions
    }

    teamsIncomingCall.accept(options: options) { (call, error) in
        // Handle call object if successful or an error.
    }
}

func declineIncomingCall() {
    self.teamsIncomingCall?.reject { (error) in
        // Handle if rejection was successfully or not.
    }
}
イベントをサブスクライブする
通話中に値が変化したときに通知されるイベントのコレクションをサブスクライブするには、TeamsCallObserver クラスを実装できます。
public class TeamsCallObserver: NSObject, TeamsCallDelegate, TeamsIncomingCallDelegate {
    private var owner: ContentView
    init(_ view:ContentView) {
            owner = view
    }

    public func teamsCall(_ teamsCall: TeamsCall, didChangeState args: PropertyChangedEventArgs) {
        if(teamsCall.state == CallState.connected) {
            initialCallParticipant()
        }
    }

    // render remote video streams when remote participant changes
    public func teamsCall(_ teamsCall: TeamsCall, didUpdateRemoteParticipant args: ParticipantsUpdatedEventArgs) {
        for participant in args.addedParticipants {
            participant.delegate = self.remoteParticipantObserver
        }
    }

    // Handle remote video streams when the call is connected
    public func initialCallParticipant() {
        for participant in owner.teamsCall.remoteParticipants {
            participant.delegate = self.remoteParticipantObserver
            for stream in participant.videoStreams {
                renderRemoteStream(stream)
            }
            owner.remoteParticipant = participant
        }
    }
}
コードの実行
iOS シミュレーターでアプリをビルドして実行するには、[Product](製品) > [Run](実行) を選択するか、(⌘-R) キーボード ショートカットを使用します。
リソースをクリーンアップする
Communication Services サブスクリプションをクリーンアップして解除する場合は、リソースまたはリソース グループを削除できます。 リソース グループを削除すると、それに関連付けられている他のリソースも削除されます。 詳細については、リソースのクリーンアップに関する記事を参照してください。
次の手順
詳細については、次の記事を参照してください。
- Microsoft の Web 通話のサンプルを確認する
- Calling SDK の機能について確認する
- 通話のしくみの詳細について確認する