このクイック スタートでは、TypeScript 言語で記述された Node.js アプリケーションから Azure Managed Redis キャッシュを使用し、Microsoft Entra ID を使用して Redis 接続を認証する方法について説明します。
[前提条件]
Azure サブスクリプション - 無料アカウントを作成する
LTSNode.js インストールする
このクイック スタートで使用するパッケージをプロジェクトに追加します。
npm install redis @redis/entraid @redis/clientAzure CLI を使用して、開発環境に対して Azure に対して認証を行います。
az login
この記事のクイック スタート サンプル コードは、 GitHub で入手できます。
Azure Managed Redis インスタンスを作成する
まず、Azure portal で Azure Managed Redis Cache を作成します。
キャッシュを作成すると、Microsoft Entra ID 認証が既定で有効になり、最初からセキュリティで保護されます。 このクイック スタートでは、キャッシュはパブリック エンドポイントを使用します。 運用環境では、プライベート エンドポイントやその他のネットワーク制御の使用を検討してください。
- ポータルでキャッシュを作成するには、次のいずれかの手順に従います。
-
必要に応じて、Azure CLI、PowerShell、または任意のツールを使用してキャッシュを作成できます。
Redis Cache に接続するコード
TypeScript コード サンプル ファイルの最初の部分で、 index.ts、キャッシュへの接続を構成します。
import { DefaultAzureCredential } from '@azure/identity';
import { EntraIdCredentialsProviderFactory, REDIS_SCOPE_DEFAULT } from '@redis/entraid';
import { createCluster, RedisClusterType, RedisModules, RedisFunctions, RedisScripts } from '@redis/client';
import * as net from 'node:net';

const redisEndpoint = process.env.REDIS_ENDPOINT!;
if (!redisEndpoint) {
    console.error('REDIS_ENDPOINT is not set. It should look like: `cache-name.region-name.redis.azure.net:<PORT>`. Find the endpoint in the Azure portal.');
    process.exit(1);
}

const [redisHostName, _] = redisEndpoint.split(":");

let client;

function createRedisClient(): RedisClusterType<RedisModules, RedisFunctions, RedisScripts>  {

    const credential = new DefaultAzureCredential();

    const provider = EntraIdCredentialsProviderFactory.createForDefaultAzureCredential({
        credential,
        scopes: REDIS_SCOPE_DEFAULT,
        options: {},
        tokenManagerConfig: {
            expirationRefreshRatio: 0.8
        }
    });

    const client = createCluster<RedisModules, RedisFunctions, RedisScripts>({
        rootNodes: [{ url: `rediss://${redisEndpoint}` }],
        defaults: {
            credentialsProvider: provider,
            socket: {
                connectTimeout: 15000,
                tls: true,

                // This quickstart code uses a fail fast `reconnectStrategy` which
                // is suitable only in sample code. The purpose is to quickly
                // demonstrate the functionality without getting stuck in
                // reconnection loops if your endpoint or authentication is not
                // correctly configured. In production code, a more robust
                // `reconnectStrategy` should be implemented.
                reconnectStrategy: () => new Error('Failure to connect')
            }

        },
        nodeAddressMap(incomingAddress) {
            const [hostNameOrIP, port] = incomingAddress.split(":");

            const address =
                net.isIP(hostNameOrIP) !== 0
                    ? redisHostName
                    : hostNameOrIP;

            return {
                host: address,
                port: Number(port),
            };
        }

    });

    client.on('error', (err) => console.error('Redis cluster error:', err));

    return client;
}
createRedisClient()関数を使用して、Redis キャッシュへの node-redis クライアント接続を作成します。
client = createRedisClient();
await client.connect();
接続をテストするコード
次のセクションでは、Redis PING コマンドを使用して接続をテストします。 Redis サーバーは PONGを返します。
const pingResult = await client.ping();
console.log('Ping result:', pingResult);
コードでキーを設定し、キーを取得する
このセクションでは、 SET コマンドと GET コマンドを使用して、最も簡単な方法で Redis キャッシュ内のデータの書き込みと読み取りを開始します。
const setResult = await client.set("Message", "Hello! The cache is working from Node.js!");
console.log('Set result:', setResult);

const getResult = await client.get("Message");
console.log('Get result:', getResult);
コードの実行
Node.js アプリケーションをビルドして実行します。
tsc
node index.js
結果は次のようになります。
Ping result: PONG
Set result: OK
Get result: Hello! The cache is working from Node.js!
ここでは、このコード サンプル全体を確認できます。
import { DefaultAzureCredential } from '@azure/identity';
import { EntraIdCredentialsProviderFactory, REDIS_SCOPE_DEFAULT } from '@redis/entraid';
import { createCluster, RedisClusterType, RedisModules, RedisFunctions, RedisScripts } from '@redis/client';
import * as net from 'node:net';

const redisEndpoint = process.env.REDIS_ENDPOINT!;
if (!redisEndpoint) {
    console.error('REDIS_ENDPOINT is not set. It should look like: `cache-name.region-name.redis.azure.net:<PORT>`. Find the endpoint in the Azure portal.');
    process.exit(1);
}

const [redisHostName, _] = redisEndpoint.split(":");

let client;

function createRedisClient(): RedisClusterType<RedisModules, RedisFunctions, RedisScripts>  {

    const credential = new DefaultAzureCredential();

    const provider = EntraIdCredentialsProviderFactory.createForDefaultAzureCredential({
        credential,
        scopes: REDIS_SCOPE_DEFAULT,
        options: {},
        tokenManagerConfig: {
            expirationRefreshRatio: 0.8
        }
    });

    const client = createCluster<RedisModules, RedisFunctions, RedisScripts>({
        rootNodes: [{ url: `rediss://${redisEndpoint}` }],
        defaults: {
            credentialsProvider: provider,
            socket: {
                connectTimeout: 15000,
                tls: true,

                // This quickstart code uses a fail fast `reconnectStrategy` which
                // is suitable only in sample code. The purpose is to quickly
                // demonstrate the functionality without getting stuck in
                // reconnection loops if your endpoint or authentication is not
                // correctly configured. In production code, a more robust
                // `reconnectStrategy` should be implemented.
                reconnectStrategy: () => new Error('Failure to connect')
            }

        },
        nodeAddressMap(incomingAddress) {
            const [hostNameOrIP, port] = incomingAddress.split(":");

            const address =
                net.isIP(hostNameOrIP) !== 0
                    ? redisHostName
                    : hostNameOrIP;

            return {
                host: address,
                port: Number(port),
            };
        }

    });

    client.on('error', (err) => console.error('Redis cluster error:', err));

    return client;
}

try {

    client = createRedisClient();

    await client.connect();

    const pingResult = await client.ping();
    console.log('Ping result:', pingResult);

    const setResult = await client.set("Message", "Hello! The cache is working from Node.js!");
    console.log('Set result:', setResult);

    const getResult = await client.get("Message");
    console.log('Get result:', getResult);

} catch (err) {
    console.error('Error:', err);
} finally {
    if (client) {
        try {
            await client.quit();
        } catch (quitErr) {
            console.error('Error occurred while quitting Redis client:', quitErr);

        }
    }
}
リソースをクリーンアップする
この記事で作成したリソースを引き続き使用する場合は、リソース グループを保持します。
それ以外の場合、リソースを使い終わったら、課金されないように、作成した Azure リソース グループを削除できます。
重要
リソース グループを削除すると、元に戻すことができません。 リソース グループを削除すると、そのリソース グループ内のすべてのリソースは完全に削除されます。 間違ったリソース グループやリソースをうっかり削除しないようにしてください。 リソースを既存のリソース グループ内に作成し、そのリソース グループ内に保持したいリソースが含まれている場合は、リソース グループを削除するのではなく、各リソースを個別に削除できます。
リソース グループを削除するには
Azure portal にサインインし、 [リソース グループ] を選択します。
削除するリソース グループを選択します。
多数のリソース グループがある場合は、[任意のフィールドのフィルター...] ボックスを使用し、この記事用に作成したリソース グループの名前を入力します。 結果リストでリソース グループを選びます。
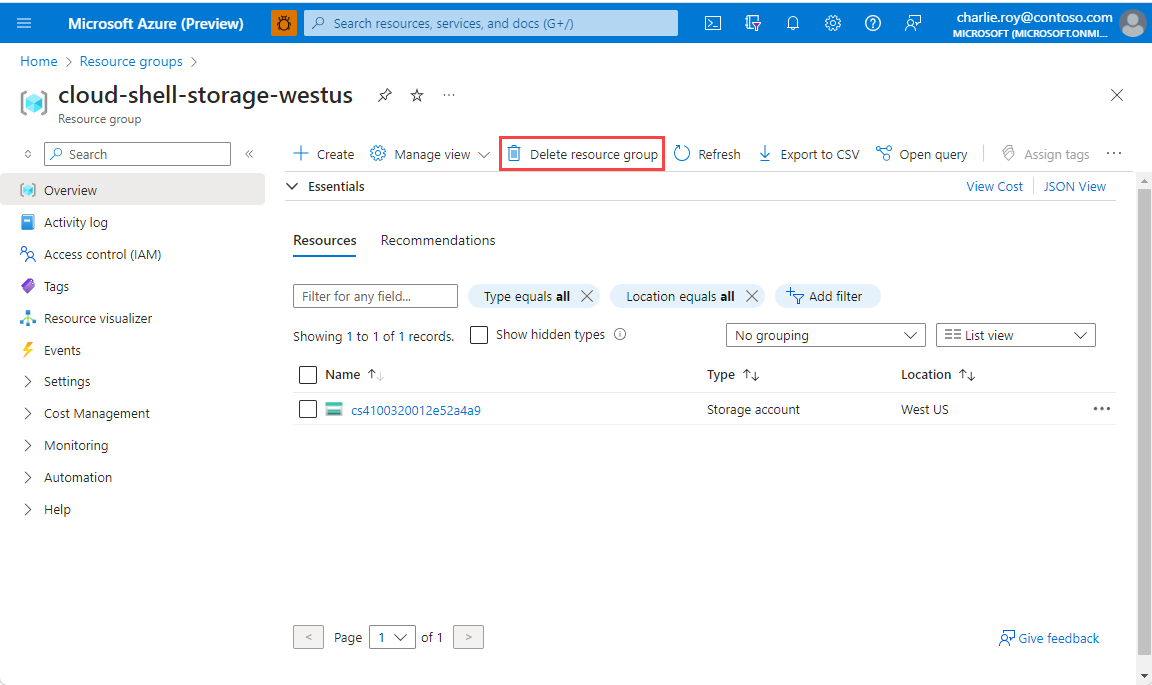
[リソース グループの削除] を選択します。
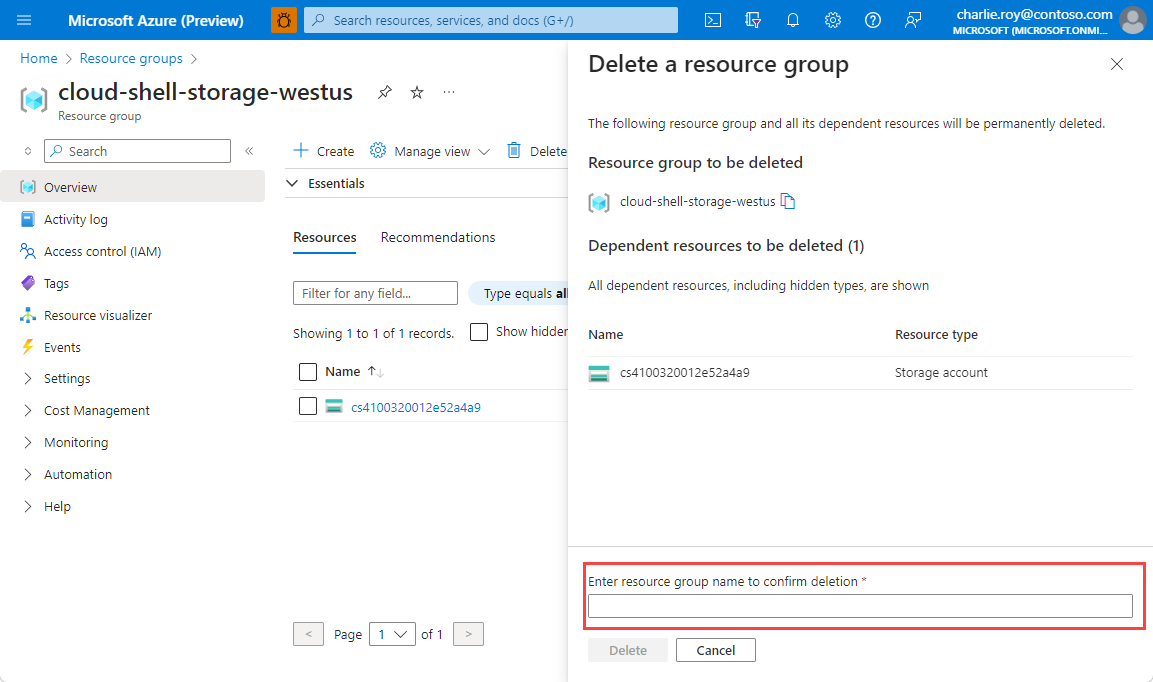
リソース グループの削除の確認を求めるメッセージが表示されます。 確認のためにリソース グループの名前を入力し、[削除] を選択します。
しばらくすると、リソース グループとそのリソースのすべてが削除されます。