このチュートリアルでは、以下の内容を学習します。
- Azure Remote Rendering (ARR) インスタンスをプロビジョニングする
- レンダリング セッションを作成および停止する
- 既存のレンダリング セッションを再利用する
- セッションの接続と切断を行う
- レンダリング セッションにモデルを読み込む
前提条件
このチュートリアルには、次のものが必要です。
- 従量課金制のアクティブな Azure サブスクリプション。アカウントを作成する
- Windows SDK 10.0.18362.0 (ダウンロード)
- 最新バージョンの Visual Studio 2022 (ダウンロード)
- Git (ダウンロード)
- Git LFS プラグイン (ダウンロード)
- Unity (サポートされるバージョンについては、システム要件を参照してください)
- Unity および C# 言語に関する中級レベルの知識 (スクリプトとオブジェクトの作成、プレハブの使用、Unity イベントの構成など)
Azure Remote Rendering (ARR) インスタンスをプロビジョニングする
Azure Remote Rendering サービスにアクセスするには、まずアカウントを作成する必要があります。
新しい Unity プロジェクトを作成する
ヒント
ARR サンプル リポジトリには、すべてのチュートリアルが完了した状態のプロジェクトが含まれています。これはリファレンスとして使用できます。 完全な Unity プロジェクトについては、Unity\Tutorial-Complete を参照してください。
Unity Hub から新しいプロジェクトを作成します。 この例では、RemoteRendering というフォルダーにプロジェクトが作成されることを想定しています。
![[Create a New Unity Project]\(新しい Unity プロジェクトの作成\) ダイアログを示す Unity Hub のスクリーンショット。パネル 3D が選択されています。](media/unity-new-project.png)
Azure Remote Rendering と OpenXR パッケージを含める
Unity プロジェクトに Azure Remote Rendering と OpenXR パッケージを追加する方法に関する手順に従ってください。
Note
OpenXR パッケージをインポートした後で、新しい入力システムに対してネイティブ プラットフォーム バックエンドを有効にするかどうかを確認する Unity の警告ダイアログが表示される場合は、今のところ [いいえ] をクリックします。 それは後のステップで有効にします。
カメラを構成する
[Main Camera](メイン カメラ) ノードを選択します。
[Transform] (変換) コンポーネントを右クリックしてコンテキスト メニューを開き、[Reset] (リセット) オプションを選択します。
![Transform コンポーネントの Unity インスペクターのスクリーンショット。コンテキスト メニューが開き、[リセット] が選択されています。](media/camera-reset-transform.png)
[Clear flags](フラグをクリア) を [Solid Color](単色) に設定します。
[Background](背景) を [Black](黒) (#000000) に設定します (アルファ (A) 値は完全に透明 (0) を使用します)
[クリップ面] を [近] = 0.1 および [遠] = 20 に設定します。 つまりこの設定は、10 cm 未満、または 20 m 以上遠いジオメトリをレンダリングによってクリップされます。

プロジェクトの設定を調整する
[Edit](編集) > [Project Settings](プロジェクトの設定) を開きます。
左側のリスト メニューから [Quality](品質) を選択します
すべてのプラットフォームの [Default Quality Level](既定の品質レベル) を [Low](低) に変更します。 この設定によってローカル コンテンツをより効率的にレンダリングできるようになりますが、リモートでレンダリングされるコンテンツの品質には影響しません。
![[Unity プロジェクトの設定] ダイアログのスクリーンショット。左側の一覧で [品質] エントリが選択されています。既定の品質レベルのコンテキスト メニューが右側に開きます。低いエントリが選択されています。](media/settings-quality.png)
注意
このチュートリアルの範囲では、Unity の組み込みレンダー パイプラインを使用します。 ユニバーサル レンダー パイプラインを使用する場合は、追加のセットアップ手順について、「Unity レンダー パイプライン」を参照してください。
左側のリスト メニューから [XR Plugin Management] (XR プラグイン管理) を選択します
- [Install XR Plugin Management] (XR プラグイン管理のインストール) ボタンをクリックします。
- Windows アイコンとして表示されているユニバーサル Windows プラットフォームの設定タブを選択します。
- [プラグイン プロバイダー] の下の [Open XR] チェックボックスを選択します
- 新しい入力システムでネイティブ プラットフォーム バックエンドを有効にするかどうかを尋ねるダイアログが開いたら、[いいえ] を選択します。
![Unity の [Project Settings] ダイアログのスクリーンショット。左側の一覧で [XR Plug-in Management] エントリが選択されています。右側に Windows ロゴが表示されたタブが強調表示されています。その下の [Open XR] チェックボックスも強調表示されています。](media/xr-plugin-management-settings.png)
Note
[Microsoft HoloLens feature group] (Microsoft HoloLens 機能グループ) が無効になっている場合は、Windows Mixed Reality OpenXR プラグインがプロジェクトにありません。 Azure Remote Rendering と OpenXR パッケージを追加する方法に関する手順に従って、それをインストールしてください。
左側のリスト メニューから [OpenXR] を選択します
- [Depth Submission Mode](深度送信モード) を [Depth 16 Bit](深度 16 ビット) に設定します
- [Microsoft Hand Interaction Profile] (Microsoft ハンド インタラクション プロファイル) を [Interaction Profiles] (インタラクション プロファイル) に設定します。
- 次の OpenXR 機能を有効にします。
- Azure Remote Rendering
- ハンド トラッキング
- Mixed Reality 機能
- モーション コントローラー モデル
![Unity の [Project Settings] ダイアログのスクリーンショット。左側の一覧で [Open XR] サブエントリが選択されています。右側では、[Depth Submission Mode]、[Interaction Profiles]、[Open XR] 機能の設定が強調表示されています。](media/xr-plugin-management-openxr-settings.png)
Note
必要な OpenXR 機能が一覧に表示されていない場合は、Windows Mixed Reality OpenXR プラグインがプロジェクトにありません。 Azure Remote Rendering と OpenXR パッケージを追加する方法に関する手順に従って、それをインストールしてください。
左側のリスト メニューから [Player](プレーヤー) を選択します
- Windows アイコンとして表示されているユニバーサル Windows プラットフォームの設定タブを選択します。
- [Other Settings] (その他の設定) を展開します
- [Rendering] (レンダリング) の下で、[Color Space] (色空間) を [Linear] (線形) に変更し、Unity を再起動するよう求められたら再起動します。
- [Configuration] (構成) の下で、[Active Input Handling] (アクティブな入力処理) を [Both] (両方) に変更し、Unity を再起動するよう求められたら再起動します。
![[Unity プロジェクトの設定] ダイアログのスクリーンショット。左側の一覧で [プレーヤー] エントリが選択されています。右側の強調表示は、Windows ロゴ、色空間設定、および [アクティブな入力処理] 設定を含むタブに配置されます。](media/player-settings-other-settings.png)
- [Publishing Settings] (発行の設定) を展開します
- [Capabilities]\(機能\) まで下へスクロールし、次の項目を選択します。
- InternetClient
- InternetClientServer
- SpatialPerception
- PrivateNetworkClientServer ("省略可能")。 このオプションは、Unity リモート デバッガーをご自身のデバイスに接続する場合に選択します。
- [Supported Device Families] (サポートされるデバイス ファミリ) で、[Holographic] (ホログラフィック) と [Desktop] (デスクトップ) を有効にします。
![[Unity Project Settings] (Unity プロジェクトの設定) ダイアログのスクリーンショット。左側の一覧で [Player] (プレイヤー) エントリが選択されています。右側にある [Capabilities] (機能) と [Supported Device Families] (サポートされているデバイス ファミリ) の設定が強調表示されています。](media/player-settings-publishing-settings.png)
[Project Settings](プロジェクトの設定) パネルを閉じるか、ドッキングします
[File] (ファイル) -> [Build Settings] (ビルドの設定) を開きます
- [Universal Windows Platform](ユニバーサル Windows プラットフォーム) を選択します
- 以下の内容と一致するように設定を構成します
- [Switch Platform] (プラットフォームの切り替え) ボタンを押します。
![Unity の [ビルド設定] ダイアログのスクリーンショット。左側の一覧でユニバーサル Windows プラットフォームのエントリが選択されています。右側の強調表示は、[設定] ドロップダウン ボックスと [プラットフォームの切り替え] ボタンに配置されます。](media/build-settings.png)
Unity でプラットフォームが変更されたら、ビルド パネルを閉じます。
プロジェクトの設定を確認する
次の手順を実行して、プロジェクトの設定が正しいことを確認します。
Unity エディター ツール バーの [RemoteRendering] メニューから [ValidateProject] エントリを選択します。
[Project Validator] ウィンドウでエラーがないかを確認し、必要に応じてプロジェクトの設定を修正します。
![Unity の [Project Validator] ダイアログ。このダイアログには、必要な規則、推奨される規則、および開発規則の一覧が示されており、すべて成功してチェックマークが付けられています。](media/remote-render-unity-validation.png)
Note
プロジェクトで MRTK を使用し、カメラ サブシステムを有効にすると、MRTK によって、カメラに適用した手動による変更が上書きされます。 これには、ValidateProject ツールによる修正が含まれます。
Azure Remote Rendering の接続と状態を調整するスクリプトを作成する
リモートでレンダリングされるモデルを表示するには、4 つの基本的なステージがあります。次のフローチャートにその概要を示します。 各ステージは順番に実行する必要があります。 次の手順では、アプリケーションの状態を管理し、必要な各ステージを進めるスクリプトを作成します。

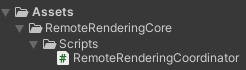
[Project](プロジェクト) ペインの [Assets](アセット) の下に、RemoteRenderingCore という名前の新しいフォルダーを作成します。 次に、RemoteRenderingCore 内に Scripts という名前の別のフォルダーを作成します。
RemoteRenderingCoordinator という名前の新しい C# スクリプトを作成します。 プロジェクトはこのようになります。
このコーディネーター スクリプトは、リモート レンダリングの状態を追跡し、管理します。 このコードの一部は、状態の保持、他のコンポーネントへの機能の公開、イベントのトリガー、および Azure Remote Rendering に "直接には" 関連しないアプリケーション固有のデータの格納に使用されることに注意してください。 このチュートリアルの後の方で、次のコードを出発点として使用し、具体的な Azure Remote Rendering のコードに取り組んで実装します。
コード エディターで RemoteRenderingCoordinator を開き、内容全体を次のコードで置き換えます。
// Copyright (c) Microsoft Corporation. All rights reserved.
// Licensed under the MIT License. See LICENSE in the project root for license information.

using Microsoft.Azure.RemoteRendering;
using Microsoft.Azure.RemoteRendering.Unity;
using System;
using System.Linq;
using System.Threading.Tasks;
using UnityEngine;
using UnityEngine.Events;

#if UNITY_WSA
using UnityEngine.XR.WSA;
#endif

/// <summary>
/// Remote Rendering Coordinator is the controller for all Remote Rendering operations.
/// </summary>

// Require the GameObject with a RemoteRenderingCoordinator to also have the ARRServiceUnity component
[RequireComponent(typeof(ARRServiceUnity))]
public class RemoteRenderingCoordinator : MonoBehaviour
{
    public enum RemoteRenderingState
    {
        NotSet,
        NotInitialized,
        NotAuthorized,
        NoSession,
        ConnectingToExistingRemoteSession,
        ConnectingToNewRemoteSession,
        RemoteSessionReady,
        ConnectingToRuntime,
        RuntimeConnected
    }

    public static RemoteRenderingCoordinator instance;

    // Account
    // RemoteRenderingDomain must be '<region>.mixedreality.azure.com' - if no '<region>' is specified, connections will fail
    // For most people '<region>' is either 'westus2' or 'westeurope'
    [SerializeField]
    private string remoteRenderingDomain = "westus2.mixedreality.azure.com";
    public string RemoteRenderingDomain
    {
        get => remoteRenderingDomain.Trim();
        set => remoteRenderingDomain = value;
    }

    [Header("Development Account Credentials")]
    [SerializeField]
    private string accountDomain = "<enter your account domain here>";
    public string AccountDomain
    {
        get => accountDomain.Trim();
        set => accountDomain = value;
    }

    [SerializeField]
    private string accountId = "<enter your account id here>";
    public string AccountId {
        get => accountId.Trim();
        set => accountId = value;
    }

    [SerializeField]
    private string accountKey = "<enter your account key here>";
    public string AccountKey {
        get => accountKey.Trim();
        set => accountKey = value;
    }

    // These settings are important. All three should be set as low as possible, while maintaining a good user experience
    // See the documentation around session management and the technical differences in session VM size
    [Header("New Session Defaults")]

    public RenderingSessionVmSize renderingSessionVmSize = RenderingSessionVmSize.Standard;
    public uint maxLeaseHours = 0;
    public uint maxLeaseMinutes = 20;

    [Header("Other Configuration")]

    [Tooltip("If you have a known active SessionID, you can fill it in here before connecting")]
    [SerializeField]
    private string sessionIDOverride;
    public string SessionIDOverride {
        get => sessionIDOverride.Trim();
        set => sessionIDOverride = value;
    }

    // When Automatic Mode is true, the coordinator will attempt to automatically proceed through the process of connecting and loading a model
    public bool automaticMode = true;

    public event Action RequestingAuthorization;
    public UnityEvent OnRequestingAuthorization = new UnityEvent();

    public event Action AuthorizedChanged;
    public UnityEvent OnAuthorizationChanged = new UnityEvent();
    private bool authorized;
    public bool Authorized
    {
        get => authorized;
        set
        {
            if (value == true) //This is a one-way value, once we're authorized it lasts until the app is shutdown.
            {
                authorized = value;
                AuthorizedChanged?.Invoke();
            }
        }
    }

    public delegate Task<SessionConfiguration> AccountInfoGetter();

    public static AccountInfoGetter ARRCredentialGetter
    {
        private get;
        set;
    }

    private RemoteRenderingState currentCoordinatorState = RemoteRenderingState.NotSet;
    public RemoteRenderingState CurrentCoordinatorState
    {
        get => currentCoordinatorState;
        private set
        {
            if (currentCoordinatorState != value)
            {
                currentCoordinatorState = value;
                Debug.LogFormat(LogType.Log, LogOption.NoStacktrace, null, "{0}", $"State changed to: {currentCoordinatorState}");
                CoordinatorStateChange?.Invoke(currentCoordinatorState);
            }
        }
    }

    public static event Action<RemoteRenderingState> CoordinatorStateChange;

    public static RenderingSession CurrentSession => instance?.ARRSessionService?.CurrentActiveSession;

    private ARRServiceUnity arrSessionService;

    private ARRServiceUnity ARRSessionService
    {
        get
        {
            if (arrSessionService == null)
                arrSessionService = GetComponent<ARRServiceUnity>();
            return arrSessionService;
        }
    }

    private async Task<SessionConfiguration> GetDevelopmentCredentials()
    {
        Debug.LogWarning("Using development credentials! Not recommended for production.");
        return await Task.FromResult(new SessionConfiguration(AccountDomain, RemoteRenderingDomain, AccountId, AccountKey));
    }

    /// <summary>
    /// Keep the last used SessionID, when launching, connect to this session if its available
    /// </summary>
    private string LastUsedSessionID
    {
        get
        {
            if (!string.IsNullOrEmpty(SessionIDOverride))
                return SessionIDOverride;

            if (PlayerPrefs.HasKey("LastUsedSessionID"))
                return PlayerPrefs.GetString("LastUsedSessionID");
            else
                return null;
        }
        set
        {
            PlayerPrefs.SetString("LastUsedSessionID", value);
        }
    }

    public void Awake()
    {
        //Forward events to Unity events
        RequestingAuthorization += () => OnRequestingAuthorization?.Invoke();
        AuthorizedChanged += () => OnAuthorizationChanged?.Invoke();

        //Attach to event
        AuthorizedChanged += RemoteRenderingCoordinator_AuthorizedChanged;

        if (instance == null)
            instance = this;
        else
            Destroy(this);

        CoordinatorStateChange += AutomaticMode;

        CurrentCoordinatorState = RemoteRenderingState.NotInitialized;
    }

    private void RemoteRenderingCoordinator_AuthorizedChanged()
    {
        if (CurrentCoordinatorState != RemoteRenderingState.NotAuthorized)
            return; //This isn't valid from any other state than NotAuthorized


        //We just became authorized to connect to Azure
        InitializeSessionService();
    }

    /// <summary>
    /// Automatic mode attempts to automatically progress through the connection and loading steps. Doesn't handle error states.
    /// </summary>
    /// <param name="currentState">The current state</param>
    private async void AutomaticMode(RemoteRenderingState currentState)
    {
        if (!automaticMode)
            return;

        //Add a small delay for visual effect
        await Task.Delay(1500);
        switch (currentState)
        {
            case RemoteRenderingState.NotInitialized:
                InitializeARR();
                break;
            case RemoteRenderingState.NotAuthorized:
                RequestAuthorization();
                break;
            case RemoteRenderingState.NoSession:
                JoinRemoteSession();
                break;
            case RemoteRenderingState.RemoteSessionReady:
                ConnectRuntimeToRemoteSession();
                break;
        }
    }

    /// <summary>
    /// Initializes ARR, associating the main camera
    /// Note: This must be called on the main Unity thread
    /// </summary>
    public void InitializeARR()
    {
        //Implement me
    }

    /// <summary>
    /// Create a new remote session manager
    /// If the ARRCredentialGetter is set, use it as it, otherwise use the development credentials
    /// </summary>
    public async void InitializeSessionService()
    {
        //Implement me
    }

    /// <summary>
    /// Trigger the event for checking authorization, respond to this event by prompting the user for authentication
    /// If authorized, set Authorized = true
    /// </summary>
    public void RequestAuthorization()
    {
        RequestingAuthorization?.Invoke();
    }

    public void BypassAuthorization()
    {
        Authorized = true;
    }

    /// <summary>
    /// Attempts to join an existing session or start a new session
    /// </summary>
    public async void JoinRemoteSession()
    {
        //Implement me
    }

    public async void StopRemoteSession()
    {
        //Implement me
    }

    private async Task<bool> IsSessionAvailable(string sessionID)
    {
        bool sessionAvailable = false;
        try
        {
            RenderingSessionPropertiesArrayResult result = await ARRSessionService.Client.GetCurrentRenderingSessionsAsync();
            if (result.ErrorCode == Result.Success)
            {
                RenderingSessionProperties[] properties = result.SessionProperties;
                if (properties != null)
                {
                    sessionAvailable = properties.Any(x => x.Id == sessionID && (x.Status == RenderingSessionStatus.Ready || x.Status == RenderingSessionStatus.Starting));
                }
            }
            else
            {
                Debug.LogError($"Failed to get current rendering sessions. Error: {result.Context.ErrorMessage}");
            }
        }
        catch (RRException ex)
        {
            Debug.LogError($"Failed to get current rendering sessions. Error: {ex.Message}");
        }
        return sessionAvailable;
    }

    /// <summary>
    /// Connects the local runtime to the current active session, if there's a session available
    /// </summary>
    public async void ConnectRuntimeToRemoteSession()
    {
        //Implement me
    }

    public void DisconnectRuntimeFromRemoteSession()
    {
        //Implement me
    }

    /// <summary>
    /// The session must have its runtime pump updated.
    /// The Connection.Update() will push messages to the server, receive messages, and update the frame-buffer with the remotely rendered content.
    /// </summary>
    private void LateUpdate()
    {
        ARRSessionService?.CurrentActiveSession?.Connection?.Update();
    }

    /// <summary>
    /// Loads a model into the remote session for rendering
    /// </summary>
    /// <param name="modelPath">The model's path</param>
    /// <param name="progress">A call back method that accepts a float progress value [0->1]</param>
    /// <param name="parent">The parent Transform for this remote entity</param>
    /// <returns>An awaitable Remote Rendering Entity</returns>
    public async Task<Entity> LoadModel(string modelPath, UnityEngine.Transform parent = null, Action<float> progress = null)
    {
        //Implement me
        return null;
    }

    private async void OnRemoteSessionStatusChanged(ARRServiceUnity caller, RenderingSession session)
    {
        var properties = await session.GetPropertiesAsync();

        switch (properties.SessionProperties.Status)
        {
            case RenderingSessionStatus.Error:
            case RenderingSessionStatus.Expired:
            case RenderingSessionStatus.Stopped:
            case RenderingSessionStatus.Unknown:
                CurrentCoordinatorState = RemoteRenderingState.NoSession;
                break;
            case RenderingSessionStatus.Starting:
                CurrentCoordinatorState = RemoteRenderingState.ConnectingToNewRemoteSession;
                break;
            case RenderingSessionStatus.Ready:
                CurrentCoordinatorState = RemoteRenderingState.RemoteSessionReady;
                break;
        }
    }

    private void OnLocalRuntimeStatusChanged(ConnectionStatus status, Result error)
    {
        switch (status)
        {
            case ConnectionStatus.Connected:
                CurrentCoordinatorState = RemoteRenderingState.RuntimeConnected;
                break;
            case ConnectionStatus.Connecting:
                CurrentCoordinatorState = RemoteRenderingState.ConnectingToRuntime;
                break;
            case ConnectionStatus.Disconnected:
                CurrentCoordinatorState = RemoteRenderingState.RemoteSessionReady;
                break;
        }
    }
}
Azure Remote Rendering の GameObject を作成する
リモート レンダリング コーディネーターとこれに必要なスクリプト (ARRServiceUnity) はどちらも、シーン内の GameObject にアタッチする必要がある MonoBehaviours です。 ARRServiceUnity スクリプトは、リモート セッションに接続して管理するための ARR の機能の多くを公開する目的で、ARR によって提供されています。
- シーンに新しい GameObject を作成し (Ctrl + Shift + N キーを押すか、[GameObject]->[Create Empty] (空の作成) の順に選択)、それに RemoteRenderingCoordinator という名前を付けます。
- RemoteRenderingCoordinator スクリプトを RemoteRenderingCoordinator GameObject に追加します。
![Unity の [コンポーネントの追加] ダイアログのスクリーンショット。検索テキスト フィールドには、RemoteRenderingCoordinator というテキストが含まれています。](media/add-coordinator-script.png)
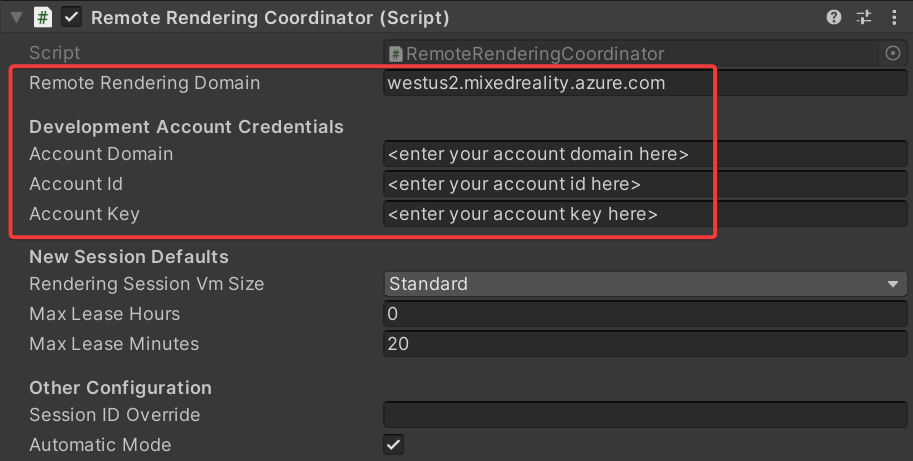
- インスペクターで "サービス" として表示される ARRServiceUnity スクリプトが、自動的に GameObject に追加されていることを確認します。 判然としない場合は、RemoteRenderingCoordinator スクリプトの先頭に
[RequireComponent(typeof(ARRServiceUnity))]が含まれていることを確認してください。 - Azure Remote Rendering の資格情報、アカウント ドメイン、リモート レンダリング ドメインをコーディネーター スクリプトに追加します。
Azure Remote Rendering を初期化する
コーディネーターのフレームワークが用意されたので、4 つの各ステージのうち、Remote Rendering の初期化から実装を始めていきます。

初期化によって、どのカメラ オブジェクトをレンダリングに使用するかが Azure Remote Rendering に伝えられ、状態機械が NotAuthorized に進みます。 この状態では、初期化されていても、セッションに接続する権限はまだありません。 ARR セッションを開始するとコストが発生するため、続行するかどうかをユーザーに確認する必要があります。
NotAuthorized 状態に入ると、CheckAuthorization が呼び出されます。これにより、RequestingAuthorization イベントが呼び出され、どのアカウントの資格情報を使用するかが決定されます (AccountInfo はクラスの先頭付近で定義されており、上記の手順で Unity インスペクターを介して定義した資格情報が使用されます)。
Note
ARR では、実行時の再コンパイルはサポートされていません。 再生モードがアクティブになっているときにスクリプトを変更して保存すると、Unity がフリーズして、タスク マネージャーを使用したシャットダウンを余儀なくされることがあります。 スクリプトを編集する前に、必ず再生モードを停止するようにしてください。
InitializeARR と InitializeSessionService の内容を、次の完成したコードで置き換えます。
/// <summary>
/// Initializes ARR, associating the main camera
/// Note: This must be called on the main Unity thread
/// </summary>
public void InitializeARR()
{
    RemoteManagerUnity.InitializeManager(new RemoteUnityClientInit  (Camera.main));

    CurrentCoordinatorState = RemoteRenderingState.NotAuthorized;
}

/// <summary>
/// Create a new remote session manager
/// If the ARRCredentialGetter is set, use it as it, otherwise use  the development credentials
/// </summary>
public async void InitializeSessionService()
{
    if (ARRCredentialGetter == null)
        ARRCredentialGetter = GetDevelopmentCredentials;

    var sessionConfiguration = await ARRCredentialGetter.Invoke();

    ARRSessionService.OnSessionStatusChanged +=     OnRemoteSessionStatusChanged;

    try
    {
        ARRSessionService.Initialize(sessionConfiguration);
    }
    catch (ArgumentException argumentException)
    {
        Debug.LogError(argumentException.Message);
        CurrentCoordinatorState = RemoteRenderingState. NotAuthorized;
        return;
    }

    CurrentCoordinatorState = RemoteRenderingState.NoSession;
}
通常、NotAuthorized から NoSession に進む際は、モーダル ダイアログを表示して、ユーザーが選択できるようにします (これは別の章で行います)。 ここでは、RequestingAuthorization イベントがトリガーされると、すぐに ByPassAuthentication を呼び出すことによって、承認チェックを自動的にバイパスします。
RemoteRenderingCoordinator GameObject を選択し、RemoteRenderingCoordinator コンポーネントのインスペクターで公開されている OnRequestingAuthorization Unity イベントを見つけます。
右下にある [+] を押して、新しいイベントを追加します。
コンポーネントを独自のイベントにドラッグして、それ自体を参照するようにします。
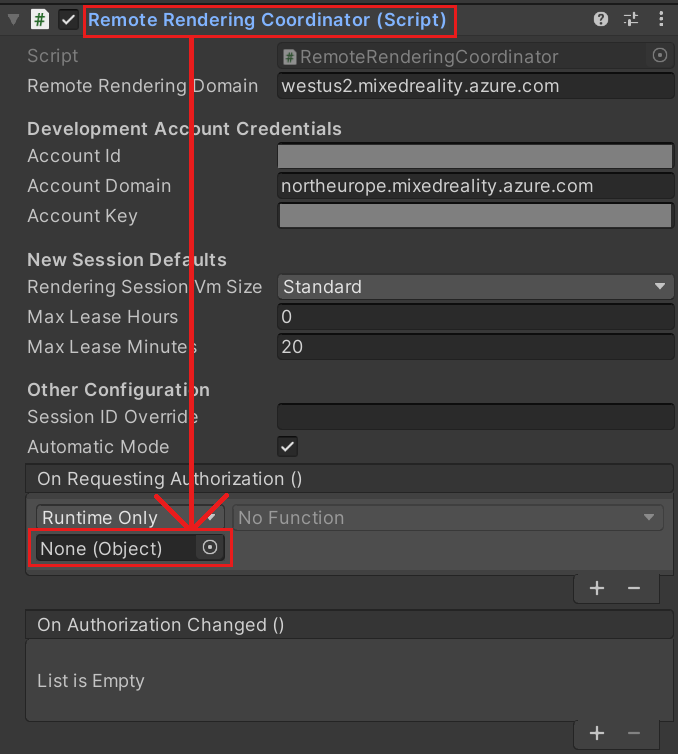
ドロップダウンで [RemoteRenderingCoordinator] > [BypassAuthorization] の順に選択します。

リモート セッションの作成または参加を行う
2 番目のステージでは、Remote Rendering セッションを作成するか、またはセッションに参加します (セッションのレンダリングの詳細については、「Remote Rendering のセッション」を参照してください)。

リモート セッションは、モデルがレンダリングされる場所です。 JoinRemoteSession( ) メソッドは、 LastUsedSessionID プロパティを使用して追跡されるか、SessionIDOverride にアクティブなセッション ID が割り当てられている場合に、既存のセッションへの参加を試行します。 SessionIDOverride はデバッグのみを目的としたものであり、セッションが存在することがわかっていて、そこに明示的に接続する必要がある場合だけ使用してください。
使用可能なセッションがない場合は、新しいセッションが作成されます。 ただし、新しいセッションの作成は時間のかかる操作です。 したがって、必要な場合にのみセッションを作成し、できる限り再利用するようにする必要があります (セッション管理の詳細については、商用対応のセッション プール、スケジュール、およびベスト プラクティスに関するページをご覧ください)。
ヒント
StopRemoteSession() を使用すると、アクティブなセッションを終了できます。 余計な料金の発生を避けるために、不要になったセッションは必ず停止してください。
これで、使用可能なセッションに応じて、状態機械が ConnectingToNewRemoteSession または ConnectingToExistingRemoteSession に進みます。 既存のセッションを開いた場合も、新しいセッションを作成した場合も、ARRSessionService.OnSessionStatusChanged イベントがトリガーされ、OnRemoteSessionStatusChanged メソッドが実行されます。 結果として状態機械が RemoteSessionReady に進むのが理想的です。
- 新しいセッションに参加するには、コードを変更して、JoinRemoteSession() および StopRemoteSession() メソッドを完成した次のコードで置き換えます。
/// <summary>
/// Attempts to join an existing session or start a new session
/// </summary>
public async void JoinRemoteSession()
{
    //If there's a session available that previously belonged to us, and it's ready, use it. Otherwise start a new session.
    RenderingSessionProperties joinResult;
    if (await IsSessionAvailable(LastUsedSessionID))
    {
        CurrentCoordinatorState = RemoteRenderingState.ConnectingToExistingRemoteSession;
        joinResult = await ARRSessionService.OpenSession(LastUsedSessionID);
    }
    else
    {
        CurrentCoordinatorState = RemoteRenderingState.ConnectingToNewRemoteSession;
        joinResult = await ARRSessionService.StartSession(new RenderingSessionCreationOptions(renderingSessionVmSize, (int)maxLeaseHours, (int)maxLeaseMinutes));
    }

    if (joinResult.Status == RenderingSessionStatus.Ready || joinResult.Status == RenderingSessionStatus.Starting)
    {
        LastUsedSessionID = joinResult.Id;
    }
    else
    {
        //The session should be ready or starting, if it's not, something went wrong
        await ARRSessionService.StopSession();
        if(LastUsedSessionID == SessionIDOverride)
            SessionIDOverride = "";
        CurrentCoordinatorState = RemoteRenderingState.NoSession;
    }
}

public async void StopRemoteSession()
{
    if (ARRSessionService.CurrentActiveSession != null)
    {
        await ARRSessionService.CurrentActiveSession.StopAsync();
    }
}
セッションを再利用することによって時間を節約する場合は、ARRServiceUnity コンポーネントで [Auto-Stop Session](セッションの自動停止) オプションを必ず非アクティブ化してください。 これにより、接続しているユーザーがいない場合でも、セッションは実行したままになることに注意してください。 セッションは、MaxLeaseTime が経過してサーバーによってシャットダウンされるまで実行される可能性があります (MaxLeaseTime の値は、Remote Rendering コーディネーターの [New Session Defaults](新しいセッションの既定値) で変更できます)。 一方、切断時にすべてのセッションを自動的にシャットダウンする場合は、毎回新しいセッションが開始されるまで待機する必要があります。このプロセスには時間がかかることがあります。
Note
セッションの停止は直ちに実行され、取り消すことはできません。 定義した後は、同じ起動オーバーヘッドで新しいセッションを作成する必要があります。
ローカル ランタイムをリモート セッションに接続する
次に、アプリケーションは、そのローカル ランタイムをリモート セッションに接続する必要があります。

また、アプリケーションは、ランタイムと現在のセッションの間の接続に関するイベントをリッスンする必要があります。これらの状態の変化は OnLocalRuntimeStatusChanged で処理されます。 このコードによって、状態が ConnectingToRuntime に進みます。 OnLocalRuntimeStatusChanged で接続が完了すると、状態は RuntimeConnected に進みます。 ランタイムへの接続は、コーディネーターが関与する最後の状態です。つまり、これでアプリケーションでの一般的な構成がすべて完了し、モデルの読み込みとレンダリングというセッション固有の処理を開始する準備が整ったことになります。
- ConnectRuntimeToRemoteSession() および DisconnectRuntimeFromRemoteSession() メソッドを、次の完成版で置き換えます。
- Unity メソッド LateUpdate をメモし、これによって現在のアクティブなセッションが更新されていることを確認することが重要です。 これにより、現在のセッションでメッセージを送受信し、リモート セッションから受信したフレームを使用してフレーム バッファーを更新できます。 これは ARR が正常に機能するうえで非常に重要です。
/// <summary>
/// Connects the local runtime to the current active session, if there's a session available
/// </summary>
public async void ConnectRuntimeToRemoteSession()
{
    if (ARRSessionService == null || ARRSessionService.CurrentActiveSession == null)
    {
        Debug.LogError("Not ready to connect runtime");
        return;
    }

    // Connect the local runtime to the currently connected session
    // This session is set when connecting to a new or existing session

    ARRSessionService.CurrentActiveSession.ConnectionStatusChanged += OnLocalRuntimeStatusChanged;
    await ARRSessionService.CurrentActiveSession.ConnectAsync(new RendererInitOptions());
}

public void DisconnectRuntimeFromRemoteSession()
{
    if (ARRSessionService == null || ARRSessionService.CurrentActiveSession == null || ARRSessionService.CurrentActiveSession.ConnectionStatus != ConnectionStatus.Connected)
    {
        Debug.LogError("Runtime not connected!");
        return;
    }

    ARRSessionService.CurrentActiveSession.Disconnect();
    ARRSessionService.CurrentActiveSession.ConnectionStatusChanged -= OnLocalRuntimeStatusChanged;
    CurrentCoordinatorState = RemoteRenderingState.RemoteSessionReady;
}
Note
ローカル ランタイムをリモート セッションに接続できるかどうかは、現在アクティブなセッションで Update が呼び出されているかどうかで決まります。 アプリケーションが ConnectingToRuntime 状態よりも先に進まない場合は、アクティブなセッションで Update を定期的に呼び出していることを確認してください。
モデルを読み込む
必要な基盤が整ったら、モデルをリモート セッションに読み込んで、フレームの受信を開始する準備ができています。

LoadModel メソッドは、モデル パス、進行状況ハンドラー、および親変換を受け入れるように設計されています。 これらの引数を使用して、リモート セッションにモデルを読み込み、読み込みの進行状況に応じてユーザーを更新し、親変換に基づいてリモートでレンダリングされるモデルの向きを指定します。
LoadModel メソッド全体を次のコードで置き換えます。
/// <summary>
/// Loads a model into the remote session for rendering
/// </summary>
/// <param name="modelName">The model's path</param>
/// <param name="parent">The parent Transform for this remote entity</param>
/// <param name="progress">A call back method that accepts a float progress value [0->1]</param>
/// <returns>An awaitable Remote Rendering Entity</returns>
public async Task<Entity> LoadModel(string modelPath, UnityEngine.Transform parent = null, Action<float> progress = null)
{
    //Create a root object to parent a loaded model to
    var modelEntity = ARRSessionService.CurrentActiveSession.Connection.CreateEntity();

    //Get the game object representation of this entity
    var modelGameObject = modelEntity.GetOrCreateGameObject(UnityCreationMode.DoNotCreateUnityComponents);

    //Ensure the entity will sync its transform with the server
    var sync = modelGameObject.GetComponent<RemoteEntitySyncObject>();
    sync.SyncEveryFrame = true;

    //Parent the new object under the defined parent
    if (parent != null)
    {
        modelGameObject.transform.SetParent(parent, false);
        modelGameObject.name = parent.name + "_Entity";
    }

    //Load a model that will be parented to the entity
    var loadModelParams = new LoadModelFromSasOptions(modelPath, modelEntity);
    var loadModelAsync = ARRSessionService.CurrentActiveSession.Connection.LoadModelFromSasAsync(loadModelParams, progress);
    var result = await loadModelAsync;
    return modelEntity;
}
上記のコードでは、次の手順を実行しています。
- リモート エンティティを作成します。
- リモート エンティティを表すローカル GameObject を作成します。
- ローカル GameObject を構成して、その状態 (すなわち変換) を、リモート エンティティのすべてのフレームに同期させます。
- Blob Storage からリモート エンティティにモデル データを読み込みます。
- 後で参照できるように、親エンティティを返します。
テスト モデルを表示する
これで、リモートでレンダリングされるモデルを表示するために必要なすべてのコードが用意され、リモート レンダリングに必要な 4 つのステージがすべて完了しました。 次に、モデルの読み込みプロセスを開始するための小さなコードを追加する必要があります。

次のコードを RemoteRenderingCoordinator クラスの LoadModel メソッドのすぐ下に追加します。
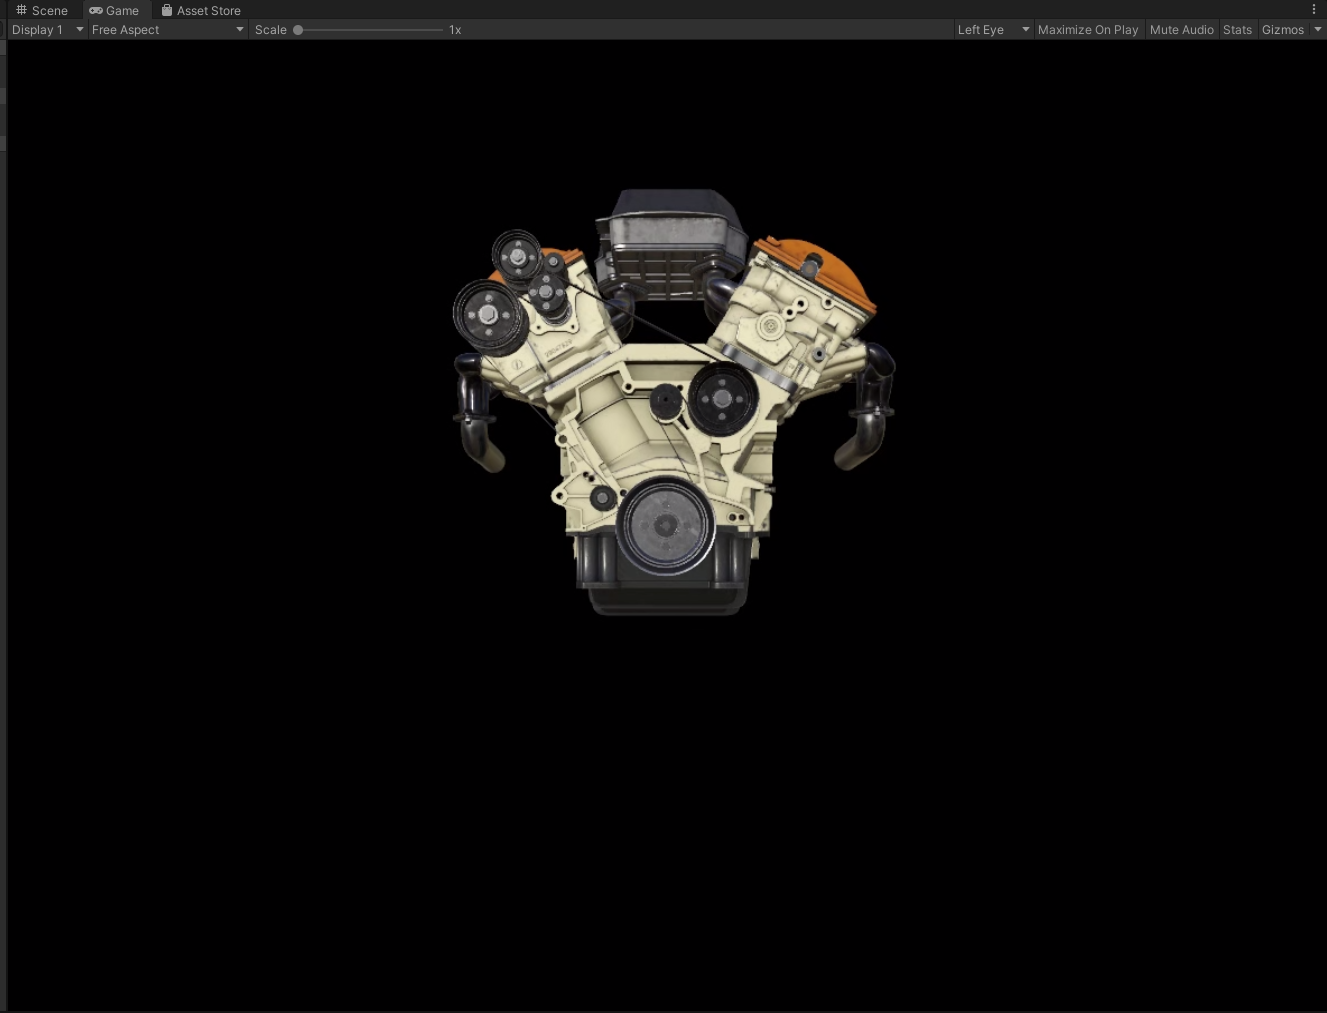
private bool loadingTestModel = false;
[ContextMenu("Load Test Model")]
public async void LoadTestModel()
{
    if(CurrentCoordinatorState != RemoteRenderingState.RuntimeConnected)
    {
        Debug.LogError("Please wait for the runtime to connect before loading the test model. Try again later.");
        return;
    }
    if(loadingTestModel)
    {
        Debug.Log("Test model already loading or loaded!");
        return;
    }
    loadingTestModel = true;

    // Create a parent object to use for positioning
    GameObject testParent = new GameObject("TestModelParent");
    testParent.transform.position = new Vector3(0f, 0f, 3f);

    // The 'built in engine path' is a special path that references a test model built into Azure Remote Rendering.
    await LoadModel("builtin://Engine", testParent.transform, (progressValue) => Debug.Log($"Loading Test Model progress: {Math.Round(progressValue * 100, 2)}%"));
}
このコードは、テスト モデルの親として機能する GameObject を作成します。 次に、これは LoadModel メソッドを呼び出して、"builtin://Engine" モデルを読み込みます。これは、レンダリングをテストする目的で Azure Remote Rendering に組み込まれているアセットです。
コードを保存します。
Unity エディターの [Play](再生) ボタンを押し、Azure Remote Rendering に接続して新しいセッションを作成するプロセスを開始します。
[ゲーム] ビューにはあまり表示されませんが、コンソールにはアプリケーションの状態が変化するのが表示されます。 多くの場合、
ConnectingToNewRemoteSessionまで進行し、そこで最大 5 分間とどまる可能性があります。RemoteRenderingCoordinator GameObject を選択して、インスペクターにアタッチされているスクリプトを表示します。 初期化と接続の手順が進むに従って、Service コンポーネントが更新されていくのを確認します。
コンソール出力を監視します。状態が RuntimeConnected に変更されるまで待機します。
ランタイムに接続できたら、インスペクターの RemoteRenderingCoordinator を右クリックして、コンテキスト メニューを表示します。 次に、上記コードの
[ContextMenu("Load Test Model")]部分で追加された、コンテキスト メニューの [テスト モデルの読み込み] オプションを選択します。![Remote Rendering コーディネーター スクリプトの Unity インスペクターのスクリーンショット。強調表示では、最初にタイトル バーを右クリックし、コンテキスト メニューから [ロード テスト モデル] を選択するように指示されています。](media/load-test-model.png)
コンソールで、LoadModel メソッドに渡した ProgressHandler の出力を確認します。
リモートでレンダリングされているモデルを表示します。
Note
リモート モデルは、[Scene](シーン) ビューには表示されません。[Game](ゲーム) ビューにのみ表示されます。 これは、ARR が [Game](ゲーム) ビュー カメラのパースペクティブ専用にリモートでフレームをレンダリングしていて、([Scene](シーン) ビューのレンダリングに使用される) エディター カメラを認識しないためです。
次のステップ
お疲れさまでした。 Azure Remote Rendering を使用して、リモートでレンダリングされるモデルを表示するという基本的なアプリケーション機能を作成しました。 次のチュートリアルでは、MRTK を統合し、独自のモデルをインポートします。