データ バインディングと MVVM
 サンプルを参照する
Model-View-ViewModel (MVVM) パターンでは、XAML ユーザー インターフェイス (ビュー)、基になるデータ (モデル)、ビューとモデル間の仲介 (ビューモデル) という 3 つのソフトウェア レイヤー間の分離が強制されます。 ビューとビューモデルは、多くの場合、XAML で定義されているデータ バインディングを介して接続されます。 ビューの BindingContext は通常、ビューモデルのインスタンスです。
重要
.NET マルチプラットフォーム アプリ UI (.NET MAUI) は、UI スレッドへのバインドの更新をマーシャリングします。 MVVM を使用すると、.NET MAUI のバインド エンジンによって UI スレッドに更新が適用され、データ バインド ビューモデル プロパティを任意のスレッドから更新できます。
MVVM パターンを実装するには複数の方法があり、この記事では単純なアプローチに焦点を当てています。 ビューとビューモデルを使用しますが、モデルは使用せず、2 つのレイヤー間のデータ バインディングに焦点を当てます。 .NET MAUI で MVVM パターンを使用する方法の詳細については、「.NET MAUI を使用したエンタープライズ アプリケーション パターン」の「Model-View-ViewModel (MVVM)」を参照してください。 MVVM パターンの実装に役立つチュートリアルについては、「MVVM の概念を使用してアプリをアップグレードする」を参照してください。
単純な MVVM
XAML マークアップ拡張機能では、XAML ファイルが他のアセンブリ内のクラスを参照できるように、新しい XML 名前空間宣言を定義する方法について説明しました。 次の例では、x:Static マークアップ拡張機能を使用して、System 名前空間の静的 DateTime.Now プロパティから現在の日付と時刻を取得します。
<ContentPage xmlns="http://schemas.microsoft.com/dotnet/2021/maui"
             xmlns:x="http://schemas.microsoft.com/winfx/2009/xaml"
             xmlns:sys="clr-namespace:System;assembly=netstandard"
             x:Class="XamlSamples.OneShotDateTimePage"
             Title="One-Shot DateTime Page">

    <VerticalStackLayout BindingContext="{x:Static sys:DateTime.Now}"
                         Spacing="25" Padding="30,0"
                         VerticalOptions="Center" HorizontalOptions="Center">

        <Label Text="{Binding Year, StringFormat='The year is {0}'}" />
        <Label Text="{Binding StringFormat='The month is {0:MMMM}'}" />
        <Label Text="{Binding Day, StringFormat='The day is {0}'}" />
        <Label Text="{Binding StringFormat='The time is {0:T}'}" />

    </VerticalStackLayout>

</ContentPage>
この例では、取得した DateTime 値は StackLayout の BindingContext として設定されます。 要素に BindingContext を設定すると、その要素のすべての子によって継承されます。 これは、BindingContext のすべての子に同じ StackLayout があり、そのオブジェクトのプロパティへのバインドを含むことができることを意味します。
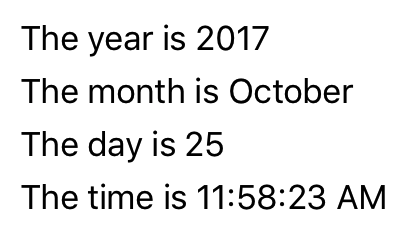
ただし、問題は、ページが構築および初期化されるときに日付と時刻が 1 回設定され、変更されないということです。
警告
BindableObject から派生するクラスでは、BindableProperty 型のプロパティのみがバインド可能です。 たとえば、VisualElement.IsLoaded と Element.Parent はバインドできません。
XAML ページでは、常に現在の時刻を表示するクロックを表示できますが、追加のコードが必要です。 MVVM パターンは、ビジュアル オブジェクトと基になるデータの間のプロパティからのデータ バインディングの場合、.NET MAUI アプリにとって自然な選択肢です。 MVVM の観点から考えると、モデルとビューモデルは完全にコードで記述されたクラスです。 ビューは、多くの場合、データ バインディングを介してビューモデルで定義されたプロパティを参照する XAML ファイルです。 MVVM では、モデルはビューモデルを認識せず、ビューモデルはビューを認識しません。 ただし、多くの場合、ビューモデルによって公開される型を、UI に関連付けられている型に合わせて調整します。
注
ここに示すような MVVM の単純な例では、多くの場合、モデルがまったくなく、パターンにはデータ バインディングとリンクされたビューとビューモデルだけが含まれます。
次の例は、1 秒ごとに更新される DateTime という名前の 1 つのプロパティがある、クロックのビューモデルを示しています。
using System.ComponentModel;
using System.Runtime.CompilerServices;

namespace XamlSamples;

class ClockViewModel: INotifyPropertyChanged
{
    public event PropertyChangedEventHandler PropertyChanged;

    private DateTime _dateTime;
    private Timer _timer;

    public DateTime DateTime
    {
        get => _dateTime;
        set
        {
            if (_dateTime != value)
            {
                _dateTime = value;
                OnPropertyChanged(); // reports this property
            }
        }
    }

    public ClockViewModel()
    {
        this.DateTime = DateTime.Now;

        // Update the DateTime property every second.
        _timer = new Timer(new TimerCallback((s) => this.DateTime = DateTime.Now),
                           null, TimeSpan.Zero, TimeSpan.FromSeconds(1));
    }

    ~ClockViewModel() =>
        _timer.Dispose();

    public void OnPropertyChanged([CallerMemberName] string name = "") =>
        PropertyChanged?.Invoke(this, new PropertyChangedEventArgs(name));
}
通常、ビューモデルは INotifyPropertyChanged インターフェイスを実装します。このインターフェイスを使用すると、クラスのプロパティのいずれかが変更されるたびに PropertyChanged イベントを発生させる機能が提供されます。 .NET MAUI のデータ バインディング メカニズムは、ハンドラーをこの PropertyChanged イベントにアタッチして、プロパティが変更されたときに通知を受け取り、ターゲットを新しい値で更新し続けることができます。 前のコード例では、OnPropertyChanged メソッドはイベントの発生を処理しながら、プロパティソース名 DateTime を自動的に決定します。
次の例は、ClockViewModel を使用する XAML を示しています。
<ContentPage xmlns="http://schemas.microsoft.com/dotnet/2021/maui"
xmlns:x="http://schemas.microsoft.com/winfx/2009/xaml"
xmlns:local="clr-namespace:XamlSamples"
x:Class="XamlSamples.ClockPage"
Title="Clock Page">
<ContentPage.BindingContext>
<local:ClockViewModel />
</ContentPage.BindingContext>
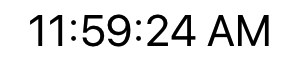
<Label Text="{Binding DateTime, StringFormat='{0:T}'}"
FontSize="18"
HorizontalOptions="Center"
VerticalOptions="Center" />
</ContentPage>
この例では、ClockViewModel はプロパティ要素タグを使って ContentPage の BindingContext に設定されます。 または、分離コード ファイルでビューモデルをインスタンス化することもできます。
Label の Text プロパティの Binding マークアップ拡張機能によって、DateTime のプロパティを書式設定できます。 次のスクリーンショットは、結果を示しています。
さらに、プロパティをピリオドで区切ることで、ビューモデルの DateTime プロパティの個々のプロパティにアクセスできます。
<Label Text="{Binding DateTime.Second, StringFormat='{0}'}" … >
対話的な MVVM
MVVM は、多くの場合、基になるデータ モデルに基づく対話型ビューの双方向データ バインディングで使用されます。
次の例は、Color 値を Hue、Saturation、Luminosity の値に変換し、再度変換する HslViewModel を示しています。
using System.ComponentModel;
using System.Runtime.CompilerServices;

namespace XamlSamples;

class HslViewModel: INotifyPropertyChanged
{
    public event PropertyChangedEventHandler PropertyChanged;

    private float _hue, _saturation, _luminosity;
    private Color _color;

    public float Hue
    {
        get => _hue;
        set
        {
            if (_hue != value)
                Color = Color.FromHsla(value, _saturation, _luminosity);
        }
    }

    public float Saturation
    {
        get => _saturation;
        set
        {
            if (_saturation != value)
                Color = Color.FromHsla(_hue, value, _luminosity);
        }
    }

    public float Luminosity
    {
        get => _luminosity;
        set
        {
            if (_luminosity != value)
                Color = Color.FromHsla(_hue, _saturation, value);
        }
    }

    public Color Color
    {
        get => _color;
        set
        {
            if (_color != value)
            {
                _color = value;
                _hue = _color.GetHue();
                _saturation = _color.GetSaturation();
                _luminosity = _color.GetLuminosity();

                OnPropertyChanged("Hue");
                OnPropertyChanged("Saturation");
                OnPropertyChanged("Luminosity");
                OnPropertyChanged(); // reports this property
            }
        }
    }

    public void OnPropertyChanged([CallerMemberName] string name = "") =>
        PropertyChanged?.Invoke(this, new PropertyChangedEventArgs(name));
}
この例では、Hue、Saturation、Luminosity プロパティを変更すると Color プロパティが変更され、Color プロパティを変更すると他の 3 つのプロパティが変更されます。 プロパティが変更されない限り、ビューモデルが PropertyChanged イベントを呼び出さない点を除いて、これは無限ループのように見える場合があります。
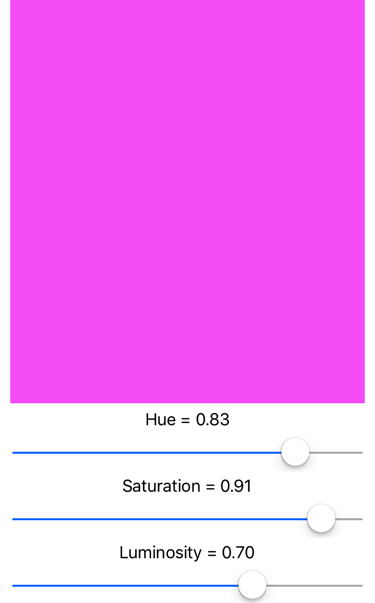
次の XAML の例では、ビューモデルの Color プロパティに Color プロパティがバインドされた BoxView と、Hue、Saturation、Luminosity プロパティにバインドされた 3 つの Slider と 3 つの Label ビューが含まれています。
<ContentPage xmlns="http://schemas.microsoft.com/dotnet/2021/maui"
             xmlns:x="http://schemas.microsoft.com/winfx/2009/xaml"
             xmlns:local="clr-namespace:XamlSamples"
             x:Class="XamlSamples.HslColorScrollPage"
             Title="HSL Color Scroll Page">
    <ContentPage.BindingContext>
        <local:HslViewModel Color="Aqua" />
    </ContentPage.BindingContext>

    <VerticalStackLayout Padding="10, 0, 10, 30">
        <BoxView Color="{Binding Color}"
                 HeightRequest="100"
                 WidthRequest="100"
                 HorizontalOptions="Center" />
        <Label Text="{Binding Hue, StringFormat='Hue = {0:F2}'}"
               HorizontalOptions="Center" />
        <Slider Value="{Binding Hue}"
                Margin="20,0,20,0" />
        <Label Text="{Binding Saturation, StringFormat='Saturation = {0:F2}'}"
               HorizontalOptions="Center" />
        <Slider Value="{Binding Saturation}"
                Margin="20,0,20,0" />
        <Label Text="{Binding Luminosity, StringFormat='Luminosity = {0:F2}'}"
               HorizontalOptions="Center" />
        <Slider Value="{Binding Luminosity}"
                Margin="20,0,20,0" />
    </VerticalStackLayout>
</ContentPage>
それぞれの Label のバインドは、既定の OneWay です。 値を表示するだけで済みます。 ただし、それぞれの Slider の既定のバインドは TwoWay です。 これにより、ビューモデルから Slider を初期化できます。 ビューモデルがインスタンス化されると、その Color プロパティは Aqua に設定されます。 Slider の変更により、ビューモデル内のプロパティの新しい値が設定され、新しい色が計算されます。
コマンド実行
アプリには、プロパティのバインディングを超えて、ユーザーにビューモデルに何らかの影響を与えるコマンドを開始させることが必要な場合があります。 通常、このようなコマンドはボタンのクリックや指のタップによって通知され、従来は、Button の Clicked のイベントまたは TapGestureRecognizer の Tapped イベントに対するハンドラーの分離コード ファイル内で処理されます。
コマンド実行インターフェイスでは、MVVM アーキテクチャにいっそうよく適した代わりのコマンド実装方法が提供されます。 ビューモデル自体にコマンドを含めることができます。その場合のコマンドは、Button クリックのようなビュー内の特定のアクティビティに対応して実行されるメソッドです。 データ バインディングは、これらのコマンドと Button の間で定義されます。
Button とビューモデル間のデータ バインディングを可能にするには、Button で 2 つのプロパティを定義します。
Command(System.Windows.Input.ICommand型)CommandParameter(Object型)
注
他の多くのコントロールも Command と CommandParameter プロパティを定義します。
ICommand インターフェイスは、System.Windows.Input 名前空間内で定義されており、2 つのメソッドと 1 つのイベントで構成されます。
void Execute(object arg)bool CanExecute(object arg)event EventHandler CanExecuteChanged
ビューモデルでは、型 ICommand のプロパティを定義できます。 その後、これらのプロパティを各 Button の Command プロパティ、または他の要素のプロパティ、またはこのインターフェイスを実装するカスタム ビューにバインドできます。 必要に応じて、このビューモデル プロパティにバインドされている個々の Button オブジェクト (または他の要素) を識別するように CommandParameter プロパティを設定できます。 内部的には、Button はユーザーが Button をタップするたびに Execute メソッドを呼び出し、Execute メソッドに CommandParameter を渡します。
CanExecute メソッドと CanExecuteChanged イベントは、Button タップが現在無効かもしれない場合に使用されます、その場合、Button はそれ自体を無効にする必要があります。 Buttonは、Command プロパティが最初に設定されたときと、CanExecuteChanged イベントが発生したときに、CanExecute を呼び出します。 CanExecute が false を返した場合、Button はそれ自体を無効にし、Execute 呼び出しを発生させません。
.NET MAUI に含まれている Command クラスまたは Command<T> クラスを使用して、ICommand インターフェイスを実装できます。 これらの 2 つのクラスは、いくつかのコンストラクタと、Command オブジェクトに CanExecuteChanged イベントを発生させるためにビューモデルが呼び出す ChangeCanExecute メソッドを定義します。
次の例は、電話番号の入力を目的とした単純なキーパッドのビューモデルを示しています。
using System.ComponentModel;
using System.Runtime.CompilerServices;
using System.Windows.Input;

namespace XamlSamples;

class KeypadViewModel: INotifyPropertyChanged
{
    public event PropertyChangedEventHandler PropertyChanged;

    private string _inputString = "";
    private string _displayText = "";
    private char[] _specialChars = { '*', '#' };

    public ICommand AddCharCommand { get; private set; }
    public ICommand DeleteCharCommand { get; private set; }

    public string InputString
    {
        get => _inputString;
        private set
        {
            if (_inputString != value)
            {
                _inputString = value;
                OnPropertyChanged();
                DisplayText = FormatText(_inputString);

                // Perhaps the delete button must be enabled/disabled.
                ((Command)DeleteCharCommand).ChangeCanExecute();
            }
        }
    }

    public string DisplayText
    {
        get => _displayText;
        private set
        {
            if (_displayText != value)
            {
                _displayText = value;
                OnPropertyChanged();
            }
        }
    }

    public KeypadViewModel()
    {
        // Command to add the key to the input string
        AddCharCommand = new Command<string>((key) => InputString += key);

        // Command to delete a character from the input string when allowed
        DeleteCharCommand =
            new Command(
                // Command will strip a character from the input string
                () => InputString = InputString.Substring(0, InputString.Length - 1),

                // CanExecute is processed here to return true when there's something to delete
                () => InputString.Length > 0
            );
    }

    string FormatText(string str)
    {
        bool hasNonNumbers = str.IndexOfAny(_specialChars) != -1;
        string formatted = str;

        // Format the string based on the type of data and the length
        if (hasNonNumbers || str.Length < 4 || str.Length > 10)
        {
            // Special characters exist, or the string is too small or large for special formatting
            // Do nothing
        }

        else if (str.Length < 8)
            formatted = string.Format("{0}-{1}", str.Substring(0, 3), str.Substring(3));

        else
            formatted = string.Format("({0}) {1}-{2}", str.Substring(0, 3), str.Substring(3, 3), str.Substring(6));

        return formatted;
    }


    public void OnPropertyChanged([CallerMemberName] string name = "") =>
        PropertyChanged?.Invoke(this, new PropertyChangedEventArgs(name));
}
この例では、コマンドの Execute メソッドと CanExecute メソッドがコンストラクターでラムダ関数として定義されています。 ビューモデルは、AddCharCommand プロパティが複数のボタン (またはコマンド インターフェイスを持つ他のコントロール) の Command プロパティにバインドされており、各ボタンが CommandParameter で識別されていると想定しています。 これらのボタンによって InputString プロパティに文字が追加され、DisplayText プロパティの電話番号として書式設定されます。 DeleteCharCommand という名前の型 ICommand の 2 番目のプロパティもあります。 これはバックスペース ボタンにバインドされますが、削除する文字がない場合は、ボタンを無効にする必要があります。
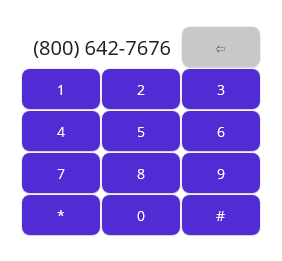
次の例は、KeypadViewModel を使用する XAML を示します。
<ContentPage xmlns="http://schemas.microsoft.com/dotnet/2021/maui"
xmlns:x="http://schemas.microsoft.com/winfx/2009/xaml"
xmlns:local="clr-namespace:XamlSamples"
x:Class="XamlSamples.KeypadPage"
Title="Keypad Page">
<ContentPage.BindingContext>
<local:KeypadViewModel />
</ContentPage.BindingContext>
<Grid HorizontalOptions="Center" VerticalOptions="Center">
<Grid.RowDefinitions>
<RowDefinition Height="Auto" />
<RowDefinition Height="Auto" />
<RowDefinition Height="Auto" />
<RowDefinition Height="Auto" />
<RowDefinition Height="Auto" />
</Grid.RowDefinitions>
<Grid.ColumnDefinitions>
<ColumnDefinition Width="80" />
<ColumnDefinition Width="80" />
<ColumnDefinition Width="80" />
</Grid.ColumnDefinitions>
<Label Text="{Binding DisplayText}"
Margin="0,0,10,0" FontSize="20" LineBreakMode="HeadTruncation"
VerticalTextAlignment="Center" HorizontalTextAlignment="End"
Grid.ColumnSpan="2" />
<Button Text="⇦" Command="{Binding DeleteCharCommand}" Grid.Column="2"/>
<Button Text="1" Command="{Binding AddCharCommand}" CommandParameter="1" Grid.Row="1" />
<Button Text="2" Command="{Binding AddCharCommand}" CommandParameter="2" Grid.Row="1" Grid.Column="1" />
<Button Text="3" Command="{Binding AddCharCommand}" CommandParameter="3" Grid.Row="1" Grid.Column="2" />
<Button Text="4" Command="{Binding AddCharCommand}" CommandParameter="4" Grid.Row="2" />
<Button Text="5" Command="{Binding AddCharCommand}" CommandParameter="5" Grid.Row="2" Grid.Column="1" />
<Button Text="6" Command="{Binding AddCharCommand}" CommandParameter="6" Grid.Row="2" Grid.Column="2" />
<Button Text="7" Command="{Binding AddCharCommand}" CommandParameter="7" Grid.Row="3" />
<Button Text="8" Command="{Binding AddCharCommand}" CommandParameter="8" Grid.Row="3" Grid.Column="1" />
<Button Text="9" Command="{Binding AddCharCommand}" CommandParameter="9" Grid.Row="3" Grid.Column="2" />
<Button Text="*" Command="{Binding AddCharCommand}" CommandParameter="*" Grid.Row="4" />
<Button Text="0" Command="{Binding AddCharCommand}" CommandParameter="0" Grid.Row="4" Grid.Column="1" />
<Button Text="#" Command="{Binding AddCharCommand}" CommandParameter="#" Grid.Row="4" Grid.Column="2" />
</Grid>
</ContentPage>
この例では、DeleteCharCommand にバインドされている最初の Button の Command プロパティです。 その他のボタンは、Button に表示される文字と同じ CommandParameter で AddCharCommand にバインドされています。
.NET MAUI