このクイック スタートでは、サンプル データセットを Lakehouse に移動するパイプラインを構築します。 パイプライン コピー アクティビティのしくみと、Lakehouse にデータを読み込む方法を簡単に確認する方法です。
前提条件
開始する前に、次のセットアップを行っていることを確認します。
- アクティブなサブスクリプションを持つ Microsoft Fabric テナント アカウント。 無料アカウントの作成。
- Microsoft Fabric 対応ワークスペースがあることを確認します: ワークスペースの作成。
パイプラインを作成する
Power BI に移動します。
左下にある Power BI アイコンを選択し、[ Fabric ] を選択して Microsoft Fabric ホームページを開きます。
Microsoft Fabric ワークスペースに移動します。 新しいワークスペースを前提条件として作成した場合は、そのワークスペースを使用します。
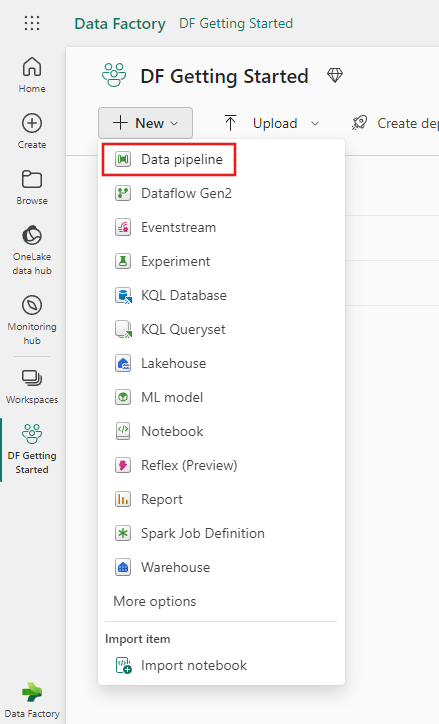
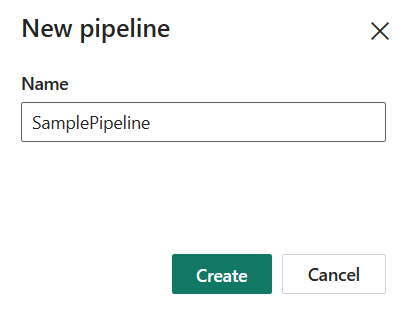
[ 新しい項目] を選択し、[ パイプライン] を検索して選択し、パイプラインの名前を入力します。
パイプラインを使用してデータをコピーする
パイプラインで、[ データ のコピー アシスタント] を選択します。
![[データのコピー] ボタンを示すスクリーンショット。](media/create-first-pipeline-with-sample-data/copy-data-button.png)
データ ソース ブラウザー ページの上部にある [サンプル データ] タブを選択し、[祝日] サンプル データを選択し、[次へ] を選択します。
![[データのコピー] アシスタントの [データ ソースの選択] ページで [Public Holidays] (祝日) サンプル データが選択されている様子を示すスクリーンショット。](media/create-first-pipeline-with-sample-data/sample-data.png)
アシスタントの [データ ソースに接続] ページに、祝日のサンプル データのプレビューが表示されます。その後、[次へ] を選択します。
![[Public Holidays] (祝日) サンプル データのサンプル データを示すスクリーンショット。](media/create-first-pipeline-with-sample-data/sample-data-preview.png)
宛先を構成するには、 Lakehouse を選択します。
![[データのコピー] アシスタントでコピー先の レイクハウス の選択を示すスクリーンショット。](media/create-first-pipeline-with-sample-data/lakehouse-destination.png)
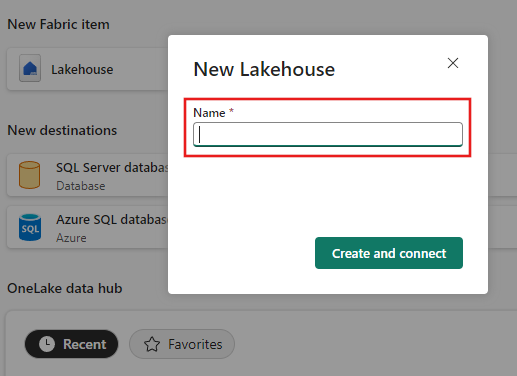
Lakehouse 名を入力し、[ 作成して接続] を選択します。
ソース データを構成し、コピー先の レイクハウス テーブルにマップします。 [ルート] フォルダーの [テーブル] を選択し、[読み込み] 設定で [新しいテーブルに読み込む] を選択します。 テーブル名を指定し、[次へ] を選択します。
![[データのコピー] アシスタントの [Connect to data destination] (データのコピー先に接続する) ページのスクリーンショット。[テーブル] が選択され、サンプル データのテーブル名が指定されています。](media/create-first-pipeline-with-sample-data/configure-lakehouse-tables.png)
コピー アクティビティの設定を確認し、[ 保存と実行] を選択して完了します。 必要に応じて、戻って設定を変更できます。 パイプラインをすぐに実行せずに保存するだけの場合は、[ データ転送をすぐに開始 する] チェック ボックスをオフにします。
![[データのコピー] アシスタントの [確認 + 作成] ページのスクリーンショット。ソースとコピー先が強調表示されています。](media/create-first-pipeline-with-sample-data/review-create-activity.png)
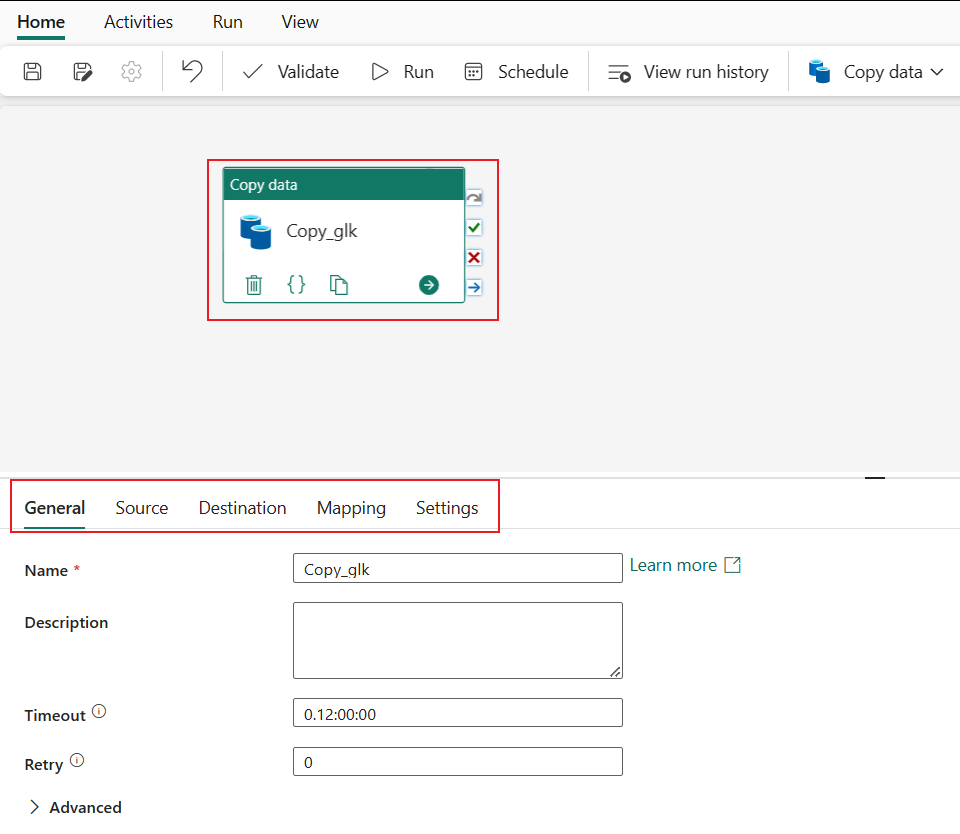
これで、コピー アクティビティがパイプラインに表示されます。 [データのコピー] アクティビティを選択すると、キャンバスの下のタブにすべての設定 (詳細オプションを含む) が表示されます。
![[データのコピー] アシスタントの [Connect to data destination] (データのコピー先に接続する) ページのスクリーンショット。[テーブル] が選択され、サンプル データのテーブル名が指定されています。](media/create-first-pipeline-with-sample-data/configure-lakehouse-tables.png#lightbox)
パイプラインの実行とスケジュール設定
[データのコピー] アシスタントの [レビューして保存] ページで [保存して実行] を選択しなかった場合は、[ホーム] タブに切り替えて 、[実行] を選択します。 確認ダイアログが表示されます。 次に、[保存および実行] を選択してアクティビティを開始します。
![[ホーム] タブの [実行] ボタンと、[保存および実行] プロンプトが表示されたスクリーンショット。](media/create-first-pipeline-with-sample-data/save-and-run.png)
パイプラインの実行を監視し、キャンバスの下にある [出力 ] タブで結果を確認できます。 詳細を確認するには、出力リストでアクティビティ名を選択します。
![進行中のパイプライン実行の [出力] タブを示すスクリーンショット。実行状態の [詳細] ボタンが強調表示されています。](media/create-first-pipeline-with-sample-data/run-details-button.png)
実行の詳細ページには、パイプラインが読み書きしたデータの量と、実行に関するその他の役立つ情報が表示されます。
![[実行の詳細] ウィンドウを示すスクリーンショット。](media/create-first-pipeline-with-sample-data/run-details.png)
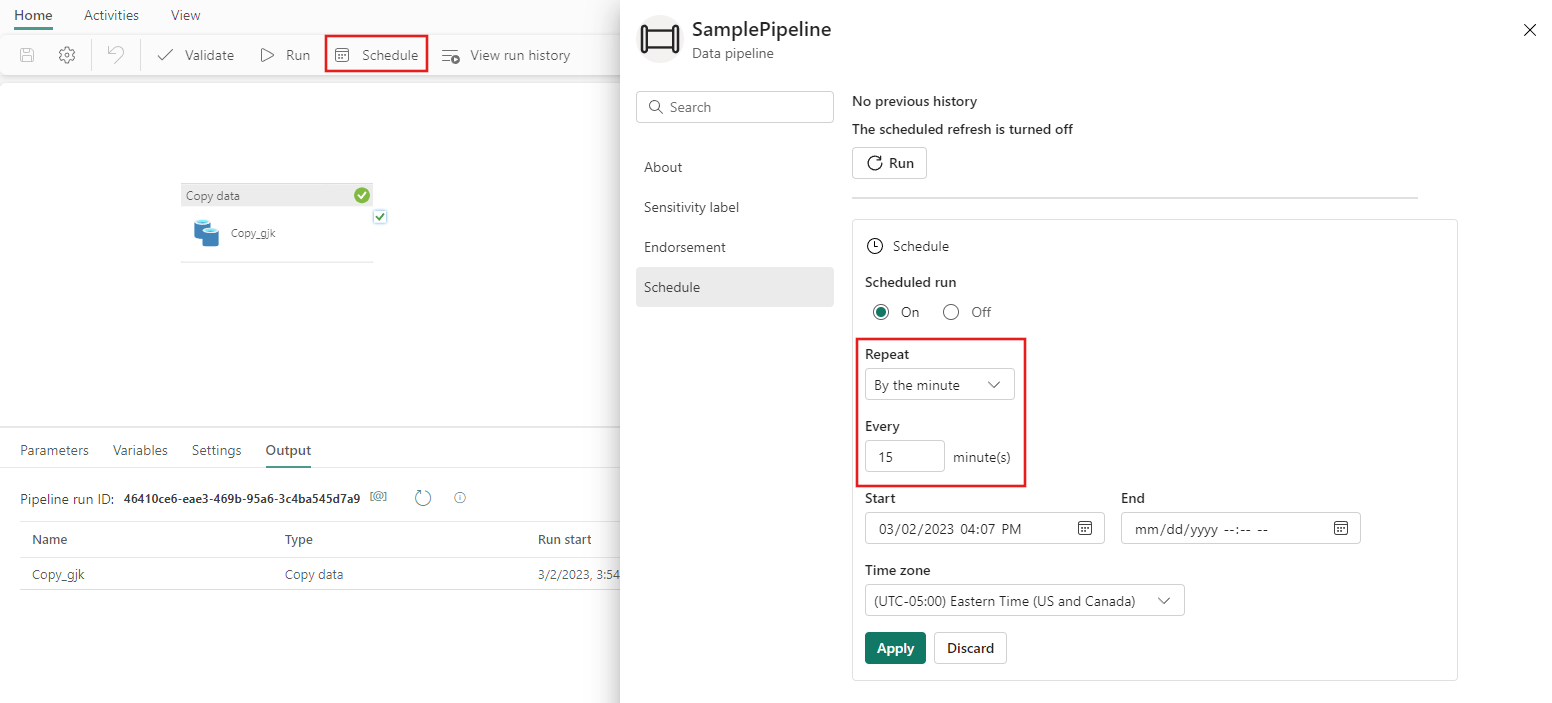
スケジュールに従って実行するようにパイプラインを設定できます。 たとえば、[ スケジュール] を選択してスケジュール オプションを開き、15 分ごとに実行する頻度を選択します。
![[ホーム] タブの [実行] ボタンと、[保存および実行] プロンプトが表示されたスクリーンショット。](media/create-first-pipeline-with-sample-data/save-and-run.png#lightbox)
![進行中のパイプライン実行の [出力] タブを示すスクリーンショット。実行状態の [詳細] ボタンが強調表示されています。](media/create-first-pipeline-with-sample-data/run-details-button.png#lightbox)

関連するコンテンツ
このクイック スタートでは、パイプラインを使用してサンプル データを Lakehouse にコピーする方法について説明しました。パイプラインを使って簡単に操作を行い、データの移動がいかに簡単であるかを確認しました。
次に、パイプラインの実行を監視し、データを監視する方法について説明します。