このモジュールは約 15 分で完了できます。 このチュートリアルの最後の部分では、コピー ジョブを調整するパイプラインを作成し、必要に応じてモジュール 1 と 2 で構築したデータフローを作成し、すべてのジョブが完了したときに電子メール通知を送信し、パイプラインを自動的に実行するようにスケジュールします。
[前提条件]
パイプラインを作成する
まず、既にビルドしたコピー ジョブを調整するパイプラインを作成します。
ワークスペースから [ + 新しい項目] を選択し、[パイプライン] を検索して選択 します。
![[Data Factory スタート] ページのスクリーンショット。新しい項目を作成するためのボタンが表示され、[データ パイプライン] が選択されています。](media/tutorial-end-to-end-pipeline/new-data-pipeline.png)
パイプライン名を指定します。 次に、[ 作成] を選択します。
![[Data Factory スタート] ページのスクリーンショット。新しい項目を作成するためのボタンが表示され、[データ パイプライン] が選択されています。](media/tutorial-end-to-end-pipeline/new-data-pipeline.png#lightbox)
コピー ジョブ アクティビティを追加する
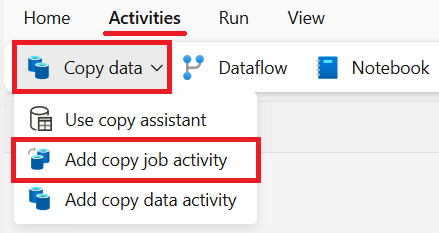
パイプライン キャンバスで、[ アクティビティ ] タブの [ データのコピー] を選択し、[ コピー ジョブ アクティビティの追加] を選択します。
パイプライン キャンバスでコピー ジョブ アクティビティを選択し、キャンバスの下にある [設定] タブを選択します。
![コピー ジョブ アクティビティが強調表示され、[設定] タブが強調表示されているパイプライン キャンバスのスクリーンショット。](media/tutorial-end-to-end-pipeline/select-settings.png)
[ 接続 ] ドロップダウンを選択し、[ すべて参照] を選択します。
![コピー ジョブ アクティビティの設定リストのスクリーンショット。[すべて参照] が強調表示されています。](media/tutorial-end-to-end-pipeline/browse-all.png)
[新しいソース] で [ジョブをコピー] を選択します。
[ 接続データ ソース ] ページで、[ サインイン ] を選択して接続を認証します。
![[サインイン オプション] が強調表示されている [データ接続資格情報の取得] ページのスクリーンショット。](media/tutorial-end-to-end-pipeline/select-sign-in.png)
プロンプトに従って、組織のアカウントにサインインします。
[ 接続 ] を選択して、接続のセットアップを完了します。
[ワークスペース] で、モジュール 1 のコピー ジョブを作成したワークスペースを選択します。
[コピー ジョブ] で、モジュール 1 で作成したコピー ジョブを選択します。

![コピー ジョブ アクティビティが強調表示され、[設定] タブが強調表示されているパイプライン キャンバスのスクリーンショット。](media/tutorial-end-to-end-pipeline/select-settings.png#lightbox)
![コピー ジョブ アクティビティの設定リストのスクリーンショット。[すべて参照] が強調表示されています。](media/tutorial-end-to-end-pipeline/browse-all.png#lightbox)
![[サインイン オプション] が強調表示されている [データ接続資格情報の取得] ページのスクリーンショット。](media/tutorial-end-to-end-pipeline/select-sign-in.png#lightbox)
Office 365 Outlook アクティビティを追加する
パイプライン エディターで Activities タブを選択し、Office 365電子メール アクティビティを見つけます。
![パイプライン エディター メニューの [アクティビティ] ツールバーからのOffice 365 Outlookアクティビティの選択を示すスクリーンショット。](media/tutorial-end-to-end-integration/add-office-outlook-activity.png)
新しいOffice 365電子メール アクティビティを選択し、そのSettings タブを選択します。
[ 接続 ] ドロップダウン リストを選択し、[ すべて参照] を選択します。
[Office 365電子メールを選択します。
Sign in を選択してOffice 365 accountを接続します。
![[アカウントの選択] ダイアログを示すスクリーンショット。](media/tutorial-end-to-end-integration/pick-your-email-account.png)
注
このサービスは現在、個人の電子メールをサポートしていません。 エンタープライズ メール アドレスを使用する必要があります。
[接続] を選択します。
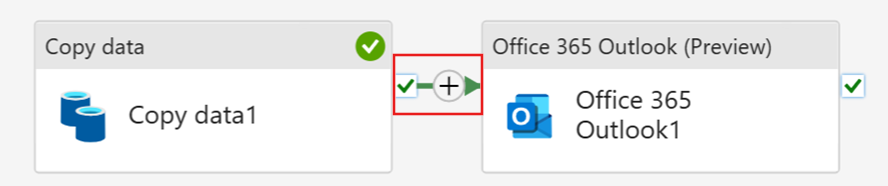
On success パス (パイプライン キャンバスのアクティビティの右上にある緑色のチェック ボックス) を選択して、コピー ジョブ アクティビティから新しい Office 365 Email アクティビティにドラッグします。
パイプライン キャンバスから Office 365 Email アクティビティを選択し、キャンバスの下にあるプロパティ領域の Settings タブを選択して、電子メールを構成します。
- [ 宛先 ] セクションにメール アドレスを入力します。 複数のアドレスを使用する場合は、 ; を使用してアドレスを区切ります。
- [件名] で、フィールドを選択して [動的コンテンツの追加] オプションが表示されるようにし、それを選択してパイプライン式ビルダー キャンバスを表示します。

[パイプライン式ビルダー] ダイアログが表示されます。 次の式を入力し、[ OK] を選択します。
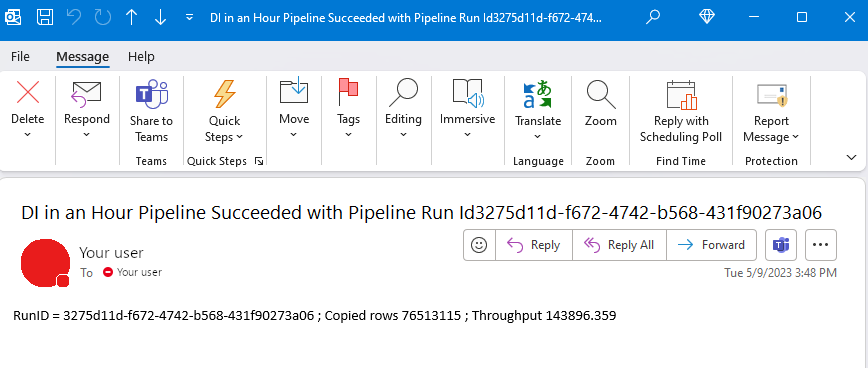
@concat('DI in an Hour Pipeline Succeeded with Pipeline Run Id', pipeline().RunId)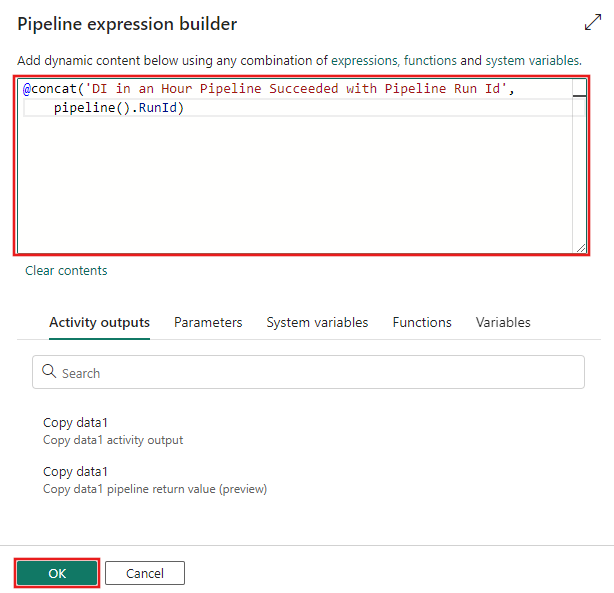
本文のテキストフィールドを選択し、テキスト領域の下に表示された場合は式ビルダーで表示オプションを選択します。 表示される パイプライン式ビルダー ダイアログで、次の式を (独自のコピー ジョブ アクティビティ名で) 再度追加し、[ OK] を選択します。
@concat('RunID = ', pipeline().RunId, ' ; ', 'Files written: ', activity('Copy job_1').output.value[0].output.filesWritten, ' ; ','Throughput: ', activity('Copy job_1').output.value[0].output.throughput,' ; ','Time to copy: ', activity('Copy job_1').output.executionDuration,' ; ','Time in queue: ', activity('Copy job_1').output.durationInQueue)Von Bedeutung
Copy job_1をあなた自身のパイプラインコピージョブアクティビティの名前に置き換えます。
最後に、パイプライン エディターの上部にある [ ホーム ] タブを選択し、[ 実行] を選択します。 次に、[ 保存] を選択し、 確認ダイアログでもう一度実行して、これらのアクティビティを実行します。
![メニューの [実行] ボタンが強調表示されているパイプライン エディター ウィンドウを示すスクリーンショット。](media/tutorial-end-to-end-integration/run-pipeline.png)
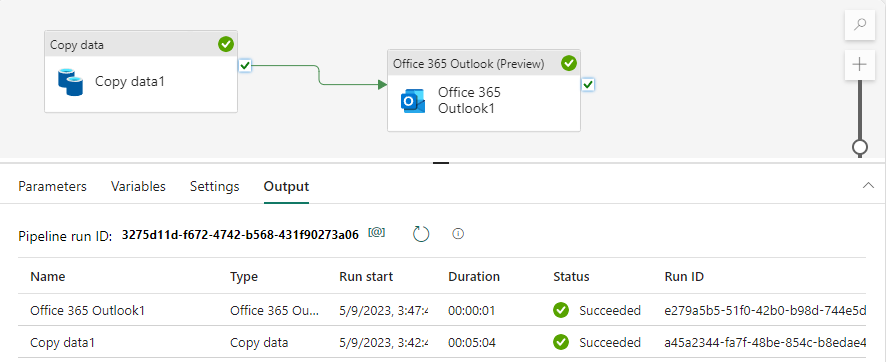
パイプラインが正常に実行されたら、電子メールを確認して、パイプラインから送信された確認メールを見つけます。
(省略可能) パイプラインにデータフロー アクティビティを追加する
「モジュール 2: Data Factory でデータフローを作成する」で作成したデータフローをパイプラインに追加することもできます。
パイプライン キャンバスのコピー ジョブ アクティビティと Office 365 Email アクティビティを接続する緑色の線にカーソルを合わせ、+ ボタンを選択して新しいアクティビティを挿入します。
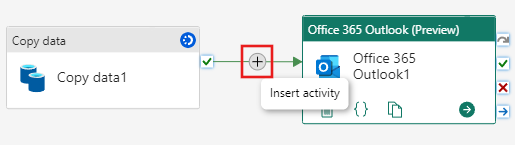
表示されるメニューから [データフロー ] を選択します。
![パイプライン キャンバスの [アクティビティの挿入] メニューからの [データフロー] の選択を示すスクリーンショット。](media/tutorial-end-to-end-integration/insert-dataflow-activity.png)
新しく作成されたデータフロー アクティビティは、コピー ジョブ アクティビティと Office 365 Email アクティビティの間に挿入され、自動的に選択され、キャンバスの下の領域にそのプロパティが表示されます。 プロパティ領域の [設定] タブを選択し、「 モジュール 2: Data Factory でデータフローを作成する」で作成したデータフローを選択します。
![データフロー アクティビティの [設定] タブを示すスクリーンショット。](media/tutorial-end-to-end-integration/choose-dataflow-settings.png)
パイプラインの実行をスケジュールする
パイプラインの開発とテストが完了したら、自動的に実行されるようにスケジュールできます。
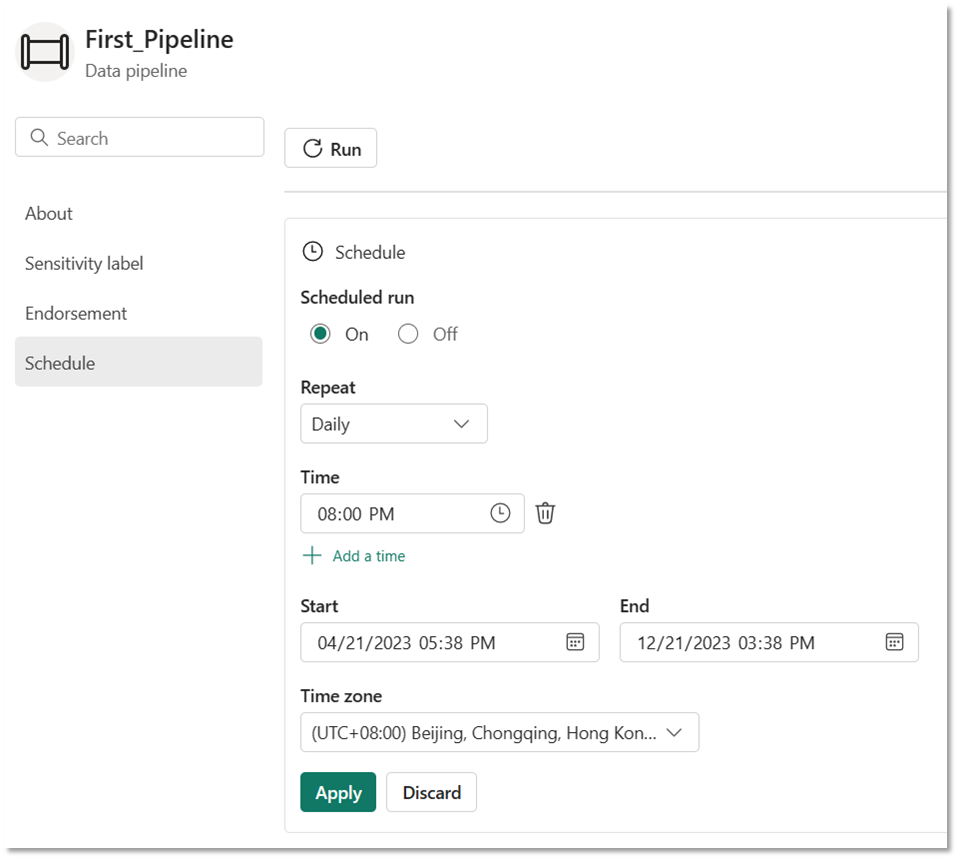
パイプライン エディター ウィンドウの [ホーム] タブで、[スケジュール] を選択します。
![パイプライン エディターの [ホーム] タブのメニューにある [スケジュール] ボタンのスクリーンショット。](media/tutorial-end-to-end-integration/schedule-button.png)
[+ スケジュールの追加] を選択する
必要に応じてスケジュールを構成します。 この例では、1 年間、毎日午後 8 時に実行するようにパイプラインをスケジュールします。