Excel では、Excel の描画レイヤー上にある任意のオブジェクトとして図形を定義します。 つまり、セルの外部にあるものは図形です。 この記事では、図形、線、および画像を Shape API と ShapeCollection API と組み合わせて使用する方法について説明します。 グラフ については、 Excel JavaScript API を使用したグラフの操作に関する記事を参照してください。
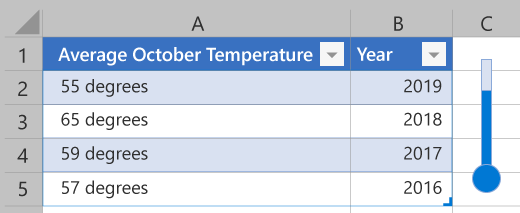
次の図は、温度計を形成する図形を示しています。
図形を作成する
図形は、 を介して作成され、ワークシートの図形コレクション (Worksheet.shapes) に格納されます。
ShapeCollection には、この目的のためにいくつかの .add* メソッドがあります。 すべての図形の名前と ID は、コレクションに追加されたときに生成されます。 これらはそれぞれ name プロパティと id プロパティです。
name は、 ShapeCollection.getItem(name) メソッドを使用して簡単に取得できるように、アドインで設定できます。
関連付けられたメソッドを使用して、次の種類の図形が追加されます。
| Shape | Tabs.Add メソッド (Outlook フォーム スクリプト) | 署名 |
|---|---|---|
| ジオメトリシェイプ | addGeometricShape | addGeometricShape(geometricShapeType: Excel.GeometricShapeType): Excel.Shape |
| 画像 (JPEG または PNG) | addImage | addImage(base64ImageString: string): Excel.Shape |
| Line | addLine | addLine(startLeft: number, startTop: number, endLeft: number, endTop: number, connectorType?: Excel.ConnectorType): Excel.Shape |
| SVG | addSvg | addSvg(xml: string): Excel.Shape |
| テキスト ボックス | addTextBox | addTextBox(text?: string): Excel.Shape |
幾何学的図形
ジオメトリ シェイプは、 ShapeCollection.addGeometricShapeで作成されます。 そのメソッドは、 引数として GeometrShapeType 列挙型を受け取ります。
次のコード サンプルでは、ワークシートの上端と左側から 100 ピクセルの位置にある "Square" という名前の 150 x 150 ピクセルの四角形を作成します。
// This sample creates a rectangle positioned 100 pixels from the top and left sides
// of the worksheet and is 150x150 pixels.
await Excel.run(async (context) => {
    let shapes = context.workbook.worksheets.getItem("MyWorksheet").shapes;

    let rectangle = shapes.addGeometricShape(Excel.GeometricShapeType.rectangle);
    rectangle.left = 100;
    rectangle.top = 100;
    rectangle.height = 150;
    rectangle.width = 150;
    rectangle.name = "Square";

    await context.sync();
});
画像
JPEG、PNG、SVG の画像は、図形としてワークシートに挿入できます。
ShapeCollection.addImage メソッドは、Base64 でエンコードされた文字列を引数として受け取ります。 これは、文字列形式の JPEG または PNG イメージです。
ShapeCollection.addSvg また、文字列も受け取りますが、この引数はグラフィックを定義する XML です。
次のコード サンプルは、 FileReader によって文字列として読み込まれているイメージ ファイルを示しています。 文字列には、図形が作成される前にメタデータ "base64" が削除されています。
// This sample creates an image as a Shape object in the worksheet.
let myFile = document.getElementById("selectedFile");
let reader = new FileReader();

reader.onload = (event) => {
    Excel.run(function (context) {
        let startIndex = reader.result.toString().indexOf("base64,");
        let myBase64 = reader.result.toString().substr(startIndex + 7);
        let sheet = context.workbook.worksheets.getItem("MyWorksheet");
        let image = sheet.shapes.addImage(myBase64);
        image.name = "Image";
        return context.sync();
    }).catch(errorHandlerFunction);
};

// Read in the image file as a data URL.
reader.readAsDataURL(myFile.files[0]);
Lines
ShapeCollection.addLineを使用して行が作成されます。 このメソッドには、行の始点と終点の左端と上端の余白が必要です。 また、 ConnectorType 列挙型を使用して、エンドポイント間の行の競合を指定します。 次のコード サンプルでは、ワークシートに直線を作成します。
// This sample creates a straight line from [200,50] to [300,150] on the worksheet.
await Excel.run(async (context) => {
    let shapes = context.workbook.worksheets.getItem("MyWorksheet").shapes;
    let line = shapes.addLine(200, 50, 300, 150, Excel.ConnectorType.straight);
    line.name = "StraightLine";
    await context.sync();
});
線は、他の Shape オブジェクトに接続できます。
connectBeginShape メソッドと connectEndShape メソッドは、指定した接続ポイントの図形に線の始点と終点をアタッチします。 これらのポイントの場所は図形によって異なりますが、 Shape.connectionSiteCount を使用して、アドインが範囲外のポイントに接続しないようにすることができます。 線は、 disconnectBeginShape メソッドと disconnectEndShape メソッドを使用して、アタッチされた図形から切断されます。
次のコード サンプルでは、"MyLine" 行を "LeftShape" と "RightShape" という名前の 2 つの図形に接続します。
// This sample connects a line between two shapes at connection points '0' and '3'.
await Excel.run(async (context) => {
    let shapes = context.workbook.worksheets.getItem("MyWorksheet").shapes;
    let line = shapes.getItem("MyLine").line;
    line.connectBeginShape(shapes.getItem("LeftShape"), 0);
    line.connectEndShape(shapes.getItem("RightShape"), 3);
    await context.sync();
});
図形の移動とサイズ変更
図形はワークシートの上に置かれます。 配置は、 left プロパティと top プロパティによって定義されます。 これらはワークシートのそれぞれの端の余白として機能し、[0, 0] が左上隅になります。 これらは、 incrementLeft メソッドと incrementTop メソッドを使用して、直接設定することも、現在の位置から調整することもできます。 この方法では、既定の位置から図形を回転させる量も確立されます。 rotation プロパティは絶対量であり、 incrementRotation メソッドは既存の回転を調整します。
他の図形に対する図形の深さは、 zorderPosition プロパティによって定義されます。 これは、ShapeZOrder を受け取る setZOrder メソッドを使用して設定されます。
setZOrder は、現在の図形の順序を他の図形に対して調整します。
アドインには、図形の高さと幅を変更するためのオプションがいくつかあります。
height または width プロパティを設定すると、他のディメンションを変更せずに指定したディメンションが変更されます。
scaleHeightとscaleWidthは、現在または元のサイズ (指定された ShapeScaleType の値に基づいて) を基準にして、図形のそれぞれの寸法を調整します。 省略可能な ShapeScaleFrom パラメーターは、図形のスケーリング元 (左上隅、中央、または右下隅) を指定します。
lockAspectRatio プロパティがtrueされている場合、スケール メソッドは、もう一方の寸法も調整することで、図形の現在の縦横比を維持します。
注:
lockAspectRatio プロパティの値に関係なく、heightプロパティと width プロパティへの直接の変更は、そのプロパティにのみ影響します。
次のコード サンプルは、元のサイズの 1.25 倍にスケーリングされ、30 度回転する図形を示しています。
// In this sample, the shape "Octagon" is rotated 30 degrees clockwise
// and scaled 25% larger, with the upper-left corner remaining in place.
await Excel.run(async (context) => {
    let sheet = context.workbook.worksheets.getItem("MyWorksheet");

    let shape = sheet.shapes.getItem("Octagon");
    shape.incrementRotation(30);
    shape.lockAspectRatio = true;
    shape.scaleWidth(
        1.25,
        Excel.ShapeScaleType.currentSize,
        Excel.ShapeScaleFrom.scaleFromTopLeft);

    await context.sync();
});
アクティブな図形を取得する
次のいずれかの方法を使用して、アクティブな図形を取得します。
次のコード サンプルは、ブック内のアクティブな図形を取得し、その高さを 10% 高くする方法を示しています。
 await Excel.run(async (context) => {
    const shape = context.workbook.getActiveShapeOrNullObject();
    if (shape !== null) {
      shape.load("height");
      await context.sync();
      shape.height = shape.height + shape.height * 0.1;
      await context.sync();
    }
  });
図形のテキスト
Geometr Shapes にはテキストを含めることができます。 図形には、TextFrame 型のtextFrame プロパティがあります。
TextFrame オブジェクトは、テキスト表示オプション (余白やテキスト オーバーフローなど) を管理します。
TextFrame.textRange は、テキストコンテンツとフォント設定を持つ TextRange オブジェクトです。
次のコード サンプルでは、"Shape Text" というテキストを使用して "Wave" という名前の幾何学的図形を作成します。 また、図形とテキストの色も調整し、テキストの水平方向の配置を中央に設定します。
// This sample creates a light-blue wave shape and adds the purple text "Shape text" to the center.
await Excel.run(async (context) => {
    let shapes = context.workbook.worksheets.getItem("MyWorksheet").shapes;
    let wave = shapes.addGeometricShape(Excel.GeometricShapeType.wave);
    wave.left = 100;
    wave.top = 400;
    wave.height = 50;
    wave.width = 150;

    wave.name = "Wave";
    wave.fill.setSolidColor("lightblue");

    wave.textFrame.textRange.text = "Shape text";
    wave.textFrame.textRange.font.color = "purple";
    wave.textFrame.horizontalAlignment = Excel.ShapeTextHorizontalAlignment.center;

    await context.sync();
});
ShapeCollectionのaddTextBoxメソッドは、白い背景と黒いテキストを使用してRectangle型のGeometricShapeを作成します。 これは、[挿入] タブの [Excel のテキスト ボックス] ボタンによって作成されたものと同じです。addTextBoxは文字列引数を受け取り、TextRangeのテキストを設定します。
次のコード サンプルは、テキスト "Hello!" を含むテキスト ボックスの作成を示しています。
// This sample creates a text box with the text "Hello!" and sizes it appropriately.
await Excel.run(async (context) => {
    let shapes = context.workbook.worksheets.getItem("MyWorksheet").shapes;
    let textbox = shapes.addTextBox("Hello!");
    textbox.left = 100;
    textbox.top = 100;
    textbox.height = 20;
    textbox.width = 45;
    textbox.name = "Textbox";
    await context.sync();
});
図形グループ
図形はグループ化できます。 これにより、ユーザーは、配置、サイズ設定、およびその他の関連タスク用の単一のエンティティとして扱うことができます。
ShapeGroup はShapeの一種であるため、アドインはグループを 1 つの図形として扱います。
次のコード サンプルは、3 つの図形がグループ化されていることを示しています。 次のコード サンプルは、図形グループが右の 50 ピクセルに移動されていることを示しています。
// This sample takes three previously-created shapes ("Square", "Pentagon", and "Octagon")
// and groups them into a single ShapeGroup.
await Excel.run(async (context) => {
    let shapes = context.workbook.worksheets.getItem("MyWorksheet").shapes;
    let square = shapes.getItem("Square");
    let pentagon = shapes.getItem("Pentagon");
    let octagon = shapes.getItem("Octagon");

    let shapeGroup = shapes.addGroup([square, pentagon, octagon]);
    shapeGroup.name = "Group";
    console.log("Shapes grouped");

    await context.sync();
});

// This sample moves the previously created shape group to the right by 50 pixels.
await Excel.run(async (context) => {
    let shapes = context.workbook.worksheets.getItem("MyWorksheet").shapes;
    let shapeGroup = shapes.getItem("Group");
    shapeGroup.incrementLeft(50);
    await context.sync();
});
重要
グループ内の個々の図形は、GroupShapeCollection 型の ShapeGroup.shapes プロパティを介して参照されます。 グループ化された後、ワークシートの図形コレクションからアクセスできなくなります。 たとえば、ワークシートに 3 つの図形があり、それらがすべてグループ化されている場合、ワークシートの shapes.getCount メソッドは 1 のカウントを返します。
図形をイメージとしてエクスポートする
任意の Shape オブジェクトをイメージに変換できます。
Shape.getAsImage は Base64 でエンコードされた文字列を返します。 イメージの形式は、getAsImageに渡される PictureFormat 列挙型として指定されます。
await Excel.run(async (context) => {
    let shapes = context.workbook.worksheets.getItem("MyWorksheet").shapes;
    let shape = shapes.getItem("Image");
    let stringResult = shape.getAsImage(Excel.PictureFormat.png);

    await context.sync();

    console.log(stringResult.value);
    // Instead of logging, your add-in may use the Base64-encoded string to save the image as a file or insert it in HTML.
});
図形を削除する
図形は、 Shape オブジェクトの delete メソッドを使用してワークシートから削除されます。 他のメタデータは必要ありません。
次のコード サンプルでは、 MyWorksheet からすべての図形を削除します。
// This deletes all the shapes from "MyWorksheet".
await Excel.run(async (context) => {
    let sheet = context.workbook.worksheets.getItem("MyWorksheet");
    let shapes = sheet.shapes;

    // We'll load all the shapes in the collection without loading their properties.
    shapes.load("items/$none");
    await context.sync();

    shapes.items.forEach(function (shape) {
        shape.delete();
    });

    await context.sync();
});
関連項目
GitHub で Microsoft と共同作業する
このコンテンツのソースは GitHub にあります。そこで、issue や pull request を作成および確認することもできます。 詳細については、共同作成者ガイドを参照してください。
Office Add-ins