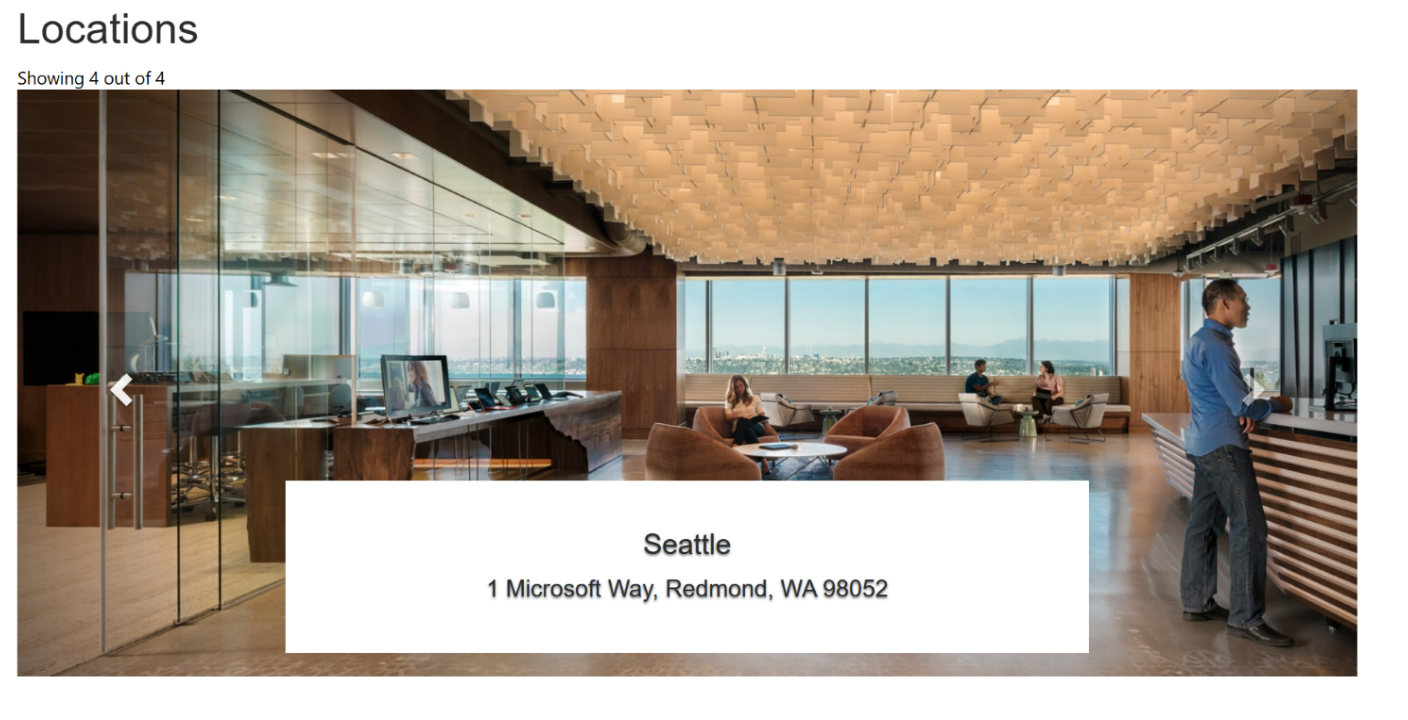
レコードをカルーセルとして表示する
このサンプルは、マニフェストを使用して Web テンプレートを拡張し、回転カルーセル形式で Web ページに場所を表示する方法を示します。

Web テンプレート コンポートを作成して場所を表示する方法
ステップ 1: 準備
- 環境に一致する列 (名前、アドレス、画像) を持つテーブルを作成します。
- テーブルの論理名をコピーします。
- 新しいテーブルにサンプル レコードをいくつか作成します。
ステップ 2: Web テンプレートの設定
ソース コードを環境内の新しい Web テンプレートにコピーします。 詳細については、Web テンプレート コンポーネントを作成する方法を参照してください。
{% fetchxml locationsQuery %}
    <fetch mapping='logical'>
    <entity name='cr50f_place'>
        <attribute name='cr50f_name' />
        <attribute name='cr50f_address' />
        <attribute name='cr50f_image' />
    </entity>
    </fetch>
{% endfetchxml %}

<h2>{{ title | default: "Locations" }}</h2>

{% assign interval = interval | integer %}
{% assign count = count | integer %}
{% assign height = height | integer %}

<span>Showing {{ count }} out of {{ locationsQuery.results.entities.size }}</span>
{% if locationsQuery.results.entities.size > 0 %}
    <div id="carousel-example-generic"
    class="carousel slide"
    data-ride="carousel"
    data-interval="{{interval}}">
    <!-- Indicators -->
    <ol class="carousel-indicators">
        {% for location in locationsQuery.results.entities limit: count %}
        <li
            data-target="#carousel-example-generic"
            data-slide-to="{{forloop.index0}}"
            class="{% if forloop.first %}active{% endif %}"></li>
        {% endfor %}
    </ol>
    <!-- Wrapper for slides -->
    <div class="carousel-inner" role="listbox">
        {% for loc in locationsQuery.results.entities limit: count %}
        <div class="item {% if forloop.first %}active{% endif %}" style="background-image:url('{{loc.cr50f_image.Url}}&Full=true'); height: {{height | default:500}}px">
            <div class="carousel-caption" style="background:white">
            <h3>{{ loc.cr50f_name }}</h3>
            <p>{{ loc.cr50f_address }}</p>
            </div>
        </div>
        {% endfor %}
    </div>
    <!-- Controls -->
    <a
        class="left carousel-control"
        href="#carousel-example-generic"
        role="button"
        data-slide="prev">
        <span class="glyphicon glyphicon-chevron-left" aria-hidden="true"></span>
        <span class="sr-only">Previous</span>
    </a>
    <a
        class="right carousel-control"
        href="#carousel-example-generic"
        role="button"
        data-slide="next">
        <span class="glyphicon glyphicon-chevron-right" aria-hidden="true"></span>
        <span class="sr-only">Next</span>
    </a>
    </div>
{% endif %}

<style>
    .carousel .item {
    background-size: cover;
    background-repeat: no-repeat;
    }
</style>

{% manifest %}
    {
    "type": "Functional",
        "displayName": "Locations Slider",
        "description": "Locations slider using the table 'Place' as the data source",
        "tables": ["cr50f_place"],
        "params": [
            {
            "id": "title",
            "displayName": "Title",
            "description": ""
        },{
            "id": "interval",
            "displayName": "Interval",
            "description": "The amount of time to delay between automatically cycling an item. If false, carousel will not automatically cycle. Default: 5000ms"
        },{
            "id": "count",
            "displayName": "Count",
            "description": "The number of locations to display"
        },{
            "id": "height",
            "displayName": "Slide's height",
            "description": "In px, default: 500px"
        }
      ]
    }
{% endmanifest %}
「cr50f」のすべてのインスタンスを新しいテーブルのスキーマ名に置き換えます。 これにより、fetchXML プロパティと、HTML および
{% manifest %}全体が処理されます。
ステップ 3: Web テンプレートの使用
- 新しい Web テンプレートをページのページ コピーに追加します。たとえば、
{% include 'locations-slider' title:'Locations' interval:'6500' count:'4' height:'500' %}または{% include 'locations-slider' title:'Locations' interval:'3500' count:'3' height:'750' %}を追加します - デザイン スタジオで Web テンプレートのプロパティを編集および構成します。
- 必要に応じてさまざまな Web ページ間でコンポーネントを再利用し、前の手順を繰り返して、要件に基づいて表示を構成します。
- データの編集を選択して、新しく作成したテーブルのレコードを更新します。