SharePoint アドインを作成する場合、通常は、さまざまなソースのデータを組み込む必要があります。 ただし、セキュリティのために、一度に複数のドメインと通信することを防ぐブロック メカニズムがあります。
リモート アドイン インフラストラクチャにホストされるカスタム プロキシ ページを提供する場合は、クロスドメイン ライブラリを使用して、リモート アドインのデータにアクセスできます。 開発者は、カスタム プロキシ ページを実装し、リモート アドインに対する認証のメカニズムなどのカスタム ロジックを扱う必要があります。 クライアント レベルで通信する場合は、クロスドメイン ライブラリとカスタム プロキシ ページを使用します。
この記事の例を使用するための前提条件
「プロバイダー向けのホスト型 SharePoint アドインの作成を始める」で説明されている開発環境が必要です。
SharePoint アドインでカスタム プロキシ ページを使用する前に知っておく必要のある主要な概念
次の表に、SharePoint アドインのクロスドメイン シナリオに関連する概念の理解に役立ついくつかの有用な記事を示します。
| 記事のタイトル | 説明 |
|---|---|
| SharePoint アドイン | エンド ユーザー向けの小型で使いやすいソリューションであるアドインを作成できる、SharePoint の新しいアドイン モデルについて説明します。 |
| SharePoint アドインのセキュリティで保護されたデータ アクセスとクライアント オブジェクト モデル | SharePoint アドイン のデータ アクセス オプションについて説明します。このトピックでは、アドインのデータを扱うときに選択する必要のある高レベルの代替手段に関するガイダンスを提供します。 |
| SharePoint のホスト Web、アドイン Web、SharePoint コンポーネント | ホスト Web とアドイン Web の違いについて説明します。 SharePoint アドイン に含めることができる SharePoint コンポーネント、ホスト Web に展開されるコンポーネント、アドイン Web に展開されるコンポーネント、および分離ドメインでのアドイン Web の展開方法を示しています。 |
| クライアント側のクロスドメイン セキュリティ | クロスドメインの脅威とユース ケース、および cross-origin 要求のセキュリティ原則について説明し、ブラウザーで実行する Web アプリケーションからのクロスドメイン アクセスを強化する場合の開発者にとってのリスクを評価します。 |
コード例: クロスドメイン ライブラリのカスタム プロキシ ページを使用してリモート データにアクセスする
リモート サービスからデータを読み取るには、次の操作を実行する必要があります。
SharePoint アドイン 用プロジェクトを作成します。
アドイン マニフェストを変更して、リモート アドインからの通信を許可します。
Web プロジェクトでカスタム プロキシ ページとコンテンツ ページを作成します。
SharePoint アドイン プロジェクトのクロスドメイン ライブラリを使用するページを作成します。
SharePoint アドイン プロジェクトを作成するには
管理者として Visual Studio を開きます (これを行うには、[スタート] メニューの [Visual Studio] アイコンを右クリックし、[管理者として実行] を選択します)。
「プロバイダー向けのホスト型 SharePoint アドインの作成を始める」で説明されているように、プロバイダー向けのホスト型 SharePoint アドインを作成して、ProxyPageApp という名前を付けます。
アドイン マニフェスト ファイルを編集するには
ソリューション エクスプローラーで、AppManifest.xml ファイルを右クリックし、[コードの表示] を選択します。
AppPrincipal 要素全体を次で置き換えます。
<AppPrincipal>
    <Internal AllowedRemoteHostUrl="~remoteAppUrl"/>
</AppPrincipal>
注:
AllowedRemoteHostUrl 属性を使用して、リモート ドメインを指定します。 ~remoteAppUrl は、リモート アドインの URL に解決されます。 トークンの詳細については、「SharePoint アドインのアプリ マニフェスト構造およびパッケージについて調べる」を参照してください。
カスタム プロキシ ページを作成するには
Visual Studio ソリューションの作成後、Web アプリケーション プロジェクト (SharePoint アドイン プロジェクトではない) を右クリックし、[追加]>[新しい項目]>[Web]>[Web フォーム] を選択して、新しい Web フォームを追加します。 フォームに Proxy.aspx という名前を付けます。
Proxy.aspx ファイルで、HTML 要素全体とその子を、以下の HTML コードに置き換えます。 HTML 要素の上のマークアップは、すべてそのままにします。 HTML コードには、次のタスクを実行する JavaScript とマークアップが含まれています。
クロスドメイン ライブラリ JavaScript ファイルのプレースホルダーを提供します。
参照元からアドイン Web URL を抽出します。
クロスドメイン ライブラリ JavaScript ファイルをプレースホルダーに動的に読み込みます。
RequestExecutorMessageProcessor オブジェクトの設定を指定します。
RequestExecutorMessageProcessor オブジェクトを初期化します。
<html xmlns="http://www.w3.org/1999/xhtml"> <head runat="server"> <meta http-equiv="X-UA-Compatible" content="IE=8" /> <title>Custom Proxy Host Page</title> <script src="http://ajax.aspnetcdn.com/ajax/4.0/1/MicrosoftAjax.js" type="text/javascript"> </script> <script type="text/javascript" src="http://ajax.aspnetcdn.com/ajax/jQuery/jquery-1.7.2.min.js"> </script> <!-- Script to load the cross-domain library js file --> <script type="text/javascript"> var hostweburl; $(document).ready(function(){ //Get the URI decoded host web URL. hostweburl = decodeURIComponent( getQueryStringParameter("SPHostUrl") ); // The cross-domain js file is in a URL in the form: // host_web_url/_layouts/15/SP.RequestExecutor.js var scriptbase = hostweburl + "/_layouts/15/"; // Load the js file $.getScript(scriptbase + "SP.RequestExecutor.js", initCustomProxy); }); //Function to initialize the custom proxy page // must set the appropriate settings and implement // proper authentication mechanism function initCustomProxy() { var settings = { originAuthorityValidator: function (messageOriginAuthority) { // This page must implement the authentication for the // remote add-in. // You should validate if messageOriginAuthority is // an approved domain to receive calls from. return true; } }; SP.RequestExecutorMessageProcessor.init(settings); } // Function to retrieve a query string value. // For production purposes you may want to use // a library to handle the query string. function getQueryStringParameter(paramToRetrieve) { var params = document.URL.split("?")[1].split("&"); var strParams = ""; for (var i = 0; i < params.length; i = i + 1) { var singleParam = params[i].split("="); if (singleParam[0] == paramToRetrieve) return singleParam[1]; } } </script> </head> <body> </body> </html>
重要
運用 SharePoint アドインでは、承認ロジックを指定し、設定の originAuthorityValidator オブジェクトで、適切な値を返す必要があります。
コンテンツ ページを作成するには
ソリューション エクスプローラーで Web アプリケーション プロジェクトを右クリックし、[新しい項目 > Web Web フォームの追加] を選択して新しいWeb> フォームを追加>します。 Content.aspx という形式に名前を付けます。
次のコードをコピーして分離コード ファイルの Page_Load メソッドに貼り付けます。 このコードは以下のタスクを実行します。
出力 content-type を text/plain に設定します。
コンテンツを出力バッファーに書き込みます。
接続を終了します。
string content;
content = "Just some text.";
Response.ContentType="text/plain";
Response.Write(content);
Response.End();
クロスドメイン ライブラリを使用する SharePoint Web ページを作成するには
SharePoint アドイン プロジェクトを右クリックして、[追加]>[新しい項目]>[Office/SharePoint]>[モジュール] を選択します。
モジュールに Pages という名前を付けて、[追加] を選択します。
[Pages] フォルダーを右クリックして、[追加]>[新しい項目]>[Office/SharePoint]>[ページ] の順に選択します。
ページに Home.aspx という名前を付け、[追加] を選択します。
Home.aspx ページが自動的に開かない場合は開きます。
次のコードをコピーして PlaceHolderMain コンテンツ タグに貼り付けます。
<!-- The page dynamically loads the cross-domain library's js file, rescript acts as the placeholder. --> <script type="text/javascript" id="rescript" src="../_layouts/15/SP.RequestExecutor.js"> </script> Data from the remote domain: <span id="TextData"></span> <!-- Main script to retrieve the host web's title --> <script type="text/javascript"> (function () { var executor; var hostweburl; var remotedomain; remotedomain = "<your_remote_add-in_domain>"; //Get the URI decoded host web URL. hostweburl = decodeURIComponent( getQueryStringParameter("SPHostUrl") ); // Initialize the RequestExecutor with the custom proxy URL. executor = new SP.RequestExecutor(remotedomain); executor.iFrameSourceUrl = "Proxy.aspx?SPHostUrl=" + hostweburl; // Issue the call against the remote endpoint. // The response formats the data in plain text. // The functions successHandler and errorHandler attend the // sucess and error events respectively. executor.executeAsync( { url: remotedomain + "Content.aspx", method: "GET", headers: { "Accept": "text/plain" }, success: successHandler, error: errorHandler } ); })(); // Function to handle the success event. // Prints the data to the placeholder. function successHandler(data) { document.getElementById("TextData").innerText = data.body; } // Function to handle the error event. // Prints the error message to the page. function errorHandler(data, errorCode, errorMessage) { document.getElementById("TextData").innerText = "Could not complete cross-domain call: " + errorMessage; } // Function to retrieve a query string value. // For production purposes you may want to use // a library to handle the query string. function getQueryStringParameter(paramToRetrieve) { var params = document.URL.split("?")[1].split("&"); var strParams = ""; for (var i = 0; i < params.length; i = i + 1) { var singleParam = params[i].split("="); if (singleParam[0] == paramToRetrieve) return singleParam[1]; } } </script>
貼り付けた前のコードで、 行
remotedomain = "<your_remote_add-in_domain>";を見つけて、プレースホルダー <your_remote_add-in_domain> を、Visual Studio で F5 でアドインを実行するときに Web アプリケーションで使用する "localhost" URL に置き換えます。 この値を見つけるには、ソリューション エクスプローラーで Web アプリケーション プロジェクトを選択します。 URL プロパティは、[プロパティ] ウィンドウにあります。 プロトコル、ポート、終了スラッシュなど、値全体を使用します。たとえばhttp://localhost:45072、 です。ファイルを保存して閉じます。
appmanifest.xml ファイルを開き、[ スタート ページ] の値を ProxyPageApp/Pages/Home.aspx に設定します。
ソリューションを構築して実行するには
SharePoint アドイン プロジェクトがスタートアップ プロジェクトとして設定されていることを確認します。
F5 キーを選択します。
注:
F5 キーを押すと、Visual Studio がソリューションをビルドして、アドインを展開し、アドインのアクセス許可ページを開きます。
[信頼する] ボタンを選択します。
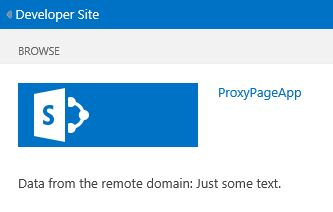
[ホーム] ページが開き、次のようになります。 語句 "Just some text" が表示されるまで数秒かかる場合がありますが、これはリモート ドメインの Content.aspx ページからフェッチされるためです。
ソリューションのトラブルシューティング
| 問題 | 解決方法 |
|---|---|
| Visual Studio で F5 キーを押してもブラウザーが開かない。 | SharePoint アドイン プロジェクトをスタートアップ プロジェクトとして設定してください。 |
| "SP は定義されていません" というハンドルされない例外が発生します。 | ブラウザー ウィンドウで SP.RequestExecutor.js ファイルにアクセスできることを確認してください。 |