このトピックでは、コントロール (または他の UI 要素) を 1 つの項目にバインドする方法、またはユニバーサル Windows プラットフォーム (UWP) アプリの項目のコレクションに項目コントロールをバインドする方法について説明します。 さらに、項目のレンダリングを制御する方法、選択内容に基づいて詳細ビューを実装する方法、表示するデータを変換する方法を示します。 詳細については、「データ バインディングについての詳しい説明」を参照してください。
[前提条件]
このトピックでは、基本的な UWP アプリを作成する方法を知っていることを前提としています。 最初の UWP アプリを作成する手順については、「 Windows アプリの使用を開始する」を参照してください。
プロジェクトを作成する
新しい ブランクアプリケーション (Windows ユニバーサル) プロジェクトを作成します。 "クイック スタート" という名前を付けます。
1 つの項目へのバインド
すべてのバインディングは、バインディング ターゲットとバインディング ソースで構成されます。 通常、ターゲットはコントロールまたはその他の UI 要素のプロパティであり、ソースはクラス インスタンス (データ モデルまたはビュー モデル) のプロパティです。 この例では、コントロールを 1 つの項目にバインドする方法を示します。 ターゲットは TextBlock の Text プロパティです。 ソースは、オーディオ録音を表す Recording という名前の単純なクラスのインスタンスです。 まずクラスを見てみましょう。
C# または C++/CX を使用している場合は、プロジェクトに新しいクラスを追加し、クラス に Recording という名前を付けます。
C++/WinRT を使用している場合は、次の C++/WinRT コード例に示すように、新しい Midl File (.idl) 項目をプロジェクトに追加します。 これらの新しいファイルの内容を、リストに示されている MIDL 3.0 コードに置き換え、 Recording.h と .cpp と RecordingViewModel.h と .cppを生成するプロジェクトをビルドしてから、生成されたファイルに一致するコードを追加します。 生成されたファイルとそのプロジェクトへのコピー方法の詳細については、 XAML コントロールと C++/WinRT プロパティへのバインドに関するページを参照してください。
namespace Quickstart
{
    public class Recording
    {
        public string ArtistName { get; set; }
        public string CompositionName { get; set; }
        public DateTime ReleaseDateTime { get; set; }
        public Recording()
        {
            this.ArtistName = "Wolfgang Amadeus Mozart";
            this.CompositionName = "Andante in C for Piano";
            this.ReleaseDateTime = new DateTime(1761, 1, 1);
        }
        public string OneLineSummary
        {
            get
            {
                return $"{this.CompositionName} by {this.ArtistName}, released: "
                    + this.ReleaseDateTime.ToString("d");
            }
        }
    }
    public class RecordingViewModel
    {
        private Recording defaultRecording = new Recording();
        public Recording DefaultRecording { get { return this.defaultRecording; } }
    }
}
// Recording.idl
namespace Quickstart
{
    runtimeclass Recording
    {
        Recording(String artistName, String compositionName, Windows.Globalization.Calendar releaseDateTime);
        String ArtistName{ get; };
        String CompositionName{ get; };
        Windows.Globalization.Calendar ReleaseDateTime{ get; };
        String OneLineSummary{ get; };
    }
}

// RecordingViewModel.idl
import "Recording.idl";

namespace Quickstart
{
    runtimeclass RecordingViewModel
    {
        RecordingViewModel();
        Quickstart.Recording DefaultRecording{ get; };
    }
}

// Recording.h
// Add these fields:
...
#include <sstream>
...
private:
    std::wstring m_artistName;
    std::wstring m_compositionName;
    Windows::Globalization::Calendar m_releaseDateTime;
...

// Recording.cpp
// Implement like this:
...
Recording::Recording(hstring const& artistName, hstring const& compositionName, Windows::Globalization::Calendar const& releaseDateTime) :
    m_artistName{ artistName.c_str() },
    m_compositionName{ compositionName.c_str() },
    m_releaseDateTime{ releaseDateTime } {}

hstring Recording::ArtistName(){ return hstring{ m_artistName }; }
hstring Recording::CompositionName(){ return hstring{ m_compositionName }; }
Windows::Globalization::Calendar Recording::ReleaseDateTime(){ return m_releaseDateTime; }

hstring Recording::OneLineSummary()
{
    std::wstringstream wstringstream;
    wstringstream << m_compositionName.c_str();
    wstringstream << L" by " << m_artistName.c_str();
    wstringstream << L", released: " << m_releaseDateTime.MonthAsNumericString().c_str();
    wstringstream << L"/" << m_releaseDateTime.DayAsString().c_str();
    wstringstream << L"/" << m_releaseDateTime.YearAsString().c_str();
    return hstring{ wstringstream.str().c_str() };
}
...

// RecordingViewModel.h
// Add this field:
...
#include "Recording.h"
...
private:
    Quickstart::Recording m_defaultRecording{ nullptr };
...

// RecordingViewModel.cpp
// Implement like this:
...
Quickstart::Recording RecordingViewModel::DefaultRecording()
{
    Windows::Globalization::Calendar releaseDateTime;
    releaseDateTime.Year(1761);
    releaseDateTime.Month(1);
    releaseDateTime.Day(1);
    m_defaultRecording = winrt::make<Recording>(L"Wolfgang Amadeus Mozart", L"Andante in C for Piano", releaseDateTime);
    return m_defaultRecording;
}
...
// Recording.h
#include <sstream>
namespace Quickstart
{
    public ref class Recording sealed
    {
    private:
        Platform::String^ artistName;
        Platform::String^ compositionName;
        Windows::Globalization::Calendar^ releaseDateTime;
    public:
        Recording(Platform::String^ artistName, Platform::String^ compositionName,
            Windows::Globalization::Calendar^ releaseDateTime) :
            artistName{ artistName },
            compositionName{ compositionName },
            releaseDateTime{ releaseDateTime } {}
        property Platform::String^ ArtistName
        {
            Platform::String^ get() { return this->artistName; }
        }
        property Platform::String^ CompositionName
        {
            Platform::String^ get() { return this->compositionName; }
        }
        property Windows::Globalization::Calendar^ ReleaseDateTime
        {
            Windows::Globalization::Calendar^ get() { return this->releaseDateTime; }
        }
        property Platform::String^ OneLineSummary
        {
            Platform::String^ get()
            {
                std::wstringstream wstringstream;
                wstringstream << this->CompositionName->Data();
                wstringstream << L" by " << this->ArtistName->Data();
                wstringstream << L", released: " << this->ReleaseDateTime->MonthAsNumericString()->Data();
                wstringstream << L"/" << this->ReleaseDateTime->DayAsString()->Data();
                wstringstream << L"/" << this->ReleaseDateTime->YearAsString()->Data();
                return ref new Platform::String(wstringstream.str().c_str());
            }
        }
    };
    public ref class RecordingViewModel sealed
    {
    private:
        Recording ^ defaultRecording;
    public:
        RecordingViewModel()
        {
            Windows::Globalization::Calendar^ releaseDateTime = ref new Windows::Globalization::Calendar();
            releaseDateTime->Year = 1761;
            releaseDateTime->Month = 1;
            releaseDateTime->Day = 1;
            this->defaultRecording = ref new Recording{ L"Wolfgang Amadeus Mozart", L"Andante in C for Piano", releaseDateTime };
        }
        property Recording^ DefaultRecording
        {
            Recording^ get() { return this->defaultRecording; };
        }
    };
}

// Recording.cpp
#include "pch.h"
#include "Recording.h"
次に、マークアップのページを表すクラスからバインディング ソース クラスを公開します。 型RecordingViewModelのプロパティをMainPageに追加します。
C++/WinRT を使用している場合は、最初にMainPage.idlを更新します。 プロジェクトをビルドして MainPage.h と .cppを再生成し、生成されたファイルの変更をプロジェクト内の変更内容にマージします。
namespace Quickstart
{
    public sealed partial class MainPage : Page
    {
        public MainPage()
        {
            this.InitializeComponent();
            this.ViewModel = new RecordingViewModel();
        }
        public RecordingViewModel ViewModel{ get; set; }
    }
}
// MainPage.idl
// Add this property:
import "RecordingViewModel.idl";
...
RecordingViewModel ViewModel{ get; };
...

// MainPage.h
// Add this property and this field:
...
#include "RecordingViewModel.h"
...
    Quickstart::RecordingViewModel ViewModel();

private:
    Quickstart::RecordingViewModel m_viewModel{ nullptr };
...

// MainPage.cpp
// Implement like this:
...
MainPage::MainPage()
{
    InitializeComponent();
    m_viewModel = winrt::make<RecordingViewModel>();
}
Quickstart::RecordingViewModel MainPage::ViewModel()
{
    return m_viewModel;
}
...
// MainPage.h
...
#include "Recording.h"

namespace Quickstart
{
    public ref class MainPage sealed
    {
    private:
        RecordingViewModel ^ viewModel;
    public:
        MainPage();

        property RecordingViewModel^ ViewModel
        {
            RecordingViewModel^ get() { return this->viewModel; };
        }
    };
}

// MainPage.cpp
...
MainPage::MainPage()
{
    InitializeComponent();
    this->viewModel = ref new RecordingViewModel();
}
最後に、 TextBlock を ViewModel.DefaultRecording.OneLineSummary プロパティに バインドします。
<Page x:Class="Quickstart.MainPage" ... >
    <Grid Background="{ThemeResource ApplicationPageBackgroundThemeBrush}">
        <TextBlock Text="{x:Bind ViewModel.DefaultRecording.OneLineSummary}"
    HorizontalAlignment="Center"
    VerticalAlignment="Center"/>
    </Grid>
</Page>
C++/WinRT を使用している場合は、プロジェクトをビルドするために MainPage::ClickHandler 関数を削除する必要があります。
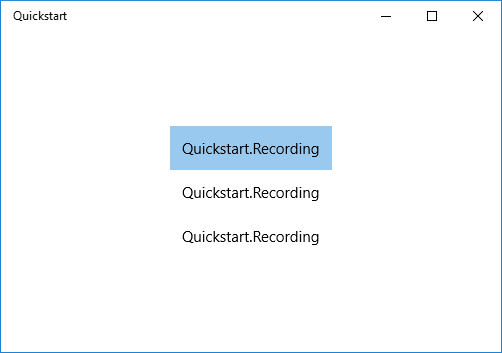
結果を次に示します。
テキストブロック を
項目のコレクションへのバインド
一般的なシナリオは、ビジネス オブジェクトのコレクションにバインドすることです。 C# および Visual Basic では、汎用 の ObservableCollection<T> クラスは、 INotifyPropertyChanged インターフェイスと INotifyCollectionChanged インターフェイスを実装するため、データ バインディングに適したコレクションの選択肢です。 これらのインターフェイスは、項目が追加または削除されたとき、またはリスト自体のプロパティが変更されたときに、バインディングに変更通知を提供します。 バインドされたコントロールをコレクション内のオブジェクトのプロパティに変更して更新する場合は、ビジネス オブジェクトも INotifyPropertyChanged を実装する必要があります。 詳細については、「データ バインディングの詳細」を参照してください。
C++/WinRTを使用している場合は、XAML 項目コントロールで監視可能なコレクションへのバインドの詳細 学習できます。C++/WinRT コレクションにバインドします。 最初にそのトピックを読んだ場合、次に示す C++/WinRT コードリストの意図がより明確になります。
次の例では、ListView を Recording オブジェクトのコレクションにバインドします。 まず、ビュー モデルにコレクションを追加します。 これらの新しいメンバーを RecordingViewModel クラスに追加するだけです。
public class RecordingViewModel
{
    ...
    private ObservableCollection<Recording> recordings = new ObservableCollection<Recording>();
    public ObservableCollection<Recording> Recordings{ get{ return this.recordings; } }
    public RecordingViewModel()
    {
        this.recordings.Add(new Recording(){ ArtistName = "Johann Sebastian Bach",
            CompositionName = "Mass in B minor", ReleaseDateTime = new DateTime(1748, 7, 8) });
        this.recordings.Add(new Recording(){ ArtistName = "Ludwig van Beethoven",
            CompositionName = "Third Symphony", ReleaseDateTime = new DateTime(1805, 2, 11) });
        this.recordings.Add(new Recording(){ ArtistName = "George Frideric Handel",
            CompositionName = "Serse", ReleaseDateTime = new DateTime(1737, 12, 3) });
    }
}
// RecordingViewModel.idl
// Add this property:
...
#include <winrt/Windows.Foundation.Collections.h>
...
Windows.Foundation.Collections.IVector<IInspectable> Recordings{ get; };
...

// RecordingViewModel.h
// Change the constructor declaration, and add this property and this field:
...
    RecordingViewModel();
    Windows::Foundation::Collections::IVector<Windows::Foundation::IInspectable> Recordings();

private:
    Windows::Foundation::Collections::IVector<Windows::Foundation::IInspectable> m_recordings;
...

// RecordingViewModel.cpp
// Update/add implementations like this:
...
RecordingViewModel::RecordingViewModel()
{
    std::vector<Windows::Foundation::IInspectable> recordings;

    Windows::Globalization::Calendar releaseDateTime;
    releaseDateTime.Month(7); releaseDateTime.Day(8); releaseDateTime.Year(1748);
    recordings.push_back(winrt::make<Recording>(L"Johann Sebastian Bach", L"Mass in B minor", releaseDateTime));

    releaseDateTime = Windows::Globalization::Calendar{};
    releaseDateTime.Month(11); releaseDateTime.Day(2); releaseDateTime.Year(1805);
    recordings.push_back(winrt::make<Recording>(L"Ludwig van Beethoven", L"Third Symphony", releaseDateTime));

    releaseDateTime = Windows::Globalization::Calendar{};
    releaseDateTime.Month(3); releaseDateTime.Day(12); releaseDateTime.Year(1737);
    recordings.push_back(winrt::make<Recording>(L"George Frideric Handel", L"Serse", releaseDateTime));

    m_recordings = winrt::single_threaded_observable_vector<Windows::Foundation::IInspectable>(std::move(recordings));
}

Windows::Foundation::Collections::IVector<Windows::Foundation::IInspectable> RecordingViewModel::Recordings() { return m_recordings; }
...
// Recording.h
...
public ref class RecordingViewModel sealed
{
private:
    ...
    Windows::Foundation::Collections::IVector<Recording^>^ recordings;
public:
    RecordingViewModel()
    {
        ...
        releaseDateTime = ref new Windows::Globalization::Calendar();
        releaseDateTime->Year = 1748;
        releaseDateTime->Month = 7;
        releaseDateTime->Day = 8;
        Recording^ recording = ref new Recording{ L"Johann Sebastian Bach", L"Mass in B minor", releaseDateTime };
        this->Recordings->Append(recording);
        releaseDateTime = ref new Windows::Globalization::Calendar();
        releaseDateTime->Year = 1805;
        releaseDateTime->Month = 2;
        releaseDateTime->Day = 11;
        recording = ref new Recording{ L"Ludwig van Beethoven", L"Third Symphony", releaseDateTime };
        this->Recordings->Append(recording);
        releaseDateTime = ref new Windows::Globalization::Calendar();
        releaseDateTime->Year = 1737;
        releaseDateTime->Month = 12;
        releaseDateTime->Day = 3;
        recording = ref new Recording{ L"George Frideric Handel", L"Serse", releaseDateTime };
        this->Recordings->Append(recording);
    }
    ...
    property Windows::Foundation::Collections::IVector<Recording^>^ Recordings
    {
        Windows::Foundation::Collections::IVector<Recording^>^ get()
        {
            if (this->recordings == nullptr)
            {
                this->recordings = ref new Platform::Collections::Vector<Recording^>();
            }
            return this->recordings;
        };
    }
};
次に、 ListView を ViewModel.Recordings プロパティにバインドします。
<Page x:Class="Quickstart.MainPage" ... >
    <Grid Background="{ThemeResource ApplicationPageBackgroundThemeBrush}">
        <ListView ItemsSource="{x:Bind ViewModel.Recordings}"
        HorizontalAlignment="Center" VerticalAlignment="Center"/>
    </Grid>
</Page>
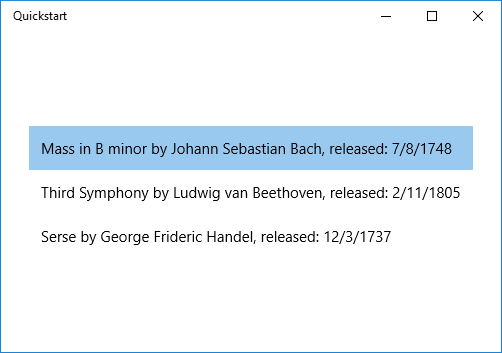
まだ Recording クラスのデータ テンプレートを提供していないので、UI フレームワークで実行できる最善の方法は、ListView の各項目に対して ToString を呼び出す方法です。 ToString の既定の実装では、型名が返されます。
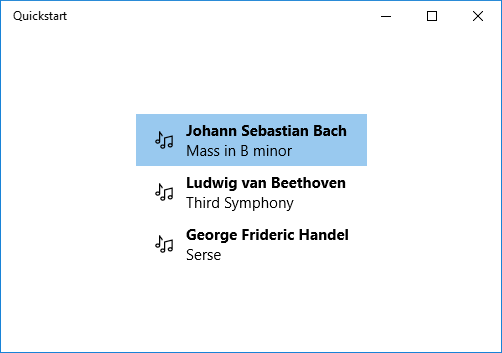
これを解決するには、 ToString を オーバーライドして OneLineSummary の値を返すか、データ テンプレートを提供します。 データ テンプレート オプションは、より一般的なソリューションであり、柔軟性が高くなります。 データ テンプレートは、コンテンツ コントロールの ContentTemplate プロパティまたはアイテム コントロールの ItemTemplate プロパティを使用して指定します。 記録用のデータ テンプレートを、結果の図と共に設計する 2 つの方法を次に示します。
<ListView ItemsSource="{x:Bind ViewModel.Recordings}"
HorizontalAlignment="Center" VerticalAlignment="Center">
    <ListView.ItemTemplate>
        <DataTemplate x:DataType="local:Recording">
            <TextBlock Text="{x:Bind OneLineSummary}"/>
        </DataTemplate>
    </ListView.ItemTemplate>
</ListView>
<ListView ItemsSource="{x:Bind ViewModel.Recordings}"
HorizontalAlignment="Center" VerticalAlignment="Center">
    <ListView.ItemTemplate>
        <DataTemplate x:DataType="local:Recording">
            <StackPanel Orientation="Horizontal" Margin="6">
                <SymbolIcon Symbol="Audio" Margin="0,0,12,0"/>
                <StackPanel>
                    <TextBlock Text="{x:Bind ArtistName}" FontWeight="Bold"/>
                    <TextBlock Text="{x:Bind CompositionName}"/>
                </StackPanel>
            </StackPanel>
        </DataTemplate>
    </ListView.ItemTemplate>
</ListView>
XAML 構文の詳細については、「XAMLを使用して UI を作成する」を参照してください。 コントロール レイアウトの詳細については、「XAMLを使用してレイアウトを定義する」を参照してください。
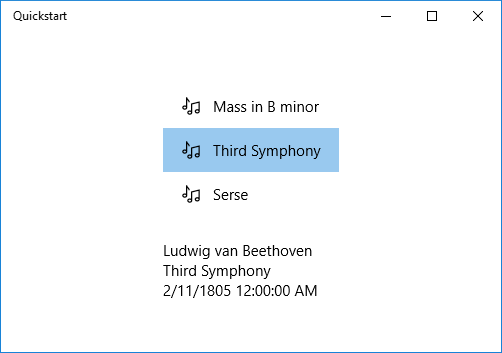
詳細ビューの追加
ListView アイテム内の Recording オブジェクトのすべての詳細を表示することを選択できます。 しかし、それは多くのスペースを占有します。 代わりに、項目を識別するのに十分なデータだけをアイテムに表示し、ユーザーが選択を行うときに、選択した項目のすべての詳細を、詳細ビューと呼ばれる別の UI に表示できます。 この配置は、マスター/詳細ビュー、またはリスト/詳細ビューとも呼ばれます。
これについては 2 つの方法があります。 詳細ビューは、ListViewの SelectedItem プロパティにバインドできます。 または、 CollectionViewSource を使用できます。この場合、 ListView ビューと詳細ビューの両方を CollectionViewSource にバインドします (これにより、現在選択されている項目が自動的に処理されます)。 両方の手法を次に示します。両方とも同じ結果を得られます (図を参照)。
注
ここまで、このトピックでは{x:Bind} マークアップ拡張
C++/WinRT または Visual C++ コンポーネント拡張機能 (C++/CX) を使用している場合、 {Binding} マークアップ拡張を使用するには、バインドするランタイム クラスに BindableAttribute 属性を追加する必要があります。 {x:Bind} を使用するには、その属性は必要ありません。
Von Bedeutung
C++/WinRT を使用している場合は、Windows SDK バージョン 10.0.17763.0 (Windows 10 バージョン 1809) 以降をインストールしている場合は、BindableAttribute 属性を使用できます。 この属性がないと、ICustomPropertyProvider インターフェイスと ICustomProperty インターフェイスを実装しない限り、{Binding} マークアップ拡張を使用することができません。
まず、SelectedItem 手法を示します。
// No code changes necessary for C#.
// Recording.idl
// Add this attribute:
...
[Windows.UI.Xaml.Data.Bindable]
runtimeclass Recording
...
[Windows::UI::Xaml::Data::Bindable]
public ref class Recording sealed
{
    ...
};
必要なその他の変更は、マークアップのみです。
<Page x:Class="Quickstart.MainPage" ... >
    <Grid Background="{ThemeResource ApplicationPageBackgroundThemeBrush}">
        <StackPanel HorizontalAlignment="Center" VerticalAlignment="Center">
            <ListView x:Name="recordingsListView" ItemsSource="{x:Bind ViewModel.Recordings}">
                <ListView.ItemTemplate>
                    <DataTemplate x:DataType="local:Recording">
                        <StackPanel Orientation="Horizontal" Margin="6">
                            <SymbolIcon Symbol="Audio" Margin="0,0,12,0"/>
                            <StackPanel>
                                <TextBlock Text="{x:Bind CompositionName}"/>
                            </StackPanel>
                        </StackPanel>
                    </DataTemplate>
                </ListView.ItemTemplate>
            </ListView>
            <StackPanel DataContext="{Binding SelectedItem, ElementName=recordingsListView}"
            Margin="0,24,0,0">
                <TextBlock Text="{Binding ArtistName}"/>
                <TextBlock Text="{Binding CompositionName}"/>
                <TextBlock Text="{Binding ReleaseDateTime}"/>
            </StackPanel>
        </StackPanel>
    </Grid>
</Page>
CollectionViewSource 手法の場合は、最初に CollectionViewSource をページ リソースとして追加します。
<Page.Resources>
    <CollectionViewSource x:Name="RecordingsCollection" Source="{x:Bind ViewModel.Recordings}"/>
</Page.Resources>
次に、ListView (名前を付ける必要がなくなったもの) と詳細ビューのバインドを調整して、CollectionViewSourceを使用します。 詳細ビューを CollectionViewSource に直接バインドすることで、コレクション自体にパスが見つからないバインド内の現在の項目にバインドすることを意味することに注意してください。 バインディングのパスとして CurrentItem プロパティを指定する必要はありませんが、あいまいさがある場合は指定できます)。
...
<ListView ItemsSource="{Binding Source={StaticResource RecordingsCollection}}">
...
<StackPanel DataContext="{Binding Source={StaticResource RecordingsCollection}}" ...>
...
各ケースで同じ結果を次に示します。
注
C++ を使用している場合、UI は次の図のようには見えません。 ReleaseDateTime プロパティのレンダリングは異なります。 この詳細については、次のセクションを参照してください。
表示するデータ値の書式設定または変換
上記のレンダリングに問題があります。
ReleaseDateTime プロパティは単なる日付ではなく、DateTime です (C++ を使用している場合は Calendar です)。 そのため、C# では、必要以上の精度で表示されます。 C++ では、型名としてレンダリングされます。 1 つの解決策は、と同等のものを返す文字列プロパティを this.ReleaseDateTime.ToString("d") クラスに追加することです。 プロパティ ReleaseDate という名前を付けると、日付と時刻ではなく、日付のみが返されることを示します。 それを ReleaseDateAsString
より柔軟なソリューションは、値コンバーターと呼ばれるものを使用することです。 独自の値コンバーターを作成する方法の例を次に示します。 C# を使用している場合は、次のコードを Recording.cs ソース コード ファイルに追加します。 C++/WinRT を使用している場合は、次の C++/WinRT コード例のリストに示すように名前が付けられた新しい Midl File (.idl) 項目をプロジェクトに追加し、プロジェクトをビルドして StringFormatter.h と .cppを生成し、それらのファイルをプロジェクトに追加してから、コード一覧を貼り付けます。 また、#include "StringFormatter.h"にMainPage.hを追加します。
public class StringFormatter : Windows.UI.Xaml.Data.IValueConverter
{
    // This converts the value object to the string to display.
    // This will work with most simple types.
    public object Convert(object value, Type targetType,
        object parameter, string language)
    {
        // Retrieve the format string and use it to format the value.
        string formatString = parameter as string;
        if (!string.IsNullOrEmpty(formatString))
        {
            return string.Format(formatString, value);
        }

        // If the format string is null or empty, simply
        // call ToString() on the value.
        return value.ToString();
    }

    // No need to implement converting back on a one-way binding
    public object ConvertBack(object value, Type targetType,
        object parameter, string language)
    {
        throw new NotImplementedException();
    }
}
// pch.h
...
#include <winrt/Windows.Globalization.h>

// StringFormatter.idl
namespace Quickstart
{
    runtimeclass StringFormatter : [default] Windows.UI.Xaml.Data.IValueConverter
    {
        StringFormatter();
    }
}

// StringFormatter.h
#pragma once

#include "StringFormatter.g.h"
#include <sstream>

namespace winrt::Quickstart::implementation
{
    struct StringFormatter : StringFormatterT<StringFormatter>
    {
        StringFormatter() = default;

        Windows::Foundation::IInspectable Convert(Windows::Foundation::IInspectable const& value, Windows::UI::Xaml::Interop::TypeName const& targetType, Windows::Foundation::IInspectable const& parameter, hstring const& language);
        Windows::Foundation::IInspectable ConvertBack(Windows::Foundation::IInspectable const& value, Windows::UI::Xaml::Interop::TypeName const& targetType, Windows::Foundation::IInspectable const& parameter, hstring const& language);
    };
}

namespace winrt::Quickstart::factory_implementation
{
    struct StringFormatter : StringFormatterT<StringFormatter, implementation::StringFormatter>
    {
    };
}

// StringFormatter.cpp
#include "pch.h"
#include "StringFormatter.h"
#include "StringFormatter.g.cpp"

namespace winrt::Quickstart::implementation
{
    Windows::Foundation::IInspectable StringFormatter::Convert(Windows::Foundation::IInspectable const& value, Windows::UI::Xaml::Interop::TypeName const& /* targetType */, Windows::Foundation::IInspectable const& /* parameter */, hstring const& /* language */)
    {
        // Retrieve the value as a Calendar.
        Windows::Globalization::Calendar valueAsCalendar{ value.as<Windows::Globalization::Calendar>() };

        std::wstringstream wstringstream;
        wstringstream << L"Released: ";
        wstringstream << valueAsCalendar.MonthAsNumericString().c_str();
        wstringstream << L"/" << valueAsCalendar.DayAsString().c_str();
        wstringstream << L"/" << valueAsCalendar.YearAsString().c_str();
        return winrt::box_value(hstring{ wstringstream.str().c_str() });
    }

    Windows::Foundation::IInspectable StringFormatter::ConvertBack(Windows::Foundation::IInspectable const& /* value */, Windows::UI::Xaml::Interop::TypeName const& /* targetType */, Windows::Foundation::IInspectable const& /* parameter */, hstring const& /* language */)
    {
        throw hresult_not_implemented();
    }
}
...
public ref class StringFormatter sealed : Windows::UI::Xaml::Data::IValueConverter
{
public:
    virtual Platform::Object^ Convert(Platform::Object^ value, TypeName targetType, Platform::Object^ parameter, Platform::String^ language)
    {
        // Retrieve the value as a Calendar.
        Windows::Globalization::Calendar^ valueAsCalendar = dynamic_cast<Windows::Globalization::Calendar^>(value);

        std::wstringstream wstringstream;
        wstringstream << L"Released: ";
        wstringstream << valueAsCalendar->MonthAsNumericString()->Data();
        wstringstream << L"/" << valueAsCalendar->DayAsString()->Data();
        wstringstream << L"/" << valueAsCalendar->YearAsString()->Data();
        return ref new Platform::String(wstringstream.str().c_str());
    }

    // No need to implement converting back on a one-way binding
    virtual Platform::Object^ ConvertBack(Platform::Object^ value, TypeName targetType, Platform::Object^ parameter, Platform::String^ language)
    {
        throw ref new Platform::NotImplementedException();
    }
};
...
注
上記の C++/WinRT コード リストでは、 StringFormatter.idlでは 、既定の属性 を使用して IValueConverter を既定のインターフェイスとして宣言します。 この一覧では、 StringFormatter にはコンストラクターのみが含まれており、メソッドがないため、既定のインターフェイスは生成されません。
default メソッドを呼び出すために QueryInterface は必要ないため、StringFormatter にインスタンス メンバーを追加しない場合は、属性が最適です。 または、IStringFormatter インターフェイス
これで、ページ リソースとして StringFormatter のインスタンスを追加し、ReleaseDateTime プロパティを表示する TextBlock のバインドで使用できるようになりました。
<Page.Resources>
    <local:StringFormatter x:Key="StringFormatterValueConverter"/>
</Page.Resources>
...
<TextBlock Text="{Binding ReleaseDateTime,
    Converter={StaticResource StringFormatterValueConverter},
    ConverterParameter=Released: \{0:d\}}"/>
...
前述のように、書式設定の柔軟性のために、マークアップを使用して、コンバーター パラメーターを使用してコンバーターに書式文字列を渡します。 このトピックに示すコード例では、C# 値コンバーターのみがそのパラメーターを使用します。 C++スタイルの書式指定文字列をコンバーターパラメーターとして簡単に渡し、それを使用して、値コンバーターにおいて wprintf や swprintfのような書式設定関数を使用できます。
結果を次に示します。
カスタム書式設定 を使用して日付を表示する
注
Windows 10 バージョン 1607 以降、XAML フレームワークには組み込みのブール型から可視性へのコンバーターが用意されています。 コンバーター