Note
ამ გვერდზე წვდომა ავტორიზაციას მოითხოვს. შეგიძლიათ სცადოთ შესვლა ან დირექტორიების შეცვლა.
ამ გვერდზე წვდომა ავტორიზაციას მოითხოვს. შეგიძლიათ სცადოთ დირექტორიების შეცვლა.
Note
The Retail Interest Group by Dynamics 365 Commerce has moved from Yammer to Viva Engage. If you don't have access to the new Viva Engage community, fill out this form (https://aka.ms/JoinD365commerceVivaEngageCommunity) to be added and stay engaged in the latest discussions.
This article describes how to manage attributes and attribute groups to describe products and their characteristics in Microsoft Dynamics 365 Commerce.
Attributes provide a way to describe products and their characteristics through user-defined fields. Examples include memory size, hard disk capacity, and Energy Star compliance.
You can associate attributes with various Commerce entities, such as product categories and channels, and set default values for them. When you associate attributes with product categories or channels, products inherit those attributes and their default values. You can override default attribute values at the individual product level, at the channel level, or in a catalog.
For example, a typical television product might have the following attributes.
| Category | Attribute | Permissible values | Default value |
|---|---|---|---|
| TV & Video | Brand | Any valid brand value | None |
| TV | Screen Size | 20–85 inches | 55 inches |
| Vertical Resolution | 4K (2160p), Full HD (1080p), or HD (720p) | 4K (2160p) | |
| Screen Refresh Rate | 60 hz, 120 hz, or 240 hz | 60 hz | |
| HDMI Inputs | 0–10 | 3 |
Attributes and attribute types
Attributes are based on attribute types. An attribute type specifies the type of data that you can enter for a specific attribute. Commerce supports the following attribute types:
- Currency – This type supports a currency value. It can be bounded (that is, it can support a range of values), or it can be open.
- DateTime – This type supports a date and time value. It can be bounded or open.
- Decimal – This type supports a numerical value that includes decimal places. It also supports a unit of measure. It can be bounded or open.
- Integer – This type supports a numerical value. It also supports a unit of measure. It can be bounded or open.
- Text – This type supports a text value. It also supports a predefined set of possible values when the Fixed list setting is enabled.
- Boolean – This type supports a binary value (true or false).
- Reference – This type references other attributes.
Note
Because of limitations of the Azure search index, the Decimal attribute type isn't supported for cloud-powered search experiences. Azure Cognitive Search doesn't support converting Decimal attribute types to Edm.Double target index field types, because this conversion would decrease precision.
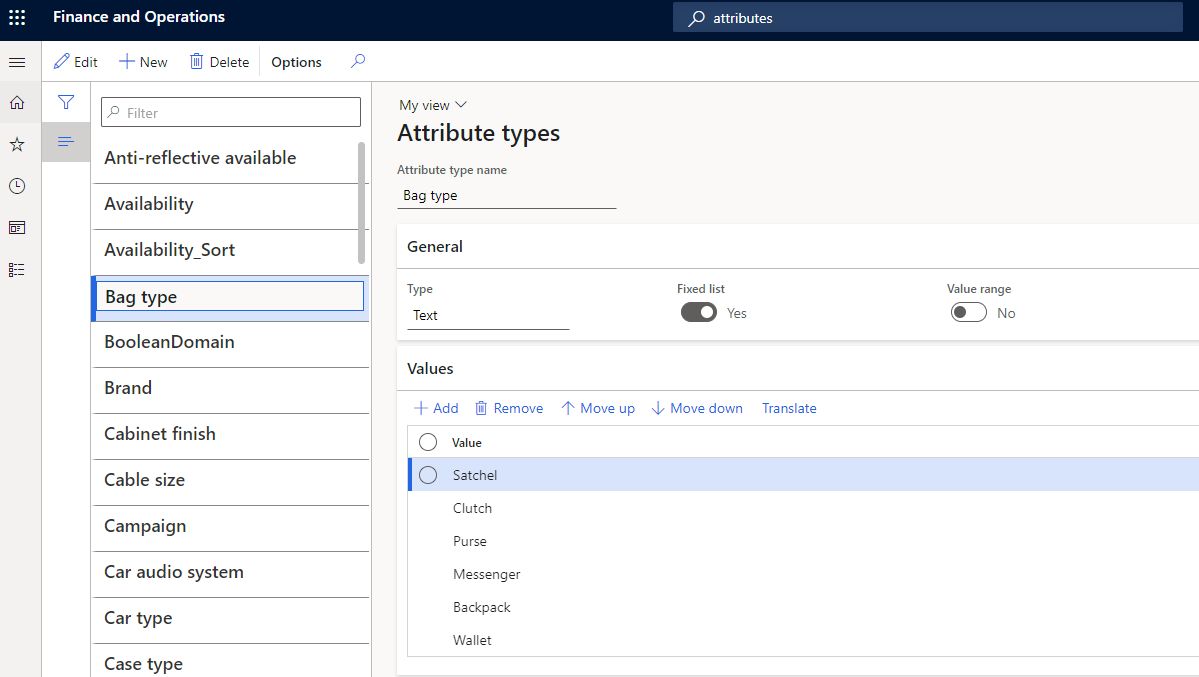
Set up attribute types
To set up attribute types, follow the steps in this example procedure:
- Sign in to Commerce headquarters as a merchandising manager.
- Go to Product information management > Setup > Categories and attributes > Attribute types.
- On the Action Pane, select New.
- In the Attribute type name field, enter Bag type.
- In the Type field, select Text.
- Set the Fixed list option to Yes.
- On the Values FastTab, select Add.
- On the new row, in the Value field, enter Satchel.
- Add five more rows. In the Value field of each, enter a different value: Clutch, Purse, Backpack, Messenger, or Wallet.
- On the Action Pane, select Save.
- On the Action Pane, select New.
- In the Attribute type name field, enter Sunglass brand.
- In the Type field, select Text.
- Set the Fixed list option to Yes.
- On the Values FastTab, select Add.
- On the new row, in the Value field, enter Ray ban.
- Add two more rows. In the Value field of each, enter a different value: Aviator or Oakley.
- On the Action Pane, select Save.
Set up an attribute
To set up an attribute, follow the steps in this example procedure:
- Sign in to Commerce headquarters as a merchandising manager.
- Go to Product information management > Setup > Categories and attributes > Attributes.
- On the Action Pane, select New.
- In the Name field, enter Bag type.
- In the Attribute type field, select Bag type.
- On the Action Pane, select Save.
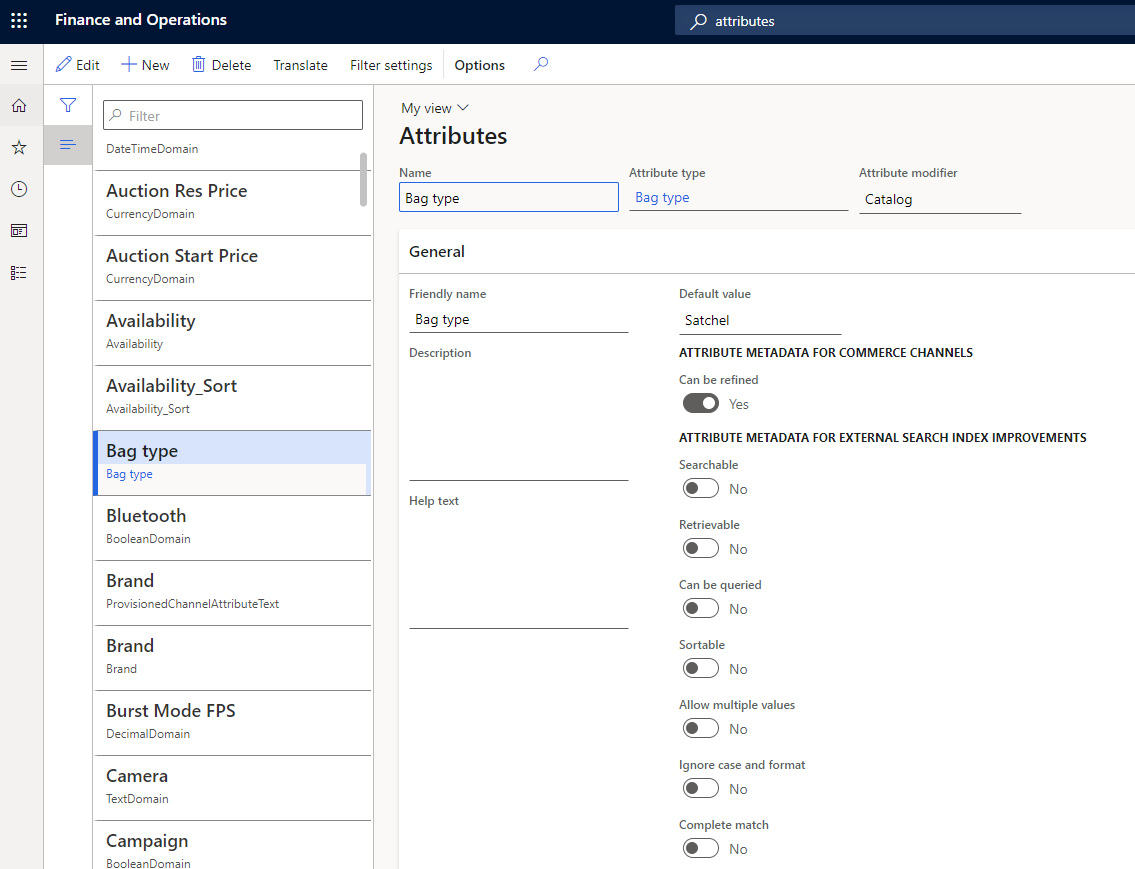
Attribute metadata
Attribute metadata lets you select options to specify how the attributes for each product should behave. For example, you can specify whether attributes are required, and whether they can be used for searches, or used as a filter.
For products, you can override the attribute metadata settings at the channel level.
An attribute's Attributes page includes several options that are related to attribute metadata. For example, if you set the Can be refined option to Yes under Attribute metadata for Commerce channels, the attribute appears for refinement or filtering of products on search results and category browsing pages. To configure an attribute as refinable, you must first select Filter settings on the Action Pane and confirm the filter settings for the attribute.
Filter settings for attributes
Filter settings for attributes let you define how the attribute filters show in point of sale (POS). To access the filter settings for an attribute, on the attribute's Attributes page, on the Action Pane, select Filter settings.
The Filter settings page includes the following fields:
Name – By default, this field is set to the name of the attribute. However, you can change the value.
Display option – The following options are available:
- Single value – This option is available for the following attribute types: Boolean, Currency, Decimal, Integer, and Text. It allows only a single value to be selected for refiners on product list pages, such as category browsing and product search results pages.
- Multi value – This option is available for the following attribute types: Currency, Decimal, Integer, and Text.
Display control – The following options are available:
- List – This option is available for all attribute types.
- Range – This option is available for the following attribute types: Currency, Decimal, and Integer.
- Slider – This option is available for the following attribute types: Currency, Decimal, and Integer.
- Slider with bars – This option is available for the following attribute types: Currency, Decimal, and Integer.
Threshold value – This setting is required if you select Range as the display control type. You can define values by using a semicolon (;) as a delimiter.
For example, for a Bag Volume attribute that has an attribute type of Integer, the threshold value might be 10; 20; 50; 100; 200; 500; 1000; 5000. In this case, the POS shows the following ranges. Ranges that don't have any products in the result set appears dimmed.
- Less than 10
- 10 – 20
- 20 – 50
- 50 – 100
- 100 – 200
- 200 – 500
- 500 or more
Filter settings for attributes are applicable only to product attributes and can be used to refine product search and category browsing results. They don't apply to customer search or order search, although the same attributes can be used to enrich customer or order information.
In the default Commerce modules, no out-of-box support is available for Display control filter settings such as Range, Slider, and Slider with bars. The Range and Slider settings continue to be supported for POS solutions, whereas the Slider with bars setting is applicable to legacy SharePoint online storefronts and continues to be available for partner integration and custom scenarios.
Use refinable attributes with an attribute of the Text type where the Fixed-list option is enabled, and keep the list manageable (up to 100–200 unique values). If a refiner has 1,000 or more unique values, use an attribute of the Text type where the Fixed-list option is disabled.
Translations are critical for attribute names and their values. For attributes of the Text type where the Fixed-list option is enabled, you can define translations for the attribute values under Attribute type. For every other attribute type, you can define translations on the page where you define the attribute values. For example, for an attribute of the Text type, you can define translations for the default value on the attribute's Attributes page. However, if you override the default value at the product level, you can define translations for the attribute on the product's Product attributes page.
After you mark an attribute as refinable for a channel, don't update the attribute type. Otherwise, you affect the publication of product data to the search index. Instead, create a new attribute for a new type of refiner and retire the previous attribute by removing it from other attribute groups.
Search by attributes is supported but fetches results only for exact matches of search words. For example, a Fabric attribute has a value of Cashmere cotton. If a customer searches for "Cash," no products that have Cashmere cotton as the fabric is retrieved. However, if a customer searches for "Cashmere," "Cotton," or "Cashmere Cotton," products that have Cashmere cotton as the fabric is retrieved.
Additional attribute metadata options
Note
These attribute metadata options apply only to legacy SharePoint online storefront and external integrations. For more information about these attribute metadata options, see Overview of the search schema in SharePoint Server 2013.
The following additional attribute metadata options are also available on the Attributes page:
- Searchable
- Retrievable
- Can be queried
- Sortable
- Ignore case and format
- Complete match
- Mandatory
- Hidden
These options originally improved the search functionality for legacy SharePoint-based online storefronts. They don't necessarily apply to Commerce e-commerce websites or POS terminals. Because headless integration continues to be supported, these options are available for exporting attribute metadata by using the Commerce software development kit (SDK). You can use the Commerce SDK to put products into a custom, optimized external search index. In this way, you can ensure that only attributes that should be indexed are indexed.
Attribute groups
An attribute group is used to group the individual attributes of a component or subcomponent in a product configuration model. An attribute can be included in more than one attribute group. Attribute groups can help users configure products, because the various selections are arranged in a specific context. You can assign attribute groups to categories or channels. You can also set default values for attributes in an attribute group.
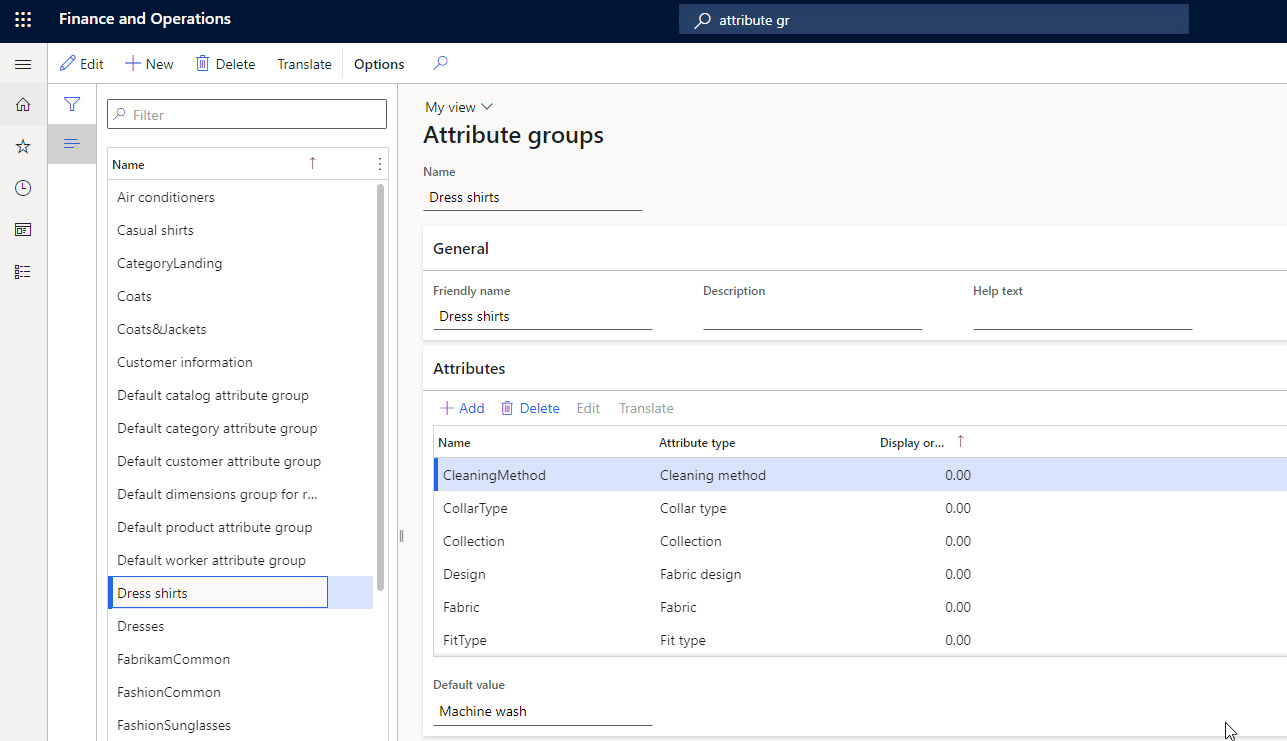
Create an attribute group
To create an attribute group, follow the steps in this example procedure:
- Sign in to Commerce headquarters as a merchandising manager.
- Go to Product information management > Setup > Categories and attributes > Attribute groups.
- Create an attribute group named Dress Shirts.
- Add the following attributes: CleaningMethod, CollarType, Collection, and Design.
Note
The display order values of attributes in the attribute group don't influence or apply to the order of the refiners in the search and category browse results. They're applicable only to the "order attributes" scenario.
Assign attribute groups to categories
You can associate one or more attribute groups with category nodes in the following types of category hierarchies:
- Commerce product hierarchy
- Channel navigation category hierarchy
- Supplemental product category hierarchy
When you categorize products in categories that are associated with attribute groups, the products inherit the attributes that are included in those attribute groups.
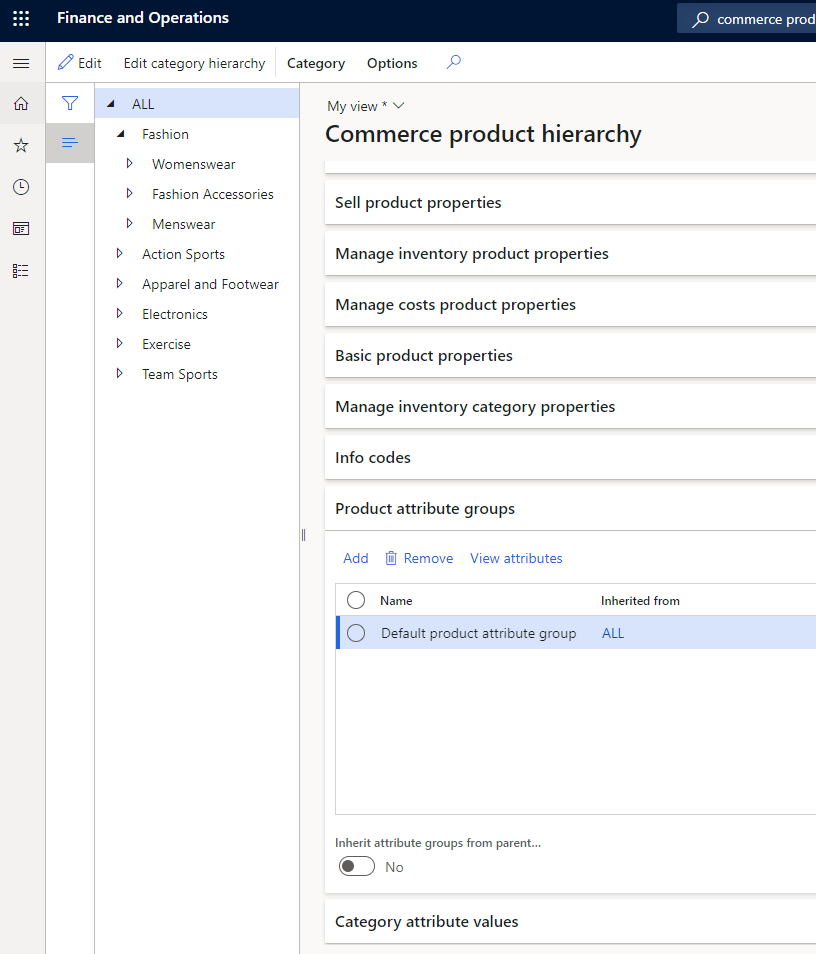
To assign attribute groups to categories in the Commerce product hierarchy, follow the steps in this example procedure:
- Sign in to Commerce headquarters as a merchandising manager.
- Go to Retail and Commerce > Products and categories > Commerce product hierarchy.
- Select the Fashion navigation hierarchy.
- Under Menswear, select the Pants category. On the Product attribute groups FastTab, add an attribute group named Men's belt.
- Select the Fashion sunglasses category. Select View attributes to verify the new attributes in the Fashion Sunglasses attribute group. The attribute group should show the new Lens shape and Sunglass brand attributes.
- Select the Pants category. Select View attributes to verify the attributes for the Men's belt attribute group. The attribute group should show the Men's belt brand, Belt fabric, and Belt size attributes.
You can use the same basic procedure to assign attribute groups to categories in the channel navigation category hierarchy and the supplemental product category hierarchy. However, in step 2, use one of the following paths, depending on the hierarchy that you want to assign attribute groups to:
- Channel navigation category hierarchy: Go to Retail and Commerce > Category and product management > Channel navigation categories.
- Supplemental product category hierarchy: Go to Retail and Commerce > Category and product management > Supplemental product categories.
Note
Ensure that you only associate attribute groups in a category hierarchy on the Product attribute groups FastTab, not on the Category attribute values FastTab. If attributes appear on the Category attribute values FastTab, select Edit category hierarchy on the Action Pane. Then, on the Category attribute groups FastTab, select the category nodes, and select Remove. Commerce Scale Unit doesn't support fetching attributes by category.
Identify viewable and refinable attributes for Commerce channels for the default product collection
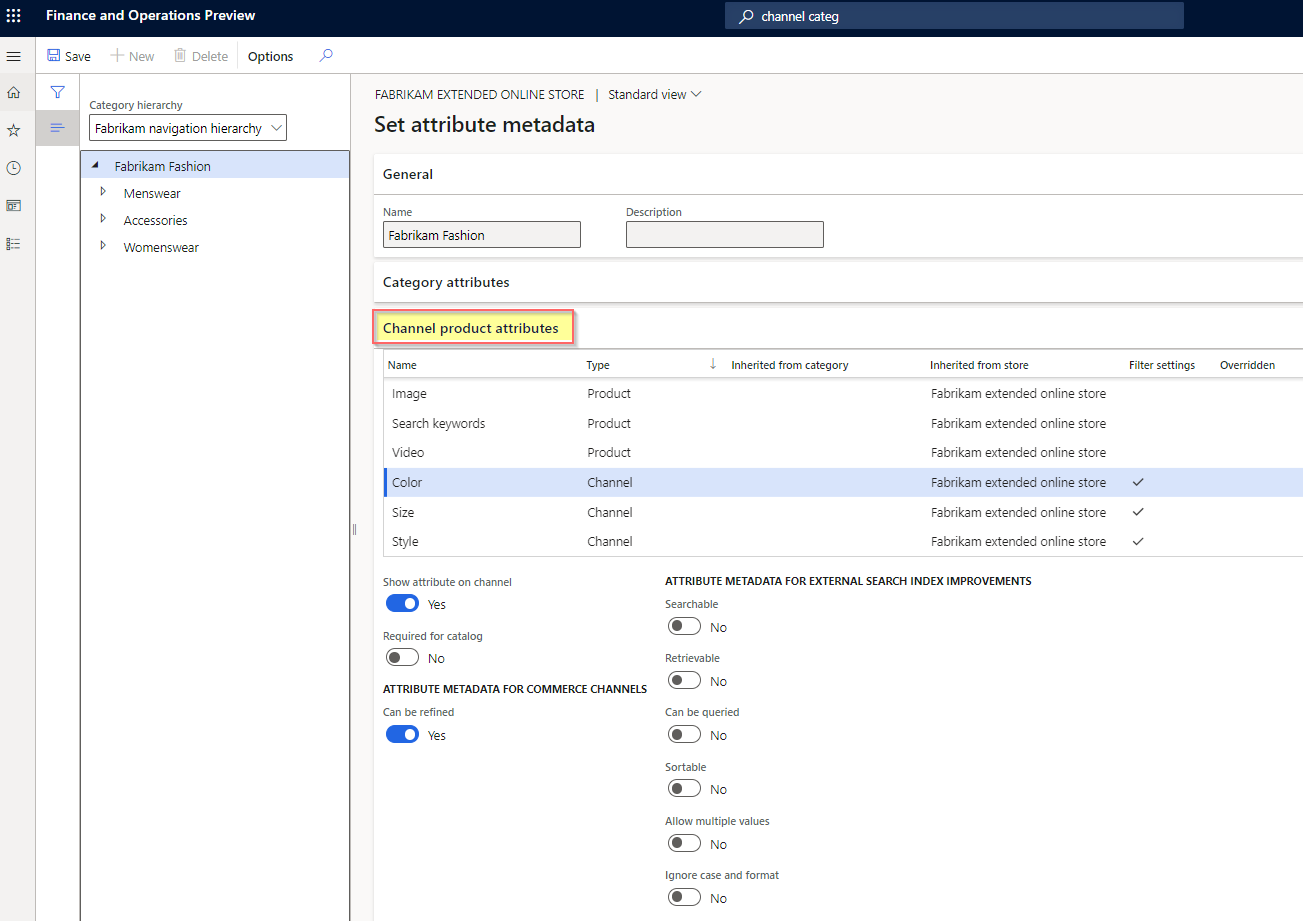
After you associate various attribute groups with categories in different hierarchies (Commerce product hierarchy or channel navigation categories) and define attribute values for each product based on the category association, enable the Show attribute on Channel flag to make those attributes viewable in a specific channel.
- Go to Retail and Commerce > Channel setup > Channel categories and product attributes.
- Select Set attribute metadata, and then select an attribute in the left navigation pane.
- On the Channel product attributes FastTab (not the Category attributes FastTab), set the Show attribute on channel option to Yes to make the attribute viewable.
- If you want the attribute to be refinable too, set the Can be refined option to Yes.
Control visibility of dimension-based refiners such as size, style, and color
Product dimensions such as size, style, and color are the most commonly used refiners. To make these product dimensions available as refiners, associate an attribute group at the channel level that contains a reference to an attribute type that automatically inherits values from product dimension values.
You can specify that product dimensions are viewable and refinable by updating flags on the Channel categories and product attributes page. Select the root node in the navigation pane, and then, on Channel product attributes FastTab, set the Show attribute on channel option to Yes for the Size, Style, and Color attributes. If you want these attributes to be refinable too, set the Can be refined option to Yes for each.
To enable the attributes so that they're available in the demo-data-based Houston channel, follow the steps in this example procedure:
- Go to Retail and Commerce > Channel setup > Channel categories and product attributes.
- Select the Houston channel.
- On the Action Pane, select Set attribute metadata.
- Select the Fashion category node, and then, on the Channel product attributes FastTab, select Include attribute for each attribute.
- Select the Fashion Accessories category node, select the Fashion Sunglasses category, and then, on the Channel product attributes FastTab, select Include attribute for each attribute.
- Select the Menswear category node, select the Pants category, and then, on the Channel product attributes FastTab, select Include attribute for each attribute.
- After you update the attribute metadata for your intended attributes and refiners, ensure that you save your changes and run the Publish channel updates job. Then, after the updates are published, run the following jobs: 1070 (Channel configuration), 1040 (Products), and 1150 (Catalog).
Note
- If your business requires that you frequently add or remove products in the navigation hierarchy, or that you make changes such as updating display order values, adding new categories, and adding new attribute groups to categories, configure the Publish channel updates job to run as a frequent batch job. Alternatively, manually trigger the Publish channel updates job, and then the following Commerce Data Exchange (CDX) jobs: 1070 (Channel configuration), 1040 (Products), and 1150 (Catalog).
- An Inherit option lets you specify that a channel should inherit the attribute groups from its parent channel in the hierarchy. If you set the Inherit option to Yes, the child channel node inherits all the attribute groups and all the attributes in those attribute groups.
- If the Set attribute metadata button on the Action Pane is unavailable, ensure that Navigation hierarchy is associated with your channel on the General FastTab.
- Don't associate any attribute groups except dimension-based attribute groups at a channel level (for example, under Attribute groups on the Channel categories and product attributes page).
- After the introduction of support for customer-specific business-to-business (B2B) catalogs in Commerce version 10.0.27, identify the refiner and attribute setups for each B2B catalog in the same way that is described in this article.
Override attribute values
Override the default values of attributes for individual products at the product level. You can also override these values for individual products in specific catalogs that target specific channels.
Override the attribute values for an individual product
To override the attribute values for an individual product, follow the steps in this example procedure:
- Sign in to Commerce headquarters as a merchandising manager.
- Go to Retail and Commerce > Category and product management > Released products by category.
- Select Fashion > Fashion Accessories > Fashion Sunglasses.
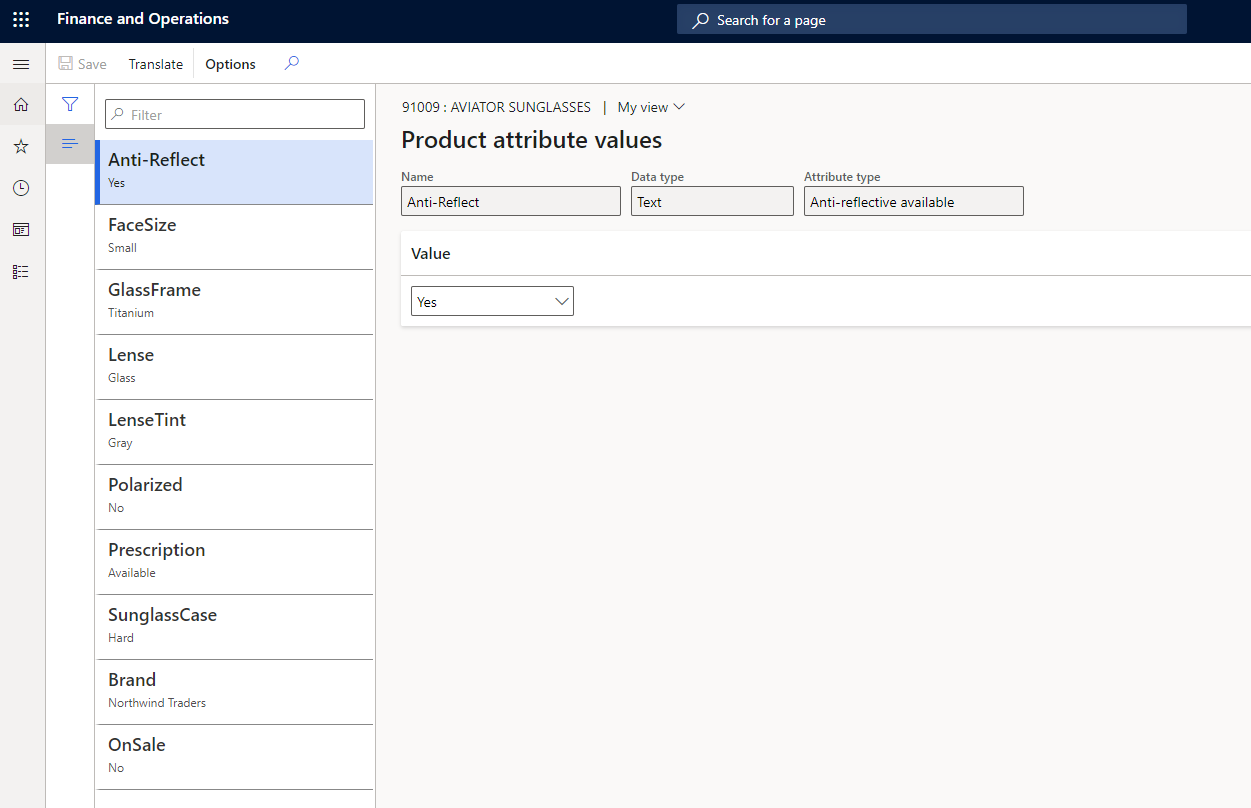
- Select the product that you want in the grid. Then, on the Action Pane, on the Product tab, in the Set up group, select Product attributes.
- Select an attribute in the left pane, and then update its value in the right pane.
Override the attribute values for all products in a catalog
To override the attribute values for all products in a catalog, follow the steps in this example procedure:
Sign in to Commerce headquarters as a merchandising manager.
Go to Retail and Commerce > Catalog management > All catalogs.
Select the Fabrikam Base Catalog catalog.
Select Fashion > Fashion Accessories > Fashion Sunglasses.
On the Products FastTab, select the product that you want, and then select Attributes above the product grid.
On the following FastTabs, update the values of the required attributes:
- Shared product media
- Shared product attributes
- Channel media
- Channel product attributes
Override the attribute values of all products in a channel
To override the attribute values of all products in a channel, follow the steps in this example procedure:
Note
Some attributes accept multiple values separated by a pipe character (|). However, you can't specify multiple values for attribute types that have a fixed list of values.
Sign in to Commerce headquarters as a merchandising manager.
Go to Retail and Commerce > Channel setup > Channel categories and product attributes.
Select the Houston channel.
On the Products FastTab, select the product that you want, and then select Attributes above the product grid.
If no products are available, select Add on the Products FastTab, and then select the products you want in the Add products dialog box.
On the following FastTabs, update the values of the required attributes:
- Shared product media
- Shared product attributes
- Channel media
- Channel product attributes
Define variant-specific attribute values and define multiple values for product attributes
To define variant-specific attribute values and to define multiple values for product attributes, follow the steps in this example procedure:
Sign in to Commerce headquarters as a merchandising manager.
Go to Retail and Commerce > Channel setup > Channel categories and product attributes.
Select the Houston channel.
On the Products FastTab, select the required product variant, and then select Attributes above the product grid.
If no products are available, select Add on the Products FastTab, and then select the required product variants in the Add products dialog box.
On the following FastTabs, update the values of the required attributes:
- Shared product media
- Shared product attributes
- Channel media
- Channel product attributes
Example of variant-specific attribute configuration
In this example, the P001-Master product is a multiple-activity shoe that has three variants: Running, Walking, and Trekking. For each variant, you want to uniquely define the value of the Activity attribute. On the Products FastTab of the Channel categories and product attributes page for your channel, you define the Activity attribute value for the variants as shown in the following table.
| Variant | Activity attribute value |
|---|---|
| P001-Master | Sports |
| P001-1 | Running |
| P001-2 | Walking |
| P001-3 | Trekking |
If a user searches for "shoe," the P001-Master product appears in the search results. If you configured the Activity attribute as refinable, the Activity refiner lists only Sports as a refinable value, because that value is defined for the Activity attribute at the P001-Master product level.
By default, variant-level attributes are intended to be used only on product details pages (PDPs). When you select a specific product variant on a PDP, the product specifications on the PDP are updated for that specific variant.
For refiners to pick up attribute values that you define at the product variant level, you must define an attribute at the product master level, select the Allow multiple values checkbox, and set the attribute type to Text.
Next, determine all possible values for your product variants. For the Activity attribute that is used in this example, possible values might include Running, Walking, Hiking, Trekking, Camping, Watersports, and Snowsports.
After you determine what the variant attribute values should be, define them at the product master level by using pipe-separated values. For the Activity attribute, you might define the attribute value on the product master as Running|Walking|Hiking|Trekking|Camping|Watersports|Snowsports.
Then, for each variant, define attribute values by entering either pipe-separated values or single values. For the Activity attribute, you might configure an individual product variant as Running|Walking|Hiking, Running, Running|Hiking|Watersports, and so on.
After you define the variant attribute values, on the Channel categories and product attributes page, on the Action Pane, select Publish channel updates, and then run the 1150, 1040, and 1070 jobs.
After the jobs complete and the search index updates, all expected values appear in search results and category browsing results.