Azure Managed Instance: Configure P2S VPN Using Certificates and Connect to SQL managed Instance from On-premise Machine
Objective
In this article we will configure SQL Managed Instance and connect to it via Point to Site (P2S) VPN from on-premise machine. The P2S VPN would be configured using certificates. It is not possible to directly connect to Azure MI from on-premise network hence you need to setup some VPN to establish a secure connection.
Why Managed Instance
Azure SQL Managed Instance(MI) is a PaaS offering from Microsoft Azure where you get "Fully managed" SQL Server with "almost" same functionality and feature as that of on-premise SQL Server, for list of differences between on-premise SQL Server and SQL Managed Instance please refer Azure SQL Database Managed Instance T-SQL differences from SQL Server. The greatest USP of MI is its ability to offer almost all features as compared to on-premise SQL Server and that too with relatively lower cost. The cost can further be lowered by bringing on-premise Volume Licensing with SA when creating MI. The cost may decrease almost 30-40 %. Please note although MI offers vast features but it is still limited because in terms of few functionality as underneath it is still a PaaS offering.
If you go with General Purpose Gen 5 machine having 64 cores and 326 GB RAM with Azure Hybrid Benefit and pay upfront for 3 years the monthly cost comes to $3199 per month. See the calculator here. OTOH if you go for SQL Server on Azure VM's the cost is way too high.
Managed Instance is also preferred upgrade destination when you have SQL Server 2008 and 2008 r2 whose support is ending July 2019. Although you can have SQL Server 2008 and 2008 r2 running on Azure VM but the cost as compared to running the database in MI would be way too high. Again after 3 years of running it on Azure VM you would have to again upgrade so there would again be a rework. This is why it is highly recommended that if your SQL Server workload can be moved to SQL Managed Instance you should go that way.
Prerequisites for Configuring P2S VPN.
- Azure Subscription with subscription having the privilege to create Managed Instance in the region where you would like to create it. If you do not have privilege simply drop the mail to Azure support and they will do it within a couple of days. To create support request log onto Azure portal, click on Help and Support and you would see below page. Click on new support request to create new support ticket. Believe me, Azure Support is Super and quick.

2. Make sure you have some credit if you are not using Pay as you go subscription.
A client machine from where you would like to access the Managed Instance. The machine should be on-premise. Accessing Mi from Azure cloud is easy.
Windows 8.1 or higher machine. We are going to use Windows 8.1 machine to connect to MI. The process is even easier if you have a Windows 10 machine.
SSMS 18 or above. Please do not use version lower than this you might face issue creating database on MI using lower version.
Microsoft has already an article on the above topic Quickstart: Configure a point-to-site connection to an Azure SQL Database Managed Instance from on-premises. The issue with the article is the PS script which it has used would not work on the machine below windows 10
$scriptUrlBase = 'https://raw.githubusercontent.com/Microsoft/sql-server-samples/master/samples/manage/azure-sql-db-managed-instance/attach-vpn-gateway'

$parameters = @{
  subscriptionId = '<subscriptionId>'
  resourceGroupName = '<resourceGroupName>'
  virtualNetworkName = '<virtualNetworkName>'
  certificateNamePrefix  = '<certificateNamePrefix>'
  }

Invoke-Command -ScriptBlock ([Scriptblock]::Create((iwr ($scriptUrlBase+'/attachVPNGatewayAz.ps1?t='+ [DateTime]::Now.Ticks)).Content)) -ArgumentList $parameters, $scriptUrlBase
It will flash error. The error is basically while creating certificates using Powershell. Look at the starting error it says new-selfsignedcertificate is not recognized as name of cmdlet.
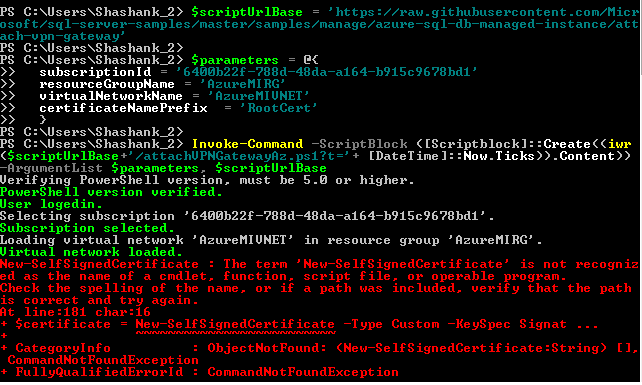
Reason: This is because the command New-SelfSignedCertificate is part of module PKIClient which comes from Windows 10.
To work around we will use another article by MS Configure a Point-to-Site connection to a VNet using native Azure certificate authentication: Azure portal. While the article is straight forward you might still face issue while creating certificates, hence this article to explain step by step and in details.
What we will do is
- Create a resource group for deploying Azure Managed Instance(MI).
- Create a Virtual network or a dedicated subnet within an already existing virtual network. You do not need to specifically create a NEW VNET for MI you can also have a new subnet in a Vnet dedicated for MI.
- Create a SQL Managed Instance.
- Add a gateway subnet to the Vnet you have created or in which the Azure MI would be created.
- Create A Virtual network gateway.
- Generate Root and client certificate and upload the root certificate in Azure portal. This certificate is used to authenticate between on-premise and Azure portal when you connect to MI.
- Configure point to site (P2S) VPN.
- Connect to SQL Managed Instance.
Creating Resource Group
This Resource Group(RG) will hold your SQL Managed Instance. A managed instance must reside in some RG.
Logon to Azure portal. Portal.azure.com. Now in left-hand side of the dashboard page
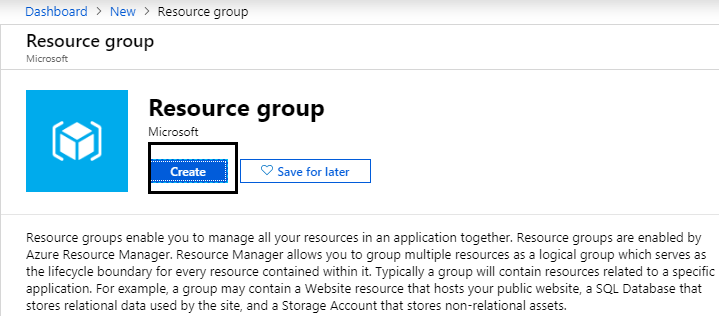
Click on Create a resource. On the search type Resource Group and select it. Then click on Create button
NOTE: Through out the article please use this method to create a resource. This is what used in this article as well.
this will direct you to below screen. Select appropriate name for resource group and **please make sure you select region where your subscription has permission to create Managed Instance. **

Click on Review+Create. After RG is created you can view it under the resource group

Create Virtual Network/Subnet
Now let us create a Virtual network in which our MI will reside. Go to Create a resource, search for Virtual network, select it. You would get below screen

Go ahead and click on create. Let the deployment model be resource Manager.
Enter the details as shown in the screenshot below.
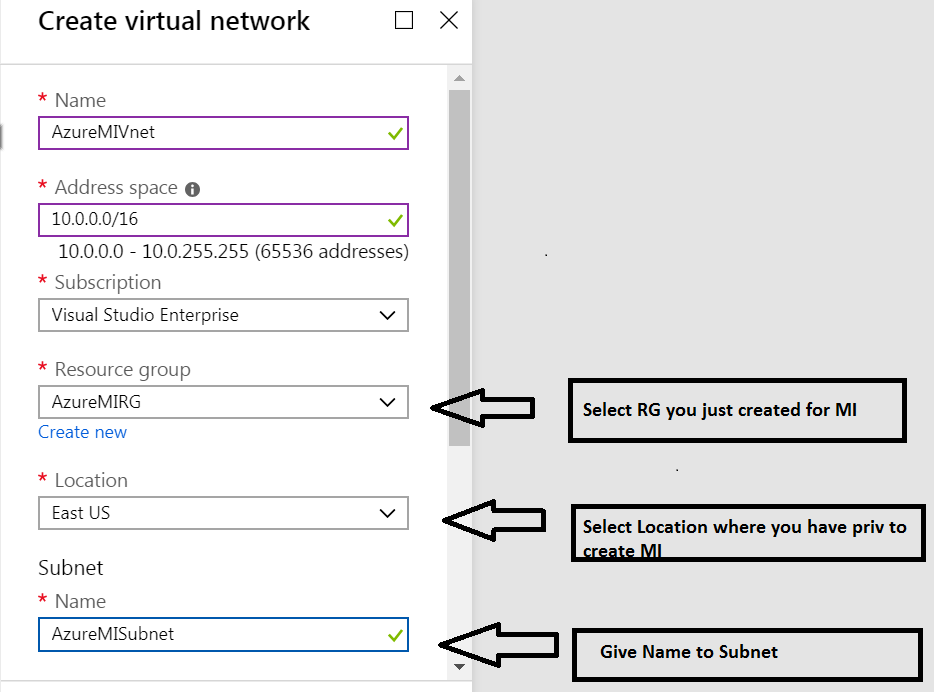
the lower part of Create Virtual Network.

Click Create
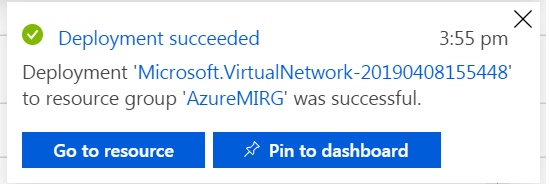
You will get deployment succeeded.
Go to Virtual networks you can see your new Vnet.
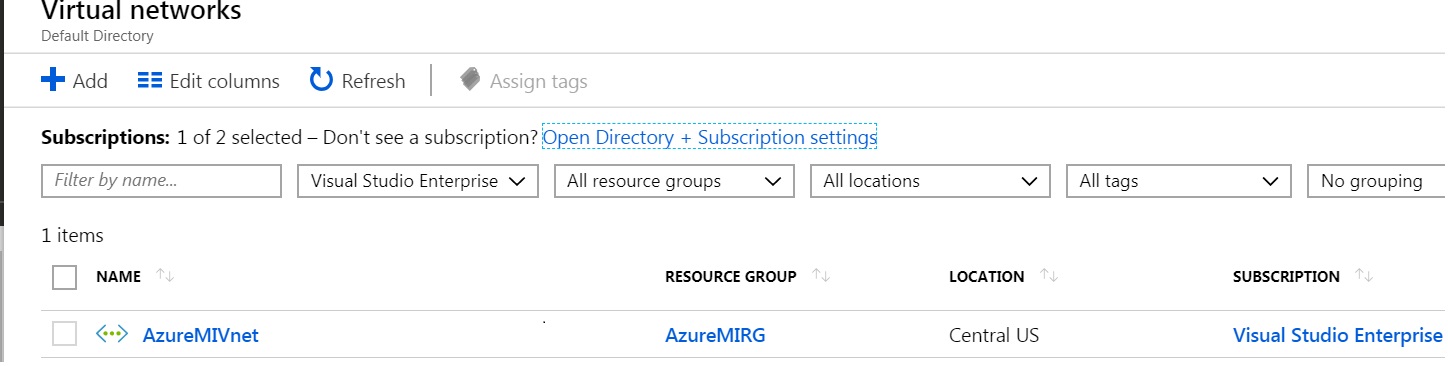 .
.
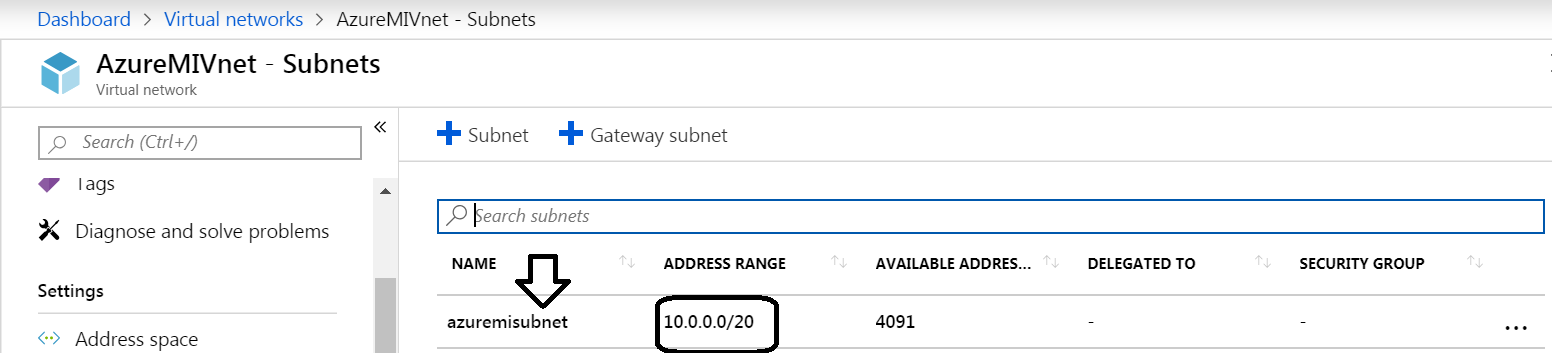
Click on AzureMIVnet, the virtual network we have just created. On the page that comes on left-hand side click on Subnet
You can see the Subnet you have created in this Vnet. Refer the screenshot below
Create Gateway Subnet
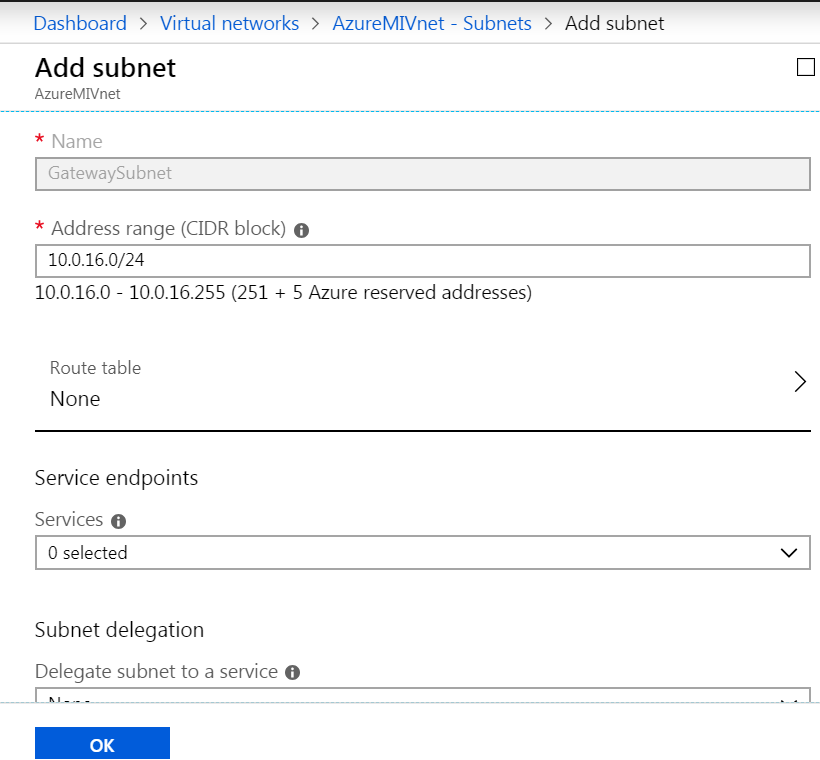
Now we need to add a Subnet Gateway. This would be used by MS to connect to MI via the internet. On the subnet page above( see above pic) you can see +Gateway Subnet, click on that and you would see below screen.
The name is grayed out an auto-filled as this is used by MS to recognize a gateway subnet. Add an address range and leave other option to the default value and click on Ok to create it.
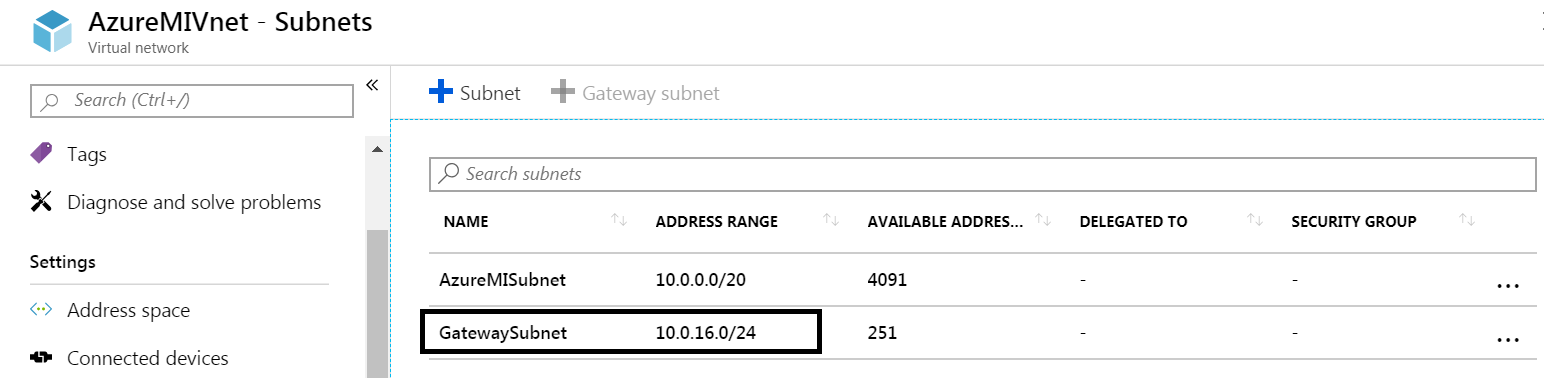
After gateway subnet is created you can see it under subnets in your Vnet.
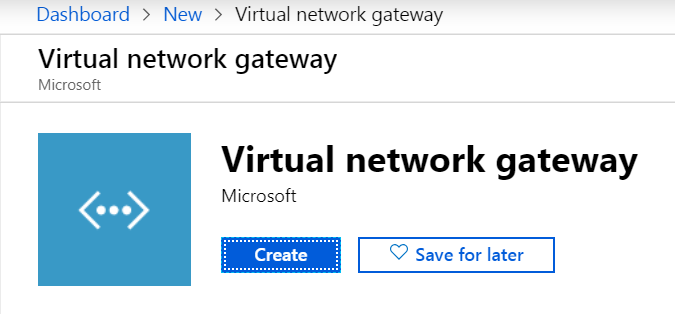
Create Virtual Network Gateway
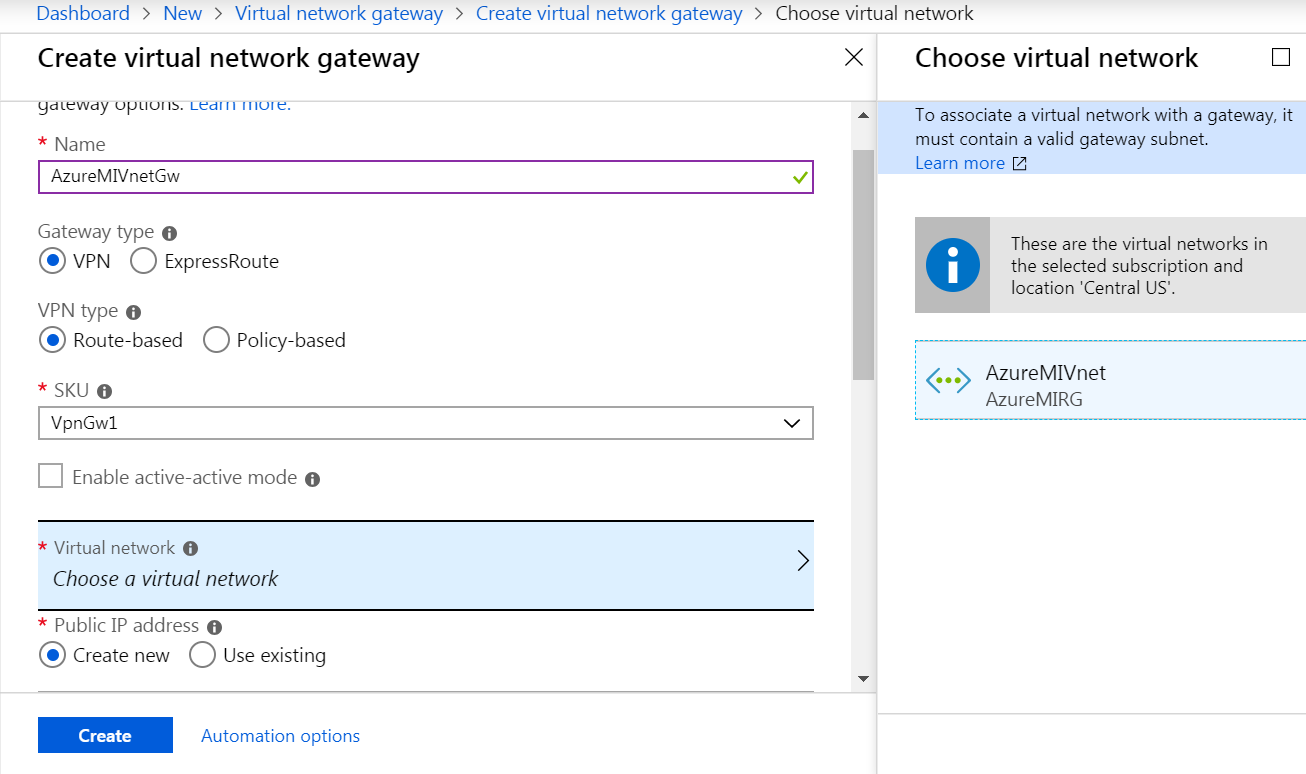
Now we need to create a Virtual Network gateway. Follow the same process of going to **+Create a resource, ** type virtual network gateway and then create.
Give a name to your Virtual network. Make sure you select Virtual network as the one you created at the start of the article. For Public IP address name give a suitable name like **AzureMIVnetGwPIP. **Leave defaults as it is and click on create.
After the resource is created it should look like below when you go to the resource.
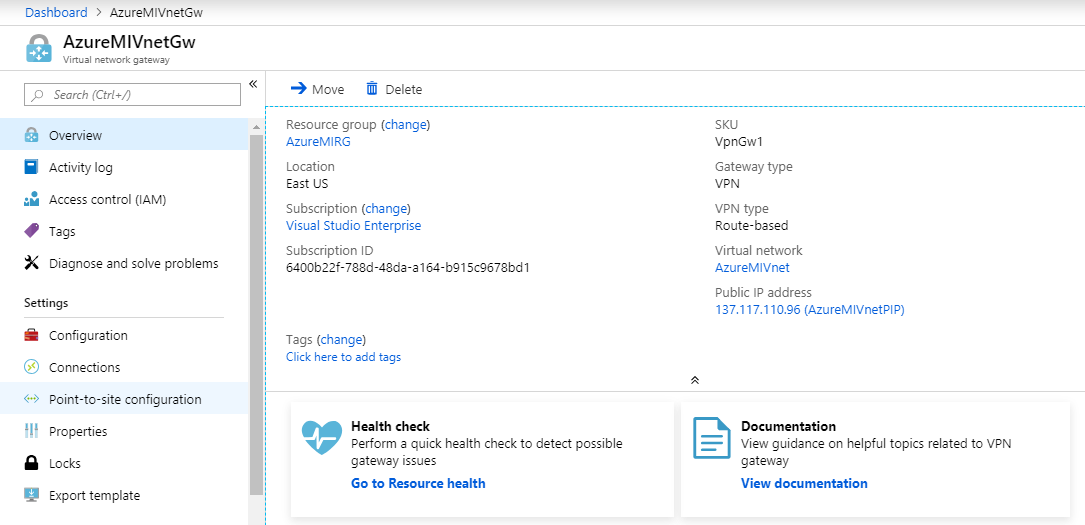
So we are done with network and subnet creation. Now we will move to Managed Instance creation.
Create SQL Managed Instance
Again go to +Create a resource, search for SQL Managed Instance, select and click create to get below screen.
Give a unique name to your managed instance. The Azuremiadmin login would be added as SQL Server login with admin privileges when MI is created.

If you do not select correct region where your subscription has permission to create MI or if your subscription do not have permission at all you would see that Pricing tier is locked out with message that MI is not available in region you have selected. In such case either select correct region or create a support request asking Azure to allow you to create MI in region of your choice. Normally it just takes 2 days to resolve the ticket you have raised.

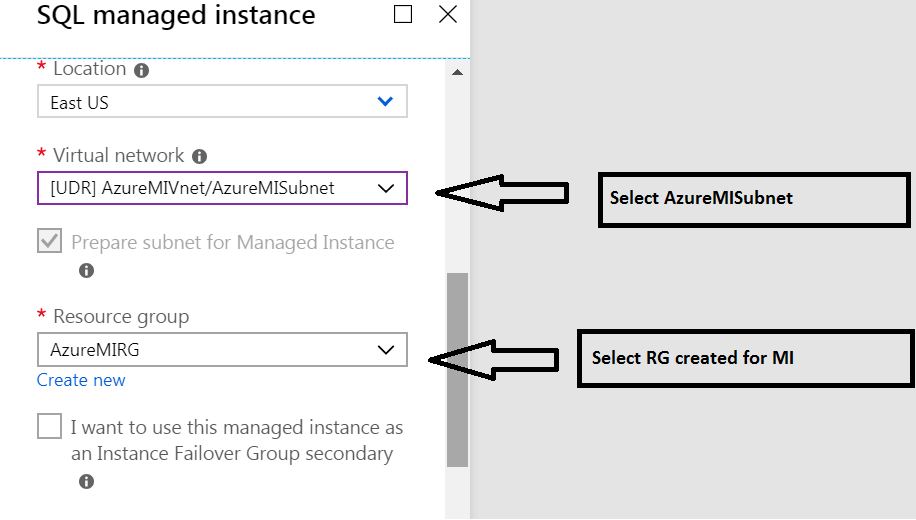
Assuming the above issue does not come/is resolved let move with MI configuration. In Virtual network, you have the option to select existing VNet/subnet or create a new one/ Go ahead and select the subnet we created specifically for MI. Please note the name is line AzureMIVnet/AzureMIsubnet showing you Vnet and subnet of which MI is part of
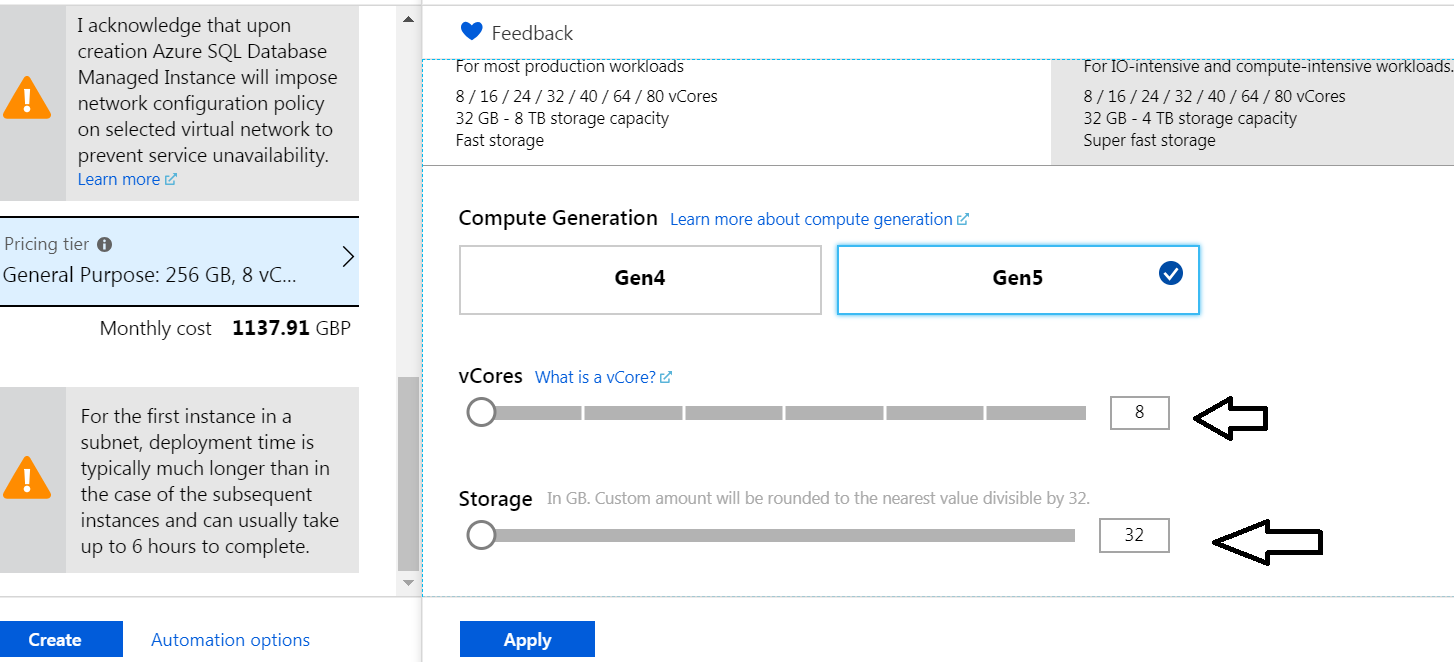
Select Gen5. At minimum, you have to select 8 vCores and keep storage as 32 GB as this will not involve storage cost. Anything more than 32 GB (like 64 GB) will have an additional cost. The more the vCores and storage the more will be a monthly charge of MI
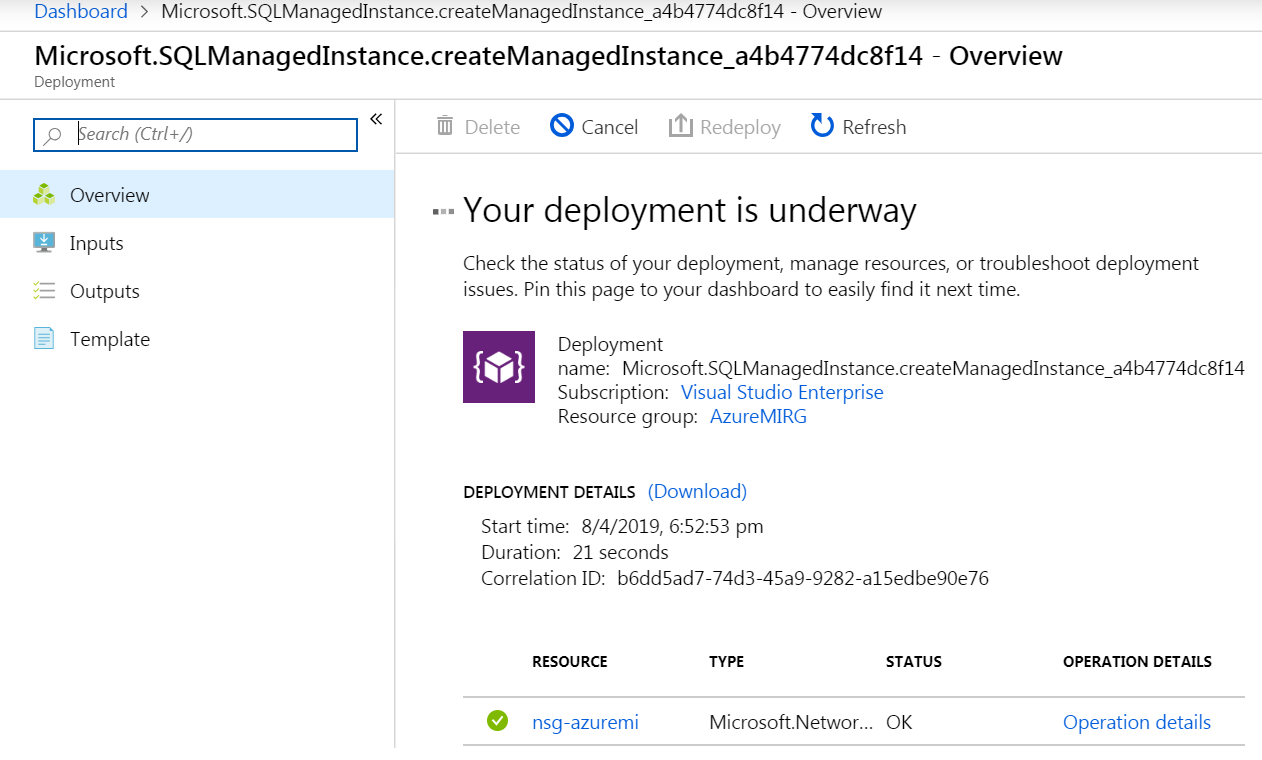
Click Create to start creating MI. You can click on deployment message to get details of your deployment. The deployment will at least take 2.5-3 hours so relax and go ahead and do other work. You can close your machine the deployment will run in the background
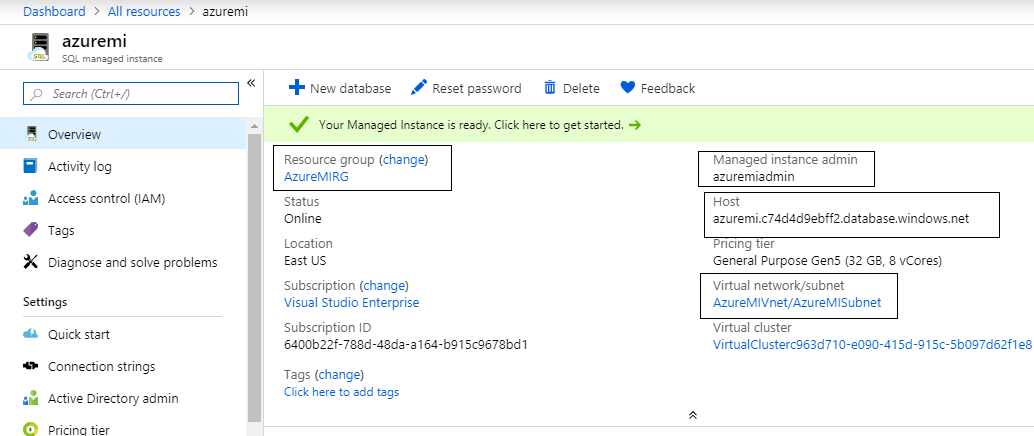
Once the deployment is complete go to Azure managed Instance and notice the RG, Vnet, and host( name). This hostname will be used to connect to MI
Using Certificates for P2S VPN
Certificates are used by Azure to authenticate clients connecting to a VNet over a Point-to-Site VPN connection. We need to first create root certificate export the root certificate public key .cer file (not the private key). this key will be used to authenticate the on-premise machine. After root certificate will will create a client certificate and install it.
If you have windows 10 you can use Generate and export certificates for Point-to-Site using PowerShell but if you do not have windows 10 and have a lower version like 8.1 or 7 then the process is a bit different you need to use Makercert tool to generate the certificate. You can use Generate and export certificates for Point-to-Site connections using MakeCert
NOTE: MS does not recommend the makecert tool for production and this is deprecated. But since we are doing the testing we can use it.
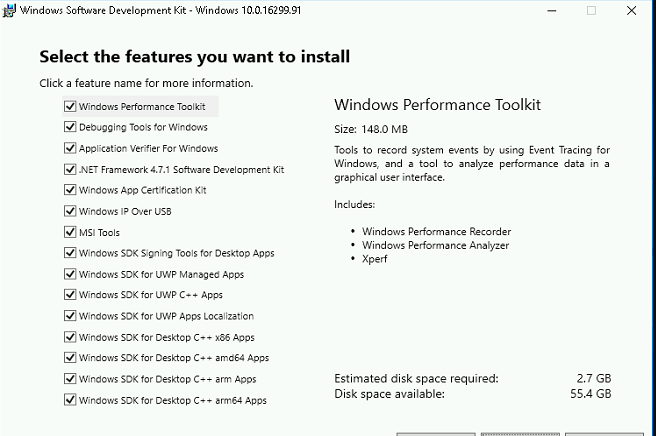
To use makecert tool we need to down load windows SDK kit. The makecert tool is part of this download and when installed will install makecert tool

For windows 8.1 machine download the one marked with an arrow and install it.
The installation is simple just involves Next Next when you reach select feature page, select all features and install it.
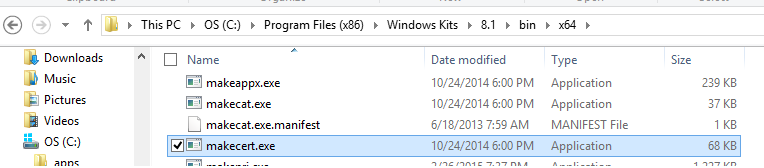
After installation is done you can find makecert.exe file at location
C:\Program Files (x86)\Windows Kits\8.1\bin\x64
Create a Root Certificate
Now we need to create Root certificate. Launch CMD with admin rights. and move to location where makecert tool is present using below code.
cd C:\Program Files (x86)\Windows Kits\8.1\bin\x64
Run below command to create root certificate.
makecert -sky exchange -r -n "CN=AzureMIRootCert" -pe -a sha256 -len 2048 -ss My

After command succeeds. Go to search and type Manage User certificates. Launch the option which comes and you would see your certificate.
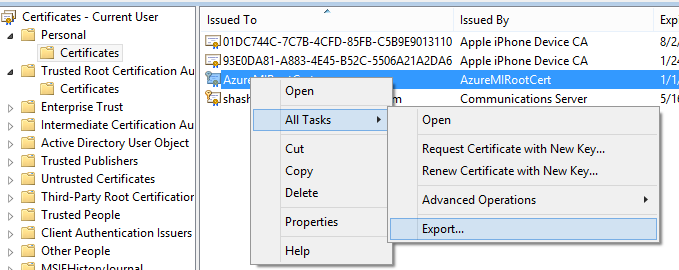
On the page which pops up go to personal and certificates. There you can see the root certificate you just created.

Export Root certificate
Now export the certificate. Right click ...all tasks and select export.
On the Wizard which comes click NEST
On the Certificate export Wizard page select "No, do not export Private Key" and click NEXT
On the file Format page select Base-64 encoded X.509 (.CER)., and then click Next.
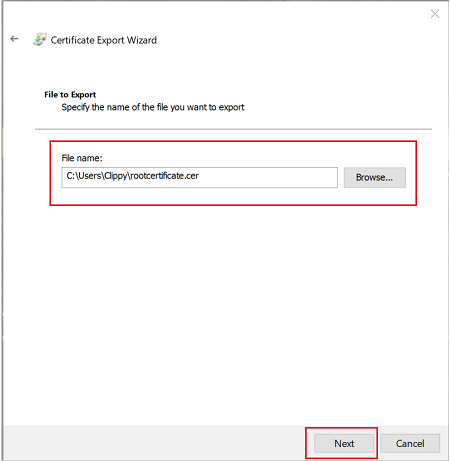
For** File to Export**, Browse to the location to which you want to export the certificate. For File name, name the certificate file. Then, click Next.
Click Finish to export the certificate.

You will get message. The export was successful.
Create Client Certificate
Each client computer that connects to a VNet using Point-to-Site must have a client certificate installed. You generate a client certificate from the self-signed root certificate, and then export and install the client certificate. If the client certificate is not installed, authentication fails
Now we need to create client certificate from the root certificate we created above. Use below similar code
makecert.exe -n "CN=AzureMIChildCert" -pe -sky exchange -m 96 -ss My -in "AzureMIRootCert" -is my -a sha256

Again go to user certificate manager and you can see the new client certificate. The client certificate need to be installed on each machine which need to connect to Azure using P2S VPN. it should also be installed on current machine.
Export Client Certificate
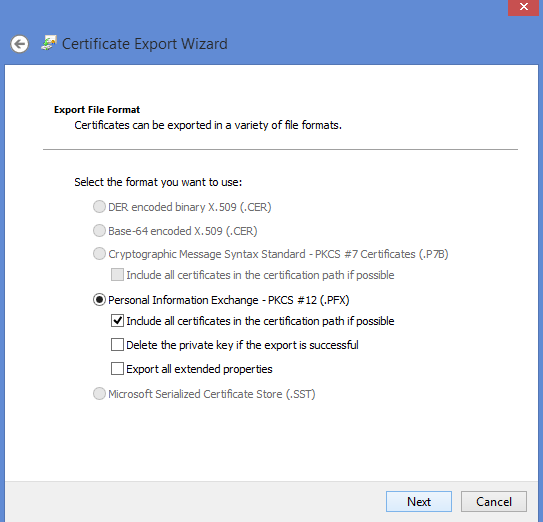
To install it we have to export it as .pfx file and install it. Right click on client certificate ...all task...and click on export
On the Export File Format page, leave the defaults selected. Make sure that Include all certificates in the certification path if possible is selected.
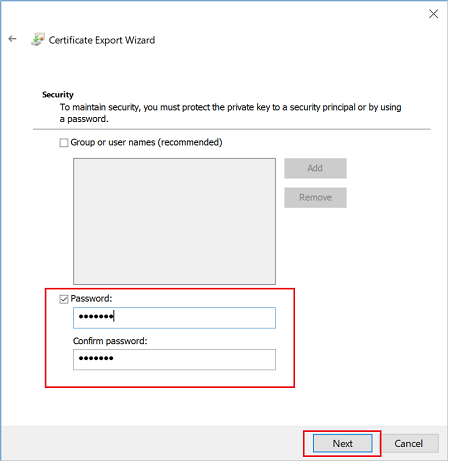
On the Security page, you must protect the private key. If you select to use a password, make sure to record or remember the password that you set for this certificate. Then, click Next.
On the File to Export, Browse to the location to which you want to export the certificate. For File name, name the certificate file. Then, click Next.
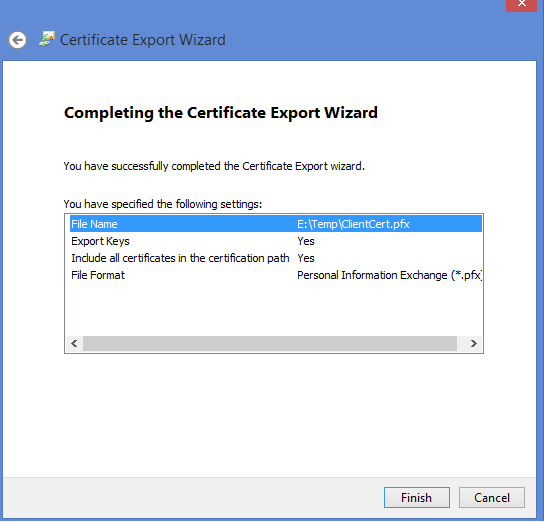
The next page should be lick below, click Finish.
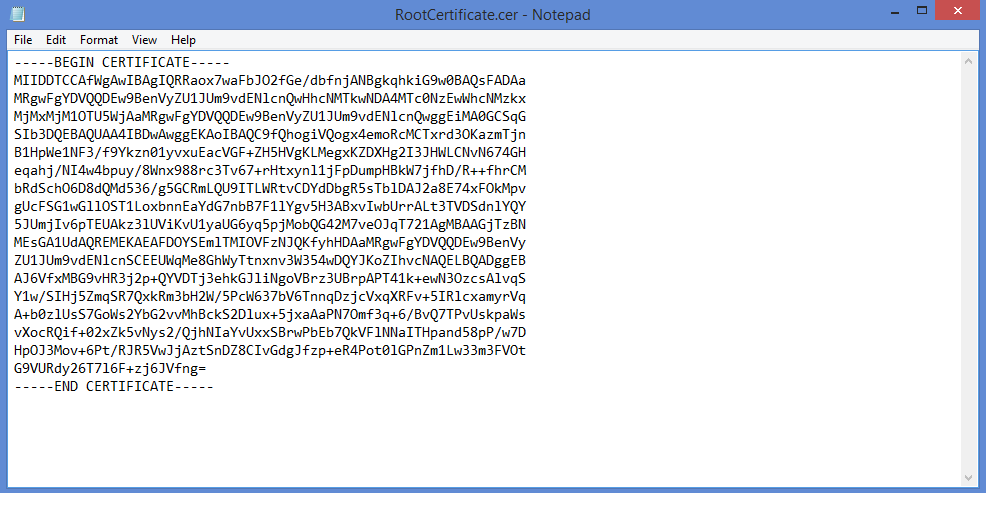
Now go to the location where certificate was exported and open the .cer file in notepad. Should look somewhat like below. This cert key will later be added into Azure.
Configure P2S VPN
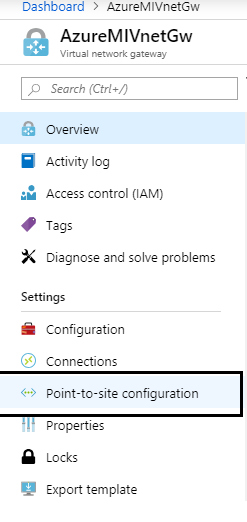
Go to Azure portal and go to AzureMIVnetGw you have created. On this page select point to site as shown below
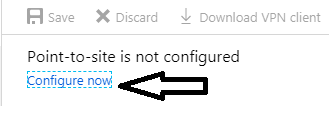
You will get below screen showing P2S not configured. Click on configure now
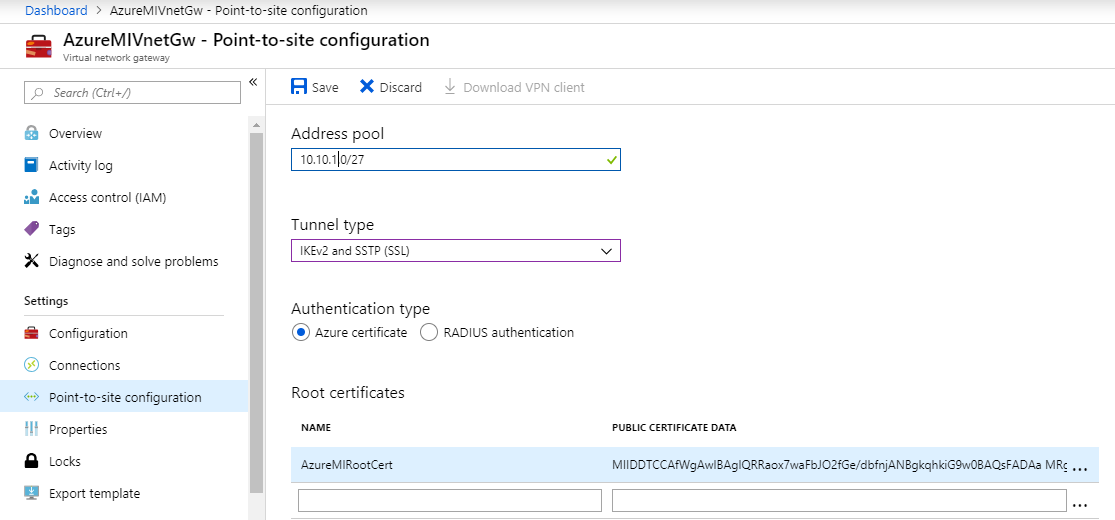
Enter details as per below screenshot. Select tunnel type as shown in screenshot below
For root certification you need to copy the content of rootcertifcate.cer file and paste in public certificate data.
Give it name as AzureMIrootcert and click SAVE.
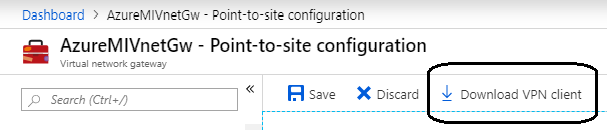
Go to Point to site configuration and download VPN client
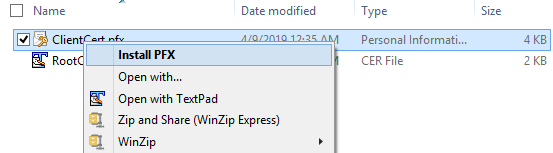
After download is complete we need to install 2 things
- Client Cert.pfx (the client export file we created )
- VPN client
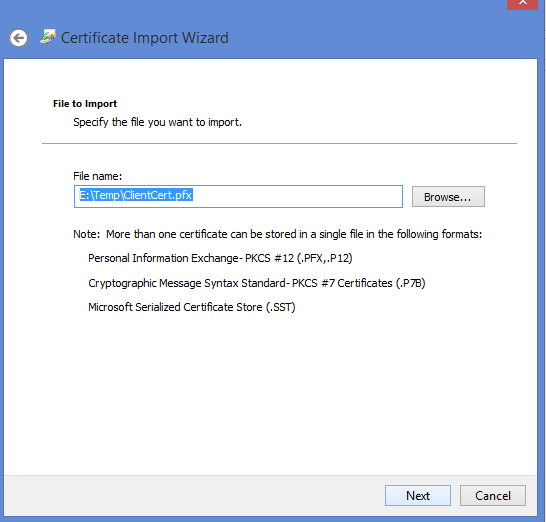
Go to location where you save the.pfx file right click and install it.
Select the file
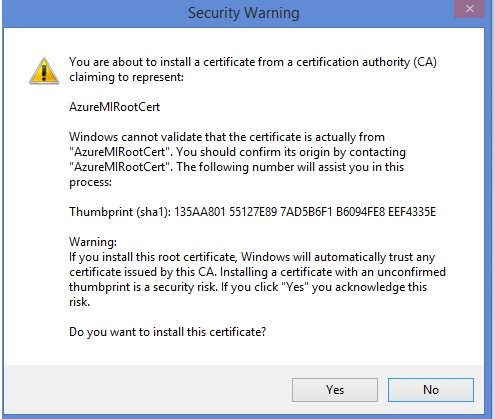
Click YES
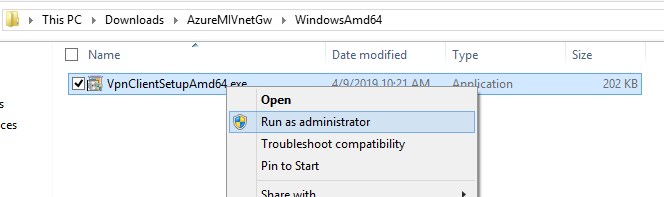
Open VPN clinet download folder named as AzureMIVnetGw go to WindowsAMD64 folder and install VPNClientSetupAMd64.exe file.
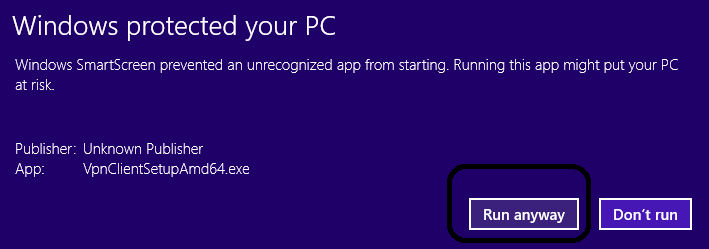
Select Run Aanyway
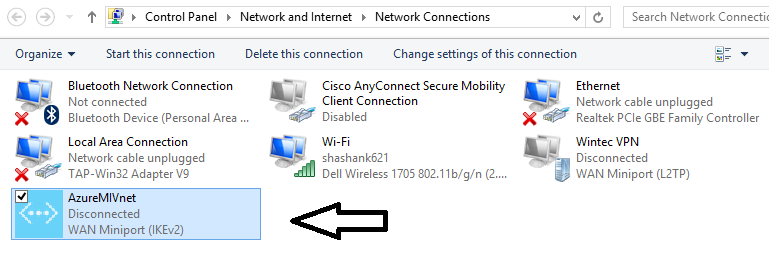
This will create a VNET in your network connections.
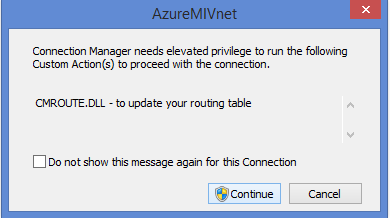
Right click on select connect you get below pop up, select continue.
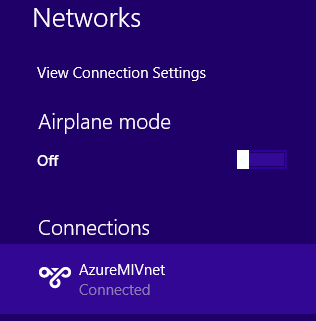
Once you do this you can now see connection established.
Connect to SQL MI from on-premise
Now that you have connected to Azure from On prem let us connect to Managed instance from On prem using SSMS 18.
Copy the host name as shown below
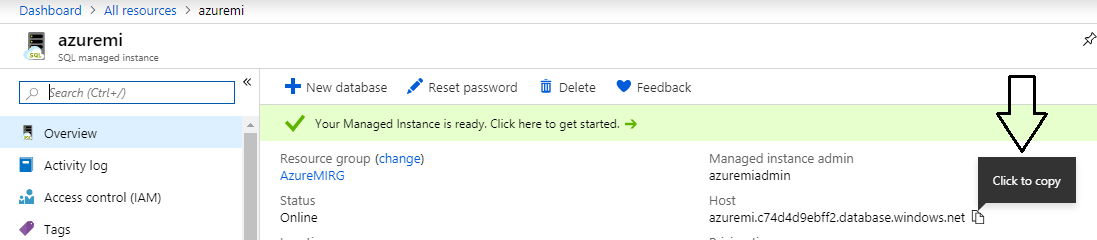
Open SSMS 18 and on server name paste this hostname
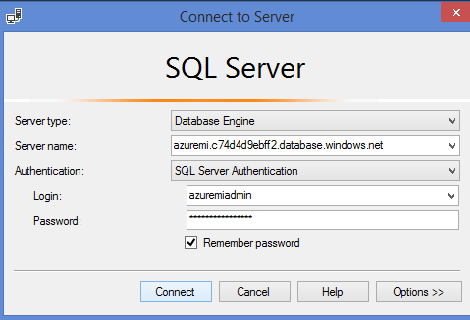
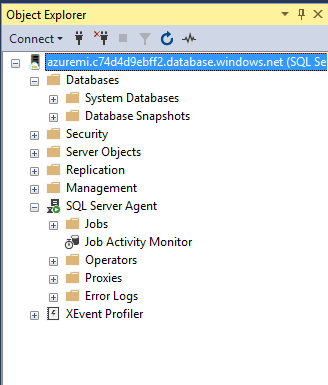
Select SQL Server authentication and add azureadmin as username and enter password. It would connect and you should see below
Conclusion
In this article we saw how to create SQL Managed Instance and how to connect it from on premise machine by configuring point to site VPN using certificates. It is highly recommended that when you follow these steps on machine which is in production use enterprise level certificates instead of makecert, as already mentioned makecert is deprecated and Microsoft does not recommends to use it in prod scenarios.
References
- Quick start: Configure a point-to-site connection to an Azure SQL Database Managed Instance from on-premises
- Configure a Point-to-Site connection to a VNet using native Azure certificate authentication: Azure portal
- Generate and export certificates for Point-to-Site connections using MakeCert