Azure AD Managed Identity: Connecting Azure Web App and Slots with Azure SQL DB (without credentials)
Introduction
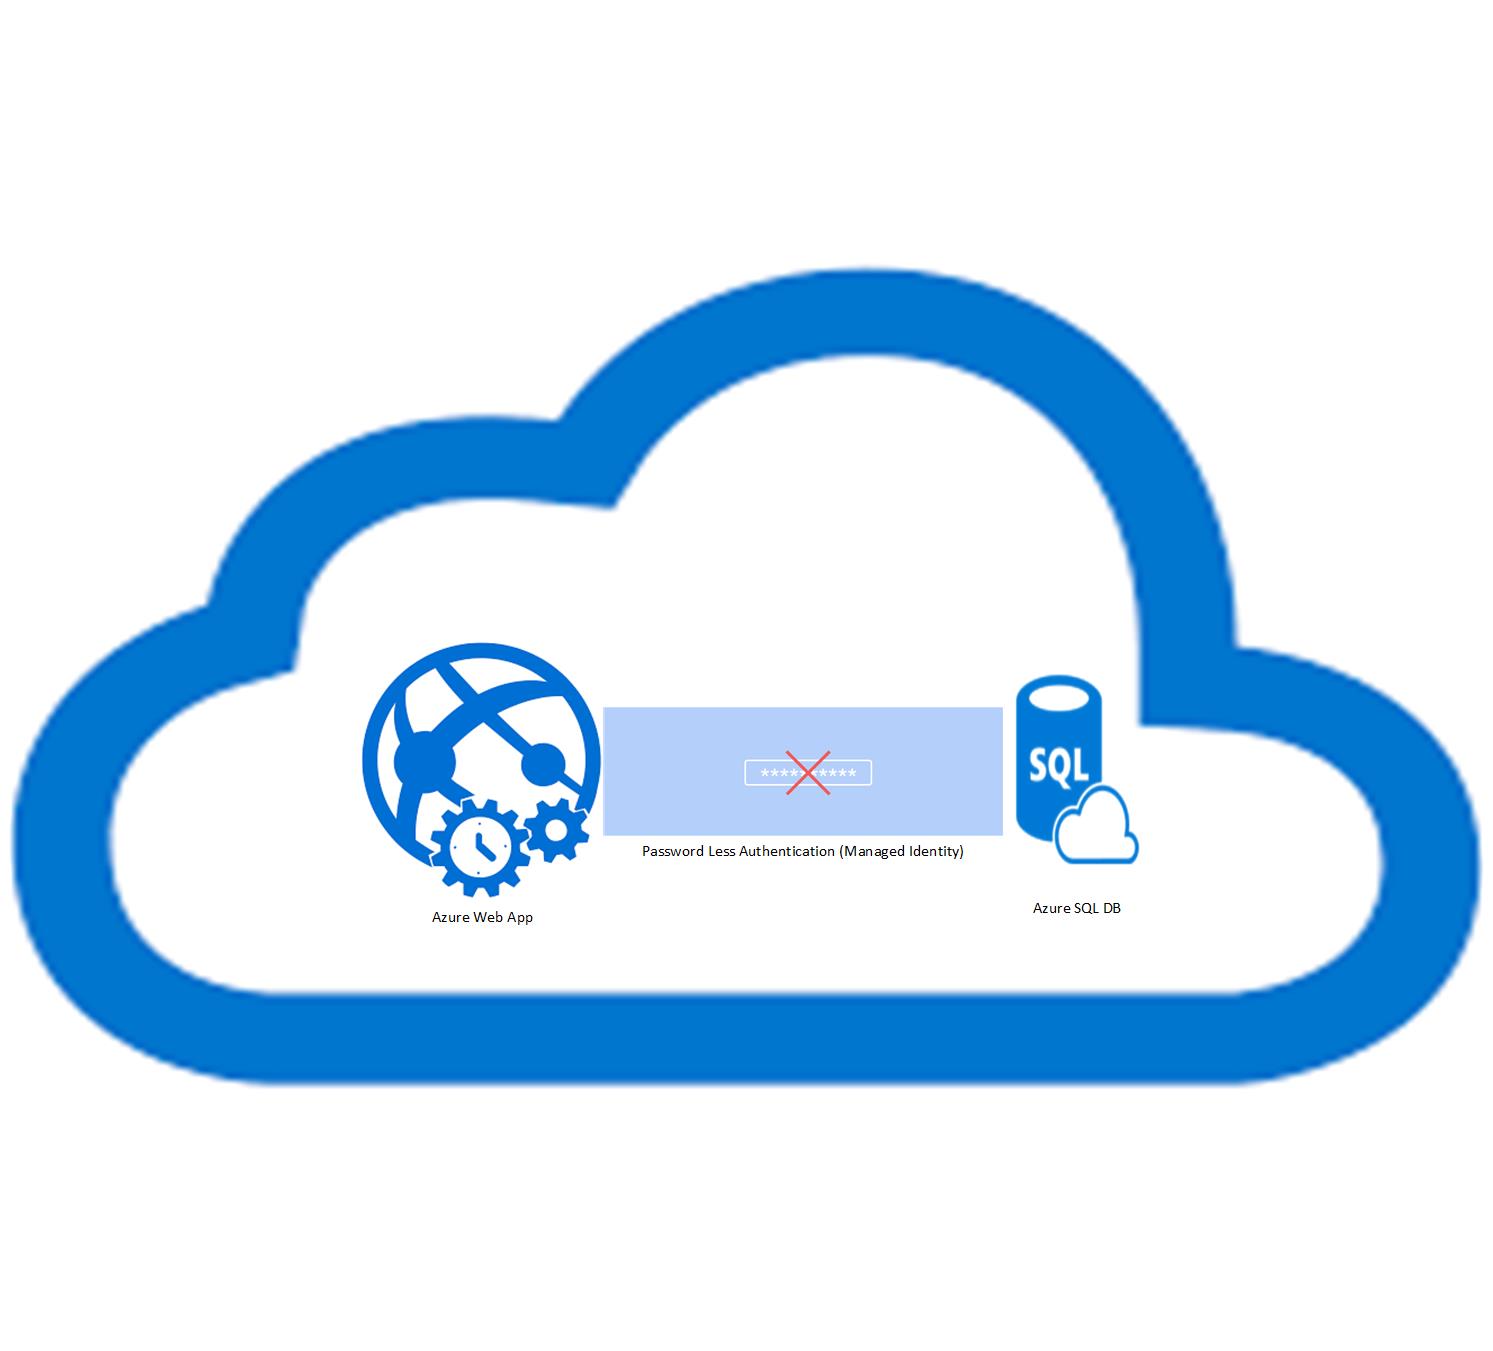
Managed Identity is a great way for connecting services in Azure without having to provide credentials like username or password or even clientid or client secrets. Please note that not all azure services support managed identity. There are many great articles and blogs which discuss in depth managed identity and their types. You can see some of them in the See Also section below. In this article we are going to see two main popular Azure resources to connect each other without providing any credentials in the code, they are azure app service (front-end) and azure sql database (back-end) by using System Managed Identity.
Using typical Connection String way
Usually we use the connection string to connect an Azure sql database from any front-end. For instance lets say we are developing a dotnet application and want to connect to a back end (azure sql db) we will simply use the connection string like in the web.config below (which may be different for some other applications)
<connectionStrings>
<add name="DbConnection" connectionString="server=<sqlinstance>.database.windows.net;database=<dbname>;Uid=localadmin;Pwd={your_password_here};Encrypt=yes;TrustServerCertificate=no;Connection Timeout=30;" providerName="System.Data.SqlClient" />
</connectionStrings>
From the C# code we will consume the connection string from the web.config to establish the connectivity from our code to backend like this
using (var connection = new SqlConnection(connectionstring))
{
connection.Open();

//Executing some sql code

}
Azure Key Vault for Connection String
It is always good to store this type of connection string in a secure place like azure key vault. However we still need to store the client id and client secret in a web.config. See again storing a secret in a web.config, which is more like a chicken and egg problem.
Here we need more sophisticated solution to solve this, which is the Managed Identity.
Using System Managed Identity way
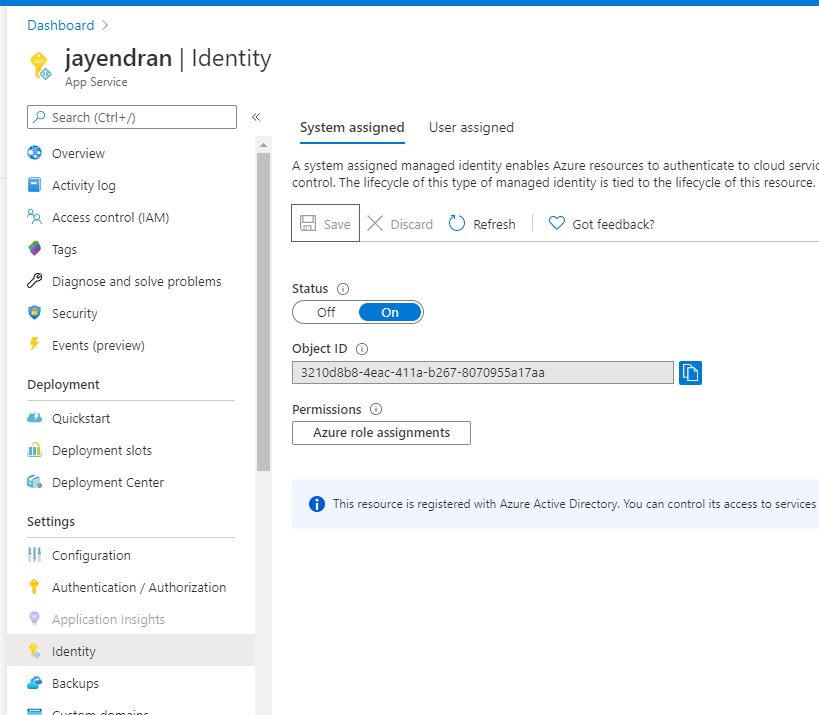
Step 1: Enabling System Managed Identity in Web App
First we need to enable the system Managed Identity in our web app.
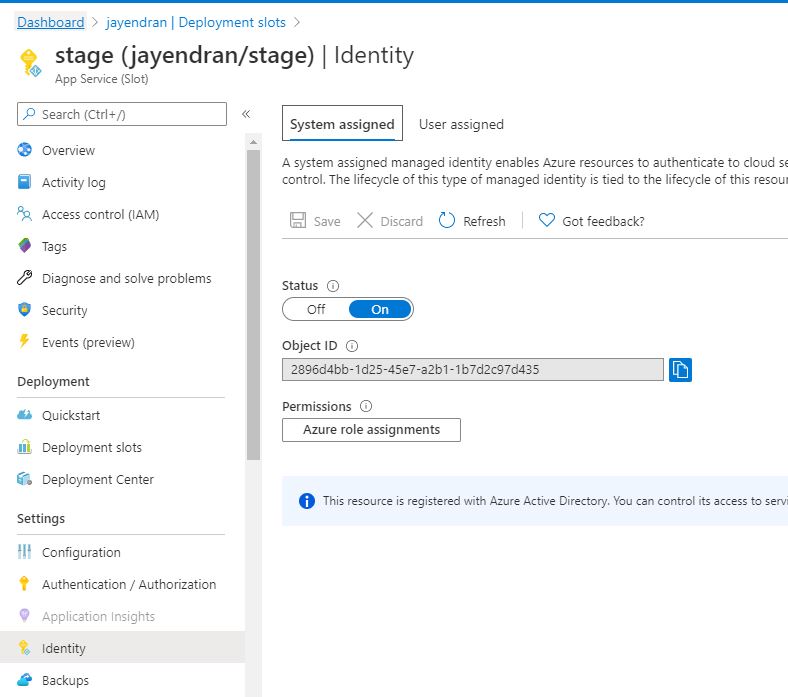
If you are using any slots you should also enable the same options in the slots as well
Step 2: Creating Managed Identity User in Azure SQL
After we enabled the System Managed Identity in Azure App, we have to create a Managed Identity User in Azure sql db. To do so we must enable the Azure Active Directory Admin, then login to the database using the Active Directory account from either SSMS or Azure Data Studio.

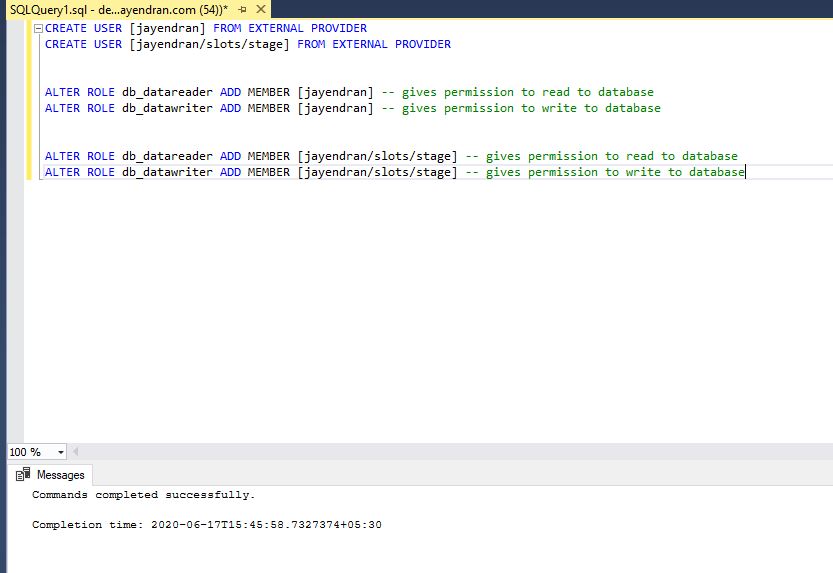
We have to run the below query in the corresponding database.
CREATE USER [<App Service Name>] FROM  EXTERNAL PROVIDER

CREATE USER [<App Service Name>/slots/<slotname>] FROM  EXTERNAL PROVIDER -- For apps in the slots

ALTER ROLE db_datareader ADD MEMBER [<App Service Name>] -- gives permission for normal app read to database
ALTER ROLE db_datawriter ADD MEMBER [<App Service Name>] -- gives permission for normal app write to database


ALTER ROLE db_datareader ADD MEMBER [<App Service Name>/slots/<slotname>] -- gives permission for slot app  read to database
ALTER ROLE db_datawriter ADD MEMBER [<App Service Name>/slots/<slotname>] -- gives permission for slot app  write to database
By doing the above we are creating a user for our system managed identity of our app in the backend and providing required permissions like read/write a database.
Step 3: Remove the credentials from the Connection String
Finally we have to remove the credentials details like userid , password from the connection string, like below
<connectionStrings>
<add name="DbConnection" connectionString="server=<sqlinstance>.database.windows.net;database=<dbname>;Encrypt=yes;TrustServerCertificate=no;Connection Timeout=30;" providerName="System.Data.SqlClient" />
</connectionStrings>
Step 4: 1-Line Magic Code
Now we just need to add a single line of code (magic) in our application before opening the connection like below
connection.AccessToken = await (new AzureServiceTokenProvider()).GetAccessTokenAsync("https://database.windows.net/");
Sometime during the local testing if you have more than one subscription you will get error at the above line. To resolve that please use the optional parameters called tenant id for GetAccessTokenAsync method
connection.AccessToken = await (new AzureServiceTokenProvider()).GetAccessTokenAsync("https://database.windows.net/", <tenant-id>);
In order to use the above code you also need to import a package called Microsoft.Azure.Services.AppAuthentication. You can install it from nuget like below
Install-Package Microsoft.Azure.Services.AppAuthentication -Version 1.5.0
So finally our code will look like below
using (var connection = new SqlConnection(connectionstring))
{
connection.AccessToken = await (new AzureServiceTokenProvider()).GetAccessTokenAsync("https://database.windows.net/");
connection.Open();

//Executing some sql code

}
Step 5: Testing it Locally
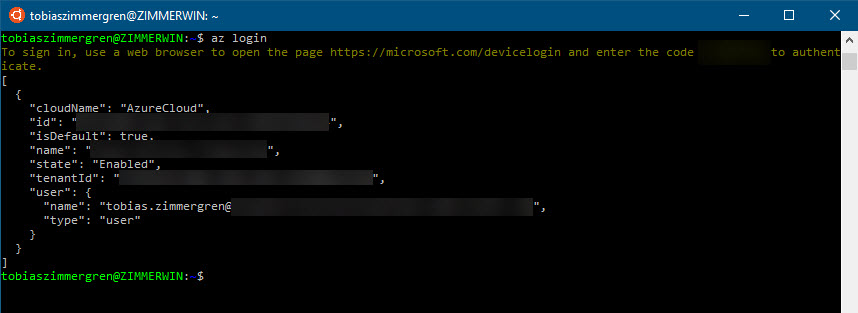
In order to test this from local machine we have to use Azure CLI 2.0 or above. So install the Az Cli, then run the command
az login
It will prompt you for the credentials. Once you successfully logged in you will see your subscription details like in below pic
Now you can run your application.
(Note: If you have more than 1 tenant access you have to explicitly pass the tenantid in the GetAccessTokenAsync method)
After the successful run you can deploy the application in Azure.
Conclusion
Azure Managed Identity is going to remove the way of storing credentials in code even in azure key vault. In this article we saw only 2 services. But there are more and more services are coming along the way. Using this great feature we can do all the things inside Azure very safely and not leaking any credentials to others.
See Also
- https://social.technet.microsoft.com/wiki/contents/articles/52342.azure-active-directory-introduction-to-managed-identities-for-azure-resources.aspx
- https://joonasw.net/view/azure-service-bus-managed-identities
- https://thomasthornton.cloud/2019/01/07/azure-managed-identities/
- https://github.com/Azure-Samples/app-service-msi-entityframework-dotnet