지도 스타일 설정(Android SDK)
이 문서에서는 Azure Maps Android SDK를 사용하여 지도 스타일을 설정하는 두 가지 방법을 보여 줍니다. Azure Maps에서는 여섯 가지 다른 지도 스타일 중에서 선택할 수 있습니다. 지원되는 지도 스타일에 대한 자세한 내용은 Azure Maps에서 지원되는 지도 스타일을 참조하세요.
참고 항목
Azure Maps Android SDK 사용 중지
이제 Android용 Azure Maps 네이티브 SDK는 더 이상 사용되지 않으며 2025년 3월 31일에 사용 중지됩니다. 서비스 중단을 방지하려면 2025년 3월 31일까지 Azure Maps 웹 SDK로 마이그레이션합니다. 자세한 내용은 Azure Maps Android SDK 마이그레이션 가이드를 참조하세요.
필수 조건
빠른 시작: Android 앱 만들기 문서의 단계를 완료해야 합니다.
레이아웃에서 지도 스타일 설정
지도 컨트롤을 추가할 때 활동 클래스의 레이아웃 파일에서 지도 스타일을 설정할 수 있습니다. 다음 코드는 중심 위치, 확대/축소 수준 및 지도 스타일을 설정합니다.
<com.azure.android.maps.control.MapControl
android:id="@+id/mapcontrol"
android:layout_width="match_parent"
android:layout_height="match_parent"
app:azure_maps_centerLat="47.602806"
app:azure_maps_centerLng="-122.329330"
app:azure_maps_zoom="12"
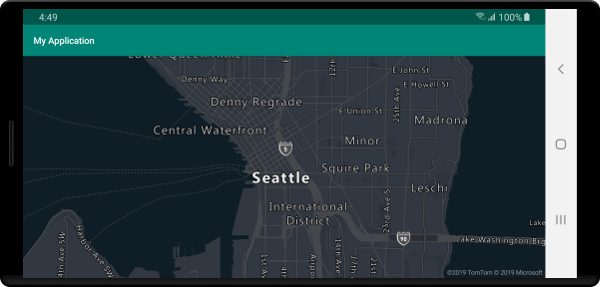
app:azure_maps_style="grayscale_dark"
/>
다음 스크린샷은 도로 지도를 회색조 어두운 스타일로 표시하는 위의 코드를 보여 줍니다.
코드에서 지도 스타일 설정
지도의 setStyle 메서드를 사용하여 코드에서 프로그래밍 방식으로 지도 스타일을 설정할 수 있습니다. 다음 코드는 지도 setCamera 메서드와 지도 스타일을 사용하여 중심 위치 및 확대/축소 수준을 SATELLITE_ROAD_LABELS(으)로 설정합니다.
mapControl.onReady(map -> {
//Set the camera of the map.
map.setCamera(center(Point.fromLngLat(-122.33, 47.64)), zoom(14));
//Set the style of the map.
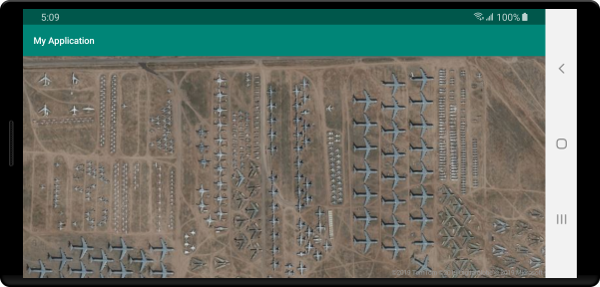
map.setStyle(style(MapStyle.SATELLITE_ROAD_LABELS));
});
mapControl!!.onReady { map: AzureMap ->
    //Set the camera of the map.
    map.setCamera(center(Point.fromLngLat(-122.33, 47.64)), zoom(14))

    //Set the style of the map.
    map.setStyle(style(MapStyle.SATELLITE_ROAD_LABELS))
}
다음 스크린샷은 위성 도로 레이블 스타일로 지도를 표시하는 위의 코드를 보여 줍니다.
지도 카메라 설정
지도 카메라는 지도 뷰포트에 세계의 어느 부분이 표시되는지 제어합니다. 카메라는 코드에서 프로그래밍 방식으로 레이아웃에 있을 수 있습니다. 코드에서 설정할 때 지도의 위치를 설정하는 주요 방법은 두 가지로 중심 및 확대/축소 사용 또는 경계 상자로 전달이 있습니다. 다음 코드에서는 center 및 zoom을(를) 사용할 때 모든 선택적 카메라 옵션을 설정하는 방법을 보여 줍니다.
//Set the camera of the map using center and zoom.
map.setCamera(
    center(Point.fromLngLat(-122.33, 47.64)),

    //The zoom level. Typically a value between 0 and 22.
    zoom(14),

    //The amount of tilt in degrees the map where 0 is looking straight down.
    pitch(45),

    //Direction the top of the map is pointing in degrees. 0 = North, 90 = East, 180 = South, 270 = West
    bearing(90),

    //The minimum zoom level the map will zoom-out to when animating from one location to another on the map.
    minZoom(10),

    //The maximum zoom level the map will zoom-in to when animating from one location to another on the map.
    maxZoom(14)
);
//Set the camera of the map using center and zoom.
map.setCamera(
    center(Point.fromLngLat(-122.33, 47.64)),

    //The zoom level. Typically a value between 0 and 22.
    zoom(14),

    //The amount of tilt in degrees the map where 0 is looking straight down.
    pitch(45),

    //Direction the top of the map is pointing in degrees. 0 = North, 90 = East, 180 = South, 270 = West
    bearing(90),

    //The minimum zoom level the map will zoom-out to when animating from one location to another on the map.
    minZoom(10),

    //The maximum zoom level the map will zoom-in to when animating from one location to another on the map.
    maxZoom(14)
)
데이터 세트보다 지도에 초점을 맞추는 것이 바람직한 경우가 종종 있습니다. 경계 상자는 MapMath.fromData 메서드를 사용하여 기능에서 계산될 수 있고 지도 카메라의 bounds 옵션으로 전달될 수 있습니다. 경계 상자를 기준으로 지도 보기를 설정하는 경우 padding 값을 지정하여 거품 또는 기호로 렌더링되는 지점의 픽셀 크기를 설명하는 것이 유용한 경우가 많습니다. 다음 코드에서는 경계 상자를 사용하여 카메라의 위치를 설정하는 경우 모든 선택적 카메라 옵션을 설정하는 방법을 보여 줍니다.
//Set the camera of the map using a bounding box.
map.setCamera(
    //The area to focus the map on.
    bounds(BoundingBox.fromLngLats(
        //West
        -122.4594,

        //South
        47.4333,

        //East
        -122.21866,

        //North
        47.75758
    )),

    //Amount of pixel buffer around the bounding box to provide extra space around the bounding box.
    padding(20),

    //The maximum zoom level the map will zoom-in to when animating from one location to another on the map.
    maxZoom(14)
);
//Set the camera of the map using a bounding box.
map.setCamera(
    //The area to focus the map on.
    bounds(BoundingBox.fromLngLats(
        //West
        -122.4594,

        //South
        47.4333,

        //East
        -122.21866,

        //North
        47.75758
    )),

    //Amount of pixel buffer around the bounding box to provide extra space around the bounding box.
    padding(20),

    //The maximum zoom level the map will zoom-in to when animating from one location to another on the map.
    maxZoom(14)
)
경계 상자의 가로 세로 비율은 지도의 가로 세로 비율과 동일하지 않을 수 있습니다. 이와 같이 지도는 전체 경계 상자 영역을 표시하지만 세로 또는 가로로만 밀집되는 경우가 많습니다.
맵 보기 애니메이션
맵의 카메라 옵션을 설정하는 경우 애니메이션 옵션을 사용하여 현재 맵 보기와 다음 맵 보기 간의 전환을 만들 수도 있습니다. 이 옵션은 애니메이션 유형과 카메라를 이동하는 데 걸리는 시간을 지정합니다.
| 옵션 | 설명 |
|---|---|
animationDuration(Integer durationMs) |
카메라가 보기 간에 애니메이션을 적용할 시간(밀리초)을 지정합니다. |
animationType(AnimationType animationType) |
수행할 애니메이션 전환 유형을 지정합니다. - JUMP - 즉각적인 변경.- EASE - 카메라 설정의 점진적 변경.- FLY - 비행과 유사한 arc를 만드는 카메라 설정을 점진적으로 변경합니다. |
다음 코드에서는 3초 동안 FLY 애니메이션을 사용하여 맵 보기에 애니메이션을 적용하는 방법을 보여줍니다.
map.setCamera(
    center(Point.fromLngLat(-122.33, 47.6)),
    zoom(12),
    animationType(AnimationType.FLY),
    animationDuration(3000)
);
map.setCamera(
    center(Point.fromLngLat(-122.33, 47.6)),
    zoom(12.0),
    AnimationOptions.animationType(AnimationType.FLY),
    AnimationOptions.animationDuration(3000)
)
위 코드는 뉴욕에서 시애틀까지의 맵 보기에 애니메이션을 적용하는 위의 코드를 보여줍니다.

다음 단계
맵에 추가할 더 많은 코드 예제를 보려면 다음 문서를 참조하세요.
피드백
출시 예정: 2024년 내내 콘텐츠에 대한 피드백 메커니즘으로 GitHub 문제를 단계적으로 폐지하고 이를 새로운 피드백 시스템으로 바꿀 예정입니다. 자세한 내용은 다음을 참조하세요. https://aka.ms/ContentUserFeedback
다음에 대한 사용자 의견 제출 및 보기