액세스 토큰을 사용하면 Azure Communication Services SDK가 특정 ID로 Azure Communication Services에 대해 직접 인증 할 수 있습니다. 최종 사용자가 애플리케이션 내에서 통화 또는 채팅 스레드에 가입하도록 하려면 최종 사용자를 위한 액세스 토큰을 만들어야 합니다.
이 문서에서는 Azure Communication Services SDK를 사용하여 ID를 만들고 액세스 토큰을 관리하는 방법을 설명합니다. 프로덕션 사용 사례의 경우 클라이언트 및 서버 아키텍처에 설명된 대로 서버 쪽 서비스에서 액세스 토큰을 생성하는 것이 좋습니다.
필수 조건
- 활성 구독이 있는 Azure 계정. 체험 계정을 만듭니다.
- 활성 Communication Services 리소스 및 연결 문자열 Communication Services 리소스 만들기
- Azure CLI를 설치합니다.
환경 설정
확장 추가
명령을 사용하여 Azure CLI용 Azure Communication Services 확장을 추가합니다 az extension .
az extension add --name communication
Azure CLI에 로그인
Azure CLI에 로그인해야 합니다. 터미널에서 명령을 실행하여 로그인한 az login 다음 자격 증명을 제공할 수 있습니다.
(선택 사항) 연결 문자열을 전달하지 않고 Azure CLI ID 작업 사용
AZURE_COMMUNICATION_CONNECTION_STRING을 사용하여 연결 문자열을 제공할 필요 없이 Azure CLI ID 작업을 사용하도록 --connection_string 환경 변수를 구성할 수 있습니다. 환경 변수를 구성하려면 콘솔 창을 열고 다음 탭에서 운영 체제를 선택합니다.
<yourConnectionString>을 실제 연결 문자열로 바꿉니다.
콘솔 창을 열고 다음 명령을 입력합니다.
setx AZURE_COMMUNICATION_CONNECTION_STRING "<yourConnectionString>"
환경 변수를 추가한 후에는 콘솔 창을 포함하여 실행 중인 프로그램 중에서 환경 변수를 읽어야 하는 프로그램을 다시 시작해야 할 수도 있습니다. 예를 들어 편집기로 Visual Studio를 사용하는 경우 Visual Studio를 다시 시작한 후 예제를 실행합니다.
환경 변수에 액세스 토큰 저장
환경 변수를 구성하려면 콘솔 창을 열고 아래 탭에서 운영 체제를 선택합니다.
<yourAccessToken>을 실제 액세스 토큰으로 바꿉니다.
콘솔 창을 열고 다음 명령을 입력합니다.
setx AZURE_COMMUNICATION_ACCESS_TOKEN "<yourAccessToken>"
환경 변수를 추가한 후에는 콘솔 창을 포함하여 실행 중인 프로그램 중에서 환경 변수를 읽어야 하는 프로그램을 다시 시작해야 할 수도 있습니다. 예를 들어 편집기로 Visual Studio를 사용하는 경우 Visual Studio를 다시 시작한 후 예제를 실행합니다.
작업
ID 만들기
액세스 토큰을 만들려면 ID가 필요합니다. Azure Communication Services는 이를 위해 간단한 ID 디렉터리를 유지 관리합니다.
user create 명령을 사용하여 고유한 Id가 있는 디렉터리에 새 항목을 만듭니다. 이 ID는 나중에 액세스 토큰을 발급하는 데 필요합니다.
az communication identity user create --connection-string "<yourConnectionString>"
-
<yourConnectionString>을 연결 문자열로 바꿉니다.
ID를 만들고 동일한 요청 내에서 액세스 토큰을 발급합니다.
다음 명령을 실행하여 Communication Services ID를 만들고 동시에 액세스 토큰을 발급할 수 있습니다.
scopes 매개 변수는 액세스 토큰 권한 및 역할 집합을 정의합니다. 자세한 내용은 Azure Communication Services에서 인증 받기에서 지원되는 작업 목록을 참조하세요.
az communication identity token issue --scope chat --connection-string "<yourConnectionString>"
코드에서 다음을 대체합니다.
-
<yourConnectionString>을 연결 문자열로 바꿉니다.
액세스 토큰 발급
다음 명령을 실행하여 Communication Services ID에 대한 액세스 토큰을 실행합니다.
scopes 매개 변수는 액세스 토큰 권한 및 역할 집합을 정의합니다. 자세한 내용은 Azure Communication Services에서 인증 받기에서 지원되는 작업 목록을 참조하세요.
az communication identity token issue --scope chat --user "<userId>" --connection-string "<yourConnectionString>"
코드에서 다음을 대체합니다.
-
<yourConnectionString>을 연결 문자열로 바꿉니다. -
<userId>를 userId로 바꿉니다.
액세스 토큰은 다시 발급해야 하는 단기 자격 증명입니다. 이렇게 하지 않으면 애플리케이션의 사용자 환경이 중단될 수 있습니다.
expires_on 응답 속성은 액세스 토큰의 수명을 나타냅니다.
여러 범위의 액세스 토큰 발급
다음 명령을 실행하여 Communication Services ID에 대한 여러 범위의 액세스 토큰을 발급합니다.
scopes 매개 변수는 액세스 토큰 권한 및 역할 집합을 정의합니다. 자세한 내용은 ID 모델에서 지원되는 작업 목록을 참조하세요.
az communication identity token issue --scope chat voip --user "<userId>" --connection-string "<yourConnectionString>"
코드에서 다음을 대체합니다.
-
<yourConnectionString>을 연결 문자열로 바꿉니다. -
<userId>를 userId로 바꿉니다.
액세스 토큰은 다시 발급해야 하는 단기 자격 증명입니다. 이렇게 하지 않으면 애플리케이션의 사용자 환경이 중단될 수 있습니다.
expires_on 응답 속성은 액세스 토큰의 수명을 나타냅니다.
Teams 사용자의 Microsoft Entra 액세스 토큰을 Exchange하여 Communication Identity 액세스 토큰
token get-for-teams-user 명령을 사용하여 Azure Communication Services SDK와 함께 사용할 수 있는 Teams 사용자에 대한 액세스 토큰을 발급합니다.
az communication identity token get-for-teams-user --aad-token "<yourAadToken>" --client "<yourAadApplication>" --aad-user "<yourAadUser>" --connection-string "<yourConnectionString>"
코드에서 다음을 대체합니다.
-
<yourConnectionString>을 연결 문자열로 바꿉니다. -
<yourAadUser>를 Microsoft Entra 사용자 ID로 바꿉니다. - Microsoft Entra 애플리케이션 ID로 대체
<yourAadApplication>합니다. -
<yourAadToken>을 Microsoft Entra 액세스 토큰으로 대체합니다.
액세스 토큰 취소
액세스 토큰을 명시적으로 해지해야 할 수 있습니다. 예를 들어 애플리케이션 사용자가 서비스에서 인증을 받는 데 사용하는 암호를 변경할 때 토큰을 명시적으로 해지해야 할 수 있습니다.
token revoke 명령은 ID에 발급된 모든 활성 액세스 토큰을 무효화합니다.
az communication identity token revoke --user "<userId>" --connection-string "<yourConnectionString>"
코드에서 다음을 대체합니다.
-
<yourConnectionString>을 연결 문자열로 바꿉니다. -
<userId>를 userId로 바꿉니다.
ID 삭제
ID를 삭제하면 모든 활성 액세스 토큰이 해지되고 ID에 대한 액세스 토큰의 추가 발급이 방지됩니다. 이렇게 하면 ID와 연결된 모든 지속형 콘텐츠도 제거됩니다.
az communication identity user delete --user "<userId>" --connection-string "<yourConnectionString>"
코드에서 다음을 대체합니다.
-
<yourConnectionString>을 연결 문자열로 바꿉니다. -
<userId>를 userId로 바꿉니다.
필수 조건
- 활성 구독이 있는 Azure 계정. 체험 계정을 만듭니다.
- 운영 체제에 대한 최신 .NET Core SDK 버전.
- 활성 Communication Services 리소스 및 연결 문자열 Communication Services 리소스 만들기
최종 코드
GitHub에서 최종 코드를 찾습니다.
환경 설정
새 C# 애플리케이션 만들기
cmd, PowerShell 또는 Bash와 같은 명령 프롬프트 창에서 명령을 실행
dotnet new하여 이름으로AccessTokensQuickstart새 콘솔 앱을 만듭니다. 이 명령은 단일 소스 파일을Program.cs사용하여 간단한 헬로 월드 C# 프로젝트를 만듭니다.dotnet new console -o AccessTokensQuickstart디렉터리를 새로 만든 앱 폴더로 변경하고
dotnet build명령을 사용하여 애플리케이션을 컴파일합니다.cd AccessTokensQuickstart dotnet build간단한
Hello World출력이 표시됩니다. 올바르게 표시되면 설정이 작동하며 Azure Communication Services 코드 작성을 시작할 수 있습니다.
패키지 설치
애플리케이션 디렉터리에 있는 동안 dotnet add package 명령을 사용하여 .NET 패키지용 Azure Communication Services ID 라이브러리를 설치합니다.
dotnet add package Azure.Communication.Identity
앱 프레임워크 설정
프로젝트 디렉터리에서 다음 단계를 완료합니다.
- 텍스트 편집기에서
Program.cs파일을 엽니다. -
using네임스페이스를 포함하는Azure.Communication.Identity지시문 추가합니다. - 비동기 코드를 지원하려면 메서드 선언을 업데이트합니다
Main.
시작하려면 다음 코드를 실행합니다.
using System;
using Azure;
using Azure.Core;
using Azure.Communication.Identity;

namespace AccessTokensQuickstart
{
    class Program
    {
        static async System.Threading.Tasks.Task Main(string[] args)
        {
            Console.WriteLine("Azure Communication Services - Access Tokens Quickstart");

            // Quickstart code goes here
        }
    }
}
클라이언트 인증
연결 문자열로 CommunicationIdentityClient를 초기화합니다.
Main 메서드에 추가하는 다음 코드는 COMMUNICATION_SERVICES_CONNECTION_STRING이라는 환경 변수에서 리소스에 대한 연결 문자열을 검색합니다.
자세한 내용은 > Store Communication Services 리소스 만들기 및 관리를 참조하세요.
// This code demonstrates how to retrieve your connection string
// from an environment variable.
string connectionString = Environment.GetEnvironmentVariable("COMMUNICATION_SERVICES_CONNECTION_STRING");
var client = new CommunicationIdentityClient(connectionString);
또는 다음 코드를 실행하여 엔드포인트와 액세스 키를 분리할 수 있습니다.
// This code demonstrates how to fetch your endpoint and access key
// from an environment variable.
string endpoint = Environment.GetEnvironmentVariable("COMMUNICATION_SERVICES_ENDPOINT");
string accessKey = Environment.GetEnvironmentVariable("COMMUNICATION_SERVICES_ACCESSKEY");
var client = new CommunicationIdentityClient(new Uri(endpoint), new AzureKeyCredential(accessKey));
Microsoft Entra 애플리케이션을 이미 설정한 경우 Microsoft Entra ID를 사용하여 인증할 수 있습니다.
TokenCredential tokenCredential = new DefaultAzureCredential();
var client = new CommunicationIdentityClient(new Uri(endpoint), tokenCredential);
ID 만들기
액세스 토큰을 만들려면 ID가 필요합니다. Azure Communication Services는 이를 위해 간단한 ID 디렉터리를 유지 관리합니다.
createUser 메서드를 사용하여 고유한 Id가 있는 디렉터리에 새 항목을 만듭니다. 나중에 ID를 사용하여 액세스 토큰을 발급합니다.
var identityResponse = await client.CreateUserAsync();
var identity = identityResponse.Value;
Console.WriteLine($"\nCreated an identity with ID: {identity.Id}");
받은 ID를 애플리케이션 사용자에 매핑하여 저장합니다(예: 애플리케이션 서버 데이터베이스에 저장).
(미리 보기) 연결된 customId를 사용하여 ID 만들기
중요합니다
이 기능은 SDK 버전 1.4.0-beta1부터 사용할 수 있습니다.
비고
이 기능은 현재 미리 보기로 제공됩니다.
연결된 customId ID를 만들어 애플리케이션의 사용자 ID를 Azure Communication Services ID와 매핑할 수 있습니다. 동일한 CreateUser로 customId 메서드를 다시 호출하면 동일한 user.Id가 반환됩니다. 이렇게 하면 매핑을 직접 저장할 필요가 없습니다.
Response<CommunicationUserIdentifier> user = await client.CreateUserAsync(customId: "alice@contoso.com");
Console.WriteLine($"\nCreated an identity with ID: {user.Id}");
(미리 보기) ID 세부 정보 가져오기
중요합니다
이 기능은 SDK 버전 1.4.0-beta1부터 사용할 수 있습니다.
비고
이 기능은 현재 미리 보기로 제공됩니다.
메서드 GetUserDetail를 사용하여 사용자에 대한 정보를 조회할 수 있으며, customId 및 lastTokenIssuedAt 포함됩니다.
Response<CommunicationUserIdentifier> user = await client.CreateUserAsync(customId: "alice@contoso.com");
var userDetails = client.GetUserDetail(user);
Console.WriteLine($"User ID: {userDetails.Id}");
Console.WriteLine($"Custom ID: {userDetails.CustomId}");
Console.WriteLine($"Last token issued at: {userDetails.LastTokenIssuedAt}");
액세스 토큰 발급
Communication Services ID가 있으면 GetToken 메서드를 사용하여 액세스 토큰을 발급합니다.
scopes 매개 변수는 액세스 토큰 권한 및 역할 집합을 정의합니다. 자세한 내용은 ID 모델에서 지원되는 작업 목록을 참조하세요. Azure Communication Service ID의 문자열 표현에 따라 communicationUser의 새 인스턴스를 구성할 수도 있습니다.
// Issue an access token with a validity of 24 hours and the "voip" scope for an identity
var tokenResponse = await client.GetTokenAsync(identity, scopes: new [] { CommunicationTokenScope.VoIP });

// Get the token from the response
var token =  tokenResponse.Value.Token;
var expiresOn = tokenResponse.Value.ExpiresOn;
Console.WriteLine($"\nIssued an access token with 'voip' scope that expires at {expiresOn}:");
Console.WriteLine(token);
액세스 토큰은 다시 발급해야 하는 단기 자격 증명입니다. 이렇게 하지 않으면 애플리케이션 사용자 환경이 중단될 수 있습니다.
expiresOn 속성은 액세스 토큰의 수명을 나타냅니다.
사용자 지정 토큰 만료 시간 설정
기본 토큰 만료 시간은 24시간이지만 선택적 매개 변수 tokenExpiresIn에 1시간에서 24시간 사이의 값을 제공하여 구성할 수 있습니다. 새 토큰을 요청할 때 토큰 만료 시간에 대한 통신 세션의 예상 일반적인 길이를 지정합니다.
// Issue an access token with a validity of an hour and the "voip" scope for an identity
TimeSpan tokenExpiresIn = TimeSpan.FromHours(1);
CommunicationTokenScope[] scopes = new[] { CommunicationTokenScope.VoIP };
var tokenResponse = await client.GetTokenAsync(identity, scopes, tokenExpiresIn);
ID를 만들고 동일한 요청 내에서 토큰 발급
CreateUserAndTokenAsync 메서드를 사용하여 Communication Services ID를 만들고 동시에 액세스 토큰을 발급할 수 있습니다.
scopes 매개 변수는 액세스 토큰 권한 및 역할 집합을 정의합니다. 자세한 내용은 Azure Communication Services에서 인증 받기에서 지원되는 작업 목록을 참조하세요.
// Issue an identity and an access token with a validity of 24 hours and the "voip" scope for the new identity
var identityAndTokenResponse = await client.CreateUserAndTokenAsync(scopes: new[] { CommunicationTokenScope.VoIP });

// Retrieve the identity, token, and expiration date from the response
var identity = identityAndTokenResponse.Value.User;
var token = identityAndTokenResponse.Value.AccessToken.Token;
var expiresOn = identityAndTokenResponse.Value.AccessToken.ExpiresOn;
Console.WriteLine($"\nCreated an identity with ID: {identity.Id}");
Console.WriteLine($"\nIssued an access token with 'voip' scope that expires at {expiresOn}:");
Console.WriteLine(token);
(미리 보기) 사용자 지정 ID를 사용하여 동일한 요청에서 토큰 만들기 및 ID 및 발급
중요합니다
이 기능은 SDK 버전 1.4.0-beta1부터 사용할 수 있습니다.
비고
이 기능은 현재 미리 보기로 제공됩니다.
사용자 지정 ID를 메서드에 CreateUserAndTokenAsync 전달하여 ID를 만들고 단일 호출에서 액세스 토큰을 발급할 수 있습니다.
// Issue an identity and an access token with a validity of 24 hours and the "voip" scope for the new identity
Response<CommunicationUserIdentifierAndToken> identityAndTokenResponse = await client.CreateUserAndTokenAsync(customId: "bob@contoso.com", scopes: new[] { CommunicationTokenScope.VoIP });

// Retrieve the identity, token, and expiration date from the response
var identity = identityAndTokenResponse.User;
var token = identityAndTokenResponse.AccessToken.Token;
var expiresOn = identityAndTokenResponse.AccessToken.ExpiresOn;
Console.WriteLine($"\nCreated an identity with ID: {identity.Id}");
Console.WriteLine($"\nIssued an access token with 'voip' scope that expires at {expiresOn}:");
Console.WriteLine(token);
액세스 토큰 새로 고침
액세스 토큰을 새로 고치려면 CommunicationUserIdentifier 개체의 인스턴스를 GetTokenAsync에 전달합니다. 이 Id 항목을 저장하고 새 CommunicationUserIdentifier항목을 만들어야 하는 경우 다음과 같이 생성자에 저장된 IdCommunicationUserIdentifier 항목을 전달하여 이 작업을 수행할 수 있습니다.
var identityToRefresh = new CommunicationUserIdentifier(identity.Id);
var tokenResponse = await client.GetTokenAsync(identityToRefresh, scopes: new [] { CommunicationTokenScope.VoIP });
액세스 토큰 취소
액세스 토큰을 명시적으로 해지해야 할 수 있습니다. 예를 들어 애플리케이션 사용자가 서비스에 인증하는 데 사용하는 암호를 변경하는 경우입니다.
RevokeTokensAsync 메서드는 ID에 발급된 모든 활성 액세스 토큰을 무효화합니다.
await client.RevokeTokensAsync(identity);
Console.WriteLine($"\nSuccessfully revoked all access tokens for identity with ID: {identity.Id}");
ID 삭제
ID를 삭제하면 모든 활성 액세스 토큰을 해지하고 ID에 대한 액세스 토큰의 추가 문제를 방지합니다. 이렇게 하면 ID와 연결된 모든 지속형 콘텐츠도 제거됩니다.
await client.DeleteUserAsync(identity);
Console.WriteLine($"\nDeleted the identity with ID: {identity.Id}");
코드 실행
액세스 토큰 만들기를 마치면 명령을 사용하여 애플리케이션 디렉터리에서 애플리케이션을 dotnet run 실행할 수 있습니다.
dotnet run
앱의 출력은 완료된 각 작업을 설명합니다.
Azure Communication Services - Access Tokens Quickstart

Created an identity with ID: 8:acs:4ccc92c8-9815-4422-bddc-ceea181dc774_00000006-19e0-2727-80f5-8b3a0d003502

Issued an access token with 'voip' scope that expires at 10/11/2022 7:34:29 AM +00:00:
eyJhbGciOiJSUzI1NiIsImtpZCI6IjEwNiIsIng1dCI6Im9QMWFxQnlfR3hZU3pSaXhuQ25zdE5PU2p2cyIsInR5cCI6IkpXVCJ9.eyJza3lwZWlkIjoiYWNzOjAwMDAwMDAwLTAwMDAtMDAwMC0wMDAwLTAwMDAwMDAwMDAwMF8wMDAwMDAwMC0wMDAwLTAwMDAtMDAwMC0wMDAwMDAwMDAwMDAiLCJzY3AiOjE3OTIsImNzaSI6IjE2NjUzODcyNjkiLCJleHAiOjE2NjUzOTA4NjksImFjc1Njb3BlIjoidm9pcCIsInJlc291cmNlSWQiOiIwMDAwMDAwMC0wMDAwLTAwMDAtMDAwMC0wMDAwMDAwMDAwMDAiLCJyZXNvdXJjZUxvY2F0aW9uIjoidW5pdGVkc3RhdGVzIiwiaWF0IjoxNjY1Mzg3MjY5fQ.kTXpQQtY7w6O82kByljZXrKtBvNNOleDE5m06LapzLeoWfRZCCpJQcDzBoLRA146mOhNzLZ0b5WMNTa5tD-0hWCiicDwgKLMASEGY9g0EvNQOidPff47g2hh6yqi9PKiDPp-t5siBMYqA6Nh6CQ-Oeh-35vcRW09VfcqFN38IgSSzJ7QkqBiY_QtfXz-iaj81Td0287KO4U1y2LJIGiyJLWC567F7A_p1sl6NmPKUmvmwM47tyCcQ1r_lfkRdeyDmcrGgY6yyI3XJZQbpxyt2DZqOTSVPB4PuRl7iyXxvppEa4Uo_y_BdMOOWFe6YTRB5O5lhI8m7Tf0LifisxX2sw

Created an identity with ID: 8:acs:4ccc92c8-9815-4422-bddc-ceea181dc774_00000006-1ce9-31b4-54b7-a43a0d006a52

Issued an access token with 'voip' scope that expires at 10/11/2022 7:34:29 AM +00:00:
eyJhbGciOiJSUzI1NiIsImtpZCI6IjEwNiIsIng1dCI6Im9QMWFxQnlfR3hZU3pSaXhuQ25zdE5PU2p2cyIsInR5cCI6IkpXVCJ9.eyJza3lwZWlkIjoiYWNzOjAwMDAwMDAwLTAwMDAtMDAwMC0wMDAwLTAwMDAwMDAwMDAwMF8wMDAwMDAwMC0wMDAwLTAwMDAtMDAwMC0wMDAwMDAwMDAwMDAiLCJzY3AiOjE3OTIsImNzaSI6IjE2NjUzODcyNjkiLCJleHAiOjE2NjUzOTA4NjksImFjc1Njb3BlIjoidm9pcCIsInJlc291cmNlSWQiOiIwMDAwMDAwMC0wMDAwLTAwMDAtMDAwMC0wMDAwMDAwMDAwMDAiLCJyZXNvdXJjZUxvY2F0aW9uIjoidW5pdGVkc3RhdGVzIiwiaWF0IjoxNjY1Mzg3MjY5fQ.kTXpQQtY7w6O82kByljZXrKtBvNNOleDE5m06LapzLeoWfRZCCpJQcDzBoLRA146mOhNzLZ0b5WMNTa5tD-0hWCiicDwgKLMASEGY9g0EvNQOidPff47g2hh6yqi9PKiDPp-t5siBMYqA6Nh6CQ-Oeh-35vcRW09VfcqFN38IgSSzJ7QkqBiY_QtfXz-iaj81Td0287KO4U1y2LJIGiyJLWC567F7A_p1sl6NmPKUmvmwM47tyCcQ1r_lfkRdeyDmcrGgY6yyI3XJZQbpxyt2DZqOTSVPB4PuRl7iyXxvppEa4Uo_y_BdMOOWFe6YTRB5O5lhI8m7Tf0LifisxX2sw

Successfully revoked all access tokens for identity with ID: 8:acs:4ccc92c8-9815-4422-bddc-ceea181dc774_00000006-19e0-2727-80f5-8b3a0d003502

Deleted the identity with ID: 8:acs:4ccc92c8-9815-4422-bddc-ceea181dc774_00000006-19e0-2727-80f5-8b3a0d003502
필수 조건
- 활성 구독이 있는 Azure 계정. 체험 계정을 만듭니다.
- Node.js 활성 LTS 및 유지 관리 LTS 버전(8.11.1 및 10.14.1 권장)
- 활성 Communication Services 리소스 및 연결 문자열 Communication Services 리소스 만들기
최종 코드
GitHub에서 최종 코드를 찾습니다.
환경 설정
새 Node.js 애플리케이션 만들기
터미널 또는 명령 프롬프트 창에서 앱에 대한 새 디렉터리를 만든 다음 엽니다.
mkdir access-tokens-quickstart && cd access-tokens-quickstartnpm init -y를 실행하여 기본 설정으로package.json파일을 만듭니다.npm init -y
패키지 설치
npm install 명령을 사용하여 JavaScript용 Azure Communication Services ID SDK를 설치합니다.
npm install @azure/communication-identity@latest --save
--save 옵션은 라이브러리를 package.json 파일의 종속성으로 나열합니다.
앱 프레임워크 설정
프로젝트 루트에
issue-access-token.js라는 파일을 만들고 다음 코드를 추가합니다.const { CommunicationIdentityClient } = require('@azure/communication-identity'); const main = async () => { console.log("Azure Communication Services - Access Tokens Quickstart") // Quickstart code goes here }; main().catch((error) => { console.log("Encountered an error"); console.log(error); })
클라이언트 인증
연결 문자열로 CommunicationIdentityClient를 인스턴스화합니다.
Main 메서드에 추가하는 다음 코드는 COMMUNICATION_SERVICES_CONNECTION_STRING이라는 환경 변수에서 리소스에 대한 연결 문자열을 검색합니다.
자세한 내용은 > Store Communication Services 리소스 만들기 및 관리를 참조하세요.
// This code demonstrates how to fetch your connection string
// from an environment variable.
const connectionString = process.env['COMMUNICATION_SERVICES_CONNECTION_STRING'];

// Instantiate the identity client
const identityClient = new CommunicationIdentityClient(connectionString);
또는 다음 코드를 실행하여 엔드포인트와 액세스 키를 분리할 수 있습니다.
// This code demonstrates how to fetch your endpoint and access key
// from an environment variable.
const endpoint = process.env["COMMUNICATION_SERVICES_ENDPOINT"];
const accessKey = process.env["COMMUNICATION_SERVICES_ACCESSKEY"];

// Create the credential
const tokenCredential = new AzureKeyCredential(accessKey);

// Instantiate the identity client
const identityClient = new CommunicationIdentityClient(endpoint, tokenCredential)
Microsoft Entra 애플리케이션을 이미 설정한 경우 Microsoft Entra ID를 사용하여 인증할 수 있습니다.
const endpoint = process.env["COMMUNICATION_SERVICES_ENDPOINT"];
const tokenCredential = new DefaultAzureCredential();
const identityClient = new CommunicationIdentityClient(endpoint, tokenCredential);
ID 만들기
액세스 토큰을 만들려면 ID가 필요합니다. Azure Communication Services는 이를 위해 간단한 ID 디렉터리를 유지 관리합니다.
createUser 메서드를 사용하여 고유한 Id가 있는 디렉터리에 새 항목을 만듭니다. 액세스 토큰을 발급하려면 나중에 ID가 필요합니다.
let identityResponse = await identityClient.createUser();
console.log(`\nCreated an identity with ID: ${identityResponse.communicationUserId}`);
수신된 ID를 애플리케이션의 사용자에 매핑하여 저장합니다(예: 애플리케이션 서버 데이터베이스에 저장).
(미리 보기) 연결된 사용자 지정 ID를 사용하여 ID 만들기
중요합니다
이 기능은 SDK 버전 1.4.0-beta1부터 사용할 수 있습니다.
비고
이 기능은 현재 미리 보기로 제공됩니다.
연결된 customId ID를 만들어 애플리케이션의 사용자 ID를 Azure Communication Services ID에 매핑할 수 있습니다.
createUser을 동일한 customId로 호출하면, 서비스는 동일한 communicationUserId를 반환합니다. 이렇게 하면 매핑을 직접 저장할 필요가 없습니다.
const customId = "alice@contoso.com";
let user = await identityClient.createUser({ customId });
console.log(`\nCreated an identity with ID: ${user.communicationUserId}`);
(미리 보기) ID 세부 정보 가져오기
중요합니다
이 기능은 SDK 버전 1.4.0-beta1부터 사용할 수 있습니다.
비고
이 기능은 현재 미리 보기로 제공됩니다.
메서드 getUserDetail를 사용하여 사용자에 대한 정보를 조회할 수 있으며, customId 및 lastTokenIssuedAt 포함됩니다.
const customId = "alice@contoso.com";
let user = await identityClient.createUser({ customId });
let userDetails = client.getUserDetail(user);
console.log(`\nUser ID: ${user.communicationUserId}`);
console.log(`\nCustom ID: ${userDetails.customId}`);
console.log(`\nLast token issued at: ${userDetails.lastTokenIssuedAt}`);
액세스 토큰 발급
getToken 메서드를 사용하여 Communication Services ID에 대한 액세스 토큰을 발급합니다.
scopes 매개 변수는 액세스 토큰 권한 및 역할 집합을 정의합니다. 자세한 내용은 ID 모델에서 지원되는 작업 목록을 참조하세요. Azure Communication Service ID의 문자열 표현에 따라 communicationUser의 새 인스턴스를 구성할 수도 있습니다.
// Issue an access token with a validity of 24 hours and the "voip" scope for an identity
let tokenResponse = await identityClient.getToken(identityResponse, ["voip"]);

// Get the token and its expiration date from the response
const { token, expiresOn } = tokenResponse;
console.log(`\nIssued an access token with 'voip' scope that expires at ${expiresOn}:`);
console.log(token);
액세스 토큰은 다시 발급해야 하는 단기 자격 증명입니다. 이렇게 하지 않으면 애플리케이션 사용자 환경이 중단될 수 있습니다.
expiresOn 속성은 액세스 토큰의 수명을 나타냅니다.
사용자 지정 토큰 만료 시간 설정
기본 토큰 만료 시간은 24시간(1440분)이지만 선택적 매개 변수 tokenExpiresInMinutes에 60분에서 1440분 사이의 값을 제공하여 구성할 수 있습니다. 새 토큰을 요청할 때 토큰 만료 시간에 대한 통신 세션의 예상 일반적인 길이를 지정합니다.
// Issue an access token with a validity of an hour and the "voip" scope for an identity
const tokenOptions: GetTokenOptions = { tokenExpiresInMinutes: 60 };
let tokenResponse = await identityClient.getToken
(identityResponse, ["voip"], tokenOptions);
한 번의 메서드 호출로 ID 생성 및 토큰 발급
createUserAndToken 메서드를 사용하여 Communication Services ID를 만들고 동시에 액세스 토큰을 발급할 수 있습니다.
scopes 매개 변수는 액세스 토큰 권한 및 역할 집합을 정의합니다. 범위를 사용하여 만듭니다 voip .
// Issue an identity and an access token with a validity of 24 hours and the "voip" scope for the new identity
let identityTokenResponse = await identityClient.createUserAndToken(["voip"]);

// Get the token, its expiration date, and the user from the response
const { token, expiresOn, user } = identityTokenResponse;
console.log(`\nCreated an identity with ID: ${user.communicationUserId}`);
console.log(`\nIssued an access token with 'voip' scope that expires at ${expiresOn}:`);
console.log(token);
(미리 보기) customId를 포함하여 하나의 메서드 호출에서 ID를 만들고 토큰을 발급합니다.
중요합니다
이 기능은 SDK 버전 1.4.0-beta1부터 사용할 수 있습니다.
비고
이 기능은 현재 미리 보기로 제공됩니다.
사용자 지정 ID를 메서드에 createUserAndToken 전달하여 ID를 만들고 단일 호출에서 액세스 토큰을 발급할 수 있습니다.
// Issue an identity and an access token with a validity of 24 hours and the "voip" scope for the new identity
const customId = "bob@contoso.com";
let identityTokenResponse = await identityClient.createUserAndToken(["voip"], { customId });

// Get the token, its expiration date, and the user from the response
const { token, expiresOn, user } = identityTokenResponse;
console.log(`\nCreated an identity with ID: ${user.communicationUserId}`);
console.log(`\nIssued an access token with 'voip' scope that expires at ${expiresOn}:`);
console.log(token);
액세스 토큰 새로 고침
토큰이 만료되면 새로 고쳐야 합니다. 토큰을 새로 고치려면 토큰을 발급하는 데 사용된 것과 동일한 ID로 다시 호출 getToken 합니다. 새로 고친 토큰의 scopes도 제공해야 합니다.
// Value of identityResponse represents the Azure Communication Services identity stored during identity creation and then used to issue the tokens being refreshed
let refreshedTokenResponse = await identityClient.getToken(identityResponse, ["voip"]);
액세스 토큰 취소
액세스 토큰을 해지해야 할 수도 있습니다. 예를 들어 애플리케이션 사용자가 서비스에 인증하는 데 사용하는 암호를 변경할 때 이렇게 합니다.
revokeTokens 메서드는 ID에 발급된 모든 활성 액세스 토큰을 무효화합니다.
await identityClient.revokeTokens(identityResponse);

console.log(`\nSuccessfully revoked all access tokens for identity with ID: ${identityResponse.communicationUserId}`);
ID 삭제
ID를 삭제하면 모든 활성 액세스 토큰을 해지하고 ID에 대한 액세스 토큰의 추가 문제를 방지합니다. 이렇게 하면 ID와 연결된 모든 지속형 콘텐츠도 제거됩니다.
await identityClient.deleteUser(identityResponse);

console.log(`\nDeleted the identity with ID: ${identityResponse.communicationUserId}`);
코드 실행
콘솔 프롬프트에서 issue-access-token.js 파일이 포함된 디렉터리로 이동한 후, 다음 node 명령을 실행하여 앱을 실행합니다.
node ./issue-access-token.js
앱 출력은 완료된 각 작업을 설명합니다.
Azure Communication Services - Access Tokens Quickstart

Created an identity with ID: 8:acs:4ccc92c8-9815-4422-bddc-ceea181dc774_00000006-19e0-2727-80f5-8b3a0d003502

Issued an access token with 'voip' scope that expires at 2022-10-11T07:34:29.9028648+00:00:
eyJhbGciOiJSUzI1NiIsImtpZCI6IjEwNiIsIng1dCI6Im9QMWFxQnlfR3hZU3pSaXhuQ25zdE5PU2p2cyIsInR5cCI6IkpXVCJ9.eyJza3lwZWlkIjoiYWNzOjAwMDAwMDAwLTAwMDAtMDAwMC0wMDAwLTAwMDAwMDAwMDAwMF8wMDAwMDAwMC0wMDAwLTAwMDAtMDAwMC0wMDAwMDAwMDAwMDAiLCJzY3AiOjE3OTIsImNzaSI6IjE2NjUzODcyNjkiLCJleHAiOjE2NjUzOTA4NjksImFjc1Njb3BlIjoidm9pcCIsInJlc291cmNlSWQiOiIwMDAwMDAwMC0wMDAwLTAwMDAtMDAwMC0wMDAwMDAwMDAwMDAiLCJyZXNvdXJjZUxvY2F0aW9uIjoidW5pdGVkc3RhdGVzIiwiaWF0IjoxNjY1Mzg3MjY5fQ.kTXpQQtY7w6O82kByljZXrKtBvNNOleDE5m06LapzLeoWfRZCCpJQcDzBoLRA146mOhNzLZ0b5WMNTa5tD-0hWCiicDwgKLMASEGY9g0EvNQOidPff47g2hh6yqi9PKiDPp-t5siBMYqA6Nh6CQ-Oeh-35vcRW09VfcqFN38IgSSzJ7QkqBiY_QtfXz-iaj81Td0287KO4U1y2LJIGiyJLWC567F7A_p1sl6NmPKUmvmwM47tyCcQ1r_lfkRdeyDmcrGgY6yyI3XJZQbpxyt2DZqOTSVPB4PuRl7iyXxvppEa4Uo_y_BdMOOWFe6YTRB5O5lhI8m7Tf0LifisxX2sw

Created an identity with ID: 8:acs:4ccc92c8-9815-4422-bddc-ceea181dc774_00000006-1ce9-31b4-54b7-a43a0d006a52

Issued an access token with 'voip' scope that expires at 2022-10-11T07:34:29.9028648+00:00:
eyJhbGciOiJSUzI1NiIsImtpZCI6IjEwNiIsIng1dCI6Im9QMWFxQnlfR3hZU3pSaXhuQ25zdE5PU2p2cyIsInR5cCI6IkpXVCJ9.eyJza3lwZWlkIjoiYWNzOjAwMDAwMDAwLTAwMDAtMDAwMC0wMDAwLTAwMDAwMDAwMDAwMF8wMDAwMDAwMC0wMDAwLTAwMDAtMDAwMC0wMDAwMDAwMDAwMDAiLCJzY3AiOjE3OTIsImNzaSI6IjE2NjUzODcyNjkiLCJleHAiOjE2NjUzOTA4NjksImFjc1Njb3BlIjoidm9pcCIsInJlc291cmNlSWQiOiIwMDAwMDAwMC0wMDAwLTAwMDAtMDAwMC0wMDAwMDAwMDAwMDAiLCJyZXNvdXJjZUxvY2F0aW9uIjoidW5pdGVkc3RhdGVzIiwiaWF0IjoxNjY1Mzg3MjY5fQ.kTXpQQtY7w6O82kByljZXrKtBvNNOleDE5m06LapzLeoWfRZCCpJQcDzBoLRA146mOhNzLZ0b5WMNTa5tD-0hWCiicDwgKLMASEGY9g0EvNQOidPff47g2hh6yqi9PKiDPp-t5siBMYqA6Nh6CQ-Oeh-35vcRW09VfcqFN38IgSSzJ7QkqBiY_QtfXz-iaj81Td0287KO4U1y2LJIGiyJLWC567F7A_p1sl6NmPKUmvmwM47tyCcQ1r_lfkRdeyDmcrGgY6yyI3XJZQbpxyt2DZqOTSVPB4PuRl7iyXxvppEa4Uo_y_BdMOOWFe6YTRB5O5lhI8m7Tf0LifisxX2sw

Successfully revoked all access tokens for identity with ID: 8:acs:4ccc92c8-9815-4422-bddc-ceea181dc774_00000006-19e0-2727-80f5-8b3a0d003502

Deleted the identity with ID: 8:acs:4ccc92c8-9815-4422-bddc-ceea181dc774_00000006-19e0-2727-80f5-8b3a0d003502
필수 조건
- 활성 구독이 있는 Azure 계정. 체험 계정을 만듭니다.
- Python 3.8 이상.
- 활성 Communication Services 리소스 및 연결 문자열 Communication Services 리소스 만들기
최종 코드
GitHub에서 최종 코드를 찾습니다.
환경 설정
새 Python 애플리케이션 만들기
터미널 또는 명령 프롬프트 창에서 앱에 대한 새 디렉터리를 만든 다음 엽니다.
mkdir access-tokens-quickstart && cd access-tokens-quickstart텍스트 편집기를 사용하여 프로젝트 루트 디렉터리에 호출
issue-access-tokens.py된 파일을 만듭니다. 그런 다음 기본 예외 처리를 포함하여 프로그램의 구조를 추가합니다. 이 파일에 모든 소스 코드를 추가합니다.import os from datetime import timedelta from azure.communication.identity import CommunicationIdentityClient, CommunicationUserIdentifier try: print("Azure Communication Services - Access Tokens Quickstart") # Quickstart code goes here except Exception as ex: print("Exception:") print(ex)
패키지 설치
애플리케이션 디렉터리에 있는 동안 명령을 사용하여 Python용 Azure Communication Services ID SDK 패키지를 설치합니다 pip install .
pip install azure-communication-identity
클라이언트 인증
연결 문자열로 CommunicationIdentityClient를 인스턴스화합니다.
try 블록에 추가하는 다음 코드는 COMMUNICATION_SERVICES_CONNECTION_STRING이라는 환경 변수에서 리소스에 대한 연결 문자열을 검색합니다.
자세한 내용은 > Store Communication Services 리소스 만들기 및 관리를 참조하세요.
# This code demonstrates how to retrieve your connection string
# from an environment variable.
connection_string = os.environ["COMMUNICATION_SERVICES_CONNECTION_STRING"]

# Instantiate the identity client
client = CommunicationIdentityClient.from_connection_string(connection_string)
또는 이미 Microsoft Entra 애플리케이션을 설정한 경우 Microsoft Entra ID를 사용하여 인증할 수 있습니다.
endpoint = os.environ["COMMUNICATION_SERVICES_ENDPOINT"]
client = CommunicationIdentityClient(endpoint, DefaultAzureCredential())
ID 만들기
액세스 토큰을 만들려면 ID가 필요합니다. Azure Communication Services는 이를 위해 간단한 ID 디렉터리를 유지 관리합니다.
create_user 메서드를 사용하여 고유한 Id가 있는 디렉터리에 새 항목을 만듭니다. ID는 나중에 액세스 토큰을 발급하는 데 필요합니다.
identity = client.create_user()
print("\nCreated an identity with ID: " + identity.properties['id'])
받은 ID를 애플리케이션 사용자에 매핑하여 저장합니다(예: 애플리케이션 서버 데이터베이스에 저장).
액세스 토큰 발급
get_token 메서드를 사용하여 Communication Services ID에 대한 액세스 토큰을 발급합니다.
scopes 매개 변수는 액세스 토큰 권한 및 역할 집합을 정의합니다. 자세한 내용은 ID 모델에서 지원되는 작업 목록을 참조하세요. Azure Communication Service ID의 문자열 표현에 따라 매개 변수 CommunicationUserIdentifier의 새 인스턴스를 구성할 수도 있습니다.
# Issue an access token with a validity of 24 hours and the "voip" scope for an identity
token_result = client.get_token(identity, ["voip"])
print("\nIssued an access token with 'voip' scope that expires at " + token_result.expires_on + ":")
print(token_result.token)
액세스 토큰은 다시 발급해야 하는 단기 자격 증명입니다. 이렇게 하지 않으면 애플리케이션 사용자 환경이 중단될 수 있습니다.
expires_on 응답 속성은 액세스 토큰의 수명을 나타냅니다.
사용자 지정 토큰 만료 시간 설정
기본 토큰 만료 시간은 24시간이지만 선택적 매개 변수 token_expires_in에 1시간에서 24시간 사이의 값을 제공하여 구성할 수 있습니다. 새 토큰을 요청할 때 토큰 만료 시간에 대한 통신 세션의 예상 일반적인 길이를 지정합니다.
# Issue an access token with a validity of an hour and the "voip" scope for an identity
token_expires_in = timedelta(hours=1)
token_result = client.get_token(identity, ["voip"], token_expires_in=token_expires_in)
ID를 만들고 동일한 요청 내에서 액세스 토큰을 발급합니다.
create_user_and_token 메서드를 사용하여 Communication Services ID를 만들고 동시에 액세스 토큰을 발급할 수 있습니다.
scopes 매개 변수는 액세스 토큰 권한 및 역할 집합을 정의합니다. 자세한 내용은 Azure Communication Services에서 인증 받기에서 지원되는 작업 목록을 참조하세요.
# Issue an identity and an access token with a validity of 24 hours and the "voip" scope for the new identity
identity_token_result = client.create_user_and_token(["voip"])

# Get the token details from the response
identity = identity_token_result[0]
token = identity_token_result[1].token
expires_on = identity_token_result[1].expires_on
print("\nCreated an identity with ID: " + identity.properties['id'])
print("\nIssued an access token with 'voip' scope that expires at " + expires_on + ":")
print(token)
액세스 토큰 새로 고침
액세스 토큰을 새로 고치려면 CommunicationUserIdentifier 개체를 사용하여 기존 ID를 전달하여 토큰을 다시 발급합니다.
# The existingIdentity value represents the Communication Services identity that's stored during identity creation
identity = CommunicationUserIdentifier(existingIdentity)
token_result = client.get_token(identity, ["voip"])
액세스 토큰 취소
액세스 토큰을 명시적으로 해지해야 할 수 있습니다. 예를 들어 애플리케이션 사용자가 서비스에 인증하는 데 사용하는 암호를 변경하는 경우입니다.
revoke_tokens 메서드는 ID에 발급된 모든 활성 액세스 토큰을 무효화합니다.
client.revoke_tokens(identity)
print("\nSuccessfully revoked all access tokens for identity with ID: " + identity.properties['id'])
ID 삭제
ID를 삭제하면 모든 활성 액세스 토큰이 해지되고 ID에 대한 액세스 토큰의 추가 발급이 방지됩니다. 이렇게 하면 ID와 연결된 모든 지속형 콘텐츠도 제거됩니다.
client.delete_user(identity)
print("\nDeleted the identity with ID: " + identity.properties['id'])
코드 실행
콘솔 프롬프트에서 파일이 포함된 issue-access-tokens.py 디렉터리로 이동한 다음, 다음 python 명령을 실행하여 앱을 실행합니다.
python ./issue-access-tokens.py
생성된 출력은 완료된 각 작업을 설명합니다.
Azure Communication Services - Access Tokens Quickstart

Created an identity with ID: 8:acs:4ccc92c8-9815-4422-bddc-ceea181dc774_00000006-19e0-2727-80f5-8b3a0d003502

Issued an access token with 'voip' scope that expires at 2022-10-11T07:34:29.9028648+00:00:
eyJhbGciOiJSUzI1NiIsImtpZCI6IjEwNiIsIng1dCI6Im9QMWFxQnlfR3hZU3pSaXhuQ25zdE5PU2p2cyIsInR5cCI6IkpXVCJ9.eyJza3lwZWlkIjoiYWNzOjAwMDAwMDAwLTAwMDAtMDAwMC0wMDAwLTAwMDAwMDAwMDAwMF8wMDAwMDAwMC0wMDAwLTAwMDAtMDAwMC0wMDAwMDAwMDAwMDAiLCJzY3AiOjE3OTIsImNzaSI6IjE2NjUzODcyNjkiLCJleHAiOjE2NjUzOTA4NjksImFjc1Njb3BlIjoidm9pcCIsInJlc291cmNlSWQiOiIwMDAwMDAwMC0wMDAwLTAwMDAtMDAwMC0wMDAwMDAwMDAwMDAiLCJyZXNvdXJjZUxvY2F0aW9uIjoidW5pdGVkc3RhdGVzIiwiaWF0IjoxNjY1Mzg3MjY5fQ.kTXpQQtY7w6O82kByljZXrKtBvNNOleDE5m06LapzLeoWfRZCCpJQcDzBoLRA146mOhNzLZ0b5WMNTa5tD-0hWCiicDwgKLMASEGY9g0EvNQOidPff47g2hh6yqi9PKiDPp-t5siBMYqA6Nh6CQ-Oeh-35vcRW09VfcqFN38IgSSzJ7QkqBiY_QtfXz-iaj81Td0287KO4U1y2LJIGiyJLWC567F7A_p1sl6NmPKUmvmwM47tyCcQ1r_lfkRdeyDmcrGgY6yyI3XJZQbpxyt2DZqOTSVPB4PuRl7iyXxvppEa4Uo_y_BdMOOWFe6YTRB5O5lhI8m7Tf0LifisxX2sw

Created an identity with ID: 8:acs:4ccc92c8-9815-4422-bddc-ceea181dc774_00000006-1ce9-31b4-54b7-a43a0d006a52

Issued an access token with 'voip' scope that expires at 2022-10-11T07:34:29.9028648+00:00:
eyJhbGciOiJSUzI1NiIsImtpZCI6IjEwNiIsIng1dCI6Im9QMWFxQnlfR3hZU3pSaXhuQ25zdE5PU2p2cyIsInR5cCI6IkpXVCJ9.eyJza3lwZWlkIjoiYWNzOjAwMDAwMDAwLTAwMDAtMDAwMC0wMDAwLTAwMDAwMDAwMDAwMF8wMDAwMDAwMC0wMDAwLTAwMDAtMDAwMC0wMDAwMDAwMDAwMDAiLCJzY3AiOjE3OTIsImNzaSI6IjE2NjUzODcyNjkiLCJleHAiOjE2NjUzOTA4NjksImFjc1Njb3BlIjoidm9pcCIsInJlc291cmNlSWQiOiIwMDAwMDAwMC0wMDAwLTAwMDAtMDAwMC0wMDAwMDAwMDAwMDAiLCJyZXNvdXJjZUxvY2F0aW9uIjoidW5pdGVkc3RhdGVzIiwiaWF0IjoxNjY1Mzg3MjY5fQ.kTXpQQtY7w6O82kByljZXrKtBvNNOleDE5m06LapzLeoWfRZCCpJQcDzBoLRA146mOhNzLZ0b5WMNTa5tD-0hWCiicDwgKLMASEGY9g0EvNQOidPff47g2hh6yqi9PKiDPp-t5siBMYqA6Nh6CQ-Oeh-35vcRW09VfcqFN38IgSSzJ7QkqBiY_QtfXz-iaj81Td0287KO4U1y2LJIGiyJLWC567F7A_p1sl6NmPKUmvmwM47tyCcQ1r_lfkRdeyDmcrGgY6yyI3XJZQbpxyt2DZqOTSVPB4PuRl7iyXxvppEa4Uo_y_BdMOOWFe6YTRB5O5lhI8m7Tf0LifisxX2sw

Successfully revoked all access tokens for identity with ID: 8:acs:4ccc92c8-9815-4422-bddc-ceea181dc774_00000006-19e0-2727-80f5-8b3a0d003502

Deleted the identity with ID: 8:acs:4ccc92c8-9815-4422-bddc-ceea181dc774_00000006-19e0-2727-80f5-8b3a0d003502
필수 조건
- 활성 구독이 있는 Azure 계정. 체험 계정을 만듭니다.
- JDK(Java Development Kit) 버전 8 이상
- Apache Maven.
- 활성 Communication Services 리소스 및 연결 문자열 Communication Services 리소스 만들기
최종 코드
GitHub에서 최종 코드를 찾습니다.
환경 설정
새 Java 애플리케이션 만들기
터미널 또는 명령 프롬프트 창에서 Java 애플리케이션을 만들 디렉터리로 이동합니다. maven-archetype-quickstart 템플릿에서 Java 프로젝트를 생성하려면 다음 코드를 실행합니다.
mvn archetype:generate -DgroupId=com.communication.quickstart -DartifactId=communication-quickstart -DarchetypeArtifactId=maven-archetype-quickstart -DarchetypeVersion=1.4 -DinteractiveMode=false
작업에서 generate 이름이 같은 artifactId디렉터리를 만듭니다. 이 디렉터리 src/main/java 아래에는 프로젝트 소스 코드가 포함되고, src/test/java 디렉터리에는 테스트 소스가 포함되고 pom.xml , 파일은 프로젝트의 프로젝트 개체 모델 또는 POM입니다. 이 파일은 프로젝트 구성 매개 변수에 사용됩니다.
Communication Services 패키지 설치
텍스트 편집기에서 pom.xml 파일을 엽니다. 종속성 그룹에 다음 종속성 요소를 추가합니다.
<dependency>
    <groupId>com.azure</groupId>
    <artifactId>azure-communication-identity</artifactId>
    <version>[1.4.0,)</version>
</dependency>
이 코드는 나중에 사용해야 하는 Communication Services ID SDK를 설치하도록 Maven에 지시합니다.
앱 프레임워크 설정
프로젝트 디렉터리에서 다음 단계를 완료합니다.
-
/src/main/java/com/communication/quickstart디렉터리로 이동합니다. - 편집기
App.java에서 파일을 엽니다. -
System.out.println("Hello world!");문을 바꿉니다. -
import지시문을 추가합니다.
시작하려면 다음 코드를 사용합니다.
package com.communication.quickstart;

import com.azure.communication.common.*;
import com.azure.communication.identity.*;
import com.azure.communication.identity.models.*;
import com.azure.core.credential.*;

import java.io.IOException;
import java.time.*;
import java.util.*;

public class App
{
    public static void main( String[] args ) throws IOException
    {
        System.out.println("Azure Communication Services - Access Tokens Quickstart");
        // Quickstart code goes here
    }
}
클라이언트 인증
리소스의 액세스 키 및 엔드포인트를 사용하여 CommunicationIdentityClient를 인스턴스화합니다. 자세한 내용은 > Store Communication Services 리소스 만들기 및 관리를 참조하세요.
com.azure.core.http.HttpClient 인터페이스를 구현하는 사용자 지정 HTTP 클라이언트로 클라이언트를 초기화할 수도 있습니다.
파일에서 App.java 메서드에 다음 코드를 main 추가합니다.
// You can find your endpoint and access key from your resource in the Azure portal
String endpoint = "https://<RESOURCE_NAME>.communication.azure.com";
String accessKey = "SECRET";

CommunicationIdentityClient communicationIdentityClient = new CommunicationIdentityClientBuilder()
        .endpoint(endpoint)
        .credential(new AzureKeyCredential(accessKey))
        .buildClient();
엔드포인트 및 액세스 키를 제공하는 대신, connectionString() 메서드를 사용하여 전체 연결 문자열을 제공할 수 있습니다.
// You can find your connection string from your Communication Services resource in the Azure portal
String connectionString = "<connection_string>";

CommunicationIdentityClient communicationIdentityClient = new CommunicationIdentityClientBuilder()
    .connectionString(connectionString)
    .buildClient();
Microsoft Entra 애플리케이션을 이미 설정한 경우 Microsoft Entra ID를 사용하여 인증할 수 있습니다.
String endpoint = "https://<RESOURCE_NAME>.communication.azure.com";
TokenCredential credential = new DefaultAzureCredentialBuilder().build();

CommunicationIdentityClient communicationIdentityClient = new CommunicationIdentityClientBuilder()
        .endpoint(endpoint)
        .credential(credential)
        .buildClient();
ID 만들기
액세스 토큰을 만들려면 ID가 필요합니다. Azure Communication Services는 이를 위해 간단한 ID 디렉터리를 유지 관리합니다.
createUser 메서드를 사용하여 고유한 Id가 있는 디렉터리에 새 항목을 만듭니다.
CommunicationUserIdentifier user = communicationIdentityClient.createUser();
System.out.println("\nCreated an identity with ID: " + user.getId());
생성된 ID는 나중에 액세스 토큰을 발급하는 데 필요합니다. 수신된 ID를 애플리케이션의 사용자에 매핑하여 저장합니다(예: 애플리케이션 서버 데이터베이스에 저장).
액세스 토큰 발급
getToken 메서드를 사용하여 Communication Services ID에 대한 액세스 토큰을 발급합니다.
scopes 매개 변수는 액세스 토큰 권한 및 역할 집합을 정의합니다. 자세한 내용은 ID 모델에서 지원되는 작업 목록을 참조하세요.
다음 코드에서는 이전 단계에서 만든 사용자 변수를 사용하여 토큰을 가져옵니다.
// Issue an access token with a validity of 24 hours and the "voip" scope for a user identity
List<CommunicationTokenScope> scopes = new ArrayList<>(Arrays.asList(CommunicationTokenScope.VOIP));
AccessToken accessToken = communicationIdentityClient.getToken(user, scopes);
OffsetDateTime expiresAt = accessToken.getExpiresAt();
String token = accessToken.getToken();
System.out.println("\nIssued an access token with 'voip' scope that expires at: " + expiresAt + ": " + token);
액세스 토큰은 다시 발급해야 하는 단기 자격 증명입니다. 이렇게 하지 않으면 애플리케이션 사용자 환경이 중단될 수 있습니다.
expiresAt 속성은 액세스 토큰의 수명을 나타냅니다.
사용자 지정 토큰 만료 시간 설정
기본 토큰 만료 시간은 24시간이지만 선택적 매개 변수 tokenExpiresIn에 1시간에서 24시간 사이의 값을 제공하여 구성할 수 있습니다. 새 토큰을 요청할 때 토큰 만료 시간에 대한 통신 세션의 예상 일반적인 길이를 지정합니다.
// Issue an access token with a validity of an hour and the "voip" scope for a user identity
List<CommunicationTokenScope> scopes = new ArrayList<>(Arrays.asList(CommunicationTokenScope.VOIP));
Duration tokenExpiresIn = Duration.ofHours(1);
AccessToken accessToken = communicationIdentityClient.getToken(user, scopes, tokenExpiresIn);
한 번의 요청으로 ID 생성 및 토큰 발급
또는 'createUserAndToken' 메서드를 사용하여 디렉터리에서 고유한 Id로 새 항목을 만들고 동시에 액세스 토큰을 발급할 수 있습니다.
//Create an identity and issue token with a validity of 24 hours in one call
List<CommunicationTokenScope> scopes = Arrays.asList(CommunicationTokenScope.CHAT);
CommunicationUserIdentifierAndToken result = communicationIdentityClient.createUserAndToken(scopes);
CommunicationUserIdentifier user = result.getUser();
System.out.println("\nCreated a user identity with ID: " + user.getId());
AccessToken accessToken = result.getUserToken();
OffsetDateTime expiresAt = accessToken.getExpiresAt();
String token = accessToken.getToken();
System.out.println("\nIssued an access token with 'chat' scope that expires at: " + expiresAt + ": " + token);
액세스 토큰 새로 고침
액세스 토큰을 새로 고치려면 CommunicationUserIdentifier 개체를 사용하여 다시 발급합니다.
// existingIdentity represents the Communication Services identity that's stored during identity creation
CommunicationUserIdentifier identity = new CommunicationUserIdentifier(existingIdentity.getId());
AccessToken response = communicationIdentityClient.getToken(identity, scopes);
액세스 토큰 해지
액세스 토큰을 명시적으로 해지해야 할 수 있습니다. 예를 들어 애플리케이션 사용자가 서비스에서 인증을 받는 데 사용하는 암호를 변경할 때 토큰을 명시적으로 해지해야 할 수 있습니다.
revokeTokens 메서드는 특정 사용자에 대한 모든 활성 액세스 토큰을 무효화합니다. 다음 코드에서는 이전에 만든 사용자를 사용할 수 있습니다.
communicationIdentityClient.revokeTokens(user);
System.out.println("\nSuccessfully revoked all access tokens for user identity with ID: " + user.getId());
ID 삭제
ID를 삭제하면 모든 활성 액세스 토큰이 해지되고 ID에 대한 액세스 토큰의 추가 발급이 방지됩니다. 이렇게 하면 ID와 연결된 모든 지속형 콘텐츠도 제거됩니다.
communicationIdentityClient.deleteUser(user);
System.out.println("\nDeleted the user identity with ID: " + user.getId());
코드 실행
파일이 포함된 디렉터리로
pom.xml이동합니다.다음 명령을 사용하여 프로젝트를 컴파일합니다
mvn.mvn compile패키지를 빌드합니다.
mvn package다음
mvn명령을 실행하여 앱을 실행합니다.mvn exec:java -Dexec.mainClass="com.communication.quickstart.App" -Dexec.cleanupDaemonThreads=false
출력은 완료된 각 작업을 설명합니다.
Azure Communication Services - Access Tokens Quickstart

Created an identity with ID: 8:acs:4ccc92c8-9815-4422-bddc-ceea181dc774_00000006-19e0-2727-80f5-8b3a0d003502

Issued an access token with 'voip' scope that expires at 2022-10-11T07:34:29.902864800Z:
eyJhbGciOiJSUzI1NiIsImtpZCI6IjEwNiIsIng1dCI6Im9QMWFxQnlfR3hZU3pSaXhuQ25zdE5PU2p2cyIsInR5cCI6IkpXVCJ9.eyJza3lwZWlkIjoiYWNzOjAwMDAwMDAwLTAwMDAtMDAwMC0wMDAwLTAwMDAwMDAwMDAwMF8wMDAwMDAwMC0wMDAwLTAwMDAtMDAwMC0wMDAwMDAwMDAwMDAiLCJzY3AiOjE3OTIsImNzaSI6IjE2NjUzODcyNjkiLCJleHAiOjE2NjUzOTA4NjksImFjc1Njb3BlIjoidm9pcCIsInJlc291cmNlSWQiOiIwMDAwMDAwMC0wMDAwLTAwMDAtMDAwMC0wMDAwMDAwMDAwMDAiLCJyZXNvdXJjZUxvY2F0aW9uIjoidW5pdGVkc3RhdGVzIiwiaWF0IjoxNjY1Mzg3MjY5fQ.kTXpQQtY7w6O82kByljZXrKtBvNNOleDE5m06LapzLeoWfRZCCpJQcDzBoLRA146mOhNzLZ0b5WMNTa5tD-0hWCiicDwgKLMASEGY9g0EvNQOidPff47g2hh6yqi9PKiDPp-t5siBMYqA6Nh6CQ-Oeh-35vcRW09VfcqFN38IgSSzJ7QkqBiY_QtfXz-iaj81Td0287KO4U1y2LJIGiyJLWC567F7A_p1sl6NmPKUmvmwM47tyCcQ1r_lfkRdeyDmcrGgY6yyI3XJZQbpxyt2DZqOTSVPB4PuRl7iyXxvppEa4Uo_y_BdMOOWFe6YTRB5O5lhI8m7Tf0LifisxX2sw

Created an identity with ID: 8:acs:4ccc92c8-9815-4422-bddc-ceea181dc774_00000006-1ce9-31b4-54b7-a43a0d006a52

Issued an access token with 'chat' scope that expires at 2022-10-11T07:34:29.902864800Z:
eyJhbGciOiJSUzI1NiIsImtpZCI6IjEwNiIsIng1dCI6Im9QMWFxQnlfR3hZU3pSaXhuQ25zdE5PU2p2cyIsInR5cCI6IkpXVCJ9.eyJza3lwZWlkIjoiYWNzOjAwMDAwMDAwLTAwMDAtMDAwMC0wMDAwLTAwMDAwMDAwMDAwMF8wMDAwMDAwMC0wMDAwLTAwMDAtMDAwMC0wMDAwMDAwMDAwMDAiLCJzY3AiOjE3OTIsImNzaSI6IjE2NjUzODcyNjkiLCJleHAiOjE2NjUzOTA4NjksImFjc1Njb3BlIjoidm9pcCIsInJlc291cmNlSWQiOiIwMDAwMDAwMC0wMDAwLTAwMDAtMDAwMC0wMDAwMDAwMDAwMDAiLCJyZXNvdXJjZUxvY2F0aW9uIjoidW5pdGVkc3RhdGVzIiwiaWF0IjoxNjY1Mzg3MjY5fQ.kTXpQQtY7w6O82kByljZXrKtBvNNOleDE5m06LapzLeoWfRZCCpJQcDzBoLRA146mOhNzLZ0b5WMNTa5tD-0hWCiicDwgKLMASEGY9g0EvNQOidPff47g2hh6yqi9PKiDPp-t5siBMYqA6Nh6CQ-Oeh-35vcRW09VfcqFN38IgSSzJ7QkqBiY_QtfXz-iaj81Td0287KO4U1y2LJIGiyJLWC567F7A_p1sl6NmPKUmvmwM47tyCcQ1r_lfkRdeyDmcrGgY6yyI3XJZQbpxyt2DZqOTSVPB4PuRl7iyXxvppEa4Uo_y_BdMOOWFe6YTRB5O5lhI8m7Tf0LifisxX2sw

Successfully revoked all access tokens for identity with ID: 8:acs:4ccc92c8-9815-4422-bddc-ceea181dc774_00000006-19e0-2727-80f5-8b3a0d003502

Deleted the identity with ID: 8:acs:4ccc92c8-9815-4422-bddc-ceea181dc774_00000006-19e0-2727-80f5-8b3a0d003502
필수 조건
액세스 토큰 만들기
Azure Portal에서 Communication Services 리소스의 ID 및 사용자 액세스 토큰 블레이드로 이동합니다.
액세스 토큰의 범위를 선택합니다. 없음, 하나 또는 여러 서비스를 선택할 수 있습니다.
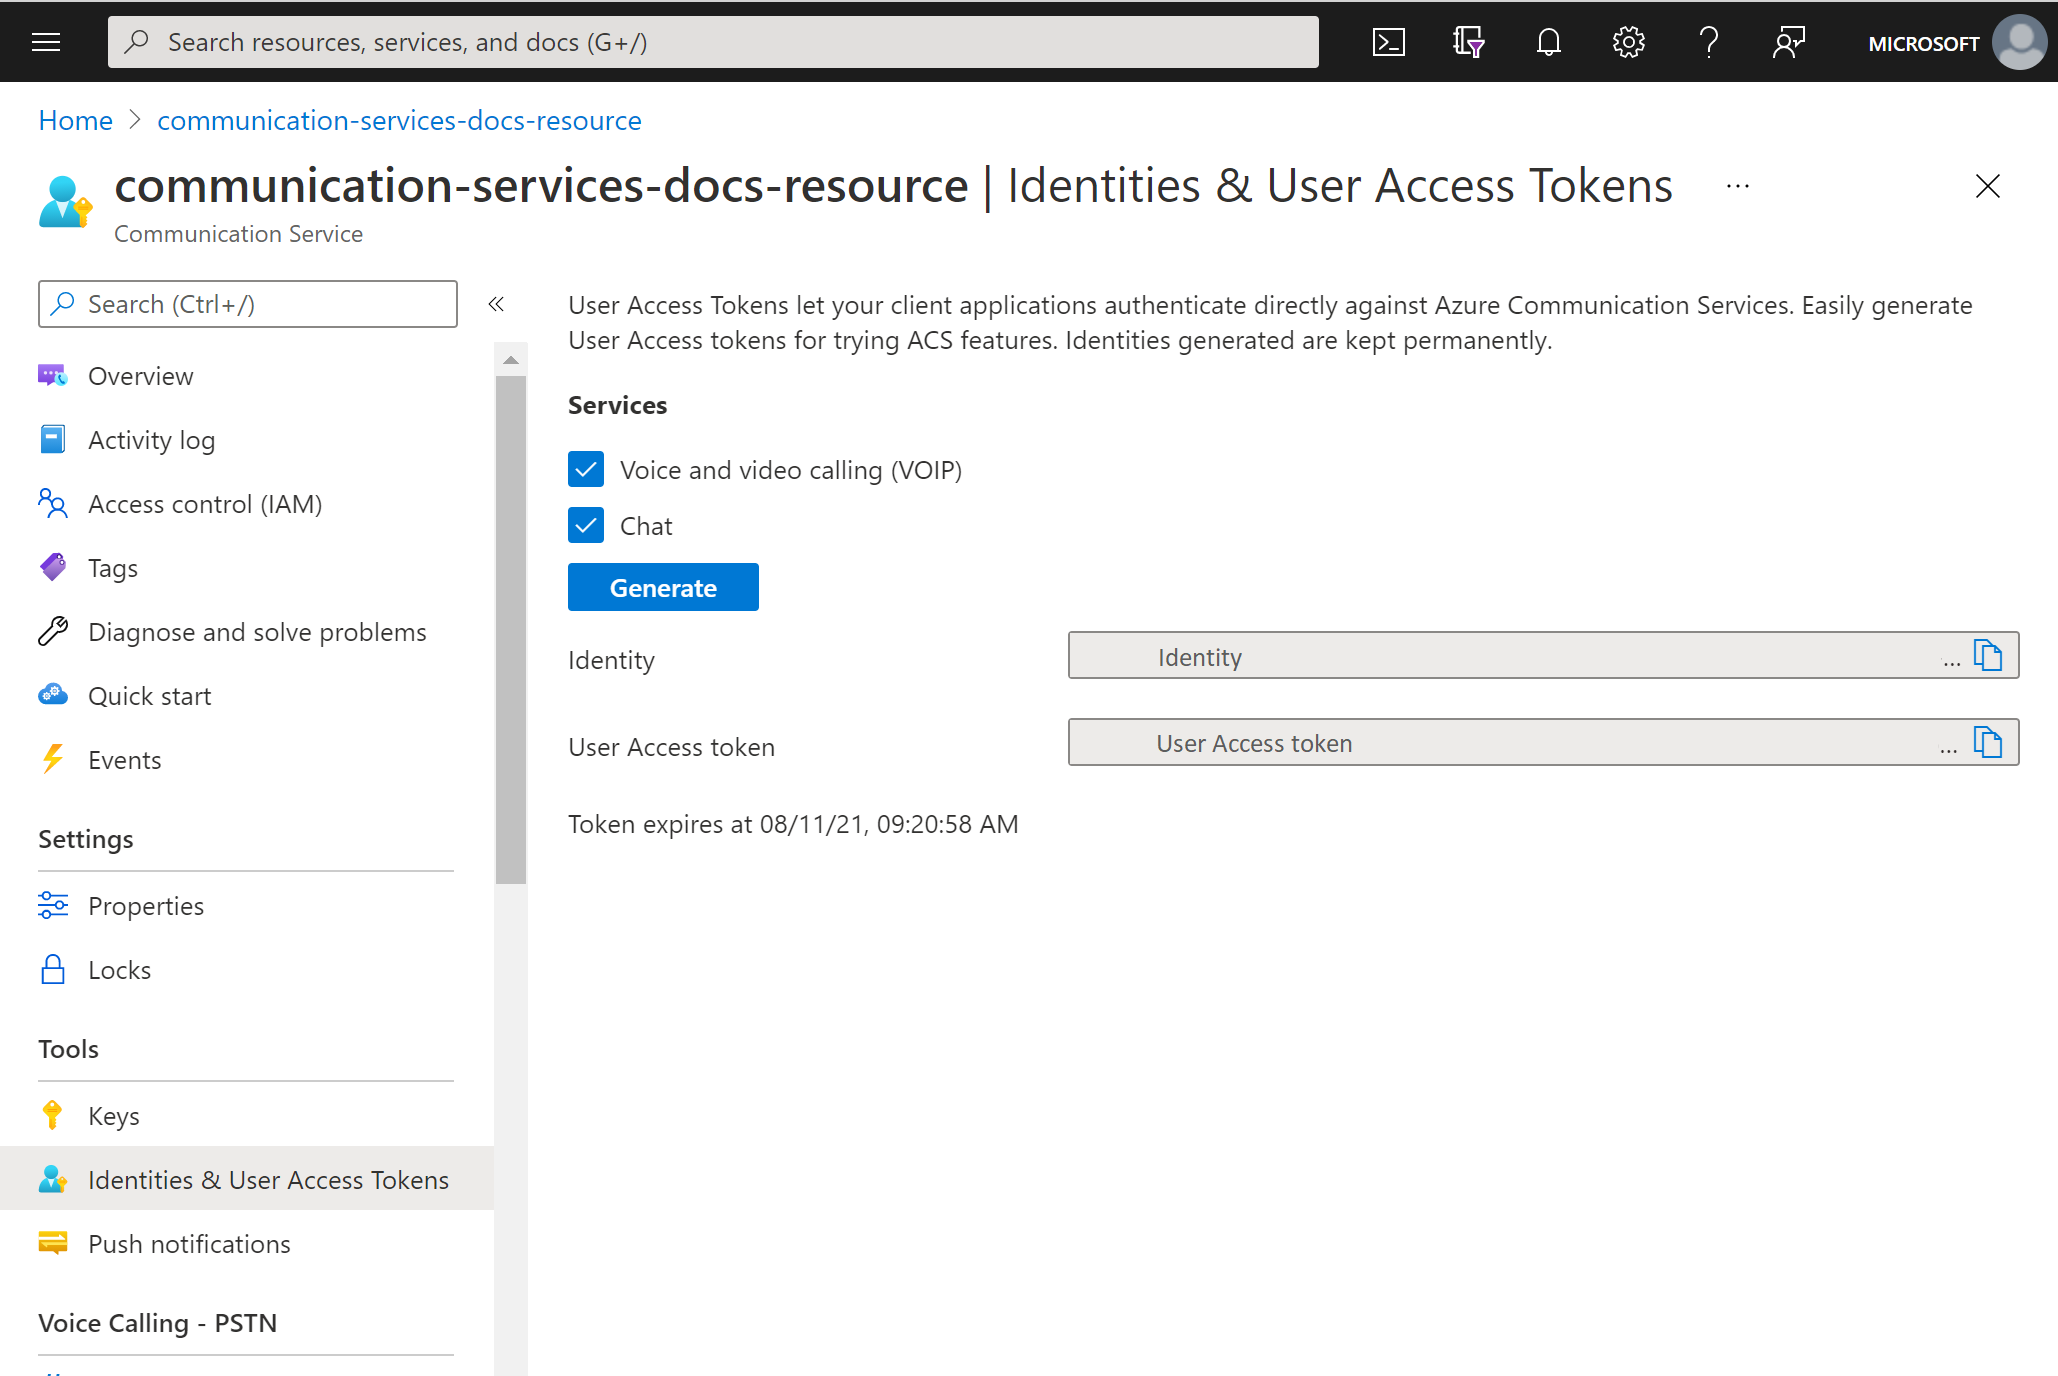
생성을 선택합니다.
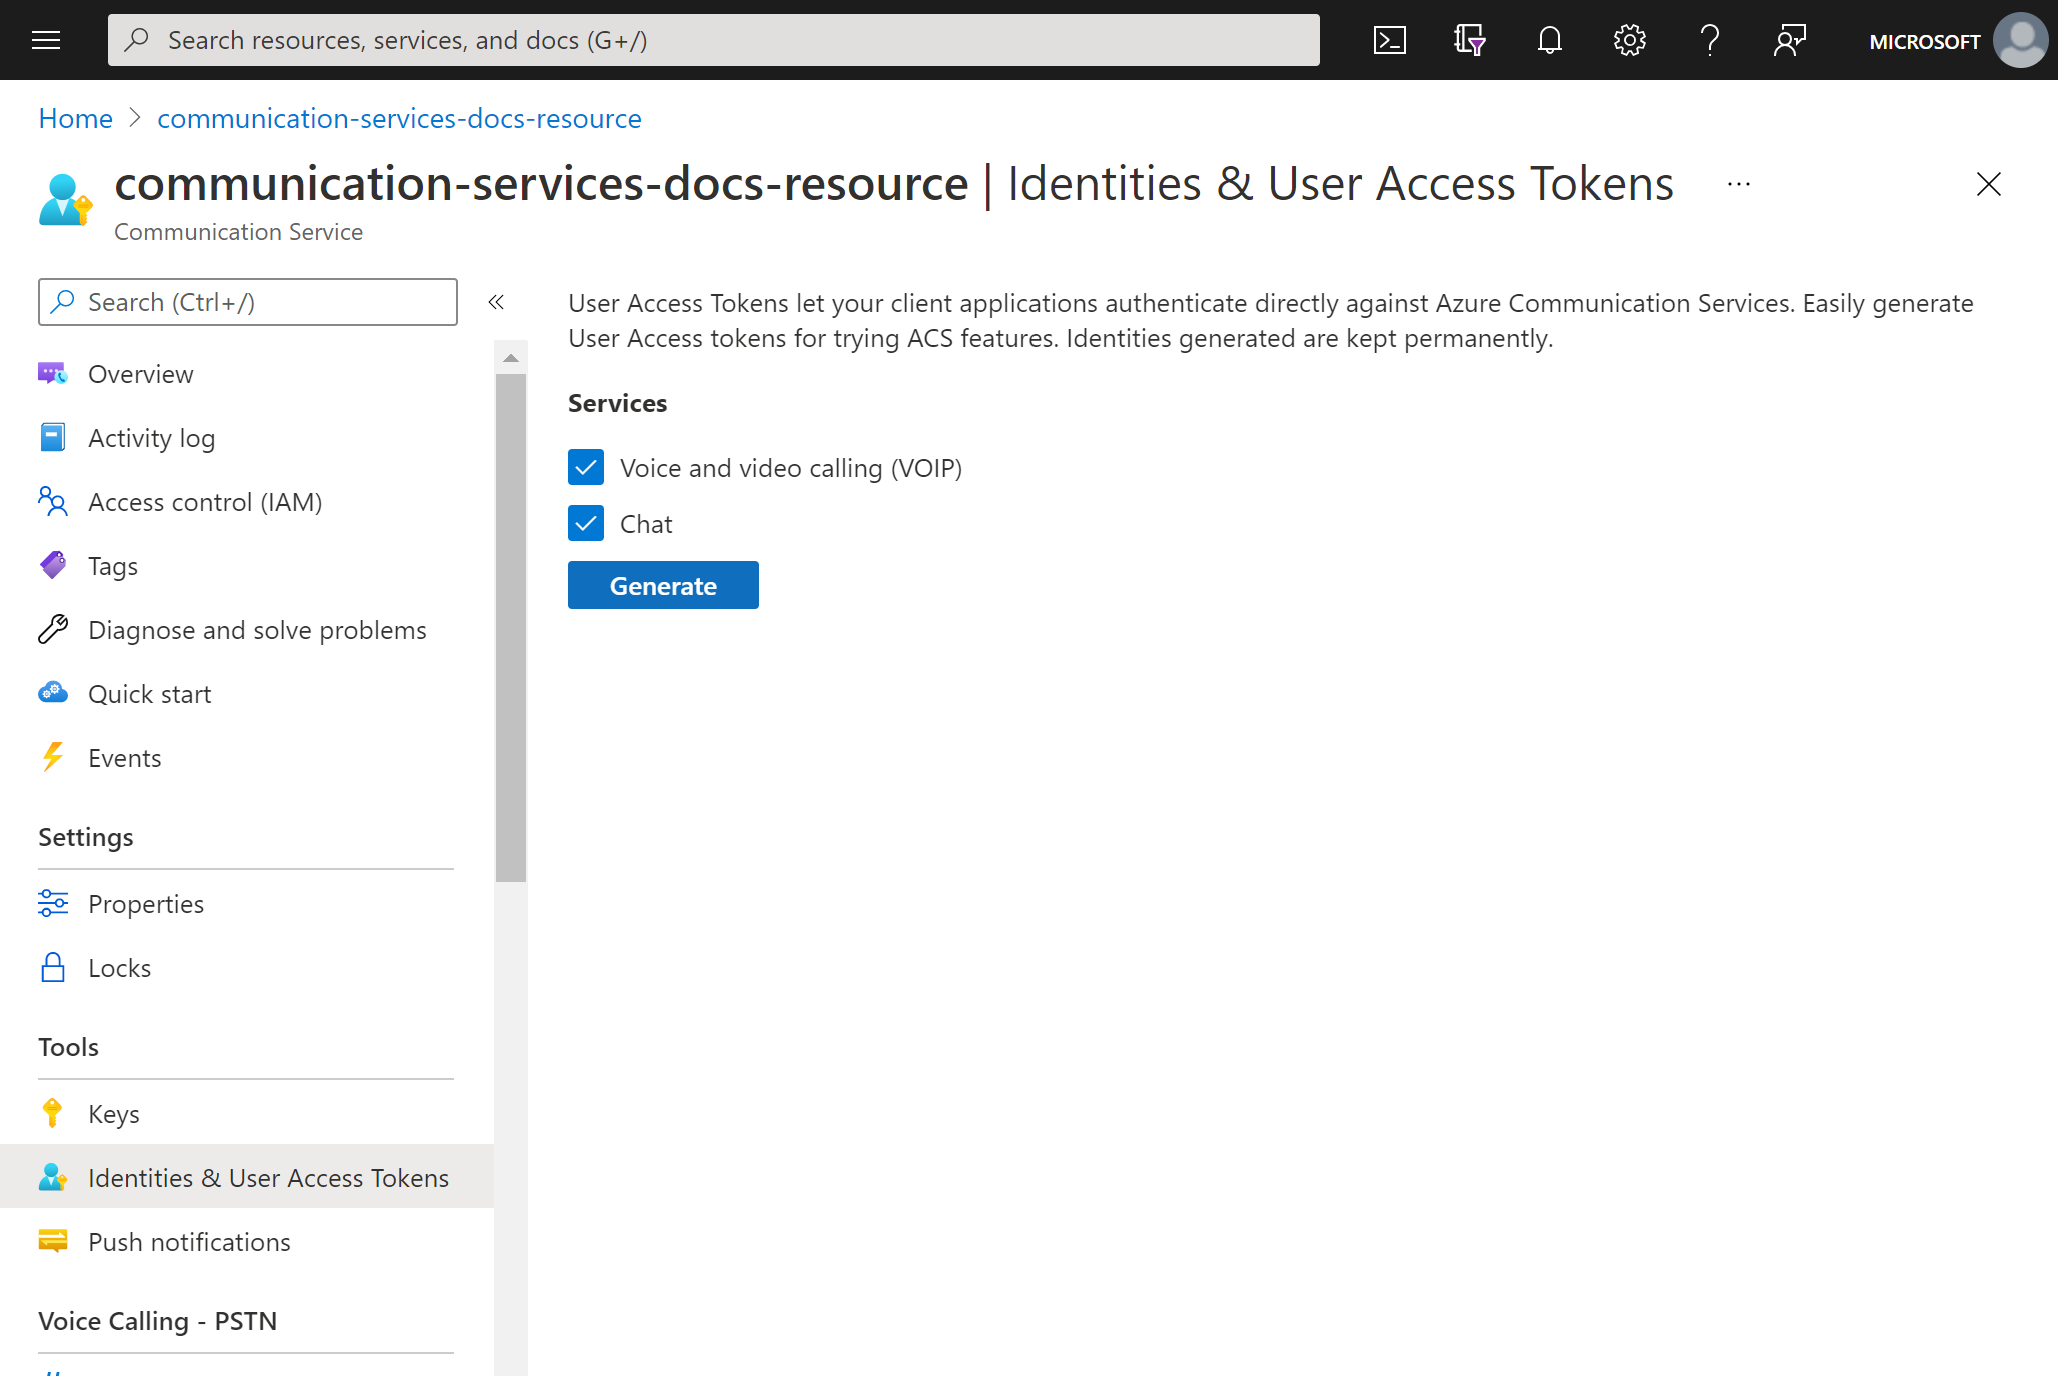
시스템은 ID 및 해당 사용자 액세스 토큰을 생성합니다.
이러한 문자열을 복사하고 샘플 앱 및 기타 테스트 시나리오에서 사용합니다.


필수 조건
활성 구독이 있는 Azure 계정. Azure 계정을 무료로 만드세요.
활성 Azure Communication Services 리소스. Communication Services 리소스 만들기
활성 Azure Logic Apps 리소스(논리 앱). 사용하려는 트리거를 사용하여 소비 논리 앱 워크플로를 만듭니다. 현재 Azure Communication Services ID 커넥터는 작업만 제공하므로 논리 앱에는 최소한 트리거가 필요합니다.
사용자 만들기
Azure Communication Services ID 커넥터를 사용하여 워크플로에 새 단계를 추가합니다. Power Automate 흐름이 편집 모드에서 열리면 Power Automate에서 다음 단계를 완료합니다.
디자이너를 엽니다. 새 작업을 추가하려는 단계에서 새 단계를 선택합니다. 또는 단계 사이에 새 작업을 추가하려면 해당 단계 사이의 화살표 위로 마우스를 가져가서 더하기 기호(+)를 선택하고 작업 추가를 선택합니다.
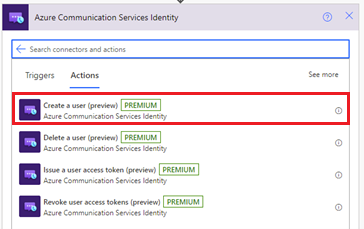
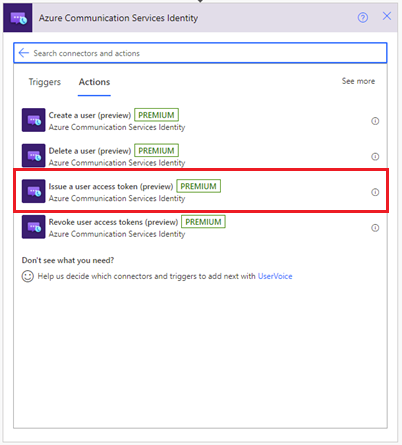
작업 선택 검색 상자에 Communication Services ID를 입력합니다. 작업 목록에서 사용자 만들기를 선택합니다.
연결 문자열을 제공합니다. Azure Communication Service 리소스 내 의 Microsoft Azure Portal에서 찾을 수 있습니다. 왼쪽 패널 메뉴에서 키 옵션을 선택하여 연결 문자열을 봅니다.

연결 이름을 제공합니다.
만들기를 클릭합니다.
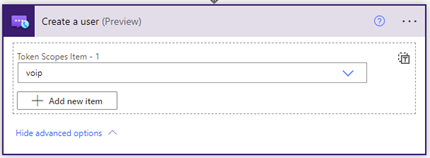
이 작업은 Communication Services 사용자 ID인 사용자 ID를 생성합니다. 또한 고급 옵션 표시를 클릭하고 토큰 범위를 선택하면 지정된 범위로 액세스 토큰 및 만료 시간도 생성됩니다.


사용자 액세스 토큰 발급
Communication Services ID가 있으면 액세스 토큰을 발급할 수 있습니다. 다음 단계를 완료합니다.
새 작업을 추가하고 검색 상자에 Communication Services ID를 입력합니다. 작업 목록에서 사용자 액세스 토큰 발급을 선택합니다.
이제 이전 사용자 만들기 단계의 사용자 ID 출력을 사용할 수 있습니다.
토큰 범위 인 VoIP 또는 채팅을 지정합니다. 토큰 및 인증에 대해 자세히 알아보기
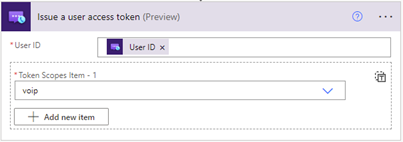
시스템은 지정된 범위를 사용하여 액세스 토큰 및 해당 만료 시간을 생성합니다.
사용자 액세스 토큰 취소
Communication Services ID가 있으면 사용자 액세스 토큰 발급 작업을 사용하여 액세스 토큰을 해지할 수 있습니다. 다음 단계를 완료합니다.
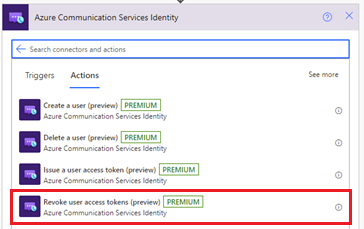
새 작업을 추가하고 검색 상자에 Communication Services ID를 입력합니다. 작업 목록에서 사용자 액세스 토큰 해지를 선택합니다.
사용자 ID를 지정합니다.

시스템은 지정된 사용자에 대한 모든 사용자 액세스 토큰을 해지합니다. 이 작업에 대한 출력은 없습니다.
사용자 삭제
Communication Services ID가 있으면 사용자 액세스 토큰 발급 작업을 사용하여 액세스 토큰을 삭제할 수 있습니다. 다음 단계를 완료합니다.
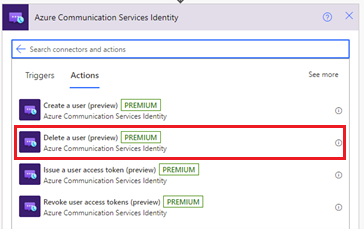
새 작업을 추가하고 검색 상자에 Communication Services ID를 입력합니다. 작업 목록에서 사용자 삭제를 선택합니다.
사용자 ID를 지정합니다.

시스템은 사용자를 제거하고 지정된 사용자에 대한 모든 사용자 액세스 토큰을 해지합니다. 이 작업에 대한 출력은 없습니다.
논리 앱 테스트
워크플로를 수동으로 시작하려면 디자이너 도구 모음에서 실행을 선택합니다. 워크플로는 사용자를 만들고, 해당 사용자에 대한 액세스 토큰을 발급한 다음, 사용자를 제거하고 삭제합니다.
자세한 내용은 워크플로를 실행하는 방법을 참조하세요. 워크플로가 성공적으로 실행된 후 이러한 작업의 출력을 확인할 수 있습니다.
모니터링 및 메트릭에 ID 사용
사용자 ID는 Azure Monitor를 통해 수집된 로그 및 메트릭의 기본 키 역할을 합니다. 예를 들어 사용자의 모든 호출을 보려면 인증을 설정하여 특정 Azure Communication Services ID(또는 ID)를 단일 사용자에게 매핑할 수 있습니다.
자세한 내용은 다음을 참조하세요.
리소스 정리
Communication Services 구독을 정리하고 제거하려면 리소스 또는 리소스 그룹을 삭제합니다. 리소스 그룹을 삭제하면 리소스 그룹과 연결된 다른 리소스도 삭제됩니다. 자세한 내용은 Communication Services 리소스 만들기 및 관리 리소스 정리를 > 참조하세요.
논리 앱 워크플로 및 관련 리소스를 정리하려면 Azure Portal > 정리 리소스를 사용하여 예제 소비 논리 앱 워크플로 만들기를 참조하세요.
다음 단계
이 문서에서는 사용자를 만들고 사용자를 삭제하는 방법을 설명했습니다. 또한 Azure Communication Services ID 커넥터를 사용하여 사용자에게 액세스 토큰을 발급하고 사용자 액세스 토큰을 제거하는 방법을 설명합니다. 자세한 내용은 Azure Communication Services ID 커넥터를 참조하세요.
다른 커넥터에서 토큰을 사용하는 방법을 보려면 Azure Communication Services를 사용하여 Power Automate에서 채팅 메시지를 보내는 방법을 확인합니다.
Azure Communication Services 이메일 커넥터를 사용하여 이메일을 보내는 방법에 대해 자세히 알아보려면 Azure Communication Services를 사용하여 Power Automate에서 이메일 메시지 보내기를 확인합니다.