이 자습서에서는 Postman을 설정하고 사용하여 HTTP를 사용하여 Azure Communication Services에 대한 요청을 만듭니다. 이 자습서를 마치면 Communication Services 및 Postman을 사용하여 SMS(짧은 메시지 서비스) 메시지를 성공적으로 보냅니다. 그런 다음 Postman을 사용하여 Communication Services의 다른 API를 탐색할 수 있습니다.
이 튜토리얼에서는 다음을 배우게 됩니다:
- Postman을 다운로드합니다.
- POSTman을 설정하여 HTTP 요청에 서명합니다.
- Communication Services SMS API에 대해 메시지를 보내도록 요청합니다.
Prerequisites
- 활성 구독이 있는 Azure 계정. Azure 구독이 없는 경우 무료 계정을 만들 수 있습니다. 체험 계정에는 모든 서비스 조합을 사용해 볼 수 있는 200달러의 Azure 크레딧이 제공됩니다.
- 활성 Communication Services 리소스 및 연결 문자열 리소스가 없으면 Communication Services 리소스 만들기를 참조하세요.
- SMS 메시지를 보낼 수 있는 Communication Services 전화 번호입니다. 전화 번호를 얻으려면 전화 번호 가져오기를 참조하세요.
Postman 다운로드 및 설치
Postman은 HTTP API에 대해 API 요청을 수행할 수 있는 데스크톱 애플리케이션입니다. Postman은 일반적으로 API를 테스트하고 탐색하는 데 사용됩니다. 이 자습서에서는 Postman 웹 사이트에서 최신 데스크톱 버전을 다운로드합니다. Postman에는 Windows, Mac 및 Linux용 버전이 있으므로 운영 체제에 적합한 버전을 다운로드합니다.
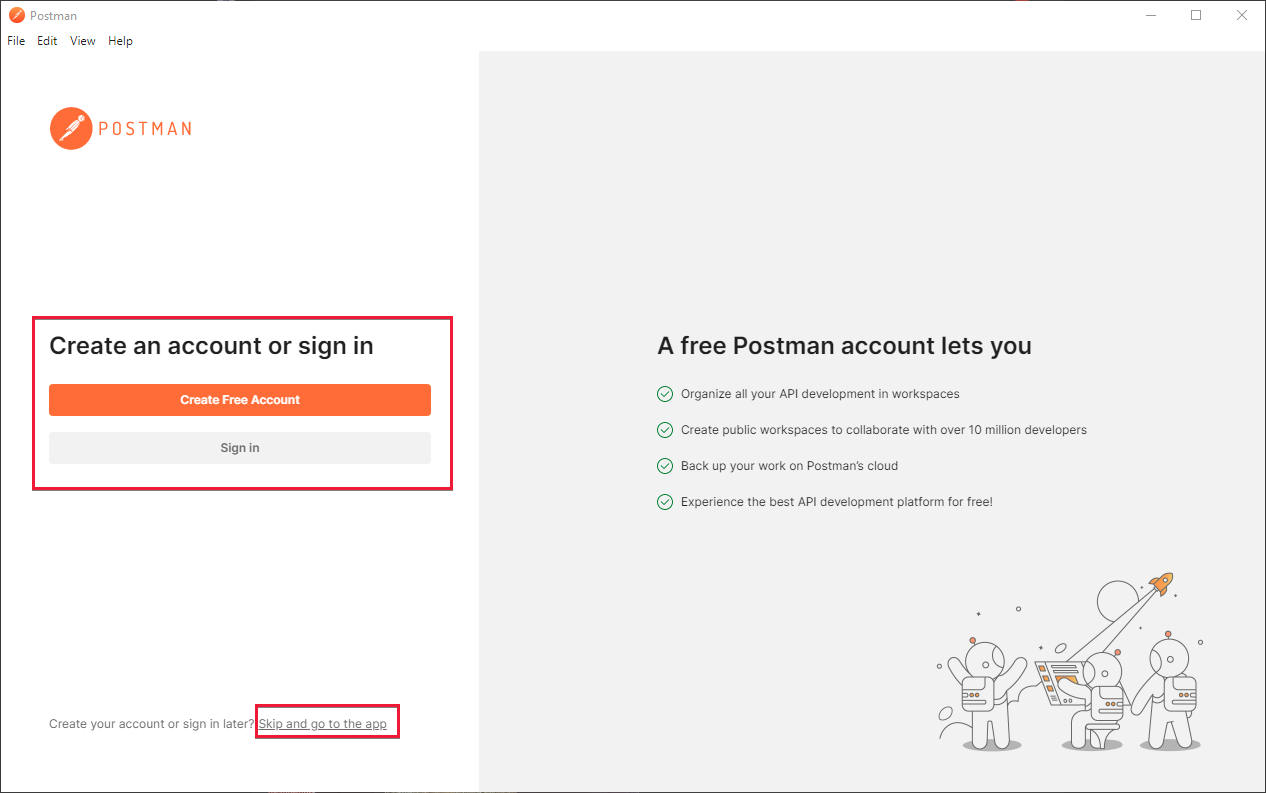
다운로드가 완료되면 애플리케이션을 엽니다. 시작 화면에서 Postman 계정에 로그인하거나 만들라는 메시지가 표시됩니다. 계정을 만드는 것은 선택 사항이며, 건너뛰고 앱으로 이동을 선택하여 계정 생성 단계를 건너뛸 수 있습니다. 계정을 만들면 API 요청 설정이 Postman에 저장됩니다. 그런 다음 다른 컴퓨터에서 요청을 액세스할 수 있습니다.
계정을 만들거나 단계를 건너뛰면 이제 Postman의 기본 화면이 표시됩니다.
Postman 컬렉션 만들기 및 구성
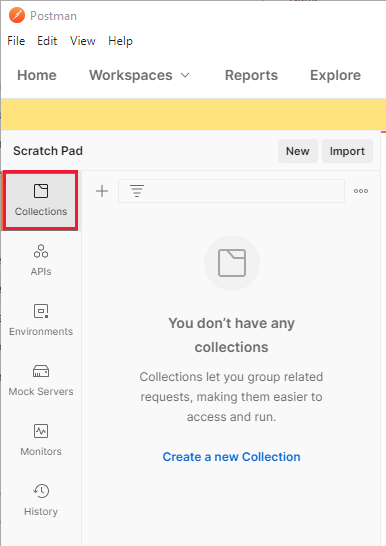
Postman은 여러 가지 방법으로 요청을 구성할 수 있습니다. 이 자습서에서는 Postman 컬렉션을 만듭니다. 이 작업을 수행하려면 애플리케이션의 왼쪽에서 컬렉션을 선택합니다.
새 컬렉션 만들기를 선택하여 컬렉션 만들기 프로세스를 시작합니다. 컬렉션 이름을 지정하는 Postman의 가운데 영역에 새 탭이 열립니다. 여기서 컬렉션의 이름은 Azure Communication Services입니다.
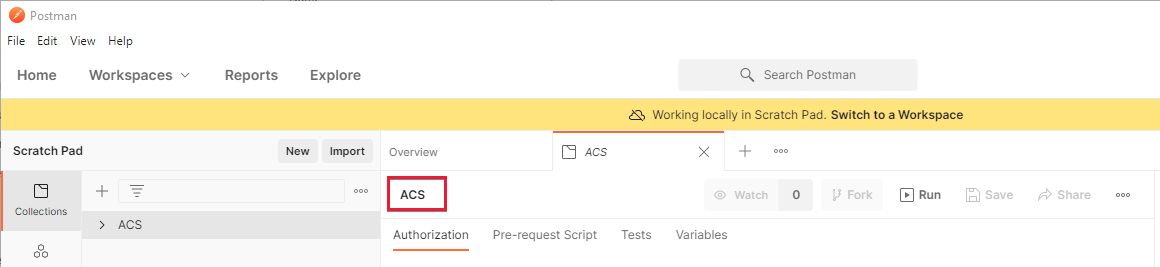
컬렉션을 만들고 이름을 지정한 후에는 구성할 준비가 된 것입니다.
컬렉션 변수 추가
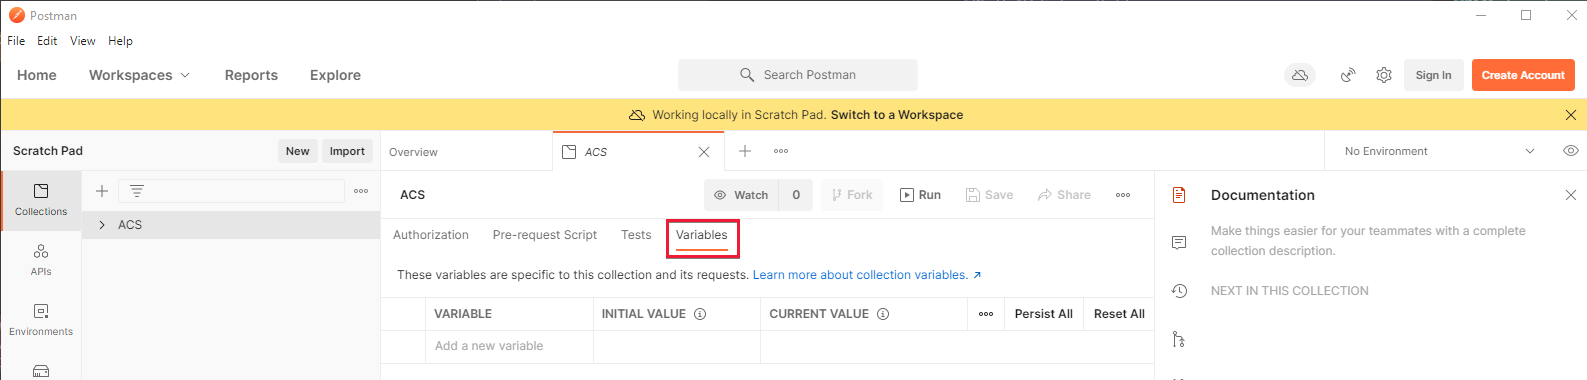
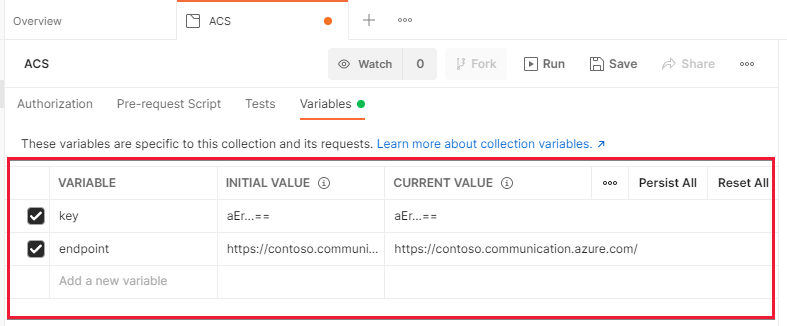
인증을 처리하고 요청을 더 쉽게 하려면 새로 만든 Communication Services 컬렉션 내에 두 개의 컬렉션 변수를 지정합니다. 이러한 변수는 컬렉션의 모든 요청에 사용할 수 있습니다. 변수 만들기를 시작하려면 변수 탭을 선택합니다.
컬렉션 탭에서 두 개의 변수를 만듭니다.
-
키: 이 변수는 Azure Portal의 Communication Services 키 페이지에서 키 중 하나여야 합니다. 예제는
oW...A==입니다. -
엔드포인트: 이 변수는 키 페이지의 Communication Services 엔드포인트여야 합니다. 후행 슬래시를 제거해야 합니다. 예제는
https://contoso.communication.azure.com입니다.
변수 탭의 초기 값 열에 이러한 값을 입력합니다. 오른쪽 상단 모서리에서 모두 유지를 선택합니다. 올바르게 구성된 경우 Postman 창은 다음 이미지와 같이 표시됩니다.
변수에 대한 자세한 내용은 Postman 설명서를 참조하세요.
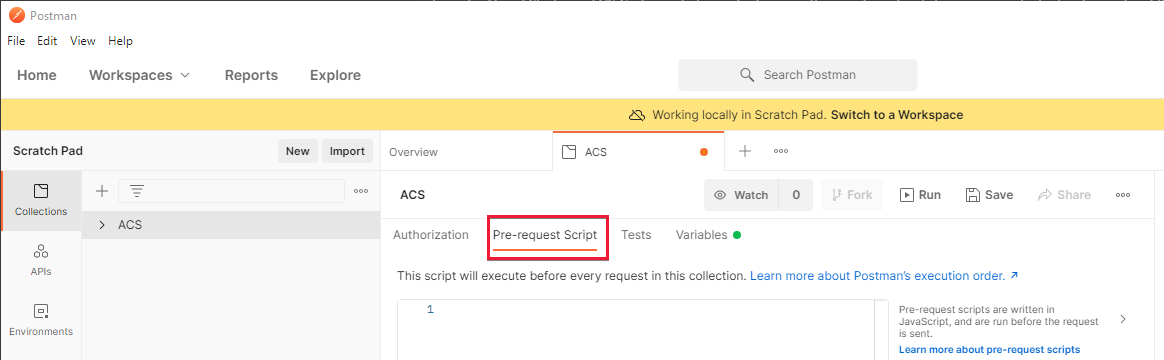
사전 요청 스크립트 만들기
다음 단계는 Postman에서 사전 요청 스크립트를 만드는 것입니다. Postman의 각 요청 전에 사전 요청 스크립트가 실행됩니다. 요청 매개 변수를 수정하거나 변경할 수 있습니다. Communication Services에서 권한을 부여할 수 있도록 이 스크립트를 사용하여 HTTP 요청에 서명합니다. 서명 요구 사항에 대한 자세한 내용은 인증 가이드를 참조하세요.
컬렉션의 모든 요청에서 실행되도록 컬렉션에서 이 스크립트를 만듭니다. 이 단계를 수행하려면 컬렉션 탭에서 사전 요청 스크립트를 선택합니다.
이제 텍스트 영역에 입력하여 사전 쿼리 스크립트를 만듭니다. 이 단계는 붙여넣기 전에 Visual Studio Code 와 같은 전체 코드 편집기에서 작성하는 것이 더 쉬울 수 있습니다. 이 자습서에서는 스크립트 프로세스의 각 부분을 안내합니다. Postman에 스크립트를 복사하여 시작하려면 끝 부분으로 건너뛰세요. 스크립트 작성을 시작해 보겠습니다.
사전 요청 스크립트 작성
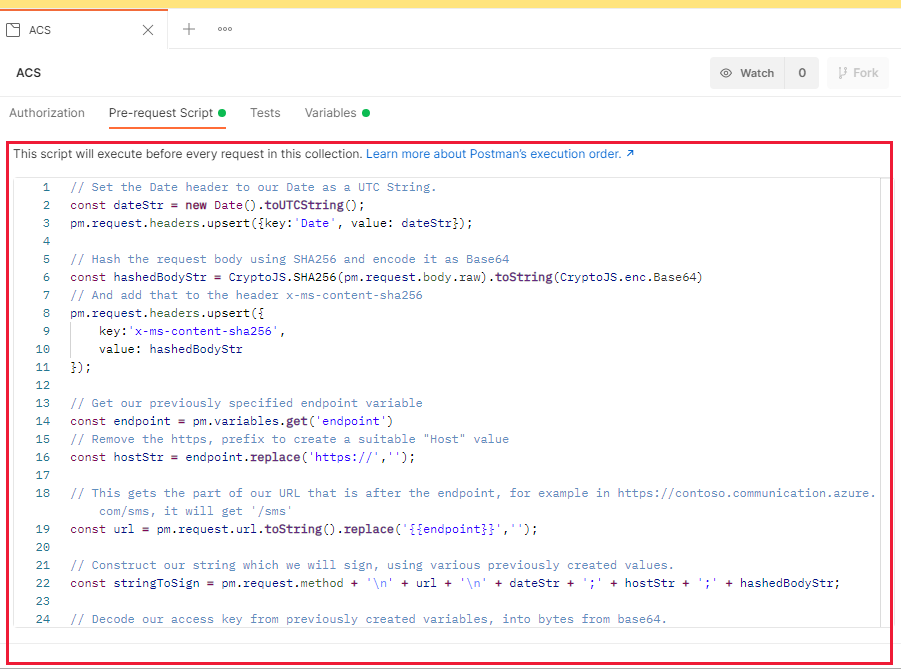
첫 번째 단계는 UTC(협정 세계시) 문자열을 만들고 HTTP 헤더에 Date 추가하는 것입니다. 나중에 서명할 때 사용할 변수에 이 문자열을 저장합니다.
// Set the Date header to our Date as a UTC String.
const dateStr = new Date().toUTCString();
pm.request.headers.upsert({key:'Date', value: dateStr});
그런 다음 SHA 256을 사용하여 요청 본문을 해시하고 헤더에 x-ms-content-sha256 배치합니다. Postman에는 전역적으로 해시 및 서명을 위한 몇 가지 표준 라이브러리 가 포함되어 있으므로 설치하거나 요구하지 않아도 됩니다.
// Hash the request body by using SHA256 and encode it as Base64
const hashedBodyStr = CryptoJS.SHA256(pm.request.body.raw).toString(CryptoJS.enc.Base64)
// And add that to the header x-ms-content-sha256
pm.request.headers.upsert({
    key:'x-ms-content-sha256',
    value: hashedBodyStr
});
이전에 지정한 엔드포인트 변수를 사용하여 HTTP 호스트 헤더의 값을 식별합니다. 호스트 헤더는 이 스크립트가 처리될 때까지 설정되지 않습니다.
// Get our previously specified endpoint variable.
const endpoint = pm.variables.get('endpoint')
// Remove the https prefix to create a suitable "Host" value.
const hostStr = endpoint.replace('https://','');
이 정보를 사용하여 이제 HTTP 요청에 서명하는 문자열을 만들 수 있습니다. 문자열은 이전에 만든 여러 값으로 구성됩니다.
// This gets the part of our URL that is after the endpoint, for example, in https://contoso.communication.azure.com/sms, it will get '/sms'.
const url = pm.request.url.toString().replace('{{endpoint}}','');

// Construct our string, which we'll sign, by using various previously created values.
const stringToSign = pm.request.method + '\n' + url + '\n' + dateStr + ';' + hostStr + ';' + hashedBodyStr;
마지막으로 Communication Services 키를 사용하여 이 문자열에 서명합니다. 그런 다음 헤더의 Authorization 요청에 해당 키를 추가합니다.
// Decode our access key from previously created variables into bytes from Base64.
const key = CryptoJS.enc.Base64.parse(pm.variables.get('key'));
// Sign our previously calculated string with HMAC 256 and our key. Convert it to Base64.
const signature = CryptoJS.HmacSHA256(stringToSign, key).toString(CryptoJS.enc.Base64);

// Add our final signature in Base64 to the authorization header of the request.
pm.request.headers.upsert({
    key:'Authorization',
    value: "HMAC-SHA256 SignedHeaders=date;host;x-ms-content-sha256&Signature=" + signature
});
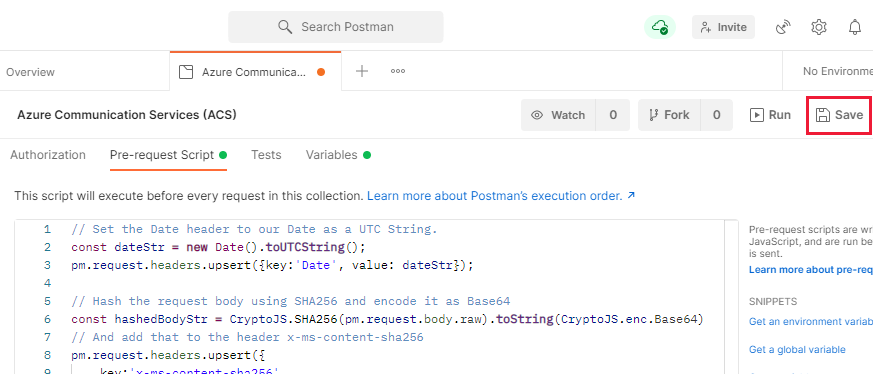
최종 사전 요청 스크립트
최종 사전 요청 스크립트는 다음 예제와 같이 표시됩니다.
// Set the Date header to our Date as a UTC String.
const dateStr = new Date().toUTCString();
pm.request.headers.upsert({key:'Date', value: dateStr});

// Hash the request body by using SHA256 and encode it as Base64.
const hashedBodyStr = CryptoJS.SHA256(pm.request.body.raw).toString(CryptoJS.enc.Base64)
// And add that to the header x-ms-content-sha256.
pm.request.headers.upsert({
    key:'x-ms-content-sha256',
    value: hashedBodyStr
});

// Get our previously specified endpoint variable.
const endpoint = pm.variables.get('endpoint')
// Remove the https prefix to create a suitable "Host" value.
const hostStr = endpoint.replace('https://','');

// This gets the part of our URL that is after the endpoint, for example, in https://contoso.communication.azure.com/sms, it will get '/sms'.
const url = pm.request.url.toString().replace('{{endpoint}}','');

// Construct our string, which we'll sign, by using various previously created values.
const stringToSign = pm.request.method + '\n' + url + '\n' + dateStr + ';' + hostStr + ';' + hashedBodyStr;

// Decode our access key from previously created variables into bytes from Base64.
const key = CryptoJS.enc.Base64.parse(pm.variables.get('key'));
// Sign our previously calculated string with HMAC 256 and our key. Convert it to Base64.
const signature = CryptoJS.HmacSHA256(stringToSign, key).toString(CryptoJS.enc.Base64);

// Add our final signature in Base64 to the authorization header of the request.
pm.request.headers.upsert({
    key:'Authorization',
    value: "HMAC-SHA256 SignedHeaders=date;host;x-ms-content-sha256&Signature=" + signature
});
사전 요청 스크립트 탭의 텍스트 영역에 이 최종 스크립트를 입력하거나 붙여넣습니다.
입력한 후 Ctrl+S를 선택하거나 저장 을 선택하여 스크립트를 컬렉션에 저장합니다.
Postman에서 요청 만들기
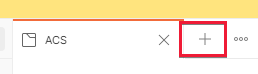
이제 모든 것이 설정되었으므로 Postman에서 Communication Services 요청을 만들 준비가 되었습니다. 시작하려면 Communication Services 컬렉션 옆에 있는 더하기 기호(+)를 선택합니다.
Postman에서 요청에 대한 새 탭을 만들었으므로 이제 구성해야 합니다. SMS 보내기 API에 대한 요청을 수행하므로 도움이 필요하면 이 API의 설명서를 참조하세요. Postman 요청을 구성해 보겠습니다.
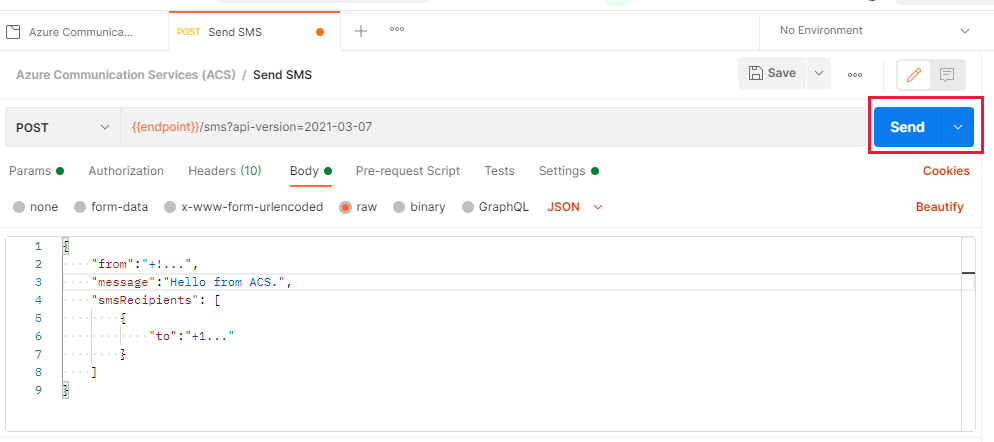
시작하려면 요청 유형을 POST 설정하고 요청 URL 필드에 입력 {{endpoint}}/sms?api-version=2021-03-07 합니다. 이 URL은 이전에 만든 endpoint 변수를 사용하여 Communication Services 리소스에 자동으로 보냅니다.

요청의 본문 탭에서 원시를 선택합니다. 오른쪽의 드롭다운 목록에서 JSON을 선택합니다.
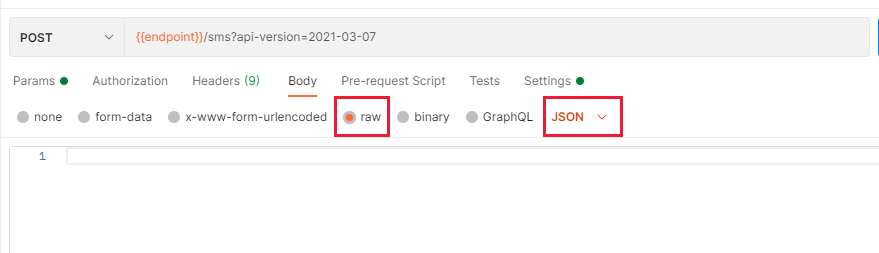
JSON 형식으로 정보를 보내고 받도록 요청을 구성했습니다.
텍스트 영역에서 요청 본문을 다음 형식으로 입력합니다.
{
    "from":"<Your Azure Communication Services Telephone Number>",
    "message":"<The message you'd like to send>",
    "smsRecipients": [
        {
            "to":"<The number you'd like to send the message to>"
        }
    ]
}
이 값의 from 경우 앞에서 설명한 대로 Communication Services 포털에서 전화 번호를 가져와 야 합니다. 국가 코드의 공백과 접두사 없이 입력합니다. 예제는 +15555551234입니다.
message는 당신이 보내고 싶은 무엇이든 될 수 있습니다. 그러나 Hello from Azure Communication Services은 좋은 예입니다. 이 값은 to SMS 메시지를 받을 수 있도록 액세스 권한이 있는 휴대폰이어야 합니다. 자신의 휴대 전화를 사용하는 것이 좋습니다.
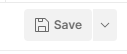
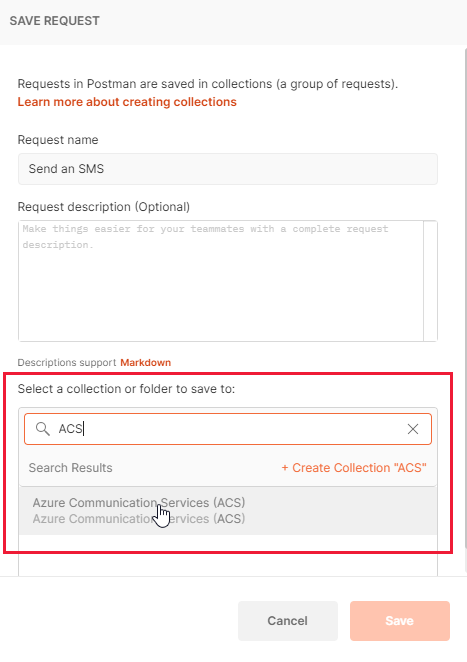
이 요청을 이전에 만든 Communication Services 컬렉션에 저장합니다. 이 단계에서는 이전에 생성한 변수와 사전 요청 스크립트를 자동으로 가져오도록 보장합니다. 요청 영역의 오른쪽 위에서 저장 을 선택합니다.
표시되는 대화 상자는 요청을 호출할 항목과 저장할 위치를 묻습니다. 원하는 이름을 지정할 수 있지만 대화 상자의 아래쪽 절반에서 Communication Services 컬렉션을 선택해야 합니다.
요청 보내기
이제 모든 항목이 설정되었으므로 요청을 보내고 휴대폰에서 SMS 메시지를 받을 수 있습니다. 이 단계를 수행하려면 요청이 선택되어 있는지 확인하고 보내기를 선택합니다.
모든 것이 잘 진행되면 202 상태 코드인 Communication Services의 응답이 표시됩니다.
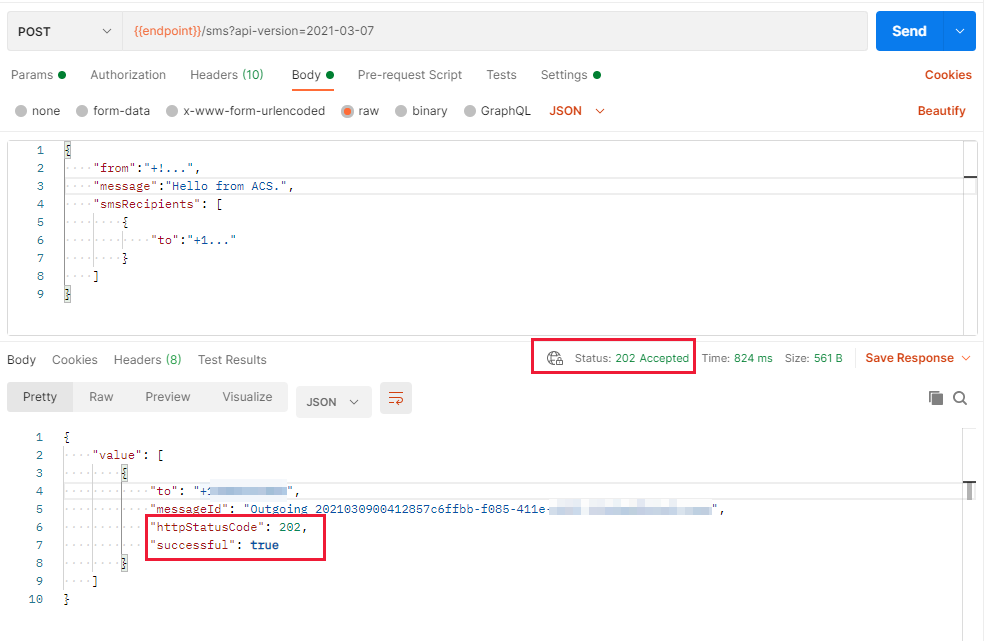
값에 to 입력한 번호를 소유하는 휴대폰에도 SMS 메시지가 수신되었습니다. 이제 Communication Services와 통신하고 SMS 메시지를 보낼 수 있는 기능적인 Postman 구성이 있습니다.