자습서: Azure Cosmos DB 및 NoSQL용 API를 사용하여 Java 웹 애플리케이션 빌드
적용 대상: ![]() NoSQL
NoSQL
이 Java 웹 애플리케이션 자습서에서는 Microsoft Azure Cosmos DB 서비스를 사용하여 Azure App Service Web Apps에 호스트된 Java 애플리케이션에서 데이터를 저장하고 액세스하는 방법을 보여 줍니다. 신용 카드 또는 Azure 구독이 없으면 Azure Cosmos DB 체험 계정을 설정할 수 있습니다. 이 문서에서는 다음에 대해 알아봅니다.
- Eclipse에서 기본 JSP(JavaServer Pages) 애플리케이션을 빌드하는 방법.
- Azure Cosmos DB Java SDK를 사용하여 Azure Cosmos DB 서비스로 작업하는 방법입니다.
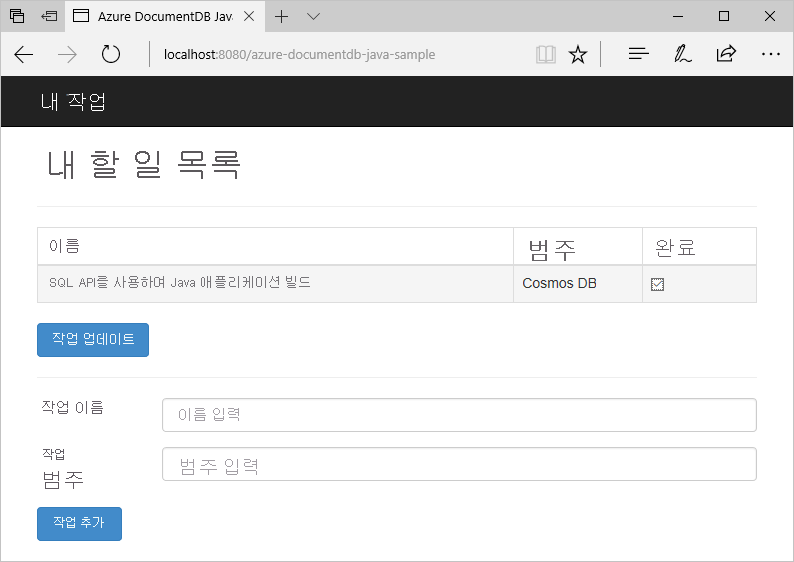
이 Java 애플리케이션 자습서에서는 다음 이미지에 표시된 것처럼 작업을 생성 및 검색하고 완료로 표시할 수 있게 해주는 웹 기반 작업 관리 애플리케이션을 만드는 방법을 보여 줍니다. 할 일 목록에 있는 각 작업은 Azure Cosmos DB에서 JSON 문서로 저장됩니다.
팁
이 애플리케이션 개발 자습서에서는 이전에 Java를 사용한 경험이 있다고 가정합니다. Java 또는 필수 구성 요소 도구를 처음 사용하는 경우 GitHub에서 전체 todo 프로젝트를 다운로드하고 이 문서의 끝에 있는 지침을 사용하여 이 프로젝트를 빌드하는 것이 좋습니다. 프로젝트를 빌드하고 나면 이 문서를 검토하여 프로젝트의 컨텍스트에서 코드를 이해할 수 있습니다.
이 Java 웹 응용 프로그램 자습서의 필수 구성 요소
이 애플리케이션 개발 자습서를 시작하기 전에 다음이 있어야 합니다.
신용 카드 또는 Azure 구독이 없으면 Azure Cosmos DB 체험 계정을 설정할 수 있습니다.
Azure 구독 및 약정 없이 Azure Cosmos DB를 무료로 사용해 볼 수 있습니다. 또는 무료로 처음 1000RU/s와 25GB의 스토리지를 사용하여 Azure Cosmos DB 무료 계층 계정을 만들 수 있습니다. 또한 URI가
https://localhost:8081인 Azure Cosmos DB Emulator를 사용할 수도 있습니다. 에뮬레이터에서 사용할 키는 요청 인증을 참조하세요.
이러한 도구를 처음 설치하는 경우, coreservlets.com에서 제공되는 단계별 설치 지침을 따르세요. 이 지침은 자습서: TomCat7 설치 및 Eclipse에서 사용 문서의 빠른 시작 섹션에서 확인할 수 있습니다.
Azure Cosmos DB 계정 만들기
Azure Cosmos DB 계정을 만들어 시작해 보겠습니다. 계정이 있거나 이 자습서에 Azure Cosmos DB 에뮬레이터를 사용하고 있는 경우 2단계: Java JSP 애플리케이션 만들기로 건너뛸 수 있습니다.
Azure Portal 메뉴 또는 홈 페이지에서 리소스 만들기를 선택합니다.
Azure Cosmos DB를 검색합니다. 만들기>Azure Cosmos DB를 선택합니다.
Azure Cosmos DB 계정 만들기 페이지의 Azure Cosmos DB for NoSQL 섹션 내에서 만들기 옵션을 선택합니다.
Azure Cosmos DB는 여러 API를 제공합니다.
- NoSQL, 문서 데이터용
- PostgreSQL
- MongoDB, 문서 데이터용
- Apache Cassandra
- 테이블
- Apache Gremlin, 그래프 데이터용
API for NoSQL에 대한 자세한 내용은 Azure Cosmos DB 시작을 참조하세요.
Azure Cosmos DB 계정 만들기 페이지에서 새 Azure Cosmos DB 계정에 대한 기본 설정을 입력합니다.
설정 값 Description 구독 구독 이름 이 Azure Cosmos DB 계정에 사용할 Azure 구독을 선택합니다. 리소스 그룹 리소스 그룹 이름 리소스 그룹을 선택하거나 새로 만들기를 선택한 후, 새 리소스 그룹에 고유한 이름을 입력합니다. 어카운트 이름 고유 이름 Azure Cosmos DB 계정을 식별하는 이름을 입력합니다. URI를 만들기 위해 제공하는 이름에 documents.azure.com이 추가되므로 고유한 이름을 사용합니다. 이름에는 소문자, 숫자, 하이픈(-) 문자만 사용할 수 있습니다. 3~44자여야 합니다. 위치 사용자와 가장 가까운 지역 Azure Cosmos DB 계정을 호스트할 지리적 위치를 선택합니다. 데이터에 가장 빨리 액세스할 수 있도록 사용자와 가장 가까운 위치를 사용합니다. 용량 모드 프로비저닝된 처리량 또는 서버리스 프로비저닝된 처리량을 선택하여 프로비저닝된 처리량 모드에서 계정을 만듭니다. 서버리스를 선택하여 서버리스 모드에서 계정을 만듭니다. Azure Cosmos DB 체험 계층 할인 적용 적용 또는 적용 안 함 Azure Cosmos DB 무료 계층을 사용하는 경우 처음에는 1000RU/초 및 25GB의 스토리지가 계정에 무료로 제공됩니다. 체험 계층에 대해 자세히 알아보세요. 총 계정 처리량 제한 선택 여부 이 계정에서 프로비전할 수 있는 총 처리량을 제한합니다. 이 한도는 프로비전된 처리량과 관련된 예기치 않은 요금을 방지합니다. 계정을 만든 후 이 한도를 업데이트하거나 제거할 수 있습니다. Azure 구독당 최대 1개의 무료 계층 Azure Cosmos DB 계정을 사용할 수 있으며 계정을 만들 때 옵트인해야 합니다. 무료 계층 할인을 적용하는 옵션이 표시되지 않으면 구독의 다른 계정에서 이미 무료 계층을 사용하도록 설정되어 있는 것입니다.

참고 항목
용량 모드로 서버리스를 선택한 경우 다음 옵션을 사용할 수 없습니다.
- 무료 계층 할인 적용
- 총 계정 처리량 제한
전역 배포 탭에서 다음 세부 정보를 구성합니다. 이 빠른 시작의 기본값을 그대로 둘 수 있습니다.
설정 값 Description 지리적 중복 사용 안 함 지역에 쌍 영역을 페어링하여 계정에서 글로벌 배포를 사용하거나 사용하지 않도록 설정합니다. 나중에 계정에 더 많은 지역을 추가할 수 있습니다. 다중 지역 쓰기 사용 안 함 다중 영역 쓰기 기능을 사용하면 전 세계의 데이터베이스 및 컨테이너에 대해 프로비저닝된 처리량을 활용할 수 있습니다. 가용성 영역 사용 안 함 가용성 영역은 애플리케이션의 가용성 및 복원력을 한층 향상시킬 수 있습니다. 참고 항목
이전 기본 사항 페이지에서 서버리스를 용량 모드로 선택하는 경우 다음 옵션을 사용할 수 없습니다.
- 지리적 중복
- 다중 지역 쓰기
필요에 따라 다음 탭에서 자세한 내용을 구성할 수 있습니다.
- 네트워킹. 가상 네트워크에서 액세스를 구성합니다.
- 백업 정책 주기적 또는 지속적인 백업 정책을 구성합니다.
- 암호화. 서비스 관리형 키 또는 고객 관리형 키를 사용합니다.
- 태그. 태그는 동일한 태그를 여러 개의 리소스 및 리소스 그룹에 적용하여 리소스를 범주화하고 통합된 청구 정보를 볼 수 있는 이름/값 쌍입니다.
검토 + 만들기를 선택합니다.
계정 설정을 검토한 다음, 만들기를 선택합니다. 계정을 만드는 데 몇 분이 걸립니다. 포털 페이지에 배포가 완료됨이 표시되기를 기다립니다.
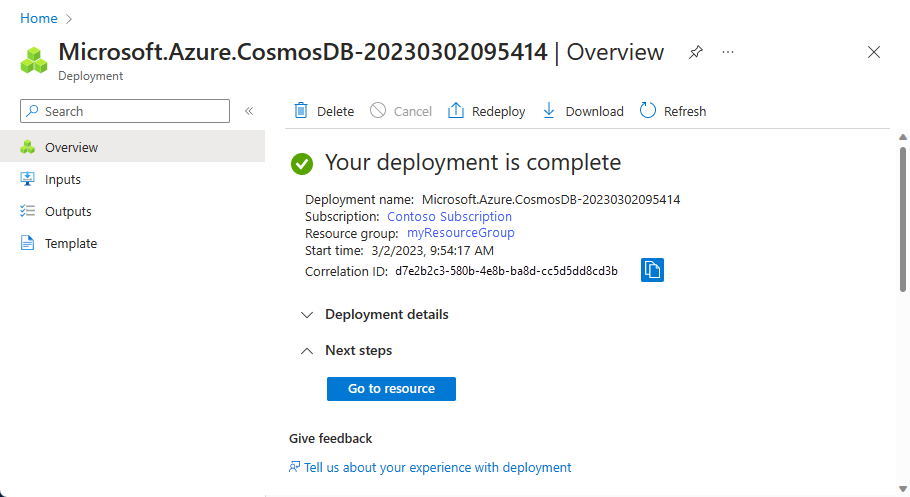
리소스로 이동을 선택하여 Azure Cosmos DB 계정 페이지로 이동합니다.


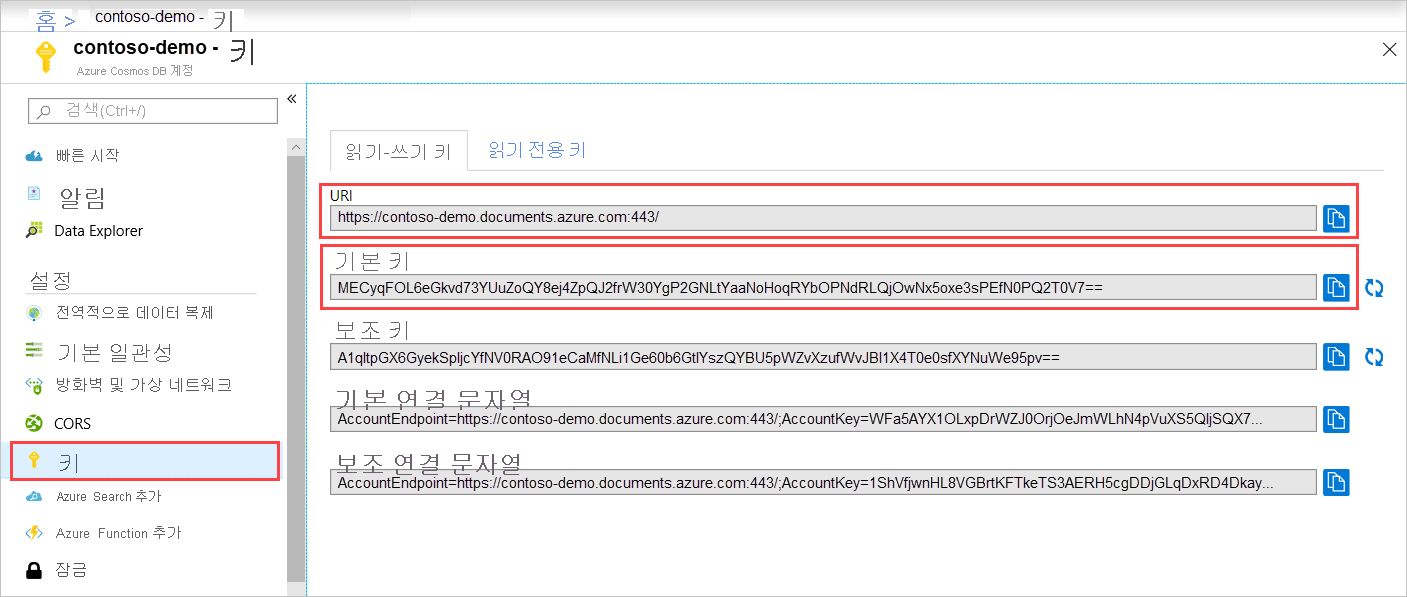
Azure Cosmos DB 계정 페이지로 이동하여 키를 선택합니다. 다음에 만든 웹 애플리케이션에 사용할 값을 복사합니다.
Java JSP 애플리케이션 만들기
JSP 애플리케이션을 만들려면 다음을 수행합니다.
먼저, Java 프로젝트를 만듭니다. Eclipse를 시작하고, 파일을 선택하고 새로 만들기를 선택한 다음, 동적 웹 프로젝트를 선택합니다. 동적 웹 프로젝트가 사용 가능한 프로젝트로 표시되지 않으면 다음을 수행합니다. 파일, 새로 만들기, 프로젝트...를 차례로 선택하고, 웹을 확장하여 동적 웹 프로젝트를 선택한 후 다음을 선택합니다.
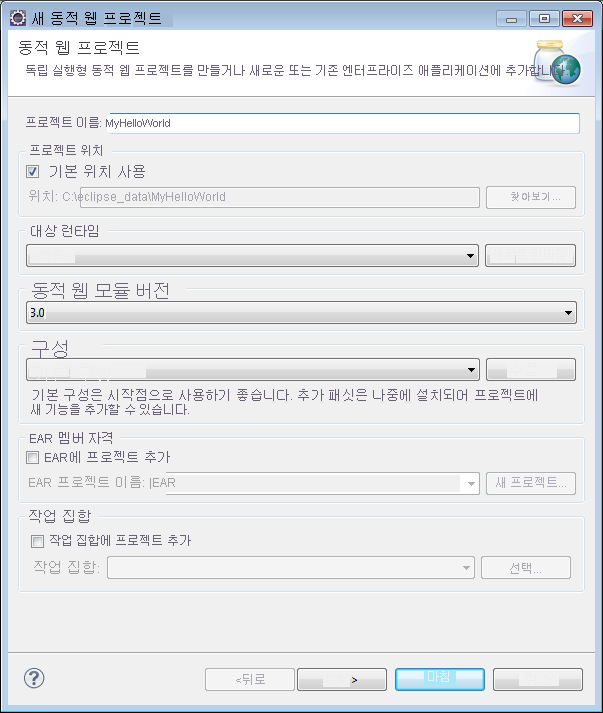
프로젝트 이름 상자에 프로젝트 이름을 입력하고 대상 런타임 드롭다운 메뉴에서 선택적으로 값(예: Apache Tomcat v7.0)을 선택한 후 마침을 선택합니다. 대상 런타임을 선택하면 Eclipse를 통해 프로젝트를 로컬로 실행할 수 있습니다.
Eclipse의 Project Explorer 보기에서 프로젝트를 확장합니다. WebContent를 마우스 오른쪽 단추로 클릭하고 새로 만들기를 선택한 다음, JSP 파일을 선택합니다.
새 JSP 파일 대화 상자에서 파일 이름을 index.jsp로 지정합니다. 다음 그림에 표시된 것처럼 상위 폴더를 WebContent로 유지하고 다음을 선택합니다.
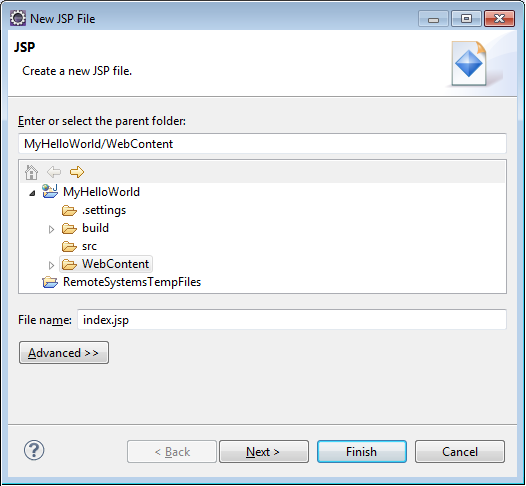
JSP 템플릿 선택 대화 상자에서 이 자습서의 목적에 따라, 새 JSP 파일(html)을 선택한 후 마침을 선택합니다.
Eclipse에서 index.jsp 파일이 열리면 기존
<body>요소에 Hello World!가 표시되도록 텍스트를 추가합니다. 업데이트된<body>콘텐츠는 다음 코드와 같이 나타납니다.<body> <% out.println("Hello World!"); %> </body>index.jsp 파일을 저장합니다.
2단계에서 대상 런타임을 설정했으면 프로젝트, 실행을 차례로 선택하여 JSP 애플리케이션을 로컬로 실행할 수 있습니다.

SQL Java SDK 설치
SQL Java SDK 및 해당 종속성을 가져오는 가장 쉬운 방법은 Apache Maven을 사용하는 것입니다. 이렇게 하려면 다음 단계를 수행해서 프로젝트를 maven 프로젝트로 변환해야 합니다.
프로젝트 탐색기에서 프로젝트를 마우스 오른쪽 단추로 클릭하고 구성을 선택한 후 Maven 프로젝트로 변환을 선택합니다.
새 POM 만들기 창에서 기본값을 수락하고 마침을 선택합니다.
프로젝트 탐색기에서 pom.xml 파일을 엽니다.
종속성 탭의 종속성 창에서 추가를 선택합니다.
종속성 선택 창에서 다음을 수행합니다.
- 그룹 ID 상자에
com.azure를 입력합니다. - 아티팩트 ID 상자에
azure-cosmos를 입력합니다. - 버전 상자에
4.11.0을 입력합니다.
또는 그룹 ID 및 아티팩트 ID에 대한 종속성 XML을 pom.xml 파일에 직접 추가합니다.
<dependency> <groupId>com.azure</groupId> <artifactId>azure-cosmos</artifactId> <version>4.11.0</version> </dependency>- 그룹 ID 상자에
확인을 선택하면 Maven이 SQL Java SDK를 설치하거나 pom.xml 파일을 저장합니다.
Java 응용 프로그램에서 Azure Cosmos DB 서비스 사용
이제 모델, 보기 및 컨트롤러를 웹 애플리케이션에 추가해 보겠습니다.
모델 추가
먼저 새 파일 TodoItem.java에 모델을 정의하겠습니다. TodoItem 클래스는 getter 및 setter 메서드와 함께 항목의 스키마를 정의합니다.
package com.microsoft.azure.cosmos.sample.model;

//@Data
//@Builder
public class TodoItem {
    private String entityType;
    private String category;
    private boolean complete;
    private String id;
    private String name;

    public String getCategory() {
        return category;
    }

    public void setCategory(String category) {
        this.category = category;
    }

    public String getEntityType() {
        return entityType;
    }

    public void setEntityType(String entityType) {
        this.entityType = entityType;
    }

    public boolean isComplete() {
        return complete;
    }

    public void setComplete(boolean complete) {
        this.complete = complete;
    }

    public String getId() {
        return id;
    }

    public void setId(String id) {
        this.id = id;
    }

    public String getName() {
        return name;
    }

    public void setName(String name) {
        this.name = name;
    }


}
DAO(Data Access Object) 클래스 추가
DAO(Data Access Object)를 만들어서 영구적인 ToDo 항목을 Azure Cosmos DB로 추상화합니다. ToDo 항목을 컬렉션에 저장하려면 클라이언트는 유지할 데이터베이스 및 컬렉션(셀프 link로 참조)을 알고 있어야 합니다. 일반적으로 데이터베이스로의 추가 왕복을 방지할 수 있을 때 데이터베이스 및 컬렉션을 캐시하는 것이 좋습니다.
Azure Cosmos DB 서비스를 호출하려면 새
cosmosClient개체를 인스턴스화해야 합니다. 일반적으로 각 후속 요청마다 새 클라이언트를 생성하는 것보다는cosmosClient개체를 다시 사용하는 것이 가장 좋습니다.cosmosClientFactory클래스 내에 클라이언트를 정의하면 재사용할 수 있습니다. 1단계에서 저장한 HOST 및 MASTER_KEY 값을 업데이트합니다. HOST 변수를 URI로 바꾸고 MASTER_KEY를 PRIMARY KEY로 바꿉니다. 다음 코드를 사용하여 CosmosClientFactory.java 파일 내에CosmosClientFactory클래스를 만듭니다.package com.microsoft.azure.cosmos.sample.dao; import com.azure.cosmos.ConsistencyLevel; import com.azure.cosmos.CosmosClient; import com.azure.cosmos.CosmosClientBuilder; public class CosmosClientFactory { private static final String HOST = "[ACCOUNT HOST NAME]"; private static final String MASTER_KEY = "[ACCOUNT KEY]"; private static CosmosClient cosmosClient = new CosmosClientBuilder() .endpoint(HOST) .key(MASTER_KEY) .consistencyLevel(ConsistencyLevel.EVENTUAL) .buildClient(); public static CosmosClient getCosmosClient() { return cosmosClient; } }새 TodoDao.java 파일을 만들고
TodoDao클래스를 추가하여 todo 항목을 만들고, 업데이트하고, 읽고, 삭제합니다.package com.microsoft.azure.cosmos.sample.dao; import java.util.List; import com.microsoft.azure.cosmos.sample.model.TodoItem; public interface TodoDao { /** * @return A list of TodoItems */ public List<TodoItem> readTodoItems(); /** * @param todoItem * @return whether the todoItem was persisted. */ public TodoItem createTodoItem(TodoItem todoItem); /** * @param id * @return the TodoItem */ public TodoItem readTodoItem(String id); /** * @param id * @return the TodoItem */ public TodoItem updateTodoItem(String id, boolean isComplete); /** * * @param id * @return whether the delete was successful. */ public boolean deleteTodoItem(String id); }새 MockDao 파일을 만들고
MockDao클래스를 추가합니다. 이 클래스는 항목에 대한 CRUD 작업을 수행하는TodoDao클래스를 구현합니다.package com.microsoft.azure.cosmos.sample.dao; import java.util.ArrayList; import java.util.HashMap; import java.util.List; import java.util.Map; import lombok.NonNull; import com.microsoft.azure.cosmos.sample.model.TodoItem; public class MockDao implements TodoDao { private final Map<String, TodoItem> todoItemMap; public MockDao() { todoItemMap = new HashMap<String, TodoItem>(); } @Override public TodoItem createTodoItem(@NonNull TodoItem todoItem) { if (todoItem.getId() == null || todoItem.getId().isEmpty()) { todoItem.setId(generateId()); } todoItemMap.put(todoItem.getId(), todoItem); return todoItem; } @Override public TodoItem readTodoItem(@NonNull String id) { return todoItemMap.get(id); } @Override public List<TodoItem> readTodoItems() { return new ArrayList<TodoItem>(todoItemMap.values()); } @Override public TodoItem updateTodoItem(String id, boolean isComplete) { todoItemMap.get(id).setComplete(isComplete); return todoItemMap.get(id); } @Override public boolean deleteTodoItem(@NonNull String id) { todoItemMap.remove(id); return true; } private String generateId() { return new Integer(todoItemMap.size()).toString(); } }새 DocDbDao.java 파일을 만들고
DocDbDao클래스를 추가합니다. 이 클래스는 컨테이너에 TodoItem을 유지하는 코드를 정의하거나, 데이터베이스 및 컬렉션(있는 경우)을 검색하거나, 없을 경우 새로 만듭니다. 이 예제에서는 Gson을 사용하여 TodoItem POJO(Plain Old Java Object)를 JSON 문서에 직렬화하고 역직렬화합니다. ToDo 항목을 컬렉션에 저장하려면 클라이언트는 유지할 데이터베이스 및 컬렉션(셀프 link로 참조)을 알고 있어야 합니다. 이 클래스는 자체 링크가 아닌 다른 특성(예: "ID")으로 문서를 검색하는 도우미 기능도 정의합니다. 도우미 메서드를 사용하여 ID로 TodoItem JSON 문서를 검색한 다음, POJO로 역직렬화할 수 있습니다.또한
cosmosClient클라이언트 개체를 사용하여 SQL 쿼리를 사용하는 TodoItem의 컬렉션 또는 목록을 가져올 수 있습니다. 마지막으로, 목록에서 TodoItem을 삭제하는 delete 메서드를 정의합니다. 다음 코드는DocDbDao클래스의 콘텐츠를 보여 줍니다.package com.microsoft.azure.cosmos.sample.dao; import com.azure.cosmos.CosmosClient; import com.azure.cosmos.CosmosContainer; import com.azure.cosmos.CosmosDatabase; import com.azure.cosmos.CosmosException; import com.azure.cosmos.implementation.Utils; import com.azure.cosmos.models.CosmosContainerProperties; import com.azure.cosmos.models.CosmosContainerResponse; import com.azure.cosmos.models.CosmosDatabaseResponse; import com.azure.cosmos.models.CosmosItemRequestOptions; import com.azure.cosmos.models.CosmosQueryRequestOptions; import com.azure.cosmos.models.FeedResponse; import com.azure.cosmos.models.PartitionKey; import com.fasterxml.jackson.core.JsonProcessingException; import com.fasterxml.jackson.databind.JsonNode; import com.fasterxml.jackson.databind.ObjectMapper; import com.fasterxml.jackson.databind.node.ObjectNode; import com.google.gson.Gson; import com.microsoft.azure.cosmos.sample.model.TodoItem; import java.util.ArrayList; import java.util.List; public class DocDbDao implements TodoDao { // The name of our database. private static final String DATABASE_ID = "TestDB"; // The name of our collection. private static final String CONTAINER_ID = "TestCollection"; // We'll use Gson for POJO <=> JSON serialization for this example. private static Gson gson = new Gson(); // The Cosmos DB Client private static CosmosClient cosmosClient = CosmosClientFactory .getCosmosClient(); // The Cosmos DB database private static CosmosDatabase cosmosDatabase = null; // The Cosmos DB container private static CosmosContainer cosmosContainer = null; // For POJO/JsonNode interconversion private static final ObjectMapper OBJECT_MAPPER = Utils.getSimpleObjectMapper(); @Override public TodoItem createTodoItem(TodoItem todoItem) { // Serialize the TodoItem as a JSON Document. JsonNode todoItemJson = OBJECT_MAPPER.valueToTree(todoItem); ((ObjectNode) todoItemJson).put("entityType", "todoItem"); try { // Persist the document using the DocumentClient. todoItemJson = getContainerCreateResourcesIfNotExist() .createItem(todoItemJson) .getItem(); } catch (CosmosException e) { System.out.println("Error creating TODO item.\n"); e.printStackTrace(); return null; } try { return OBJECT_MAPPER.treeToValue(todoItemJson, TodoItem.class); //return todoItem; } catch (Exception e) { System.out.println("Error deserializing created TODO item.\n"); e.printStackTrace(); return null; } } @Override public TodoItem readTodoItem(String id) { // Retrieve the document by id using our helper method. JsonNode todoItemJson = getDocumentById(id); if (todoItemJson != null) { // De-serialize the document in to a TodoItem. try { return OBJECT_MAPPER.treeToValue(todoItemJson, TodoItem.class); } catch (JsonProcessingException e) { System.out.println("Error deserializing read TODO item.\n"); e.printStackTrace(); return null; } } else { return null; } } @Override public List<TodoItem> readTodoItems() { List<TodoItem> todoItems = new ArrayList<TodoItem>(); String sql = "SELECT * FROM root r WHERE r.entityType = 'todoItem'"; int maxItemCount = 1000; int maxDegreeOfParallelism = 1000; int maxBufferedItemCount = 100; CosmosQueryRequestOptions options = new CosmosQueryRequestOptions(); options.setMaxBufferedItemCount(maxBufferedItemCount); options.setMaxDegreeOfParallelism(maxDegreeOfParallelism); options.setQueryMetricsEnabled(false); int error_count = 0; int error_limit = 10; String continuationToken = null; do { for (FeedResponse<JsonNode> pageResponse : getContainerCreateResourcesIfNotExist() .queryItems(sql, options, JsonNode.class) .iterableByPage(continuationToken, maxItemCount)) { continuationToken = pageResponse.getContinuationToken(); for (JsonNode item : pageResponse.getElements()) { try { todoItems.add(OBJECT_MAPPER.treeToValue(item, TodoItem.class)); } catch (JsonProcessingException e) { if (error_count < error_limit) { error_count++; if (error_count >= error_limit) { System.out.println("\n...reached max error count.\n"); } else { System.out.println("Error deserializing TODO item JsonNode. " + "This item will not be returned."); e.printStackTrace(); } } } } } } while (continuationToken != null); return todoItems; } @Override public TodoItem updateTodoItem(String id, boolean isComplete) { // Retrieve the document from the database JsonNode todoItemJson = getDocumentById(id); // You can update the document as a JSON document directly. // For more complex operations - you could de-serialize the document in // to a POJO, update the POJO, and then re-serialize the POJO back in to // a document. ((ObjectNode) todoItemJson).put("complete", isComplete); try { // Persist/replace the updated document. todoItemJson = getContainerCreateResourcesIfNotExist() .replaceItem(todoItemJson, id, new PartitionKey(id), new CosmosItemRequestOptions()) .getItem(); } catch (CosmosException e) { System.out.println("Error updating TODO item.\n"); e.printStackTrace(); return null; } // De-serialize the document in to a TodoItem. try { return OBJECT_MAPPER.treeToValue(todoItemJson, TodoItem.class); } catch (JsonProcessingException e) { System.out.println("Error deserializing updated item.\n"); e.printStackTrace(); return null; } } @Override public boolean deleteTodoItem(String id) { // CosmosDB refers to documents by self link rather than id. // Query for the document to retrieve the self link. JsonNode todoItemJson = getDocumentById(id); try { // Delete the document by self link. getContainerCreateResourcesIfNotExist() .deleteItem(id, new PartitionKey(id), new CosmosItemRequestOptions()); } catch (CosmosException e) { System.out.println("Error deleting TODO item.\n"); e.printStackTrace(); return false; } return true; } /* private CosmosDatabase getTodoDatabase() { if (databaseCache == null) { // Get the database if it exists List<CosmosDatabase> databaseList = cosmosClient .queryDatabases( "SELECT * FROM root r WHERE r.id='" + DATABASE_ID + "'", null).getQueryIterable().toList(); if (databaseList.size() > 0) { // Cache the database object so we won't have to query for it // later to retrieve the selfLink. databaseCache = databaseList.get(0); } else { // Create the database if it doesn't exist. try { CosmosDatabase databaseDefinition = new CosmosDatabase(); databaseDefinition.setId(DATABASE_ID); databaseCache = cosmosClient.createDatabase( databaseDefinition, null).getResource(); } catch (CosmosException e) { // TODO: Something has gone terribly wrong - the app wasn't // able to query or create the collection. // Verify your connection, endpoint, and key. e.printStackTrace(); } } } return databaseCache; } */ private CosmosContainer getContainerCreateResourcesIfNotExist() { try { if (cosmosDatabase == null) { CosmosDatabaseResponse cosmosDatabaseResponse = cosmosClient.createDatabaseIfNotExists(DATABASE_ID); cosmosDatabase = cosmosClient.getDatabase(cosmosDatabaseResponse.getProperties().getId()); } } catch (CosmosException e) { // TODO: Something has gone terribly wrong - the app wasn't // able to query or create the collection. // Verify your connection, endpoint, and key. System.out.println("Something has gone terribly wrong - " + "the app wasn't able to create the Database.\n"); e.printStackTrace(); } try { if (cosmosContainer == null) { CosmosContainerProperties properties = new CosmosContainerProperties(CONTAINER_ID, "/id"); CosmosContainerResponse cosmosContainerResponse = cosmosDatabase.createContainerIfNotExists(properties); cosmosContainer = cosmosDatabase.getContainer(cosmosContainerResponse.getProperties().getId()); } } catch (CosmosException e) { // TODO: Something has gone terribly wrong - the app wasn't // able to query or create the collection. // Verify your connection, endpoint, and key. System.out.println("Something has gone terribly wrong - " + "the app wasn't able to create the Container.\n"); e.printStackTrace(); } return cosmosContainer; } private JsonNode getDocumentById(String id) { String sql = "SELECT * FROM root r WHERE r.id='" + id + "'"; int maxItemCount = 1000; int maxDegreeOfParallelism = 1000; int maxBufferedItemCount = 100; CosmosQueryRequestOptions options = new CosmosQueryRequestOptions(); options.setMaxBufferedItemCount(maxBufferedItemCount); options.setMaxDegreeOfParallelism(maxDegreeOfParallelism); options.setQueryMetricsEnabled(false); List<JsonNode> itemList = new ArrayList(); String continuationToken = null; do { for (FeedResponse<JsonNode> pageResponse : getContainerCreateResourcesIfNotExist() .queryItems(sql, options, JsonNode.class) .iterableByPage(continuationToken, maxItemCount)) { continuationToken = pageResponse.getContinuationToken(); for (JsonNode item : pageResponse.getElements()) { itemList.add(item); } } } while (continuationToken != null); if (itemList.size() > 0) { return itemList.get(0); } else { return null; } } }다음으로, 새 TodoDaoFactory.java 파일을 만들고 새 DocDbDao 개체를 만드는
TodoDaoFactory클래스를 추가합니다.package com.microsoft.azure.cosmos.sample.dao; public class TodoDaoFactory { private static TodoDao myTodoDao = new DocDbDao(); public static TodoDao getDao() { return myTodoDao; } }
컨트롤러 추가
애플리케이션에 TodoItemController 컨트롤러를 추가합니다. 이 프로젝트에서는 Project Lombok을 사용해서 생성자, getter, setter 및 작성기를 생성합니다. 또는 이 코드를 수동으로 작성하거나 IDE에서 생성하도록 할 수도 있습니다.
package com.microsoft.azure.cosmos.sample.controller;

import java.util.List;
import java.util.UUID;

import lombok.NonNull;

import com.microsoft.azure.cosmos.sample.dao.TodoDao;
import com.microsoft.azure.cosmos.sample.dao.TodoDaoFactory;
import com.microsoft.azure.cosmos.sample.model.TodoItem;

public class TodoItemController {
    public static TodoItemController getInstance() {
        if (todoItemController == null) {
            todoItemController = new TodoItemController(TodoDaoFactory.getDao());
        }
        return todoItemController;
    }

    private static TodoItemController todoItemController;

    private final TodoDao todoDao;

    TodoItemController(TodoDao todoDao) {
        this.todoDao = todoDao;
    }

    public TodoItem createTodoItem(@NonNull String name,
            @NonNull String category, boolean isComplete) {
        TodoItem todoItem = new TodoItem();

        todoItem.setName(name);
        todoItem.setCategory(category);
        todoItem.setComplete(isComplete);
        todoItem.setId(UUID.randomUUID().toString());

        return todoDao.createTodoItem(todoItem);
    }

    public boolean deleteTodoItem(@NonNull String id) {
        return todoDao.deleteTodoItem(id);
    }

    public TodoItem getTodoItemById(@NonNull String id) {
        return todoDao.readTodoItem(id);
    }

    public List<TodoItem> getTodoItems() {
        return todoDao.readTodoItems();
    }

    public TodoItem updateTodoItem(@NonNull String id, boolean isComplete) {
        return todoDao.updateTodoItem(id, isComplete);
    }
}
서블릿 만들기
다음으로, HTTP 요청을 컨트롤러로 라우팅하는 서블릿을 만듭니다. ApiServlet.java 파일을 만들고 다음 코드를 정의합니다.
package com.microsoft.azure.cosmos.sample;

import java.io.IOException;

import javax.servlet.ServletException;
import javax.servlet.annotation.WebServlet;
import javax.servlet.http.HttpServlet;
import javax.servlet.http.HttpServletRequest;
import javax.servlet.http.HttpServletResponse;

import com.google.gson.Gson;
import com.microsoft.azure.cosmos.sample.controller.TodoItemController;

/**
 * API Frontend Servlet
 */
@WebServlet("/api")
public class ApiServlet extends HttpServlet {
    // API Keys
    public static final String API_METHOD = "method";

    // API Methods
    public static final String CREATE_TODO_ITEM = "createTodoItem";
    public static final String GET_TODO_ITEMS = "getTodoItems";
    public static final String UPDATE_TODO_ITEM = "updateTodoItem";

    // API Parameters
    public static final String TODO_ITEM_ID = "todoItemId";
    public static final String TODO_ITEM_NAME = "todoItemName";
    public static final String TODO_ITEM_CATEGORY = "todoItemCategory";
    public static final String TODO_ITEM_COMPLETE = "todoItemComplete";

    public static final String MESSAGE_ERROR_INVALID_METHOD = "{'error': 'Invalid method'}";

    private static final long serialVersionUID = 1L;
    private static final Gson gson = new Gson();

    @Override
    protected void doGet(HttpServletRequest request,
            HttpServletResponse response) throws ServletException, IOException {

        String apiResponse = MESSAGE_ERROR_INVALID_METHOD;

        TodoItemController todoItemController = TodoItemController
                .getInstance();

        String id = request.getParameter(TODO_ITEM_ID);
        String name = request.getParameter(TODO_ITEM_NAME);
        String category = request.getParameter(TODO_ITEM_CATEGORY);
        String itemComplete = request.getParameter(TODO_ITEM_COMPLETE);
        boolean isComplete = itemComplete!= null && itemComplete.equalsIgnoreCase("true");

        switch (request.getParameter(API_METHOD)) {
        case CREATE_TODO_ITEM:
            apiResponse = gson.toJson(todoItemController.createTodoItem(name,
                    category, isComplete));
            break;
        case GET_TODO_ITEMS:
            apiResponse = gson.toJson(todoItemController.getTodoItems());
            break;
        case UPDATE_TODO_ITEM:
            apiResponse = gson.toJson(todoItemController.updateTodoItem(id,
                    isComplete));
            break;
        default:
            break;
        }

        response.setCharacterEncoding("UTF-8");
        response.getWriter().println(apiResponse);
    }

    @Override
    protected void doPost(HttpServletRequest request,
            HttpServletResponse response) throws ServletException, IOException {
        doGet(request, response);
    }
}
Java 앱의 나머지 부분을 함께 연결
이제 재미있는 부분을 마쳤으므로 빠른 사용자 인터페이스를 빌드하고 DAO에 연결하기만 하면 됩니다.
사용자에게 표시할 웹 사용자 인터페이스가 필요합니다. 다음 코드를 사용하여 앞에서 만든 index.jsp를 다시 작성하겠습니다.
<%@ page language="java" contentType="text/html; charset=UTF-8" pageEncoding="UTF-8"%>
<!DOCTYPE html PUBLIC "-//W3C//DTD HTML 4.01 Transitional//EN" "http://www.w3.org/TR/html4/loose.dtd">
<html>
<head>
  <meta http-equiv="Content-Type" content="text/html; charset=UTF-8">
  <meta http-equiv="X-UA-Compatible" content="IE=edge;" />
  <title>Azure Cosmos Java Sample</title>

  <!-- Bootstrap -->
  <link href="//ajax.aspnetcdn.com/ajax/bootstrap/3.2.0/css/bootstrap.min.css" rel="stylesheet">

  <style>
    /* Add padding to body for fixed nav bar */
    body {
      padding-top: 50px;
    }
  </style>
</head>
<body>
  <!-- Nav Bar -->
  <div class="navbar navbar-inverse navbar-fixed-top" role="navigation">
    <div class="container">
      <div class="navbar-header">
        <a class="navbar-brand" href="#">My Tasks</a>
      </div>
    </div>
  </div>

  <!-- Body -->
  <div class="container">
    <h1>My ToDo List</h1>

    <hr/>

    <!-- The ToDo List -->
    <div class = "todoList">
      <table class="table table-bordered table-striped" id="todoItems">
        <thead>
          <tr>
            <th>Name</th>
            <th>Category</th>
            <th>Complete</th>
          </tr>
        </thead>
        <tbody>
        </tbody>
      </table>

      <!-- Update Button -->
      <div class="todoUpdatePanel">
        <form class="form-horizontal" role="form">
          <button type="button" class="btn btn-primary">Update Tasks</button>
        </form>
      </div>

    </div>

    <hr/>

    <!-- Item Input Form -->
    <div class="todoForm">
      <form class="form-horizontal" role="form">
        <div class="form-group">
          <label for="inputItemName" class="col-sm-2">Task Name</label>
          <div class="col-sm-10">
            <input type="text" class="form-control" id="inputItemName" placeholder="Enter name">
          </div>
        </div>

        <div class="form-group">
          <label for="inputItemCategory" class="col-sm-2">Task Category</label>
          <div class="col-sm-10">
            <input type="text" class="form-control" id="inputItemCategory" placeholder="Enter category">
          </div>
        </div>

        <button type="button" class="btn btn-primary">Add Task</button>
      </form>
    </div>

  </div>

  <!-- Placed at the end of the document so the pages load faster -->
  <script src="//ajax.aspnetcdn.com/ajax/jQuery/jquery-2.1.1.min.js"></script>
  <script src="//ajax.aspnetcdn.com/ajax/bootstrap/3.2.0/bootstrap.min.js"></script>
  <script src="assets/todo.js"></script>
</body>
</html>
끝으로, 웹 사용자 인터페이스와 서블릿을 연결하는 클라이언트 쪽 JavaScript를 작성합니다.
/**
 * ToDo App
 */

var todoApp = {
  /*
   * API methods to call Java backend.
   */
  apiEndpoint: "api",

  createTodoItem: function(name, category, isComplete) {
    $.post(todoApp.apiEndpoint, {
        "method": "createTodoItem",
        "todoItemName": name,
        "todoItemCategory": category,
        "todoItemComplete": isComplete
      },
      function(data) {
        var todoItem = data;
        todoApp.addTodoItemToTable(todoItem.id, todoItem.name, todoItem.category, todoItem.complete);
      },
      "json");
  },

  getTodoItems: function() {
    $.post(todoApp.apiEndpoint, {
        "method": "getTodoItems"
      },
      function(data) {
        var todoItemArr = data;
        $.each(todoItemArr, function(index, value) {
          todoApp.addTodoItemToTable(value.id, value.name, value.category, value.complete);
        });
      },
      "json");
  },

  updateTodoItem: function(id, isComplete) {
    $.post(todoApp.apiEndpoint, {
        "method": "updateTodoItem",
        "todoItemId": id,
        "todoItemComplete": isComplete
      },
      function(data) {},
      "json");
  },

  /*
   * UI Methods
   */
  addTodoItemToTable: function(id, name, category, isComplete) {
    var rowColor = isComplete ? "active" : "warning";

    todoApp.ui_table().append($("<tr>")
      .append($("<td>").text(name))
      .append($("<td>").text(category))
      .append($("<td>")
        .append($("<input>")
          .attr("type", "checkbox")
          .attr("id", id)
          .attr("checked", isComplete)
          .attr("class", "isComplete")
        ))
      .addClass(rowColor)
    );
  },

  /*
   * UI Bindings
   */
  bindCreateButton: function() {
    todoApp.ui_createButton().click(function() {
      todoApp.createTodoItem(todoApp.ui_createNameInput().val(), todoApp.ui_createCategoryInput().val(), false);
      todoApp.ui_createNameInput().val("");
      todoApp.ui_createCategoryInput().val("");
    });
  },

  bindUpdateButton: function() {
    todoApp.ui_updateButton().click(function() {
      // Disable button temporarily.
      var myButton = $(this);
      var originalText = myButton.text();
      $(this).text("Updating...");
      $(this).prop("disabled", true);

      // Call api to update todo items.
      $.each(todoApp.ui_updateId(), function(index, value) {
        todoApp.updateTodoItem(value.name, value.value);
        $(value).remove();
      });

      // Re-enable button.
      setTimeout(function() {
        myButton.prop("disabled", false);
        myButton.text(originalText);
      }, 500);
    });
  },

  bindUpdateCheckboxes: function() {
    todoApp.ui_table().on("click", ".isComplete", function(event) {
      var checkboxElement = $(event.currentTarget);
      var rowElement = $(event.currentTarget).parents('tr');
      var id = checkboxElement.attr('id');
      var isComplete = checkboxElement.is(':checked');

      // Togle table row color
      if (isComplete) {
        rowElement.addClass("active");
        rowElement.removeClass("warning");
      } else {
        rowElement.removeClass("active");
        rowElement.addClass("warning");
      }

      // Update hidden inputs for update panel.
      todoApp.ui_updateForm().children("input[name='" + id + "']").remove();

      todoApp.ui_updateForm().append($("<input>")
        .attr("type", "hidden")
        .attr("class", "updateComplete")
        .attr("name", id)
        .attr("value", isComplete));

    });
  },

  /*
   * UI Elements
   */
  ui_createNameInput: function() {
    return $(".todoForm #inputItemName");
  },

  ui_createCategoryInput: function() {
    return $(".todoForm #inputItemCategory");
  },

  ui_createButton: function() {
    return $(".todoForm button");
  },

  ui_table: function() {
    return $(".todoList table tbody");
  },

  ui_updateButton: function() {
    return $(".todoUpdatePanel button");
  },

  ui_updateForm: function() {
    return $(".todoUpdatePanel form");
  },

  ui_updateId: function() {
    return $(".todoUpdatePanel .updateComplete");
  },

  /*
   * Install the TodoApp
   */
  install: function() {
    todoApp.bindCreateButton();
    todoApp.bindUpdateButton();
    todoApp.bindUpdateCheckboxes();

    todoApp.getTodoItems();
  }
};

$(document).ready(function() {
  todoApp.install();
});
이제 애플리케이션을 테스트하는 일만 남았습니다. 애플리케이션을 로컬로 실행하고 항목 이름과 범주를 입력하고 작업 추가를 클릭하여 Todo 항목을 추가합니다. 항목이 표시되면 확인란을 설정/해제하고 작업 업데이트를 클릭하여 항목의 완료 여부를 업데이트할 수 있습니다.
Azure 웹 사이트에 Java 애플리케이션 배포
Azure 웹 사이트에서는 Java 애플리케이션을 간단히 배포할 수 있습니다. 즉, 애플리케이션을 WAR 파일로 내보내고 소스 제어(예: Git) 또는 FTP를 통해 업로드하면 됩니다.
애플리케이션을 WAR 파일로 내보내려면 프로젝트 탐색기에서 프로젝트를 마우스 오른쪽 단추로 클릭하고 내보내기를 선택한 후 WAR 파일을 선택합니다.
WAR 내보내기 창에서 다음을 수행합니다.
- 웹 프로젝트 상자에 azure-cosmos-java-sample을 입력합니다.
- 대상 상자에서 WAR 파일을 저장할 대상을 선택합니다.
- 마침을 선택합니다.
이제 WAR 파일이 준비되었으므로 간단히 Azure 웹 사이트의 webapps 디렉터리로 업로드하면 됩니다. 파일 업로드에 대한 자세한 내용은 Azure App Service Web Apps에 Java 애플리케이션 추가를 참조하세요. WAR 파일이 webapps 디렉터리에 업로드되면 런타임 환경에서 이 파일이 추가되었음을 감지하고 자동으로 로드합니다.
완성된 제품을 보려면
http://YOUR\_SITE\_NAME.azurewebsites.net/azure-cosmos-java-sample/로 이동하고 작업 추가를 시작하세요.
GitHub에서 프로젝트 가져오기
이 자습서의 모든 샘플은 GitHub의 todo 프로젝트에 포함되어 있습니다. Todo 프로젝트를 Eclipse로 가져오려면 필수 조건 섹션에 나열된 소프트웨어 및 리소스가 있는지 확인한 후 다음을 수행합니다.
Project Lombok을 설치합니다. Lombok은 프로젝트에서 생성자, getter, setter를 생성하는 데 사용됩니다. lombok.jar 파일을 다운로드한 다음에는 두 번 클릭하여 설치하거나 명령줄을 사용해서 설치합니다.
Eclipse가 열려 있으면 닫고 다시 시작해서 Lombok을 로드합니다.
Eclipse의 파일 메뉴에서 가져오기를 선택합니다.
가져오기 창에서 Git를 선택하고 Git의 프로젝트를 선택한 후 다음을 선택합니다.
리포지토리 원본 선택 화면에서 URI 복제를 선택합니다.
원본 Git 리포지토리 화면의 URI 상자에 https://github.com/Azure-Samples/azure-cosmos-java-sql-api-todo-app를 입력한 다음, 다음을 선택합니다.
분기 선택 화면에서 주가 선택되었는지 확인한 후, 다음을 선택합니다.
로컬 대상 화면에서 찾아보기를 선택하여 리포지토리를 복사할 수 있는 폴더를 선택한 후 다음을 선택합니다.
프로젝트 가져오기에 사용할 마법사 선택 화면에서 기존 프로젝트 가져오기가 선택되었는지 확인한 후 다음을 선택합니다.
프로젝트 가져오기 화면에서 DocumentDB 프로젝트를 선택 취소한 후 마침을 선택합니다. DocumentDB 프로젝트에는 종속성으로 추가할 Azure Cosmos DB Java SDK가 포함됩니다.
프로젝트 탐색기에서 azure-cosmos-java-sample\src\com.microsoft.azure.cosmos.sample.dao\DocumentClientFactory.java로 이동하고 HOST 및 MASTER_KEY 값을 각각 해당 Azure Cosmos DB 계정의 URI 및 기본 키로 바꾼 다음, 파일을 저장합니다. 자세한 내용은 1단계. Azure Cosmos DB 데이터베이스 계정 만들기를 참조하세요.
프로젝트 탐색기에서 azure-cosmos-java-sample을 마우스 오른쪽 단추로 클릭하고 빌드 경로를 선택한 후 빌드 경로 구성을 선택합니다.
Java 빌드 경로 화면의 오른쪽 창에서 라이브러리 탭을 선택한 후 외부 JAR 추가를 선택합니다. lombok.jar 파일의 위치로 이동하고 열기를 선택한 후 확인을 선택합니다.
12단계를 수행해서 속성 창을 다시 열고 왼쪽 창에서 대상 런타임을 선택합니다.
대상 런타임 화면에서 새로 만들기를 선택하고 Apache Tomcat v7.0을 선택한 후 확인을 선택합니다.
12단계를 수행해서 속성 창을 다시 열고 왼쪽 창에서 프로젝트 패싯을 선택합니다.
프로젝트 패싯 화면에서 동적 웹 모듈 및 Java를 선택한 후 확인을 선택합니다.
화면 하단에 있는 서버 탭에서 로컬 호스트의 Tomcat v7.0 서버를 마우스 오른쪽 단추로 클릭하고 추가 및 제거를 선택합니다.
추가 및 제거 창에서 azure-cosmos-java-sample을 구성됨 상자로 이동한 다음, 마침을 선택합니다.
서버 탭에서 로컬 호스트의 Tomcat v7.0 서버를 마우스 오른쪽 단추로 클릭하고 다시 시작을 선택합니다.
브라우저에서
http://localhost:8080/azure-cosmos-java-sample/로 이동하고 작업 목록에 추가하기 시작합니다. 기본 포트 값을 변경한 경우 8080을 선택한 값으로 변경합니다.프로젝트를 Azure 웹 사이트에 배포하려면 6단계. Azure 웹 사이트에 응용 프로그램 배포를 참조하세요.
다음 단계
Azure Cosmos DB로 마이그레이션하기 위한 용량 계획을 수행하려고 하시나요? 용량 계획을 위해 기존 데이터베이스 클러스터에 대한 정보를 사용할 수 있습니다.
- 기존 데이터베이스 클러스터의 vCore 및 서버의 수만 알고 있는 경우 vCore 또는 vCPU를 사용하여 요청 단위 예측을 참조하세요
- 현재 데이터베이스 워크로드에 대한 일반적인 요청 비율을 알고 있는 경우 Azure Cosmos DB 용량 계획 도구를 사용하여 요청 단위 예측에 대해 읽어보세요.
피드백
출시 예정: 2024년 내내 콘텐츠에 대한 피드백 메커니즘으로 GitHub 문제를 단계적으로 폐지하고 이를 새로운 피드백 시스템으로 바꿀 예정입니다. 자세한 내용은 다음을 참조하세요. https://aka.ms/ContentUserFeedback
다음에 대한 사용자 의견 제출 및 보기