Exercise - Create a backup copy of the desktop folder
This exercise demonstrates some actions that are used to organize and manage files and folders.
In this exercise, you will:
Get the location of the desktop folder for the current user.
Retrieve the contents of a folder on the desktop.
Create a new folder on the desktop.
Copy the contents of the first folder to the new folder.
Write to a text file.
Rename the text file to contain the current date and time in its file name.
Steps
Follow these steps to organize and manage files and folders:
Create a folder on your desktop and name it Important.
Open the new folder, right-click in the folder, go to New, and then create a new Text Document.
Repeat the previous step for other available document or file types. Though no restrictions are placed on the amount, three files should be enough for this exercise.
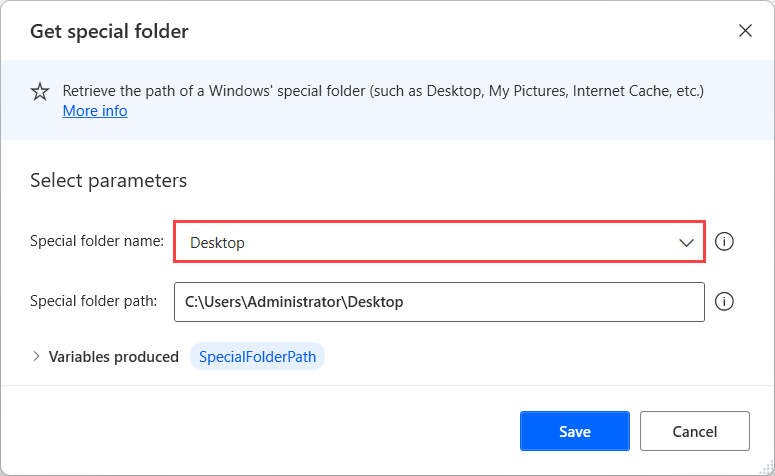
Create a new flow and add the Get special folder action to the workspace.
Set the Special folder name: field to Desktop and then store it in a variable.
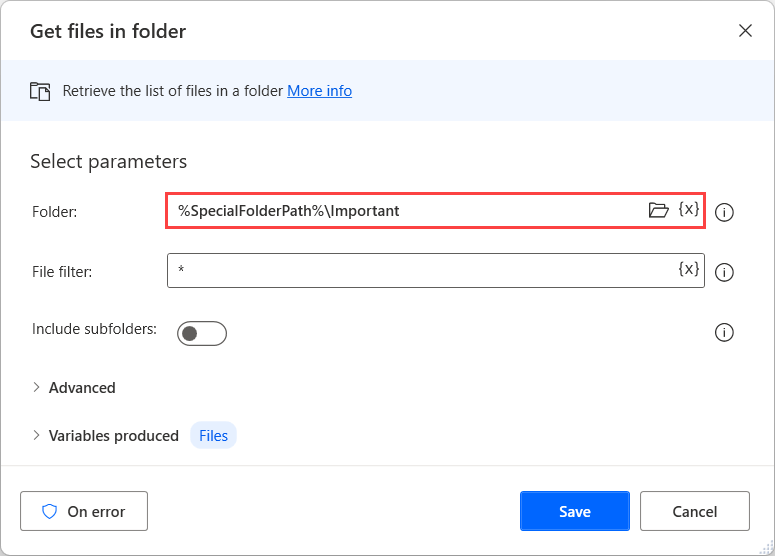
Use the Get files in folder action to set the Folder field to %SpecialFolder%\Important. This setting will select the folder that you previously created on the desktop.
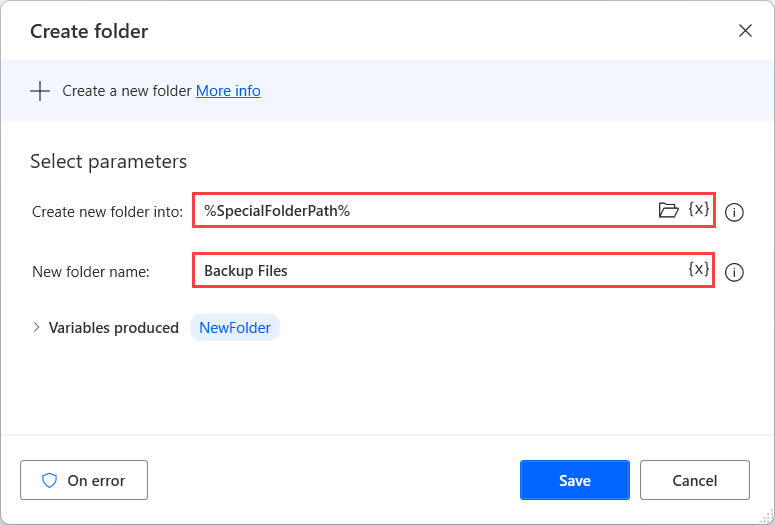
Add the Create folder action to the workspace.
In the Create new folder into field, enter %SpecialFolderPath%.
In the New folder name field, enter Backup Files.
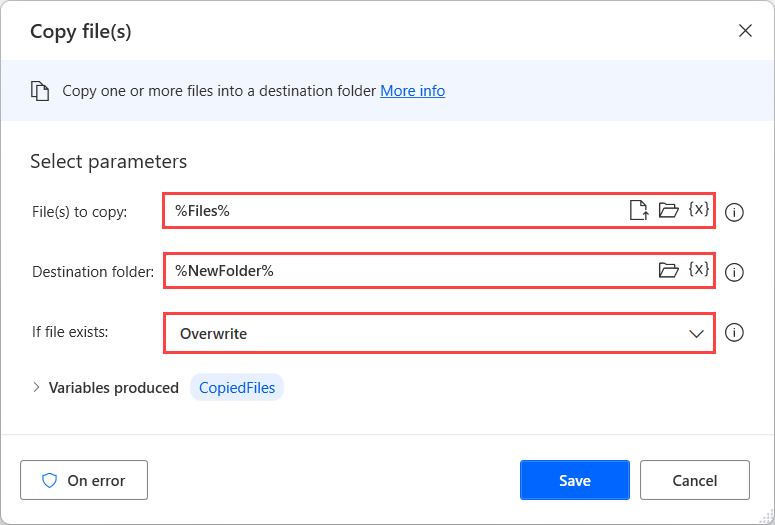
Add the Copy File(s) action.
Set the File(s) to Copy field to %Files%, the Destination Folder field to %New Folder%, and the If File(s) Exists drop-down option to Overwrite.
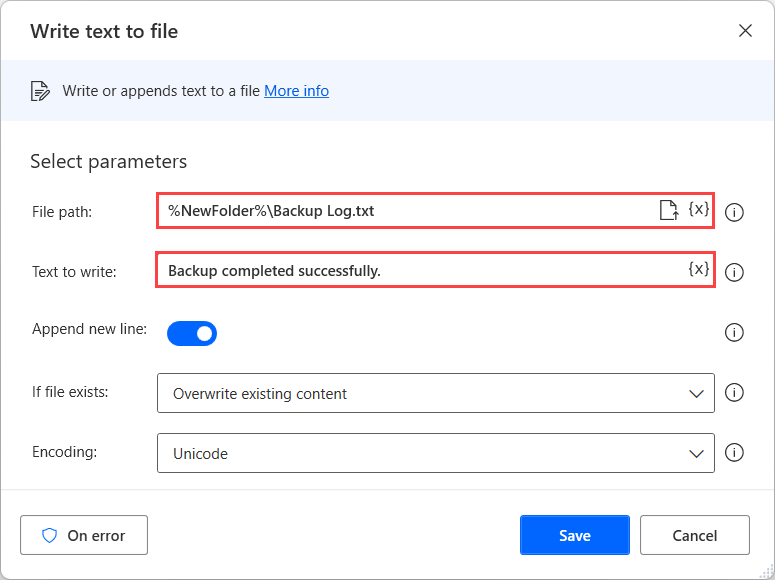
To create the log file, add the Write text to file action and then set the File path field to %NewFolder%\Backup Log.txt.
In the Text to write field, add a message that will show that the flow has run successfully.
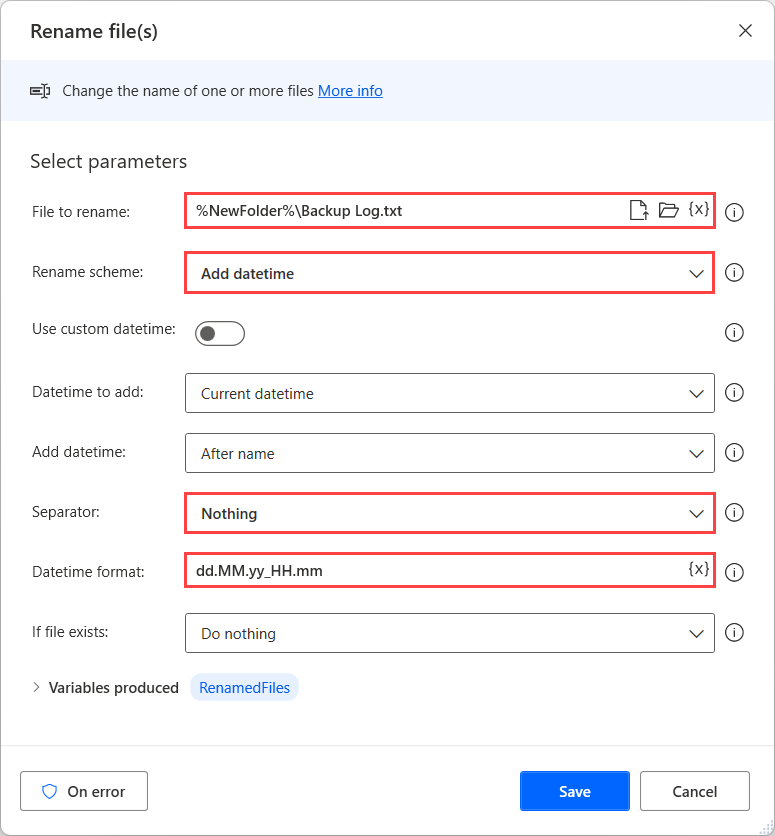
Add the Rename file(s) action and then set the File(s) to rename field to %NewFolder%\Backup Log.txt.
In the Rename scheme drop-down menu, select the Add datetime option.
Set the Separator drop-down option to no separator and the DateTime Format option to dd.MM.yy_HH.mm.
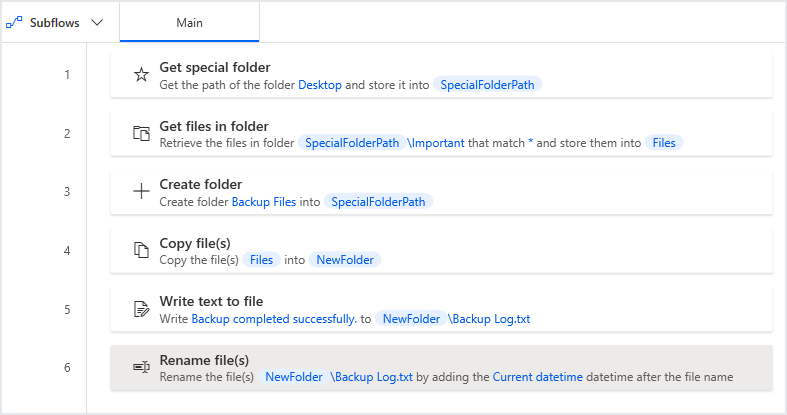
The completed flow should resemble the following screenshot.
Run the flow.
After the run flow has completed, you will have a new folder called Backup Files on your desktop. The folder will contain all contents of the folder named Important and an additional text file called Backup Log, which will have the last date and time that the flow has run appended to its file name.