참고 항목
더 큰 기능을 위해 PyTorch를 Windows의 DirectML과 함께 사용할 수도 있습니다.
이 자습서의 이전 단계에서는 PyTorch를 사용하여 기계 학습 모델을 만들었습니다. 그러나 해당 모델은 .pth 파일입니다. Windows ML 앱과 통합하려면 모델을 ONNX 형식으로 변환해야 합니다.
모델 내보내기
모델을 내보내려면 torch.onnx.export() 함수를 사용합니다. 이 함수는 모델을 실행하고, 출력을 계산하는 데 사용되는 연산자의 추적을 기록합니다.
- main 함수 위 Visual Studio의
PyTorchTraining.py파일에 다음 코드를 복사합니다.
import torch.onnx

#Function to Convert to ONNX
def Convert_ONNX():

    # set the model to inference mode
    model.eval()

    # Let's create a dummy input tensor
    dummy_input = torch.randn(1, input_size, requires_grad=True)

    # Export the model
    torch.onnx.export(model,         # model being run
         dummy_input,       # model input (or a tuple for multiple inputs)
         "ImageClassifier.onnx",       # where to save the model
         export_params=True,  # store the trained parameter weights inside the model file
         opset_version=10,    # the ONNX version to export the model to
         do_constant_folding=True,  # whether to execute constant folding for optimization
         input_names = ['modelInput'],   # the model's input names
         output_names = ['modelOutput'], # the model's output names
         dynamic_axes={'modelInput' : {0 : 'batch_size'},    # variable length axes
                                'modelOutput' : {0 : 'batch_size'}})
    print(" ")
    print('Model has been converted to ONNX')
모델을 model.eval()로 설정하므로 모델을 내보내기 전에 호출 model.train(False) 하거나 내보내는 것이 중요합니다.
dropout 또는 batchnorm과 같은 연산자는 유추 및 학습 모드에서 다르게 동작하기 때문에 필요합니다.
- ONNX로 변환을 실행하려면 변환 함수에 대한 호출을 main 함수에 추가합니다. 모델을 다시 학습할 필요가 없으므로 더 이상 실행할 필요가 없는 일부 함수를 주석으로 달겠습니다. main 함수는 다음과 같습니다.
if __name__ == "__main__":

    # Let's build our model
    #train(5)
    #print('Finished Training')

    # Test which classes performed well
    #testAccuracy()

    # Let's load the model we just created and test the accuracy per label
    model = Network()
    path = "myFirstModel.pth"
    model.load_state_dict(torch.load(path))

    # Test with batch of images
    #testBatch()
    # Test how the classes performed
    #testClassess()

    # Conversion to ONNX
    Convert_ONNX()
- 도구 모음에서
Start Debugging단추를 선택하거나F5를 눌러 프로젝트를 다시 실행합니다. 모델을 다시 학습할 필요가 없으며 프로젝트 폴더에서 기존 모델을 로드하기만 하면 됩니다.
출력은 다음과 같습니다.
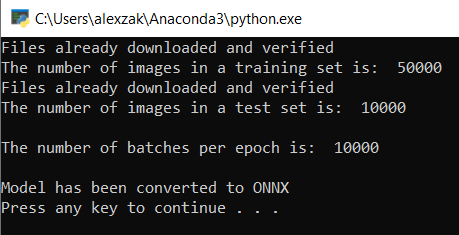
프로젝트 위치로 이동하여 .pth 모델 옆에 있는 ONNX 모델을 찾습니다.
참고 항목
더 알아보고 싶으신가요? 모델 내보내기에서 PyTorch 자습서를 검토합니다.
모델을 탐색합니다.
Netron을 통해
ImageClassifier.onnx모델 파일을 엽니다.데이터 노드를 선택하여 모델 속성을 엽니다.
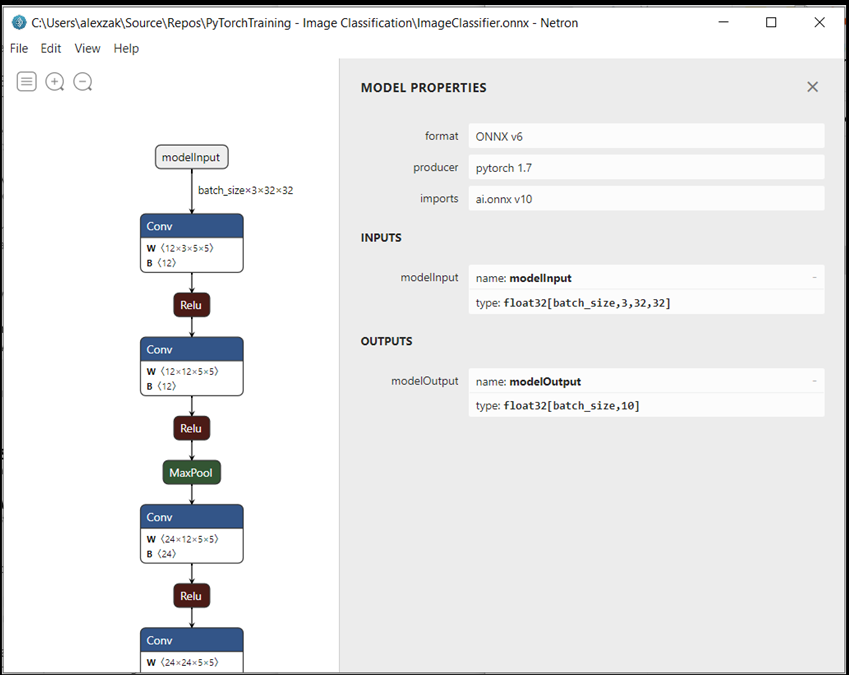
보시는 것처럼, 모델에는 32비트 텐서(다차원 배열) float 개체가 입력으로 필요하며, Tensor float을 출력으로 반환합니다. 출력 배열에는 모든 레이블에 대한 가능성이 포함됩니다. 모델을 빌드하는 방법, 레이블은 10개의 숫자로 표시되고, 모든 숫자는 개체의 10개 클래스를 나타냅니다.
| 레이블 0 | 레이블 1 | 레이블 2 | 레이블 3 | 레이블 4 | 레이블 5 | 레이블 6 | 레이블 7 | 레이블 8 | 레이블 9 |
|---|---|---|---|---|---|---|---|---|---|
| 0 | 1 | 2 | 3 | 4 | 5 | 6 | 7 | 8 (여덟) | 9 |
| 비행기 | 차량 | 새 | 고양이 | 사슴 | 강아지 | 개구리 | 말 | 선박 | 트럭 |
Windows ML 앱을 사용하여 올바른 예측을 표시하려면 이러한 값을 추출해야 합니다.
다음 단계
모델을 배포할 준비가 되었습니다. 다음으로, 주 이벤트에 대해 Windows 애플리케이션을 빌드하고 Windows 디바이스에서 로컬로 실행해 보겠습니다.