참고 항목
더 큰 기능을 위해 PyTorch를 Windows의 DirectML과 함께 사용할 수도 있습니다.
이 자습서의 이전 부분에서 ONNX 형식으로 모델을 빌드하고 내보내는 방법을 알아보았습니다. 이제는 내보낸 모델을 Windows 애플리케이션에 포함하고, WinML API를 호출하여 디바이스에서 로컬로 실행하는 방법을 보여 줍니다.
완료되면 작동하는 이미지 분류 앱이 있게 됩니다.
샘플 앱 정보
자습서의 이 단계에서는 ML 모델을 사용하여 이미지를 분류할 수 있는 앱을 만듭니다. 기본 UI를 사용하면 로컬 디바이스에서 이미지를 선택하고, 이전 부분에서 빌드하고 학습시킨 분류 ONNX 모델을 사용하여 이미지를 분류할 수 있습니다. 그러면 모델에서 반환된 태그가 이미지 옆에 표시됩니다.
여기서는 이 과정을 안내합니다.
참고 항목
미리 정의된 코드 샘플을 사용하도록 선택하면 솔루션 파일을 복제할 수 있습니다. 리포지토리를 복제하고, 이 샘플로 이동한 다음, Visual Studio에서 classifierPyTorch.sln 파일을 엽니다. 이를 사용하고 있는지 확인하려면 이 페이지의 애플리케이션 시작 부분으로 건너뜁니다.
아래에서는 앱을 만들고 Windows ML 코드를 추가하는 방법을 안내합니다.
Windows ML UWP 만들기(C#)
작동하는 Windows ML 앱을 만들려면 다음을 수행해야 합니다.
- 기계 학습 모델을 로드합니다.
- 이미지를 필요한 형식으로 로드합니다.
- 모델의 입력과 출력을 바인딩합니다.
- 모델을 평가하고, 의미 있는 결과를 표시합니다.
명령줄에서 만족스러운 이미지 기반 앱을 만들기가 어려우므로 기본 UI도 만들어야 합니다.
Visual Studio 내에서 새 프로젝트 열기
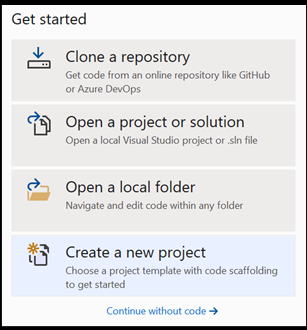
- 시작하겠습니다. Visual Studio를 열고, 새 프로젝트 만들기를 선택합니다.
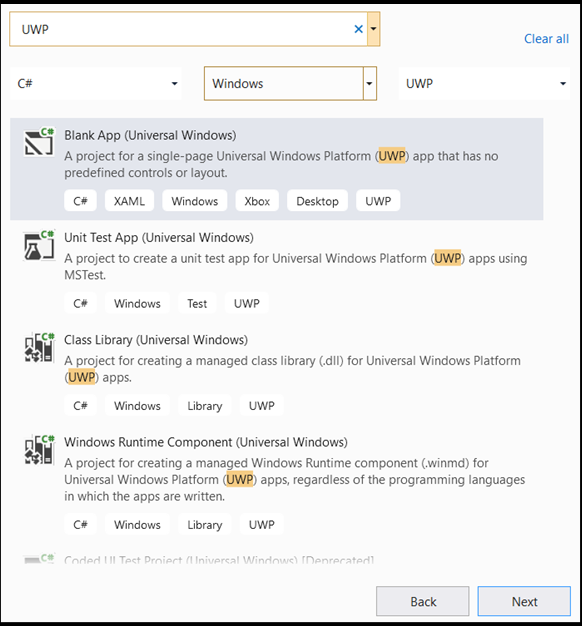
- 검색 창에서
UWP를 입력한 다음,Blank APP (Universal Windows)을 선택합니다. 그러면 미리 정의된 컨트롤 또는 레이아웃이 있는 단일 페이지 UWP(유니버설 Windows 플랫폼) 앱에 대한 C# 프로젝트가 열립니다.next를 선택하여 프로젝트에 대한 구성 창을 엽니다.
- 구성 창에서 다음을 수행합니다.
- 프로젝트 이름을 지정합니다. 여기서는 classifierPyTorch라고 합니다.
- 프로젝트의 위치를 선택합니다.
- VS2019를 사용하는 경우
Create directory for solution을 선택해야 합니다. - VS2017을 사용하는 경우
Place solution and project in the same directory를 선택 취소해야 합니다.
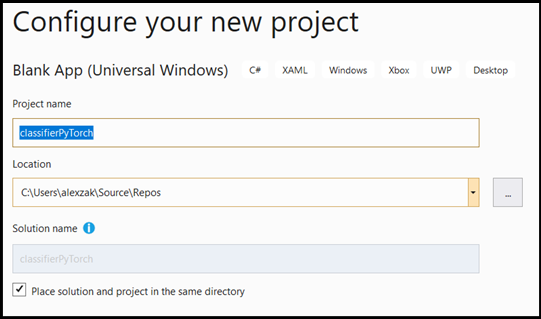
create를 눌러 프로젝트를 만듭니다. 최소 대상 버전 창이 팝업될 수 있습니다. 최소 버전이 Windows 10, 버전 1809(10.0, 빌드 17763) 이상으로 설정되어 있어야 합니다.
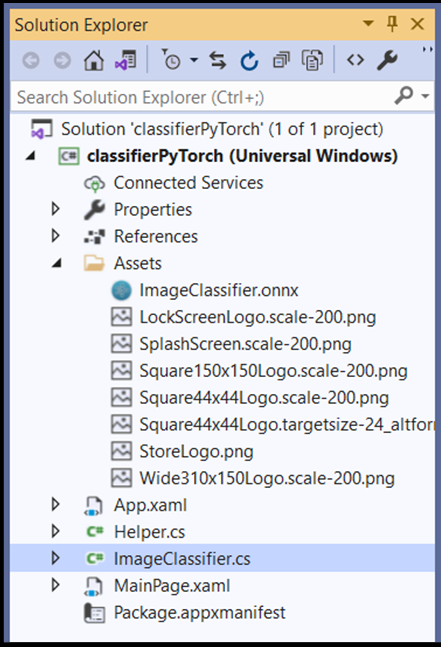
- 프로젝트가 만들어지면 프로젝트 폴더로 이동하여 assets 폴더(
[….\classifierPyTorch \Assets])를 열고,ImageClassifier.onnx파일을 이 위치에 복사합니다.
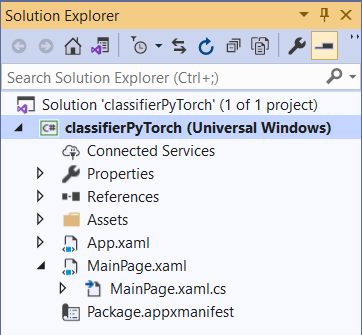
프로젝트 솔루션 살펴보기
프로젝트 솔루션을 살펴보겠습니다.
여러 개의 CS 코드 파일이 Visual Studio의 솔루션 탐색기 내에 자동으로 만들어졌습니다.
MainPage.xaml에는 GUI에 대한 XAML 코드가 포함되어 있고, MainPage.xaml.cs에는 '코드 숨김'이라고도 하는 애플리케이션 코드가 포함되어 있습니다. 이전에 UWP 앱을 만든 적이 있으면 이러한 파일에 매우 익숙할 것입니다.
애플리케이션 GUI 만들기
먼저 앱에 대한 간단한 GUI를 만들어 보겠습니다.
MainPage.xaml코드 파일을 두 번 클릭합니다. 빈 앱에서 앱의 GUI에 대한 XAML 템플릿이 비어 있으므로 몇 가지 UI 기능을 추가해야 합니다.아래 코드를
MainPage.xaml에 추가하고<Grid>및</Grid>태그를 바꿉니다.
    <Grid Background="{ThemeResource ApplicationPageBackgroundThemeBrush}">

        <StackPanel Margin="1,0,-1,0">
            <TextBlock x:Name="Menu"
                       FontWeight="Bold"
                       TextWrapping="Wrap"
                       Margin="10,0,0,0"
                       Text="Image Classification"/>
            <TextBlock Name="space" />
            <Button Name="recognizeButton"
                    Content="Pick Image"
                    Click="OpenFileButton_Click"
                    Width="110"
                    Height="40"
                    IsEnabled="True"
                    HorizontalAlignment="Left"/>
            <TextBlock Name="space3" />
            <Button Name="Output"
                    Content="Result is:"
                    Width="110"
                    Height="40"
                    IsEnabled="True"
                    HorizontalAlignment="Left"
                    VerticalAlignment="Top">
            </Button>
            <!--Display the Result-->
            <TextBlock Name="displayOutput"
                       FontWeight="Bold"
                       TextWrapping="Wrap"
                       Margin="25,0,0,0"
                       Text="" Width="1471" />
            <TextBlock Name="space2" />
            <!--Image preview -->
            <Image Name="UIPreviewImage" Stretch="Uniform" MaxWidth="300" MaxHeight="300"/>
        </StackPanel>
    </Grid>
mlgen(Windows ML 코드 생성기)을 사용하여 프로젝트에 모델 추가
mlgen(Windows Machine Learning 코드 생성기)은 UWP 앱에서 WinML API 사용을 시작하는 데 도움이 되는 Visual Studio 확장입니다. 학습된 ONNX 파일이 UWP 프로젝트에 추가되면 템플릿 코드를 생성합니다.
Windows Machine Learning의 mlgen 코드 생성기는 사용자를 위해 Windows ML API를 호출하는 래퍼 클래스가 있는 인터페이스(C#, C++/WinRT 및 C++/CX용)를 만듭니다. 이렇게 하면 프로젝트에서 모델을 쉽게 로드, 바인딩 및 평가할 수 있습니다. 이 자습서에서는 이러한 함수 대부분을 처리하는 데 사용합니다.
코드 생성기는 Visual Studio 2017 이상에서 사용할 수 있습니다. Visual Studio를 사용하는 것이 좋습니다. Windows 10 버전 1903 이상에서는 mlgen이 더 이상 Windows 10 SDK에 포함되지 않으므로 확장을 다운로드하여 설치해야 합니다. 소개 부분에서 이 자습서를 따랐으면 이미 이것을 처리했겠지만, 그렇지 않으면 VS 2019 또는 VS 2017용으로 다운로드해야 합니다.
참고 항목
mlgen에 대한 자세한 내용은 mlgen 설명서를 참조하세요.
아직 설치하지 않은 경우 mlgen을 설치합니다.
Visual Studio의 솔루션 탐색기에서 마우스 오른쪽 단추로
Assets폴더를 클릭하고,Add > Existing Item을 선택합니다.내부의 assets 폴더(
classifierPyTorch [….\classifierPyTorch \Assets])로 이동하여 이전에 여기에 복사한 ONNX 모델을 찾은 다음,add를 선택합니다.VS의 솔루션 탐색기에서 ONNX 모델이 assets 폴더에 추가되면 이제 다음과 같은 두 개의 새 파일이 프로젝트에 있습니다.
-
ImageClassifier.onnx- ONNX 형식의 모델입니다. -
ImageClassifier.cs– 자동으로 생성된 WinML 코드 파일입니다.
- 애플리케이션을 컴파일할 때 모델이 빌드되도록 하려면
ImageClassifier.onnx파일을 선택하고Properties를 선택합니다.Build Action의 경우Content를 선택합니다.
ONNX 파일 코드
이제 ImageClassifier.cs 파일에서 새로 생성된 코드를 살펴보겠습니다.
생성된 코드에는 다음 세 가지 클래스가 포함되어 있습니다.
-
ImageClassifierModel: 모델 인스턴스화 및 모델 평가를 위한 두 가지 메서드를 포함합니다. 기계 학습 모델 표현을 만들고, 세션을 시스템 기본 디바이스에 만들며, 특정 입력과 출력을 모델에 바인딩하고, 모델을 비동기적으로 평가하는 데 도움이 됩니다. -
ImageClassifierInput: 모델에 필요한 입력 형식을 초기화합니다. 모델 입력은 입력 데이터에 대한 모델 요구 사항에 따라 달라집니다. -
ImageClassifierOutput: 모델에서 출력하는 형식을 초기화합니다. 모델 출력은 모델에서 정의하는 방법에 따라 달라집니다.
이 자습서에서는 텐서화(tensorization)를 다루지 않으려고 합니다. 입력 데이터 형식을 변경하고 작업을 더 쉽게 수행할 수 있도록 ImageClassifierInput 클래스를 약간 변경할 것입니다.
-
ImageClassifier.cs파일에서 다음과 같이 변경합니다.
input 변수를 TensorFloat에서 ImageFeatureValue로 변경합니다.
public sealed class ImageClassifierInput
    {
        public ImageFeatureValue input; // shape(-1,3,32,32)
    }
모델 로드
MainPage.xaml.cs파일을 두 번 클릭하여 앱에 대한 코드 숨김을 엽니다.필요한 모든 API에 액세스하려면 "using" 문을 다음으로 바꿉니다.
// Specify all the using statements which give us the access to all the APIs that we'll need
using System;
using System.Threading.Tasks;
using Windows.AI.MachineLearning;
using Windows.Graphics.Imaging;
using Windows.Media;
using Windows.Storage;
using Windows.Storage.Pickers;
using Windows.Storage.Streams;
using Windows.UI.Xaml;
using Windows.UI.Xaml.Controls;
using Windows.UI.Xaml.Media.Imaging;
- 다음 변수 선언을
MainPage함수 위의public MainPage()클래스 내에 추가합니다.
        // All the required fields declaration
        private ImageClassifierModel modelGen;
        private ImageClassifierInput image = new ImageClassifierInput();
        private ImageClassifierOutput results;
        private StorageFile selectedStorageFile;
        private string label = "";
        private float probability = 0;
        private Helper helper = new Helper();

        public enum Labels
        {
            plane,
            car,
            bird,
            cat,
            deer,
            dog,
            frog,
            horse,
            ship,
            truck
        }
이제 LoadModel 메서드를 구현합니다. 이 메서드는 ONNX 모델에 액세스하고 이를 메모리에 저장합니다. 그런 다음, CreateFromStreamAsync 메서드를 사용하여 모델을 LearningModel 개체로 인스턴스화합니다.
LearningModel 클래스는 학습된 기계 학습 모델을 나타냅니다. 인스턴스화되면 LearningModel은 Windows ML과 상호 작용하는 데 사용하는 초기 개체가 됩니다.
모델을 로드하기 위해 LearningModel 클래스에서 몇 가지 정적 메서드를 사용할 수 있습니다. 여기서는 CreateFromStreamAsync 메서드를 사용합니다.
CreateFromStreamAsync 메서드는 mlgen을 사용하여 자동으로 만들어졌으므로 이 메서드를 구현할 필요가 없습니다. 이 메서드는 mlgen에서 생성된 classifier.cs 파일을 두 번 클릭하여 검토할 수 있습니다.
참고 항목
LearningModel 클래스에 대한 자세한 내용은 LearningModel 클래스 설명서를 검토하세요. 모델을 로드하는 추가 방법에 대한 자세한 내용은 모델 로드 설명서를 검토하세요.
-
loadModel메서드에 대한 호출을 주 클래스의 생성자에 추가합니다.
        // The main page to initialize and execute the model.
        public MainPage()
        {
            this.InitializeComponent();
            loadModel();
        }
-
loadModel메서드의 구현을 해당MainPage클래스 내에 추가합니다.
        private async Task loadModel()
        {
            // Get an access the ONNX model and save it in memory.
            StorageFile modelFile = await StorageFile.GetFileFromApplicationUriAsync(new Uri($"ms-appx:///Assets/ImageClassifier.onnx"));
            // Instantiate the model.
            modelGen = await ImageClassifierModel.CreateFromStreamAsync(modelFile);
        }
이미지 로드
- 모델 실행(변환, 바인딩 및 평가, 출력 추출, 결과 표시)을 위한 4가지 메서드 호출 시퀀스를 시작하는 클릭 이벤트를 정의해야 합니다. 다음 메서드를
MainPage.xaml.cs클래스 내의MainPage코드 파일에 추가합니다.
        // Waiting for a click event to select a file
        private async void OpenFileButton_Click(object sender, RoutedEventArgs e)
        {
            if (!await getImage())
            {
                return;
            }
            // After the click event happened and an input selected, begin the model execution.
            // Bind the model input
            await imageBind();
            // Model evaluation
            await evaluate();
            // Extract the results
            extractResult();
            // Display the results
            await displayResult();
        }
- 이제
getImage()메서드를 구현합니다. 이 메서드는 입력 이미지 파일을 선택하고 이를 메모리에 저장합니다. 다음 메서드를MainPage.xaml.cs클래스 내의MainPage코드 파일에 추가합니다.
        // A method to select an input image file
        private async Task<bool> getImage()
        {
            try
            {
                // Trigger file picker to select an image file
                FileOpenPicker fileOpenPicker = new FileOpenPicker();
                fileOpenPicker.SuggestedStartLocation = PickerLocationId.PicturesLibrary;
                fileOpenPicker.FileTypeFilter.Add(".jpg");
                fileOpenPicker.FileTypeFilter.Add(".png");
                fileOpenPicker.ViewMode = PickerViewMode.Thumbnail;
                selectedStorageFile = await fileOpenPicker.PickSingleFileAsync();
                if (selectedStorageFile == null)
                {
                    return false;
                }
            }
            catch (Exception)
            {
                return false;
            }
            return true;
        }
다음으로, 이미지 Bind() 메서드를 구현하여 BGRA8 비트맵 형식의 파일 표현을 가져옵니다. 그러나 먼저 이미지 크기를 조정하는 도우미 클래스를 만듭니다.
- 도우미 파일을 만들려면 마우스 오른쪽 단추로 솔루션 이름(
ClassifierPyTorch)을 클릭한 다음,Add a new item을 선택합니다. 열린 창에서Class를 선택하고 이름을 지정합니다. 여기서는Helper라고 합니다.
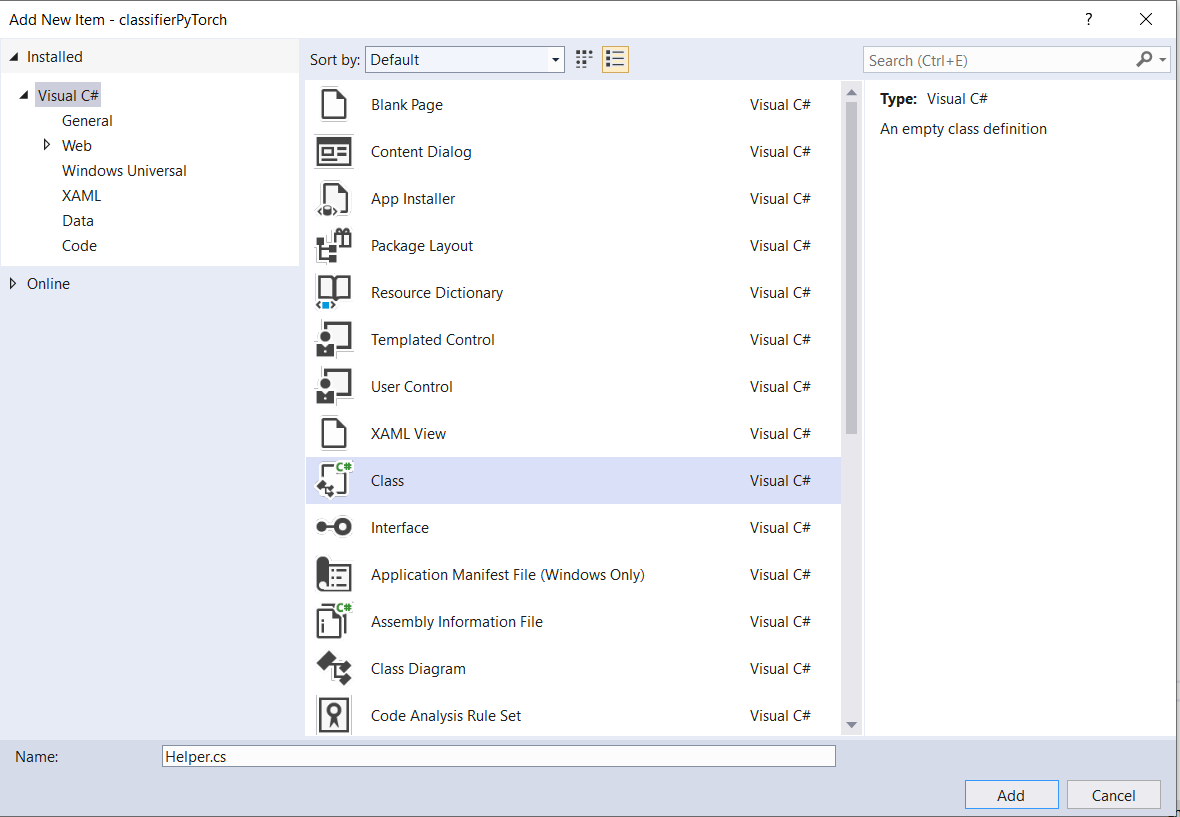
- 새 클래스 파일이 프로젝트 내에 나타납니다. 이 클래스를 열고, 다음 코드를 추가합니다.
using System;
using System.Threading.Tasks;
using Windows.Graphics.Imaging;
using Windows.Media;

namespace classifierPyTorch
{
    public class Helper
    {
        private const int SIZE = 32;
        VideoFrame cropped_vf = null;

        public async Task<VideoFrame> CropAndDisplayInputImageAsync(VideoFrame inputVideoFrame)
        {
            bool useDX = inputVideoFrame.SoftwareBitmap == null;

            BitmapBounds cropBounds = new BitmapBounds();
            uint h = SIZE;
            uint w = SIZE;
            var frameHeight = useDX ? inputVideoFrame.Direct3DSurface.Description.Height : inputVideoFrame.SoftwareBitmap.PixelHeight;
            var frameWidth = useDX ? inputVideoFrame.Direct3DSurface.Description.Width : inputVideoFrame.SoftwareBitmap.PixelWidth;

            var requiredAR = ((float)SIZE / SIZE);
            w = Math.Min((uint)(requiredAR * frameHeight), (uint)frameWidth);
            h = Math.Min((uint)(frameWidth / requiredAR), (uint)frameHeight);
            cropBounds.X = (uint)((frameWidth - w) / 2);
            cropBounds.Y = 0;
            cropBounds.Width = w;
            cropBounds.Height = h;

            cropped_vf = new VideoFrame(BitmapPixelFormat.Bgra8, SIZE, SIZE, BitmapAlphaMode.Ignore);

            await inputVideoFrame.CopyToAsync(cropped_vf, cropBounds, null);
            return cropped_vf;
        }
    }
}
이제 이미지를 적절한 형식으로 변환해 보겠습니다.
ImageClassifierInput 클래스는 모델에 필요한 입력 형식을 초기화합니다. 여기서는 ImageFeatureValue를 예상하도록 코드를 구성했습니다.
ImageFeatureValue 클래스는 모델에 전달하는 데 사용되는 이미지의 속성을 설명합니다.
ImageFeatureValue를 만들려면 CreateFromVideoFrame 메서드를 사용합니다. 이 경우에 대한 이유 및 이러한 클래스와 메서드가 작동하는 방식에 대한 자세한 내용은 ImageFeatureValue 클래스 설명서를 참조하세요.
참고 항목
이 자습서에서는 텐서 대신 ImageFeatureValue 클래스를 사용합니다. Windows ML에서 모델의 색 형식을 지원하지 않는 경우 이 클래스는 선택할 수 없습니다. 이미지 변환 및 텐서화를 사용하는 방법에 대한 예제는 사용자 지정 텐서화 샘플을 참조하세요.
-
convert()메서드의 구현을 MainPage 클래스 내의MainPage.xaml.cs코드 파일에 추가합니다. 변환 메서드는 입력 파일을 BGRA8 형식으로 표현합니다.
// A method to convert and bide the input image.
private async Task imageBind ()
{
    UIPreviewImage.Source = null;
    try
    {
        SoftwareBitmap softwareBitmap;
        using (IRandomAccessStream stream = await selectedStorageFile.OpenAsync(FileAccessMode.Read))
        {
            // Create the decoder from the stream
            BitmapDecoder decoder = await BitmapDecoder.CreateAsync(stream);
            // Get the SoftwareBitmap representation of the file in BGRA8 format
            softwareBitmap = await decoder.GetSoftwareBitmapAsync();
            softwareBitmap = SoftwareBitmap.Convert(softwareBitmap, BitmapPixelFormat.Bgra8, BitmapAlphaMode.Premultiplied);
        }
        // Display the image
        SoftwareBitmapSource imageSource = new SoftwareBitmapSource();
        await imageSource.SetBitmapAsync(softwareBitmap);
        UIPreviewImage.Source = imageSource;

        // Encapsulate the image within a VideoFrame to be bound and evaluated
        VideoFrame inputImage = VideoFrame.CreateWithSoftwareBitmap(softwareBitmap);
        // Resize the image size to 32x32
        inputImage=await helper.CropAndDisplayInputImageAsync(inputImage);
        // Bind the model input with image
        ImageFeatureValue imageTensor = ImageFeatureValue.CreateFromVideoFrame(inputImage);
        image.modelInput = imageTensor;

        // Encapsulate the image within a VideoFrame to be bound and evaluated
        VideoFrame inputImage = VideoFrame.CreateWithSoftwareBitmap(softwareBitmap);
        // bind the input image
        ImageFeatureValue imageTensor = ImageFeatureValue.CreateFromVideoFrame(inputImage);
        image.modelInput = imageTensor;
    }
    catch (Exception e)
    {
    }
}
모델 바인딩 및 평가
다음으로, 모델을 기반으로 하여 세션을 만들고, 세션의 입력과 출력을 바인딩하고, 모델을 평가합니다.
모델을 바인딩하는 세션 만들기
세션을 만들려면 LearningModelSession 클래스를 사용합니다. 이 클래스는 기계 학습 모델을 평가하고, 모델을 디바이스에 바인딩한 다음, 모델을 실행하고 평가하는 데 사용됩니다. 컴퓨터의 특정 디바이스에서 모델을 실행하는 세션을 만드는 경우 해당 디바이스를 선택할 수 있습니다. 기본 디바이스는 CPU입니다.
참고 항목
디바이스를 선택하는 방법에 대한 자세한 내용은 세션 만들기 설명서를 검토하세요.
모델 입력 및 출력 바인딩
입력과 출력을 바인딩하려면 LearningModelBinding 클래스를 사용합니다. 기계 학습 모델에는 모델 내외부로 정보를 전달하는 입력 및 출력 기능이 있습니다. 필요한 기능은 Windows ML API에서 지원해야 합니다.
LearningModelBinding 클래스는 값을 명명된 입력 및 출력 기능에 바인딩하기 위해 LearningModelSession에 적용됩니다.
바인딩의 구현은 mlgen에서 자동으로 생성되므로 사용자가 처리할 필요가 없습니다. 바인딩은 LearningModelBinding 클래스의 미리 정의된 메서드를 호출하여 구현됩니다. 여기서는 Bind 메서드를 사용하여 값을 명명된 기능 형식에 바인딩합니다.
모델 평가:
모델과 바인딩된 값을 모델의 입력과 출력에 바인딩하는 세션이 만들어지면 모델의 입력을 평가하고 예측을 얻을 수 있습니다. 모델 실행을 실행하려면 LearningModelSession에서 미리 정의된 평가 메서드 중 하나를 호출해야 합니다. 여기서는 EvaluateAsync 메서드를 사용합니다.
CreateFromStreamAsync와 마찬가지로 EvaluateAsync 메서드도 WinML 코드 생성기에서 자동으로 생성되므로 이 메서드를 구현할 필요가 없습니다. 이 메서드는 ImageClassifier.cs 파일에서 검토할 수 있습니다.
EvaluateAsync 메서드는 바인딩에 이미 바인딩된 기능 값을 사용하여 기계 학습 모델을 비동기적으로 평가합니다.
LearningModelSession을 사용하여 세션을 만들고, LearningModelBinding을 사용하여 입력과 출력을 바인딩하여 모델 평가를 실행하고, LearningModelEvaluationResult 클래스를 사용하여 모델의 출력 기능을 가져옵니다.
참고 항목
모델을 실행하는 다른 평가 메서드에 대한 자세한 내용은 LearningModelSession 클래스 설명서를 검토하여 LearningModelSession에서 구현할 수 있는 메서드를 확인하세요.
- 세션을 만들고 모델을 바인딩하여 평가하기 위해 다음 메서드를 MainPage 클래스 내의
MainPage.xaml.cs코드 파일에 추가합니다.
        // A method to evaluate the model
        private async Task evaluate()
        {
            results = await modelGen.EvaluateAsync(image);
        }
결과 추출 및 표시
이제 모델 출력을 추출하고 올바른 결과를 표시해야 합니다. 이렇게 하려면 extractResult 및 displayResult 메서드를 구현합니다. 올바른 레이블을 반환하려면 가장 높은 확률을 찾아야 합니다.
-
extractResult메서드를MainPage.xaml.cs클래스 내의MainPage코드 파일에 추가합니다.
        // A method to extract output from the model
        private void extractResult()
        {
            // Retrieve the results of evaluation
            var mResult = results.modelOutput as TensorFloat;
            // convert the result to vector format
            var resultVector = mResult.GetAsVectorView();

            probability = 0;
            int index = 0;
            // find the maximum probability
            for(int i=0; i<resultVector.Count; i++)
            {
                var elementProbability=resultVector[i];
                if (elementProbability > probability)
                {
                    index = i;
                }
            }
            label = ((Labels)index).ToString();
        }
-
displayResult메서드를MainPage.xaml.cs클래스 내의MainPage코드 파일에 추가합니다.
        private async Task displayResult()
        {
            displayOutput.Text = label;
        }
완료! 분류 모델을 테스트하기 위해 기본 GUI를 사용하여 Windows Machine Learning 앱을 성공적으로 만들었습니다. 다음 단계에서는 애플리케이션을 시작하고 Windows 디바이스에서 로컬로 실행합니다.
응용 프로그램 시작
애플리케이션 인터페이스가 완료되고, 모델이 추가되고, Windows ML 코드가 생성되면 애플리케이션을 테스트할 수 있습니다!
개발자 모드를 사용하도록 설정하고, Visual Studio에서 애플리케이션을 테스트합니다. 위쪽 도구 모음의 드롭다운 메뉴가 Debug로 설정되어 있는지 확인합니다. 디바이스가 64비트인 경우 솔루션 플랫폼을 x64로 변경하거나 32비트인 경우 x86으로 변경하여 로컬 컴퓨터에서 프로젝트를 실행합니다.
이 모델은 비행기, 자동차, 새, 고양이, 사슴, 개, 개구리, 말, 배, 트럭과 같은 이미지를 분류하도록 학습되었습니다. 앱을 테스트하기 위해 이 프로젝트를 위해 빌드된 레고 자동차의 이미지를 사용합니다. 앱에서 이미지의 콘텐츠를 분류하는 방법을 살펴보겠습니다.

이 이미지를 로컬 디바이스에 저장하여 앱을 테스트합니다. 필요한 경우 이미지 형식을
.jpg로 변경합니다. 로컬 디바이스의 다른 관련 이미지를 .jpg 또는 .png 형식으로 추가할 수도 있습니다.프로젝트를 실행하려면 도구 모음에서
Start Debugging단추를 선택하거나F5키를 누릅니다.애플리케이션이 시작되면 [이미지 선택]을 누르고 로컬 디바이스에서 이미지를 선택합니다.

결과가 화면에 바로 표시됩니다. 보시다시피 Windows ML 앱에서 이미지를 자동차로 분류했습니다.

요약
모델 만들기에서 성공적인 실행에 이르기까지 첫 번째 Windows Machine Learning 앱을 만들었습니다.
추가 리소스
이 자습서에서 언급한 항목에 대한 자세한 내용은 다음 리소스를 참조하세요.
- Windows ML 도구: Windows ML 대시보드 , WinMLRunner 및 mglen Windows ML 코드 생성기와 같은 도구에 대해 자세히 알아봅니다.
- ONNX 모델: ONNX 형식에 대해 자세히 알아봅니다.
- Windows ML 성능 및 메모리: Windows ML을 사용하여 앱 성능을 관리하는 방법에 대해 자세히 알아봅니다.
- Windows Machine Learning API 참조: Windows ML API의 세 가지 영역에 대해 자세히 알아봅니다.