Windows 앱에서 수동 입력을 용이하게 하는 두 가지 컨트롤인 InkCanvas 및 InkToolbar가 있습니다.
InkCanvas 컨트롤은 기본 Windows Ink 기능을 제공합니다. 펜 입력을 잉크 스트로크(색 및 두께에 대한 기본 설정 사용) 또는 지우기 스트로크로 렌더링하는 데 사용합니다.
InkCanvas 구현 세부 정보는 Windows 앱의 펜 및 스타일러스 상호 작용을 참조하세요.
완전히 투명한 오버레이인 InkCanvas는 잉크 스트로크 속성을 설정하기 위한 기본 제공 UI를 제공하지 않습니다. 기본 수동 입력 환경을 변경하고 사용자가 잉크 스트로크 속성을 설정하고 다른 사용자 지정 수동 입력 기능을 지원하도록 하려면 다음 두 가지 옵션이 있습니다.
코드 숨김에서는 InkCanvas에 바인딩된 InkPresenter 기본 개체를 사용하십시오.
InkPresenter API는 수동 입력 환경의 광범위한 사용자 지정을 지원합니다. 자세한 내용은 Windows 앱의 펜 및 스타일러스 상호 작용을 참조하세요.
InkToolbar를 InkCanvas에 바인딩합니다. 기본적으로 InkToolbar는 스트로크 크기, 잉크 색 및 펜 팁과 같은 잉크 관련 기능을 활성화하기 위한 사용자 지정 가능하고 확장 가능한 단추 컬렉션을 제공합니다.
이 항목에서는 InkToolbar에 대해 설명합니다.
중요 API: InkCanvas 클래스, InkToolbar 클래스, InkPresenter 클래스, Windows.UI.Input.Inking
기본 InkToolbar
기본적으로 InkToolbar에는 그리기, 지우기, 강조 표시 및 스텐실(눈금자 또는 프로트랙터) 표시 단추가 포함되어 있습니다. 기능에 따라 잉크 색, 스트로크 두께, 모든 잉크 지우기 등의 기타 설정 및 명령이 플라이아웃에 제공됩니다.
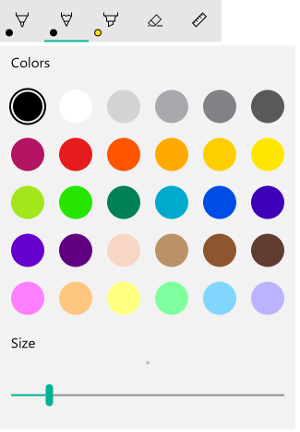
기본 Windows Ink 도구 모음
수동 입력 앱에 기본 InkToolbar 를 추가하려면 InkCanvas 와 동일한 페이지에 배치하고 두 컨트롤을 연결하기만 하면 됩니다.
- MainPage.xaml에서 잉크 입력 표면에 대한 컨테이너 개체(이 예제에서는 Grid 컨트롤을 사용하여)를 선언합니다.
- InkCanvas 개체를 컨테이너의 자식으로 선언합니다. InkCanvas 크기는 컨테이너에서 상속됩니다.
- InkToolbar를 선언하고 TargetInkCanvas 특성을 사용하여 InkCanvas에 바인딩합니다.
비고
InkCanvas 이후에 InkToolbar가 선언되었는지 확인합니다. 그렇지 않으면 InkCanvas 오버레이가 InkToolbar를 불활성화시켜 액세스할 수 없게 됩니다.
<Grid Background="{ThemeResource ApplicationPageBackgroundThemeBrush}">
    <Grid.RowDefinitions>
        <RowDefinition Height="Auto"/>
        <RowDefinition Height="*"/>
    </Grid.RowDefinitions>
    <StackPanel x:Name="HeaderPanel" Orientation="Horizontal" Grid.Row="0">
        <TextBlock x:Name="Header"
                   Text="Basic ink sample"
                   Style="{ThemeResource HeaderTextBlockStyle}"
                   Margin="10,0,0,0" />
    </StackPanel>
    <Grid Grid.Row="1">
        <Image Source="Assets\StoreLogo.png" />
        <InkCanvas x:Name="inkCanvas" />
        <InkToolbar x:Name="inkToolbar"
          VerticalAlignment="Top"
          TargetInkCanvas="{x:Bind inkCanvas}" />
    </Grid>
</Grid>
기본 사용자 지정
이 섹션에서는 몇 가지 기본 Windows Ink 도구 모음 사용자 지정 시나리오에 대해 설명합니다.
위치 및 방향 지정
앱에 잉크 도구 모음을 추가하는 경우 도구 모음의 기본 위치와 방향을 그대로 적용하거나 앱 또는 사용자가 요구하는 대로 설정할 수 있습니다.
XAML
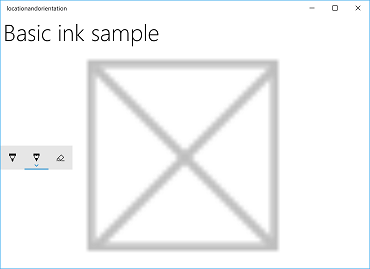
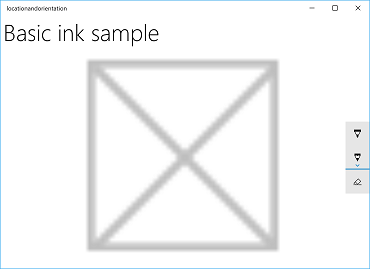
VerticalAlignment, HorizontalAlignment 및 Orientation 속성을 통해 도구 모음의 위치와 방향을 명시적으로 지정합니다.
| Default | Explicit |
|---|---|
|
|
| Windows Ink 도구 모음 기본 위치 및 방향 | Windows Ink 도구 모음 명시적 위치 및 방향 |
XAML에서 잉크 도구 모음의 위치와 방향을 명시적으로 설정하는 코드는 다음과 같습니다.
<InkToolbar x:Name="inkToolbar"
    VerticalAlignment="Center"
    HorizontalAlignment="Right"
    Orientation="Vertical"
    TargetInkCanvas="{x:Bind inkCanvas}" />
사용자 기본 설정 또는 디바이스 상태에 따라 초기화
경우에 따라 사용자 기본 설정 또는 디바이스 상태에 따라 잉크 도구 모음의 위치와 방향을 설정할 수 있습니다. 다음 예제에서는 설정 > 장치 > 펜 및 Windows 잉크 > 펜 > 왼손 또는 오른손 중 쓰기 손 선택에서 지정한 기본 설정에 따라 잉크 도구 모음의 위치와 방향을 설정하는 방법을 보여줍니다.
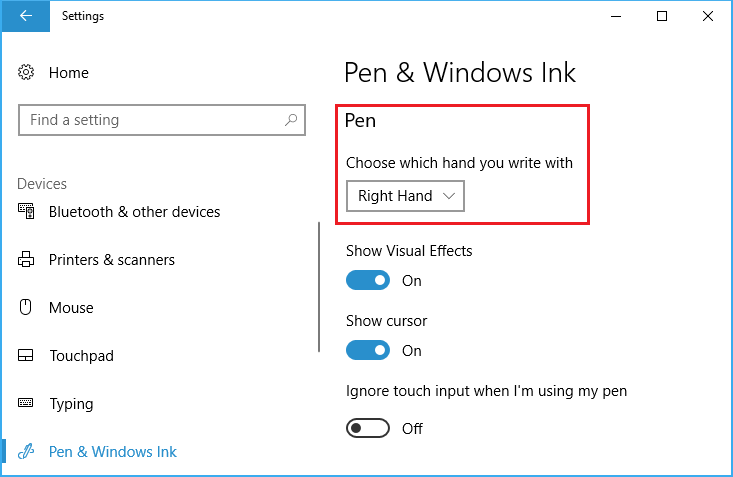
주된 손 설정
Windows.UI.ViewManagement의 HandPreference 속성을 통해 이 설정을 쿼리하고 반환된 값에 따라 HorizontalAlignment 를 설정할 수 있습니다. 이 예제에서는 왼손잡이가 사용할 경우 앱 왼쪽에 도구 모음을 배치하고, 오른손잡이가 사용할 경우 앱 오른쪽에 도구 모음을 배치합니다.
잉크 도구 모음 위치 및 방향 샘플(기본)에서 이 샘플을 다운로드하세요.
public MainPage()
{
    this.InitializeComponent();

    Windows.UI.ViewManagement.UISettings settings =
        new Windows.UI.ViewManagement.UISettings();
    HorizontalAlignment alignment =
        (settings.HandPreference ==
            Windows.UI.ViewManagement.HandPreference.LeftHanded) ?
            HorizontalAlignment.Left : HorizontalAlignment.Right;
    inkToolbar.HorizontalAlignment = alignment;
}
사용자 또는 디바이스 상태에 동적으로 조정
바인딩을 사용하여 사용자 기본 설정, 디바이스 설정 또는 디바이스 상태의 변경 내용을 기반으로 UI 업데이트를 돌볼 수도 있습니다. 다음 예제에서는 이전 예제를 확장하고 바인딩, ViewMOdel 개체 및 INotifyPropertyChanged 인터페이스를 사용하여 디바이스 방향에 따라 잉크 도구 모음을 동적으로 배치하는 방법을 보여 줍니다.
잉크 도구 모음 위치 및 방향 샘플(동적)에서 이 샘플 다운로드
먼저 ViewModel을 추가해 보겠습니다.
프로젝트에 새 폴더를 추가하고 ViewModels라고 합니다.
ViewModels 폴더에 새 클래스를 추가합니다(이 예제에서는 InkToolbarSnippetHostViewModel.cs 호출).
비고
애플리케이션의 수명 동안 이 유형의 개체가 하나만 필요하므로 Singleton 패턴을 사용했습니다.
파일에 네임스페이스를 추가
using System.ComponentModel합니다.인스턴스라는 정적 멤버 변수와 Instance라는 정적 읽기 전용 속성을 추가합니다. 인스턴스 속성을 통해서만 이 클래스에 액세스할 수 있도록 생성자를 비공개로 만듭니다.
비고
이 클래스는 클라이언트(일반적으로 바인딩 클라이언트)에게 속성 값이 변경되었음을 알리는 데 사용되는 INotifyPropertyChanged 인터페이스에서 상속됩니다. 이를 사용하여 디바이스 방향에 대한 변경 내용을 처리합니다(이 코드를 확장하고 이후 단계에서 자세히 설명하겠습니다).
using System.ComponentModel;

namespace locationandorientation.ViewModels
{
    public class InkToolbarSnippetHostViewModel : INotifyPropertyChanged
    {
        private static InkToolbarSnippetHostViewModel instance;

        public static InkToolbarSnippetHostViewModel Instance
        {
            get
            {
                if (null == instance)
                {
                    instance = new InkToolbarSnippetHostViewModel();
                }
                return instance;
            }
        }
    }

    private InkToolbarSnippetHostViewModel() { }
}
InkToolbarSnippetHostViewModel 클래스에 LeftHandedLayout (이전 XAML 전용 예제와 동일한 기능) 및 PortraitLayout (디바이스 방향)의 두 부울 속성을 추가합니다.
비고
PortraitLayout 속성은 설정 가능하며 PropertyChanged 이벤트에 대한 정의를 포함합니다.
public bool LeftHandedLayout
{
    get
    {
        bool leftHandedLayout = false;
        Windows.UI.ViewManagement.UISettings settings =
            new Windows.UI.ViewManagement.UISettings();
        leftHandedLayout = (settings.HandPreference ==
            Windows.UI.ViewManagement.HandPreference.LeftHanded);
        return leftHandedLayout;
    }
}

public bool portraitLayout = false;
public bool PortraitLayout
{
    get
    {
        Windows.UI.ViewManagement.ApplicationViewOrientation winOrientation =
            Windows.UI.ViewManagement.ApplicationView.GetForCurrentView().Orientation;
        portraitLayout =
            (winOrientation ==
                Windows.UI.ViewManagement.ApplicationViewOrientation.Portrait);
        return portraitLayout;
    }
    set
    {
        if (value.Equals(portraitLayout)) return;
        portraitLayout = value;
        PropertyChanged?.Invoke(this, new PropertyChangedEventArgs("PortraitLayout"));
    }
}
이제 프로젝트에 몇 가지 변환기 클래스를 추가해 보겠습니다. 각 클래스에는 맞춤 값( HorizontalAlignment 또는 VerticalAlignment)을 반환하는 Convert 개체가 포함되어 있습니다.
프로젝트에 새 폴더를 추가하고 변환기를 호출합니다.
Converters 폴더에 두 개의 새 클래스를 추가합니다(이 예제에서는 HorizontalAlignmentFromHandednessConverter.cs 호출하고 VerticalAlignmentFromAppViewConverter.cs).
각 파일에
using Windows.UI.Xaml및using Windows.UI.Xaml.Data네임스페이스를 추가합니다.각 클래스를
public변경하고 IValueConverter 인터페이스를 구현하도록 지정합니다.여기에 표시된 것처럼 Convert 및 ConvertBack 메서드를 각 파일에 추가합니다(ConvertBack 메서드를 구현하지 않은 상태로 둡니다).
- HorizontalAlignmentFromHandednessConverter는 오른손잡이 사용자를 위해 앱의 오른쪽에 잉크 도구 모음을 배치하고 왼손 사용자를 위해 앱의 왼쪽에 배치합니다.
using System; using Windows.UI.Xaml; using Windows.UI.Xaml.Data; namespace locationandorientation.Converters { public class HorizontalAlignmentFromHandednessConverter : IValueConverter { public object Convert(object value, Type targetType, object parameter, string language) { bool leftHanded = (bool)value; HorizontalAlignment alignment = HorizontalAlignment.Right; if (leftHanded) { alignment = HorizontalAlignment.Left; } return alignment; } public object ConvertBack(object value, Type targetType, object parameter, string language) { throw new NotImplementedException(); } } }- VerticalAlignmentFromAppViewConverter는 잉크 도구 모음을 세로 모드일 때 앱의 가운데에, 가로 모드일 때 앱의 맨 위에 배치합니다. 이것은 유용성을 향상시키기 위한 것이지만, 단순히 시범적으로 선택된 것입니다.
using System;

using Windows.UI.Xaml;
using Windows.UI.Xaml.Data;

namespace locationandorientation.Converters
{
    public class VerticalAlignmentFromAppViewConverter : IValueConverter
    {
        public object Convert(object value, Type targetType,
            object parameter, string language)
        {
            bool portraitOrientation = (bool)value;
            VerticalAlignment alignment = VerticalAlignment.Top;
            if (portraitOrientation)
            {
                alignment = VerticalAlignment.Center;
            }
            return alignment;
        }

        public object ConvertBack(object value, Type targetType,
            object parameter, string language)
        {
            throw new NotImplementedException();
        }
    }
}
이제 MainPage.xaml.cs 파일을 엽니다.
- 네임스페이스 목록에 우리의 ViewModel을 연결하기 위해
using using locationandorientation.ViewModels을 추가합니다. - 네임스페이스 목록에 추가하여
using Windows.UI.ViewManagement디바이스 방향의 변경 내용을 수신 대기할 수 있도록 합니다. - WindowSizeChangedEventHandler 코드를 추가합니다.
- 뷰의 DataContext 를 InkToolbarSnippetHostViewModel 클래스의 싱글톤 인스턴스로 설정합니다.
using Windows.UI.Xaml; using Windows.UI.Xaml.Controls; using locationandorientation.ViewModels; using Windows.UI.ViewManagement; namespace locationandorientation { public sealed partial class MainPage : Page { public MainPage() { this.InitializeComponent(); Window.Current.SizeChanged += (sender, args) => { ApplicationView currentView = ApplicationView.GetForCurrentView(); if (currentView.Orientation == ApplicationViewOrientation.Landscape) { InkToolbarSnippetHostViewModel.Instance.PortraitLayout = false; } else if (currentView.Orientation == ApplicationViewOrientation.Portrait) { InkToolbarSnippetHostViewModel.Instance.PortraitLayout = true; } }; DataContext = InkToolbarSnippetHostViewModel.Instance; } } }- 네임스페이스 목록에 우리의 ViewModel을 연결하기 위해
다음으로 MainPage.xaml 파일을 엽니다.
xmlns:converters="using:locationandorientation.Converters"을/를Page요소에 추가하여 변환기에 바인딩합니다.<Page x:Class="locationandorientation.MainPage" xmlns="http://schemas.microsoft.com/winfx/2006/xaml/presentation" xmlns:x="http://schemas.microsoft.com/winfx/2006/xaml" xmlns:local="using:locationandorientation" xmlns:converters="using:locationandorientation.Converters" xmlns:d="http://schemas.microsoft.com/expression/blend/2008" xmlns:mc="http://schemas.openxmlformats.org/markup-compatibility/2006" mc:Ignorable="d">PageResources요소를 추가하고 변환기 참조를 지정합니다.<Page.Resources> <converters:HorizontalAlignmentFromHandednessConverter x:Key="HorizontalAlignmentConverter"/> <converters:VerticalAlignmentFromAppViewConverter x:Key="VerticalAlignmentConverter"/> </Page.Resources>InkCanvas 및 InkToolbar 요소를 추가하고 InkToolbar의 VerticalAlignment 및 HorizontalAlignment 속성을 바인딩합니다.
<InkCanvas x:Name="inkCanvas" />
<InkToolbar x:Name="inkToolbar"
            VerticalAlignment="{Binding PortraitLayout, Converter={StaticResource VerticalAlignmentConverter} }"
            HorizontalAlignment="{Binding LeftHandedLayout, Converter={StaticResource HorizontalAlignmentConverter} }"
            Orientation="Vertical"
            TargetInkCanvas="{x:Bind inkCanvas}" />
InkToolbarSnippetHostViewModel.cs 파일로 돌아가서
InkToolbarSnippetHostViewModel클래스에PortraitLayout및LeftHandedLayout불린 속성을 추가하고, 해당 속성의PortraitLayout값이 변경될 때 다시 바인딩할 수 있도록 지원합니다.public bool LeftHandedLayout { get { bool leftHandedLayout = false; Windows.UI.ViewManagement.UISettings settings = new Windows.UI.ViewManagement.UISettings(); leftHandedLayout = (settings.HandPreference == Windows.UI.ViewManagement.HandPreference.LeftHanded); return leftHandedLayout; } } public bool portraitLayout = false; public bool PortraitLayout { get { Windows.UI.ViewManagement.ApplicationViewOrientation winOrientation = Windows.UI.ViewManagement.ApplicationView.GetForCurrentView().Orientation; portraitLayout = (winOrientation == Windows.UI.ViewManagement.ApplicationViewOrientation.Portrait); return portraitLayout; } set { if (value.Equals(portraitLayout)) return; portraitLayout = value; PropertyChanged?.Invoke(this, new PropertyChangedEventArgs("PortraitLayout")); } } #region INotifyPropertyChanged Members public event PropertyChangedEventHandler PropertyChanged; protected void OnPropertyChanged(string property) { PropertyChanged?.Invoke(this, new PropertyChangedEventArgs(property)); } #endregion
이제 사용자의 주 손잡이 선호도에 맞게 조정되고 사용자 디바이스의 방향에 동적으로 반응하는 디지털 잉크 앱이 있어야 합니다.
선택한 단추 지정

초기화 시 연필 단추가 선택된 Windows Ink 도구 모음
기본적으로 앱이 시작되고 도구 모음이 초기화될 때 첫 번째(또는 맨 왼쪽) 단추가 선택됩니다. 기본 Windows Ink 도구 모음에서 볼펜 단추입니다.
프레임워크는 기본 제공 단추의 순서를 정의하므로 첫 번째 단추는 기본적으로 활성화하려는 펜이나 도구가 아닐 수 있습니다.
이 기본 동작을 재정의하고 도구 모음에서 선택한 단추를 지정할 수 있습니다.
이 예제에서는 연필 단추가 선택되고 연필이 활성화된(볼펜 대신) 기본 도구 모음을 초기화합니다.
- 이전 예제의 InkCanvas 및 InkToolbar에 대해 XAML 선언을 사용합니다.
- 코드 숨김에서 InkToolbar 개체의 Loaded 이벤트에 대한 처리기를 설정합니다.
/// <summary>
/// An empty page that can be used on its own or navigated to within a Frame.
/// Here, we set up InkToolbar event listeners.
/// </summary>
public MainPage_CodeBehind()
{
    this.InitializeComponent();
    // Add handlers for InkToolbar events.
    inkToolbar.Loaded += inkToolbar_Loaded;
}
Loaded 이벤트에 대한 처리기에서:
- 기본 제공 InkToolbarPencilButton에 대한 참조를 가져옵니다.
GetToolButton 메서드에서 InkToolbarTool.Pencil 개체를 전달하면 InkToolbarPencilButton에 대한 InkToolbarToolButton 개체가 반환됩니다.
- ActiveTool을 이전 단계에서 반환된 개체로 설정합니다.
/// <summary>
/// Handle the Loaded event of the InkToolbar.
/// By default, the active tool is set to the first tool on the toolbar.
/// Here, we set the active tool to the pencil button.
/// </summary>
/// <param name="sender"></param>
/// <param name="e"></param>
private void inkToolbar_Loaded(object sender, RoutedEventArgs e)
{
    InkToolbarToolButton pencilButton = inkToolbar.GetToolButton(InkToolbarTool.Pencil);
    inkToolbar.ActiveTool = pencilButton;
}
기본 제공 단추 지정

초기화에 포함된 특정 단추
언급했듯이 Windows Ink 도구 모음에는 기본 제공 단추 컬렉션이 포함되어 있습니다. 이러한 단추는 왼쪽에서 오른쪽으로 다음 순서로 표시됩니다.
- 잉크 도구 모음 볼펜 버튼
- InkToolbarPencilButton (잉크 도구 모음 연필 버튼)
- InkToolbarHighlighterButton
- 잉크 도구 모음 지우개 버튼 (InkToolbarEraserButton)
- InkToolbarRulerButton
이 예제에서는 기본 제공 볼펜, 연필 및 지우개 단추만 사용하여 도구 모음을 초기화합니다.
XAML 또는 코드 숨김을 사용하여 이 작업을 수행할 수 있습니다.
XAML
첫 번째 예제에서 InkCanvas 및 InkToolbar에 대한 XAML 선언을 수정합니다.
- InitialControls 특성을 추가하고 해당 값을 "None"으로 설정합니다. 기본 제공 단추 컬렉션을 지웁니다.
- 앱에 필요한 특정 InkToolbar 단추를 추가합니다. 여기서는 InkToolbarBallpointPenButton, InkToolbarPencilButton 및 InkToolbarEraserButton 만 추가합니다.
비고
단추는 여기에 지정된 순서가 아니라 프레임워크에서 정의한 순서대로 도구 모음에 추가됩니다.
<Grid Background="{ThemeResource ApplicationPageBackgroundThemeBrush}">
    <Grid.RowDefinitions>
        <RowDefinition Height="Auto"/>
        <RowDefinition Height="*"/>
    </Grid.RowDefinitions>
    <StackPanel x:Name="HeaderPanel" Orientation="Horizontal" Grid.Row="0">
        <TextBlock x:Name="Header"
                   Text="Basic ink sample"
                   Style="{ThemeResource HeaderTextBlockStyle}"
                   Margin="10,0,0,0" />
    </StackPanel>
    <Grid Grid.Row="1">
        <Image Source="Assets\StoreLogo.png" />
        <!-- Clear the default InkToolbar buttons by setting InitialControls to None. -->
        <!-- Set the active tool to the pencil button. -->
        <InkCanvas x:Name="inkCanvas" />
        <InkToolbar x:Name="inkToolbar"
                    VerticalAlignment="Top"
                    TargetInkCanvas="{x:Bind inkCanvas}"
                    InitialControls="None">
            <!--
             Add only the ballpoint pen, pencil, and eraser.
             Note that the buttons are added to the toolbar in the order
             defined by the framework, not the order we specify here.
            -->
            <InkToolbarEraserButton />
            <InkToolbarBallpointPenButton />
            <InkToolbarPencilButton/>
        </InkToolbar>
    </Grid>
</Grid>
코드 숨김
- 첫 번째 예제에서 InkCanvas 및 InkToolbar에 대한 XAML 선언을 사용합니다.
<Grid Background="{ThemeResource ApplicationPageBackgroundThemeBrush}">
    <Grid.RowDefinitions>
        <RowDefinition Height="Auto"/>
        <RowDefinition Height="*"/>
    </Grid.RowDefinitions>
    <StackPanel x:Name="HeaderPanel" Orientation="Horizontal" Grid.Row="0">
        <TextBlock x:Name="Header"
                   Text="Basic ink sample"
                   Style="{ThemeResource HeaderTextBlockStyle}"
                   Margin="10,0,0,0" />
    </StackPanel>
    <Grid Grid.Row="1">
        <Image Source="Assets\StoreLogo.png" />
        <InkCanvas x:Name="inkCanvas" />
        <InkToolbar x:Name="inkToolbar"
        VerticalAlignment="Top"
        TargetInkCanvas="{x:Bind inkCanvas}" />
    </Grid>
</Grid>
- 코드 숨김에서 InkToolbar 개체의 Loading 이벤트에 대한 처리기를 설정합니다.
/// <summary>
/// An empty page that can be used on its own or navigated to within a Frame.
/// Here, we set up InkToolbar event listeners.
/// </summary>
public MainPage_CodeBehind()
{
    this.InitializeComponent();
    // Add handlers for InkToolbar events.
    inkToolbar.Loading += inkToolbar_Loading;
}
- InitialControls를 "None"으로 설정합니다.
- 앱에 필요한 단추에 대한 개체 참조를 만듭니다. 여기서는 InkToolbarBallpointPenButton, InkToolbarPencilButton 및 InkToolbarEraserButton 만 추가합니다.
비고
단추는 여기에 지정된 순서가 아니라 프레임워크에서 정의한 순서대로 도구 모음에 추가됩니다.
- InkToolbar에 단추를 추가합니다.
/// <summary>
/// Handles the Loading event of the InkToolbar.
/// Here, we identify the buttons to include on the InkToolbar.
/// </summary>
/// <param name="sender">The InkToolbar</param>
/// <param name="args">The InkToolbar event data.
/// If there is no event data, this parameter is null</param>
private void inkToolbar_Loading(FrameworkElement sender, object args)
{
    // Clear all built-in buttons from the InkToolbar.
    inkToolbar.InitialControls = InkToolbarInitialControls.None;

    // Add only the ballpoint pen, pencil, and eraser.
    // Note that the buttons are added to the toolbar in the order
    // defined by the framework, not the order we specify here.
    InkToolbarBallpointPenButton ballpoint = new InkToolbarBallpointPenButton();
    InkToolbarPencilButton pencil = new InkToolbarPencilButton();
    InkToolbarEraserButton eraser = new InkToolbarEraserButton();
    inkToolbar.Children.Add(eraser);
    inkToolbar.Children.Add(ballpoint);
    inkToolbar.Children.Add(pencil);
}
사용자 지정 단추 및 잉크 입력 기능
InkToolbar를 통해 제공되는 단추(및 관련 수동 입력 기능)의 컬렉션을 사용자 지정하고 확장할 수 있습니다.
InkToolbar는 각기 고유한 두 그룹으로 구성됩니다.
- "도구" 버튼 그룹에는 빌트인 그리기, 지우기 및 강조 표시 버튼이 있습니다. 사용자 지정 펜 및 도구가 여기에 추가됩니다.
메모 기능 선택은 상호 배타적입니다.
- "토글" 버튼 그룹에는 빌트인 눈금자 버튼이 있습니다. 사용자 지정 토글이 여기에 추가됩니다.
메모 기능은 상호 배타적이지 않으며 다른 활성 도구와 동시에 사용할 수 있습니다.
애플리케이션 및 필요한 잉크 기능에 따라, 다음 버튼(사용자 지정 잉크 기능에 바인딩됨)을 InkToolbar에 추가할 수 있습니다.
- 사용자 지정 펜 – 잉크 색상표 및 펜 팁 속성(예: 모양, 회전 및 크기)이 호스트 앱에서 정의되는 펜입니다.
- 사용자 지정 도구 – 호스트 앱에서 정의한 도구 중 펜이 아닌 도구입니다.
- 사용자 지정 토글 – 앱 정의 기능의 상태를 켜거나 끄도록 설정합니다. 이 기능을 키면, 기능이 활성 도구와 함께 작동합니다.
메모 기본 제공 단추의 표시 순서는 변경할 수 없습니다. 기본 표시 순서는 볼펜, 연필, 형광펜, 지우개 및 눈금자 순입니다. 사용자 지정 펜은 마지막 기본 펜에 추가되고, 마지막 펜 버튼과 지우개 버튼 사이에 사용자 지정 도구 단추가 추가되며 눈금자 버튼 뒤에 사용자 지정 토글 버튼이 추가됩니다. (사용자 지정 버튼은 지정된 순서대로 추가됩니다.)
사용자 지정 펜
사용자 지정 펜(사용자 지정 펜 단추를 통해 활성화됨)을 만들어 잉크 색상표 및 펜 팁 속성(예: 도형, 회전 및 크기)을 정의할 수 있습니다.
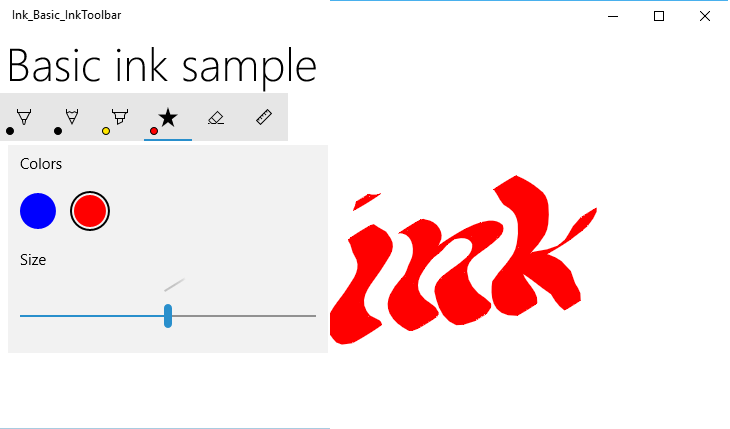
사용자 지정 서예 펜 단추
이 예에서는 기본적인 서예 필획을 가능하게 하는 광폭 팁으로 사용자 지정 펜을 정의합니다. 또한 단추 플라이아웃에 표시되는 색상표에서 브러시 컬렉션을 사용자 지정합니다.
코드 숨김
먼저 사용자 지정 펜을 정의하고 코드 비하인드에서 그리기 특성을 지정합니다. 나중에 XAML에서 이 사용자 지정 펜을 참조합니다.
- 솔루션 탐색기에서 프로젝트를 마우스 오른쪽 단추로 클릭하고 추가 -> 새 항목을 선택합니다.
- Visual C# -> 코드에서 새 클래스 파일을 추가하고 CalligraphicPen.cs 호출합니다.
- Calligraphic.cs의 기본 using 블록을 다음으로 바꿉니다.
using System.Numerics;
using Windows.UI;
using Windows.UI.Input.Inking;
using Windows.UI.Xaml.Controls;
using Windows.UI.Xaml.Media;
- CalligraphicPen 클래스가 InkToolbarCustomPen에서 파생되도록 지정합니다.
class CalligraphicPen : InkToolbarCustomPen
{
}
- CreateInkDrawingAttributesCore를 재정의하여 고유한 브러시 및 스트로크 크기를 지정합니다.
class CalligraphicPen : InkToolbarCustomPen
{
    protected override InkDrawingAttributes
      CreateInkDrawingAttributesCore(Brush brush, double strokeWidth)
    {
    }
}
- InkDrawingAttributes 개체를 만들고 펜 팁 모양, 팁 회전, 스트로크 크기 및 잉크 색을 설정합니다.
class CalligraphicPen : InkToolbarCustomPen
{
    protected override InkDrawingAttributes
      CreateInkDrawingAttributesCore(Brush brush, double strokeWidth)
    {
        InkDrawingAttributes inkDrawingAttributes =
          new InkDrawingAttributes();
        inkDrawingAttributes.PenTip = PenTipShape.Circle;
        inkDrawingAttributes.Size =
          new Windows.Foundation.Size(strokeWidth, strokeWidth * 20);
        SolidColorBrush solidColorBrush = brush as SolidColorBrush;
        if (solidColorBrush != null)
        {
            inkDrawingAttributes.Color = solidColorBrush.Color;
        }
        else
        {
            inkDrawingAttributes.Color = Colors.Black;
        }

        Matrix3x2 matrix = Matrix3x2.CreateRotation(45);
        inkDrawingAttributes.PenTipTransform = matrix;

        return inkDrawingAttributes;
    }
}
XAML
다음으로 MainPage.xaml에서 사용자 지정 펜에 필요한 참조를 추가합니다.
- CalligraphicPen.cs 정의된 사용자 지정 펜()과 사용자 지정 펜(
CalligraphicPen)에서 지원하는 브러시 컬렉션 에 대한 참조를 만드는 로컬 페이지 리소스 사전을CalligraphicPenPalette선언합니다.
<Page.Resources>
    <!-- Add the custom CalligraphicPen to the page resources. -->
    <local:CalligraphicPen x:Key="CalligraphicPen" />
    <!-- Specify the colors for the palette of the custom pen. -->
    <BrushCollection x:Key="CalligraphicPenPalette">
        <SolidColorBrush Color="Blue" />
        <SolidColorBrush Color="Red" />
    </BrushCollection>
</Page.Resources>
- 그런 다음 InkToolbarCustomPenButton 하위 요소가 있는 InkToolbar를 추가합니다.
사용자 지정 펜 단추에는 페이지 리소스에 선언된 두 개의 정적 리소스 참조가 CalligraphicPen포함됩니다. CalligraphicPenPalette
또한 스트로크 크기 슬라이더(MinStrokeWidth, MaxStrokeWidth 및 SelectedStrokeWidth), 선택한 브러시(SelectedBrushIndex) 및 사용자 지정 펜 단추(SymbolIcon)의 아이콘에 대한 범위도 지정합니다.
<Grid Grid.Row="1">
    <InkCanvas x:Name="inkCanvas" />
    <InkToolbar x:Name="inkToolbar"
                VerticalAlignment="Top"
                TargetInkCanvas="{x:Bind inkCanvas}">
        <InkToolbarCustomPenButton
            CustomPen="{StaticResource CalligraphicPen}"
            Palette="{StaticResource CalligraphicPenPalette}"
            MinStrokeWidth="1" MaxStrokeWidth="3" SelectedStrokeWidth="2"
            SelectedBrushIndex ="1">
            <SymbolIcon Symbol="Favorite" />
            <InkToolbarCustomPenButton.ConfigurationContent>
                <InkToolbarPenConfigurationControl />
            </InkToolbarCustomPenButton.ConfigurationContent>
        </InkToolbarCustomPenButton>
    </InkToolbar>
</Grid>
사용자 지정 토글
사용자 지정 토글(사용자 지정 토글 단추를 통해 활성화됨)을 만들어 앱 정의 기능의 상태를 켜거나 끌 수 있습니다. 이 기능을 키면, 기능이 활성 도구와 함께 작동합니다.
이 예제에서는 터치 입력을 사용하여 수동 입력을 사용하도록 설정하는 사용자 지정 토글 단추를 정의합니다(기본적으로 터치 수동 입력은 사용하도록 설정되지 않음).
비고
터치로 필기를 지원해야 한다면, 이 예제에 지정된 아이콘 및 도구 설명과 함께 CustomToggleButton을 사용하도록 설정하는 것을 권장합니다.
일반적으로 터치 입력은 개체 또는 앱 UI를 직접 조작하는 데 사용됩니다. 터치 수동 입력을 사용할 때 동작의 차이를 보여 주려면 InkCanvas를 ScrollViewer 컨테이너 내에 배치하고 ScrollViewer의 크기를 InkCanvas보다 작게 설정합니다.
앱이 시작되면 펜 수동 입력만 지원되며 터치는 수동 입력 화면을 이동하거나 확대/축소하는 데 사용됩니다. 터치 수동 입력을 사용하도록 설정하면 터치 입력을 통해 수동 입력 표면을 이동하거나 확대/축소할 수 없습니다.
비고
InkCanvas 및 InkToolbar UX 지침 모두에 대한 수동 입력 컨트롤을 참조하세요. 다음 권장 사항은 이 예제와 관련이 있습니다.
- InkToolbar 및 잉크 입력은 일반적으로 활성 펜을 통해 가장 잘 경험됩니다. 그러나 앱에서 필요한 경우 마우스와 터치로 잉킹을 지원할 수 있습니다.
- 터치 입력으로 잉킹을 지원하는 경우, "터치 쓰기" 도구 설명과 함께 토글 단추에 "Segoe MLD2 Assets" 글꼴의 "ED5F" 아이콘을 사용하는 것이 좋습니다.
XAML
- 먼저 이벤트 처리기(Toggle_Custom)를 지정하는 Click 이벤트 수신기를 사용하여 InkToolbarCustomToggleButton 요소(toggleButton)를 선언합니다.
<Grid Background="{ThemeResource ApplicationPageBackgroundThemeBrush}">
    <Grid.RowDefinitions>
        <RowDefinition Height="Auto"/>
        <RowDefinition Height="*"/>
    </Grid.RowDefinitions>

    <StackPanel Grid.Row="0"
                x:Name="HeaderPanel"
                Orientation="Horizontal">
        <TextBlock x:Name="Header"
                   Text="Basic ink sample"
                   Style="{ThemeResource HeaderTextBlockStyle}"
                   Margin="10" />
    </StackPanel>

    <ScrollViewer Grid.Row="1"
                  HorizontalScrollBarVisibility="Auto"
                  VerticalScrollBarVisibility="Auto">

        <Grid HorizontalAlignment="Left" VerticalAlignment="Top">
            <Grid.RowDefinitions>
                <RowDefinition Height="Auto"/>
                <RowDefinition Height="*"/>
            </Grid.RowDefinitions>

            <InkToolbar Grid.Row="0"
                        Margin="10"
                        x:Name="inkToolbar"
                        VerticalAlignment="Top"
                        TargetInkCanvas="{x:Bind inkCanvas}">
                <InkToolbarCustomToggleButton
                x:Name="toggleButton"
                Click="CustomToggle_Click"
                ToolTipService.ToolTip="Touch Writing">
                    <SymbolIcon Symbol="{x:Bind TouchWritingIcon}"/>
                </InkToolbarCustomToggleButton>
            </InkToolbar>

            <ScrollViewer Grid.Row="1"
                          Height="500"
                          Width="500"
                          x:Name="scrollViewer"
                          ZoomMode="Enabled"
                          MinZoomFactor=".1"
                          VerticalScrollMode="Enabled"
                          VerticalScrollBarVisibility="Auto"
                          HorizontalScrollMode="Enabled"
                          HorizontalScrollBarVisibility="Auto">

                <Grid x:Name="outputGrid"
                      Height="1000"
                      Width="1000"
                      Background="{ThemeResource SystemControlBackgroundChromeWhiteBrush}">
                    <InkCanvas x:Name="inkCanvas"/>
                </Grid>

            </ScrollViewer>
        </Grid>
    </ScrollViewer>
</Grid>
코드 숨김
이전 코드 조각에서는 터치 수동 입력(toggleButton)을 위한 사용자 지정 토글 단추에 Click 이벤트 수신기 및 처리기(Toggle_Custom)를 선언했습니다. 이 처리기는 InkPresenter의 InputDeviceTypes 속성을 통해 CoreInputDeviceTypes.Touch에 대한 지원을 간단히 토글합니다.
또한 SymbolIcon 요소와 코드 숨김 파일(TouchWritingIcon)에 정의된 필드에 바인딩하는 {x:Bind} 태그 확장을 사용하여 단추의 아이콘을 지정했습니다.
다음 코드 조각에는 Click 이벤트 처리기와 TouchWritingIcon 정의가 모두 포함됩니다.
namespace Ink_Basic_InkToolbar
{
    /// <summary>
    /// An empty page that can be used on its own or navigated to within a Frame.
    /// </summary>
    public sealed partial class MainPage_AddCustomToggle : Page
    {
        Symbol TouchWritingIcon = (Symbol)0xED5F;

        public MainPage_AddCustomToggle()
        {
            this.InitializeComponent();
        }

        // Handler for the custom toggle button that enables touch inking.
        private void CustomToggle_Click(object sender, RoutedEventArgs e)
        {
            if (toggleButton.IsChecked == true)
            {
                inkCanvas.InkPresenter.InputDeviceTypes |= CoreInputDeviceTypes.Touch;
            }
            else
            {
                inkCanvas.InkPresenter.InputDeviceTypes &= ~CoreInputDeviceTypes.Touch;
            }
        }
    }
}
사용자 지정 도구
사용자 지정 도구 단추를 만들어 앱에서 정의한 펜이 아닌 도구를 호출할 수 있습니다.
기본적으로 InkPresenter 는 모든 입력을 잉크 스트로크 또는 지우기 스트로크로 처리합니다. 여기에는 펜 배럴 단추, 오른쪽 마우스 단추 또는 이와 유사한 보조 하드웨어 어포던스에 의해 수정된 입력이 포함됩니다. 그러나 특정 입력을 처리되지 않은 상태로 두도록 InkPresenter 를 구성할 수 있습니다. 그러면 사용자 지정 처리를 위해 앱으로 전달될 수 있습니다.
이 예제에서는 선택할 때 후속 스트로크를 처리하고 잉크 대신 선택 올가미(파선)로 렌더링하는 사용자 지정 도구 단추를 정의합니다. 선택 영역 범위 내의 모든 잉크 스트로크는 선택됨으로 설정됩니다.
비고
InkCanvas 및 InkToolbar 사용자 경험 지침에 대한 잉킹 컨트롤을 참조하세요. 다음 권장 사항은 이 예제와 관련이 있습니다.
- 스트로크 선택을 제공하는 경우, 도구 단추에 대해 "Segoe MLD2 자산" 글꼴의 "EF20" 아이콘을 사용하고, "선택 도구" 툴팁을 제공하는 것을 권장합니다.
XAML
먼저 스트로크 선택이 구성된 이벤트 처리기(customToolButton_Click)를 지정하는 Click 이벤트 수신기를 사용하여 InkToolbarCustomToolButton 요소(customToolButton)를 선언합니다. (스트로크 선택 영역을 복사, 절단 및 붙여넣기 위한 단추 집합도 추가했습니다.)
선택 스트로크를 그리기 위한 Canvas 요소도 추가합니다. 별도의 레이어를 사용하여 선택 스트로크를 그리면 InkCanvas 및 해당 콘텐츠가 그대로 유지됩니다.
<Grid Background="{ThemeResource ApplicationPageBackgroundThemeBrush}">
    <Grid.RowDefinitions>
        <RowDefinition Height="Auto"/>
        <RowDefinition Height="Auto"/>
        <RowDefinition Height="*"/>
    </Grid.RowDefinitions>
    <StackPanel x:Name="HeaderPanel" Orientation="Horizontal" Grid.Row="0">
        <TextBlock x:Name="Header"
                   Text="Basic ink sample"
                   Style="{ThemeResource HeaderTextBlockStyle}"
                   Margin="10,0,0,0" />
    </StackPanel>
    <StackPanel x:Name="ToolPanel" Orientation="Horizontal" Grid.Row="1">
        <InkToolbar x:Name="inkToolbar"
                    VerticalAlignment="Top"
                    TargetInkCanvas="{x:Bind inkCanvas}">
            <InkToolbarCustomToolButton
                x:Name="customToolButton"
                Click="customToolButton_Click"
                ToolTipService.ToolTip="Selection tool">
                <SymbolIcon Symbol="{x:Bind SelectIcon}"/>
            </InkToolbarCustomToolButton>
        </InkToolbar>
        <Button x:Name="cutButton"
                Content="Cut"
                Click="cutButton_Click"
                Width="100"
                Margin="5,0,0,0"/>
        <Button x:Name="copyButton"
                Content="Copy"
                Click="copyButton_Click"
                Width="100"
                Margin="5,0,0,0"/>
        <Button x:Name="pasteButton"
                Content="Paste"
                Click="pasteButton_Click"
                Width="100"
                Margin="5,0,0,0"/>
    </StackPanel>
    <Grid Grid.Row="2" x:Name="outputGrid"
              Background="{ThemeResource SystemControlBackgroundChromeWhiteBrush}"
              Height="Auto">
        <!-- Canvas for displaying selection UI. -->
        <Canvas x:Name="selectionCanvas"/>
        <!-- Canvas for displaying ink. -->
        <InkCanvas x:Name="inkCanvas" />
    </Grid>
</Grid>
코드 숨김
그런 다음 MainPage.xaml.cs 코드 숨김 파일 에서 InkToolbarCustomToolButton 에 대한 Click 이벤트를 처리합니다.
이 처리기는 처리되지 않은 입력을 앱에 전달하도록 InkPresenter 를 구성합니다.
이 코드에 대한 자세한 단계는 Windows 앱에서 펜 상호 작용 및 Windows Ink의 고급 처리 섹션에 대한 통과 입력을 참조하세요.
또한 SymbolIcon 요소와 코드 숨김 파일(SelectIcon)에 정의된 필드에 바인딩하는 {x:Bind} 태그 확장을 사용하여 단추의 아이콘을 지정했습니다.
다음 코드 조각에는 Click 이벤트 처리기와 SelectIcon 정의가 모두 포함되어 있습니다.
namespace Ink_Basic_InkToolbar
{
    /// <summary>
    /// An empty page that can be used on its own or navigated to within a Frame.
    /// </summary>
    public sealed partial class MainPage_AddCustomTool : Page
    {
        // Icon for custom selection tool button.
        Symbol SelectIcon = (Symbol)0xEF20;

        // Stroke selection tool.
        private Polyline lasso;
        // Stroke selection area.
        private Rect boundingRect;

        public MainPage_AddCustomTool()
        {
            this.InitializeComponent();

            // Listen for new ink or erase strokes to clean up selection UI.
            inkCanvas.InkPresenter.StrokeInput.StrokeStarted +=
                StrokeInput_StrokeStarted;
            inkCanvas.InkPresenter.StrokesErased +=
                InkPresenter_StrokesErased;
        }

        private void customToolButton_Click(object sender, RoutedEventArgs e)
        {
            // By default, the InkPresenter processes input modified by
            // a secondary affordance (pen barrel button, right mouse
            // button, or similar) as ink.
            // To pass through modified input to the app for custom processing
            // on the app UI thread instead of the background ink thread, set
            // InputProcessingConfiguration.RightDragAction to LeaveUnprocessed.
            inkCanvas.InkPresenter.InputProcessingConfiguration.RightDragAction =
                InkInputRightDragAction.LeaveUnprocessed;

            // Listen for unprocessed pointer events from modified input.
            // The input is used to provide selection functionality.
            inkCanvas.InkPresenter.UnprocessedInput.PointerPressed +=
                UnprocessedInput_PointerPressed;
            inkCanvas.InkPresenter.UnprocessedInput.PointerMoved +=
                UnprocessedInput_PointerMoved;
            inkCanvas.InkPresenter.UnprocessedInput.PointerReleased +=
                UnprocessedInput_PointerReleased;
        }

        // Handle new ink or erase strokes to clean up selection UI.
        private void StrokeInput_StrokeStarted(
            InkStrokeInput sender, Windows.UI.Core.PointerEventArgs args)
        {
            ClearSelection();
        }

        private void InkPresenter_StrokesErased(
            InkPresenter sender, InkStrokesErasedEventArgs args)
        {
            ClearSelection();
        }

        private void cutButton_Click(object sender, RoutedEventArgs e)
        {
            inkCanvas.InkPresenter.StrokeContainer.CopySelectedToClipboard();
            inkCanvas.InkPresenter.StrokeContainer.DeleteSelected();
            ClearSelection();
        }

        private void copyButton_Click(object sender, RoutedEventArgs e)
        {
            inkCanvas.InkPresenter.StrokeContainer.CopySelectedToClipboard();
        }

        private void pasteButton_Click(object sender, RoutedEventArgs e)
        {
            if (inkCanvas.InkPresenter.StrokeContainer.CanPasteFromClipboard())
            {
                inkCanvas.InkPresenter.StrokeContainer.PasteFromClipboard(
                    new Point(0, 0));
            }
            else
            {
                // Cannot paste from clipboard.
            }
        }

        // Clean up selection UI.
        private void ClearSelection()
        {
            var strokes = inkCanvas.InkPresenter.StrokeContainer.GetStrokes();
            foreach (var stroke in strokes)
            {
                stroke.Selected = false;
            }
            ClearBoundingRect();
        }

        private void ClearBoundingRect()
        {
            if (selectionCanvas.Children.Any())
            {
                selectionCanvas.Children.Clear();
                boundingRect = Rect.Empty;
            }
        }

        // Handle unprocessed pointer events from modified input.
        // The input is used to provide selection functionality.
        // Selection UI is drawn on a canvas under the InkCanvas.
        private void UnprocessedInput_PointerPressed(
            InkUnprocessedInput sender, PointerEventArgs args)
        {
            // Initialize a selection lasso.
            lasso = new Polyline()
            {
                Stroke = new SolidColorBrush(Windows.UI.Colors.Blue),
                StrokeThickness = 1,
                StrokeDashArray = new DoubleCollection() { 5, 2 },
            };

            lasso.Points.Add(args.CurrentPoint.RawPosition);

            selectionCanvas.Children.Add(lasso);
        }

        private void UnprocessedInput_PointerMoved(
            InkUnprocessedInput sender, PointerEventArgs args)
        {
            // Add a point to the lasso Polyline object.
            lasso.Points.Add(args.CurrentPoint.RawPosition);
        }

        private void UnprocessedInput_PointerReleased(
            InkUnprocessedInput sender, PointerEventArgs args)
        {
            // Add the final point to the Polyline object and
            // select strokes within the lasso area.
            // Draw a bounding box on the selection canvas
            // around the selected ink strokes.
            lasso.Points.Add(args.CurrentPoint.RawPosition);

            boundingRect =
                inkCanvas.InkPresenter.StrokeContainer.SelectWithPolyLine(
                    lasso.Points);

            DrawBoundingRect();
        }

        // Draw a bounding rectangle, on the selection canvas, encompassing
        // all ink strokes within the lasso area.
        private void DrawBoundingRect()
        {
            // Clear all existing content from the selection canvas.
            selectionCanvas.Children.Clear();

            // Draw a bounding rectangle only if there are ink strokes
            // within the lasso area.
            if (!((boundingRect.Width == 0) ||
                (boundingRect.Height == 0) ||
                boundingRect.IsEmpty))
            {
                var rectangle = new Rectangle()
                {
                    Stroke = new SolidColorBrush(Windows.UI.Colors.Blue),
                    StrokeThickness = 1,
                    StrokeDashArray = new DoubleCollection() { 5, 2 },
                    Width = boundingRect.Width,
                    Height = boundingRect.Height
                };

                Canvas.SetLeft(rectangle, boundingRect.X);
                Canvas.SetTop(rectangle, boundingRect.Y);

                selectionCanvas.Children.Add(rectangle);
            }
        }
    }
}
사용자 지정 잉크 렌더링
기본적으로 잉크 입력은 지연 시간 낮은 백그라운드 스레드에서 처리되고, 그려질 때 마치 방금 그린 것처럼 생생하게 렌더링됩니다. 스트로크가 완료되면(펜 또는 손가락을 떼거나 마우스 단추를 놓으면) 스트로크가 UI 스레드에서 처리되고 InkCanvas 계층(애플리케이션 콘텐츠 위 및 젖은 잉크 교체)에 "건조"하게 렌더링됩니다.
잉크 플랫폼을 사용하면 이 동작을 재정의하고 잉크 입력의 건조 방식을 사용자 지정하여 잉크 경험을 완전히 사용자 지정할 수 있습니다.
사용자 지정 건조에 대한 자세한 내용은 Windows 앱의 펜 조작 및 Windows Ink를 참조하세요.
비고
사용자 지정 건조 및 InkToolbar
앱이 사용자 지정 건조 구현을 사용하여 InkPresenter 의 기본 잉크 렌더링 동작을 재정의하는 경우 렌더링된 잉크 스트로크는 더 이상 InkToolbar에서 사용할 수 없으며 InkToolbar의 기본 제공 지우기 명령은 예상대로 작동하지 않습니다. 지우기 기능을 제공하려면 모든 포인터 이벤트를 처리하고, 각 스트로크에서 적중 테스트를 수행하고, 기본 제공 "모든 잉크 지우기" 명령을 재정의해야 합니다.
관련 문서
토픽 샘플
기타 샘플
Windows developer
