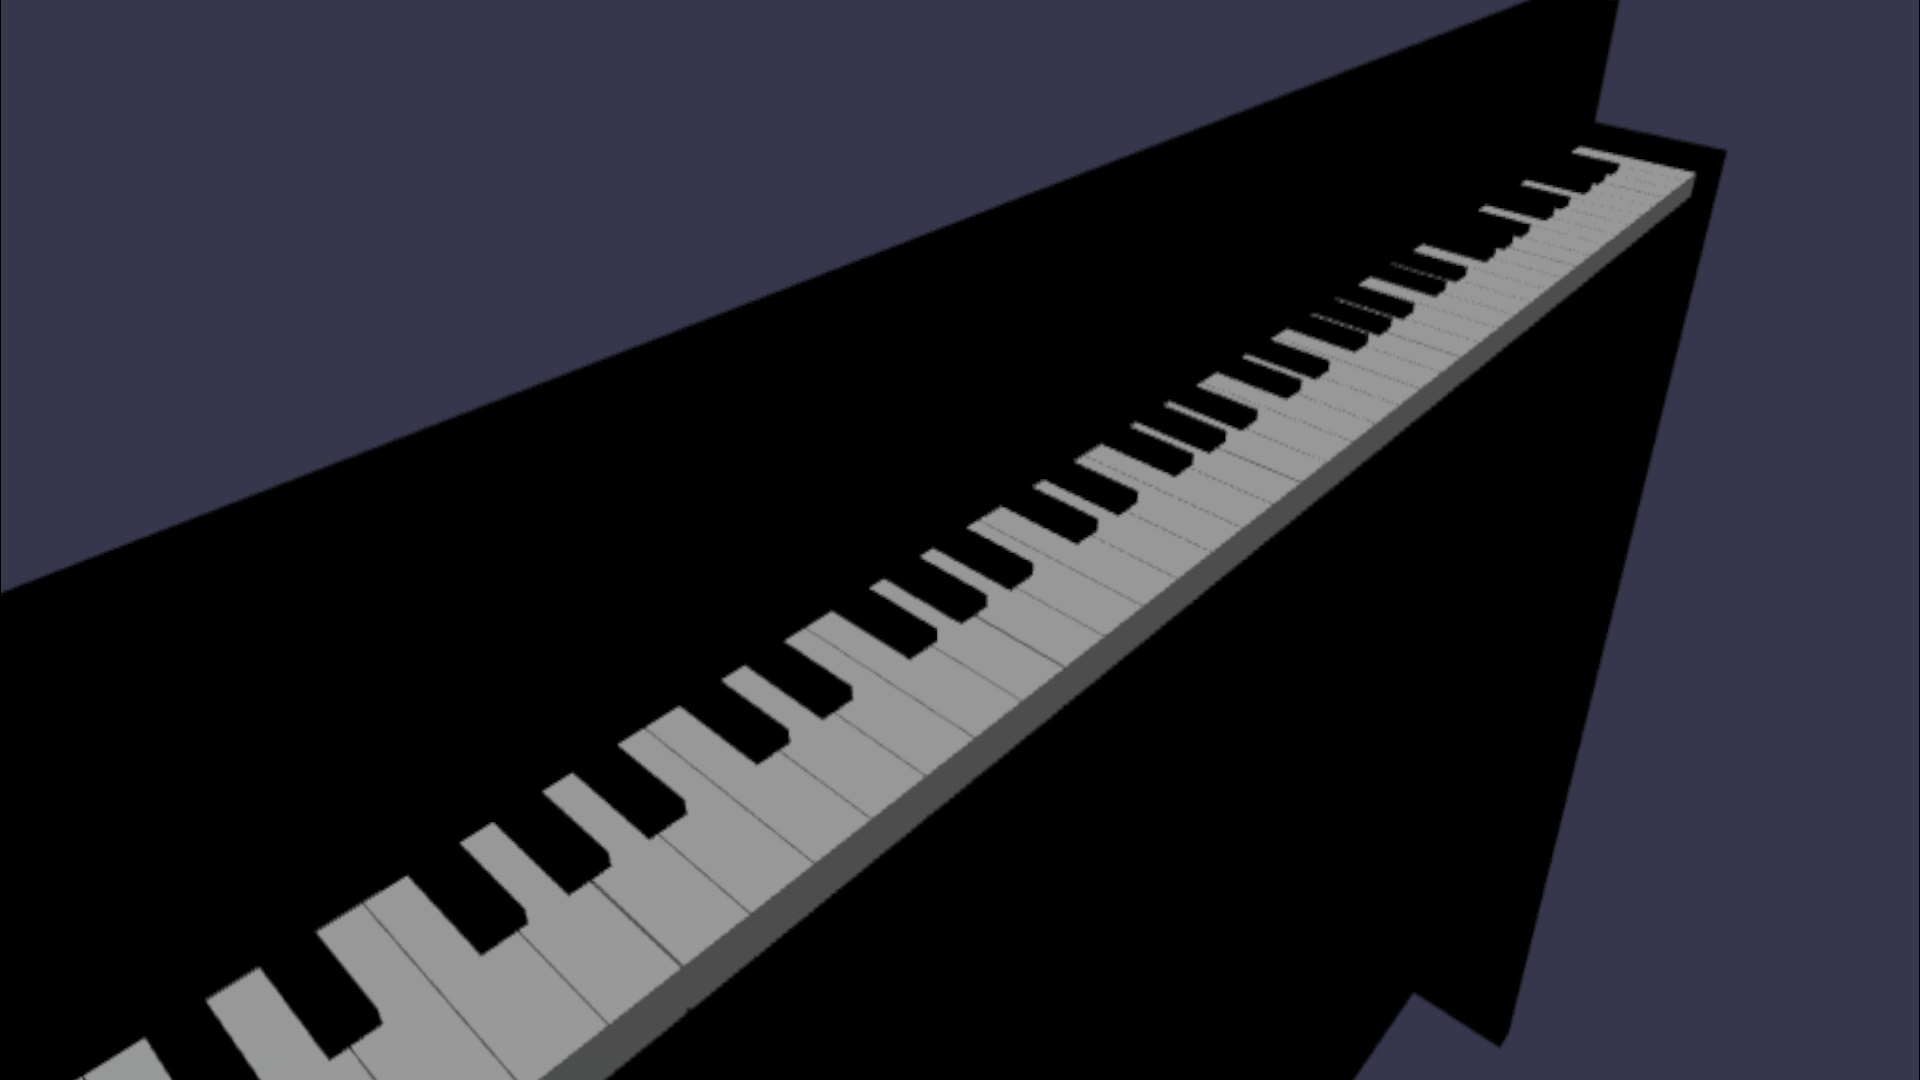
이전 자습서에서는 전체 88키 피아노 키보드 모델을 만들었습니다. 이제 XR 공간에서 재생할 수 있습니다.
이 자습서에서는 다음을 수행하는 방법을 배웁니다.
- 포인터 이벤트를 사용하여 대화형 피아노 기능 추가
- 메시 크기를 다른 크기로 조정
- XR에서 텔레포트 및 다중 포인터 지원 사용
시작하기 전에
시리즈의 이전 자습서를 완료하고 코드에 계속 추가할 준비가 되었는지 확인합니다.
index.html
<html>
    <head>
        <title>Piano in BabylonJS</title>
        <script src="https://cdn.babylonjs.com/babylon.js"></script>
        <script src="scene.js"></script>
        <style>
            body,#renderCanvas { width: 100%; height: 100%;}
        </style>
    </head>
    <body>
        <canvas id="renderCanvas"></canvas>
        <script type="text/javascript">
            const canvas = document.getElementById("renderCanvas");
            const engine = new BABYLON.Engine(canvas, true);

            createScene(engine).then(sceneToRender => {
                engine.runRenderLoop(() => sceneToRender.render());
            });

            // Watch for browser/canvas resize events
            window.addEventListener("resize", function () {
                engine.resize();
            });
        </script>
    </body>
</html>
scene.js
const buildKey = function (scene, parent, props) {
    if (props.type === "white") {
        /*
        Props for building a white key should contain:
        note, topWidth, bottomWidth, topPositionX, wholePositionX, register, referencePositionX

        As an example, the props for building the middle C white key would be
        {type: "white", note: "C", topWidth: 1.4, bottomWidth: 2.3, topPositionX: -0.45, wholePositionX: -14.4, register: 4, referencePositionX: 0}
        */

        // Create bottom part
        const bottom = BABYLON.MeshBuilder.CreateBox("whiteKeyBottom", {width: props.bottomWidth, height: 1.5, depth: 4.5}, scene);

        // Create top part
        const top = BABYLON.MeshBuilder.CreateBox("whiteKeyTop", {width: props.topWidth, height: 1.5, depth: 5}, scene);
        top.position.z =  4.75;
        top.position.x += props.topPositionX;

        // Merge bottom and top parts
        // Parameters of BABYLON.Mesh.MergeMeshes: (arrayOfMeshes, disposeSource, allow32BitsIndices, meshSubclass, subdivideWithSubMeshes, multiMultiMaterials)
        const key = BABYLON.Mesh.MergeMeshes([bottom, top], true, false, null, false, false);
        key.position.x = props.referencePositionX + props.wholePositionX;
        key.name = props.note + props.register;
        key.parent = parent;

        return key;
    }
    else if (props.type === "black") {
        /*
        Props for building a black key should contain:
        note, wholePositionX, register, referencePositionX

        As an example, the props for building the C#4 black key would be
        {type: "black", note: "C#", wholePositionX: -13.45, register: 4, referencePositionX: 0}
        */

        // Create black color material
        const blackMat = new BABYLON.StandardMaterial("black");
        blackMat.diffuseColor = new BABYLON.Color3(0, 0, 0);

        // Create black key
        const key = BABYLON.MeshBuilder.CreateBox(props.note + props.register, {width: 1.4, height: 2, depth: 5}, scene);
        key.position.z += 4.75;
        key.position.y += 0.25;
        key.position.x = props.referencePositionX + props.wholePositionX;
        key.material = blackMat;
        key.parent = parent;

        return key;
    }
}

const createScene = async function(engine) {
    const scene = new BABYLON.Scene(engine);

    const alpha =  3*Math.PI/2;
    const beta = Math.PI/50;
    const radius = 220;
    const target = new BABYLON.Vector3(0, 0, 0);

    const camera = new BABYLON.ArcRotateCamera("Camera", alpha, beta, radius, target, scene);
    camera.attachControl(canvas, true);

    const light = new BABYLON.HemisphericLight("light", new BABYLON.Vector3(0, 1, 0), scene);
    light.intensity = 0.6;

    const keyParams = [
        {type: "white", note: "C", topWidth: 1.4, bottomWidth: 2.3, topPositionX: -0.45, wholePositionX: -14.4},
        {type: "black", note: "C#", wholePositionX: -13.45},
        {type: "white", note: "D", topWidth: 1.4, bottomWidth: 2.4, topPositionX: 0, wholePositionX: -12},
        {type: "black", note: "D#", wholePositionX: -10.6},
        {type: "white", note: "E", topWidth: 1.4, bottomWidth: 2.3, topPositionX: 0.45, wholePositionX: -9.6},
        {type: "white", note: "F", topWidth: 1.3, bottomWidth: 2.4, topPositionX: -0.55, wholePositionX: -7.2},
        {type: "black", note: "F#", wholePositionX: -6.35},
        {type: "white", note: "G", topWidth: 1.3, bottomWidth: 2.3, topPositionX: -0.2, wholePositionX: -4.8},
        {type: "black", note: "G#", wholePositionX: -3.6},
        {type: "white", note: "A", topWidth: 1.3, bottomWidth: 2.3, topPositionX: 0.2, wholePositionX: -2.4},
        {type: "black", note: "A#", wholePositionX: -0.85},
        {type: "white", note: "B", topWidth: 1.3, bottomWidth: 2.4, topPositionX: 0.55, wholePositionX: 0},
    ]

    // Transform Node that acts as the parent of all piano keys
    const keyboard = new BABYLON.TransformNode("keyboard");

    // Register 1 through 7
    var referencePositionX = -2.4*14;
    for (let register = 1; register <= 7; register++) {
        keyParams.forEach(key => {
            buildKey(scene, keyboard, Object.assign({register: register, referencePositionX: referencePositionX}, key));
        })
        referencePositionX += 2.4*7;
    }

    // Register 0
    buildKey(scene, keyboard, {type: "white", note: "A", topWidth: 1.9, bottomWidth: 2.3, topPositionX: -0.20, wholePositionX: -2.4, register: 0, referencePositionX: -2.4*21});
    keyParams.slice(10, 12).forEach(key => {
        buildKey(scene, keyboard, Object.assign({register: 0, referencePositionX: -2.4*21}, key));
    })

    // Register 8
    buildKey(scene, keyboard, {type: "white", note: "C", topWidth: 2.3, bottomWidth: 2.3, topPositionX: 0, wholePositionX: -2.4*6, register: 8, referencePositionX: 84});

    // Transform node that acts as the parent of all piano components
    const piano = new BABYLON.TransformNode("piano");
    keyboard.parent = piano;

    // Import and scale piano frame
    BABYLON.SceneLoader.ImportMesh("frame", "https://raw.githubusercontent.com/MicrosoftDocs/mixed-reality/docs/mixed-reality-docs/mr-dev-docs/develop/javascript/tutorials/babylonjs-webxr-piano/files/", "pianoFrame.babylon", scene, function(meshes) {
        const frame = meshes[0];
        frame.parent = piano;
    });

    // Lift the piano keyboard
    keyboard.position.y += 80;

    const xrHelper = await scene.createDefaultXRExperienceAsync();

    return scene;
}
피아노 키보드 재생 가능
지금 우리가 만든 피아노 키보드는 사용자 상호 작용에 응답하지 않는 정적 모델입니다. 이 섹션에서는 키를 프로그래밍하여 아래쪽으로 이동하고 누군가가 키를 누를 때 소리를 재생합니다.
Babylon.js 상호 작용할 수 있는 다양한 종류의 이벤트 또는 관찰 가능한 이벤트를 제공합니다. 이 경우 마우스 클릭, 터치, XR 컨트롤러 단추 클릭 등이 될 수 있는 포인터를 통해 키를 누를 때 작업을 수행하도록 키를 프로그래밍하려고 하므로 을 처리
onPointerObservable합니다.다음은 에 동작을 추가할 수 있는 방법의 기본 구조입니다.
onPointerObservablescene.onPointerObservable.add((pointerInfo) => { // do something });Babylon.js 다양한 유형의 포인터 이벤트를 제공하지만 아래 구조를 사용하여 및
POINTERUP이벤트만 사용하여POINTERDOWN피아노 키의 동작을 프로그래밍합니다.scene.onPointerObservable.add((pointerInfo) => { switch (pointerInfo.type) { case BABYLON.PointerEventTypes.POINTERDOWN: // When the pointer is down on a piano key, // move the piano key downward (to show that it is pressed) // and play the sound of the note break; case BABYLON.PointerEventTypes.POINTERUP: // When the pointer is released, // move the piano key upward to its original position // and stop the sound of the note of the key that is released break; } });먼저 키를 누르고 놓을 때 피아노 키를 아래쪽과 위쪽으로 이동하는 작업을 살펴보겠습니다.
포인터 다운 이벤트에서 클릭 중인 메시를 감지하고, 피아노 키인지 확인하고, 메시의 y 좌표를 소량 음수로 변경하여 키를 누른 것처럼 보이게 해야 합니다.
포인터 업 이벤트의 경우 키를 누른 포인터가 키에서 해제되지 않을 수 있으므로 좀 더 복잡합니다. 예를 들어 누군가가 C4 키를 클릭하고 마우스를 E4로 끌어온 다음 클릭을 해제할 수 있습니다. 이 경우 이벤트가 발생하는 위치
pointerUp(E4) 대신 누른 키(C4)를 해제하려고 합니다.다음 코드가 원하는 것을 달성하는 방법을 살펴보겠습니다.
const pointerToKey = new Map();
scene.onPointerObservable.add((pointerInfo) => {
    switch (pointerInfo.type) {
        case BABYLON.PointerEventTypes.POINTERDOWN:
            if(pointerInfo.pickInfo.hit) {
                const pickedMesh = pointerInfo.pickInfo.pickedMesh;
                const pointerId = pointerInfo.event.pointerId;
                if (pickedMesh.parent === keyboard) {
                    pickedMesh.position.y -= 0.5;
                    // play the sound of the note
                    pointerToKey.set(pointerId, {
                        mesh: pickedMesh
                    });
                }
            }
            break;
        case BABYLON.PointerEventTypes.POINTERUP:
            const pointerId = pointerInfo.event.pointerId;
            if (pointerToKey.has(pointerId)) {
                pointerToKey.get(pointerId).mesh.position.y += 0.5;
                // stop the sound of the note of the key that is released
                pointerToKey.delete(pointerId);
            }
            break;
    }
});
는
pointerId모든 포인터에 고유하며 여러 컨트롤러가 있거나 터치 스크린을 사용하는 경우 포인터를 식별하는 데 도움이 될 수 있습니다. 여기서는 릴리스가 발생하는 위치에 관계없이 포인터가 해제될 때 해제할 키를 알 수 있도록 키를 누른 포인터의 관계를 저장하기 위해 라는pointerToKey개체를 초기화Map했습니다.위의 코드와 상호 작용의 모양은 다음과 같습니다.
이제 키를 누르고 놓을 때 소리를 재생하고 중지하는 작업을 수행해 보겠습니다. 이를 위해 soundfont-player라는 Javascript 라이브러리를 활용하여 선택한 악기의 MIDI 사운드를 쉽게 재생할 수 있습니다.
라이브러리의 축소된 코드를 다운로드하고, index.html와 동일한 폴더에 저장하고 ,index.html태그에
<header>포함합니다.<head> <title>Babylon Template</title> <script src="https://cdn.babylonjs.com/babylon.js"></script> <script src="scene.js"></script> <script src="soundfont-player.min.js"></script> <style> body,#renderCanvas { width: 100%; height: 100%;} </style> </head>라이브러리를 가져온 후에는 라이브러리를 사용하여 계측기를 초기화하고 MIDI 소리를 재생/중지하는 방법은 다음과 같습니다.
const pianoSound = await Soundfont.instrument(new AudioContext(), 'acoustic_grand_piano'); const C4 = piano.play("C4"); // Play note C4 C4.stop(); // Stop note C4이제 이를 포인터 이벤트에 통합하고 이 섹션에 대한 코드를 마무리해 보겠습니다.
const pointerToKey = new Map() const piano = await Soundfont.instrument(new AudioContext(), 'acoustic_grand_piano'); scene.onPointerObservable.add((pointerInfo) => { switch (pointerInfo.type) { case BABYLON.PointerEventTypes.POINTERDOWN: if(pointerInfo.pickInfo.hit) { let pickedMesh = pointerInfo.pickInfo.pickedMesh; let pointerId = pointerInfo.event.pointerId; if (keys.has(pickedMesh)) { pickedMesh.position.y -= 0.5; // Move the key downward pointerToKey.set(pointerId, { mesh: pickedMesh, note: pianoSound.play(pointerInfo.pickInfo.pickedMesh.name) // Play the sound of the note }); } } break; case BABYLON.PointerEventTypes.POINTERUP: let pointerId = pointerInfo.event.pointerId; if (pointerToKey.has(pointerId)) { pointerToKey.get(pointerId).mesh.position.y += 0.5; // Move the key upward pointerToKey.get(pointerId).note.stop(); // Stop the sound of the note pointerToKey.delete(pointerId); } break; } });각 키의 메시 이름을 나타내는 메모로 명명했으므로 메시의 이름을 함수에 전달하여 재생할 노트를
pianoSound.play()쉽게 나타낼 수 있습니다. 또한 키를 놓을 때 중지할 소리를 알 수 있도록 사운드pointerToKey를 맵에 저장합니다.
몰입형 VR 모드를 위해 피아노 크기 조정
지금까지 대화형 기능을 추가하면서 마우스(또는 터치 스크린)로 피아노를 이미 연주했을 것입니다. 이 섹션에서는 몰입형 VR 공간으로 이동합니다.
몰입형 VR 헤드셋에서 페이지를 열려면 먼저 헤드셋을 개발자 컴퓨터에 연결하고 Windows Mixed Reality 앱에서 사용하도록 설정되어 있는지 확인해야 합니다. Windows Mixed Reality 시뮬레이터를 사용하는 경우 사용하도록 설정되어 있는지 확인합니다.
이제 웹 페이지의 오른쪽 아래에 몰입형 VR 단추가 표시됩니다. 이 파일을 클릭하면 연결된 XR 장치에서 피아노를 볼 수 있습니다.

가상 공간에 있으면 우리가 지은 피아노가 매우 거대하다는 것을 알 수 있습니다. VR 세계에서는 맨 아래에 서서 멀리 있는 키에 대한 포인터를 가리켜서 플레이할 수 있습니다.

그 크기가 실제 생활에서 일반 스탠드 업 피아노처럼 더 있도록 피아노를 축소하자. 이렇게 하려면 공간의 지점을 기준으로 메시의 크기를 조정할 수 있는 유틸리티 함수를 사용해야 합니다. 이 함수를 scene.js (외부)에
createScene()추가합니다.const scaleFromPivot = function(transformNode, pivotPoint, scale) { const _sx = scale / transformNode.scaling.x; const _sy = scale / transformNode.scaling.y; const _sz = scale / transformNode.scaling.z; transformNode.scaling = new BABYLON.Vector3(_sx, _sy, _sz); transformNode.position = new BABYLON.Vector3(pivotPoint.x + _sx * (transformNode.position.x - pivotPoint.x), pivotPoint.y + _sy * (transformNode.position.y - pivotPoint.y), pivotPoint.z + _sz * (transformNode.position.z - pivotPoint.z)); }이 함수는 다음 3개 매개 변수를 사용합니다.
-
transformNode:
TransformNode크기를 조정할 입니다. -
pivotPoint:
Vector3크기 조정이 상대적인 점을 나타내는 개체입니다. - scale: 배율 인수
-
transformNode:
이 함수를 사용하여 피아노 프레임과 키를 원점의 피벗 지점과 함께 0.015 배율로 스케일링합니다. 함수 호출
createScene()을 다음에keyboard.position.y += 80;배치하여 함수에 추가합니다.// Put this line at the beginning of createScene() const scale = 0.015;// Put this function call after keyboard.position.y += 80; // Scale the entire piano scaleFromPivot(piano, new BABYLON.Vector3(0, 0, 0), scale);카메라 위치의 크기를 조정하는 것도 잊지 마세요.
const alpha = 3*Math.PI/2; const beta = Math.PI/50; const radius = 220*scale; // scale the radius const target = new BABYLON.Vector3(0, 0, 0); const camera = new BABYLON.ArcRotateCamera("Camera", alpha, beta, radius, target, scene); camera.attachControl(canvas, true);이제 우리가 다시 VR 공간에 들어갈 때, 피아노는 일반 스탠드 업 피아노의 크기가 될 것입니다.
WebXR 기능 사용
이제 VR 공간에서 피아노 크기를 적절한 크기로 조정했으므로 멋진 WebXR 기능을 사용하여 공간에서 피아노 연주 경험을 개선해 보겠습니다.
몰입형 VR 컨트롤러를 사용하여 피아노를 연주했다면 한 번에 하나의 컨트롤러만 사용할 수 있다는 것을 알게 되었을 것입니다. Babylon.js WebXR 기능 관리자를 사용하여 XR 공간에서 다중 포인터 지원을 사용하도록 설정해 보겠습니다.
초기화 줄 다음에
createScene()다음 코드를 함수에xrHelper추가합니다.const featuresManager = xrHelper.baseExperience.featuresManager; const pointerSelection = featuresManager.enableFeature(BABYLON.WebXRFeatureName.POINTER_SELECTION, "stable", { xrInput: xrHelper.input, enablePointerSelectionOnAllControllers: true });또한, 시작점이 어디에 있는지에 따라 피아노 앞에 자신을 배치하는 것이 조금 어려울 수 있습니다. 몰입형 VR 환경에 익숙하다면 텔레포팅에 대해 이미 알고 있을 수 있습니다. 이를 가리키면 공간의 다른 지점으로 즉시 이동할 수 있는 기능입니다.
Babylon.js 텔레포트 기능을 사용하려면 먼저 VR 공간에서 "설" 수 있는 접지 메시가 있어야 합니다. 함수에 다음 코드를
createScene()추가하여 접지를 만듭니다.const ground = BABYLON.MeshBuilder.CreateGround("ground", {width: 400, height: 400});텔레포트 지원은 스냅 투 위치라는 매우 유용한 기능도 함께 제공됩니다. 요컨대, 스냅 투 포지션은 사용자가 착륙하기를 원하는 특정 위치입니다.
예를 들어 사용자가 포인터를 피아노 가까이를 가리킬 때 해당 위치로 쉽게 텔레포트할 수 있도록 피아노 앞에 맞춤 위치를 설정할 수 있습니다.
아래 코드를 추가하여 텔레포트 기능을 사용하도록 설정하고 끌기 지점을 지정합니다.
const teleportation = featuresManager.enableFeature(BABYLON.WebXRFeatureName.TELEPORTATION, "stable", { xrInput: xrHelper.input, floorMeshes: [ground], snapPositions: [new BABYLON.Vector3(2.4*3.5*scale, 0, -10*scale)], });이제 피아노 앞의 스냅 투 포인트로 텔레포트하여 피아노 앞에 쉽게 배치할 수 있어야 하며, 두 컨트롤러를 모두 사용하여 한 번에 두 개의 키를 재생할 수 있어야 합니다.
요약
축하합니다! Babylon.js 피아노 빌드 자습서 시리즈를 완료하고 다음을 수행하는 방법을 배웠습니다.
- 메시를 만들고, 배치하고, 병합하여 피아노 키보드 모델을 빌드합니다.
- 스탠드업 피아노 프레임의 Babylon.js 모델 가져오기
- 각 피아노 키에 포인터 상호 작용 추가
- 피벗 지점에 따라 메시 크기 조정
- 텔레포트 및 멀티포인트 지원과 같은 주요 WebXR 기능 사용
scene.js 및 index.html 대한 최종 코드는 다음과 같습니다.
scene.js
const buildKey = function (scene, parent, props) {
if (props.type === "white") {
/*
Props for building a white key should contain:
note, topWidth, bottomWidth, topPositionX, wholePositionX, register, referencePositionX
As an example, the props for building the middle C white key would be
{type: "white", note: "C", topWidth: 1.4, bottomWidth: 2.3, topPositionX: -0.45, wholePositionX: -14.4, register: 4, referencePositionX: 0}
*/
// Create bottom part
const bottom = BABYLON.MeshBuilder.CreateBox("whiteKeyBottom", {width: props.bottomWidth, height: 1.5, depth: 4.5}, scene);
// Create top part
const top = BABYLON.MeshBuilder.CreateBox("whiteKeyTop", {width: props.topWidth, height: 1.5, depth: 5}, scene);
top.position.z = 4.75;
top.position.x += props.topPositionX;
// Merge bottom and top parts
// Parameters of BABYLON.Mesh.MergeMeshes: (arrayOfMeshes, disposeSource, allow32BitsIndices, meshSubclass, subdivideWithSubMeshes, multiMultiMaterials)
const key = BABYLON.Mesh.MergeMeshes([bottom, top], true, false, null, false, false);
key.position.x = props.referencePositionX + props.wholePositionX;
key.name = props.note + props.register;
key.parent = parent;
return key;
}
else if (props.type === "black") {
/*
Props for building a black key should contain:
note, wholePositionX, register, referencePositionX
As an example, the props for building the C#4 black key would be
{type: "black", note: "C#", wholePositionX: -13.45, register: 4, referencePositionX: 0}
*/
// Create black color material
const blackMat = new BABYLON.StandardMaterial("black");
blackMat.diffuseColor = new BABYLON.Color3(0, 0, 0);
// Create black key
const key = BABYLON.MeshBuilder.CreateBox(props.note + props.register, {width: 1.4, height: 2, depth: 5}, scene);
key.position.z += 4.75;
key.position.y += 0.25;
key.position.x = props.referencePositionX + props.wholePositionX;
key.material = blackMat;
key.parent = parent;
return key;
}
}
const scaleFromPivot = function(transformNode, pivotPoint, scale) {
const _sx = scale / transformNode.scaling.x;
const _sy = scale / transformNode.scaling.y;
const _sz = scale / transformNode.scaling.z;
transformNode.scaling = new BABYLON.Vector3(_sx, _sy, _sz);
transformNode.position = new BABYLON.Vector3(pivotPoint.x + _sx * (transformNode.position.x - pivotPoint.x), pivotPoint.y + _sy * (transformNode.position.y - pivotPoint.y), pivotPoint.z + _sz * (transformNode.position.z - pivotPoint.z));
}
const createScene = async function(engine) {
const scale = 0.015;
const scene = new BABYLON.Scene(engine);
const alpha = 3*Math.PI/2;
const beta = Math.PI/50;
const radius = 220*scale;
const target = new BABYLON.Vector3(0, 0, 0);
const camera = new BABYLON.ArcRotateCamera("Camera", alpha, beta, radius, target, scene);
camera.attachControl(canvas, true);
const light = new BABYLON.HemisphericLight("light", new BABYLON.Vector3(0, 1, 0), scene);
light.intensity = 0.6;
const keyParams = [
{type: "white", note: "C", topWidth: 1.4, bottomWidth: 2.3, topPositionX: -0.45, wholePositionX: -14.4},
{type: "black", note: "C#", wholePositionX: -13.45},
{type: "white", note: "D", topWidth: 1.4, bottomWidth: 2.4, topPositionX: 0, wholePositionX: -12},
{type: "black", note: "D#", wholePositionX: -10.6},
{type: "white", note: "E", topWidth: 1.4, bottomWidth: 2.3, topPositionX: 0.45, wholePositionX: -9.6},
{type: "white", note: "F", topWidth: 1.3, bottomWidth: 2.4, topPositionX: -0.55, wholePositionX: -7.2},
{type: "black", note: "F#", wholePositionX: -6.35},
{type: "white", note: "G", topWidth: 1.3, bottomWidth: 2.3, topPositionX: -0.2, wholePositionX: -4.8},
{type: "black", note: "G#", wholePositionX: -3.6},
{type: "white", note: "A", topWidth: 1.3, bottomWidth: 2.3, topPositionX: 0.2, wholePositionX: -2.4},
{type: "black", note: "A#", wholePositionX: -0.85},
{type: "white", note: "B", topWidth: 1.3, bottomWidth: 2.4, topPositionX: 0.55, wholePositionX: 0},
]
// Transform Node that acts as the parent of all piano keys
const keyboard = new BABYLON.TransformNode("keyboard");
// Register 1 through 7
var referencePositionX = -2.4*14;
for (let register = 1; register <= 7; register++) {
keyParams.forEach(key => {
buildKey(scene, keyboard, Object.assign({register: register, referencePositionX: referencePositionX}, key));
})
referencePositionX += 2.4*7;
}
// Register 0
buildKey(scene, keyboard, {type: "white", note: "A", topWidth: 1.9, bottomWidth: 2.3, topPositionX: -0.20, wholePositionX: -2.4, register: 0, referencePositionX: -2.4*21});
keyParams.slice(10, 12).forEach(key => {
buildKey(scene, keyboard, Object.assign({register: 0, referencePositionX: -2.4*21}, key));
})
// Register 8
buildKey(scene, keyboard, {type: "white", note: "C", topWidth: 2.3, bottomWidth: 2.3, topPositionX: 0, wholePositionX: -2.4*6, register: 8, referencePositionX: 84});
// Transform node that acts as the parent of all piano components
const piano = new BABYLON.TransformNode("piano");
keyboard.parent = piano;
// Import and scale piano frame
BABYLON.SceneLoader.ImportMesh("frame", "https://raw.githubusercontent.com/MicrosoftDocs/mixed-reality/docs/mixed-reality-docs/mr-dev-docs/develop/javascript/tutorials/babylonjs-webxr-piano/files/", "pianoFrame.babylon", scene, function(meshes) {
const frame = meshes[0];
frame.parent = piano;
});
// Lift the piano keyboard
keyboard.position.y += 80;
// Scale the entire piano
scaleFromPivot(piano, new BABYLON.Vector3(0, 0, 0), scale);
const pointerToKey = new Map()
const pianoSound = await Soundfont.instrument(new AudioContext(), 'acoustic_grand_piano');
scene.onPointerObservable.add((pointerInfo) => {
switch (pointerInfo.type) {
case BABYLON.PointerEventTypes.POINTERDOWN:
// Only take action if the pointer is down on a mesh
if(pointerInfo.pickInfo.hit) {
let pickedMesh = pointerInfo.pickInfo.pickedMesh;
let pointerId = pointerInfo.event.pointerId;
if (pickedMesh.parent === keyboard) {
pickedMesh.position.y -= 0.5; // Move the key downward
pointerToKey.set(pointerId, {
mesh: pickedMesh,
note: pianoSound.play(pointerInfo.pickInfo.pickedMesh.name) // Play the sound of the note
});
}
}
break;
case BABYLON.PointerEventTypes.POINTERUP:
let pointerId = pointerInfo.event.pointerId;
// Only take action if the released pointer was recorded in pointerToKey
if (pointerToKey.has(pointerId)) {
pointerToKey.get(pointerId).mesh.position.y += 0.5; // Move the key upward
pointerToKey.get(pointerId).note.stop(); // Stop the sound of the note
pointerToKey.delete(pointerId);
}
break;
}
});
const xrHelper = await scene.createDefaultXRExperienceAsync();
const featuresManager = xrHelper.baseExperience.featuresManager;
featuresManager.enableFeature(BABYLON.WebXRFeatureName.POINTER_SELECTION, "stable", {
xrInput: xrHelper.input,
enablePointerSelectionOnAllControllers: true
});
const ground = BABYLON.MeshBuilder.CreateGround("ground", {width: 400, height: 400});
featuresManager.enableFeature(BABYLON.WebXRFeatureName.TELEPORTATION, "stable", {
xrInput: xrHelper.input,
floorMeshes: [ground],
snapPositions: [new BABYLON.Vector3(2.4*3.5*scale, 0, -10*scale)],
});
return scene;
}
index.html
<html>
<head>
    <title>Babylon Template</title>
    <script src="https://cdn.babylonjs.com/babylon.js"></script>
    <script src="scene.js"></script>
    <script src="soundfont-player.min.js"></script>
    <style>
            body,#renderCanvas { width: 100%; height: 100%;}
    </style>
</head>
<body>
<canvas id="renderCanvas"></canvas>
<script>
const canvas = document.getElementById("renderCanvas"); // Get the canvas element
const engine = new BABYLON.Engine(canvas, true); // Generate the BABYLON 3D engine
// Register a render loop to repeatedly render the scene
createScene(engine).then(sceneToRender => {
engine.runRenderLoop(() => sceneToRender.render());
});
// Watch for browser/canvas resize events
window.addEventListener("resize", function () {
engine.resize();
});
</script>
</body>
</html>
다음 단계
Mixed Reality JavaScript 개발에 대한 자세한 내용은 JavaScript 개발 개요를 참조하세요.