Back up an Azure Virtual Machine in Azure Extended Zones (preview)
This article describes how to back up an existing Azure VM with the Azure Extended Zones portal.
Azure Backups can be created through the Azure portal. You can use the browser-based interface to create and configure backups and related resources to protect your data by taking regular backups. Azure Backup creates and stores recovery points in geo-redundant recovery vaults.
Azure Extended Zones provide enhanced resiliency by distributing resources across multiple physical locations within an Azure region. This approach minimizes the impact of potential failures for critical infrastructure. By using Extended Zones, your organizations can achieve higher availability and fault tolerance for their applications.
To use Azure Extended Zones, sign in to the Azure Extended Zones portal.
Before you start
Before you start backing up a VM in Extended Zones, review the supported scenario.
Create a Recovery Services vault
A Recovery Services vault is a management entity that stores recovery points that are created over time, and it provides an interface to perform backup-related operations. These operations include taking on-demand backups, performing restores, and creating backup policies.
To create a Recovery Services vault:
Sign in to the Azure portal.
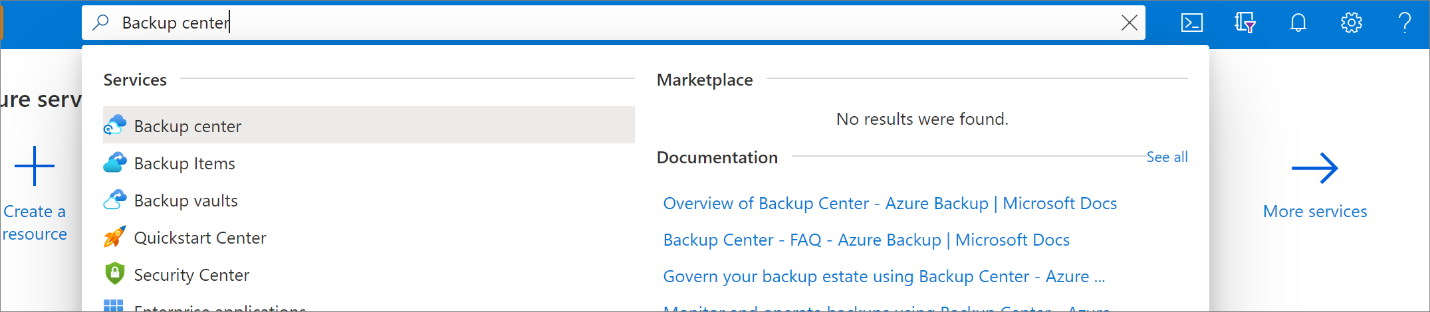
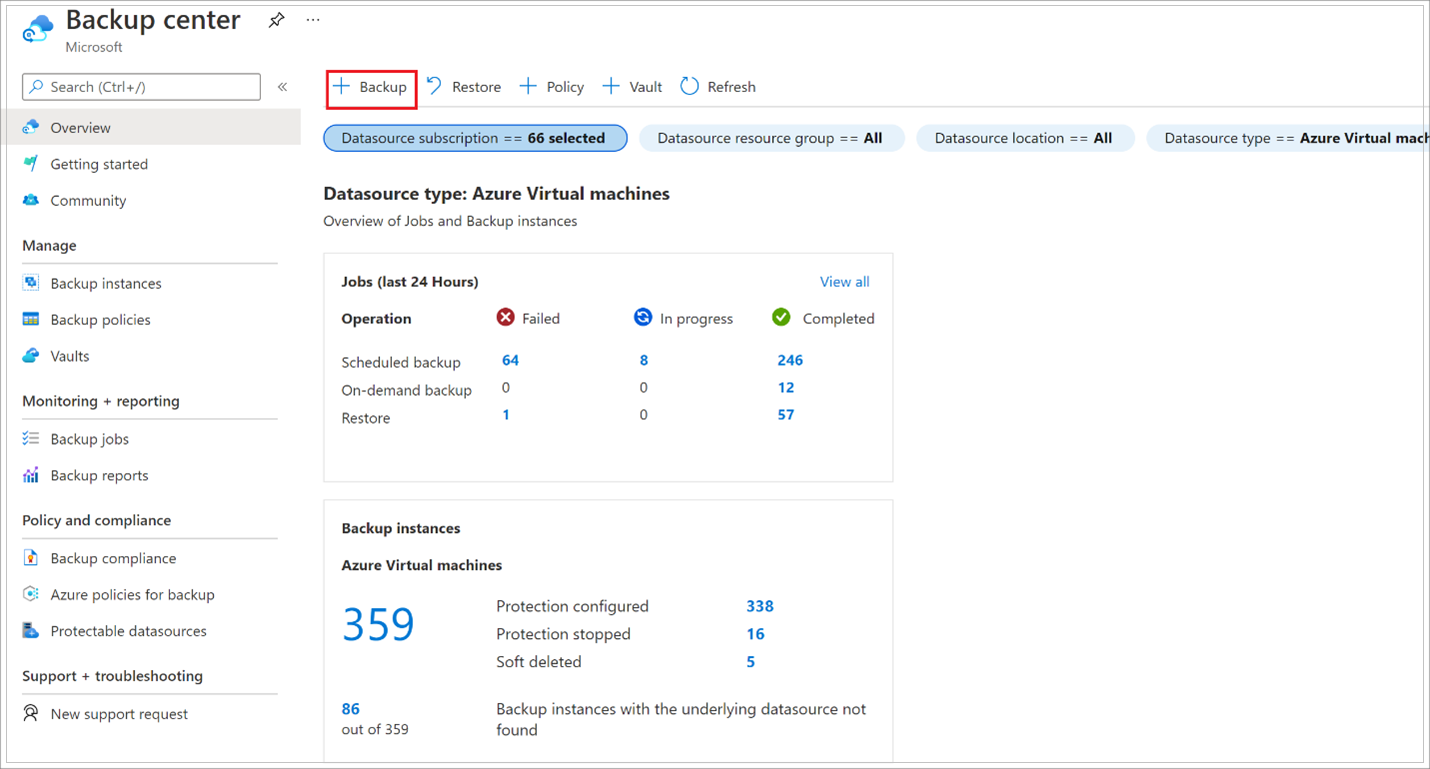
Search for Backup center, and then go to the Backup center dashboard.
On the Overview pane, select Vault.
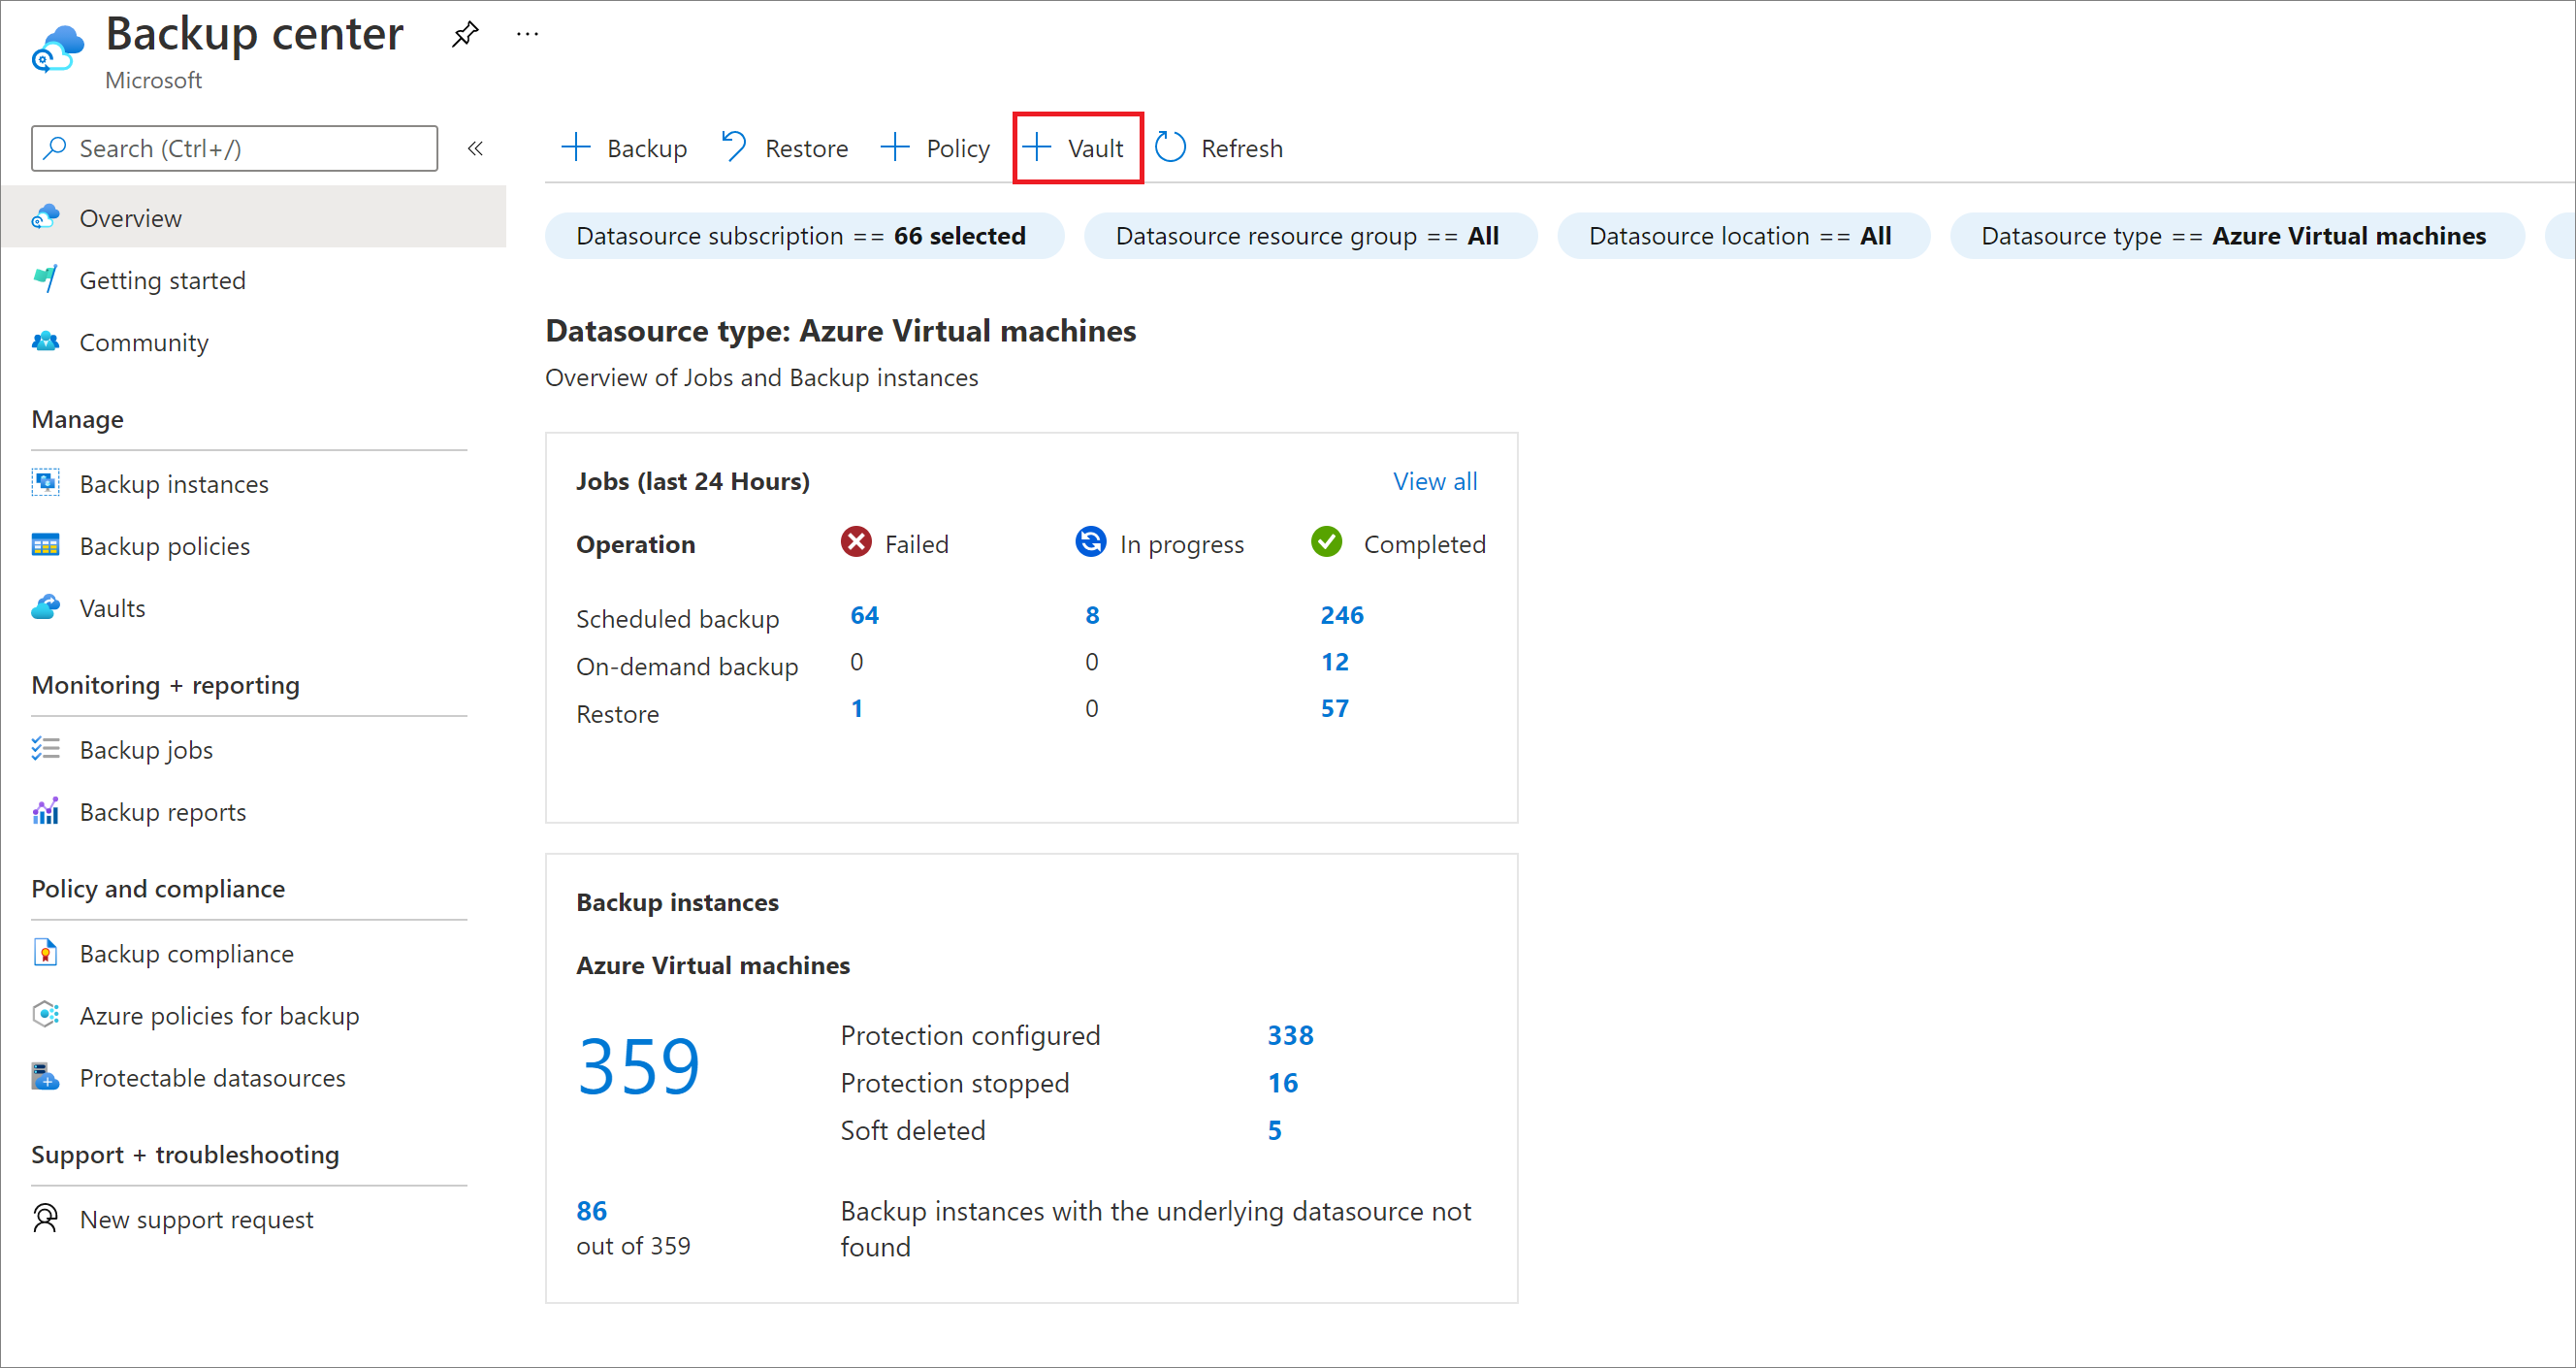
Select Recovery Services vault > Continue.

On the Recovery Services vault pane, enter the following values:
Subscription: Select the subscription to use. If you're a member of only one subscription, you'll see that name. If you're not sure which subscription to use, use the default subscription. There are multiple choices only if your work or school account is associated with more than one Azure subscription.
Resource group: Use an existing resource group or create a new one. To view a list of available resource groups in your subscription, select Use existing, and then select a resource in the dropdown list. To create a new resource group, select Create new, and then enter the name. For more information about resource groups, see Azure Resource Manager overview.
Vault name: Enter a friendly name to identify the vault. The name must be unique to the Azure subscription. Specify a name that has at least 2 but not more than 50 characters. The name must start with a letter and consist only of letters, numbers, and hyphens.
Region: Select the geographic region for the vault. For you to create a vault to help protect any data source, the vault must be in the same region as the data source.
Important
If you're not sure of the location of your data source, close the window. Go to the list of your resources in the portal. If you have data sources in multiple regions, create a Recovery Services vault for each region. Create the vault in the first location before you create a vault in another location. There's no need to specify storage accounts to store the backup data. The Recovery Services vault and Azure Backup handle that automatically.
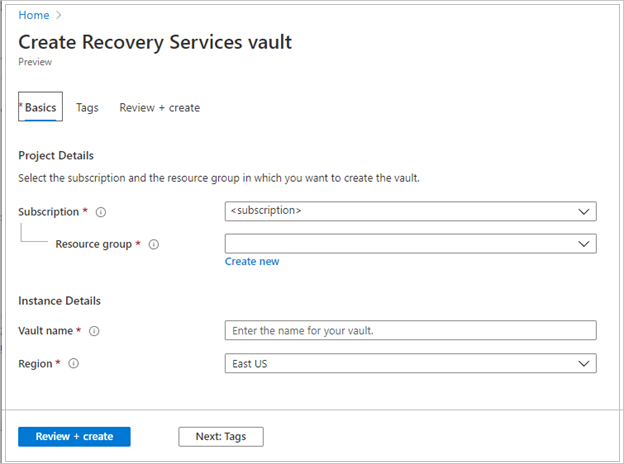
After providing the values, select Review + create.
To finish creating the Recovery Services vault, select Create.
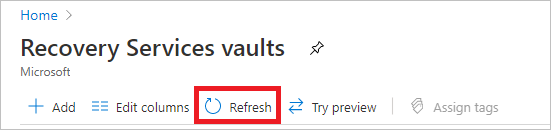
It can take a while to create the Recovery Services vault. Monitor the status notifications in the Notifications area at the upper right. After the vault is created, it appears in the list of Recovery Services vaults. If the vault doesn't appear, select Refresh.
Note
Azure Backup now supports immutable vaults that help you ensure that recovery points once created can't be deleted before their expiry as per the backup policy. You can make the immutability irreversible for maximum protection to your backup data from various threats, including ransomware attacks and malicious actors. Learn more.
Apply a backup policy
To apply a backup policy to your Azure VMs, follow these steps:
Go to Backup center and select +Backup from the Overview tab.
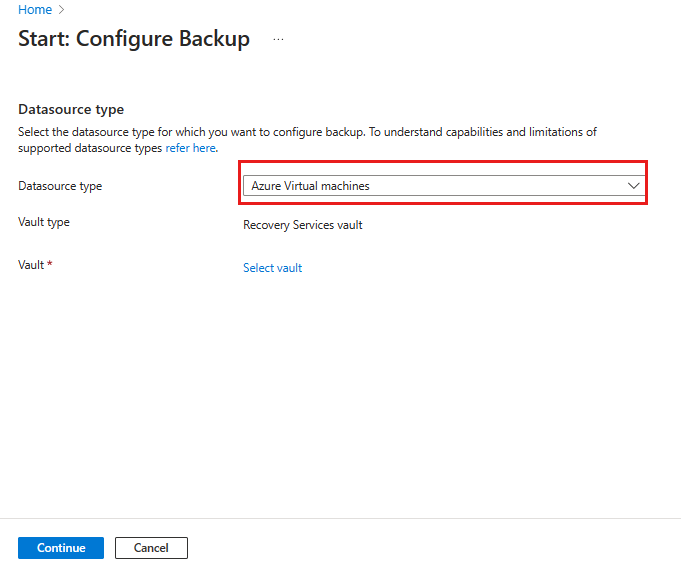
On the Start: Configure Backup blade, select Azure Virtual machines as the Datasource type and select the vault you have created. Then select Continue.
Select the Enhanced Backup policy, as that is the one compatible with Azure Extended Zones.
Note
To enable Azure Backup on Azure VMs in Azure Extended Zones, you can only use the Enhanced policy. This policy allows multiple daily backups, enabling hourly backups. Learn more.
Assign the Backup policy.
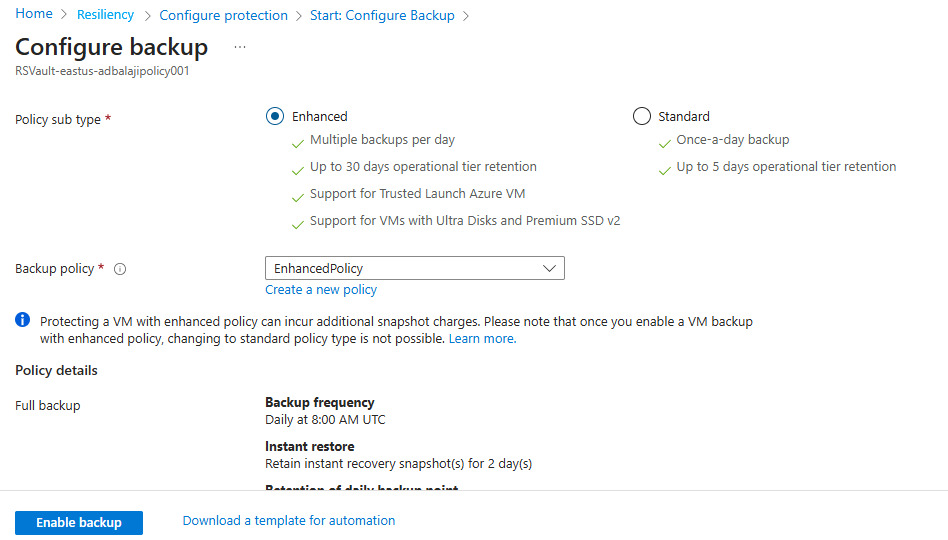
If you don't want to use the default policy, select Create New, and create a custom policy as described in the next procedure.


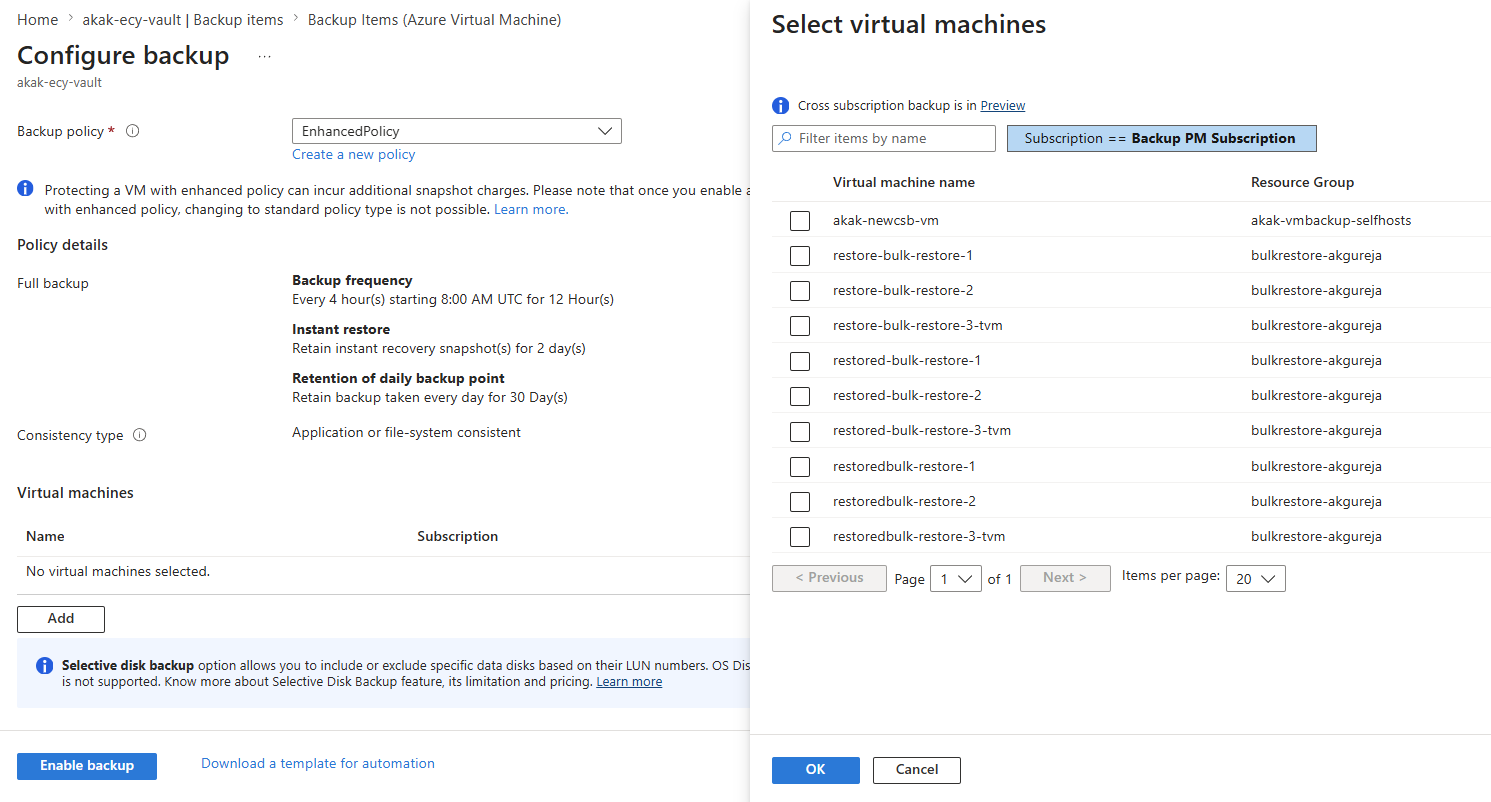
Select a VM to back up
To create a simple scheduled daily backup to a Recovery Services vault, follow these steps:
Under Virtual Machines, select Add.
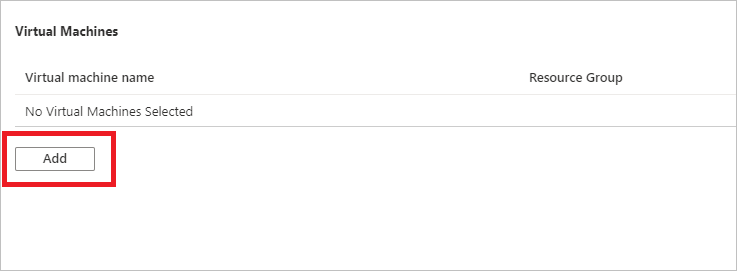
The Select virtual machines pane opens. Select the VMs you want to back up using the policy. Then select OK.
Note
You can configure backup for all VMs in the same region and subscription as the vault.


Enable backup on a VM
A Recovery Services vault is a logical container that stores backup data for protected resources like Azure VMs. When a backup job runs for a protected resource, it creates a recovery point in the Recovery Services vault. You can use these recovery points to restore data to a specific point in time.
To enable VM backup, in Backup, select Enable backup. This deploys the policy to the vault and to the VMs, and installs the backup extension on the VM agent running on the Azure VM.
After enabling backup:
- The Backup service installs the backup extension whether or not the VM is running.
- An initial backup runs in accordance with your backup schedule.
- When backups run, note that:
- A VM that's running has the highest chance for capturing an application-consistent recovery point.
- However, if the VM is turned off (an offline VM), it is still backed up, resulting in a crash-consistent recovery point.
- Explicit outbound connectivity isn't required for back up of Azure VMs.
Create a custom policy
If you selected to create a new backup policy, fill in the policy settings.
- In Policy name, specify a meaningful name.
- In Backup schedule, specify when backups should be taken. You can take daily or weekly backups for Azure VMs.
- In Instant Restore, specify how long you want to retain snapshots locally for instant restore.
- When you restore, backed-up VM disks are copied from storage across the network to the recovery storage location. With instant restore, you can use locally stored snapshots taken during a backup job without waiting for the backup data to transfer to the vault.
- You can retain snapshots for instant restore for between one to five days. The default value is two days.
- In Retention range, specify how long you want to keep your daily or weekly backup points.
- In Retention of monthly backup point and Retention of yearly backup point, specify whether you want to keep a monthly or yearly backup of your daily or weekly backups.
- Select OK to save the policy.
Note
To enable Azure Backup on Azure VMs in Azure Extended Zones, use only the Enhanced policy. The Backup service creates a separate resource group (RG) to store the restore point collection (RPC). This RG is different from the RG of the VM.

Run an on-demand backup
The initial backup runs in accordance with the schedule in the Backup policy. However, to run a backup job immediately, follow these steps:
- Go to Backup center and select the Backup Instances menu item.
- Select Azure Virtual machines as the Datasource type. Then search for the VM that you have configured for backup.
- Select the relevant row or select the more icon (…), and then select Backup Now.
- In Backup Now, use the calendar control to select the last day that the recovery point should be retained. Then select OK.
Monitor the backup job
Monitor the portal notifications. To monitor the job progress, go to Backup center > Backup Jobs and filter the list for In progress jobs. Depending on the size of your VM, creating the initial backup may take a while.
The Backup job details for each VM backup consist of two phases, the Snapshot phase followed by the Transfer data to vault phase.
The snapshot phase ensures the availability of a recovery point stored along with the disks for Instant Restores and are available for a maximum of five days depending on the snapshot retention configured by the user.
Transfer data to vault creates a recovery point in the vault for long-term retention. This phase starts after the snapshot phase is completed.


There are two Sub Tasks running at the backend, one for front-end backup job that can be checked from the Backup Job details blade as shown:

The Transfer data to vault phase can take multiple days to complete depending on the size of the disks, churn per disk and several other factors.
Job status can vary depending on the following scenarios:
| Snapshot | Transfer data to vault | Job Status |
|---|---|---|
| Completed | In progress | In progress |
| Completed | Skipped | Completed |
| Completed | Completed | Completed |
| Completed | Failed | Completed with warning |
| Failed | Failed | Failed |
With this capability, for the same VM, two backups can run in parallel, but only one sub task can run at a time in either the snapshot or transfer data to vault phase. This decoupling prevents next-day backups from failing due to a backup job already in progress. Subsequent days' backups can have the snapshot completed, while Transfer data to vault is skipped if an earlier day’s backup job is in progress state.
The incremental recovery point created in the vault will capture all the churn from the most recent recovery point created in the vault. There's no cost impact on the user.
Optional steps
Install the VM agent
Azure Backup backs up Azure VMs by installing an extension to the Azure VM agent running on the machine. If your VM was created from an Azure Marketplace image, the agent is already installed and running. However, if you create a custom VM or migrate an on-premises machine, you might need to install the agent manually, as summarized in the following table:
| VM | Details |
|---|---|
| Windows | 1. Download and install the agent MSI file. 2. Install with admin permissions on the machine. 3. Verify the installation. In C:\WindowsAzure\Packages on the VM, right-click WaAppAgent.exe > Properties. On the Details tab, Product Version should be 2.6.1198.718 or higher. If you're updating the agent, make sure that no backup operations are running, and reinstall the agent. |
| Linux | Install by using an RPM or a DEB package from your distribution's package repository. This is the preferred method for installing and upgrading the Azure Linux agent. All the endorsed distribution providers integrate the Azure Linux agent package into their images and repositories. The agent is available on GitHub, but we don't recommend installing from there. If you're updating the agent, make sure no backup operations are running, and update the binaries. |
Clean up deployment
When no longer needed, you can disable protection on the VM, remove the restore points and Recovery Services vault, then delete the resource group and associated VM resources.
If you want to restore the VM using the recovery points, skip the steps in this section and go to Next steps.
Select the Backup option for your VM.
Choose Stop backup.

Select Delete Backup Data from the drop-down menu.
In the Type the name of the Backup item dialog, enter your VM name, such as myVM. Select Stop Backup.
Once the VM backup has been stopped and recovery points removed, you can delete the resource group. If you used an existing VM, you may want to leave the resource group and VM in place.
In the menu on the left, select Resource groups.
From the list, choose your resource group. If you used the sample VM quickstart commands, the resource group is named myResourceGroup.
Select Delete resource group. To confirm, enter the resource group name, then select Delete.

Next steps
- To learn more about Azure Extended Zones, continue to Azure Extended Zones.
- To learn more about Azure VM restore, continue to Azure VM restore.