Share queries from Azure Data Explorer web UI
This article describes the process of sharing queries from the Azure Data Explorer web UI. By the end of this article, you'll know how to share a query link, share the query results, or even pin it to a dashboard.
To learn how to run queries, see Quickstart: Query data in the Azure Data Explorer web UI.
Prerequisites
- A Microsoft account or a Microsoft Entra user identity. An Azure subscription isn't required.
- An Azure Data Explorer cluster and database. Use the publicly available help cluster or create a cluster and database.
Share options
The following table outlines the many options for how to share a query.
| Action | Description |
|---|---|
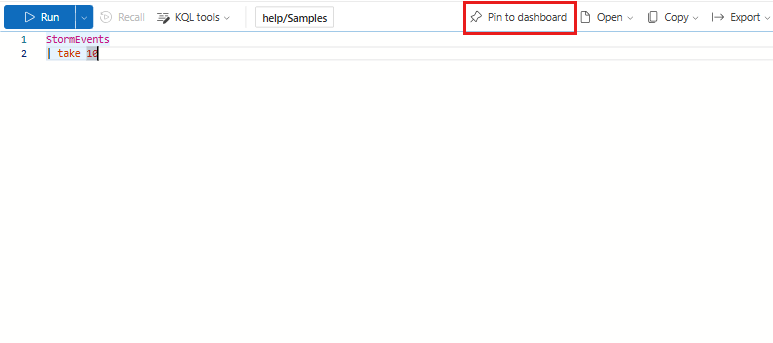
| Pin to dashboard | Display the query in an Azure Data Explorer dashboard. |
| Link to clipboard | Copy a link that can be used to run the query. |
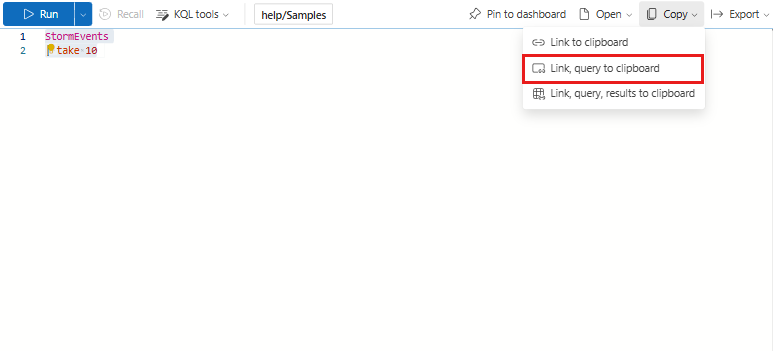
| Link, query to clipboard | Copy a link that can be used to run the query and the text of the query. For enhanced security, the shared query opens in Azure Data Explorer in Protected mode. |
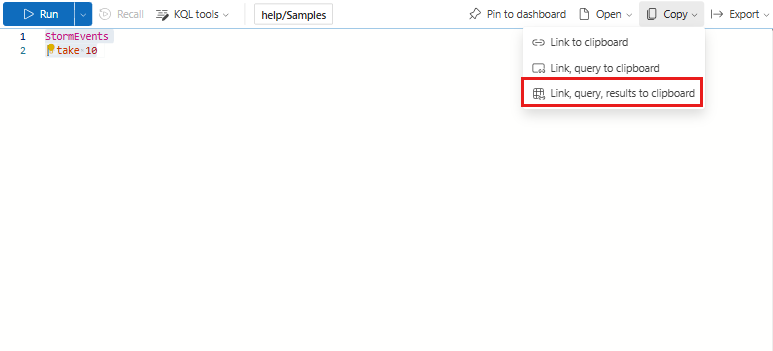
| Link, query, results to clipboard | Copy a link that can be used to run the query, the text of the query, and the results of the query. For enhanced security, the shared query opens in Azure Data Explorer in protected mode. |
| Download | Download a KQL file of the query. |
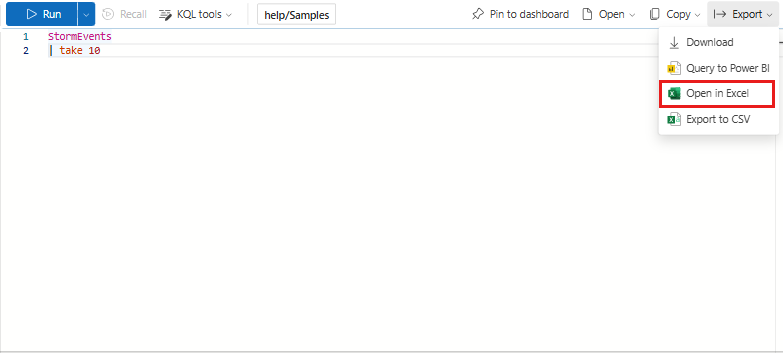
| Open in Excel | Open a live query in an Excel workbook that can be refreshed directly from Excel. |
| Export to CSV | Download a CSV of the query results. |
Pin to dashboard
To pin a query to a dashboard for continuous monitoring, follow these steps:
In the query window, select the query that you want to pin.
Select Pin to dashboard.
In the Pin to dashboard pane:
- Provide a Tile name.
- Select Use existing or Create new.
- Provide the Dashboard name.
- Select the View dashboard after creation checkbox (if it's a new dashboard).
- Select Pin.
Note
Pin to dashboard only pins the selected query. To create the dashboard data source and translate render commands to a visual in the dashboard, the relevant database must be selected in the database list.
Link to clipboard
To copy a link to share with others, follow these steps:
In the query window, select the query that you want to share.
Under Copy, select Link to clipboard.
Paste the link into a new browser window to run the query.
Note
The user must have access to the cluster to run the query.
Link, query to clipboard
To copy a link to share with others and the text of the query, follow these steps:
In the query window, select the query that you want to share.
Under Copy, select Link, query to clipboard.
Paste to share. The output lists the link followed by the query text.
Note
The query link request is generated with request_readonly_hardline set to true, ensuring it operates in strict read-only mode for enhanced security in protected mode. The Protected mode banner displays above the query and an icon appears in the query tab when protected mode is enabled. For more information about this request property, see Request properties.
Link, query, results to clipboard
To copy a link to share with others, the text of the query, and the results of the query, follow these steps:
In the query window, select the query that you want to share.
Under Copy, select Link, query, results to clipboard.
Paste to share. The output lists the link, query text, and query results.
Note
The query link request is generated with request_readonly_hardline set to true, ensuring it operates in strict read-only mode for enhanced security in protected mode. The Protected mode banner displays above the query and an icon appears in the query tab when protected mode is enabled. For more information about this request property, see Request properties.
Download
To download a KQL file of the query, follow these steps:
Open in Excel
To access live results of your query in an Excel workbook, follow these steps:
In the query window, create and select the query that you want to share.
Select Export > Open in Excel.
Open and share the downloaded Excel workbook, which is connected to Azure Data Explorer and can be refreshed. You can refresh your Excel workbook with new data from Azure Data Explorer, and all related Excel artifacts, like charts and pivot tables, is updated based on the new data.
Note
Depending on your Excel settings, you might need to enable editing and grant permission to access external data connections for the file to update.
Export to CSV
To export the query results to a CSV file, follow these steps:


