How to send requests to the Azure Digital Twins APIs using Visual Studio
Visual Studio 2022 has support for .http files, which can be used to structure, store, and directly send HTTP requests from the application. Using this functionality of Visual Studio is one way to craft HTTP requests and submit them to the Azure Digital Twins REST APIs. This article describes how to set up an .http file in Visual Studio that can interface with the Azure Digital Twins APIs.
This article contains information about the following steps:
- Set up a Visual Studio project and
.httpfile, with variables that represent your Azure Digital Twins instance. - Use the Azure CLI to get a bearer token that you can use to make API requests in Visual Studio.
- Use the Azure Digital Twins REST API documentation as a resource to craft requests in the
.httpfile, and send them to the Azure Digital Twins APIs.
Azure Digital Twins has two sets of APIs that you can work with: data plane and control plane. For more information about the difference between these API sets, see Azure Digital Twins APIs and SDKs. This article contains instructions for both API sets.
For more information about .http file support in Visual Studio, see Use .http files in Visual Studio 2022.
Prerequisites
To make requests to the Azure Digital Twins APIs using Visual Studio, you need to set up an Azure Digital Twins instance and download Visual Studio 2022. This section is for these steps.
Set up Azure Digital Twins instance
To work with Azure Digital Twins in this article, you'll need an Azure Digital Twins instance and the required permissions for using it. If you already have an Azure Digital Twins instance set up, you can use that instance and skip to the next section. Otherwise, follow the instructions in Set up an instance and authentication. The instructions contain information to help you verify that you've completed each step successfully.
After you set up your instance, make a note of the instance's host name. You can find the host name in the Azure portal.
Download Visual Studio 2022
Next, download Visual Studio 2022. Make sure to include the ASP.NET and web development workload in your installation.
Set up Visual Studio project
In this section, you set up the project in Visual Studio that will be used to craft HTTP requests.
Open Visual Studio on your machine, and create a new project. Use the ASP.NET Core Empty project template.

Follow the instructions in Create an .http file to create a new .http file in your project.
Add variables
Next, add some variables at the top of your .http file that will be used to connect to your Azure Digital Twins resource.
The set of variables you need depends on which set of APIs you're using, so use the tabs below to select between data plane and control plane APIs.
Add the following variables for data plane requests. There's one placeholder for the host name of your Azure Digital Twins instance (it ends in digitaltwins.azure.net).
@hostName=<host-name-of-your-Azure-Digital-Twins-instance>
@DPversion=2023-10-31
Add bearer token
Now that you've set up your Azure Digital Twins instance and Visual Studio project, you need to get a bearer token that HTTP requests can use to authorize against the Azure Digital Twins APIs.
There are multiple ways to obtain this token. This article uses the Azure CLI to sign into your Azure account and obtain a token that way.
If you have an Azure CLI installed locally, you can start a command prompt on your machine to run the following commands. Otherwise, you can open an Azure Cloud Shell window in your browser and run the commands there.
First, make sure you're logged into Azure with the right credentials, by running this command:
az loginNext, use the az account get-access-token command to get a bearer token with access to the Azure Digital Twins service. In this command, you pass in the resource ID for the Azure Digital Twins service endpoint, in order to get an access token that can access Azure Digital Twins resources.
The required context for the token depends on which set of APIs you're using, so use the tabs below to select between data plane and control plane APIs.
To get a token to use with the data plane APIs, use the following static value for the token context:
0b07f429-9f4b-4714-9392-cc5e8e80c8b0. This value is the resource ID for the Azure Digital Twins service endpoint.az account get-access-token --resource 0b07f429-9f4b-4714-9392-cc5e8e80c8b0Note
If you need to access your Azure Digital Twins instance using a service principal or user account that belongs to a different Microsoft Entra tenant from the instance, you need to request a token from the Azure Digital Twins instance's "home" tenant. For more information on this process, see Write app authentication code.
Copy the value of
accessTokenin the result. This value is your token value that you'll paste into Visual Studio to authorize your requests.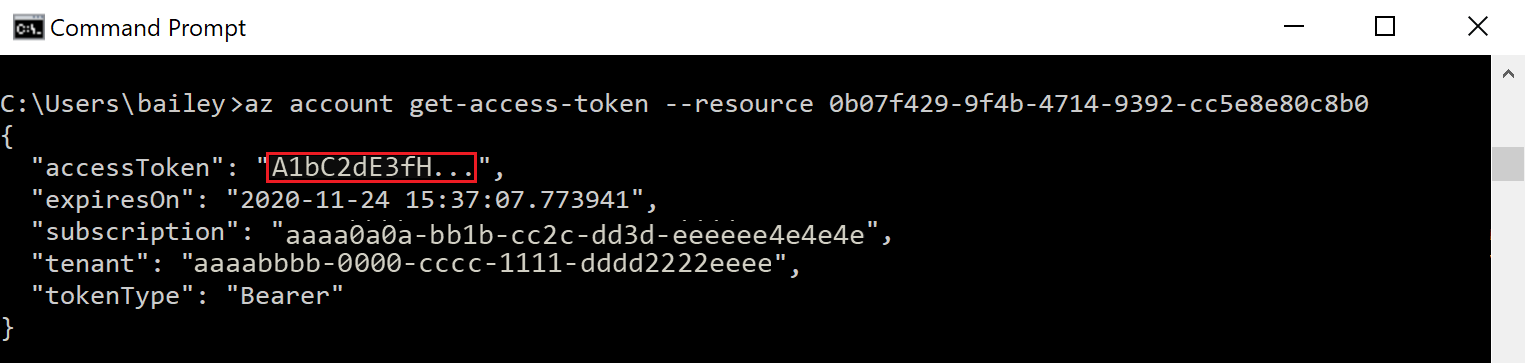

Tip
This token is valid for at least five minutes and a maximum of 60 minutes. If you run out of time allotted for the current token, you can repeat the steps in this section to get a new one.
Add token to .http file
In your .http file in Visual Studio, add another variable that holds the value of your token.
@token=<paste-data-plane-token>
Your variables should now look something like this:


Add requests
Now that your .http file is set up, you can add requests to the Azure Digital Twin APIs.
Start by opening the Azure Digital Twins REST API reference. This documentation contains details of all the operations covered by the APIs. Navigate to the reference page of the request you want to run.
This article will use the DigitalTwins Update API from the data plane as an example.
Add request template: Copy the HTTP request shown in the reference documentation.
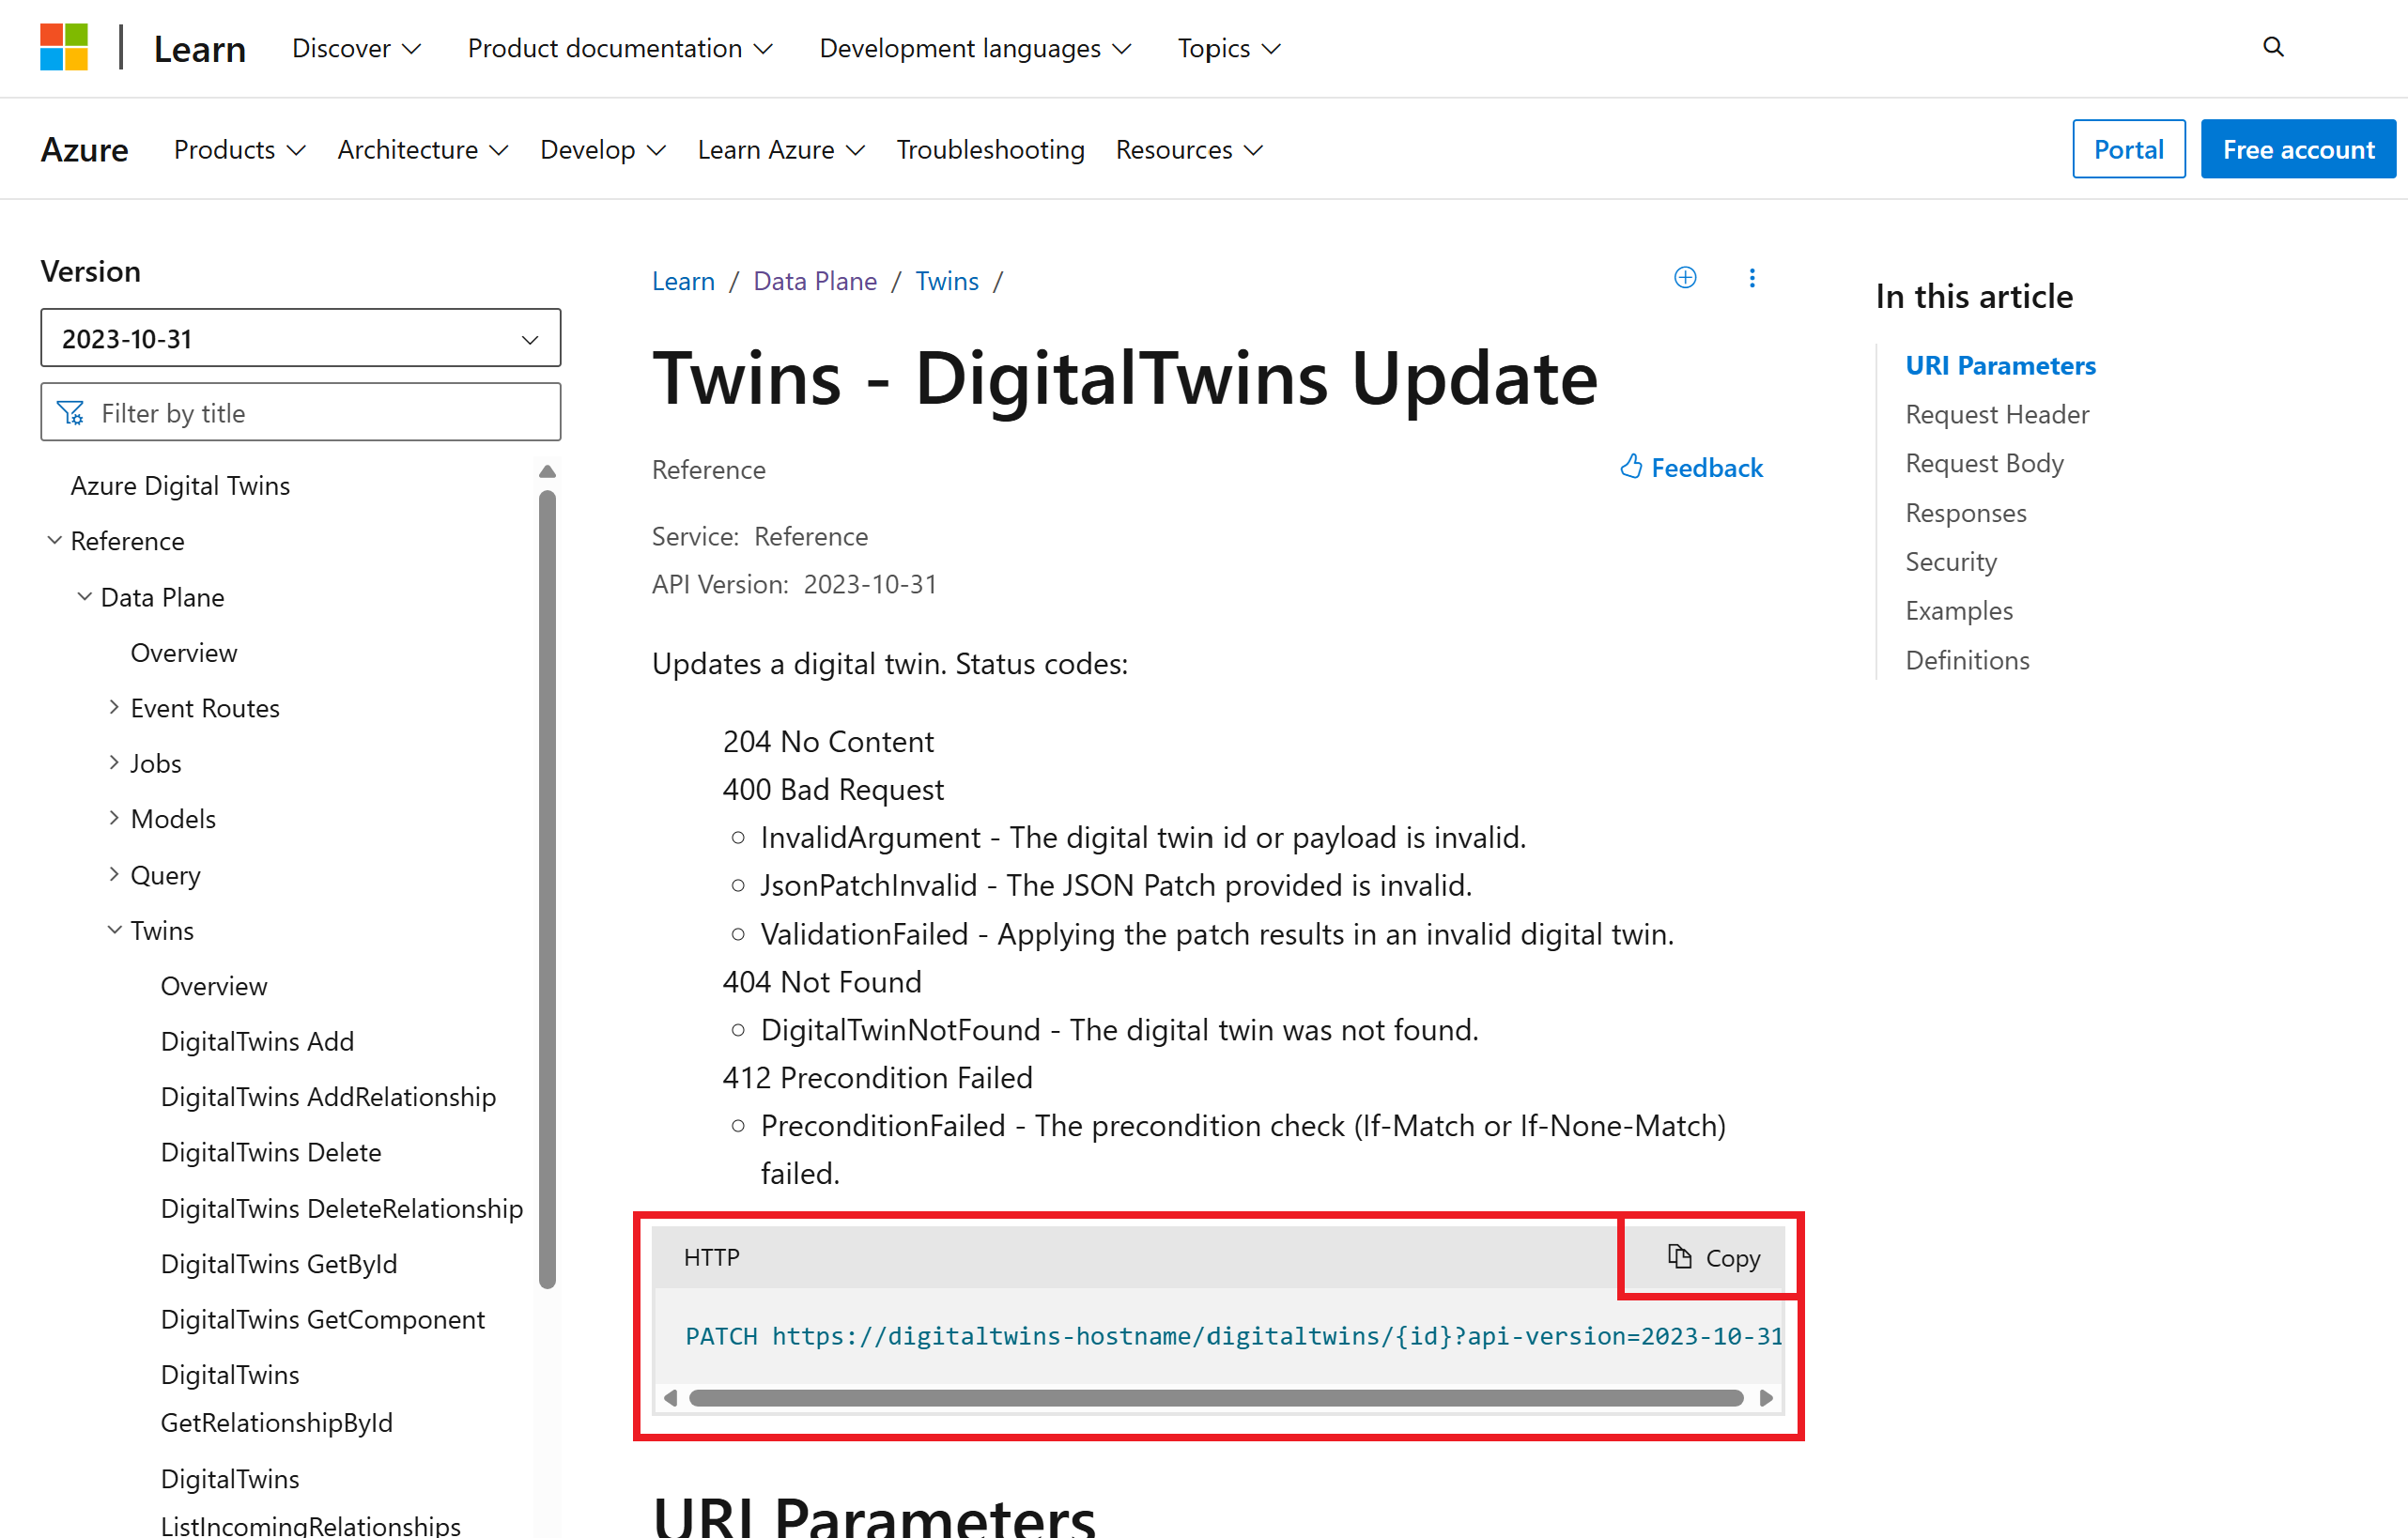
In Visual Studio, paste the request in a new line below the variables in your
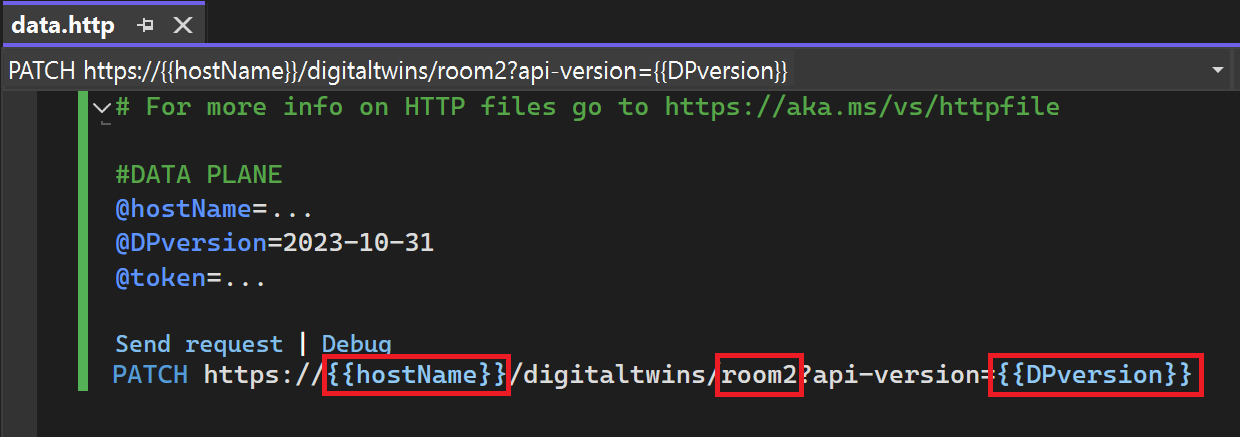
.httpfile.Add parameters: Look at the URI Parameters section of the reference documentation to see which parameter values are needed by the request. You can replace some with the variables you created earlier, and fill in other parameter values as appropriate. To reference a variable, put the variable name in double curly braces, like
{{variable}}. For more details, see Variables.Note
For data plane requests,
digitaltwins-hostnameis also a parameter. Replace this with{{hostName}}to use the value of your host name variable.Here's how this step looks in an example request:
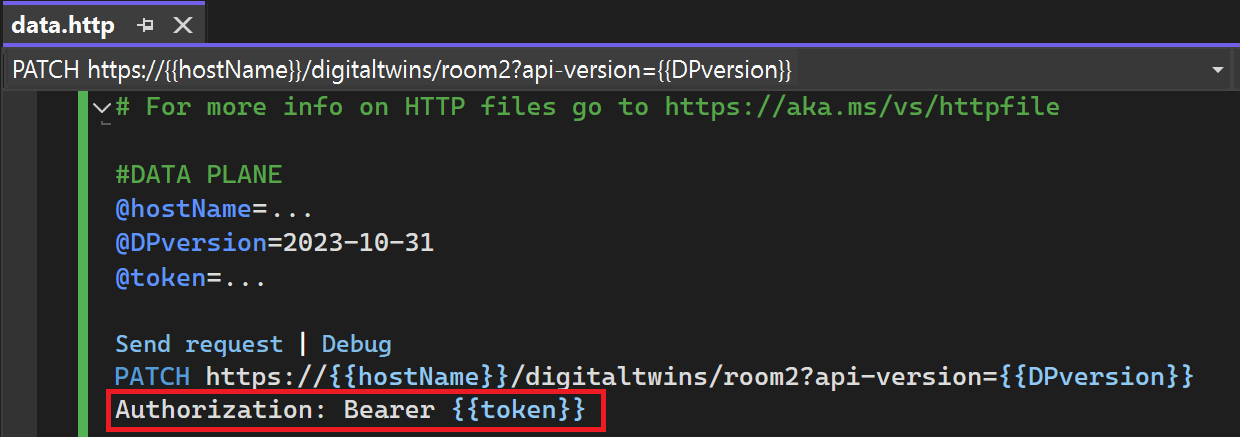
Add authorization: Add the following line (exactly as written) directly underneath the request, to specify authentication with your bearer token variable.
Authorization: Bearer {{token}}Here's how this step looks in an example request:
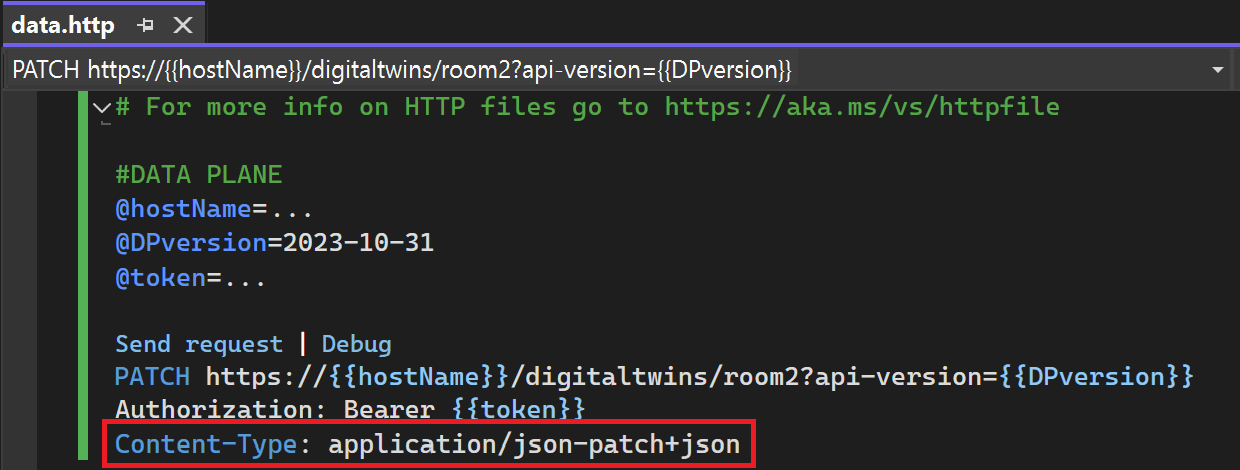
Add additional headers: Look at the Request Header section of the reference documentation to see which header values can accompany the request. You may also want to include traditional HTTP headers like
Content-Type. Add each header on its own line in the formatHeaderName: Value. For more details, see Request headers.Here's how this step looks in an example request:
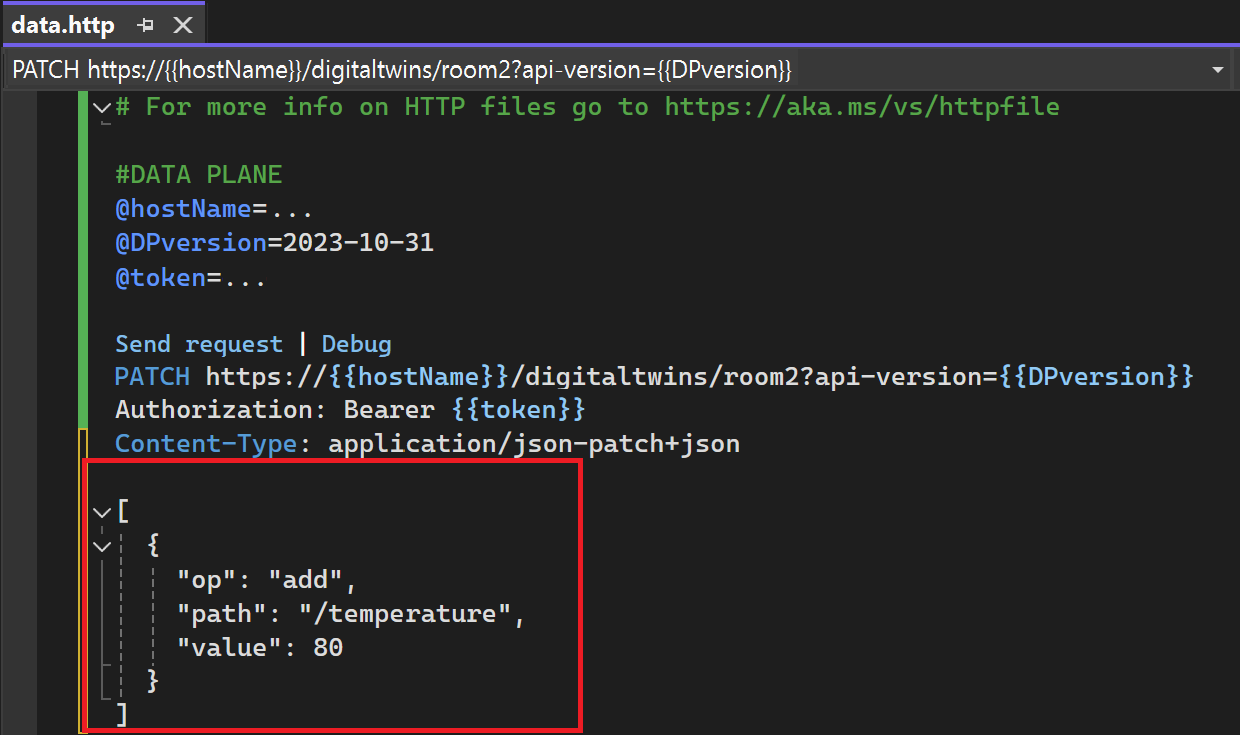
Add body: Look at the Request Body section of the reference documentation to see what body information might be needed by the request. Add the request body after a blank line. For more details, see Request body.
Here's how this step looks in an example request:
When the request is ready, select Send request above the request to send it.
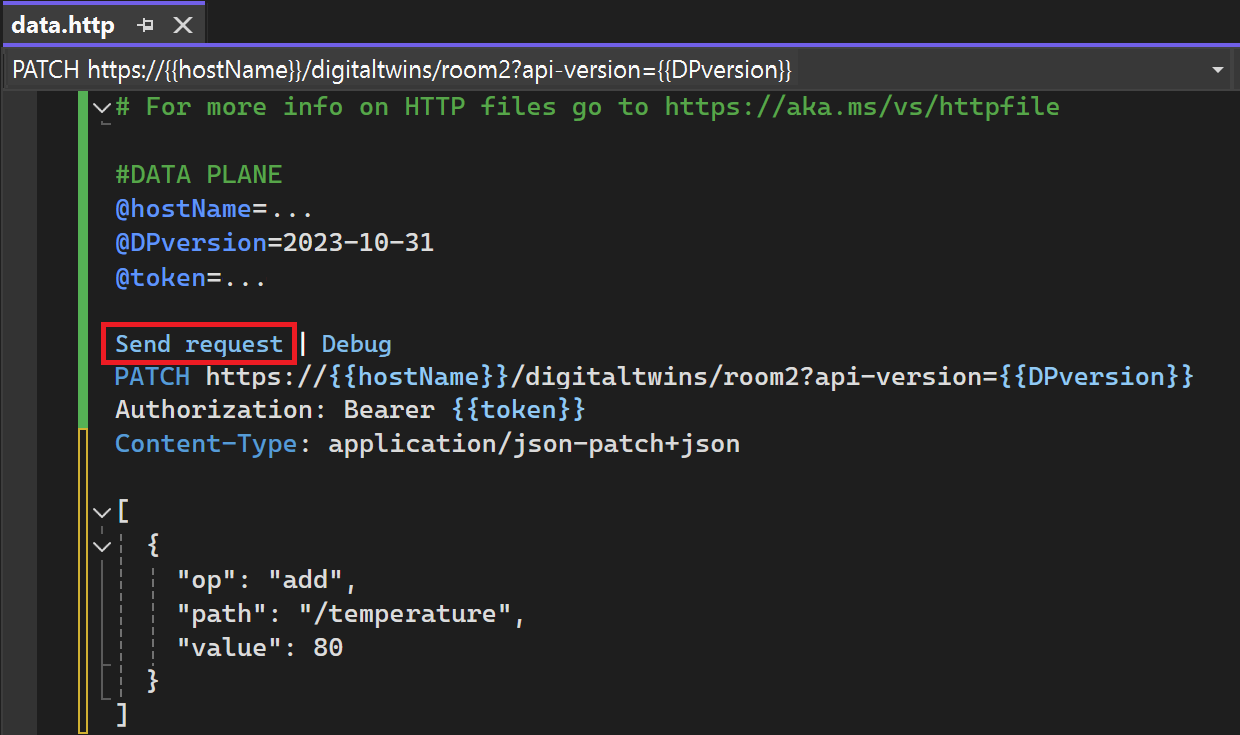


Visual Studio brings up a pane with the details of the response. Look at the Responses section of the reference documentation to interpret the status code and any data in the response body.

Add additional requests
To add more requests to the .http file, separate them with ### as a delimiter.

Next steps
For more details about sending requests with .http files in Visual Studio, including syntax details and advanced scenarios, see Use .http files in Visual Studio 2022.
To learn more about the Digital Twins APIs, read Azure Digital Twins APIs and SDKs, or view the reference documentation for the REST APIs.