Create an Azure key vault
This article describes how to create a key vault to store domain credentials.
Note
To learn about the Azure Monitor SCOM Managed Instance architecture, see Azure Monitor SCOM Managed Instance.
Create a key vault to store secrets
For security, you can store domain account credentials in key vault secrets. Later, you can use these secrets in SCOM Managed Instance creation.
Azure Key Vault is a cloud service that provides a secure store for keys, secrets, and certificates. For more information, see About Azure Key Vault.
In the Azure portal, search for and select Key vaults.

The Key vaults page opens.
Select Create.
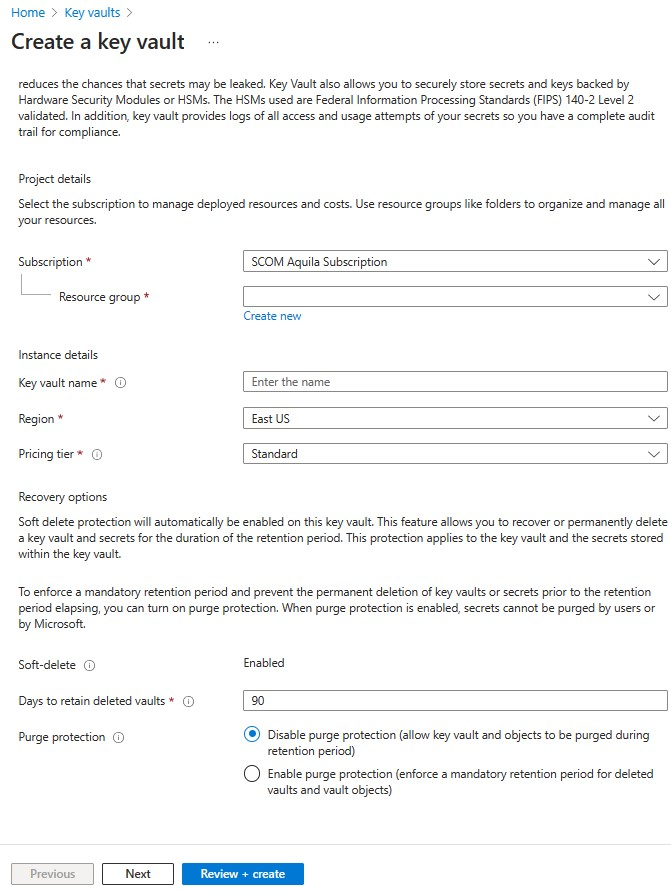
For Basics, do the following:
- Project details:
- Subscription: Select the subscription.
- Resource group: Select the resource group you want.
- Instance details:
- Key vault name: Enter the name of your key vault. There are no added restrictions, except for those that apply to names in other Azure services.
- Region: Choose the region that you're going to select for your other resources.
- Pricing tier: Select Standard or Premium as required.
- Recovery options:
- Days to retain deleted vaults: Enter a value from 7 to 90.
- Purge protection: We recommend enabling this feature to have a mandatory retention period.

- Project details:
Select Next. For now, no change is required in access configuration. Access configuration is done in the step 5.
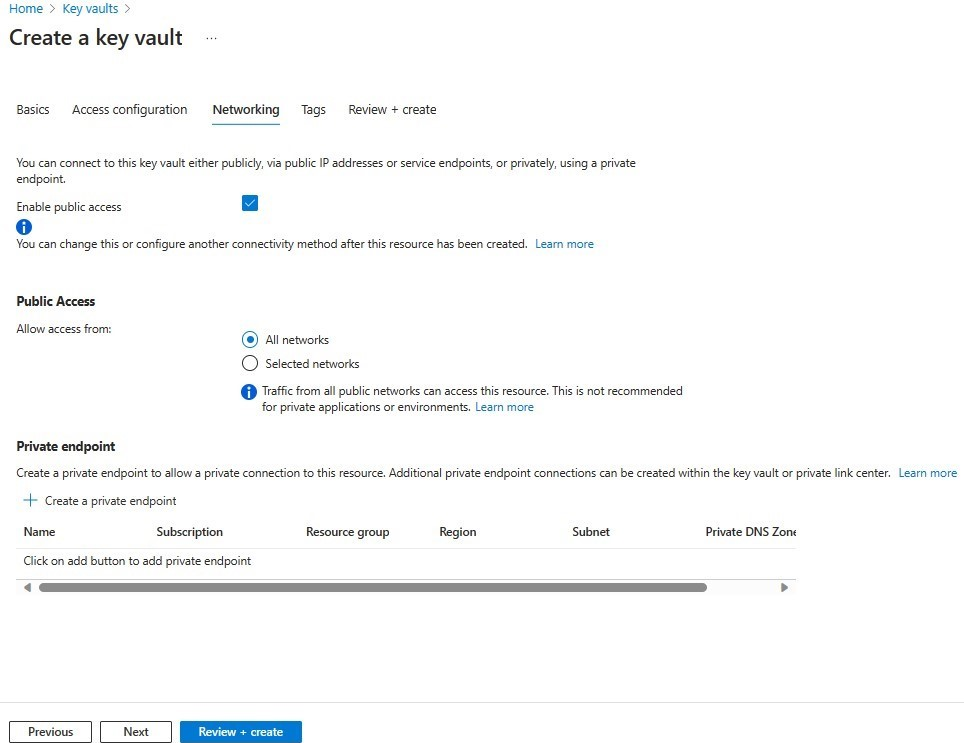
For Networking, do the following:
- Select Enable public access.
- Under Public Access, for Allow access from, select All networks.
Select Next.
For Tags, select the tags if required and select Next.
For Review + create, review the selections and select Create to create the key vault.
