Protect your Google Cloud Platform (GCP) containers with Defender for Containers
Defender for Containers in Microsoft Defender for Cloud is the cloud-native solution that is used to secure your containers so you can improve, monitor, and maintain the security of your clusters, containers, and their applications.
Learn more about Overview of Microsoft Defender for Containers.
You can learn more about Defender for Container's pricing on the pricing page.
Prerequisites
You need a Microsoft Azure subscription. If you don't have an Azure subscription, you can sign up for a free subscription.
You must enable Microsoft Defender for Cloud on your Azure subscription.
Verify your Kubernetes nodes can access source repositories of your package manager.
Ensure the following Azure Arc-enabled Kubernetes network requirements are validated.
Enable the Defender for Containers plan on your GCP project
To protect Google Kubernetes Engine (GKE) clusters:
Sign in to the Azure portal.
Search for and select Microsoft Defender for Cloud.
In the Defender for Cloud menu, select Environment settings.
Select the relevant GCP project.

Select the Next: Select plans button.
Ensure that the Containers plan is toggled to On.

To change optional configurations for the plan, select Settings.
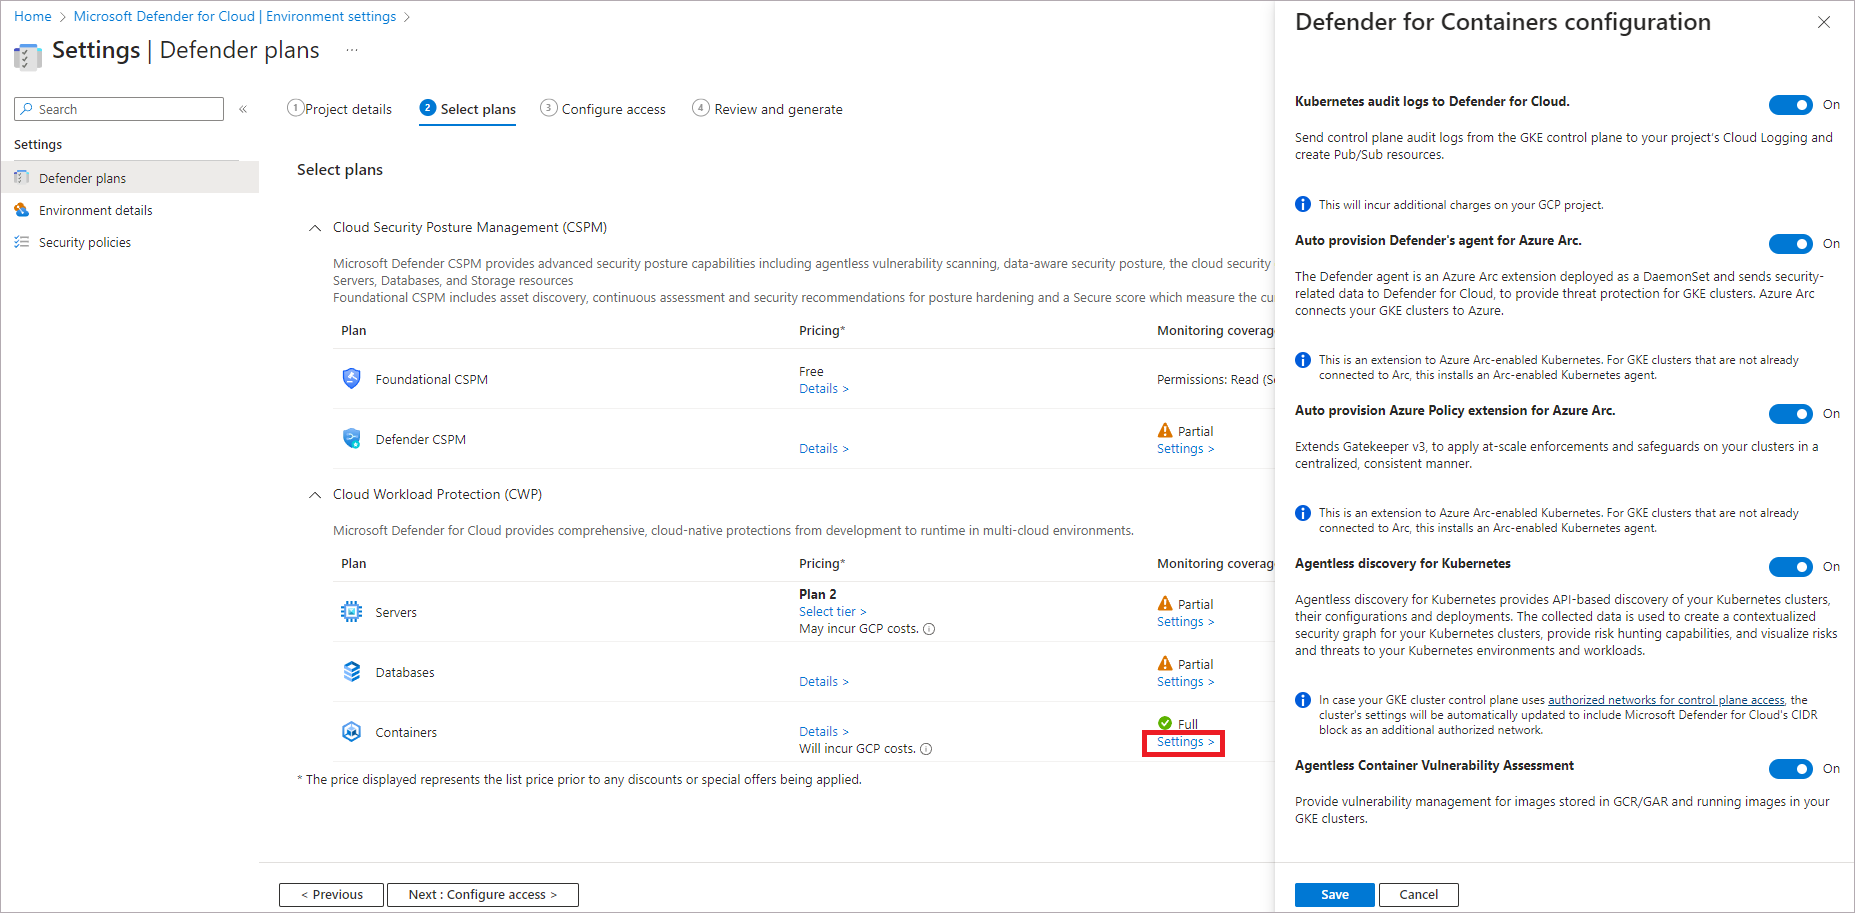
The Agentless threat protection feature provides runtime threat protection for your cluster containers and is enabled by default. This configuration is available at the GCP project level only. It provides agentless collection of the control plane audit log data through GCP Cloud Logging to the Microsoft Defender for Cloud back end for further analysis.
Note
If you disable this configuration, then the
Threat detection (control plane)feature will be disabled. Learn more about features availability.Auto provision Defender's sensor for Azure Arc and Auto provision Azure Policy extension for Azure Arc: Enabled by default. You can install Azure Arc-enabled Kubernetes and its extensions on your GKE clusters in three ways:
- Enable Defender for Containers autoprovisioning at the project level, as explained in the instructions in this section. We recommend this method.
- Use Defender for Cloud recommendations for per-cluster installation. They appear on the Microsoft Defender for Cloud recommendations page. Learn how to deploy the solution to specific clusters.
- Manually install Arc-enabled Kubernetes and extensions.
K8S API access sets permissions to allow API-based discovery of your Kubernetes clusters. To enable, set the K8S API access toggle to On.
Registry access sets permissions to allow vulnerability assessment of images stored in Google Registries (GAR and GCR). To enable, set the Registry access toggle to On.
Select the Copy button.

Select the GCP Cloud Shell button.
Paste the script into the Cloud Shell terminal, and run it.
The connector will update after the script executes. This process can take up to 6-8 hours up to complete.
Select Next: Review and Generate>.
Select Update.


Deploy the solution to specific clusters
If you disabled any of the default auto provisioning configurations to Off, during the GCP connector onboarding process, or afterwards. You need to manually install Azure Arc-enabled Kubernetes, the Defender sensor, and Azure Policy for Kubernetes to each of your GKE clusters to get the full security value out of Defender for Containers.
There are two dedicated Defender for Cloud recommendations you can use to install the extensions (and Arc if necessary):
GKE clusters should have Microsoft Defender's extension for Azure Arc installedGKE clusters should have the Azure Policy extension installed
Note
When installing Arc extensions, you must verify that the GCP project provided is identical to the one in the relevant connector.
To deploy the solution to specific clusters:
Sign in to the Azure portal.
Search for and select Microsoft Defender for Cloud.
In the Defender for Cloud menu, select Recommendations.
From Defender for Cloud's Recommendations page, search for each one of the recommendations above by name.

Select an unhealthy GKE cluster.
Important
You must select the clusters one at a time.
Don't select the clusters by their hyperlinked names: select anywhere else in the relevant row.
Select the name of the unhealthy resource.
Select Fix.

Defender for Cloud generates a script in the language of your choice:
- For Linux, select Bash.
- For Windows, select PowerShell.
Select Download remediation logic.
Run the generated script on your cluster.
Repeat steps 3 through 10 for the second recommendation.

Next steps
For advanced enablement features for Defender for Containers, see the Enable Microsoft Defender for Containers page.