Get started with Maven packages in Azure Artifacts
Azure DevOps Services | Azure DevOps Server 2022 - Azure DevOps Server 2019
Azure Artifacts enables developers to manage their dependencies from a single feed while providing control over package sharing. With Azure Artifacts feeds, you can publish and restore Maven packages, and set up upstream sources to consume packages from public registries like Maven Central, Google Maven Repository, Gradle Plugins, and JitPack. This article will guide you through setting up your Maven project, connecting to an Azure Artifacts feed, and publishing and restoring your Maven packages.
Prerequisites
Create an Azure DevOps organization and a project if you haven't already.
Create a feed
Sign in to your Azure DevOps organization, and then go to your project.
Select Artifacts, and then select Create Feed.
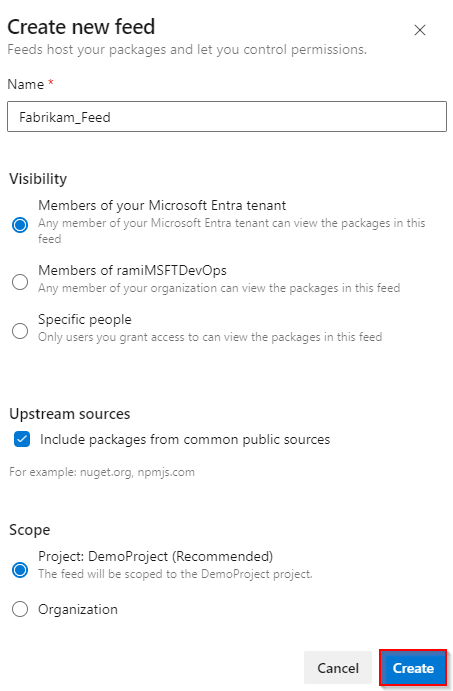
For Name, enter a descriptive name for your feed.
For Visibility, select an option to indicate who can view packages within the feed.
If you want to include packages from public sources, select the checkbox under Upstream sources.
For Scope, specify whether the scope of your feed is the project or the organization.
Select Create when you're done.
Sign in to your Azure DevOps server, and then go to your project.
Select Artifacts, and then select Create Feed.
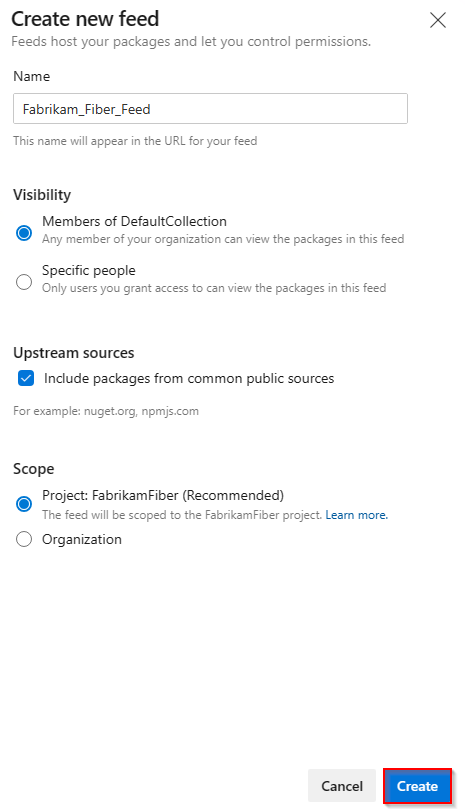
For Name, enter a descriptive name for your feed.
For Visibility, select an option to indicate who can view packages within the feed.
If you want to include packages from public sources, select the checkbox under Upstream sources.
For Scope, specify whether the scope of your feed is the project or the organization.
Select Create when you're done.

Select Create when you're done.
Sign in to your Azure DevOps server, and then go to your project.
Select Artifacts, and then select New feed.
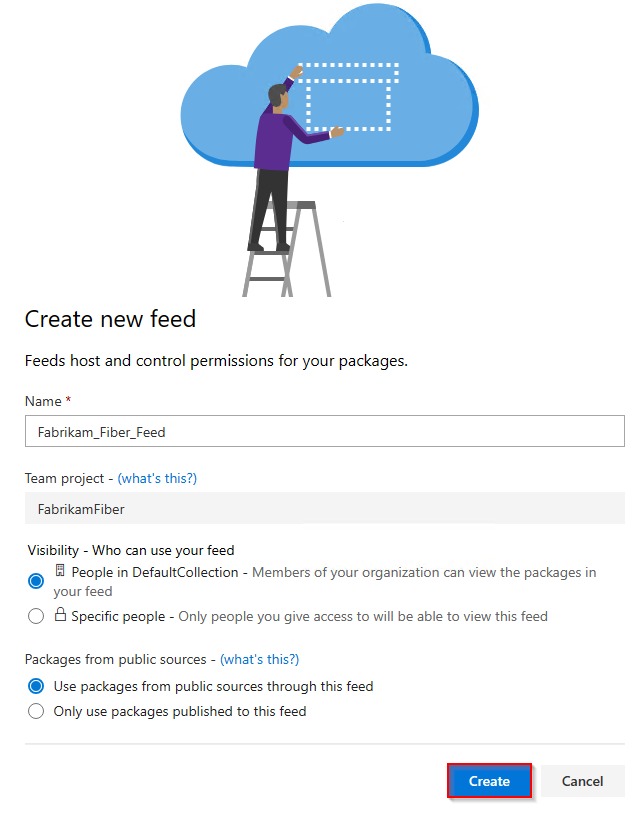
For Name, enter a descriptive name for your feed.
For Visibility, select an option to indicate who can view packages within the feed.
If you want to include packages from public sources, select the Use packages from public sources through this feed option.
Select Create when you're done.
Note
By default, newly created feeds have their project's Build Service value set to Feed and Upstream Reader (Collaborator).
Connect to a feed
Sign in to your Azure DevOps organization, and then navigate to your project.
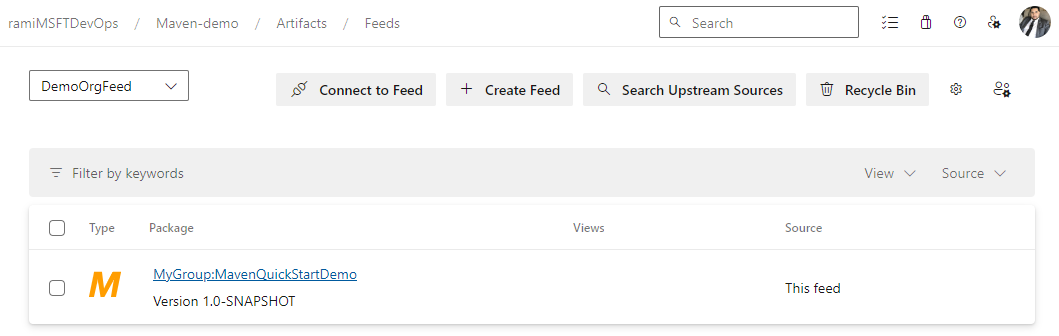
Select Artifacts, and then select your feed from the dropdown menu.
Select Connect to feed, and then select Maven from the left navigation area.
If this is your first time using Azure Artifacts with Maven, make sure you've installed the prerequisites. Otherwise select Get the tools in the top-right corner to install them.
Follow the instructions in the Project setup section to set up your pom.xml and settings.xml files. Your files should resemble the following examples:
pom.xml:
<repositories> <repository> <id>MavenDemo</id> <url>https://pkgs.dev.azure.com/<ORGANIZATION_NAME>/<PROJECT_NAME>/_packaging/<FEED_NAME>/maven/v1</url> <releases> <enabled>true</enabled> </releases> <snapshots> <enabled>true</enabled> </snapshots> </repository> </repositories> <distributionManagement> <repository> <id>MavenDemo</id> <url>https://pkgs.dev.azure.com/<ORGANIZATION_NAME>/<PROJECT_NAME>/_packaging/<FEED_NAME>/maven/v1</url> <releases> <enabled>true</enabled> </releases> <snapshots> <enabled>true</enabled> </snapshots> </repository> </distributionManagement>settings.xml:
  <servers>
    <server>
      <id>MavenDemo</id>
      <username><ORGANIZATION_NAME></username>
      <password>[PERSONAL_ACCESS_TOKEN]</password>
    </server>
  </servers>
Generate a Personal Access Token with Packaging > Read & write scope, and then paste it into the
<password>tag.
Sign in to your Azure DevOps collection, and then navigate to your project.
Select Artifacts, and then select your feed from the dropdown menu.
Select Connect to Feed, and then select Maven from the left navigation pane.
If this is your first time using Azure Artifacts with Maven, make sure you've installed the prerequisites, otherwise select Get the tools in the top-right corner to install them.
Follow the instructions in the Project setup section to set up your pom.xml and settings.xml files. Your files should resemble the following examples:
pom.xml:
<repositories> <repository> <id>MavenDemo</id> <url>http://<SERVER_NAME>/<COLLECTION_NAME>/<PROJECT_NAME>/_packaging/<FEED_NAME>/maven/v1</url> <releases> <enabled>true</enabled> </releases> <snapshots> <enabled>true</enabled> </snapshots> </repository> </repositories> <distributionManagement> <repository> <id>MavenDemo</id> <url>http://<SERVER_NAME>/<COLLECTION_NAME>/<PROJECT_NAME>/_packaging/<FEED_NAME>/maven/v1</url> <releases> <enabled>true</enabled> </releases> <snapshots> <enabled>true</enabled> </snapshots> </repository> </distributionManagement>settings.xml:
  <servers>
    <server>
      <id>MavenDemo</id>
      <username><COLLECTION_NAME></username>
      <password>[PERSONAL_ACCESS_TOKEN]</password>
    </server>
  </servers>
Generate a Personal Access Token with Packaging > Read & write scope, and then paste it into the
<password>tag.
Sign in to your Azure DevOps collection, and then navigate to your project.
Select Artifacts, and then select your feed.
Select Connect to Feed, and then select Maven from the left navigation pane.
Select Generate Maven Credentials and add the credentials to your user settings.xml file inside the
<servers>tag. Your file should look like the following example:<servers> <server> <id>server-2019-defaultcollection-demo</id> <username><FEED_NAME></username> <password>xxxxxxxxxxxxxxxxxxxxxxxxxxxxxx</password> </server> </servers>Add the second snippet to your project's pom.xml inside both the
<repositories>and<distributionManagement>tags. Your file should look like the following example:<repositories> <repository> <id>server-2019-defaultcollection-demo</id> <url>http://<SERVER_NAME>/<COLLECTION_NAME>/_packaging/<FEED_NAME>/maven/v1</url> <releases> <enabled>true</enabled> </releases> <snapshots> <enabled>true</enabled> </snapshots> </repository> </repositories> <distributionManagement> <repository> <id>server-2019-defaultcollection-demo</id> <url>http://<SERVER_NAME>/<COLLECTION_NAME>/_packaging/<FEED_NAME>/maven/v1</url> <releases> <enabled>true</enabled> </releases> <snapshots> <enabled>true</enabled> </snapshots> </repository> </distributionManagement>
Publish packages
Open a command prompt window and navigate to your project directory where your pom.xml file is located, and then run the following command to package your project. This command compiles your code, runs tests included, and packages your project into a distributable format (such as a JAR file).
mvn packageRun the following command from your project directory to publish your package to your feed:
mvn deployAfter successfully deploying your package, it will shortly be available in your feed.

Note
If your organization is using a firewall or a proxy server, make sure you allow Azure Artifacts Domain URLs and IP addresses.
Restore packages
Navigate to Artifacts in your Azure DevOps project, select your feed from the dropdown menu, and then select the package you wish to install.
Navigate to Overview > Maven, then copy the dependency snippet.
Open your pom.xml file and paste the snippet inside the
<dependencies>tag.Run the following command from the directory where your pom.xml file is located to restore your packages:
mvn install
Related articles
Atsauksmes
Drīzumā: 2024. gada laikā mēs pakāpeniski pārtrauksim izmantot “GitHub problēmas” kā atsauksmju par saturu mehānismu un aizstāsim to ar jaunu atsauksmju sistēmu. Papildinformāciju skatiet: https://aka.ms/ContentUserFeedback.
Iesniegt un skatīt atsauksmes par