Submit your connector for Microsoft certification
This article outlines how to:
Publish your connector to the open-source repository.
(This step doesn't apply to independent publishers.) Submit the commit information for certification in Connector Certification Portal.
In general, we require open-sourcing as part of our certification program. Ask your Microsoft contact if you have any concerns.
Open-source the connector
This section applies to verified publishers, including independent publishers.
Important
You must open-source the connector before it gets added to the certification portal to reduce inconsistencies. If it’s your first time contributing to GitHub, attend the Power Platform Samples - First Time Contributor session.
Open a pull request in the open-source repository.
A Microsoft certification engineer will provide feedback within 1 to 2 weeks of your initial request. If the feedback requires an update to the connector, you need to submit an update to the pull request. Allow an extra 1 to 2 weeks for this.
You retain ownership of your connector, and can accept or reject any changes to your connector.
Microsoft will approve and merge the pull request. As soon as your connector's pull request is merged, you can submit your connector artifacts to Connector Certification Portal. For instructions, go to Submit to Connector Certification Portal.
Benefits to open-sourcing your connector
There are many benefits to open-sourcing your connector, including:
Easily add functionality to a previously out-of-the-box released, unchangeable connector.
Take advantage of contributions from the developer community for connector enhancements and maintenance.
Enable a platform for users to submit and contribute feature requests.
Provide a richer tracking history for changes made to the connector.
Enable collaboration for multiple developers.
The following points about our program are important:
You're only open-sourcing your connector files, not your API. This data is already accessible to users through the Microsoft Power Platform public APIs.
Your connector artifacts are stored and publicly available in our GitHub repository. You can view our existing open-sourced connectors there.
No PII (personal identifiable information) data or intellectual property is stored in the repository.
Microsoft includes you in the CODEOWNERS file for the connector in GitHub, and any change to your connector is managed by you.
Upload from local files
If you're granted an exception from open-sourcing, you need to submit your connector by uploading your local connector files:
Format your custom connector files into a .zip archive that you submit to Microsoft.
Only submit archives that passed validation and contain the required three artifact files:
apiDefinition.swagger.jsonapiProperties.json- The connector icon
Important
When using macOS, ensure that only the three connector artifact files are included in the .zip archive. By default, macOS includes other folders and files in a .zip archive.
Submit to Connector Certification Portal
This section applies to verified publishers, excluding independent publishers.
As soon as your connector's pull request is merged, you can submit your connector artifacts to the Connector Certification Portal.
If your submission was successful, you can expect a reply from a certification engineer within 1 to 2 weeks. If there are issues with the submission, you need to update the submission based on the feedback. The certification engineer requires an extra 1 to 2 weeks to reply.
If you're granted an exception from open-sourcing, don't submit your connector until your Microsoft contact directs you to. Ensure you followed all the steps in Certification process and validated your artifacts before submitting.
The Submit for review button is available when all fields contain valid inputs.
Ensure you're creating a submission with an active email address.
On the Connector Certification Portal, you're prompted to submit your files by either:
Entering GitHub commit information from your open-sourced connector.
Note
Ensure you're providing the recent commit ID of your connector's PR.
Uploading the .zip archive you created in the previous step.
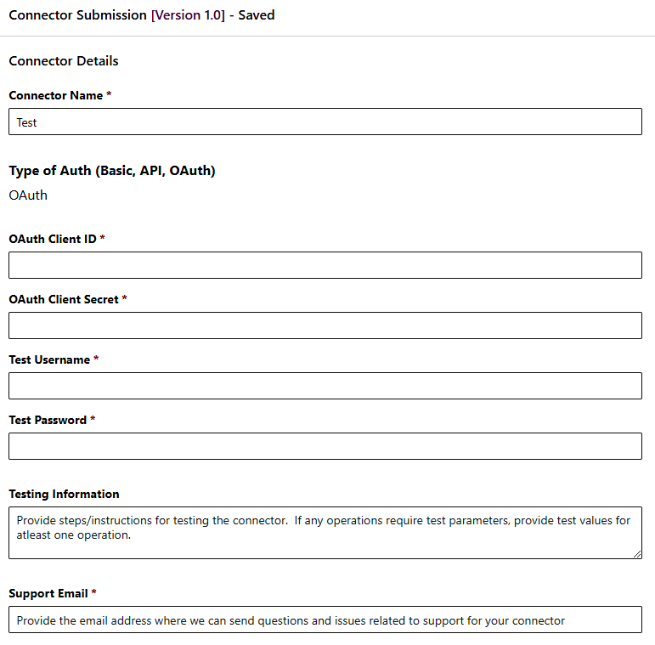
In Connector Certification Portal, enter the following information:
Connector testing information and credentials:
- Provide as much detail as possible to ensure smooth testing. Ensure you're providing valid testing information.

Important
If your connector type is OAuth, ensure you're providing a valid Client ID and Client secret. This information can't be altered after submission. Once it is received, it will be stored in Azure Key Vault.
If you want to change this, connect with your Microsoft contact.
If your connector uses OAuth as its authentication type, add these allowed redirect URLs to your app:
https://global.consent.azure-apim.net/redirect
https://global-test.consent.azure-apim.net/redirectAvoid providing an account that uses multifactor authentication, or provide steps for the certification team to properly access the multifactor authentication–protected account.
A support email for Microsoft to contact if there are any issues.
Connect with your Microsoft contact if you face difficulties submitting your connector artifacts.
After you submit your artifacts, separately attach an
intro.mdto the Activity Control or Functional Documentation area. Thisintro.mdis included in the public-facing documentation for your connector. This is separate from thereadme.mdthat you submitted during the open-sourcing step.Don't include information about your connector's actions or triggers within the
intro.md, because this information is automatically generated for you during certification.(Required) Use the following markdown as an example of a template for an
intro.mdfile:
Provide a detailed description here, distinct from your connector's description, of the value that the connector offers users and a high-level overview of functionality that the connector supports. This description should be no more than one paragraph of eight sentences.

## Prerequisites

Provide information about any prerequisites that are required to use this connector. For example, an account on your website or a paid service plan.

## How to get credentials

Provide detailed information about how a user can get credentials to use the connector. Where possible, this should be step-by-step instructions with links pointing to relevant parts of your website.

If your connector doesn't require authentication, this section can be removed.

## Get started with your connector

Provide users with a step-by-step process for getting started with your connector. This is where you should highlight common use cases, such as your expected popular triggers and actions, and how they can help in automation scenarios. Include images where possible.

## Known issues and limitations

If your connector has any known issues and limitations, include a detailed description of them here. This information should be as robust as possible so users have plenty of information should they run into problems. If any workarounds are known, include them here.

## Common errors and remedies

Highlight any errors that might commonly occur when using the connector (such as HTTP status code errors), and what the user should do to resolve the error.

## FAQ

Provide a breakdown of frequently asked questions and their respective answers here. This can cover FAQs about interacting with the underlying service or about the connector itself.
After you submit your connector and intro.md, you're ready to prepare for testing your connector. Go to Test your connector in certification for instructions.
Update submission prior to certification
This section applies to verified publishers, excluding independent publishers.
You should only update a connector that's in the process of being certified but isn't ccertified yet, in these situations:
When Microsoft requests changes.
When you find a critical issue that needs to be addressed before certification.
Important
Any updates during the certification process reset the process. After submitting an update, please submit a pull request with the updated artifacts in our open-source repository.
To submit an update:
Go to the Connector Certification Portal, and then select your existing submission.
On the pane that opens on the right, select your most recent version.

In the lower-left corner of the Connector Submissions view, select Submit an update.
In the Confirm Edit prompt, select Confirm. This resets the certification process.
Remove your existing connector archive by selecting Remove. Do one of the following:
- Use the GitHub integration to ingest the updated artifacts from the open-source repository
- Upload the updated .zip archive

Fill in the fields in the submission form. Ensure you provide the proper information—including testing—as it applies to your latest update.
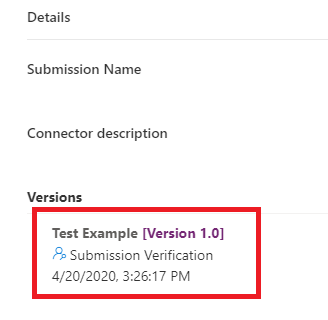
In the lower-left corner of the Connector Submission view, select Submit for Review. You see the confirmation illustrated in the following image, and Microsoft begins the review process.

Important
Don't select Submit an update again after completing step 7. Doing so resets progress once more.
If you want to submit an update to a connector that's already certified, go to Update your certified connector.
Next step
Test your connector in certification
Provide feedback
We greatly appreciate feedback on issues with our connector platform, or new feature ideas. To provide feedback, go to Submit issues or get help with connectors and select your feedback type.