Workspaces in Microsoft Fabric and Power BI
Workspaces are places to collaborate with colleagues to create collections of items such as lakehouses, warehouses, and reports, and to create task flows. This article describes workspaces, how to manage access to them, and what settings are available.
Ready to get started? Read Create a workspace.
Work with workspaces
Here are some useful tips about working with workspaces.
Set up a task flow for the workspace to organize your data project and to help others understand and work on your project. Read more about task flows.
Pin workspaces to the top of the workspace flyout list to quickly access your favorite workspaces. Read more about pin workspaces.
Use granular workspace roles for flexible permissions management in the workspaces: Admin, Member, Contributor, and Viewer. Read more about workspace roles.
Create folders in the workspace: Organize and manage artifacts in the workspace. Read more about creating folders in workspaces.
Navigate to current workspace from anywhere by selecting the icon on left nav pane. Read more about current workspace in this article.
Workspace settings: As workspace admin, you can update and manage your workspace configurations in workspace settings.
Manage a workspace in Git: Git integration in Microsoft Fabric enables Pro developers to integrate their development processes, tools, and best practices straight into the Fabric platform. Learn how to manage a workspace with Git.
Contact list: Specify who receives notification about workspace activity. Read more about workspace contact lists in this article.
Current workspace
After you select and open a workspace, this workspace becomes your current workspace. You can quickly navigate to it from anywhere by selecting the workspace icon from left nav pane.
![]()
Workspace layout
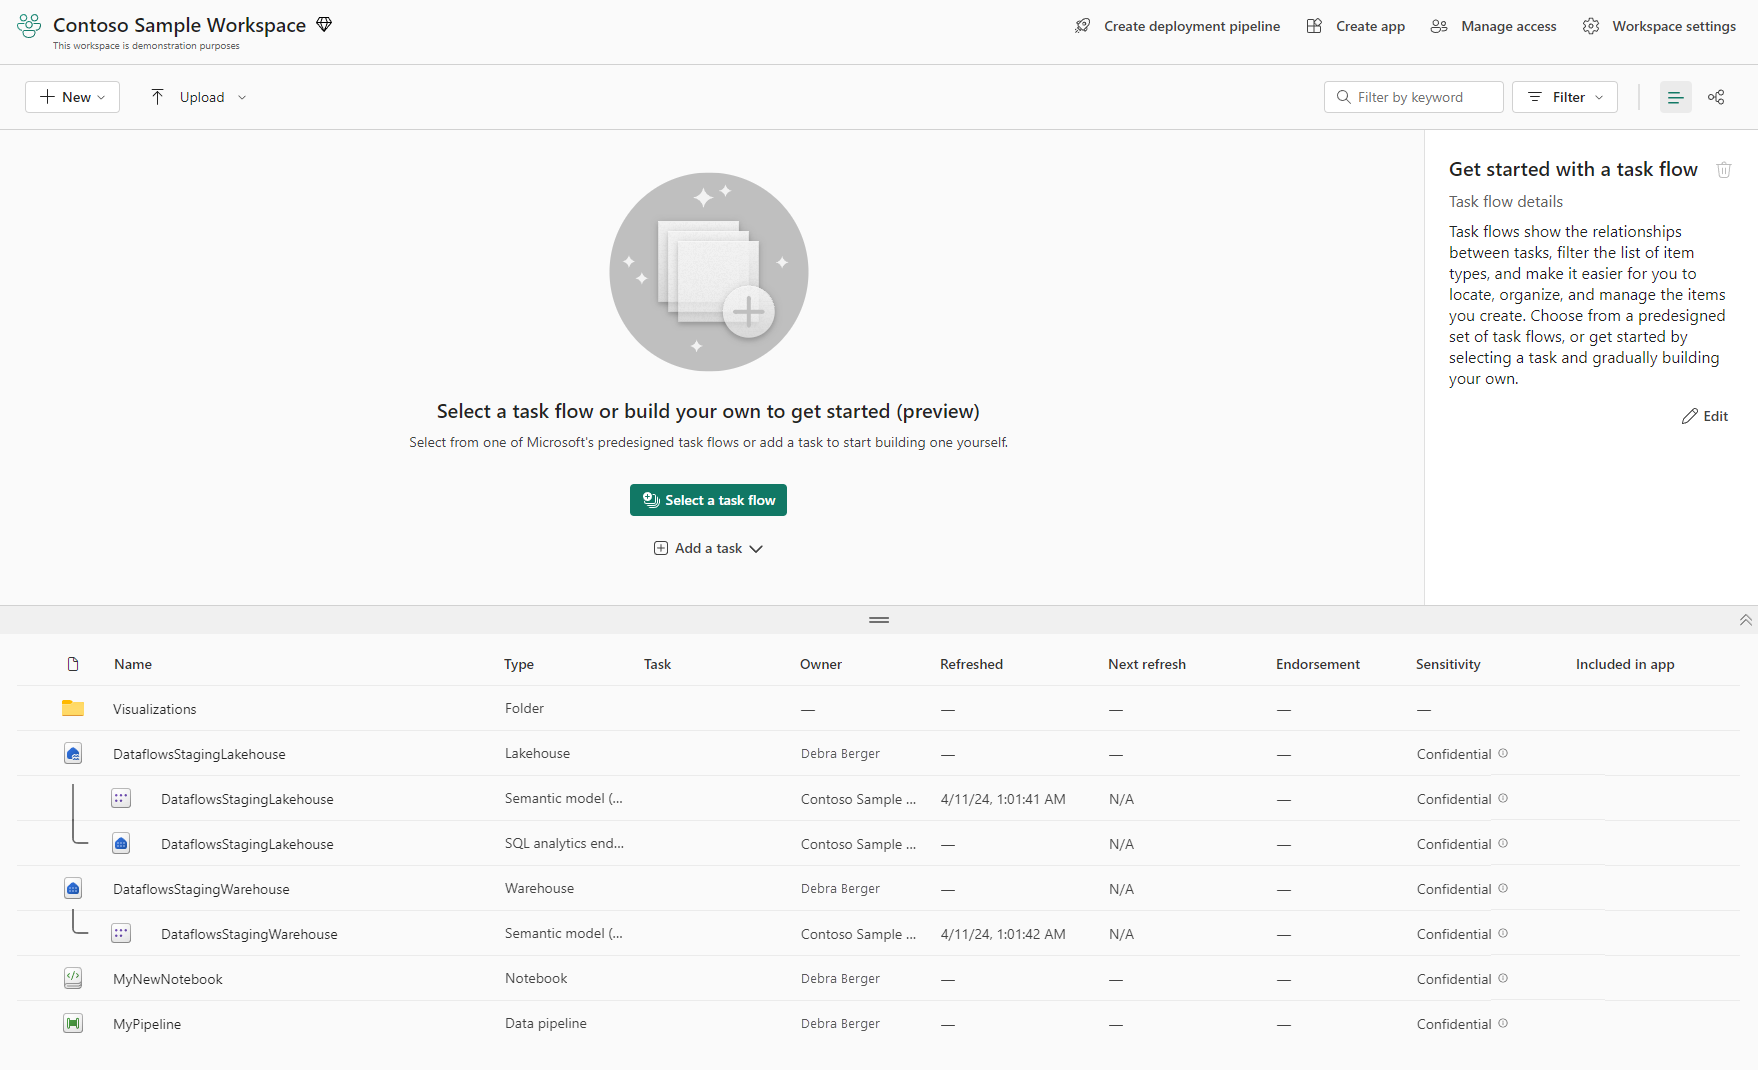
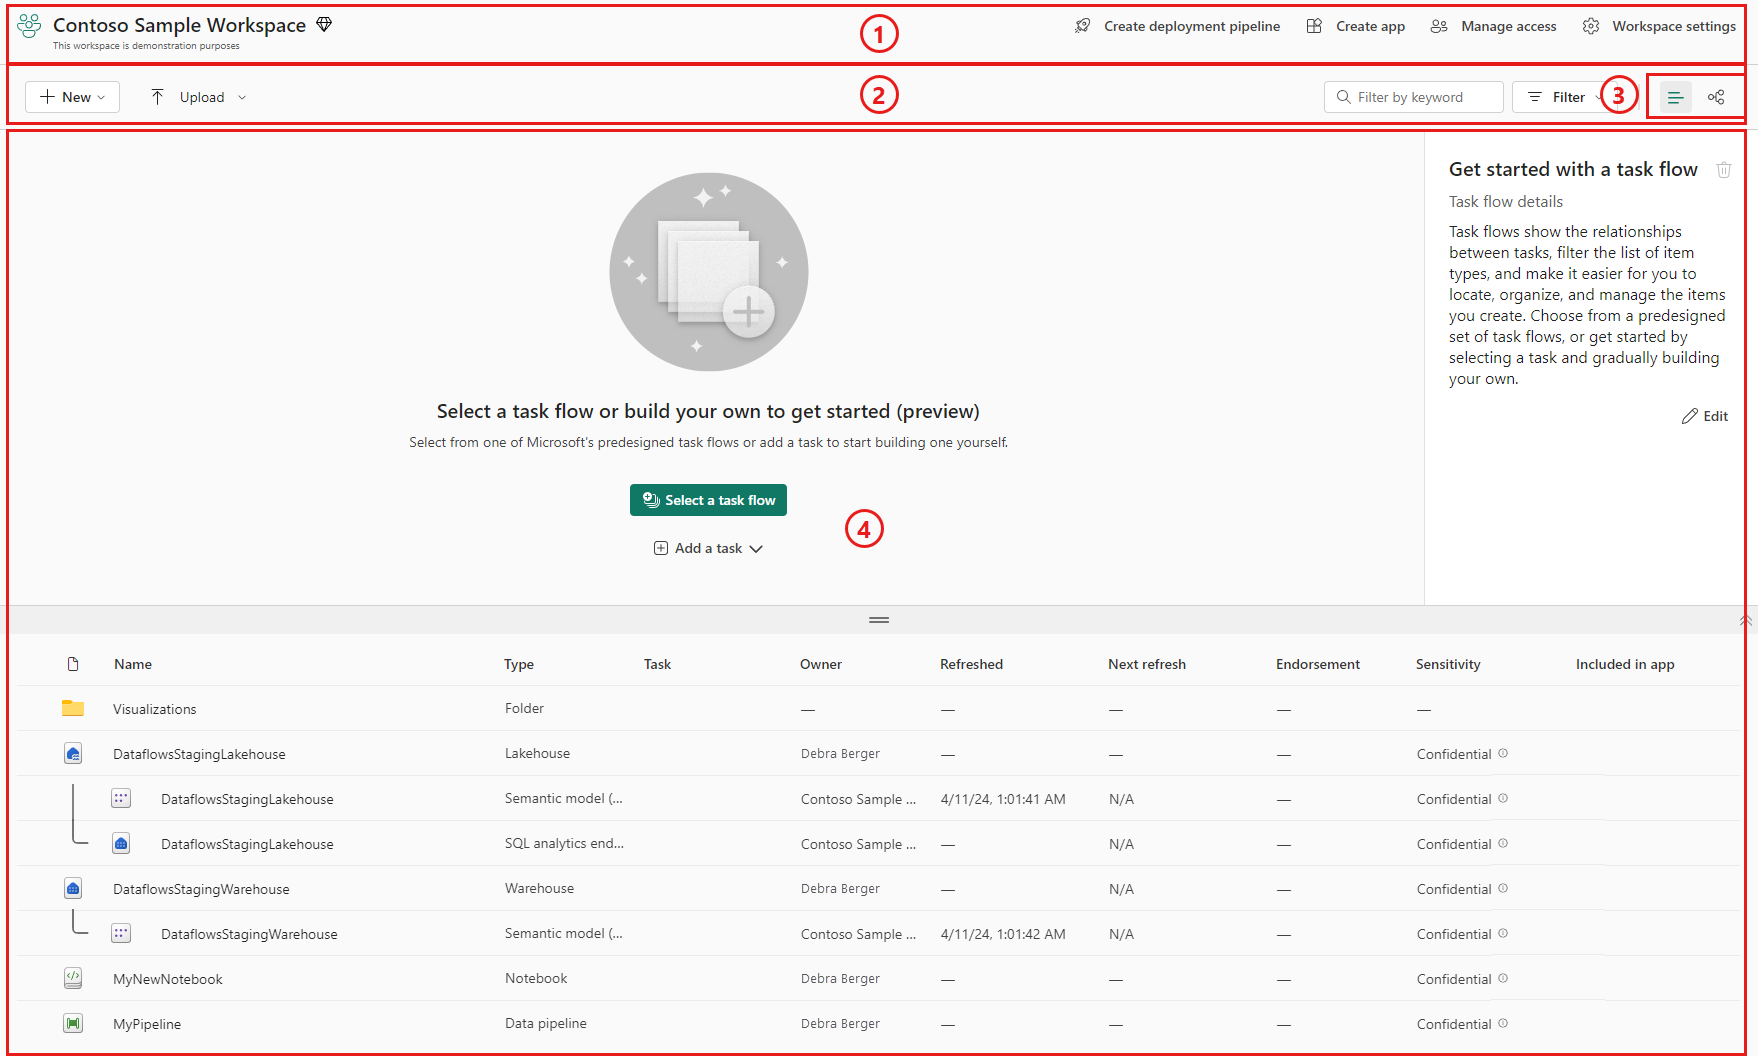
A workspace consists of a header, a toolbar, and a view area. There are two views that can appear in the view area: list view and lineage view. You select the view you want to see with controls on the toolbar. The following image shows these main workspace components, with list view selected.
- Header: The header contains the name and brief description of the workspace, and also links to other functionality.
- Toolbar: The toolbar contains controls for adding items to the workspace and uploading files. It also contains a search box, filter, and the list view and lineage view selectors.
- List view and lineage view selectors: The list view and lineage view selectors enable you to choose which view you want to see in the view area.
- View area: The view area displays either list view or lineage view.
List view
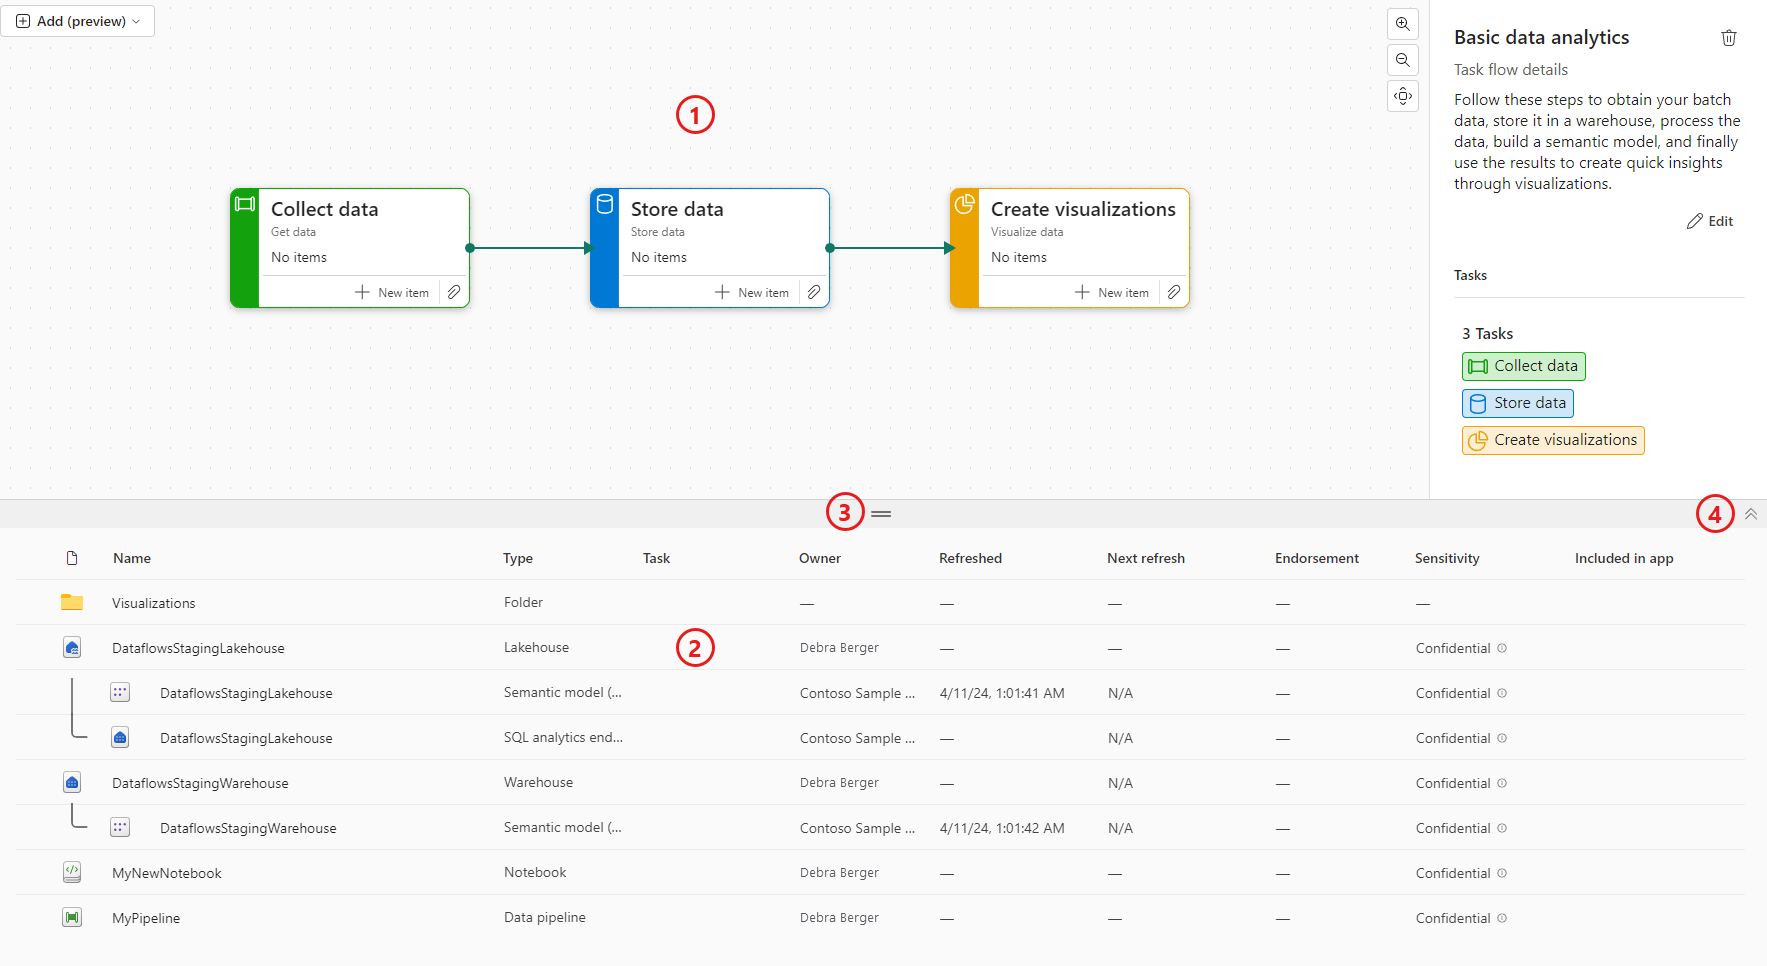
List view is divided into the task flow and the items list.
- Task flow: The task flow is where you can create or view a graphical representation of your data project. The task flow shows the logical flow of the project - it doesn't show the flow of data. Read more about task flows.
- Items list: The items list is where you see the items and folders in the workspace. If you have tasks in the task flow, you can filter the items list by selecting the tasks.
- Resize bar: You can resize the task flow and items list by dragging the resize bar up or down.
- Show/Hide task flow: If you don't want to see the task flow, you can hide it using the hide/show arrows at the side of the separator bar.
Lineage view
Lineage view shows the flow of data between the items in the workspace. Read more about lineage view.
Workspace settings
Workspace admins can use workspace settings to manage and update the workspace. The settings include general settings of the workspace, like the basic information of the workspace, contact list, SharePoint, license, Azure connections, storage, and other experiences' specific settings.
To open the workspace settings, you can select the workspace in the nav pane, then select More options (...) > Workspace settings next to the workspace name.
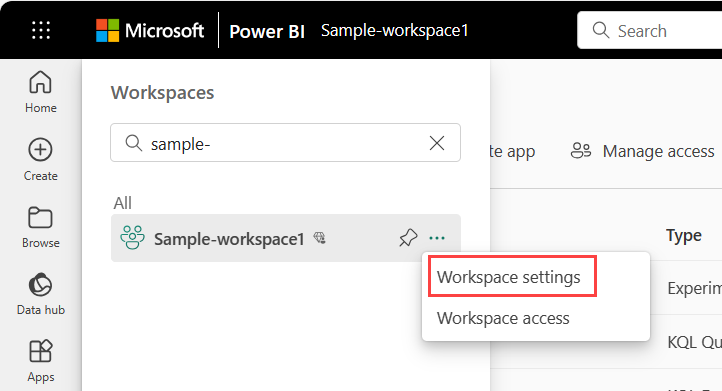
You can also open it from the workspace page.
Workspace contact list
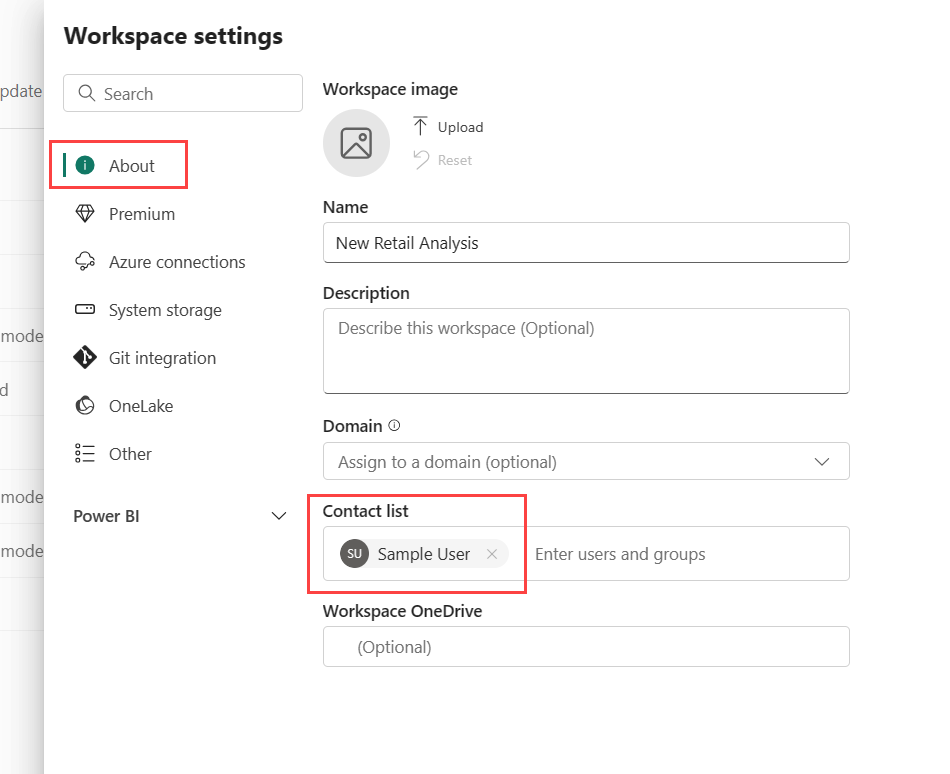
The Contact list feature allows you to specify which users receive notification about issues occurring in the workspace. By default, the one who created the workspace is in the contact list. You can add others to that list while creating workspace or in workspace settings after creation. Users or groups in the contact list are also listed in the user interface (UI) of the workspace settings, so workspace users know whom to contact.
Microsoft 365 and SharePoint
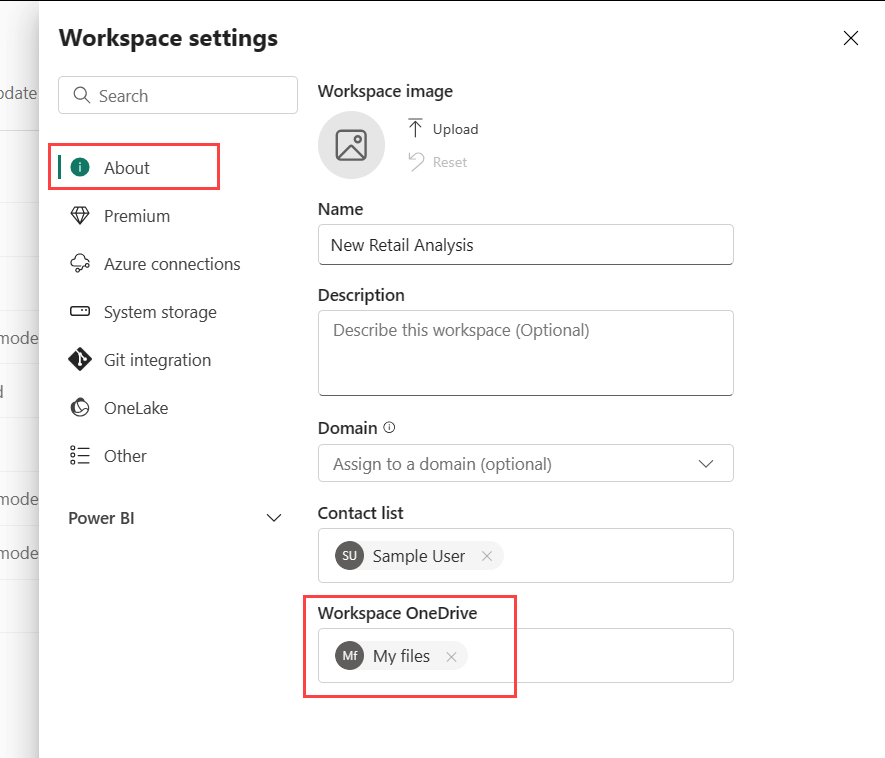
The Workspace SharePoint feature allows you to configure a Microsoft 365 Group whose SharePoint document library is available to workspace users. You create the Group outside of Microsoft Fabric first, with one available method being from SharePoint. Read about creating a SharePoint shared library.
Note
Creating Microsoft 365 Groups may be restricted in your environment, or the ability to create them from your SharePoint site may be disabled. If this is the case, speak with your IT department.
Microsoft Fabric doesn't synchronize permissions between users or groups with workspace access, and users or groups with Microsoft 365 Group membership. A best practice is to give access to the workspace to the same Microsoft 365 Group whose file storage you configured. Then manage workspace access by managing membership of the Microsoft 365 Group.
You can configure SharePoint in workspace settings by typing in the name of the Microsoft 365 group that you created earlier. Type just the name, not the URL. Microsoft Fabric automatically picks up the SharePoint for the group.
License mode
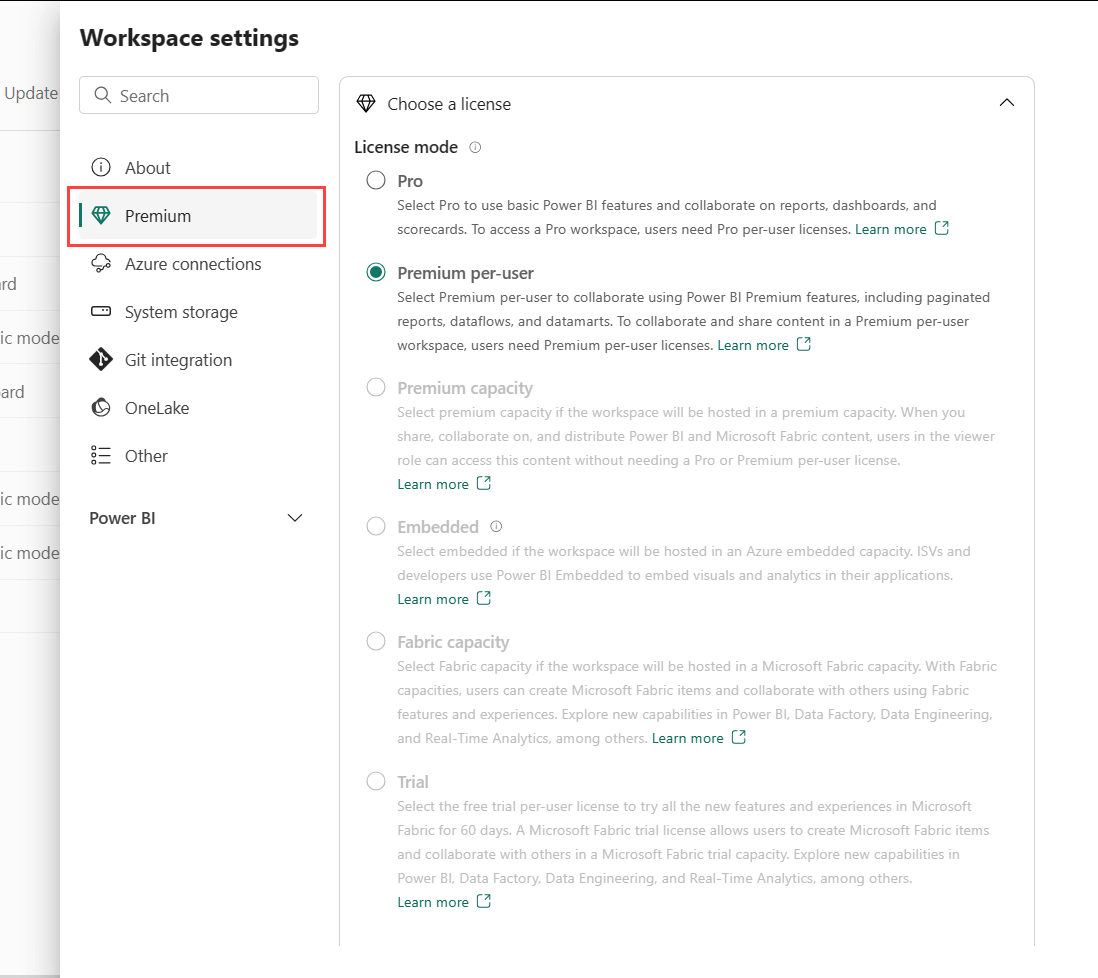
By default, workspaces are created in your organization's shared capacity. When your organization has other capacities, workspaces including My Workspaces can be assigned to any capacity in your organization. You can configure it while creating a workspace or in Workspace settings -> Premium. Read more about licenses.
Azure connections configuration
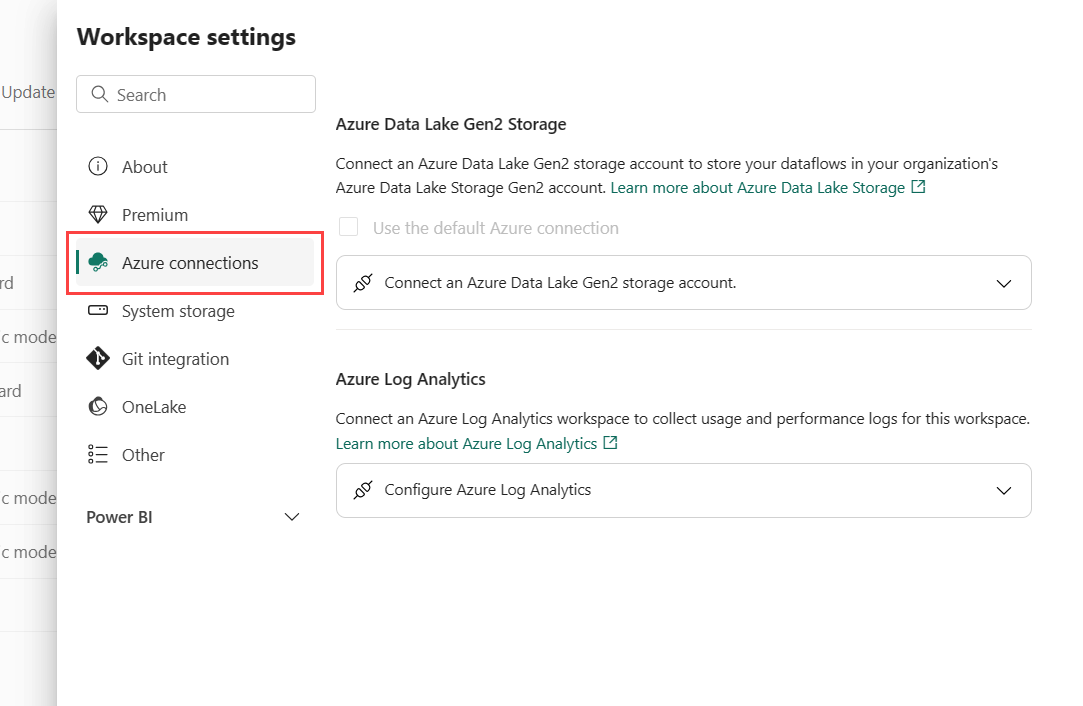
Workspace admins can configure dataflow storage to use Azure Data Lake Gen 2 storage and Azure Log Analytics (LA) connection to collect usage and performance logs for the workspace in workspace settings.
With the integration of Azure Data Lake Gen 2 storage, you can bring your own storage to dataflows, and establish a connection at the workspace level. Read Configure dataflow storage to use Azure Data Lake Gen 2 for more detail.
After the connection with Azure Log Analytics (LA), activity log data is sent continuously and is available in Log Analytics in approximately 5 minutes. Read Using Azure Log Analytics for more detail.
System storage
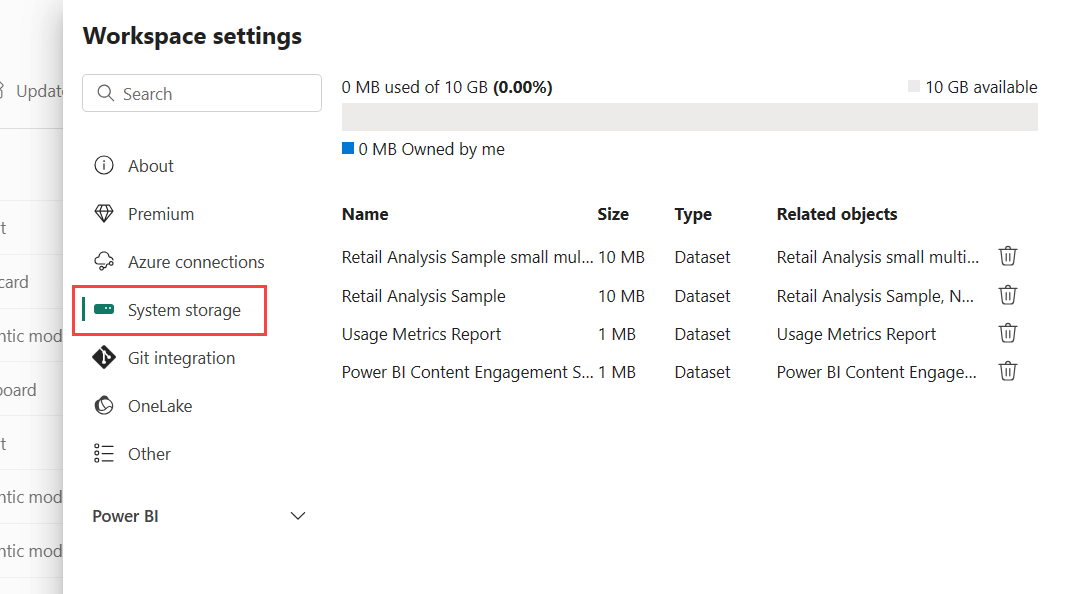
System storage is the place to manage your semantic model storage in your individual or workspace account so you can keep publishing reports and semantic models. Your own semantic models, Excel reports, and those items that someone has shared with you, are included in your system storage.
In the system storage, you can view how much storage you have used and free up the storage by deleting the items in it.
Keep in mind that you or someone else may have reports and dashboards based on a semantic model. If you delete the semantic model, those reports and dashboards don't work anymore.
Remove the workspace
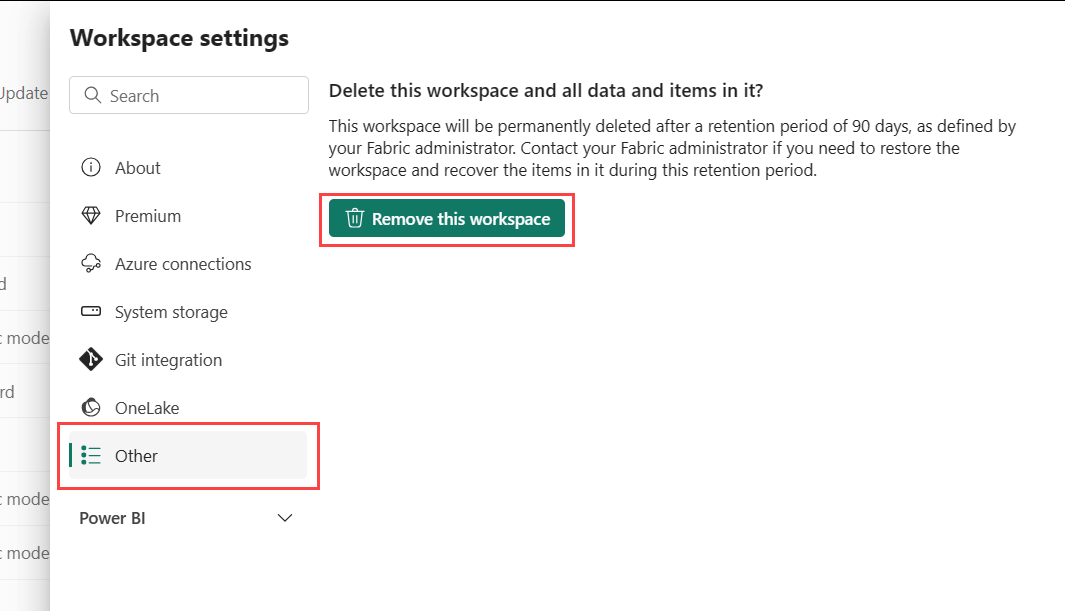
As an admin for a workspace, you can delete it. When you delete the workspace, everything contained within the workspace is deleted for all group members, and the associated app is also removed from AppSource.
In the Workspace settings pane, select Other > Remove this workspace.
Warning
If the workspace you're deleting has a workspace identity, that workspace identity will be irretrievably lost. In some scenarios this could cause Fabric items relying on the workspace identity for trusted workspace access or authentication to break. For more information, see Delete a workspace identity.
Administering and auditing workspaces
Administration for workspaces is in the Microsoft Fabric admin portal. Microsoft Fabric admins decide who in an organization can create workspaces and distribute apps. Read about managing users' ability to create workspaces in the "Workspace settings" article.
Admins can also see the state of all the workspaces in their organization. They can manage, recover, and even delete workspaces. Read about managing the workspaces themselves in the "Admin portal" article.
Auditing
Microsoft Fabric audits the following activities for workspaces.
| Friendly name | Operation name |
|---|---|
| Created Microsoft Fabric folder | CreateFolder |
| Deleted Microsoft Fabric folder | DeleteFolder |
| Updated Microsoft Fabric folder | UpdateFolder |
| Updated Microsoft Fabric folder access | UpdateFolderAccess |
Read more about Microsoft Fabric auditing.
Considerations and limitations
Limitations to be aware of:
- Workspaces can contain a maximum of 1,000 Fabric and Power BI items.
- Certain special characters aren't supported in workspace names when using an XMLA endpoint. As a workaround, use URL encoding of special characters, for example, for a forward slash /, use %2F.
- A user or a service principal can be a member of up to 1,000 workspaces.
