Use the Azure OpenAI web app
Along with Azure OpenAI Studio, APIs, and SDKs, you can use the available standalone web app to interact with Azure OpenAI Service models by using a graphical user interface. You can deploy the app by using either Azure OpenAI Studio or a manual deployment.
Important considerations
Publishing creates an Azure App Service instance in your subscription. It might incur costs depending on the pricing plan that you select. When finished with your app, you can delete it from the Azure portal.
GPT-4 Turbo with Vision models aren't supported.
By default, the app is deployed with the Microsoft identity provider already configured. The identity provider restricts access to the app to members of your Azure tenant. To add or modify authentication:
Go to the Azure portal and search for the app name that you specified during publishing. Select the web app, and then select Authentication on the left menu. Then select Add identity provider.
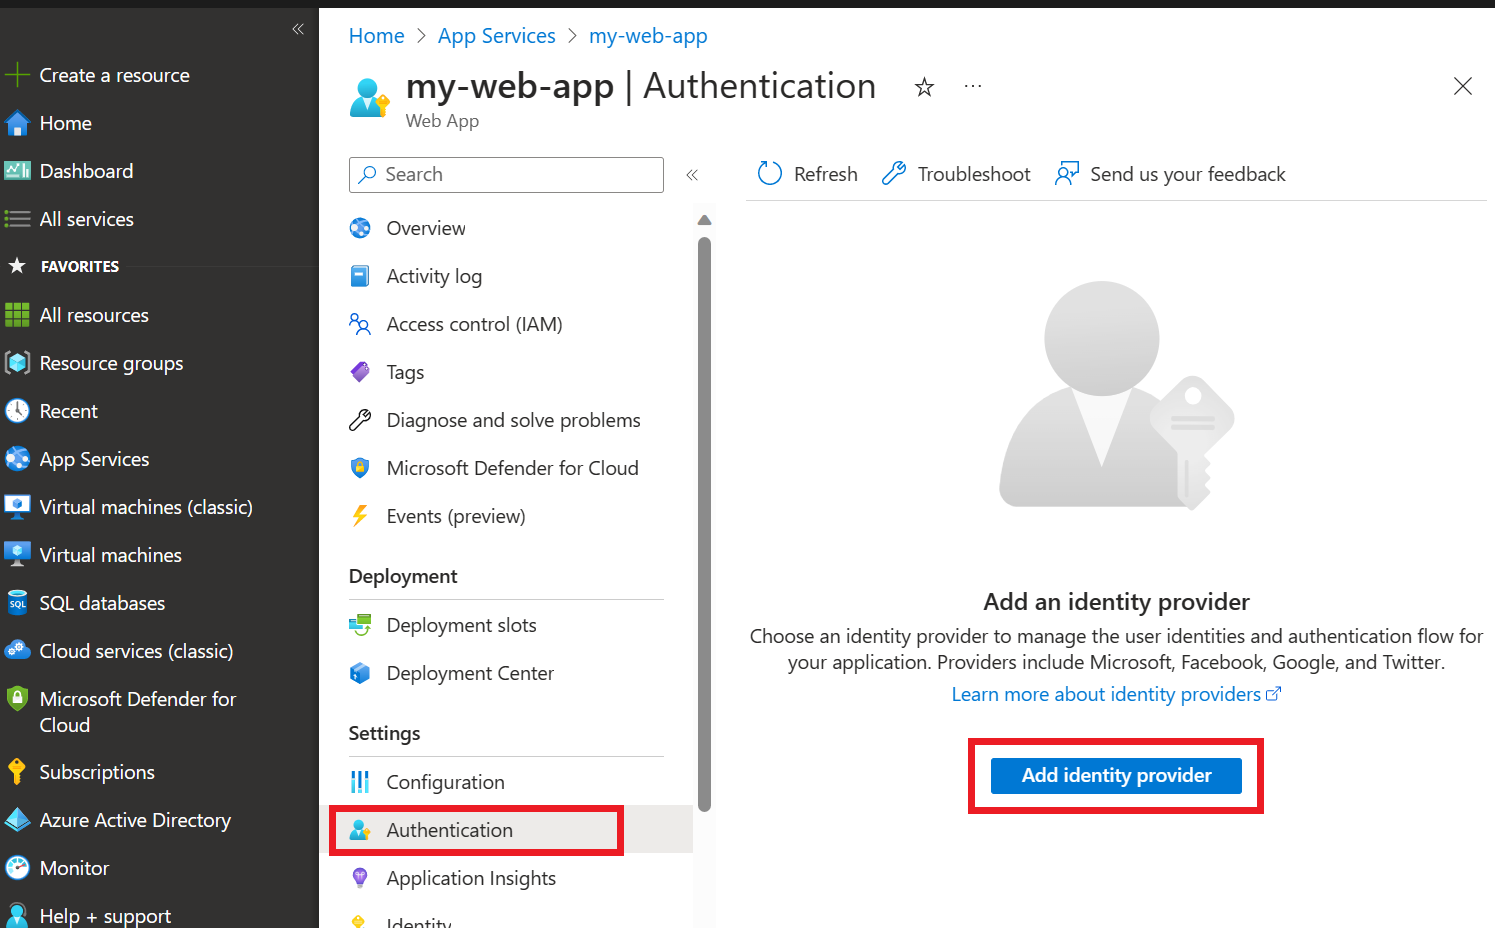
Select Microsoft as the identity provider. The default settings on this page restrict the app to your tenant only, so you don't need to change anything else here. Select Add.
Now users are asked to sign in with their Microsoft Entra account to access your app. You can follow a similar process to add another identity provider if you prefer. The app doesn't use the user's sign-in information in any way other than verifying that the user is a member of your tenant.

Web app customization
You can customize the app's front-end and back-end logic. The app provides several environment variables for common customization scenarios such as changing the icon in the app.
When you're customizing the app, we recommend:
Clearly communicating how each setting that you implement affects the user experience.
Updating the app settings for each of your deployed apps to use new API keys after you rotate keys for your Azure OpenAI or Azure AI Search resource.
Sample source code for the web app is available on GitHub. Source code is provided "as is" and as a sample only. Customers are responsible for all customization and implementation of their web apps.
Updating the web app
Note
As of February 1, 2024, the web app requires the app startup command to be set to python3 -m gunicorn app:app. When you're updating an app that was published before February 1, 2024, you need to manually add the startup command from the App Service Configuration page.
We recommend pulling changes from the main branch for the web app's source code frequently to ensure that you have the latest bug fixes, API version, and improvements. Additionally, the web app must be synchronized every time the API version that you're using is retired. Consider selecting either the Watch or the Star button on the web app's GitHub repo to be notified about changes and updates to the source code.
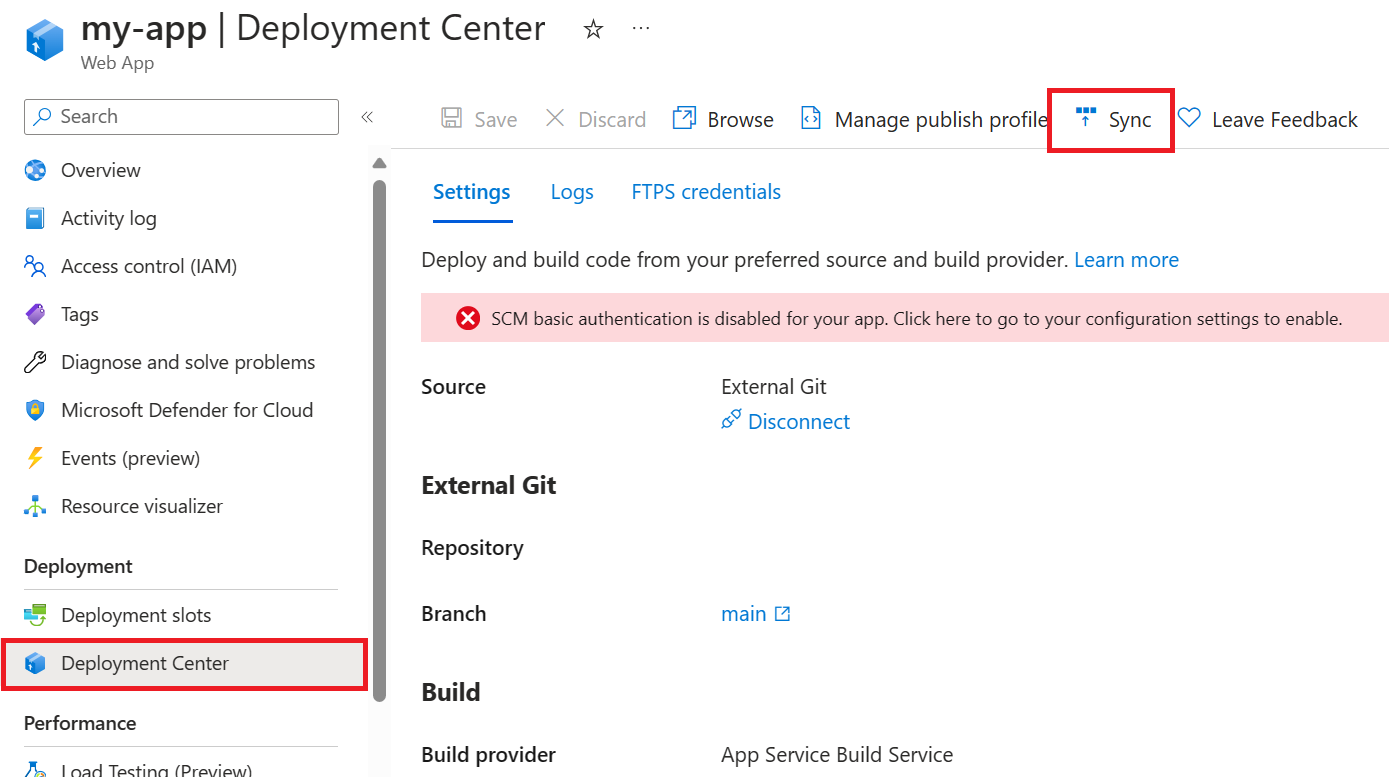
If you haven't customized the web app, you can use these steps to synchronize it:
Go to your web app in the Azure portal.
On the left menu, under Deployment, select Deployment Center.
Select Sync at the top of the pane, and confirm that the app will be redeployed.

If you customized or changed the app's source code, you need to update your app's source code manually and redeploy it:
- If your app is hosted on GitHub, push your code changes to your repo, and then use the preceding synchronization steps.
- If you're redeploying the app manually (for example, by using the Azure CLI), follow the steps for your deployment strategy.
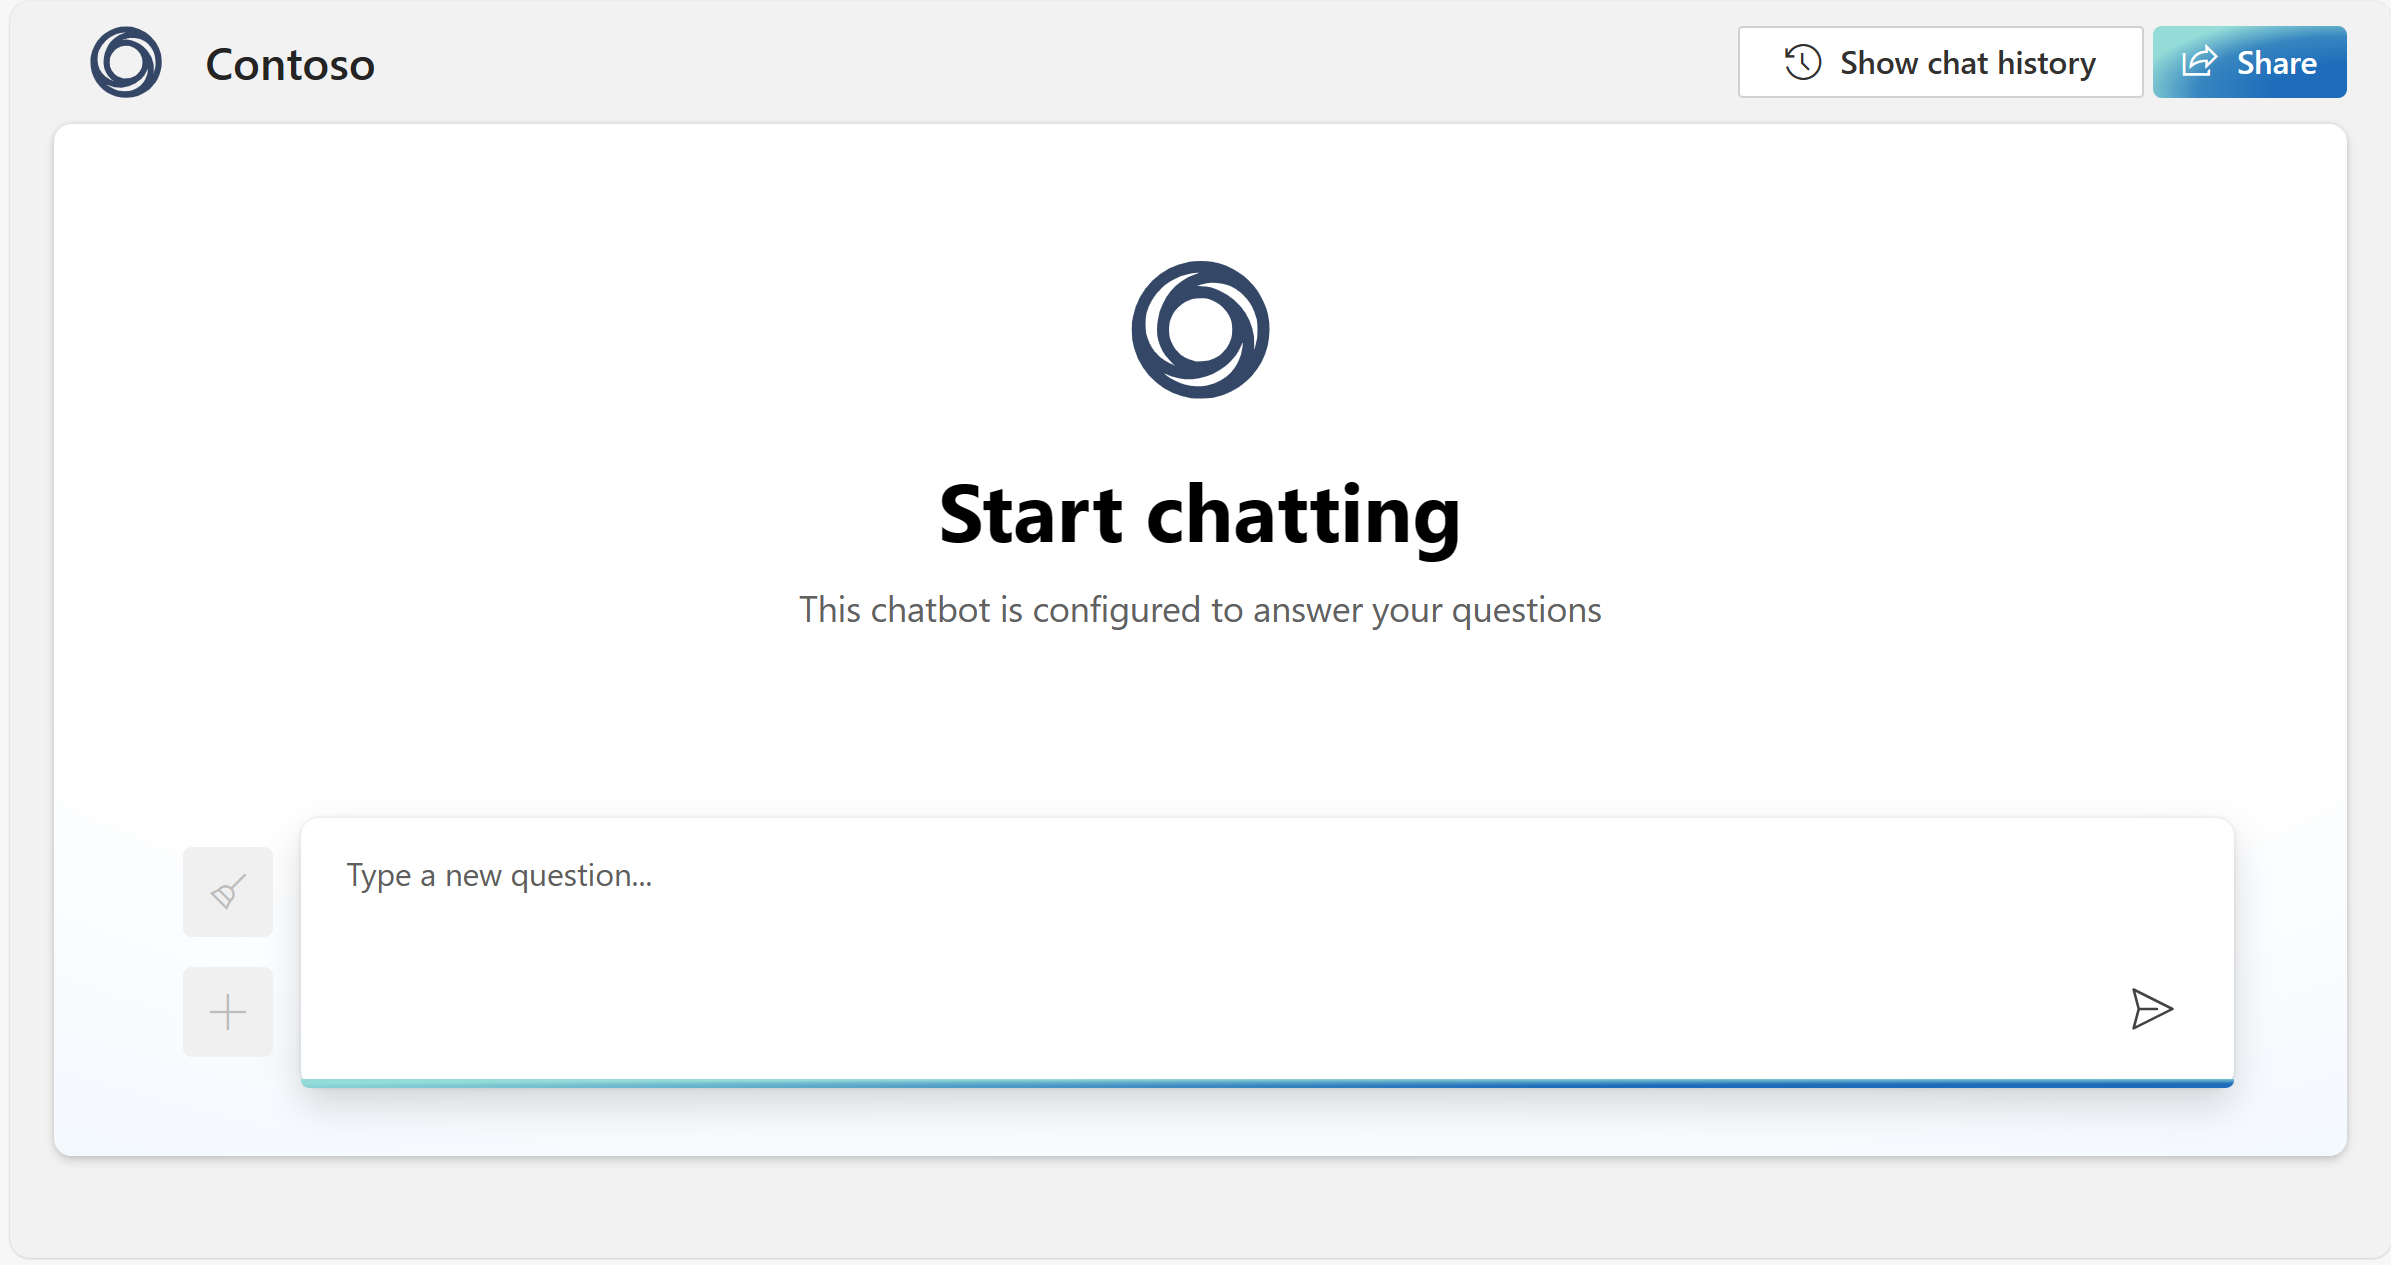
Chat history
You can turn on chat history for your users of the web app. When you turn on the feature, users have access to their individual previous queries and responses.
To turn on chat history, deploy or redeploy your model as a web app by using Azure OpenAI Studio and select Enable chat history in the web app.

Important
Turning on chat history creates an Azure Cosmos DB instance in your resource group, and it incurs additional charges for the storage that you use.
After you turn on chat history, your users can show and hide it in the upper-right corner of the app. When users show chat history, they can rename or delete conversations. Because the users are signed in to the app, conversations are automatically ordered from newest to oldest. Conversations are named based on the first query in the conversation.

Deleting your Cosmos DB instance
Deleting your web app doesn't delete your Cosmos DB instance automatically. To delete your Cosmos DB instance along with all stored chats, you need to go to the associated resource in the Azure portal and delete it. If you delete the Cosmos DB resource but keep the chat history option selected on subsequent updates from the Azure OpenAI Studio, the application notifies the user of a connection error. However, the user can continue to use the web app without access to the chat history.
Enabling Microsoft Entra ID authentication between services
To enable Microsoft Entra ID for intra-service authentication for your web app, follow these steps.
Enable managed identity on your Azure OpenAI resource and Azure App Service
You can enable managed identity for the Azure OpenAI resource and the Azure App Service by navigating to "Identity" and turning on the system assigned managed identity in the Azure portal for each resource.

Note
If you're using an embedding model deployed to the same resource used for inference, you only need to enable managed identity on one Azure OpenAI resource. If using an embedding model deployed to a different resource from the one used for inference, you also need to enable managed identity on the Azure OpenAI resource used to deploy your embedding model.
Enable role-based access control (RBAC) on your Azure Search resource (optional)
If using On Your Data with Azure Search, you should follow this step.
To enable your Azure OpenAI resource to access your Azure Search resource, you need to enable role-based access control on your Azure Search resource. Learn more about enabling RBAC roles for your resources.
Assign RBAC roles to enable intra-service communication
The following table summarizes the RBAC role assignments needed for all Azure resources associated with your application.
| Role | Assignee | Resource |
|---|---|---|
Search Index Data Reader |
Azure OpenAI (Inference) | Azure AI Search |
Search Service Contributor |
Azure OpenAI (Inference) | Azure AI Search |
Cognitive Services OpenAI User |
Web app | Azure OpenAI (Inference) |
Cognitive Services OpenAI User |
Azure OpenAI (Inference) | Azure OpenAI (Embeddings) |
To assign these roles, follow these instructions to create the needed role assignments.
App Settings Changes
In the webapp application settings, navigate to "Environment Variables" and make the following changes:
- Remove the environment variable
AZURE_OPENAI_KEY, as it's no longer needed. - If using On Your Data with Azure Search and are using Microsoft Entra ID authentication between Azure OpenAI and Azure Search, you should also delete the
AZURE_SEARCH_KEYenvironment variables for the data source access keys as well.
If using an embedding model deployed to the same resource as your model used for inference, there are no other settings changes required.
However, if you're using an embedding model deployed to a different resource, make the following extra changes to your app's environment variables:
- Set
AZURE_OPENAI_EMBEDDING_ENDPOINTvariable to the full API path of the embedding API for the resource you're using for embeddings, for example,https://<your embedding AOAI resource name>.openai.azure.com/openai/deployments/<your embedding deployment name>/embeddings - Delete the
AZURE_OPENAI_EMBEDDING_KEYvariable to use Microsoft Entra ID authentication.
Once all of the environment variable changes are completed, restart the webapp to begin using Microsoft Entra ID authentication between services in the webapp. It will take a few minutes after restarting for any settings changes to take effect.
Related content
Feedback
Disponibbli dalwaqt: Matul l-2024 se nkunu qed inwaqqfu gradwalment Problemi GitHub bħala l-mekkaniżmu ta’ feedback għall-kontenut u se nibdluh b’sistema ġdida ta’ feedback. Għal aktar informazzjoni, ara: https://aka.ms/ContentUserFeedback.
Issottometti u ara feedback għal