Tutorial: Create and manage budgets
Budgets in Cost Management help you plan for and drive organizational accountability. They help you proactively inform others about their spending to manage costs and monitor how spending progresses over time.
You can configure alerts based on your actual cost or forecasted cost to ensure that your spending is within your organizational spending limit. Notifications are triggered when the budget thresholds are exceeded. Resources aren't affected, and your consumption isn't stopped. You can use budgets to compare and track spending as you analyze costs.
Cost and usage data is typically available within 8-24 hours and budgets are evaluated against these costs every 24 hours. Be sure to get familiar with Cost and usage data updates specifics. When a budget threshold is met, email notifications are normally sent within an hour of the evaluation.
Budgets reset automatically at the end of a period (monthly, quarterly, or annually) for the same budget amount when you select an expiration date in the future. Because they reset with the same budget amount, you need to create separate budgets when budgeted currency amounts differ for future periods. When a budget expires, it automatically gets deleted.
The examples in this tutorial walk you through creating and editing a budget for an Azure Enterprise Agreement (EA) subscription.
Watch the Apply budgets to subscriptions using the Azure portal video to see how you can create budgets in Azure to monitor spending. To watch other videos, visit the Cost Management YouTube channel.
In this tutorial, you learn how to:
- Create a budget in the Azure portal
- Create and edit budgets
- Create a budget with an Azure Resource Manager template
Prerequisites
Budgets are supported for the following types of Azure account types and scopes:
Azure role-based access control (Azure RBAC) scopes
Management group
Subscription
Resource group
Enterprise Agreement scopes
- Billing account
- Department
- Enrollment account
Individual agreements
- Billing account
Microsoft Customer Agreement scopes
- Billing account - Budget evaluation only supports USD currency, not the billing currency. An exception is that customers in the China 21V cloud have their budgets evaluated in CNY currency.
- Billing profile
- Invoice section
- Customer
AWS scopes
- External account
- External subscription
Note
The Connector for AWS in the Cost Management service retires on March 31, 2025. Users should consider alternative solutions for AWS cost management reporting. On March 31, 2024, Azure will disable the ability to add new Connectors for AWS for all customers. For more information, see Retire your Amazon Web Services (AWS) connector.
To view budgets, you need at least read access for your Azure account.
If you have a new subscription, you can't immediately create a budget or use other Cost Management features. It might take up to 48 hours before you can use all Cost Management features.
Read access is required to view budgets for Azure EA subscriptions. To create and manage budgets, you must have contributor permission.
The following Azure permissions, or scopes, are supported per subscription for budgets by user and group.
- Owner – Can create, modify, or delete budgets for a subscription.
- Contributor and Cost Management contributor – Can create, modify, or delete their own budgets. Can modify the budget amount for budgets created by others.
- Reader and Cost Management reader – Can view budgets that they have permission to.
For more information about scopes, including access needed to configure exports for Enterprise Agreement and Microsoft Customer agreement scopes, see Understand and work with scopes. For more information about assigning permission to Cost Management data, see Assign access to Cost Management data.
Sign in to Azure
- Sign in to the Azure portal.
Create a budget in the Azure portal
You can create an Azure subscription budget for a monthly, quarterly, or annual period.
To create or view a budget, open a scope in the Azure portal and select Budgets in the menu. For example, navigate to Subscriptions, select a subscription from the list, and then select Budgets in the menu. Use the Scope pill to switch to a different scope, like a management group, in Budgets. For more information about scopes, see Understand and work with scopes.
If you want to create a budget for a resource group, ensure that you navigate to one first. You can navigate to a resource group by searching for Resource groups in the Azure portal search box. Then, select a resource group from the list. Afterward, the Budgets option is available in the menu.
After you create budgets, they show a simple view of your current spending against them.
Select Add.
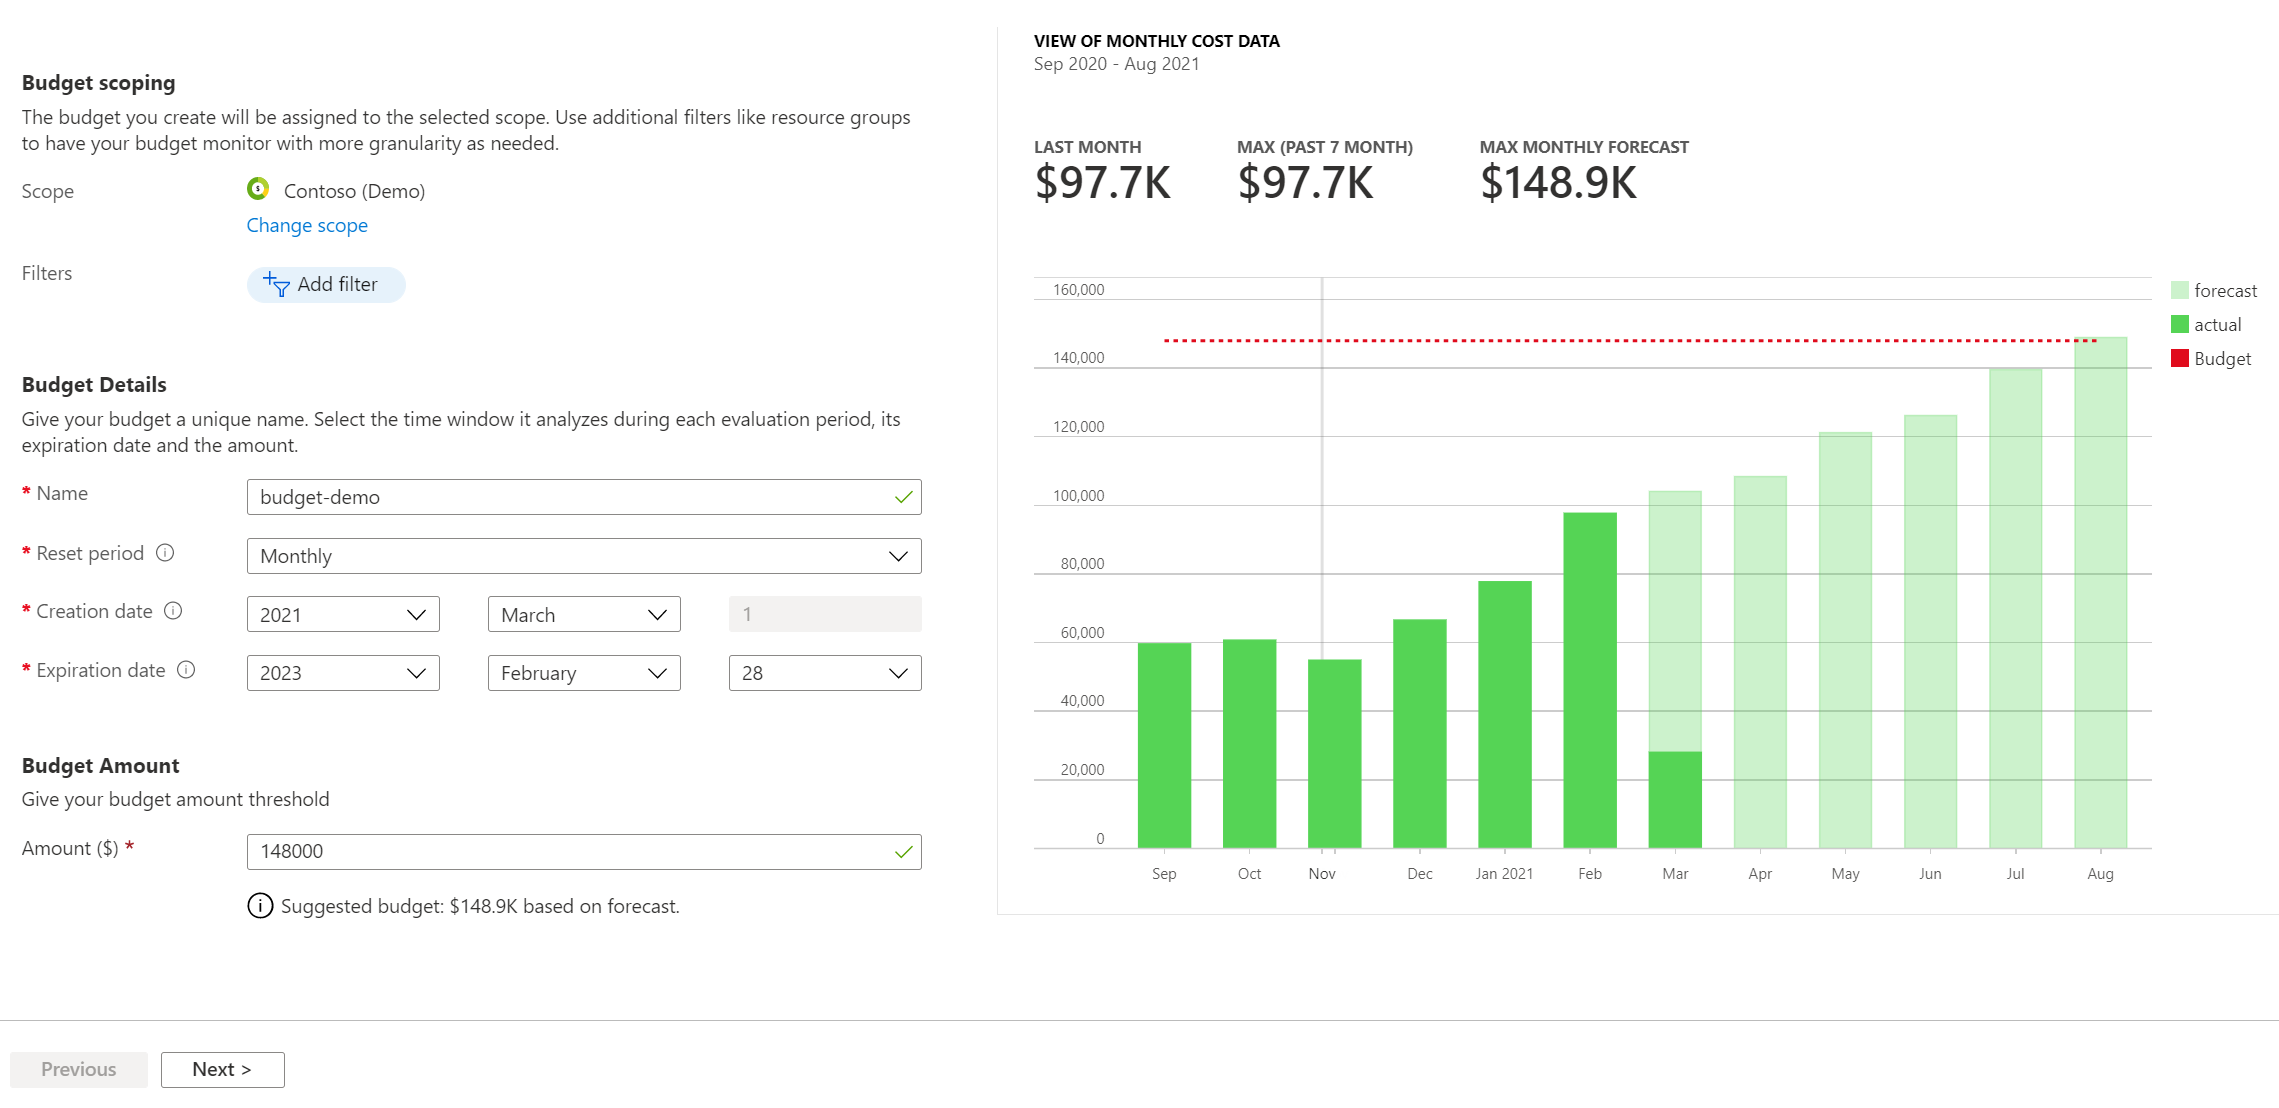
In the Create budget window, make sure that the scope shown is correct. Choose any filters that you want to add. Filters allow you to create budgets on specific costs, such as resource groups in a subscription or a service like virtual machines. For more information about the common filter properties that you can use in budgets and cost analysis, see Group and filter properties.
After you identify your scope and filters, type a budget name. Then, choose a monthly, quarterly, or annual budget reset period. The reset period determines the time window that gets analyzed by the budget. The cost evaluated by the budget starts at zero at the beginning of each new period. When you create a quarterly budget, it works in the same way as a monthly budget. The difference is that the budget amount for the quarter is evenly divided among the three months of the quarter. An annual budget amount is evenly divided among all 12 months of the calendar year.
If you have a pay-as-you-go, MSDN, or Visual Studio subscription, your invoice billing period might not align to the calendar month. For those subscription types and resource groups, you can create a budget aligned to your invoice period or to calendar months. To create a budget aligned to your invoice period, select a reset period of Billing month, Billing quarter, or Billing year. To create a budget aligned to the calendar month, select a reset period of Monthly, Quarterly, or Annually.
Next, identify the expiration date when the budget becomes invalid and stops evaluating your costs.
Based on the fields chosen in the budget so far, a graph is shown to help you select a threshold to use for your budget. The suggested budget is based on the highest forecasted cost that you might incur in future periods. You can change the budget amount.
After you configure the budget amount, select Next to configure budget alerts for actual cost and forecasted budget alerts.
Configure actual costs budget alerts
Budgets require at least one cost threshold (% of budget) and a corresponding email address. You can optionally include up to five thresholds and five email addresses in a single budget. When a budget threshold is met, email notifications are normally sent within an hour of the evaluation. Actual costs budget alerts are generated for the actual cost accrued in relation to the budget thresholds configured.
Configure forecasted budget alerts
Forecasted alerts provide advanced notification that your spending trends are likely to exceed your budget. The alerts use forecasted cost predictions. Alerts are generated when the forecasted cost projection exceeds the set threshold. You can configure a forecasted threshold (% of budget). When a forecasted budget threshold is met, notifications are normally sent within an hour of the evaluation.
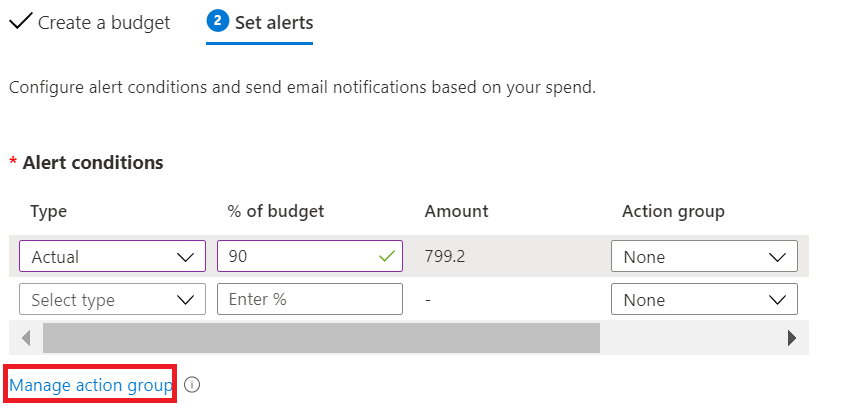
To toggle between configuring an Actual vs Forecasted cost alert, use the Type field when configuring the alert as shown in the following image.
If you want to receive emails, add azure-noreply@microsoft.com to your approved senders list so that emails don't go to your junk email folder. For more information about notifications, see Use cost alerts.
In the following example, an email alert gets generated when 90% of the budget is reached. If you create a budget with the Budgets API, you can also assign roles to people to receive alerts. Assigning roles to people isn't supported in the Azure portal. For more about the Budgets API, see Budgets API. If you want to have an email alert sent in a different language, see Supported locales for budget alert emails.
Alert limits support a range of 0.01% to 1000% of the budget threshold.
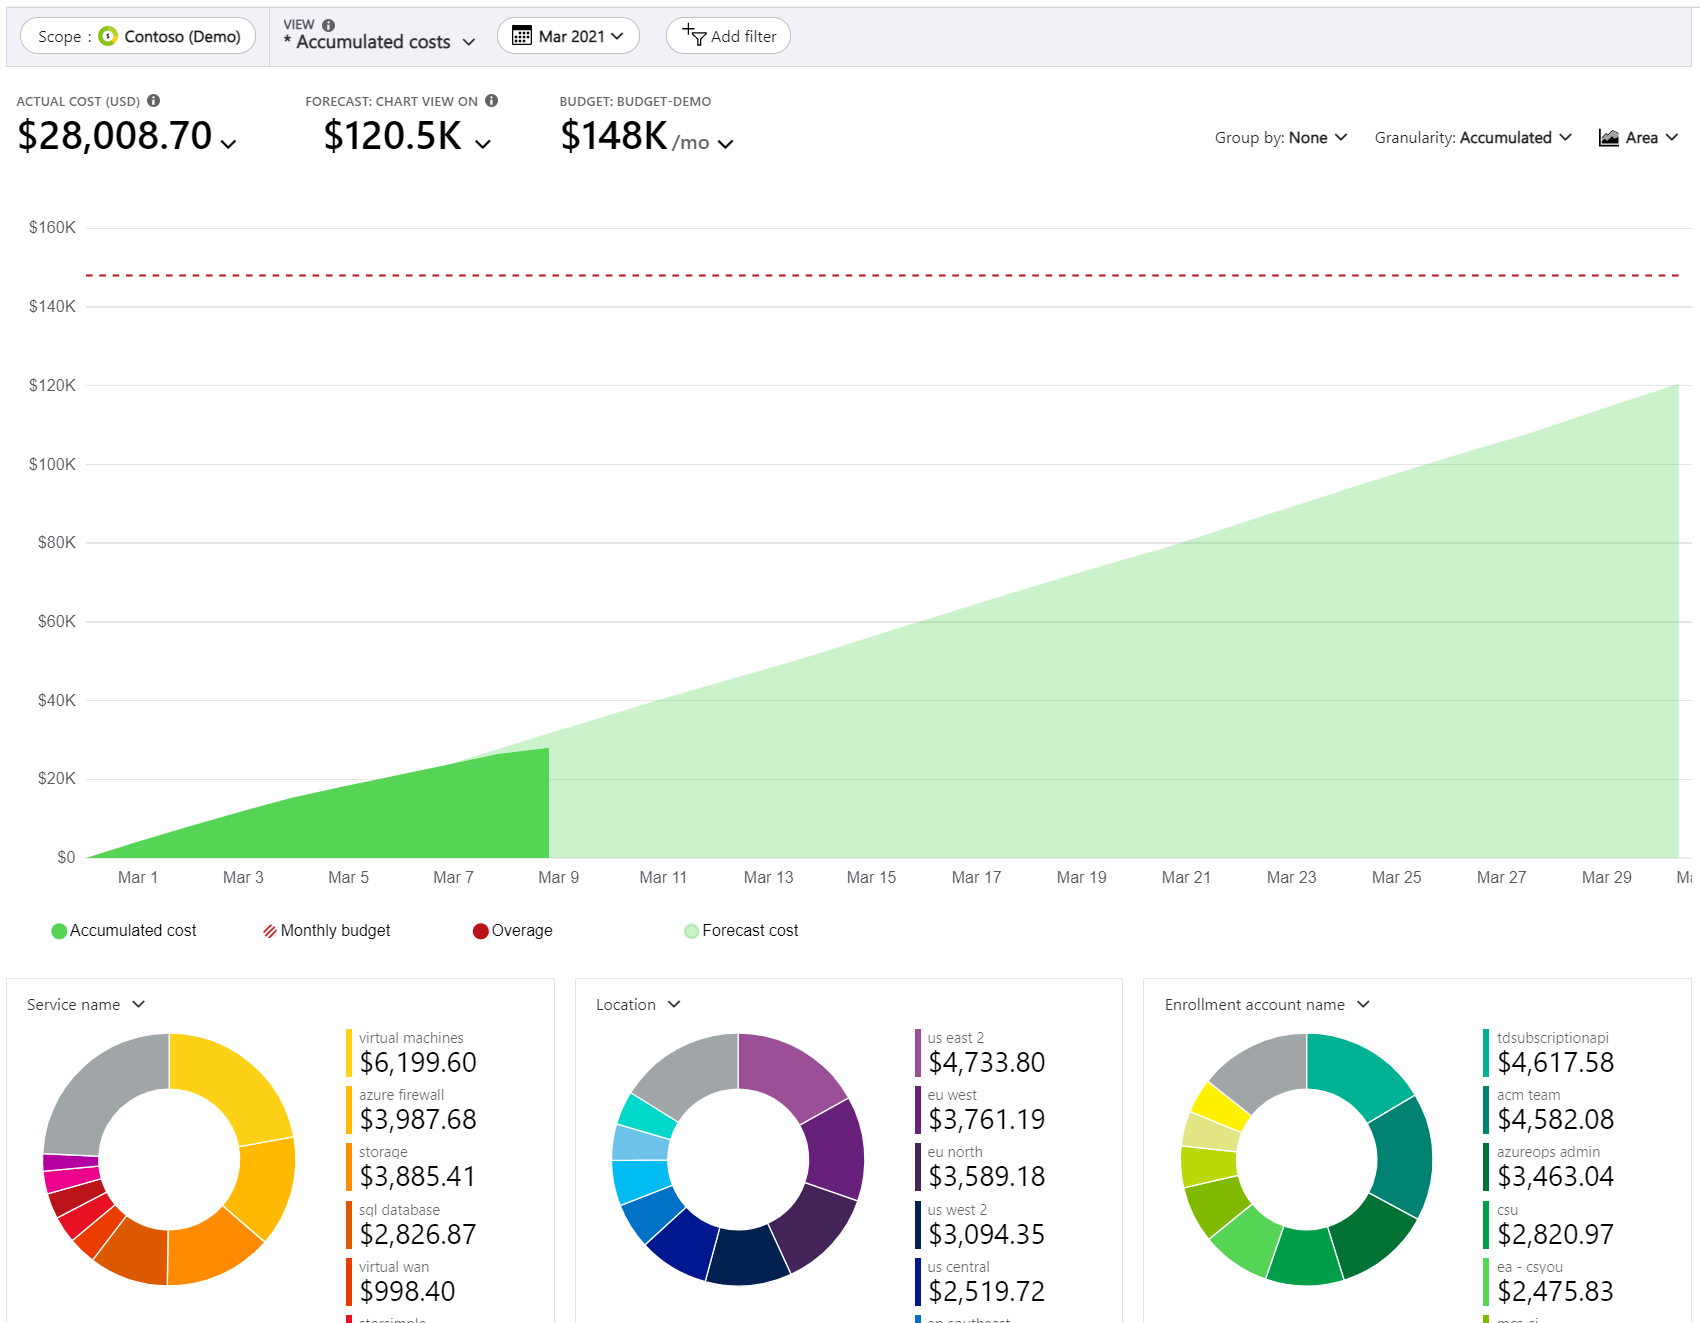
After you create a budget, it appears in cost analysis. Viewing your budget against your spending trend is one of the first steps when you start to analyze your costs and spending.
In the preceding example, you created a budget for a subscription. You can also create a budget for a resource group. If you want to create a budget for a resource group, navigate to Cost Management + Billing > Subscriptions > select a subscription > Resource groups > select a resource group > Budgets > and then Add a budget.
Create a budget for combined Azure and AWS costs
You can group your Azure and AWS costs together by assigning a management group to your connector along with its consolidated and linked accounts. Assign your Azure subscriptions to the same management group. Then create a budget for the combined costs.
- In Cost Management, select Budgets.
- Select Add.
- Select Change scope and then select the management group.
- Continue creating the budget until complete.
Costs in budget evaluations
Budget cost evaluations now include reserved instance and purchase data. If the charges apply to you, then you might receive alerts as charges are incorporated into your evaluations. Sign in to the Azure portal to verify that budget thresholds are properly configured to account for the new costs. Your Azure billed charges aren't changed. Budgets now evaluate against a more complete set of your costs. If the charges don't apply to you, then your budget behavior remains unchanged.
If you want to filter the new costs so that budgets are evaluated against first party Azure consumption charges only, add the following filters to your budget:
- Publisher Type: Azure
- Charge Type: Usage
Budget cost evaluations are based on actual cost. They don't include amortization. For more information about filtering options available to you in budgets, see Understanding grouping and filtering options.
Trigger an action group
When you create or edit a budget for a subscription or resource group scope, you can configure it to call an action group. The action group can perform various actions when your budget threshold is met. You can receive mobile push notifications when your budget threshold is met by enabling Azure app push notifications while configuring the action group.
Action groups are currently only supported for subscription and resource group scopes. For more information about creating action groups, see action groups.
For more information about using budget-based automation with action groups, see Manage costs with budgets.
To create or update action groups, select Manage action group while you're creating or editing a budget.
Next, select Add action group and create the action group.
You can integrate budgets with action groups, regardless of whether the common alert schema is enabled or disabled in those groups. For more information on how to enable common alert schema, see How do I enable the common alert schema?
Budgets in the Azure mobile app
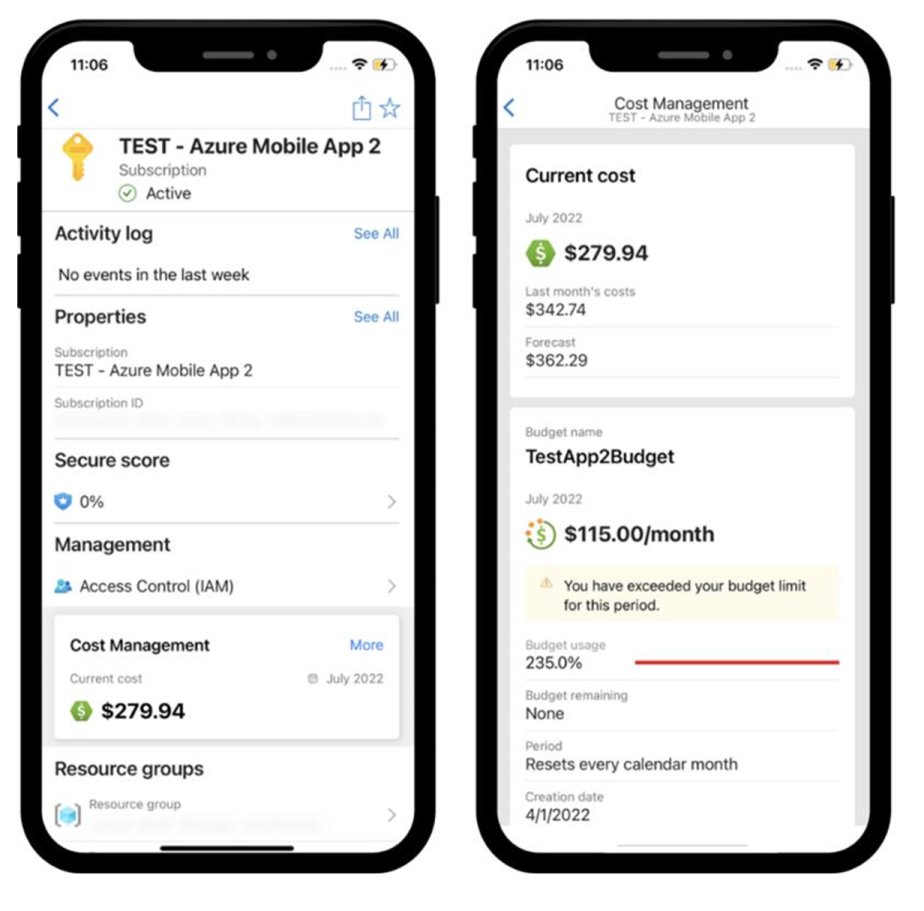
You can view budgets for your subscriptions and resource groups from the Cost Management card in the Azure app.
- Navigate to any subscription or resource group.
- Find the Cost Management card and tap More.
- Budgets load below the Current cost card. They're sorted by descending order of usage.
To receive mobile push notifications when your budget threshold is met, you can configure action groups. When setting up budget alerts, make sure to select an action group that has Azure app push notifications enabled.
Note
Currently, the Azure mobile app only supports the subscription and resource group scopes for budgets.
Create and edit budgets
If you're an EA customer, you can create and edit budgets programmatically using the Azure PowerShell module. However, we recommend that you use REST APIs to create and edit budgets because CLI commands might not support the latest version of the APIs. Budgets created with PowerShell don't send notifications.
Note
Customers with a Microsoft Customer Agreement should use the Budgets REST API to create budgets programmatically.
To download the latest version of Azure PowerShell, run the following command:
install-module -name Az
The following example commands create a budget using PowerShell. Make sure to replace all example prompts with your own info.
#Sign into Azure PowerShell with your account

Connect-AzAccount

#Select a subscription to monitor with a budget

select-AzSubscription -Subscription "Your Subscription"

#Create an action group email receiver and corresponding action group

$email1 = New-AzActionGroupReceiver -EmailAddress test@test.com -Name EmailReceiver1
$ActionGroupId = (Set-AzActionGroup -ResourceGroupName YourResourceGroup -Name TestAG -ShortName TestAG -Receiver $email1).Id

#Create a monthly budget that sends an email and triggers an Action Group to send a second email. Make sure the StartDate for your monthly budget is set to the first day of the current month. Note that Action Groups can also be used to trigger automation such as Azure Functions or Webhooks.

Get-AzContext
New-AzConsumptionBudget -Amount 100 -Name TestPSBudget -Category Cost -StartDate 2020-02-01 -TimeGrain Monthly -EndDate 2022-12-31 -ContactEmail test@test.com -NotificationKey Key1 -NotificationThreshold 0.8 -NotificationEnabled -ContactGroup $ActionGroupId
Clean up resources
If you created a budget and you no longer need it, view its details and delete it.
Next steps
In this tutorial, you learned how to:
- Create a budget in the Azure portal
- Create and edit budgets with PowerShell
- Create a budget with an Azure Resource Manager template
Advance to the next tutorial to create a recurring export for your cost management data.


