Quickstart: Create automated integration workflows with multitenant Azure Logic Apps and Visual Studio
Applies to: Azure Logic Apps (Consumption)
This quickstart shows how to design, develop, and deploy automated workflows that integrate apps, data, systems, and services across enterprises and organizations by using multitenant Azure Logic Apps and Visual Studio. Although you can perform these tasks in the Azure portal, Visual Studio lets you add your logic apps to source control, publish different versions, and create Azure Resource Manager templates for different deployment environments. For more information about multitenant versus single-tenant model, review Single-tenant versus multitenant in Azure Logic Apps.
If you're new to Azure Logic Apps and just want the basic concepts, try the quickstart for creating an example Consumption logic app workflow in the Azure portal. The workflow designer works similarly in both the Azure portal and Visual Studio.
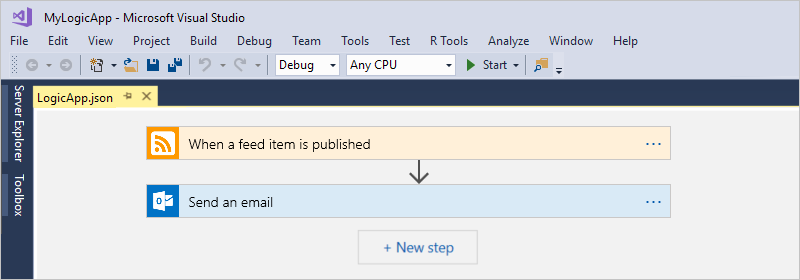
In this quickstart, you create the same logic app workflow with Visual Studio as the Azure portal quickstart. You can also learn to create an example logic app workflow in Visual Studio Code, and create and manage logic app workflows using the Azure CLI. This logic app workflow monitors a website's RSS feed and sends email for each new item in that feed. Your finished logic app workflow looks like the following high-level workflow:
Prerequisites
An Azure account and subscription. If you don't have a subscription, sign up for a free Azure account. If you have an Azure Government subscription, follow these additional steps to set up Visual Studio for Azure Government Cloud.
Download and install these tools, if you don't have them already:
Visual Studio 2019 - Community edition, which is free. This quickstart uses Visual Studio Community 2017.
Important
If you use Visual Studio 2019 or 2017, make sure that you select the Azure development workload.
The Azure Logic Apps extension is unavailable for Visual Studio 2022.
Microsoft Azure SDK for .NET (2.9.1 or later). Learn more about Azure SDK for .NET.
The corresponding Azure Logic Apps Tools for the Visual Studio extension, which is unavailable for Visual Studio 2022:
You can download and install Azure Logic Apps Tools directly from the Visual Studio Marketplace, or learn how to install this extension from inside Visual Studio. Make sure that you restart Visual Studio after you finish installing.
Access to the web while using the embedded workflow designer
The designer needs an internet connection to create resources in Azure and to read properties and data from connectors in your logic app workflow.
An email account that's supported by Azure Logic Apps, such as Outlook for Microsoft 365, Outlook.com, or Gmail. For other providers, review the connectors list here. This example uses Office 365 Outlook. If you use a different provider, the overall steps are the same, but your UI might slightly differ.
Important
If you want to use the Gmail connector, only G-Suite business accounts can use this connector without restriction in logic app workflows. If you have a Gmail consumer account, you can use this connector with only specific Google-approved services, or you can create a Google client app to use for authentication with your Gmail connector. For more information, see Data security and privacy policies for Google connectors in Azure Logic Apps.
If your logic app workflow needs to communicate through a firewall that limits traffic to specific IP addresses, that firewall needs to allow access for both the inbound and outbound IP addresses used by the Azure Logic Apps service or runtime in the Azure region where your logic app resource exists. If your logic app workflow also uses managed connectors, such as the Office 365 Outlook connector or SQL connector, or uses custom connectors, the firewall also needs to allow access for all the managed connector outbound IP addresses in your logic app resource's Azure region.
Set up Visual Studio for Azure Government
Visual Studio 2019
To work with Azure Government subscriptions in Azure Logic Apps, you need to add a discovery endpoint for Azure Government Cloud to Visual Studio. However, before you sign in to Visual Studio with your Azure Government account, you need to rename the JSON file that's generated after you add the discovery endpoint by following these steps:
Close Visual Studio.
Find the generated JSON file named
Azure U.S. Government-A3EC617673C6C70CC6B9472656832A26.Configurationat this location:%localappdata%\.IdentityService\AadConfigurationsRename the JSON file to
AadProvider.Configuration.json.Restart Visual Studio.
Continue with the steps to sign in with your Azure Government account.
To revert this setup, delete the JSON file at the following location, and restart Visual Studio:
%localappdata%\.IdentityService\AadConfigurations\AadProvider.Configuration.json
Visual Studio 2017
You can use the Azure Environment Selector Visual Studio extension, which you can download and install from the Visual Studio Marketplace.
Create Azure resource group project
To get started, create an Azure Resource Group project. Learn more about Azure resource groups and resources.
Start Visual Studio. Sign in with your Azure account.
On the File menu, select New > Project. (Keyboard: Ctrl + Shift + N)

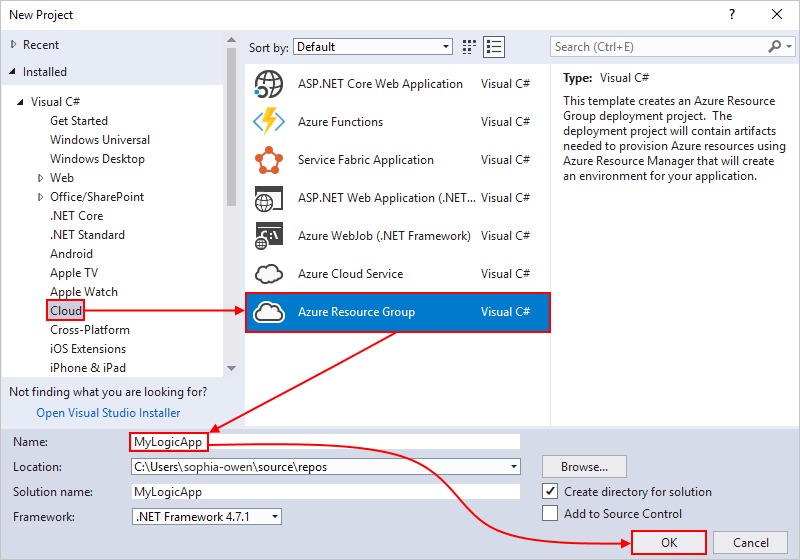
Under Installed, select Visual C# or Visual Basic. Select Cloud > Azure Resource Group. Name your project, for example:
Note
Resource group names can contain only letters, numbers, periods (
.), underscores (_), hyphens (-), and parentheses ((,)), but can't end with periods (.).If Cloud or Azure Resource Group doesn't appear, make sure you install the Azure SDK for Visual Studio.
If you're using Visual Studio 2019, follow these steps:
In the Create a new project box, select the Azure Resource Group project for Visual C# or Visual Basic. Select Next.
Provide a name for the Azure resource group you want to use and other project information. Select Create.
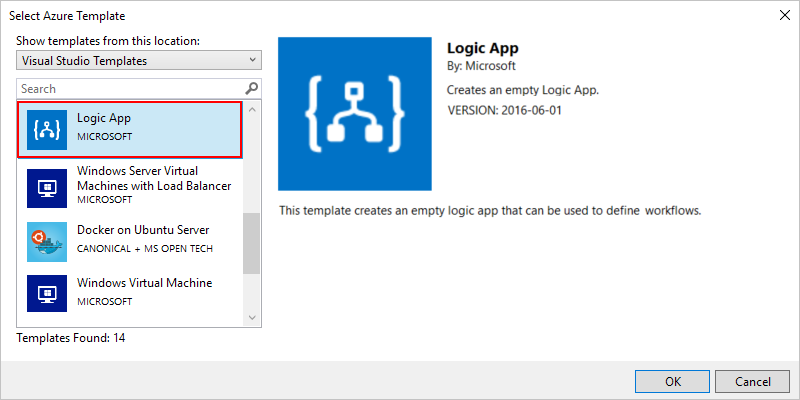
From the template list, select the Logic App template. Select OK.
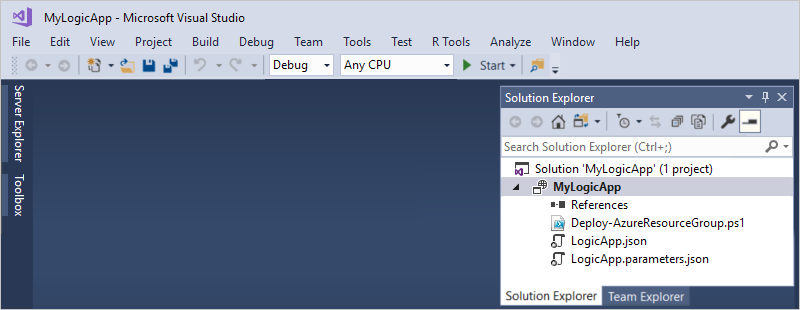
After Visual Studio creates your project, Solution Explorer opens and shows your solution. In your solution, the LogicApp.json file not only stores your logic app definition but is also an Azure Resource Manager template that you can use for deployment.
Create blank logic app workflow
When you have your Azure Resource Group project, create your logic app with the Blank Logic App template.
In Solution Explorer, open the LogicApp.json file's shortcut menu. Select Open With Logic App Designer. (Keyboard: Ctrl + L)
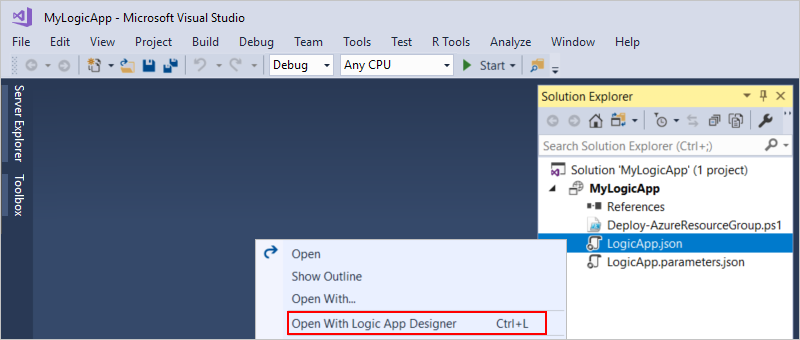
Tip
If you don't have this command in Visual Studio 2019, check that you have the latest updates for Visual Studio.
Visual Studio prompts you for your Azure subscription and an Azure resource group for creating and deploying resources for your logic app workflow and connections.
For Subscription, select your Azure subscription. For Resource group, select Create New to create another Azure resource group.
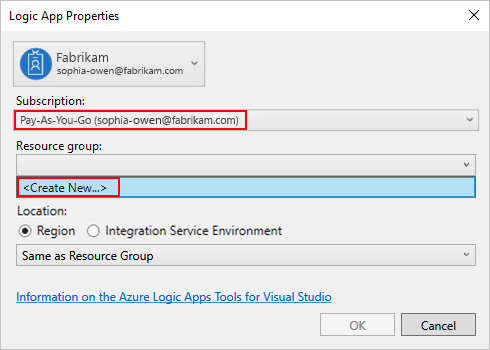
Setting Example value Description User account Fabrikam
sophia-owen@fabrikam.comThe account that you used when you signed in to Visual Studio Subscription Pay-As-You-Go
(sophia-owen@fabrikam.com)The name for your Azure subscription and associated account Resource Group MyLogicApp-RG
(West US)The Azure resource group and location for storing and deploying your logic app's resources Location Same as Resource Group The location type and location to deploy your logic app resource.
For this quickstart, keep the location type set to Region and the location set to Same as Resource Group.
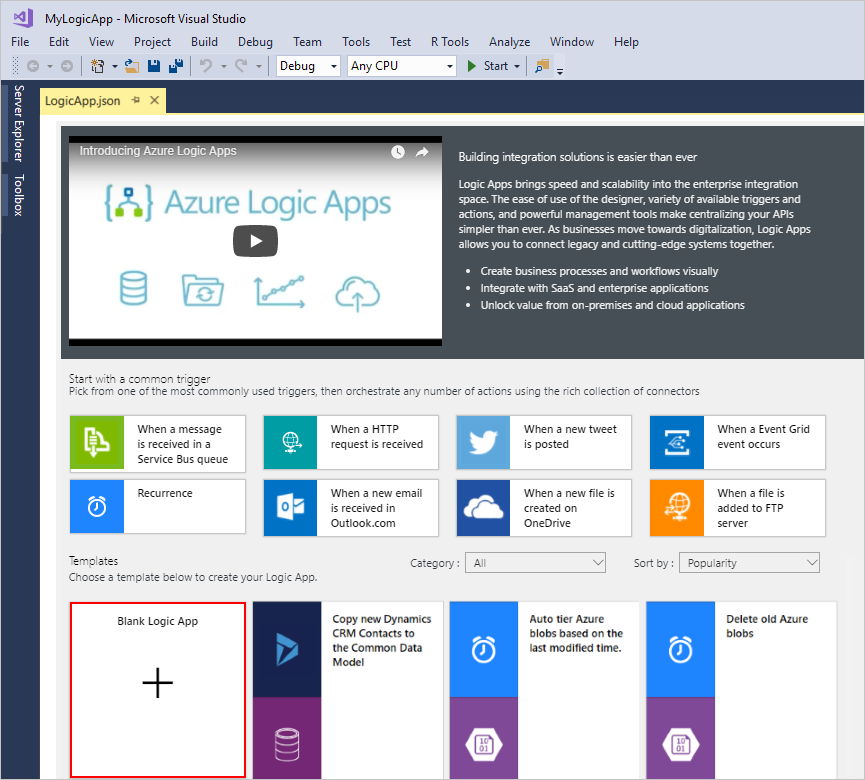
Note: After you create your resource group project, you can change the location type and the location, but different location type affects your logic app in various ways.The workflow designer opens a page that shows an introduction video and commonly used triggers. Scroll down past the video and triggers to Templates, and select Blank Logic App.
Build your workflow
Next, add an RSS trigger that fires when a new feed item appears. Every workflow starts with a trigger, which fires when specific criteria are met. Each time the trigger fires, the Azure Logic Apps engine creates a logic app workflow instance that runs your workflow.
On the workflow designer, follow these general steps to add the RSS trigger named When a feed item is published.
Finish building the workflow by following these general steps to add the Office 365 Outlook action named Send an email, then return to this article.
When you're done, your workflow looks like this example:

Save your Visual Studio solution. (Keyboard: Ctrl + S)
Deploy logic app to Azure
Before you can run and test your workflow, deploy the app to Azure from Visual Studio.
In Solution Explorer, on your project's shortcut menu, select Deploy > New. If prompted, sign in with your Azure account.
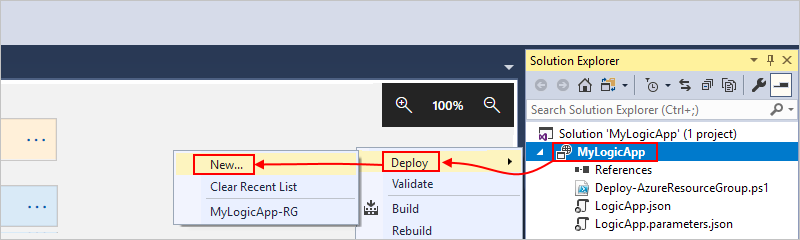
For this deployment, keep the default Azure subscription, resource group, and other settings. Select Deploy.

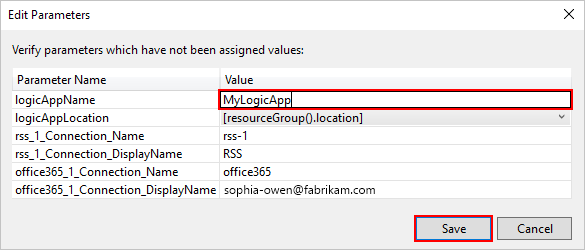
If the Edit Parameters box appears, provide a resource name for your logic app. Save your settings.
When deployment starts, your app's deployment status appears in the Visual Studio Output window. If the status doesn't appear, open the Show output from list, and select your Azure resource group.

If your selected connectors need input from you, a PowerShell window opens in the background and prompts for any necessary passwords or secret keys. After you enter this information, deployment continues.

After deployment finishes, your logic app is live in the Azure portal and runs on your specified schedule (every minute). If the trigger finds new feed items, the trigger fires and creates a workflow instance that runs the workflow's actions. Your workflow sends email for each new item. Otherwise, if the trigger doesn't find new items, the trigger doesn't fire and "skips" instantiating the workflow. Your workflow waits until the next interval before checking.
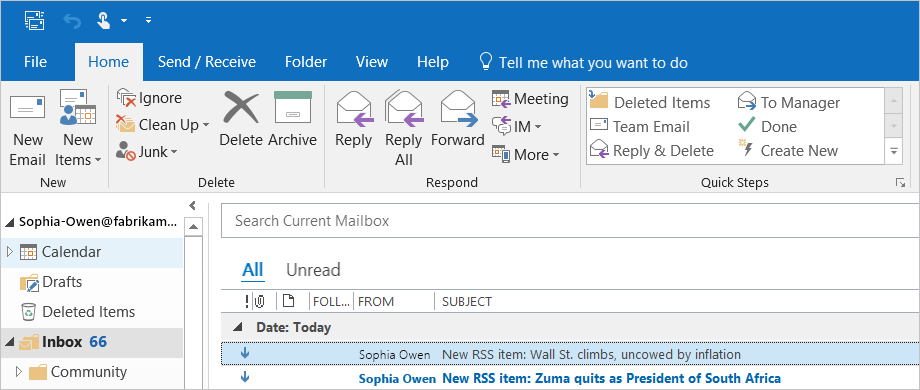
Here are sample emails that this workflow sends. If you don't get any emails, check your junk email folder.
Congratulations, you've successfully built and deployed your logic app workflow with Visual Studio. To manage your logic app workflow and review the run history, see Manage logic apps with Visual Studio.
Add new logic app
When you have an existing Azure Resource Group project, you can add a new blank logic app to that project by using the JSON Outline window.
In Solution Explorer, open the
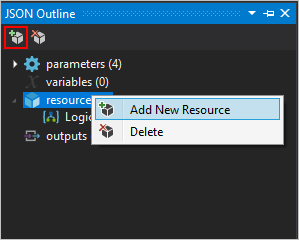
<logic-app-name>.jsonfile.From the View menu, select Other Windows > JSON Outline.
To add a resource to the template file, select Add Resource at the top of the JSON Outline window. Or in the JSON Outline window, open the resources shortcut menu, and select Add New Resource.
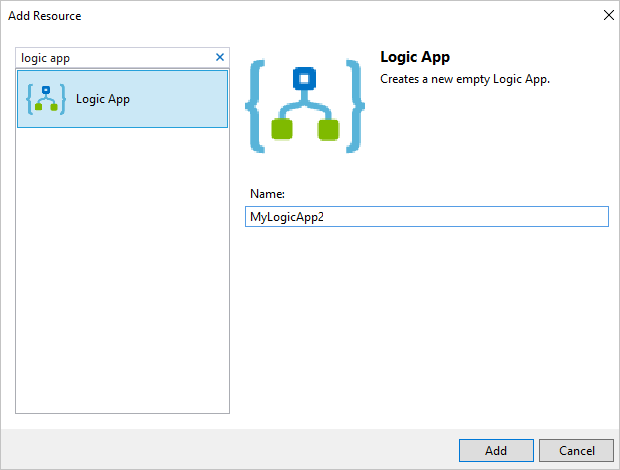
In the Add Resource dialog box, in the search box, find logic app, and select Logic App. Name your logic app resource, and select Add.
Clean up resources
When you're done with your logic app, delete the resource group that contains your logic app and related resources.
Sign in to the Azure portal with the same account used to create your logic app.
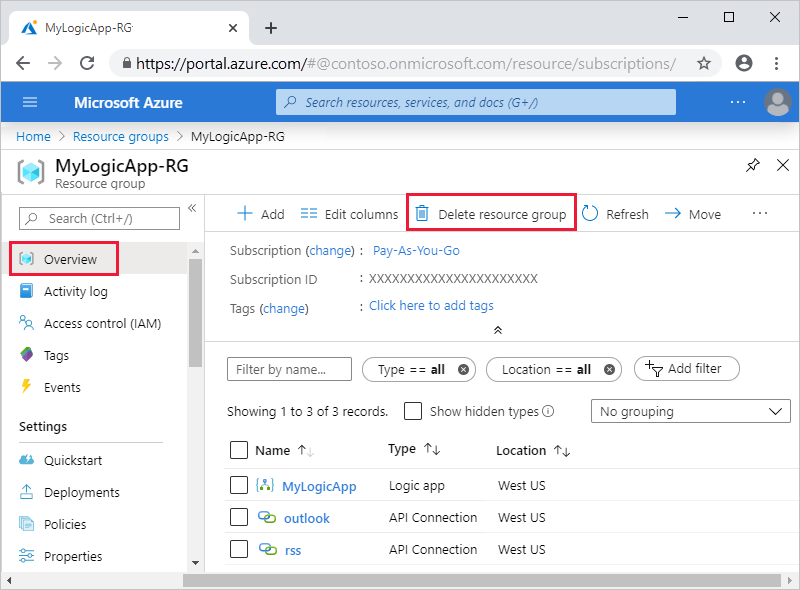
On the Azure portal menu, select Resource groups, or search for and select Resource groups from any page. Select your logic app's resource group.
On the Overview page, select Delete resource group. Enter the resource group name as confirmation, and select Delete.
Delete the Visual Studio solution from your local computer.
Next steps
In this article, you built, deployed, and ran your logic app workflow with Visual Studio. To learn about managing and performing advanced deployment for logic apps with Visual Studio, see the following article: