Hibernating Windows virtual machines
Applies to: ✔️ Windows VMs
Hibernation allows you to pause VMs that aren't being used and save on compute costs. It's an effective cost management feature for scenarios such as:
- Virtual desktops, dev/test servers, and other scenarios where the VMs don't need to run 24/7.
- Systems with long boot times due to memory intensive applications. These applications can be initialized on VMs and hibernated. These “prewarmed” VMs can then be quickly started when needed, with the applications already up and running in the desired state.
How hibernation works
To learn how hibernation works, check out the hibernation overview.
Supported configurations
Hibernation support is limited to certain VM sizes and OS versions. Make sure you have a supported configuration before using hibernation.
For a list of hibernation compatible VM sizes, check out the supported VM sizes section in the hibernation overview.
Supported Windows versions
The following Windows operating systems support hibernation:
- Windows Server 2022
- Windows Server 2019
- Windows 11 Pro
- Windows 11 Enterprise
- Windows 11 Enterprise multi-session
- Windows 10 Pro
- Windows 10 Enterprise
- Windows 10 Enterprise multi-session
Prerequisites and configuration limitations
- The Windows page file can't be on the temp disk.
- Applications such as Device Guard and Credential Guard that require virtualization-based security (VBS) work with hibernation when you enable Trusted Launch on the VM and Nested Virtualization in the guest OS.
For general limitations, Azure feature limitations supported VM sizes, and feature prerequisites check out the "Supported configurations" section in the hibernation overview.
Creating a Windows VM with hibernation enabled
To hibernate a VM, you must first enable the feature on the VM.
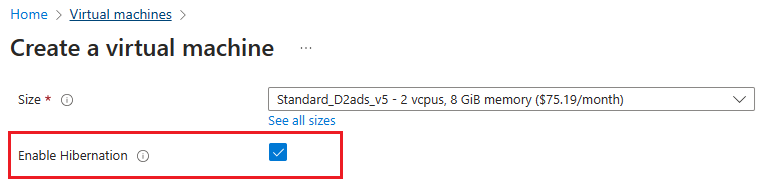
To enable hibernation during VM creation, you can use the Azure portal, CLI, PowerShell, ARM templates and API.
To enable hibernation in the Azure portal, check the 'Enable hibernation' box during VM creation.
Once you've created a VM with hibernation enabled, you need to configure the guest OS to successfully hibernate your VM.
Enabling hibernation on an existing Windows VM
To enable hibernation on an existing VM, you can use Azure CLI, PowerShell, or REST API. Before proceeding, ensure that the guest OS version supports hibernation on Azure. For more information, see supported OS versions.
Note
Ensure that the page file is located on the C: drive. Move the page file to the C: drive if necessary, before continuing.
To enable hibernation on an existing VM using Azure CLI, first deallocate your VM with az vm deallocate. Once the VM is deallocated, update the OS disk and VM.
Update the OS disk to set supportsHibernation to
true. If supportsHibernation is already set totrue, you can skip this step and proceed to the next step.az disk update --resource-group myResourceGroup \ --name MyOSDisk \ --set supportsHibernation=trueUpdate the VM to enable hibernation.
   az vm update --resource-group myResourceGroup \
   --name myVM \
   --enable-hibernation true
Start the VM and then proceed to configuring hibernation in the guest OS.
   az vm start --resource-group myResourceGroup \
   --name myVM \
Configuring hibernation in the guest OS
Enabling hibernation while creating a Windows VM automatically installs the 'Microsoft.CPlat.Core.WindowsHibernateExtension' VM extension. This extension configures the guest OS for hibernation. This extension doesn't need to be manually installed or updated, as this extension is managed by the Azure platform.
Note
When you create a VM with hibernation enabled, Azure automatically places the page file on the C: drive. If you're enabling hibernation on an existing VM or using a specialized image, then you'll need to follow additional steps to ensure that the page file is located on the C: drive.
Note
Using the WindowsHibernateExtension requires the Azure VM Agent to be installed on the VM. If you choose to opt-out of the Azure VM Agent, then you can configure the OS for hibernation by running powercfg /h /type full inside the guest. You can then verify if hibernation is enabled inside guest using the powercfg /a command.
Hibernate a VM
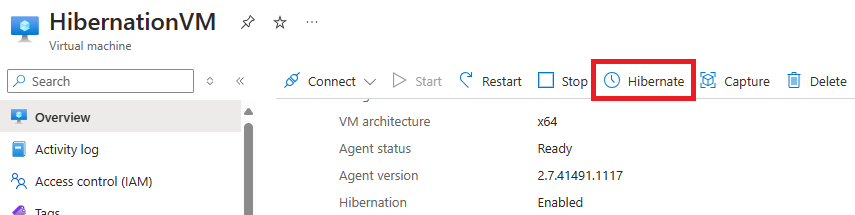
Once a VM with hibernation enabled has been created and the guest OS is configured for hibernation, you can hibernate the VM through the Azure portal, the Azure CLI, PowerShell, or REST API.
To hibernate a VM in the Azure portal, click the 'Hibernate' button on the VM Overview page.
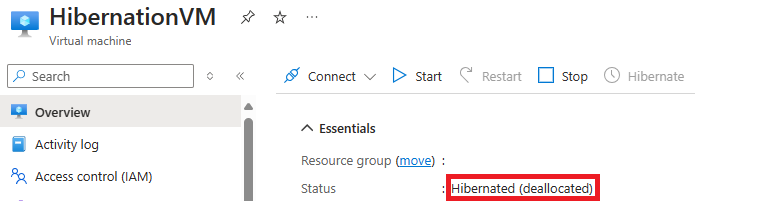
View state of hibernated VM
To view the state of a VM in the portal, check the 'Status' on the overview page. It should report as "Hibernated (deallocated)"
Start hibernated VMs
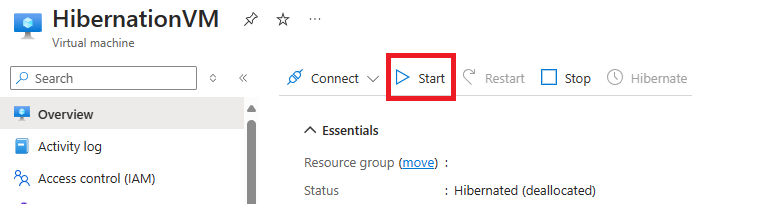
You can start hibernated VMs just like how you would start a stopped VM. This can be done through the Azure portal, the Azure CLI, PowerShell, or REST API.
To start a hibernated VM using the Azure portal, click the 'Start' button on the VM Overview page.
Deploy hibernation enabled VMs from the Azure Compute Gallery
VMs created from Compute Gallery images can also be enabled for hibernation. Ensure that the OS version associated with your Gallery image supports hibernation on Azure. Refer to the list of supported OS versions.
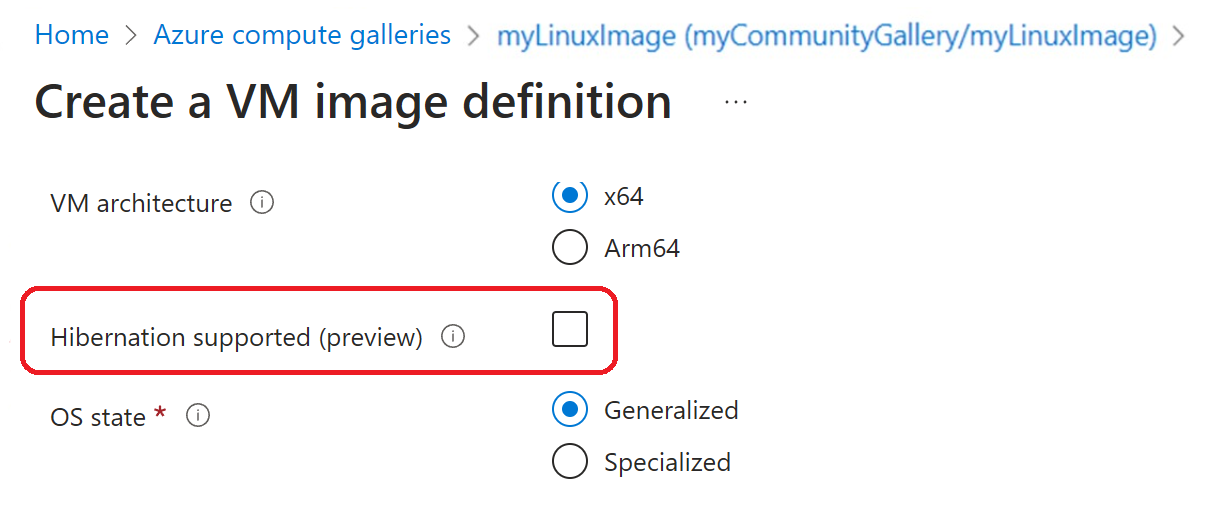
To create VMs with hibernation enabled using Gallery images, you'll first need to create a new image definition with the hibernation property enabled. Once this feature property is enabled on the Gallery Image definition, you can create an image version and use that image version to create hibernation enabled VMs.
Note
For specialized Windows images, the page file location must be set to C: drive in order for Azure to successfully configure your guest OS for hibernation. If you're creating an Image version from an existing VM, you should first move the page file to the OS disk and then use the VM as the source for the Image version.
To create an image definition with the hibernation property enabled, select the checkmark for 'Enable hibernation'.
Deploy hibernation enabled VMs from an OS disk
VMs created from OS disks can also be enabled for hibernation. Ensure that the OS version associated with your OS disk supports hibernation on Azure. Refer to the list of supported OS versions.
To create VMs with hibernation enabled using OS disks, ensure that the OS disk has the hibernation property enabled. Refer to API example to enable this property on OS disks. Once the hibernation property is enabled on the OS disk, you can create hibernation enabled VMs using that OS disk.
PATCH https://management.azure.com/subscriptions/{subscription-id}/resourceGroups/myResourceGroup/providers/Microsoft.Compute/disks/myDisk?api-version=2021-12-01

{
  "properties": {
    "supportsHibernation": true
  }
}
Troubleshooting
Refer to the Hibernate troubleshooting guide and the Windows VM hibernation troubleshooting guide for more information.
FAQs
Refer to the Hibernate FAQs for more information.
Next steps
Tilbakemeldinger
Kommer snart: Gjennom 2024 faser vi ut GitHub Issues som tilbakemeldingsmekanisme for innhold, og erstatter det med et nytt system for tilbakemeldinger. Hvis du vil ha mer informasjon, kan du se: https://aka.ms/ContentUserFeedback.
Send inn og vis tilbakemelding for