Set up copilot template for store operations
Important
Some or all of this functionality is available as part of a preview release. The content and the functionality are subject to change.
After you deploy AI store operations, you need to complete the following steps:
Prerequisites
Before you start, make sure you have the following resources:
An Azure Cognitive Search resource. To create one, see Create a search service in the portal - Azure Cognitive Search.
An Azure Blob Storage container with your retailer-specific documents uploaded. To create a storage container, see Quickstart: Upload, download, and list blobs with the Azure portal and Manage blob containers using Azure CLI - Azure Storage | Microsoft Learn.
Note
If you selected the AI Store Assistant ARM Template during the AI store operations deployment, the Azure Cognitive Search and the Azure Blob container would have been created during the deployment.
Upload retailer specific documents in the Azure Blob Storage container for the Q&A feature. Go to Storage accounts and select your storage account. Select the relevant container in the storage account and upload documents. To upload documents, see Upload a block blob. The document types currently supported are .txt, .md. .html, .docx, .pptx and .pdf.
An Azure OpenAI resource with semantic ranker subscription enabled.
To create an Azure OpenAI resource, see Create an OpenAI resource - Microsoft Azure.
To enable semantic ranker subscription, open Microsoft Azure. Navigate to Azure AI Search service instance. Select Settings> Semantic ranker (Preview) and turn on Semantic ranker subscription with your subscription plan.
Set up Microsoft Azure Cognitive Search connection
Microsoft Azure Cognitive Search is a cloud service that lets you create a search index from your data sources. You need to connect your data sources to Azure Cognitive Search to enable the Q&A feature of AI store operations.
To set up Microsoft Azure Cognitive Search connection, follow these steps:
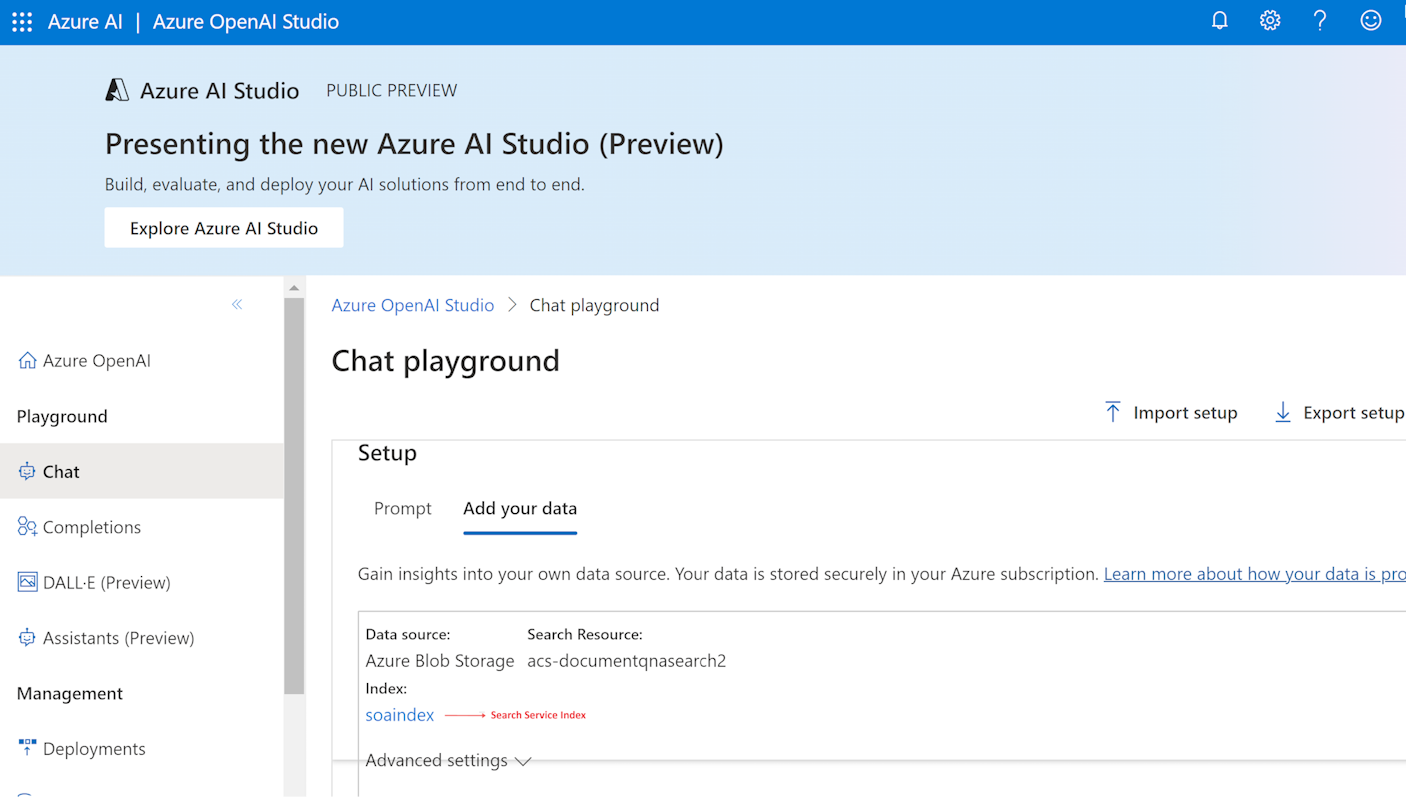
Go to Azure OpenAI studio.
Select Chat playground. On the right-side panel, choose Chat. When the Chat playground opens, select the Add your data tab. Select Add a data source.
In the Data source workflow, configure the following fields and select Next:

Select Azure Blob Storage as data source.
Select your desired subscription from the list.
Select Azure Blob Storage resource and the created Blob Storage instance. In case you don't have a Blob Storage, Create a storage account - Azure Storage | Microsoft Learn.
Select your Azure Blob storage container where all the retailer documents are uploaded.
Select your Azure Cognitive Search resource.
Enter any index name you desire.
Select Add vector search to this resource to enable vector embeddings.
Select the deployment of text embedding modal from the drop-down menu. Use the deployment created while setting up Azure OpenAI instance.
In the Data management workflow, fill in the following fields, and select Next:
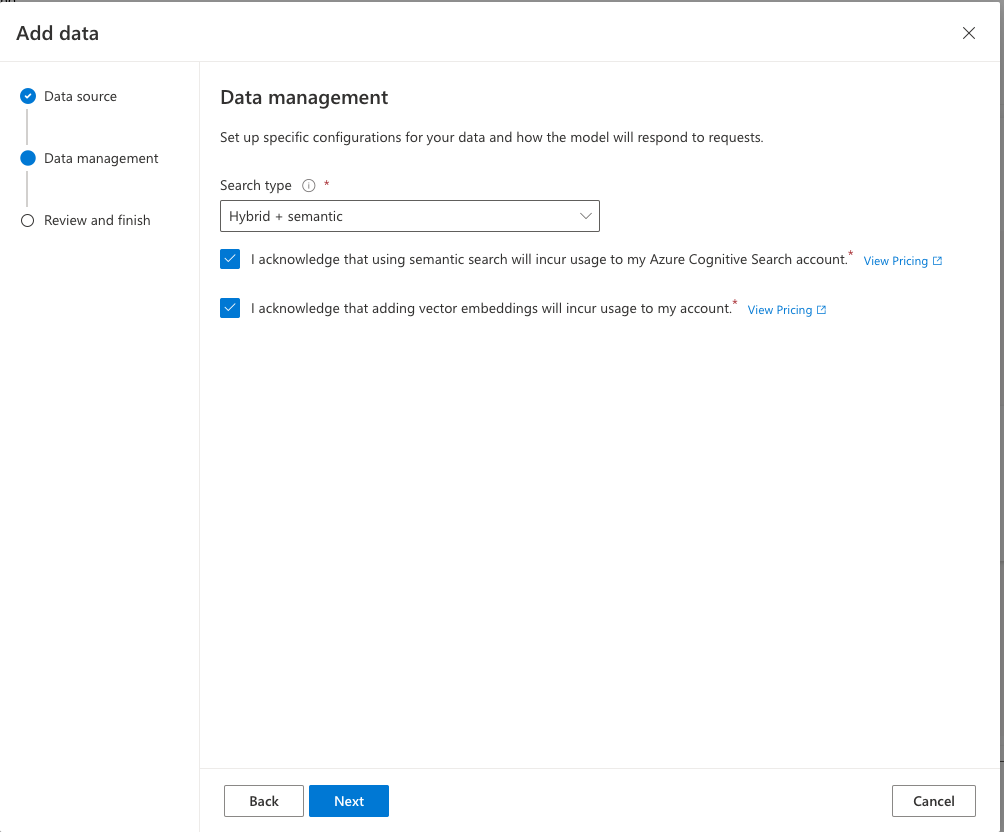
From the Search type drop-down, select Hybrid + semantic.
Select both checkboxes to give your consent to account usage.
In the Review and finish workflow, select Save and close. You see data being added on the Add your data page.
Important
Note down the index name. You need this value to link Store Operations Assist with Azure OpenAI accounts.


Create an app registration
An app registration creates an identity for your app and generates a client secret. You need these credentials to authenticate your app with Azure OpenAI.
To create an app registration, follow these steps:
Go to Microsoft Azure portal.
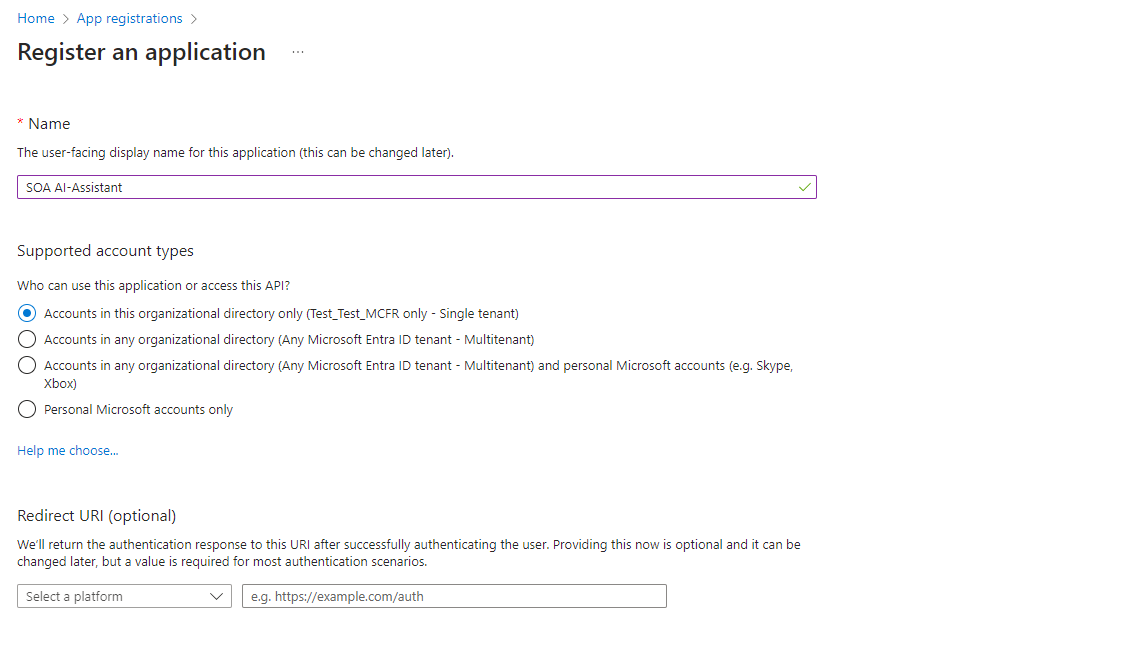
Search for App registrations in the Azure portal and select it.

Select New registration and provide a name for your app. Select single tenant option in supported account types. Select Register to create a new app registration.
You see a message that confirms your app registration. Under Client credentials, select Add a certificate or secret.
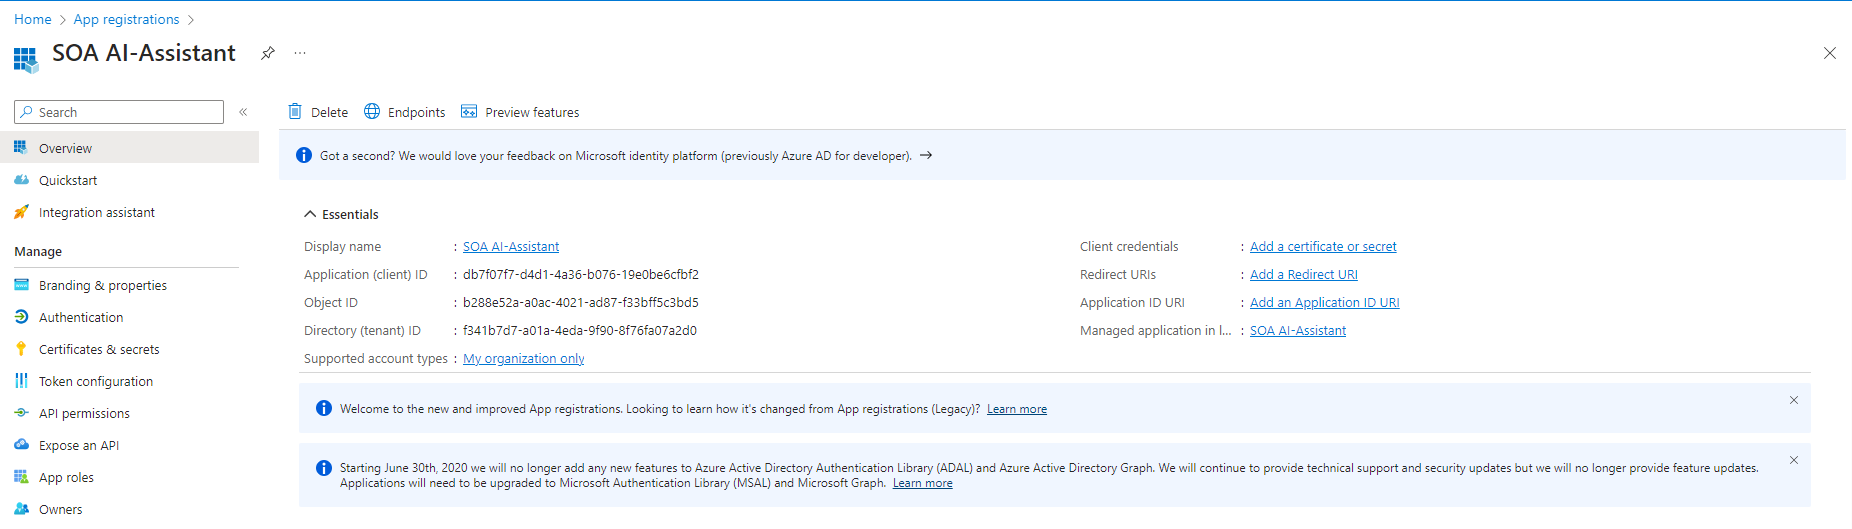
Important
Note down the value of the Application ID. You need this value to link Store Operations Assist with Azure OpenAI accounts.
Select + New client secret. Fill description, select the expiry time, and select Add. The authentication fails after expiry and you need to create a new app registration.

Copy and save the client secret value shown in the given screenshot as it is required for later configuration.

Caution
Note down the value of the client secret value. You need this value to link Store Operations Assist with Azure OpenAI accounts. After you refresh the tab or screen, the client secret value isn't displayed, and you can't copy it later. So, we recommend you save the client secret value while creation of the app registration.


Assign the contributor role to app registration instance
You need to assign the contributor role to the app registration instance created earlier to use the OpenAI and Cognitive Search resources created during deployment.
Sign in to Microsoft Azure portal.
Select the OpenAI resource and select Access control (IAM).
Select Add > Add role assignment. The Add role assignment page opens.
On the Privileged administrator roles tab, select the Contributor role. Select Next

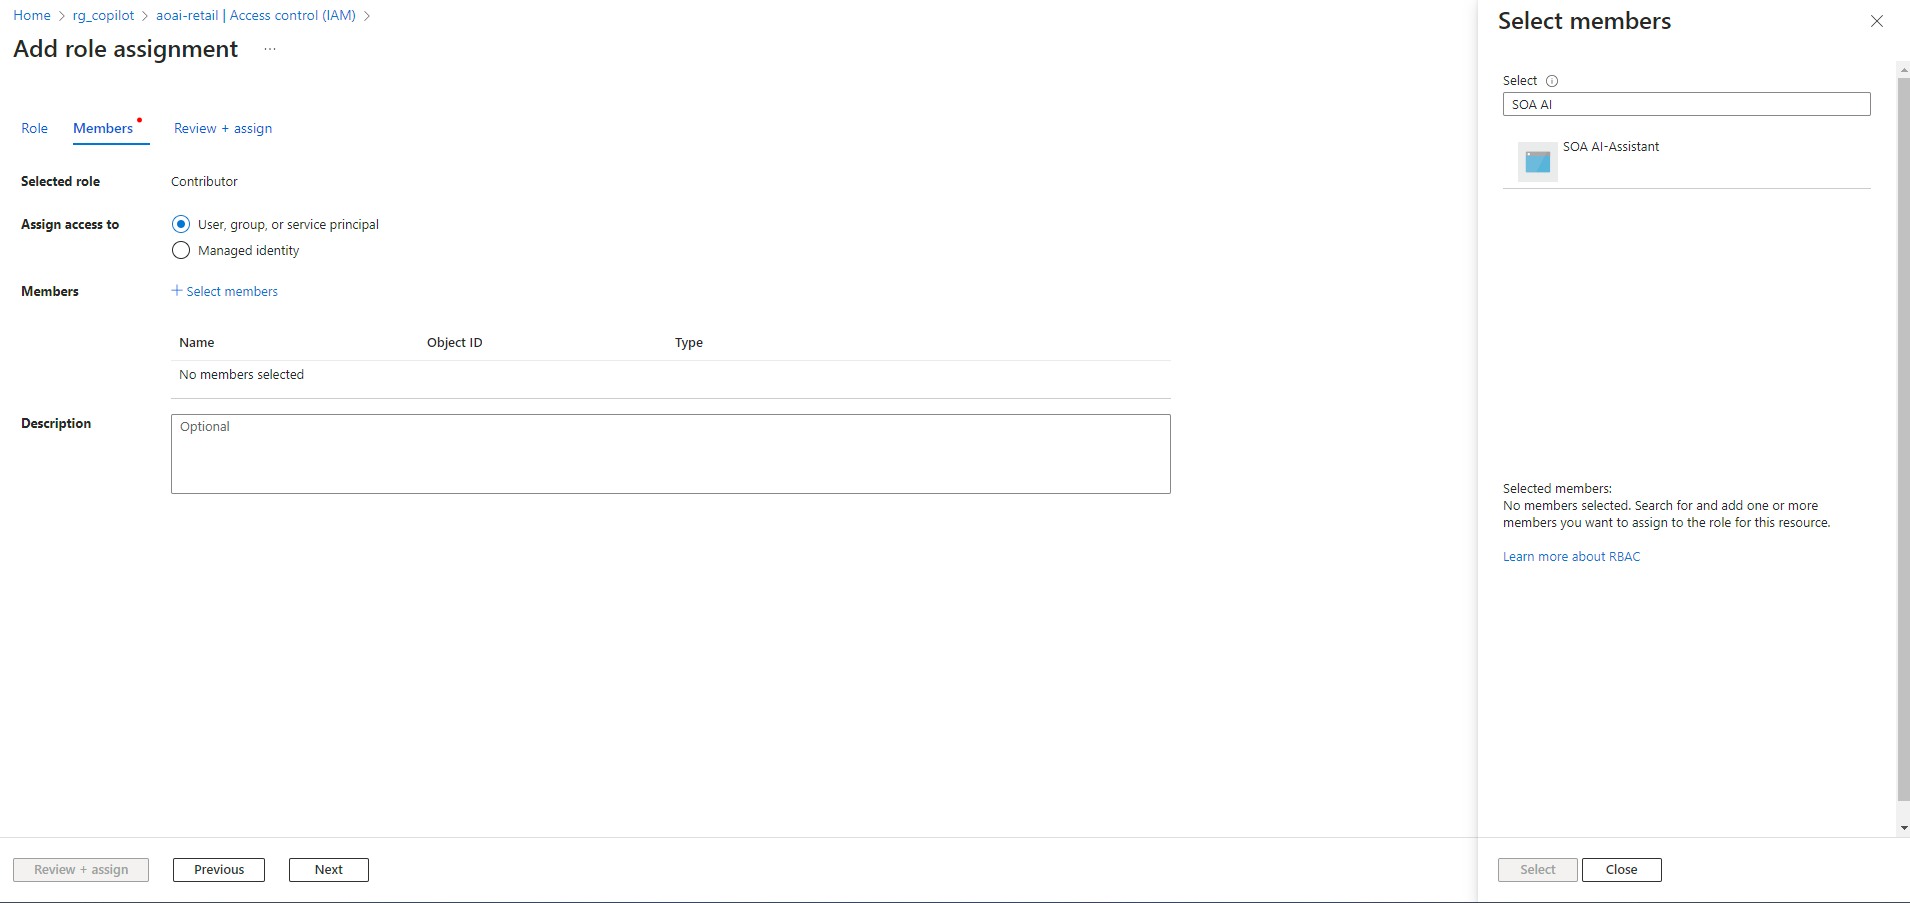
On the Members tab, select User, group, or service principal > Select members. Select the app registration instance created earlier, and select Select > Close > Next.
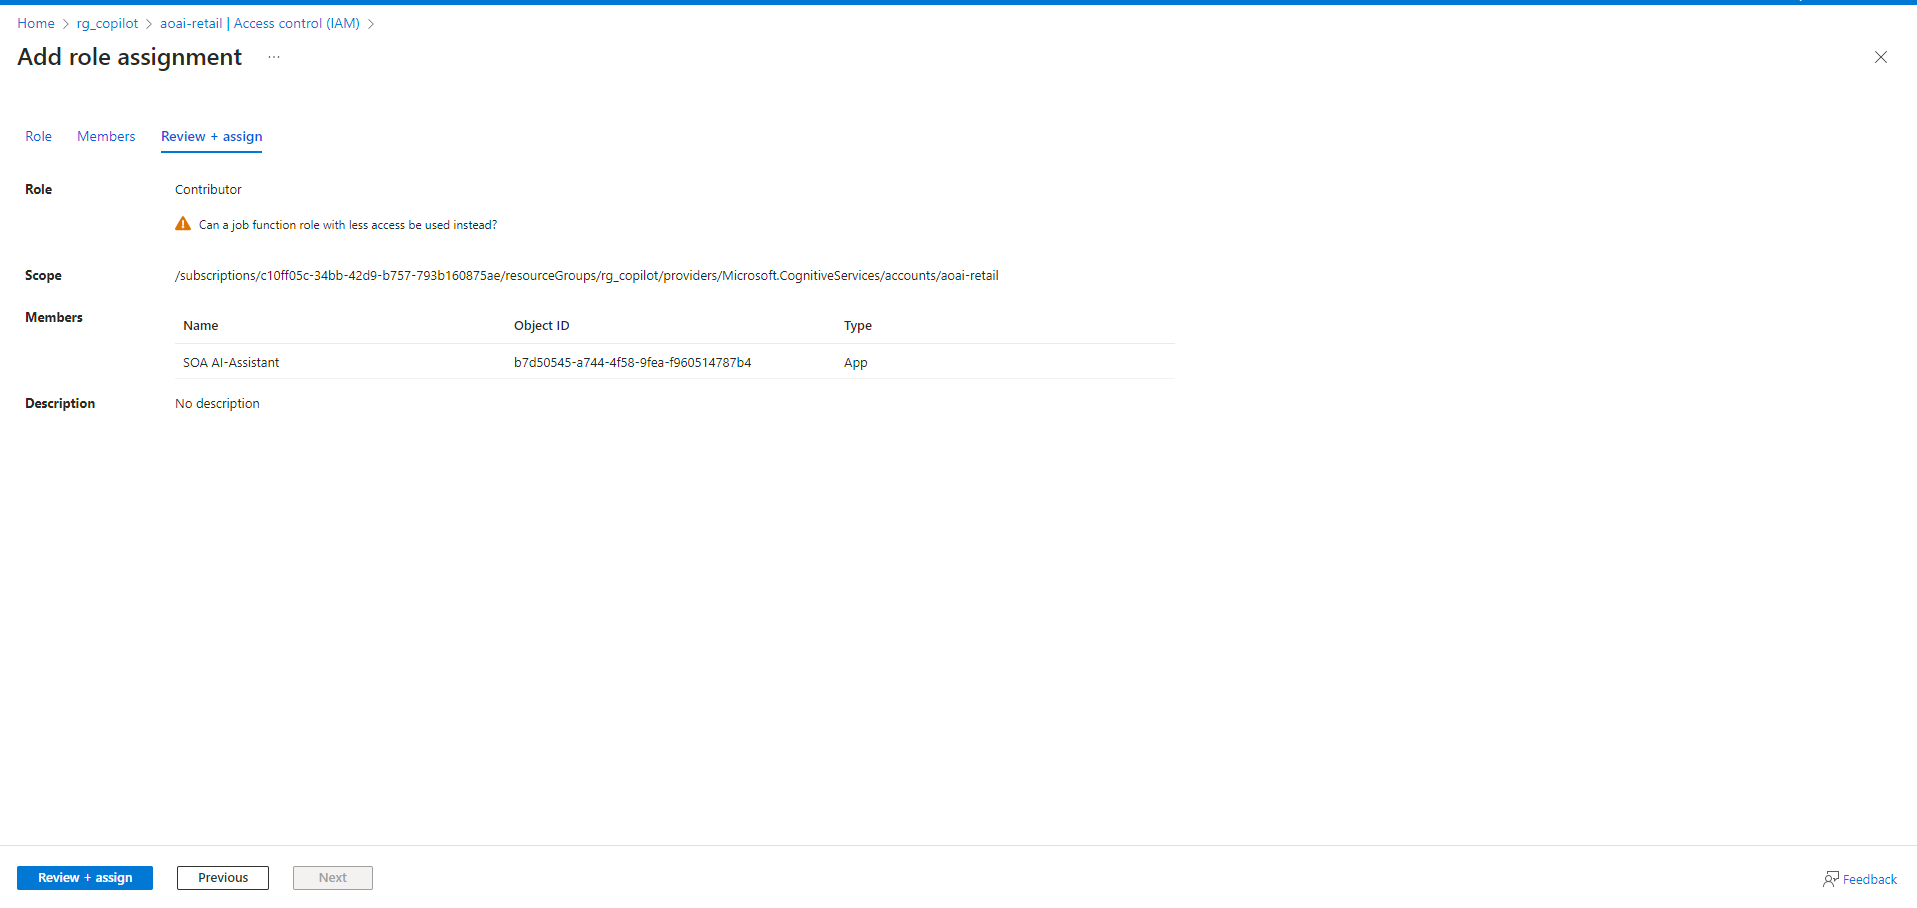
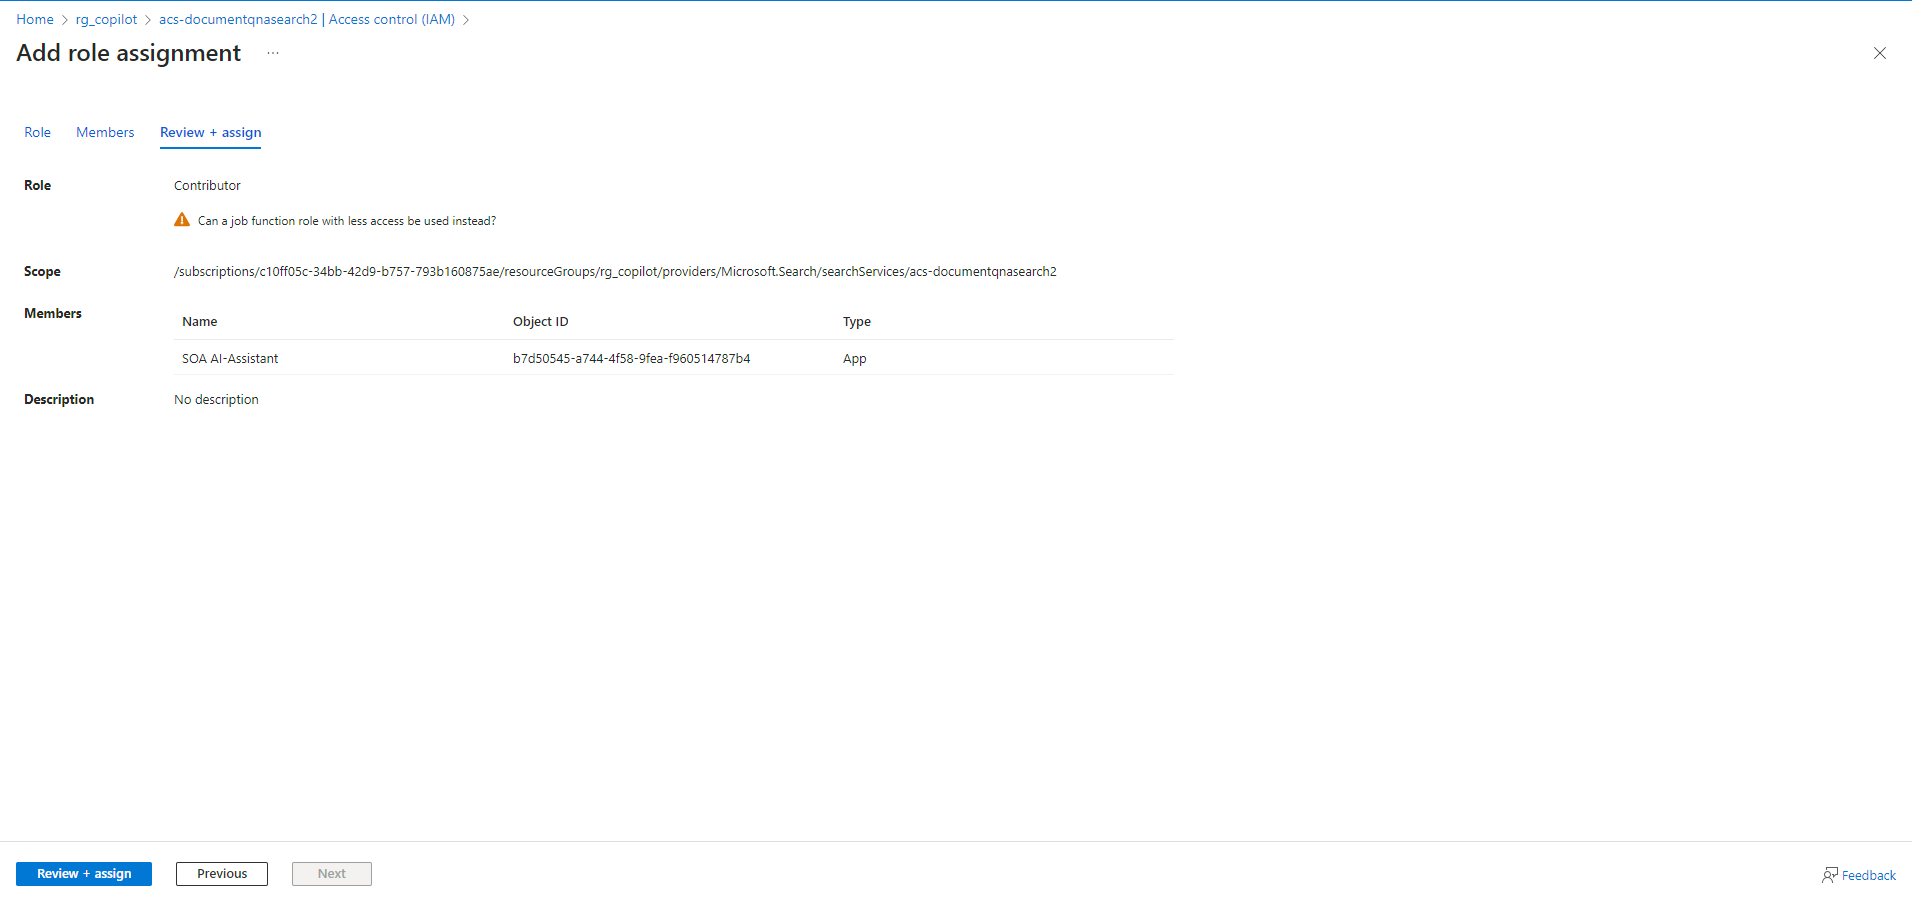
On the Review + assign tab, review the role assignment settings. Select Review + assign to assign the role.
Select the Cognitive Search resource and select Access control (IAM).
Select Add > Add role assignment. The Add role assignment page opens.
On the Privileged administrator roles tab, select the Contributor role. Select Next

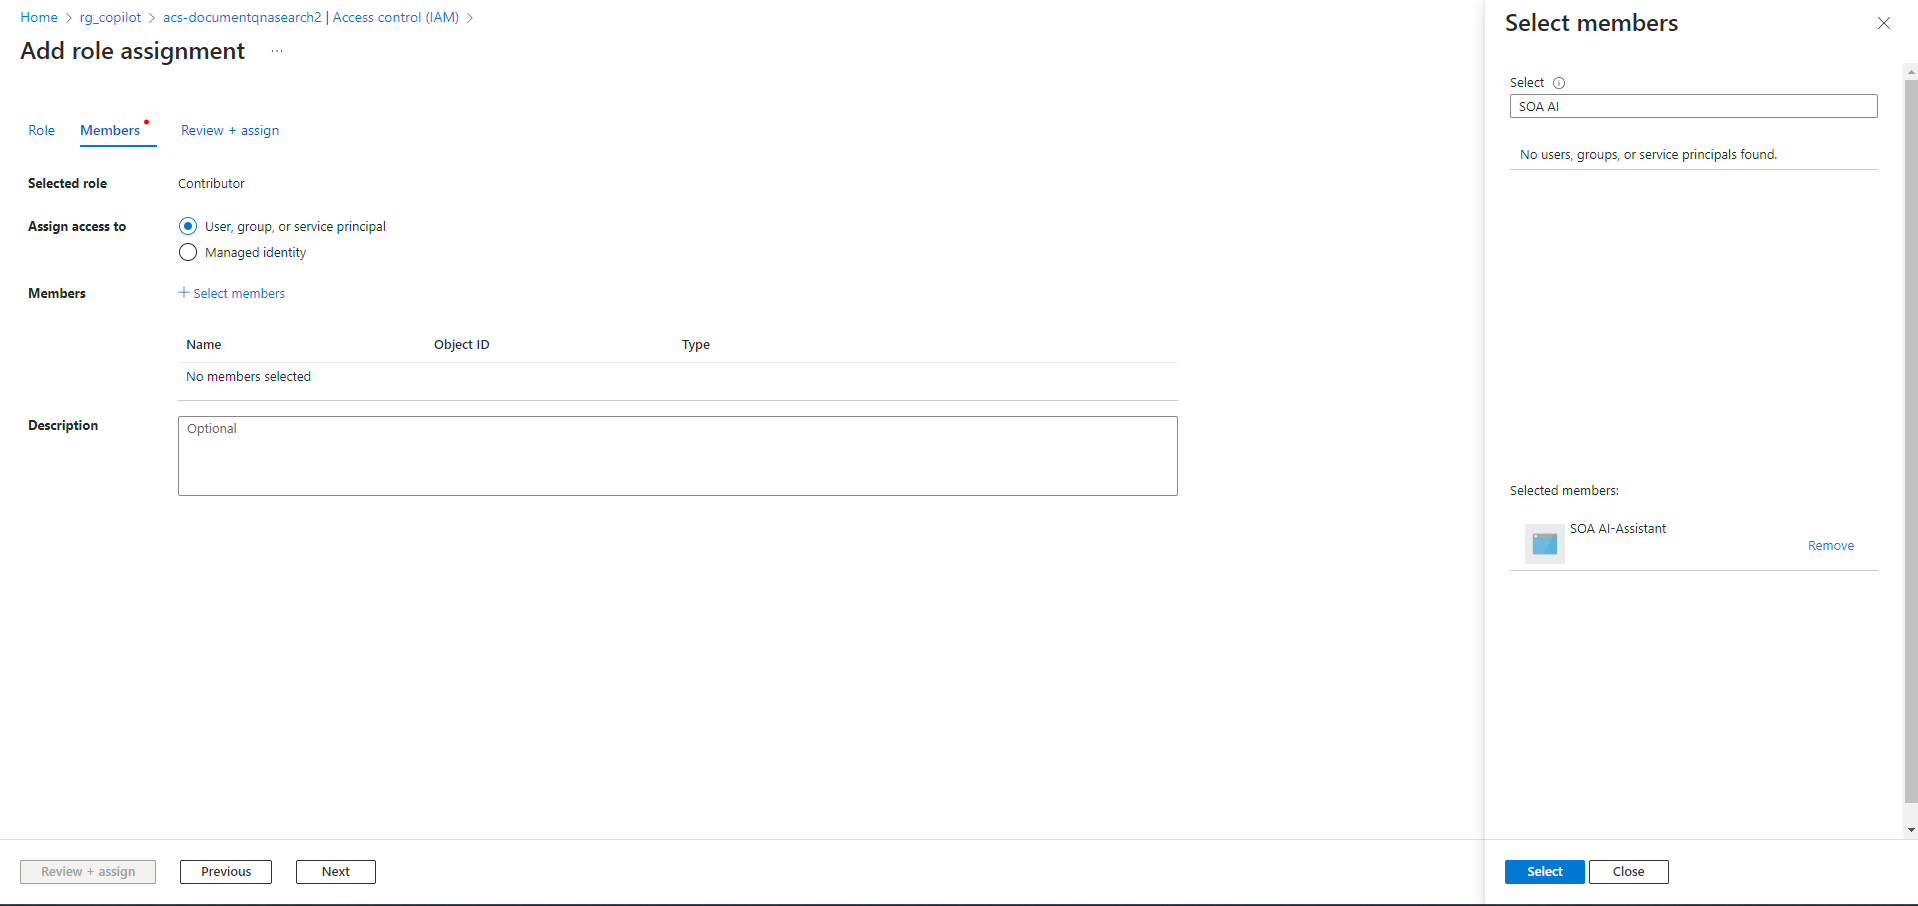
On the Members tab, select User, group, or service principal > Select members. Select the app registration instance created earlier, and select Select > Close > Next.
On the Review + assign tab, review the role assignment settings. Select Review + assign to assign the role.


For more information, see Assign Azure roles using the Azure portal.
Assign the Storage Blob Data Reader role to app registration instance
You need to assign the Storage Blob Data Reader role to the app registration instance created earlier to use the storage account created during deployment.

For detailed steps, see Assign Azure roles using the Azure portal.
Assign user permissions in Power Platform admin center
You need to assign user permissions in Power Platform admin center to enable the AI store operations feature for your users.
To assign user permissions, follow these steps:
Go to environments in the left navigation and select requisite test environment.
Go to Settings in your environment and select Users + permissions > Users.
You can sort the list of users by any column or use the search box to find the user you want to assign permissions.
Select the user to assign them roles and from More user actions, choose Manage security roles.
Choose role as Retail AI store operations user to assign to the selected user.
Select Save. Users with the role can see the AI store operations icon on the top right corner of the Store Operations Assist homepage.
Enable AI store operations
Admins need to enable the AI store operations flag to enable the AI store operations feature. To enable AI store operations, follow these steps:
Sign in to the Power Apps maker portal and select the Store Operations Assist environment(only test environment).
Go to Solutions. Create unmanaged solution or use any existing unmanaged solution.
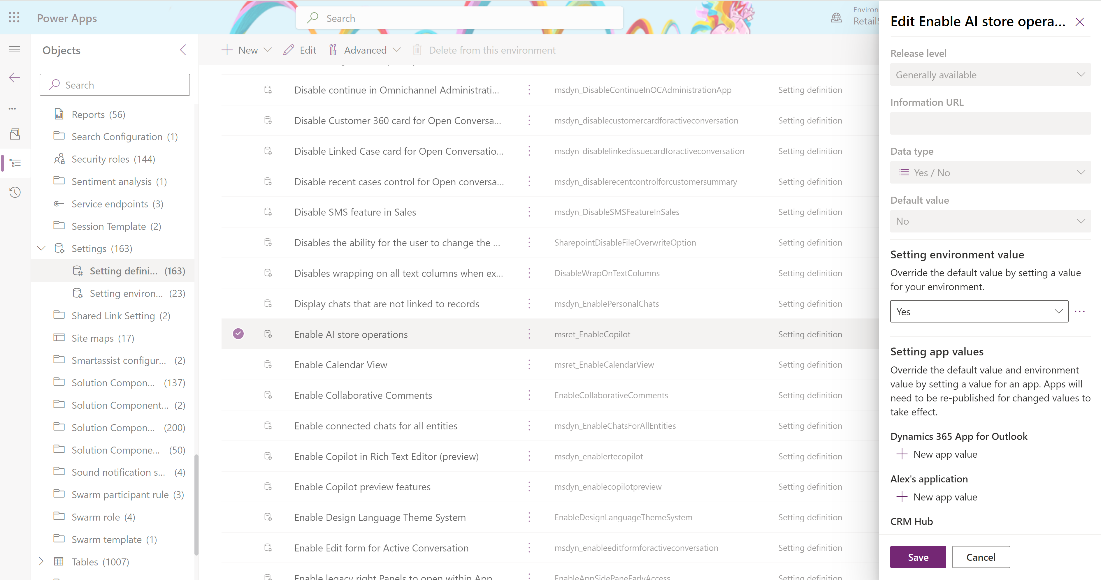
In your unmanaged solution, from the list of Objects, open Settings and go to Setting definitions.
From the list of Objects, open Settings and go to Setting definitions.
Select the Enable AI store operations setting definition, and in the Edit properties panel, select Add existing value and set the environment value to Yes.Select Save.