Configure Store Operations Assist
Prerequisites
Assign the user role of master data manager to the person configuring Store Operations Assist Admin.
Create master data in the system. You can do this step manually, but we recommended that you import the master data using Microsoft Excel or load it from another system using an interface that uses the Microsoft Dataverse API. For a step-by-step description of the Excel import process, follow this link: Import data in model-driven apps-Power Apps
Microsoft Power Automate licenses to configure push notifications. Depending on the size of the employee base, you must evaluate the number of extra licenses required.
Configure app set up
To configure Store Operations Assist, in the Change area menu, select App setup.
Configure target groups
You can use target groups to group retail stores where you want to execute the same tasks. A group can consist of any combination of retail stores. Still, in most cases, we recommended that you group retail stores that share similar characteristics so that you can execute the same tasks in those retail stores.
Define target groups
Before you start configuring Store Operations Assist, we recommend that you define your store grouping strategy. Choosing the right strategy to group your outlets can save you time to define execution plans.
You can define the tasks you want to execute in each group of stores. For example, the tasks can be a product check, asset check, or survey. You can check if there are groups in which you execute the exact same tasks. If that is the case, you can merge tasks into a group. One store can be a member of multiple groups, and the tasks assigned to each group of which the store is a member of show up in the mobile app.
Note
If you foresee that future changes won't apply to both groups, it’s recommended to keep them separate. Fewer groups mean less maintenance, but you must keep differences between outlets in mind.
The following are some examples of target groups:
- All supermarkets that have an area of 15,000 square feet or larger that requires different types of services and audits for smooth operations.
- All clothes stores in an urban area that require unique visual merchandising tasks to drive sales.
- All jewelry stores that carry premium high-end jewelry that requires special maintenance and audits.
Create a target group
To create a target group:
In the left navigation pane of Store Operations Assist Admin, select Target groups.
Select +New to create a new target group. The New Target group window opens.

Enter appropriate details for the target group and select Save.

| Name | Value |
|---|---|
| Name | Name of the target group |
| Description | Description of the target group |
Add members to the target group
You can use the members section to see the existing related target groups and assign outlets to a specific target group. You can dd more than one target group member to a target group at the same time. Since, target group members are business units, the pane is now renamed to adding business units.
Note
An outlet can be part of multiple target groups and a target group can have multiple outlets.
To add members to a target group:
Select + Add existing business units to create related target groups that can be a member of the created target group.
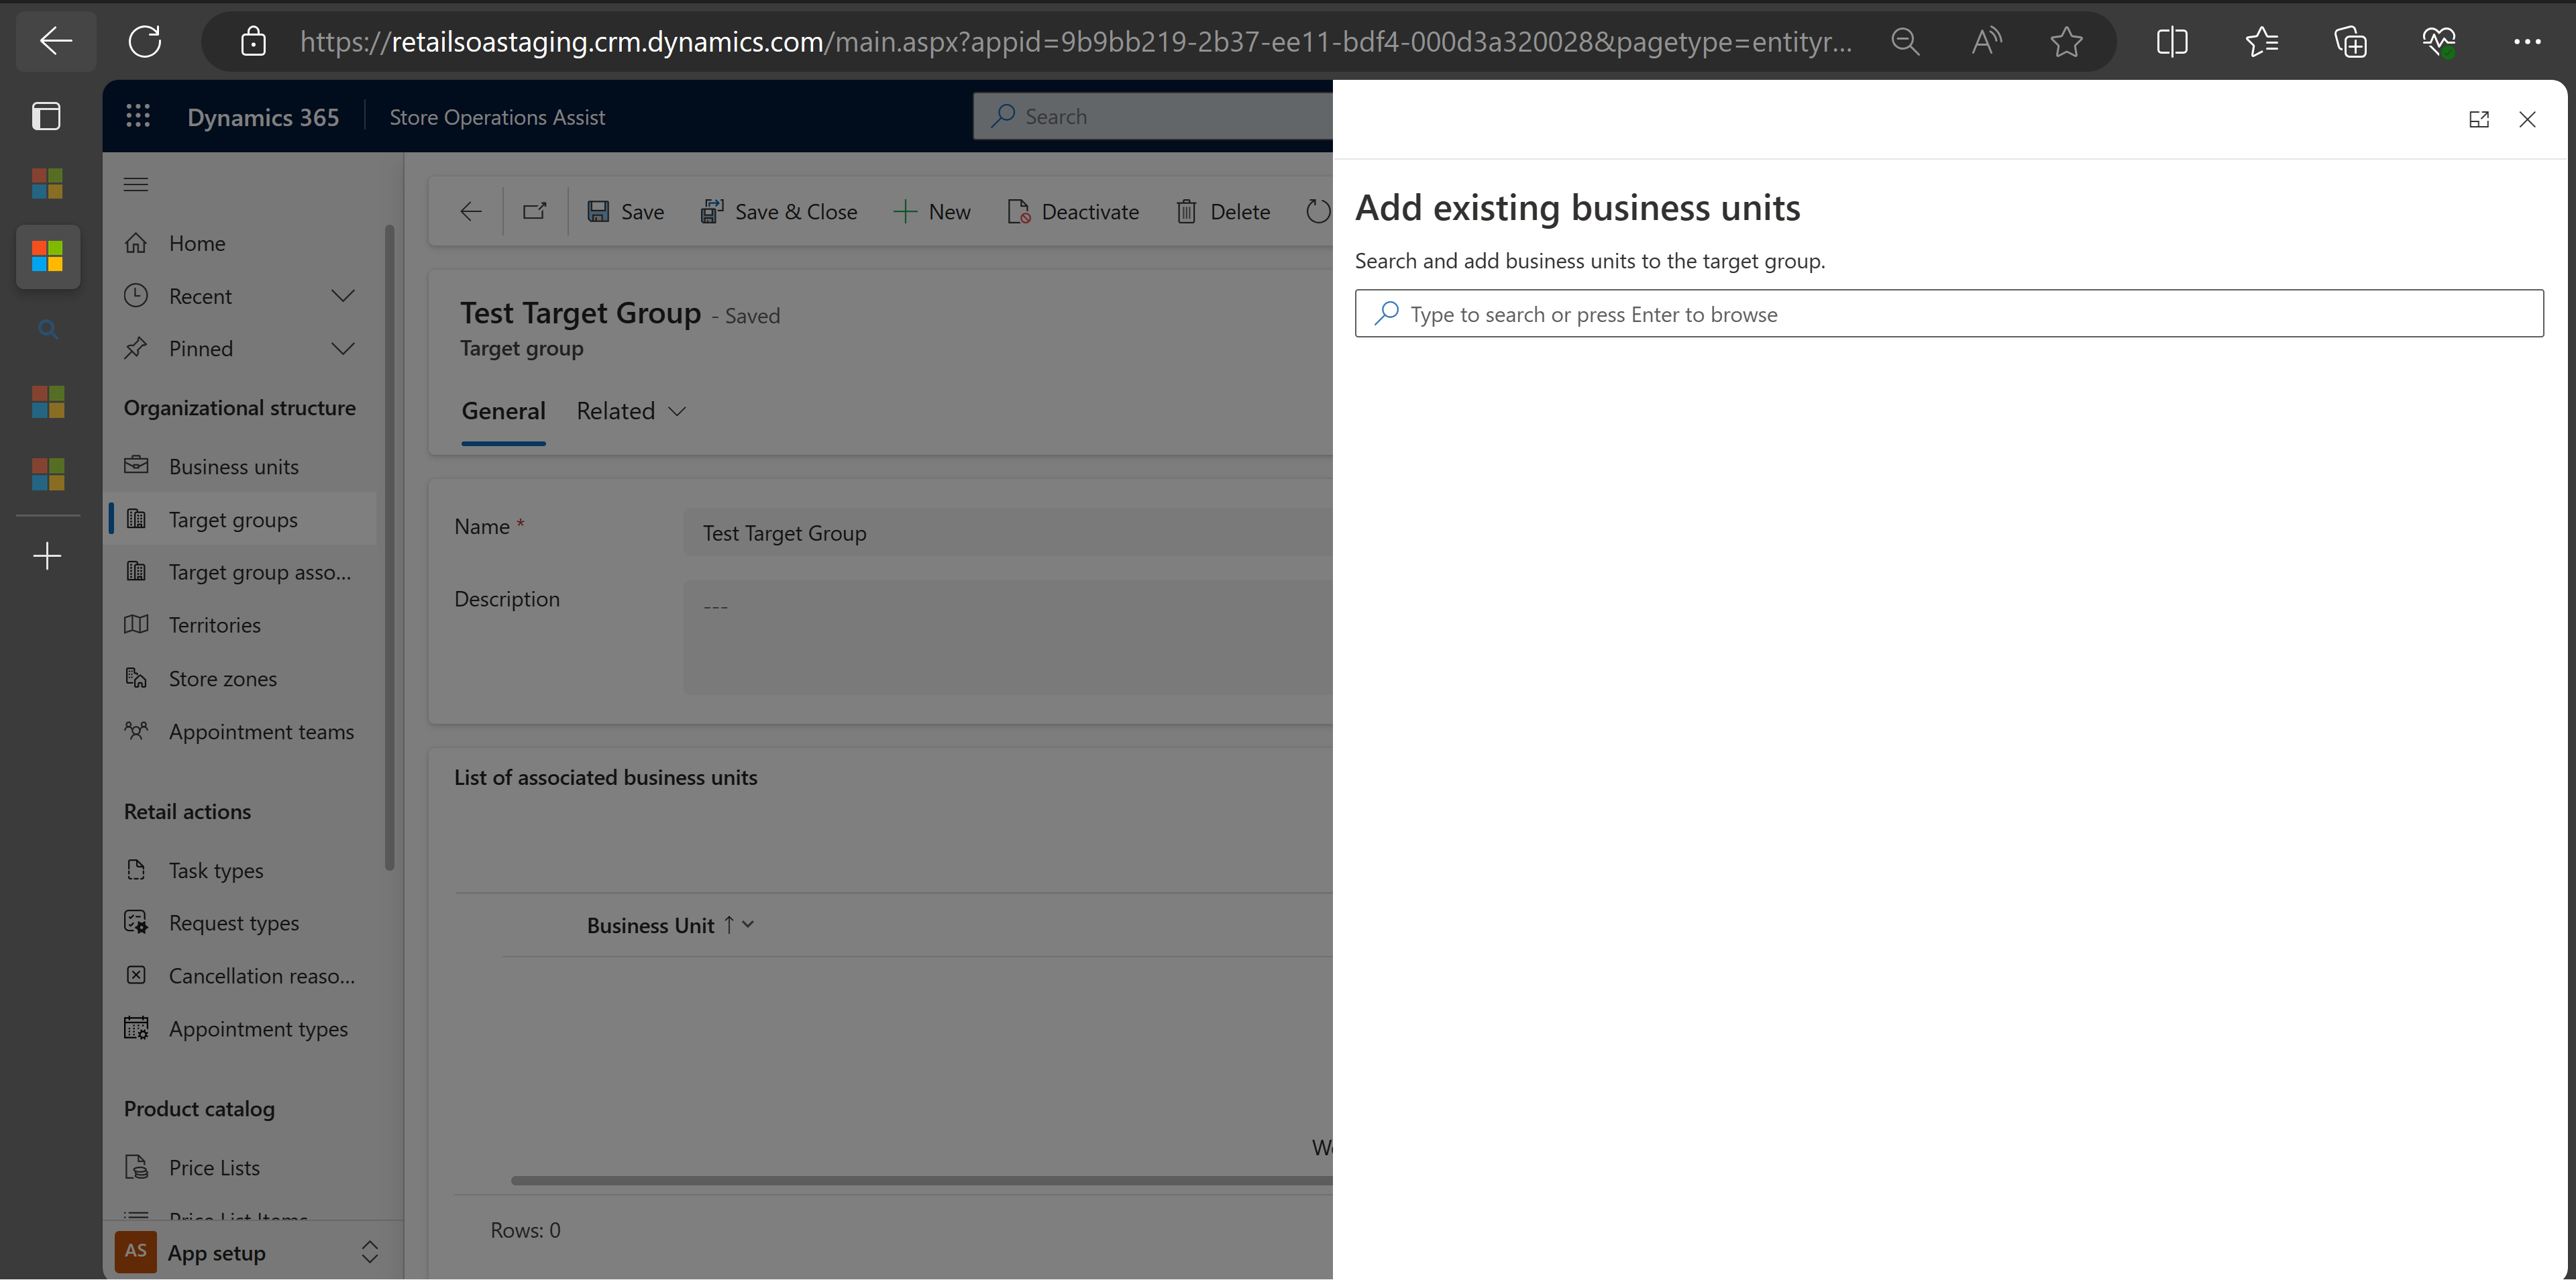
Select the relevant outlet and then select Save & Close.

There's a validation workflow that checks whether the business unit, which is being added to a target group has a manager and team assigned with the correct roles. If not, the solution prompts an error to fix this issue.
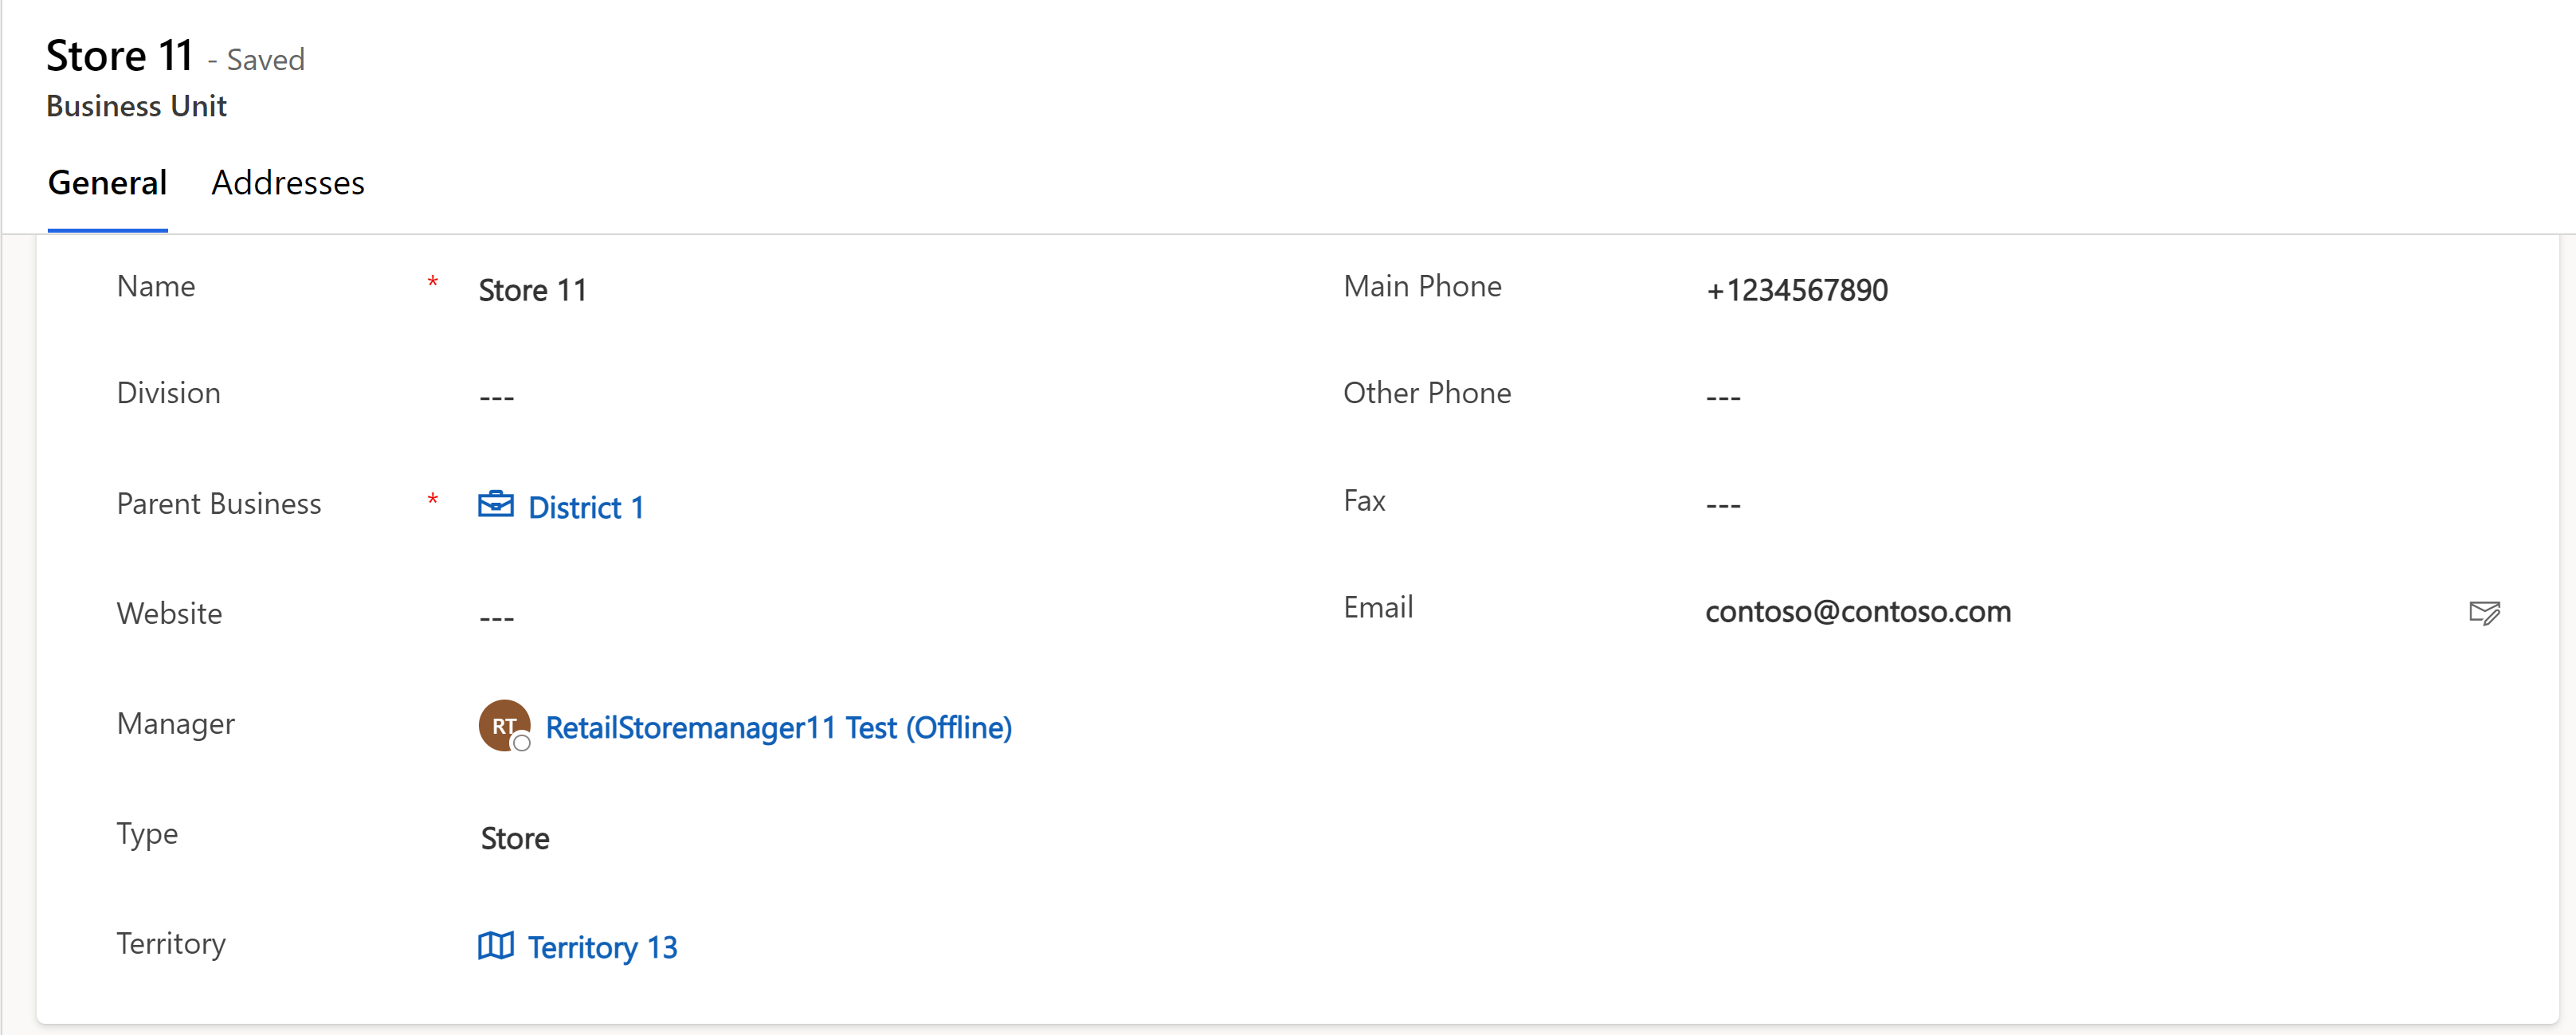
Create and assign territories
You can use a territory to group stores in the same organizational hierarchy. For example, you can assign Store 1, Store 2, and Store 3 that fall under District 1 to a territory named District 1. When you assign the task to the District 1 territory, the solution automatically assigns it to Store 1, Store 2, and Store 3.
To create a new territory and assign it to a store:
Select + New Territory.
Enter the territory name and then select Save & Close.
Select Business Units in the sitemap.
Select the store.
Assign the new territory to the store and select Save & Close.

Assign in-store zones
You can assign tasks to specific locations in the store called “store zones”, such as checkout, end cap displays, and window displays.
To create a store zone:
Select Store zones.
Select + New and enter the name of the store zone.
Select Save & Close.
Define retail actions
You need to define retail actions to complete the configuration process.
Create task types
You can use task type to segment the various types of store tasks in groups (for example, store walk, promotion set up, visual merchandising, inventory spot count, etc.).
To create a task type:
In the left navigation pane, select Task Types.
Select + New on the command bar.
The New Task Type screen opens. Enter the name to be displayed later when you create the task.
Select Save & Close.
Create request types
Request type is (an optional field) used by the store associate when creating a new request in Store Operations Assist Mobile. This field segments the various types of tasks in groups (for example, clean up, repairs, asset support, etc.) that the store manager can filter or sort by when viewing and approving requests.
To create a request type:
In the left navigation pane, select Request Types.
Select + New on the command bar.
The New Request Type screen opens. Enter the name selected by the store associate when creating the request.
Select Save & Close.
Create cancellation reasons
Cancellation reasons specify the reasons that users can provide for canceling a task.
To create a cancellation type:
In the left navigation pane, select Cancellation reasons.
Select + New on the command bar.
The cancellation reason screen opens. Enter the name of the cancellation reason.
Select Save & Close.
Configure help URL
You can customize the URL that is associated with the help button to better align with your business needs.
To customize or update the help URL, see Customize Help experience.
See also: