Extend Store Operations Assist
Store Operations Assist solutions are built on Microsoft Power Platform, which offers a rich set of customization and extension capabilities on UI, business flows as well as integration with Microsoft and partner ecosystem. Store Operations Assist supports all extensions and customizations supported by MDA Power Apps through solution layering mechanics.
Note
When you install new versions of Store Operations Assist, the UI (User Interfaces) architecture doesn't break your customizations and extensions.
Customize task form
While setting up Store Operations Assist, you have to customize the forms that the back-office manager uses to execute their work. This customization is used to capture information that is unique to your business or industry and ensure that the form layout matches your business processes.
Proper form customization can improve usability, making it easier for back-office managers to view and update relevant information. Form customizations affect the time it takes for forms to load and save changes. Hence customizing forms properly is important for maximizing performance.
This section covers form customizations, limitations in form customizations, and how to customize the outlet form, though you can use the steps to customize any other form.
Store Operations Assist allows you to customize the forms based on your specific industry needs. You can customize the form provided by Store Operations Assist Admin as part of the solution or copy and create a new form based on your organization's needs. The section details the pros and cons of these approaches.
Customize an existing form
Customization of an existing form is recommended for scenarios where there’s no need to make many changes to the layout or fields. The advantage of this approach is that updates from Store Operations Assist Admin merges with your organization-specific customizations. However, we recommend that you validate the contents of the form after an update.
Create a new form
Forms can be copied and saved as a new customer-specific form in Store Operations Assist Admin. Any page type, MDA, Custom, or Canvas pages can be added with Power Platform App. The top reasons you create a new form include:
- When you have a unique business process and are unable to use the standard process included in the solution,
- When you need to add many custom fields (greater than 100)
- When all user roles (security roles and field security profiles) can't use the same form and limit information, you have to create different forms for different user personas.
Important
In this method, the new form won’t reflect updates from Store Operations Assist Admin as seen when customizing an existing form. If you want to adopt a new component that is released, you must manually add it to your own form.
You can follow the given steps to customize the Retail activity form.
Navigate to Power Apps and sign in.
Choose the correct environment.
Navigate to Dataverse> Tables. Select All.
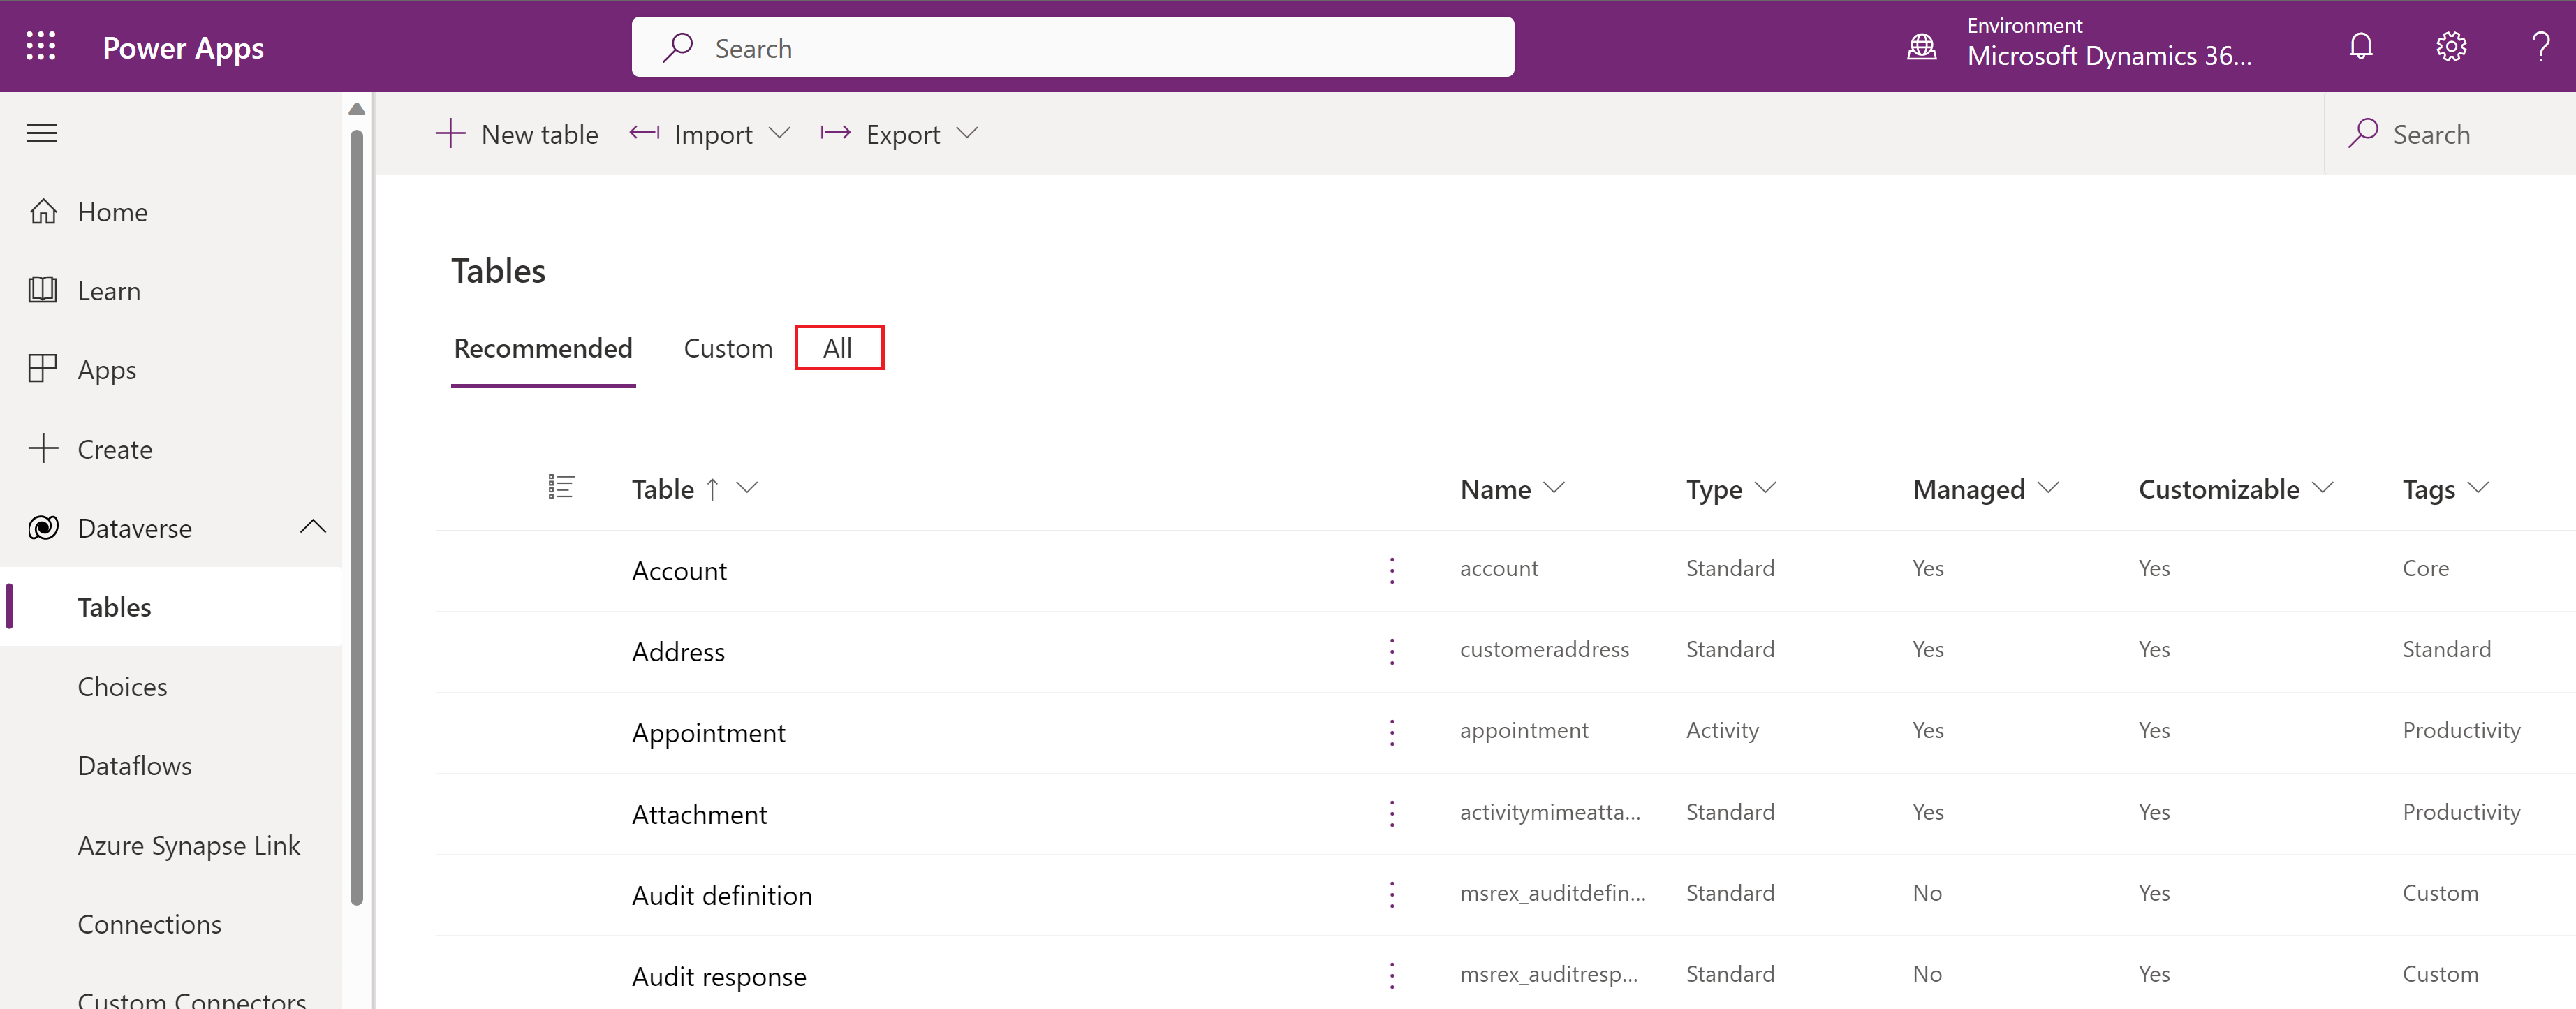
Scroll down and select Retail Activity from the list of tables.

Select Forms to open the list of forms related to Retail Activity.
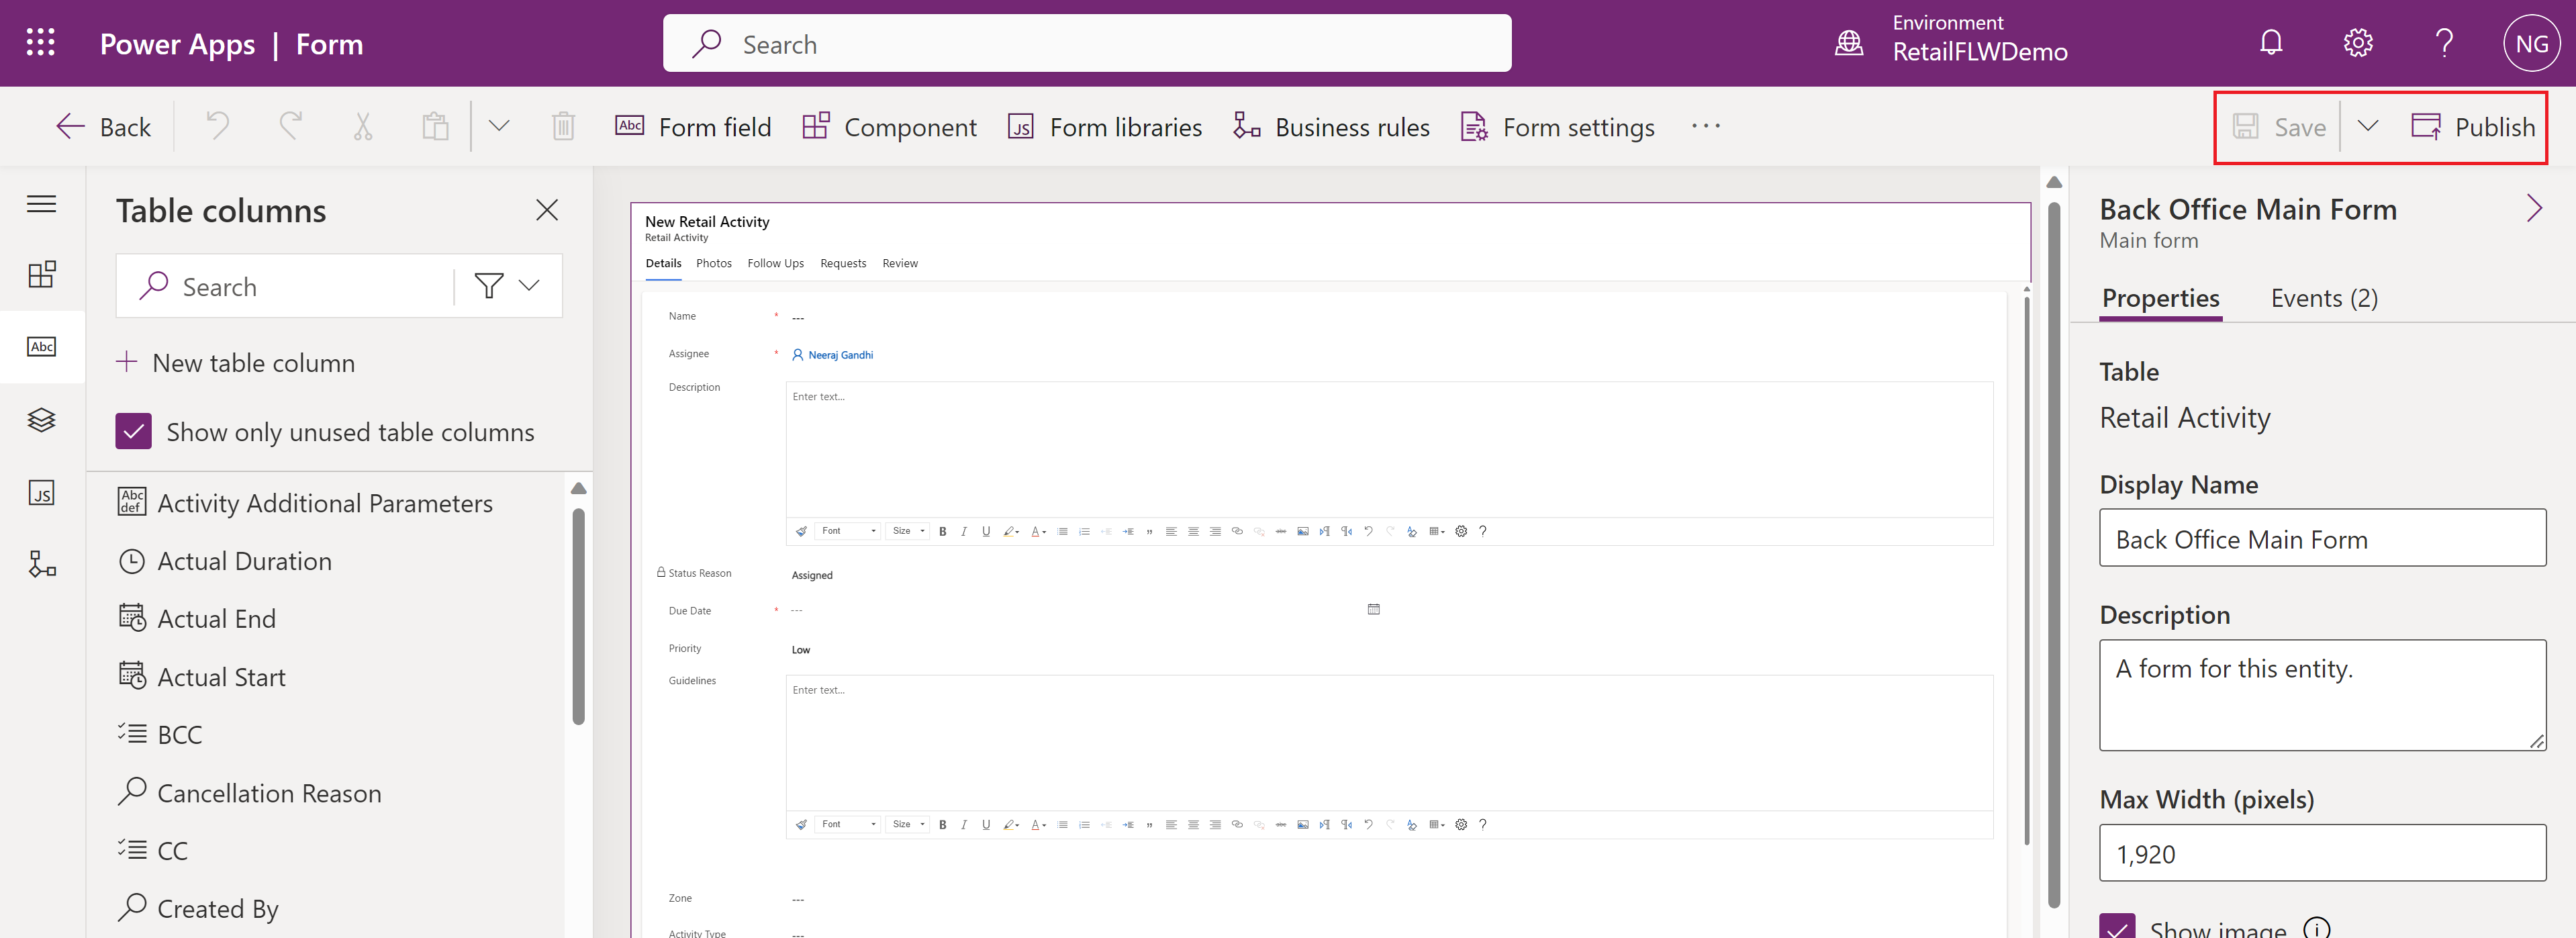
Select Back Office Main form to open the designer page.

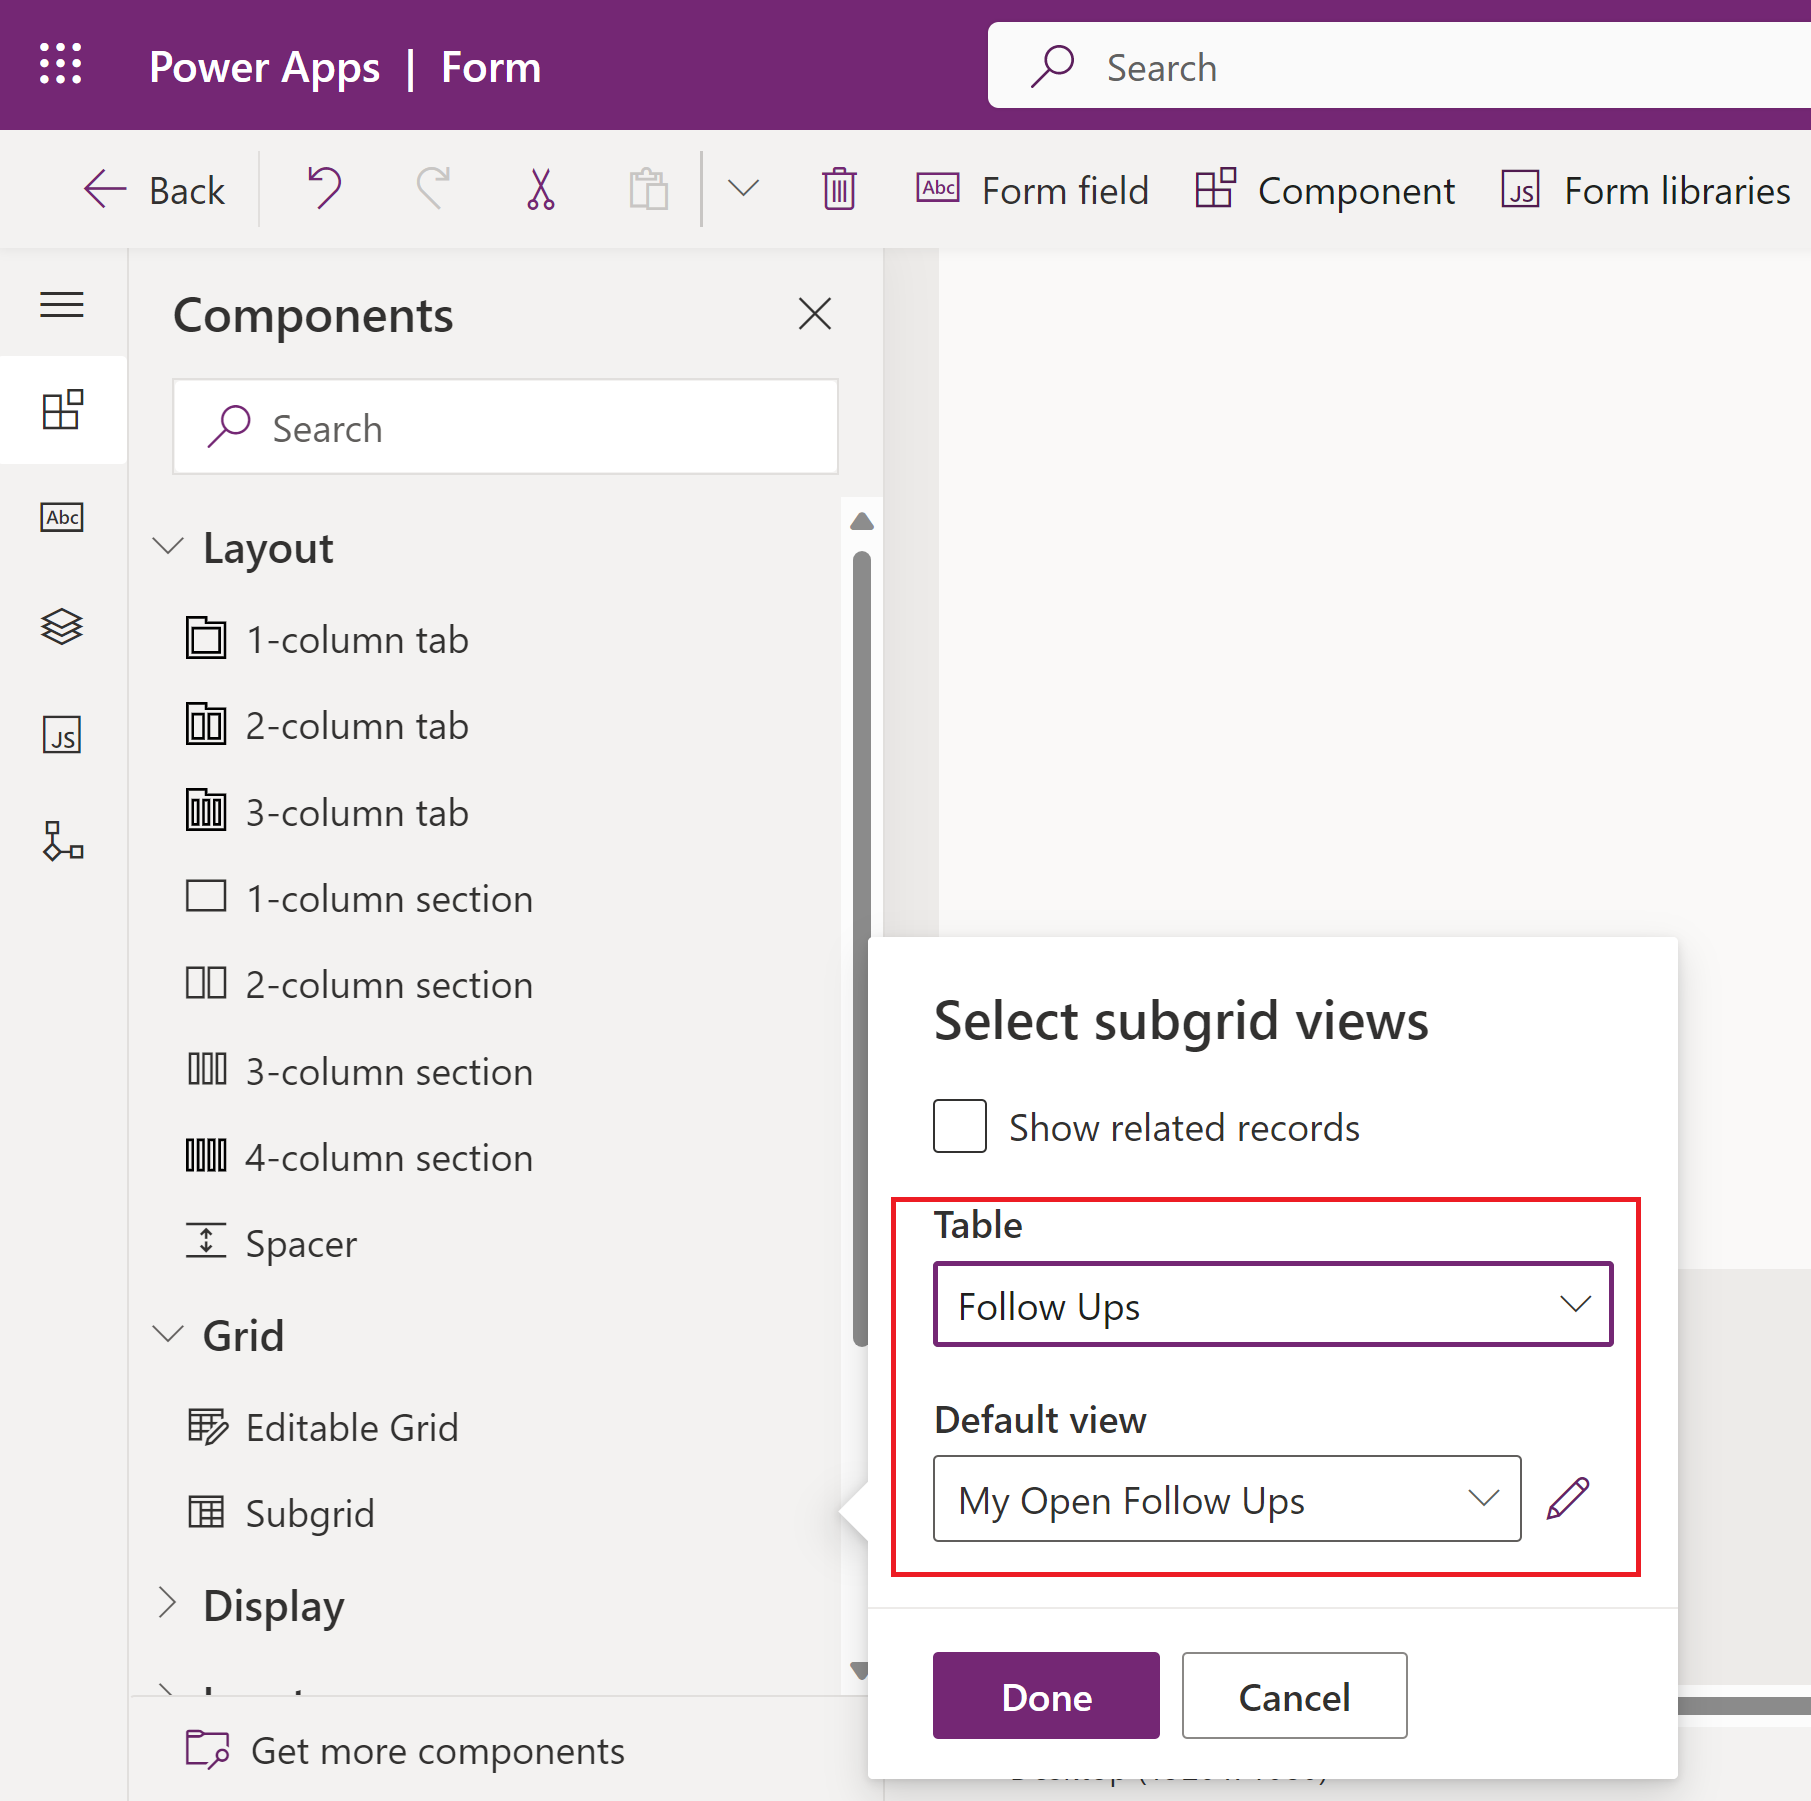
You can edit or change form fields in the designer. You can rearrange the fields or hide certain fields based on your needs. For example, you can add subgrid views to the form to show open follow ups for the Retail activity. Select Components > Grid >Subgrid in the left navigation pane. Select Table to show in the subgrid and the default view. After you enter the data, select Done.
Select Save and then select Publish to publish the changes.


Customize theme for Store Operations Assist
You can create a custom look and feel (a theme with custom logo) for your app by making changes to the default colors and visual elements provided in the default theme. For example, you can create your personal product branding by adding your company logo and providing table-specific coloring. The theme colors are applied globally throughout the application.
Store Operations Assist supports themes provided by the Dynamics platform. You can configure themes in the advanced settings of Dynamics. The default theme is as shown:

All Power Apps Component Framework (PCF) controls built for Store Operations Assist Admin uses the theme in the Theme settings to show UI elements in the configured color. For example, the blue accents by default could be changed to red or green without changing any code. The theme automatically applies to all PCF controls.
For more information on how to apply and create a new theme, go to Use a theme to create a custom look for your app.
Change the default background color for Store Operations Assist Mobile
To change the default background color for Store Operations Assist Mobile, you can use the following steps:
Go to Power Apps dashboard.
Select your Store Operations Assist environment in the top right.
Select Solutions in the left pane and then go to Default Solution.
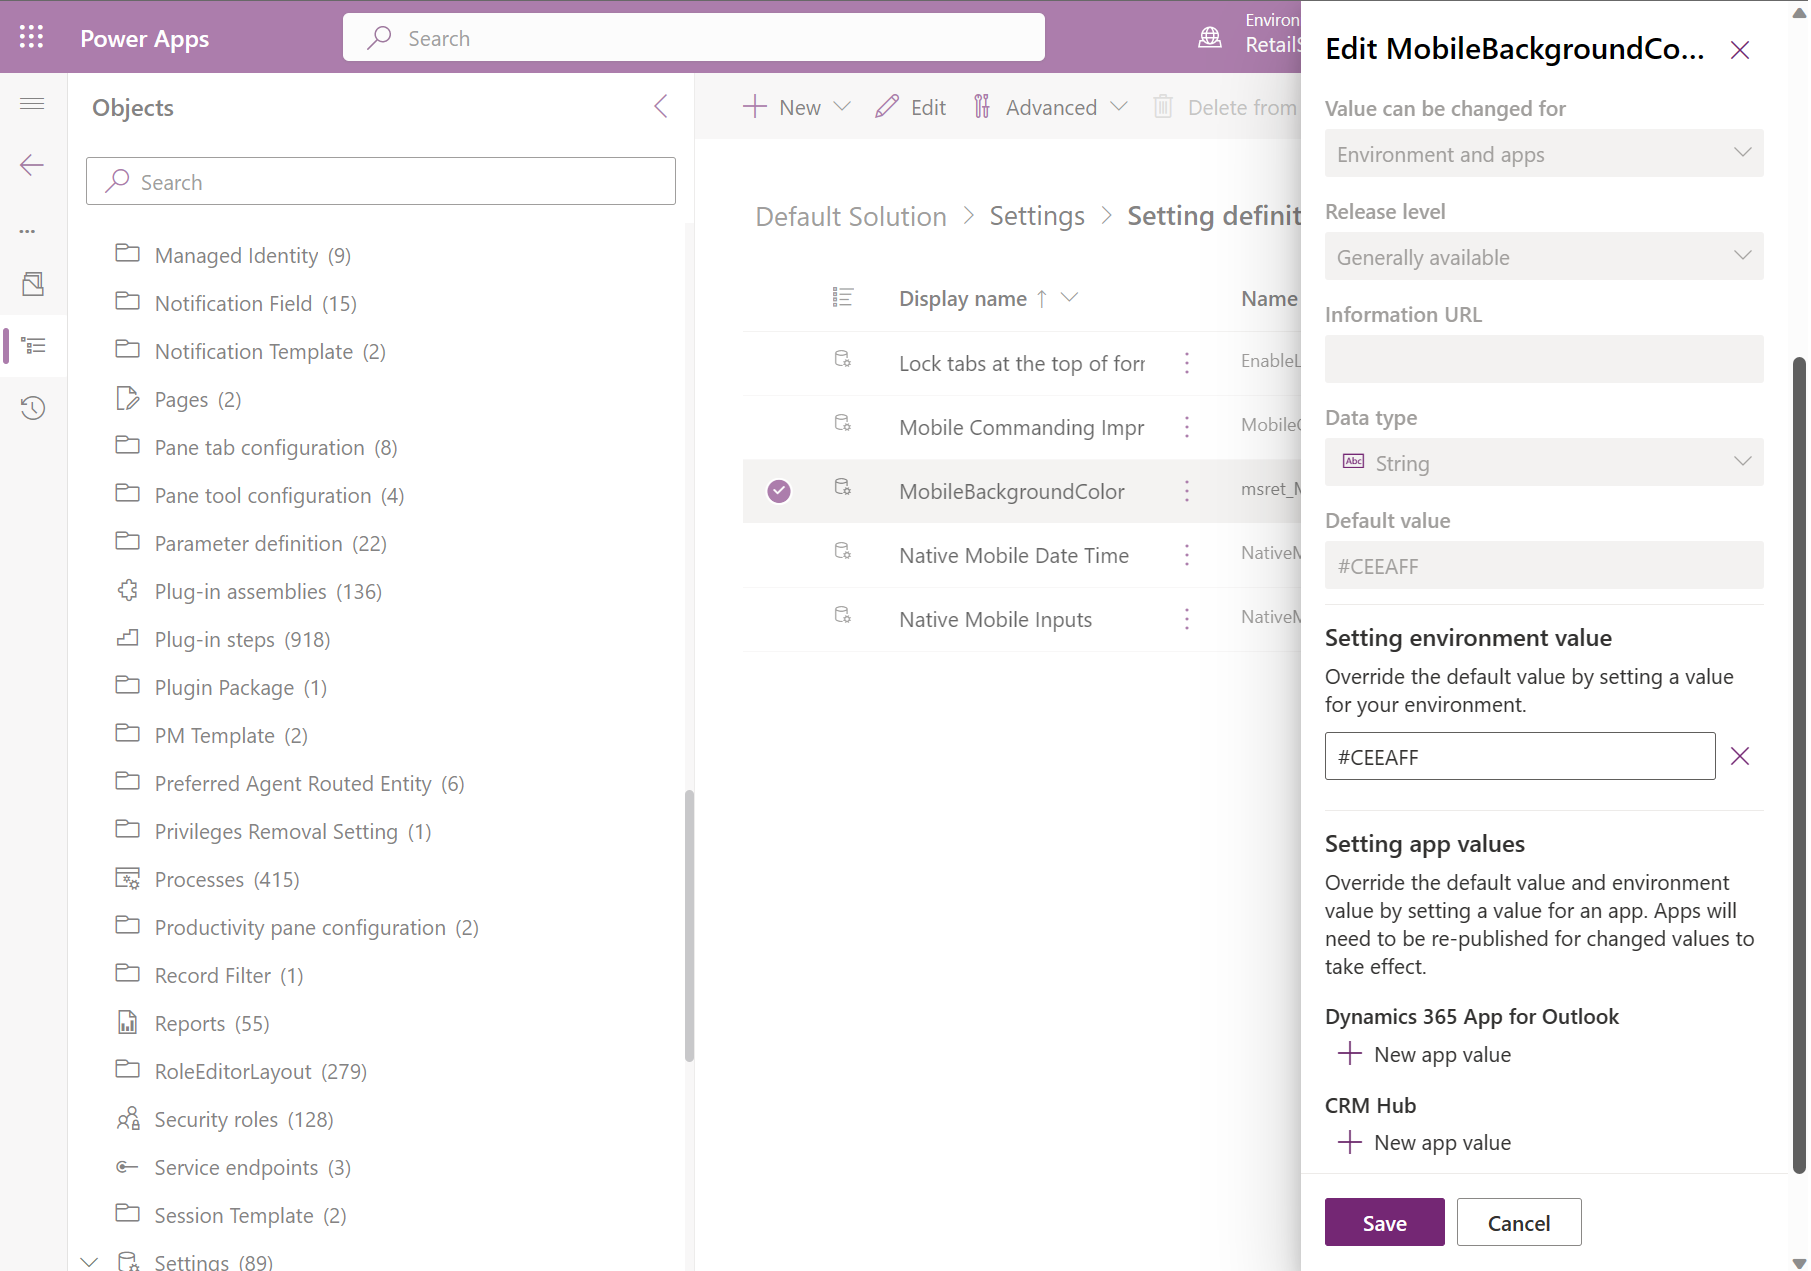
Search and select the MobileBackgroundColor setting.
On the right pane, under the Setting environment value, select + New environment value.
Enter the hex color you want the background (for example, #CEEAFF), and select Save to override the default value.
Note
Currently, there is no scope for changing font text colors in Store Operations Assist Mobile.
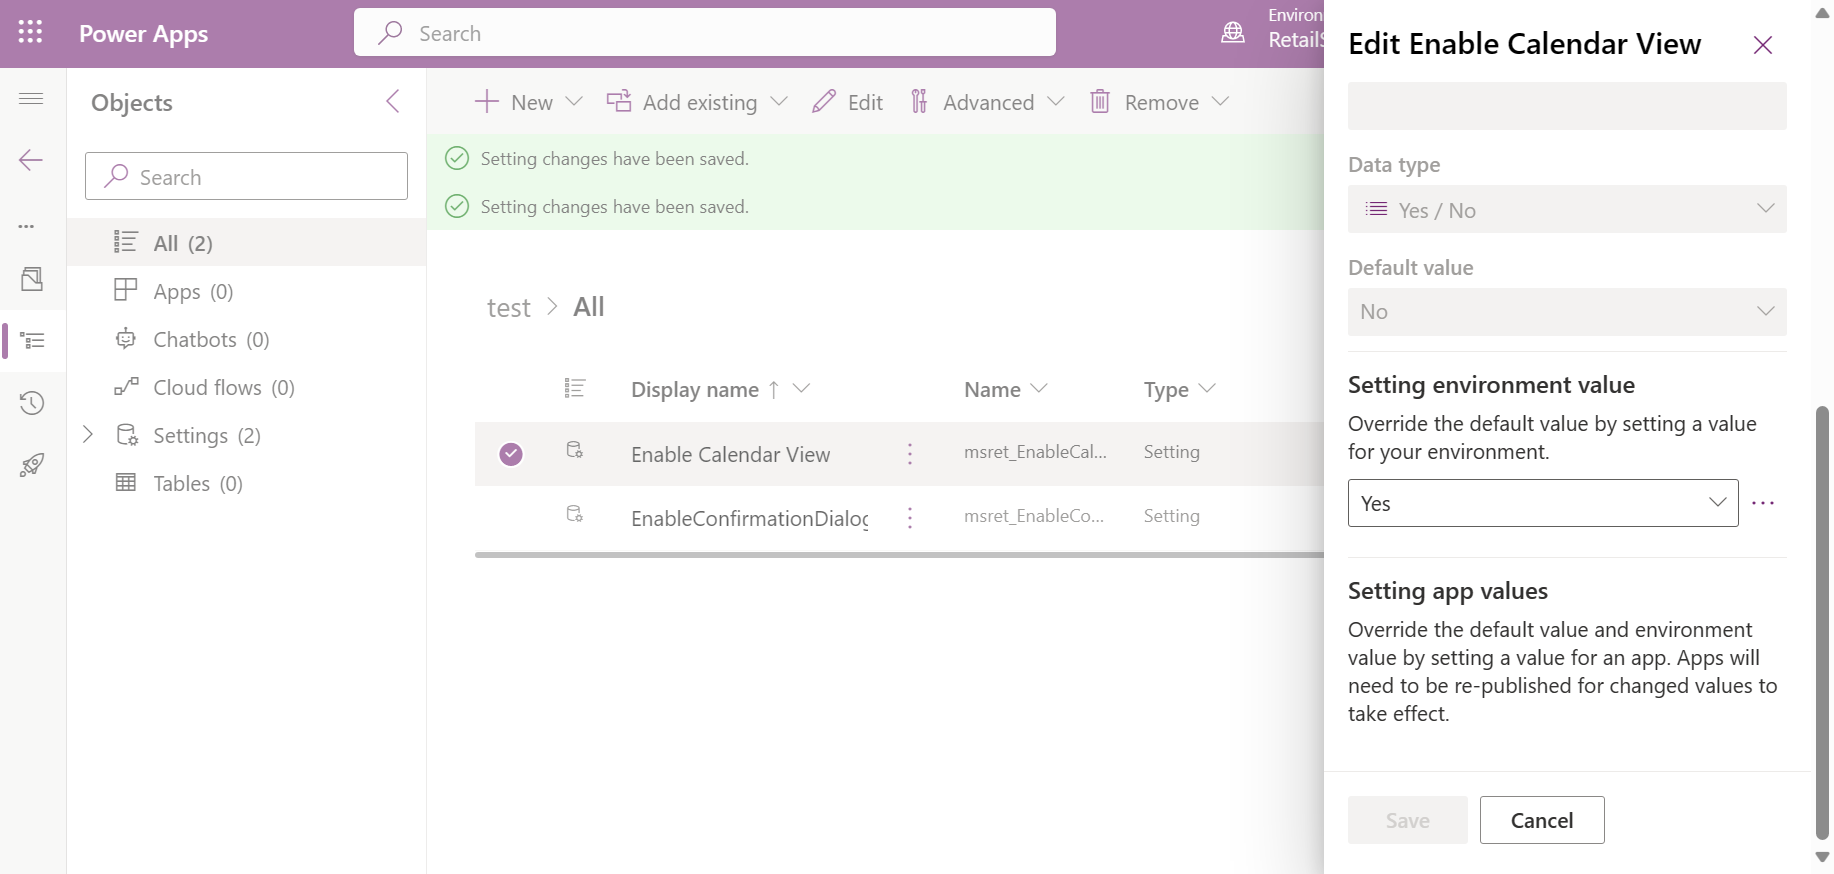
Enable the calendar view for Store Operations Assist Mobile
To enable the calendar view for the to-do list in Store Operations Assist Mobile, you can use the following steps:
Go to Power Apps dashboard.
Select your Store Operations Assist environment in the top right.
Select Solutions in the left pane and then go to Default Solution.
Search and select the Enable Calendar View setting.
On the right pane, under the Setting environment value, select Yes to override the default value.
Update labels in Store Operations Assist Admin
You can update labels in Store Operations Assist Admin to align with the specific terminology preferences used within your company. This flexibility enables a more intuitive and tailored user experience, making it easier for store associates to navigate and interact with the apps. Furthermore, the ability to rename tasks, stores, or other elements can enhance clarity and streamline communication within the organization. Overall, this feature empowers retail businesses to adapt Store Operations Assist Admin to their unique requirements, improving usability and efficiency in their day-to-day operations.
For more information on how to update labels in Store Operations Assist Admin, see Section properties in classic form designer.
Limitations in customization
Power Apps' component framework allows developers to build their own type of control or UI, which isn’t provided by out-of-the-box controls. However, they have their limitations. Store Operations Assist uses custom PCF controls in many areas. These controls aren’t low code but are built using HTML (Hypertext Markup Language), CSS (Cascading Style Sheets), and JavaScript. Hence you can’t change or customize any PCF controls that are part of Store Operations Assist.
Important
Organizations can customize an existing form or create a new form for their business-specific needs. However, if there’s an update from Microsoft to the PCF controls that are part of Store Operations Assist, these updates will in turn reflect in your solution in both these scenarios.
Best practices for customization
When you plan to customize Store Operations Assist Admin for any customer-specific requirements, it’s important to follow best practices to avoid performance, usability, and supportability issues. The recommendations for extending the solution are as follows:
Minimize the number of custom fields on forms
Don’t edit or remove out-of-box fields from forms
Don’t edit option set (choice) values for out-of-box fields
Use fewer custom scripts on form load events
For design considerations when customizing forms, refer to Design form for performance.
Use Fetch Products custom API
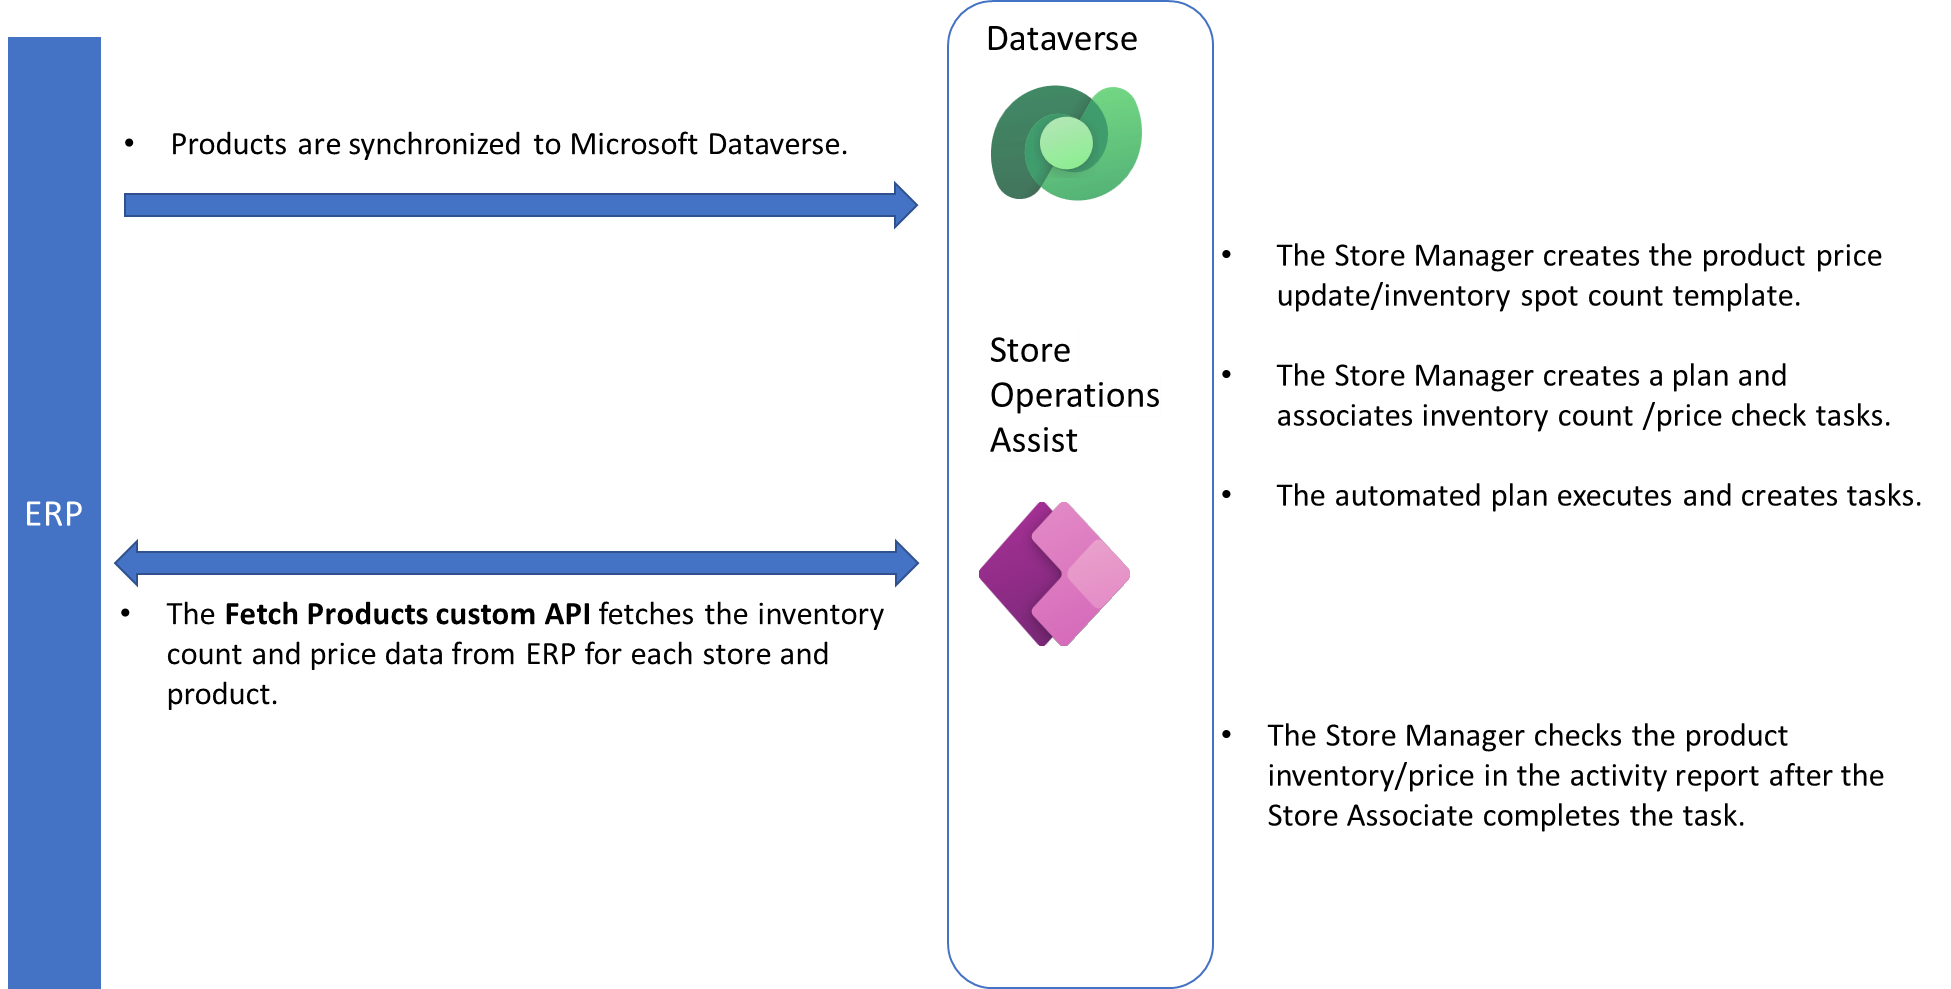
All products are stored in Microsoft Dataverse. However, the inventory count and price isn't in Dataverse and it needs to be queried from ERP. A Custom API (plugin) in Dataverse, called the Fetch Products API queries this data from ERP.
The Fetch Products API is a template, which returns the default values for all products, and you can overwrite it by custom implementation. For each product check or price check per store, the Fetch Products plugin is called. The fetched data is stored in the Audit Response table, which contains a .json file with all products including price and inventory count.
The logical flow of product check feature is shown in the following image:
Example: Fetch Products API implementation
You can see an example of the Fetch Products API implementation as follows:
Input parameters
Product Query: an expando object with two parameters
storeId: the name of the current store for which is the plugin executed. It's taken from the business unit name.
productIds: comma separated product numbers
Output parameters
Products: the list of expando objects. Each product in the Products collection contains parameters as shown:
productNumber: product number
oldPrice: old price of the product
newPrice: new price of the product
attributes: more attributes, key value collection
count: product count on the store
Sample API code - FetchProductsPlugin.cs
using Microsoft.Xrm.Sdk;
using Microsoft.Xrm.Sdk.PluginTelemetry;
using System;
using System.Collections.Generic;

namespace RetailConnectApp.Plugins
{
    public class FetchProductsPlugin  : IPlugin
    {
        public FetchProductsPlugin ()
        {

        }

        public FetchProductsPlugin(string unsecureConfiguration, string secureConfiguration)
        {

        }

        public void Execute(IServiceProvider serviceProvider)
        {
            // Obtain the tracing service
            var tracingService =
            (ITracingService)serviceProvider.GetService(typeof(ITracingService));
            var logger = (ILogger)serviceProvider.GetService(typeof(ILogger));

            // Obtain the execution context from the service provider.
            IPluginExecutionContext context = (IPluginExecutionContext)
                serviceProvider.GetService(typeof(IPluginExecutionContext));

            try
            {
                var storeId = GetInputParameter<String>(context, "storeIds");
                var productIdString = GetInputParameter<String>(context, "productIds");

                //Fetch data from ERP

                var products = new EntityCollection();
                if (!string.IsNullOrEmpty(storeId) && !string.IsNullOrEmpty(productIdString))
                {
                    var productIds = productIdString.Split(',');

                    foreach (var productId in productIds)
                    {


                        var product = new Entity() { Attributes = {
                                    { "productNumber", productId },
                                    { "oldPrice",(decimal)0.0 },
                                    { "newPrice", (decimal)0.0 },
                                    { "count", 0 },
                                    { "attributes",  new Entity()
                                        {
                                        Attributes =
                                            {
                                                //attributes with key-value pair
                                                /*
                                                { "city","Redmond" },
                                                { "countryOrRegion","United States" },
                                                { "postalCode","98008" },
                                                { "state","Washington" },
                                                { "street","123 Maple St" },*/
                                            }
                                        }
                                    }
                                }
                        };
                        products.Entities.Add(product);
                    }
                }
                context.OutputParameters["products"] = products;
            }
            catch (Exception ex)
            {
                logger.LogError(ex, "msret_FetchProducts: {0}");
                throw new InvalidPluginExecutionException("An error occurred in msret_FetchProducts.", ex);
            }
        }

        public static T GetInputParameter<T>(IPluginExecutionContext context, string inputParameterName)
        {
            T parameter = default(T);

            if (context.InputParameters.Contains(inputParameterName))
            {
                parameter = (T)context.InputParameters[inputParameterName];
            }

            return parameter;
        }
    }

}
Download and customize Power BI reports
You can download and customize Power BI reports to be used outside of Store Operations Assist. You can share the downloaded Power BI reports with other users in your org who aren't authorized to use Store Operations Admin.
Download a Power BI report
Go to app.powerbi.com.
Go to workspace and select the created managed workspace,Solutions [RetailSOATest].
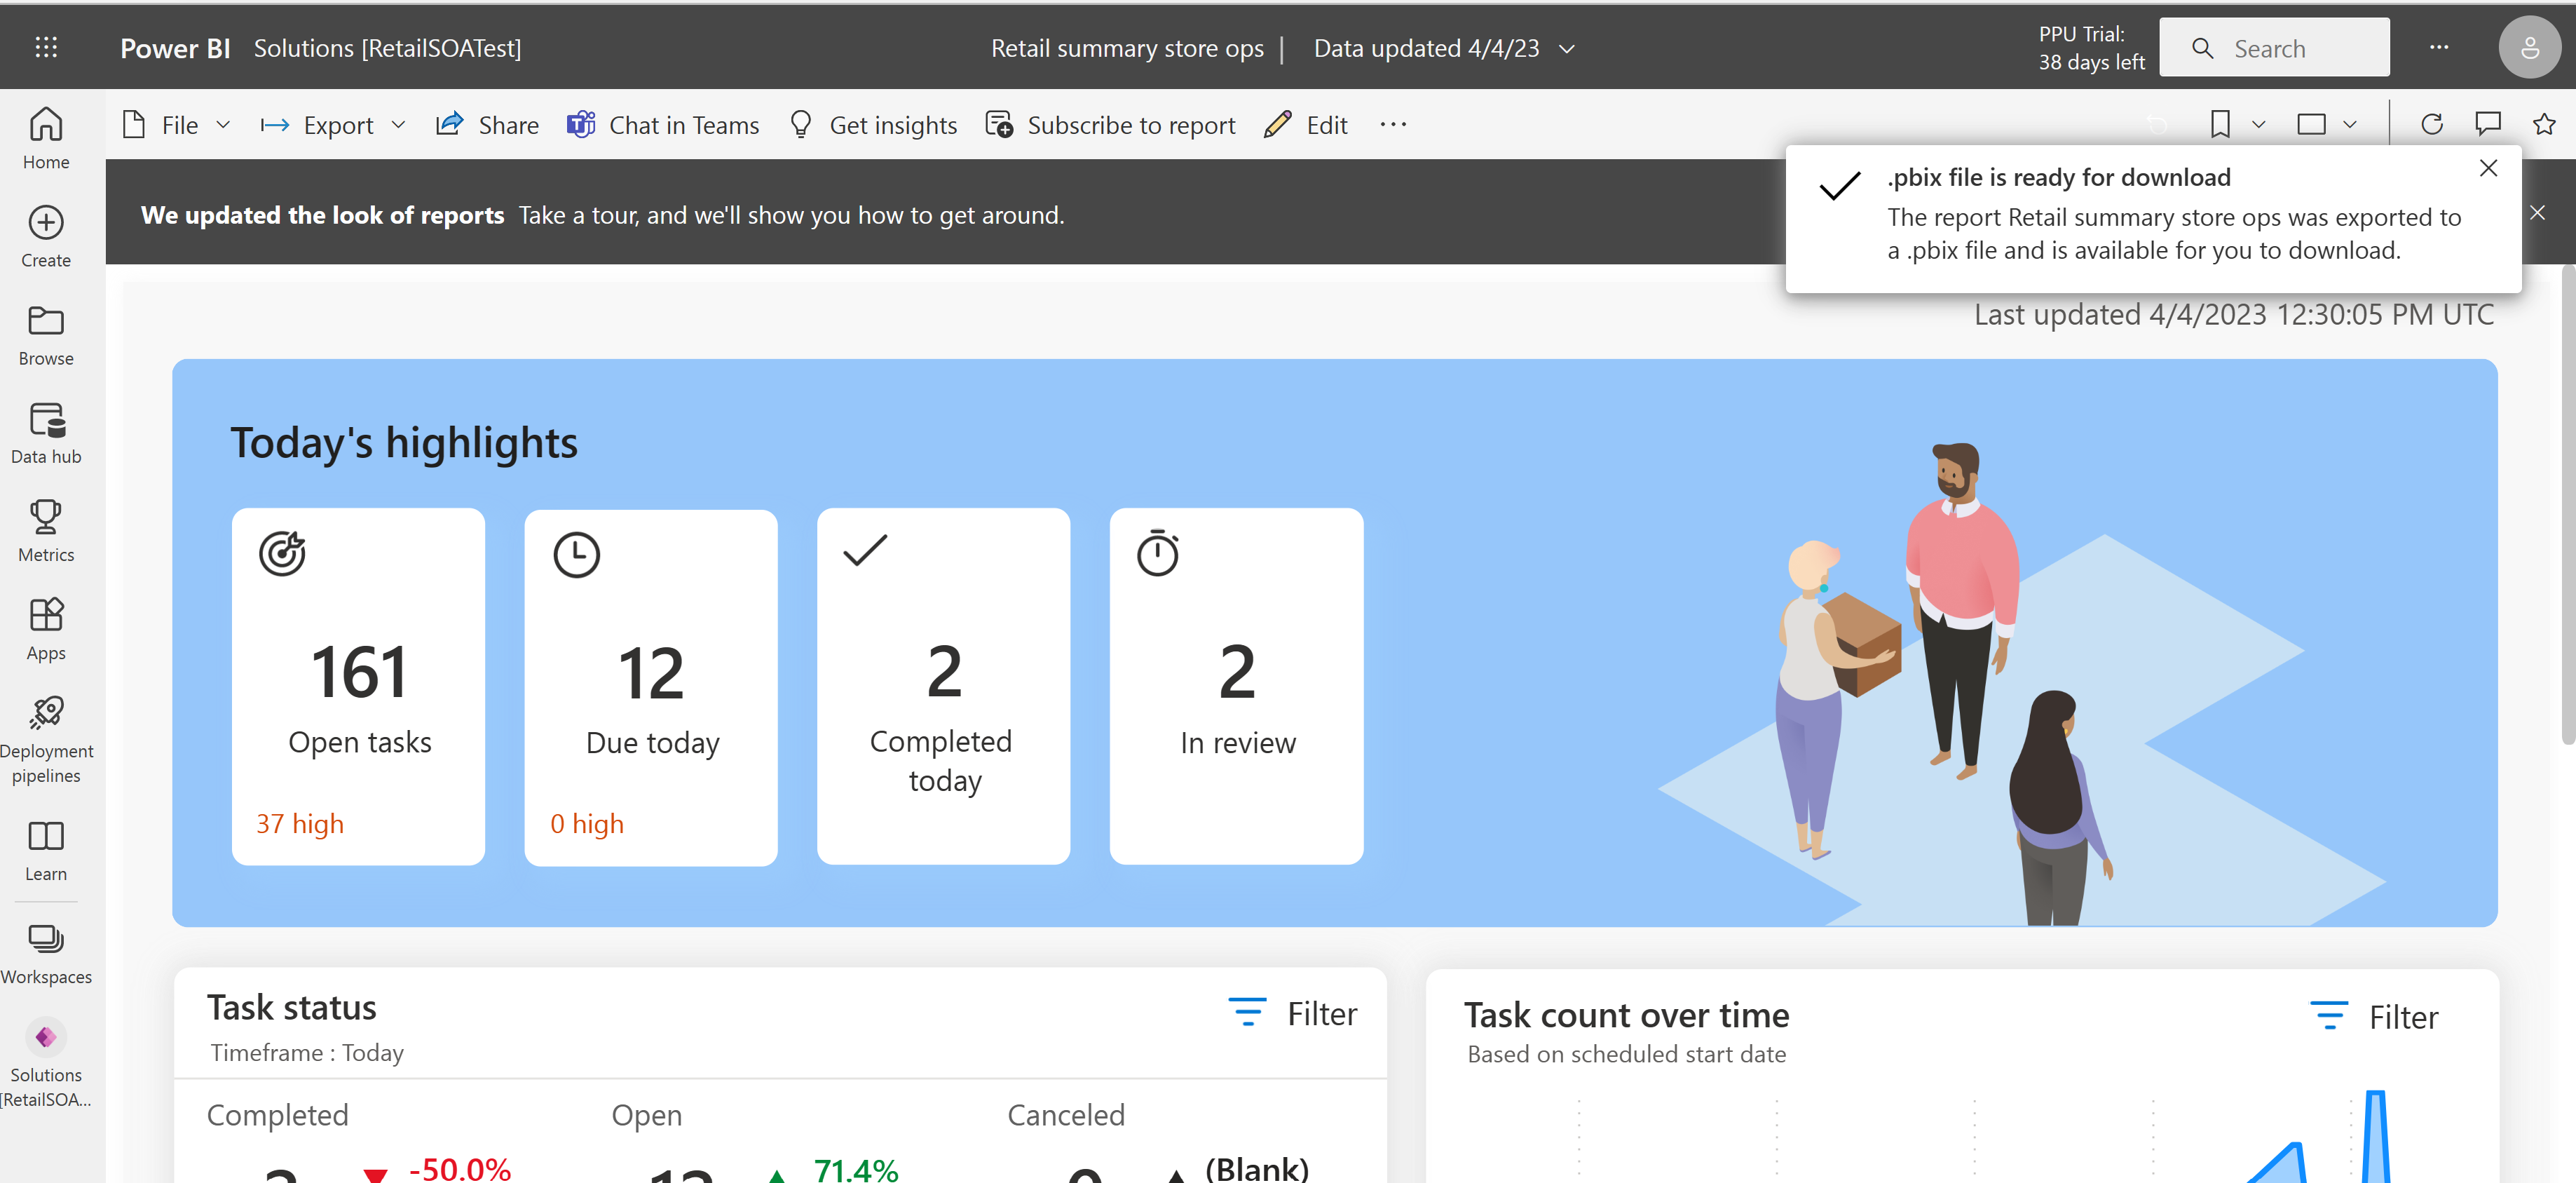
Open the Report type, Retail summary store ops.
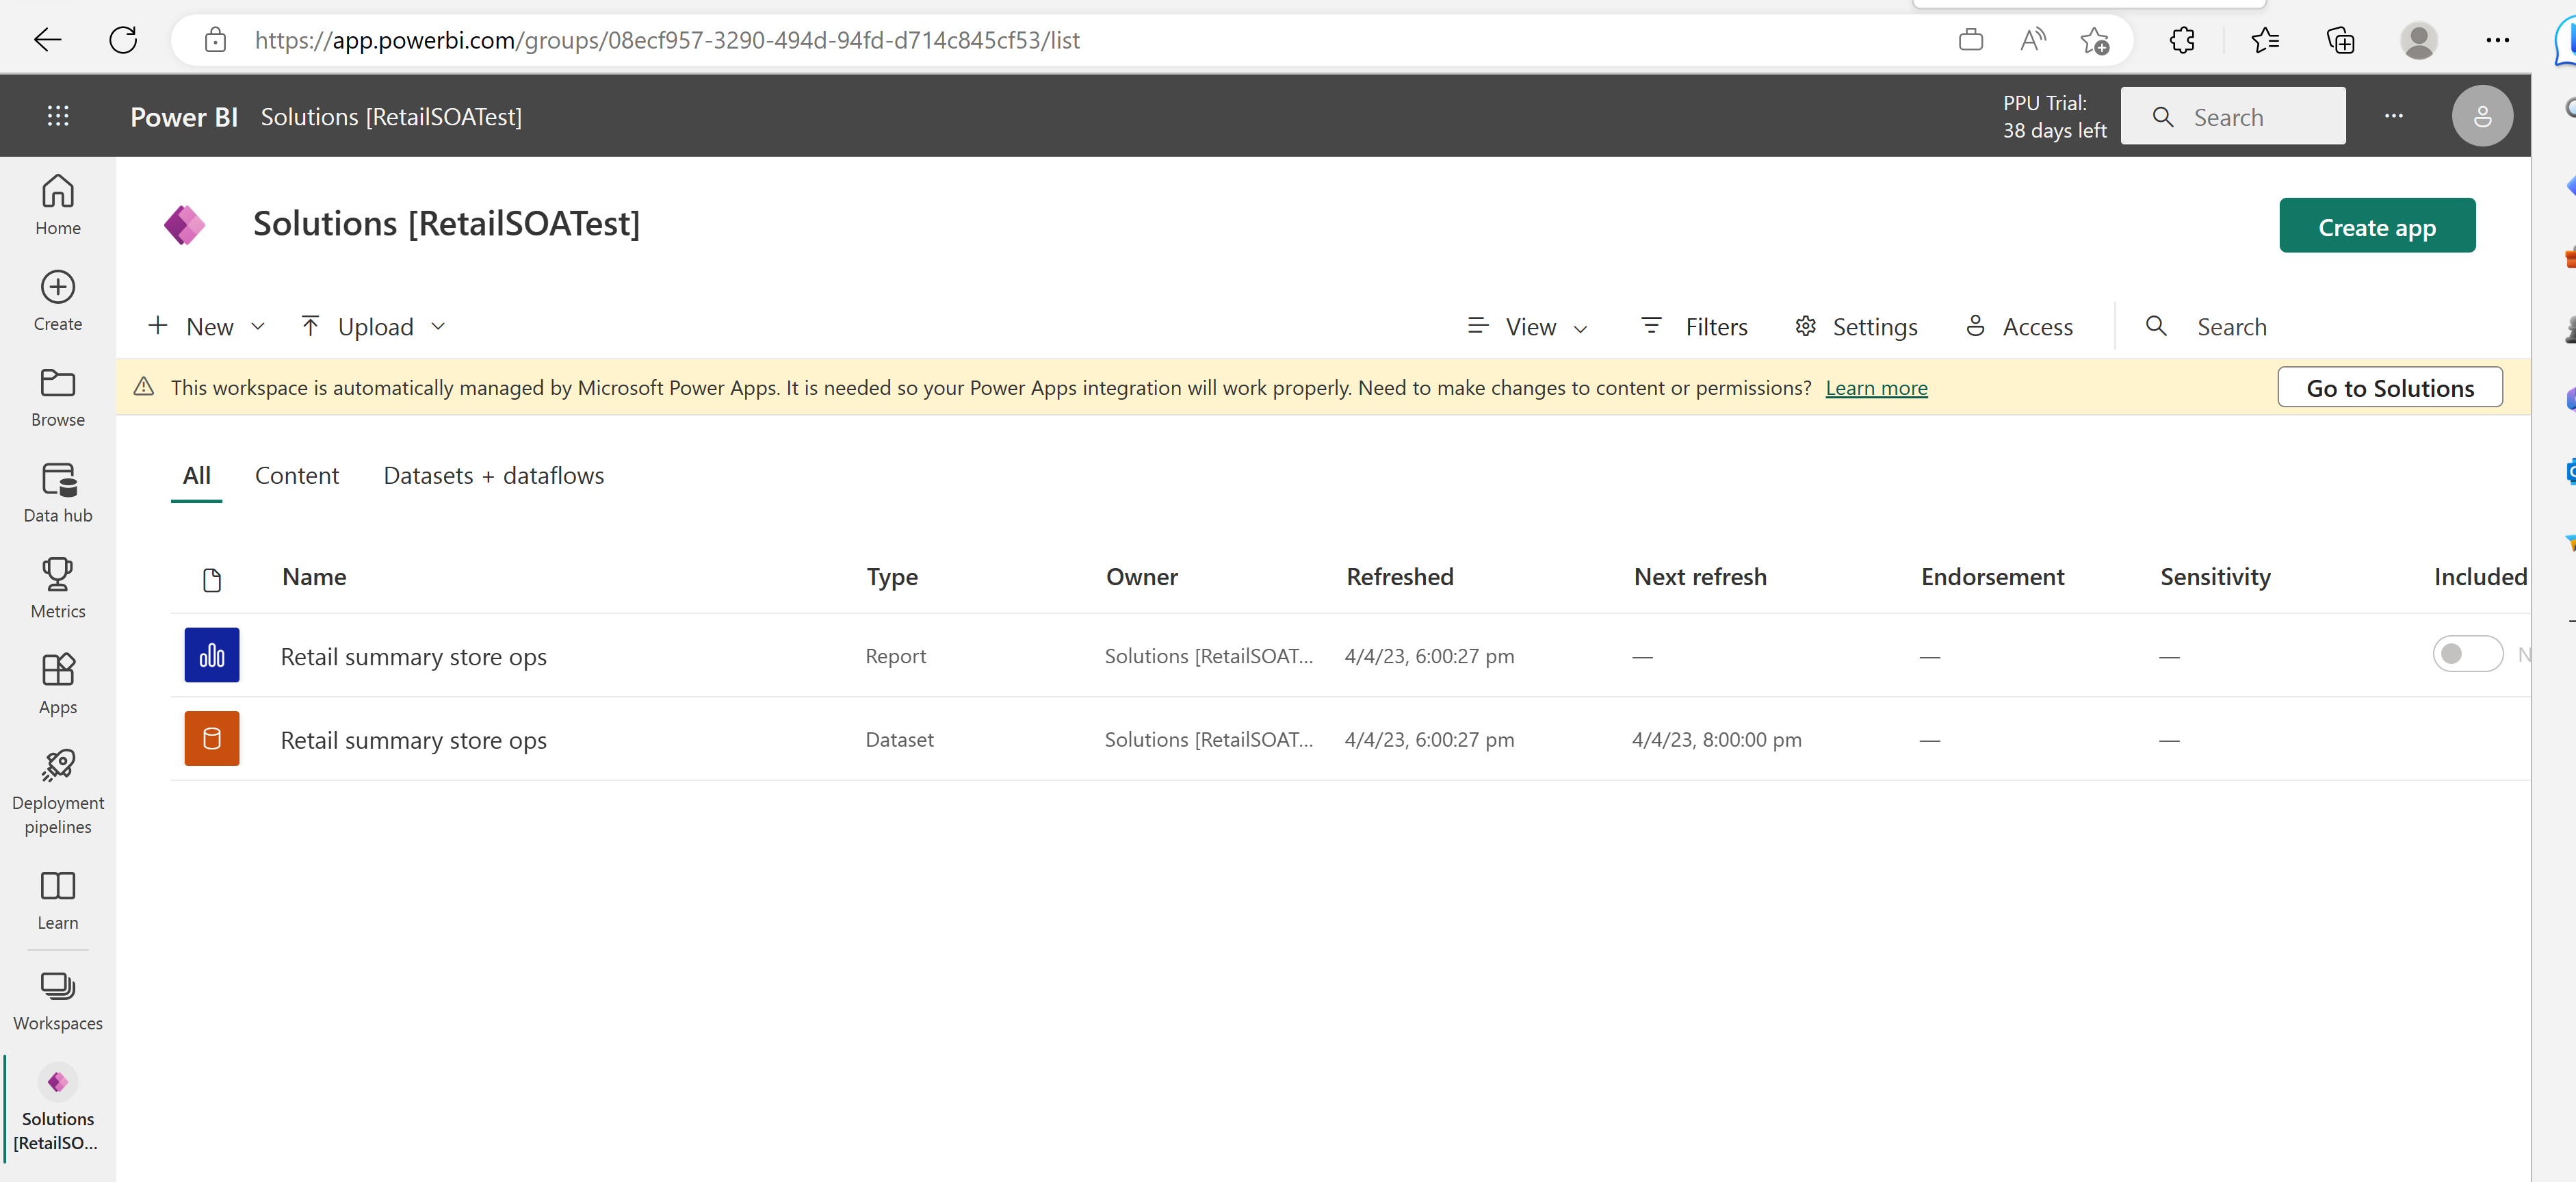
Go to File> Download this file.
In the dialog box titled What do you want to download?, select A copy of your report and data (.pbix), and then selet Download.
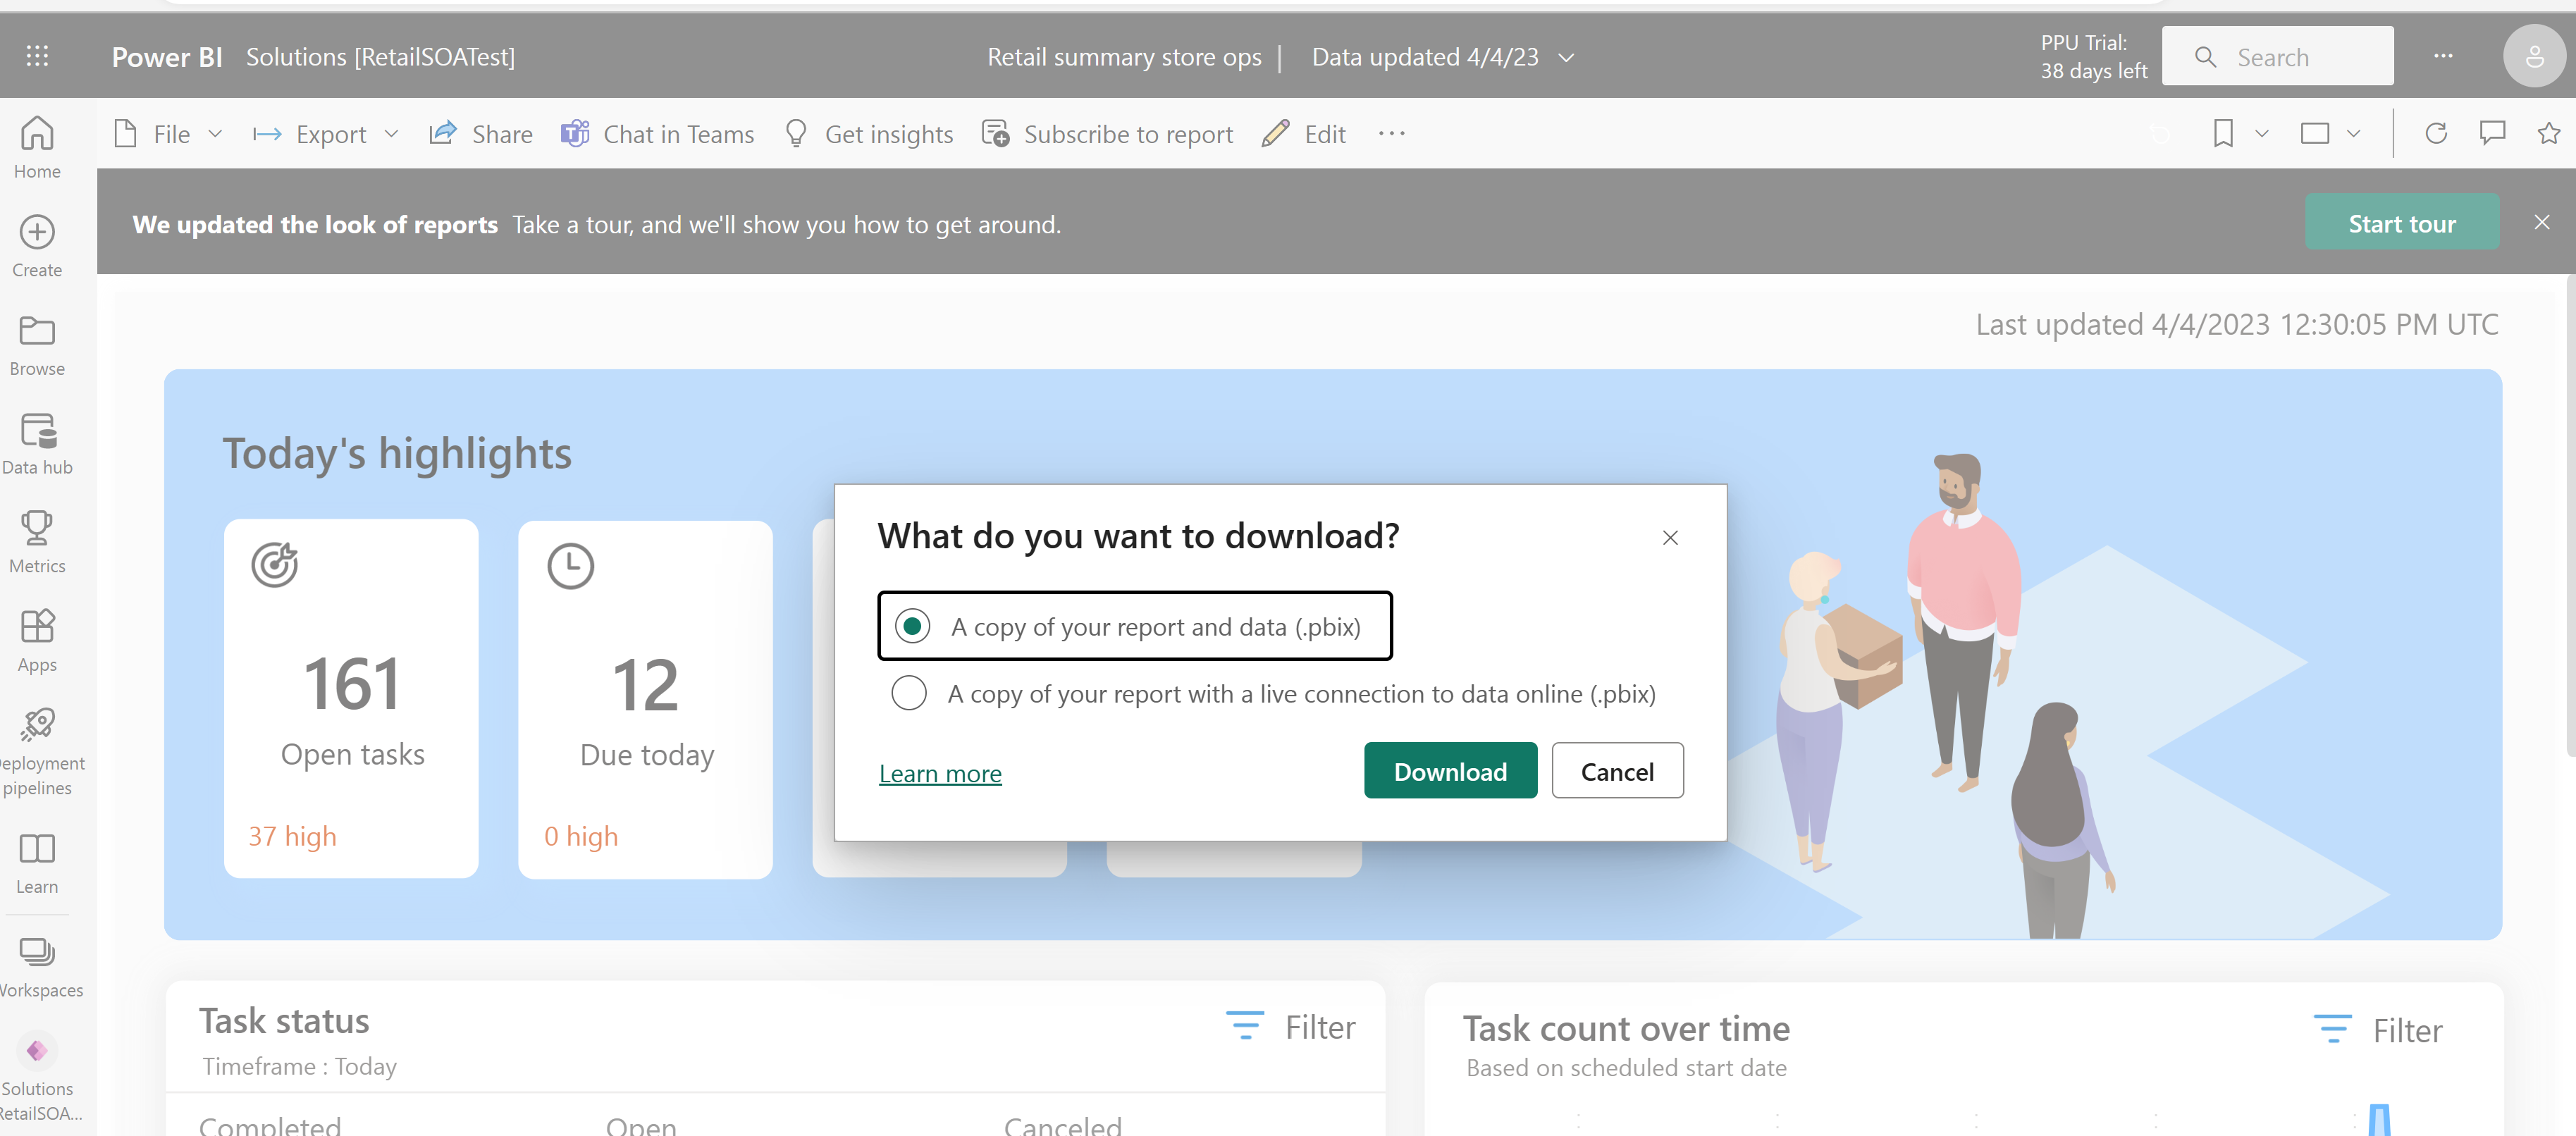
You can now download the exported .pbix file to share with users who don't have access to Store Operations Assist Admin.
Customize a Power BI report
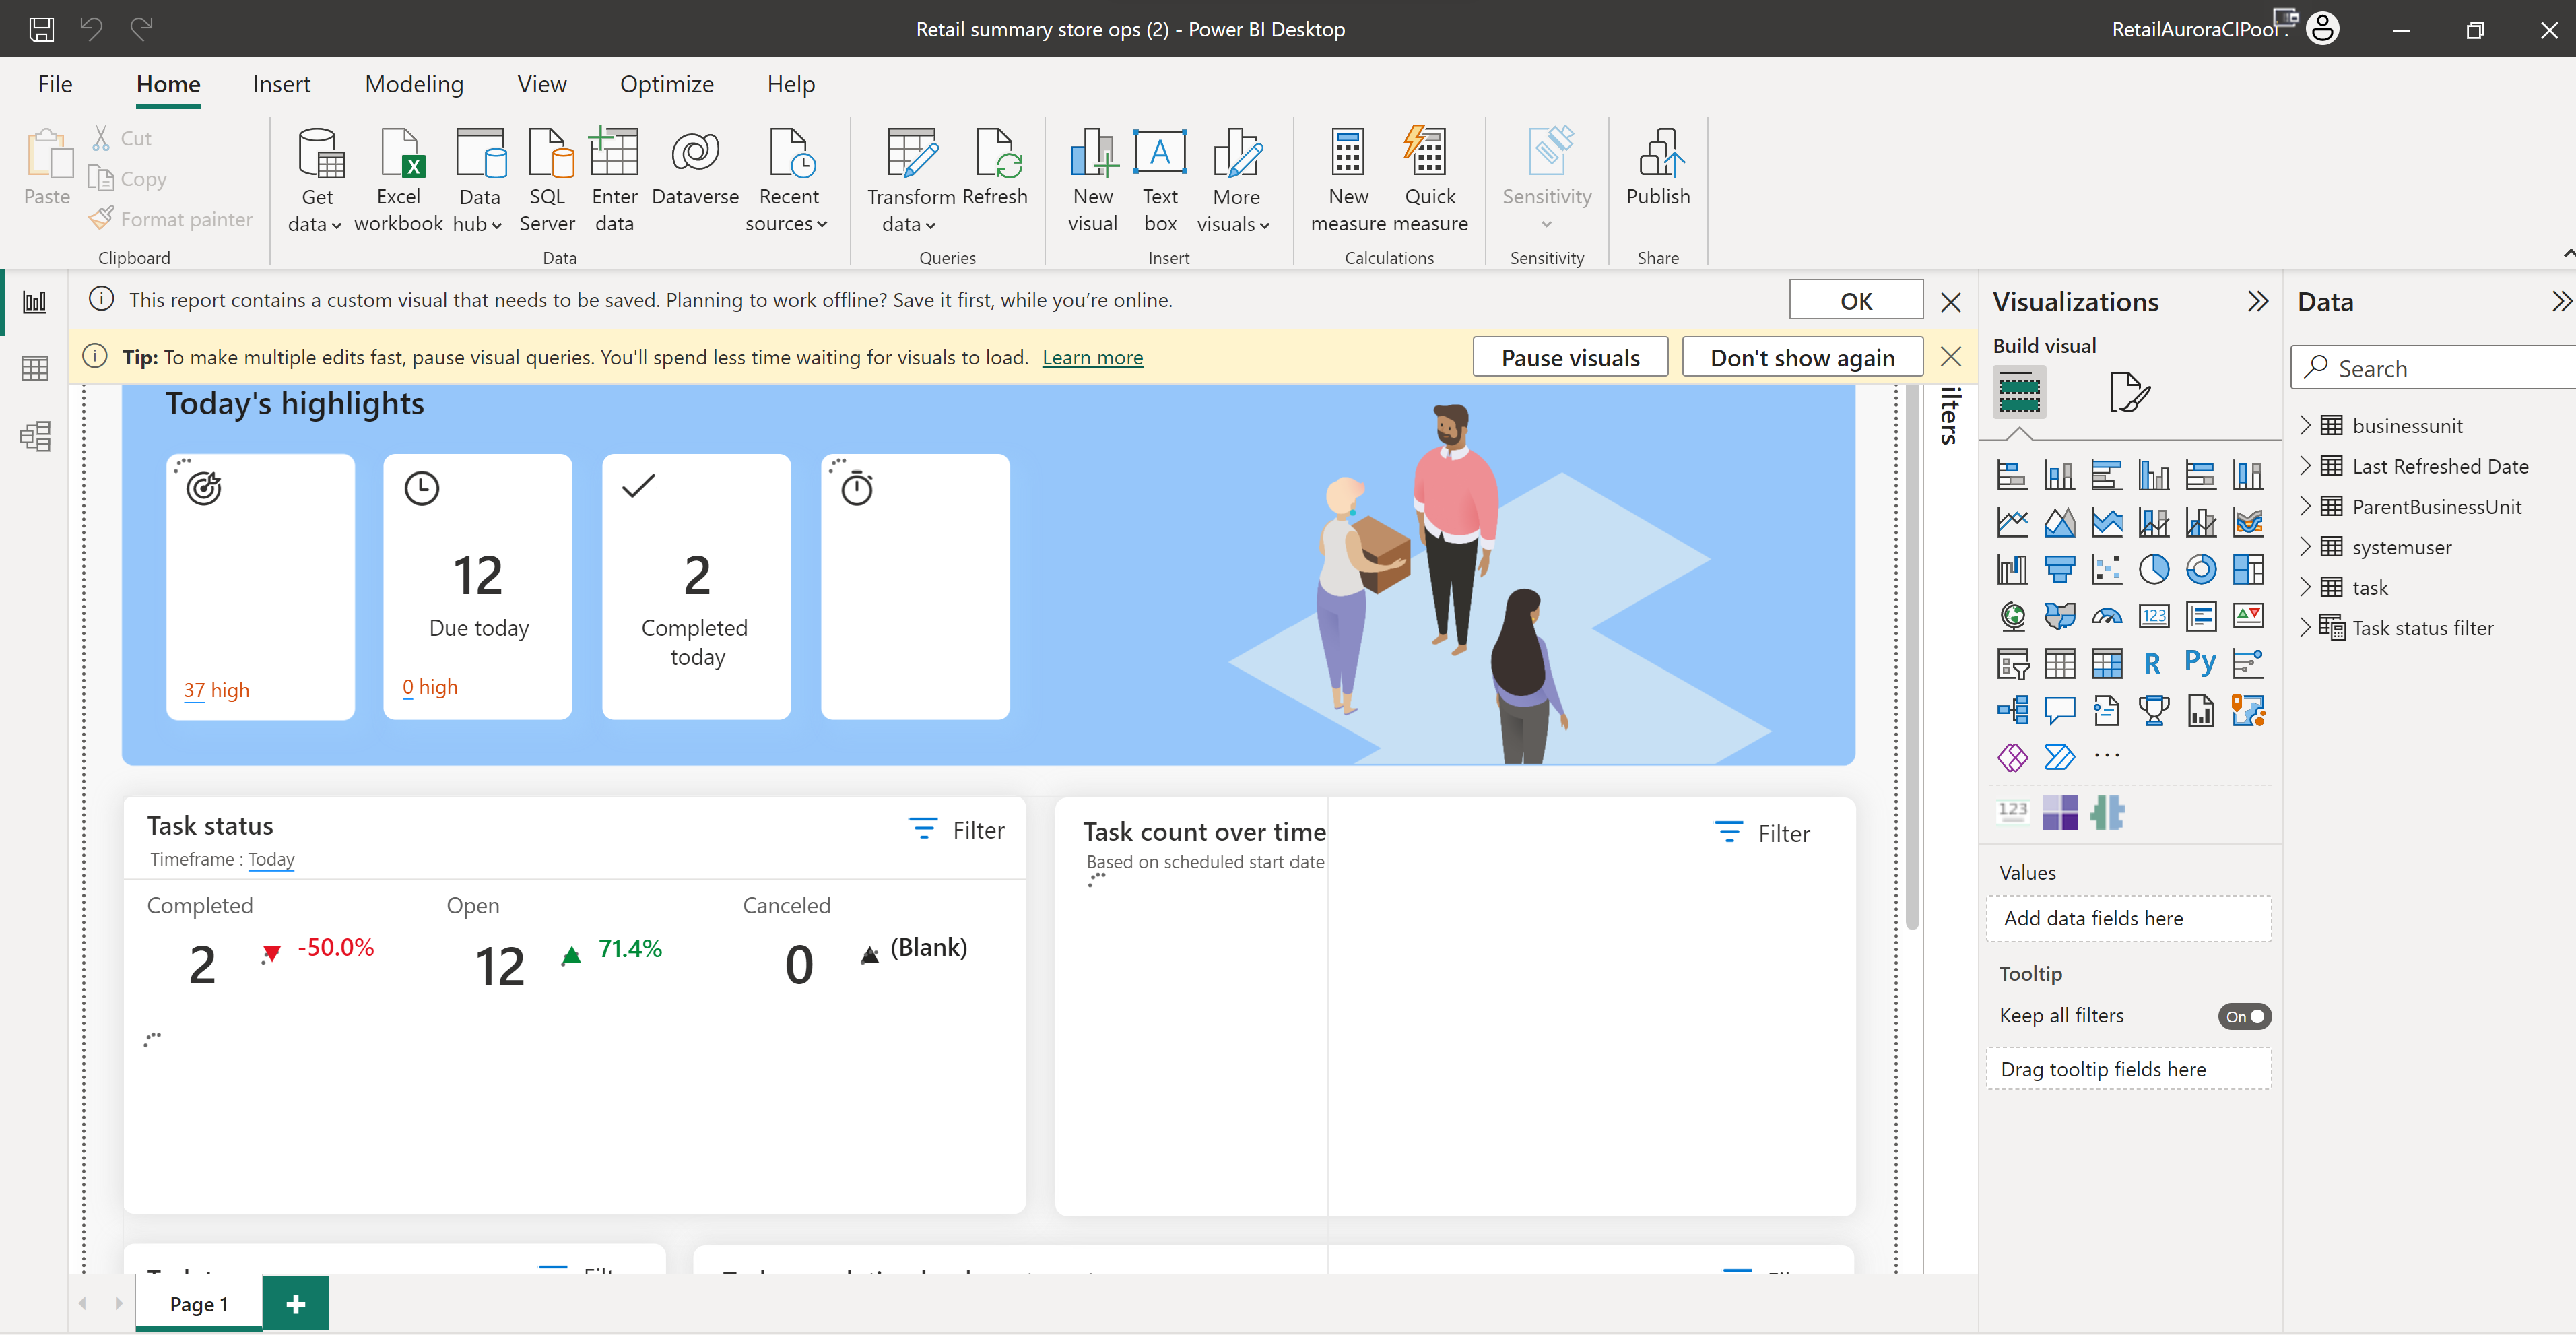
You can open the Power BI reports from Store Operations Assist in any browser or other Power BI desktops or service outside Store Operations Admin and further customize it as required.
Download and open the Power BI Desktop app.
Select the Retail summary store ops.pbix report file either from recent report list or browse from downloads.
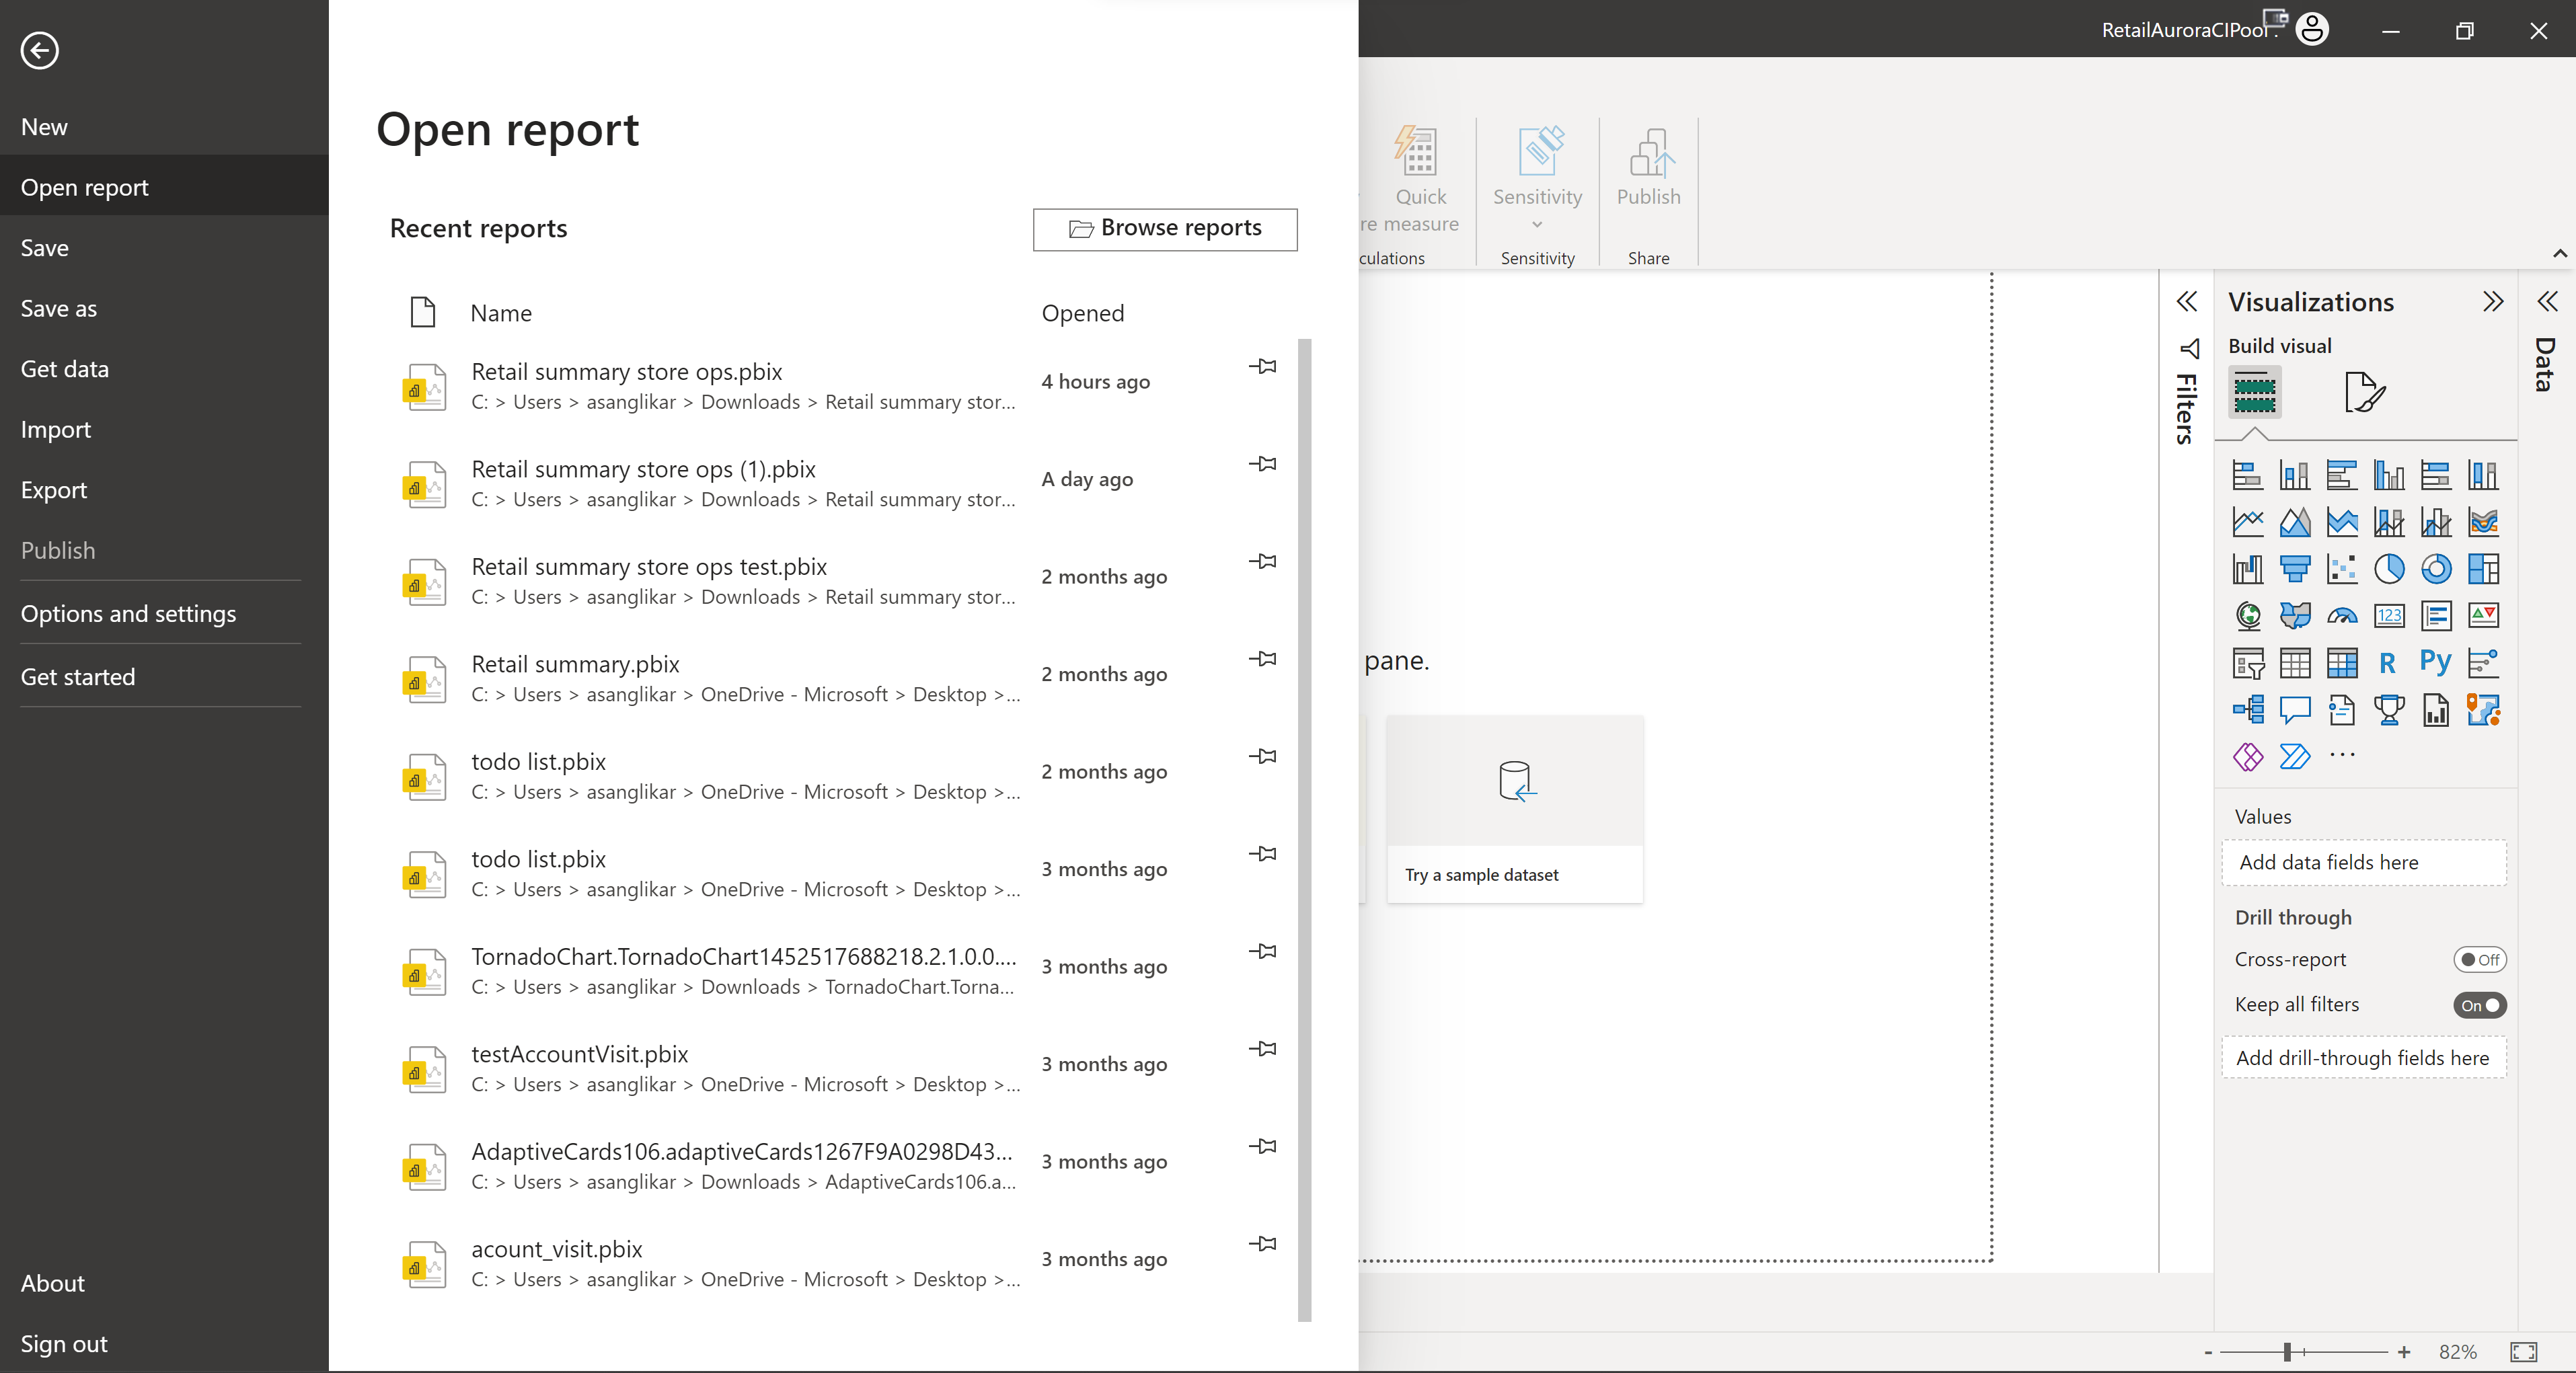
You can open the report in Power BI desktop app, and make changes as required.
See also
Use Microsoft Dataverse web API.
Overview of Power Platform connectors
Create and customize model driven apps.
Customizations using Power Apps
Out of the box (OOB) theme customizations