Set up Microsoft Dynamics 365 Customer Insights integration in Clienteling
You can integrate Dynamics 365 Customer Insights with Store Operations Assist Clienteling to access and unify data across systems without the need for any other development. This seamless integration empowers store associates with valuable customer insights, enhancing their ability to serve customers effectively.
Unification typically refers to the process of combining or integrating data from various sources and touch points to create a comprehensive and unified view of the customer. Unifying customer insights enables organizations to create a 360-degree view of each customer, allowing them to tailor their marketing messages, product offerings, and customer experiences to better meet individual needs and preferences. It can also help identify patterns, trends, and correlations that might not be apparent when analyzing data in isolation.
To integrate Dynamics 365 Customer Insights with Store Operations Assist, perform the following steps:
Important
Refer to Dynamics 365 Customer Insights documentation for completing all steps listed. You will need Administrator permissions in Dynamics 365 Customer Insights to complete all steps.
Create a Dynamics 365 Customer Insights environment.
Add a data source and import customer data by connecting to your data source.
Unify the data and set up relationships.
Enhance customer baseball profile by setting up measures and activities for Store Operations Assist in Dynamics 365 Customer Insights environment.
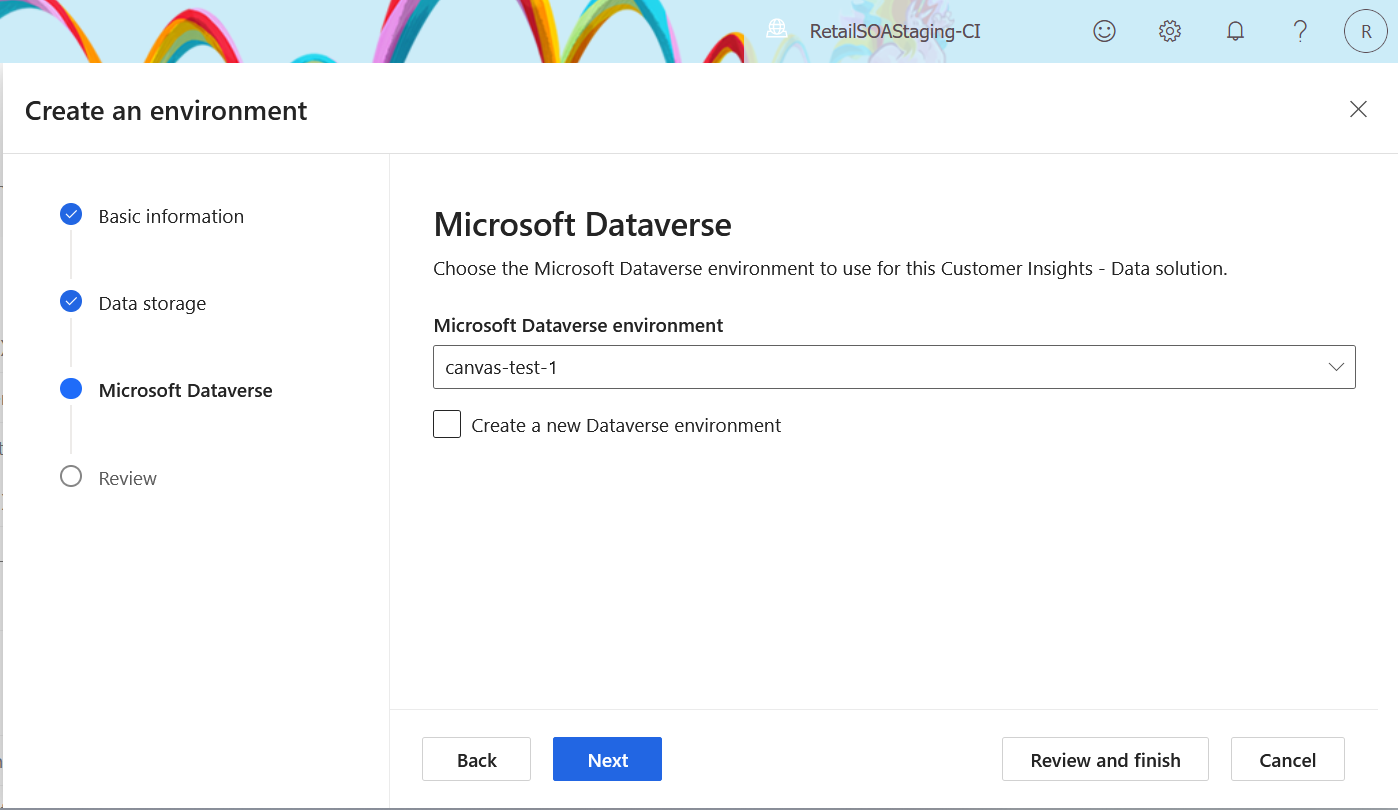
Create a Dynamics 365 Customer Insights environment
You can create a Dynamics 365 Customer Insights environment from Customer Insights - Data. You need to provide the Dataverse environment where Store Operations Assist is deployed to connect to the Dynamics 365 Customer Insights instance.
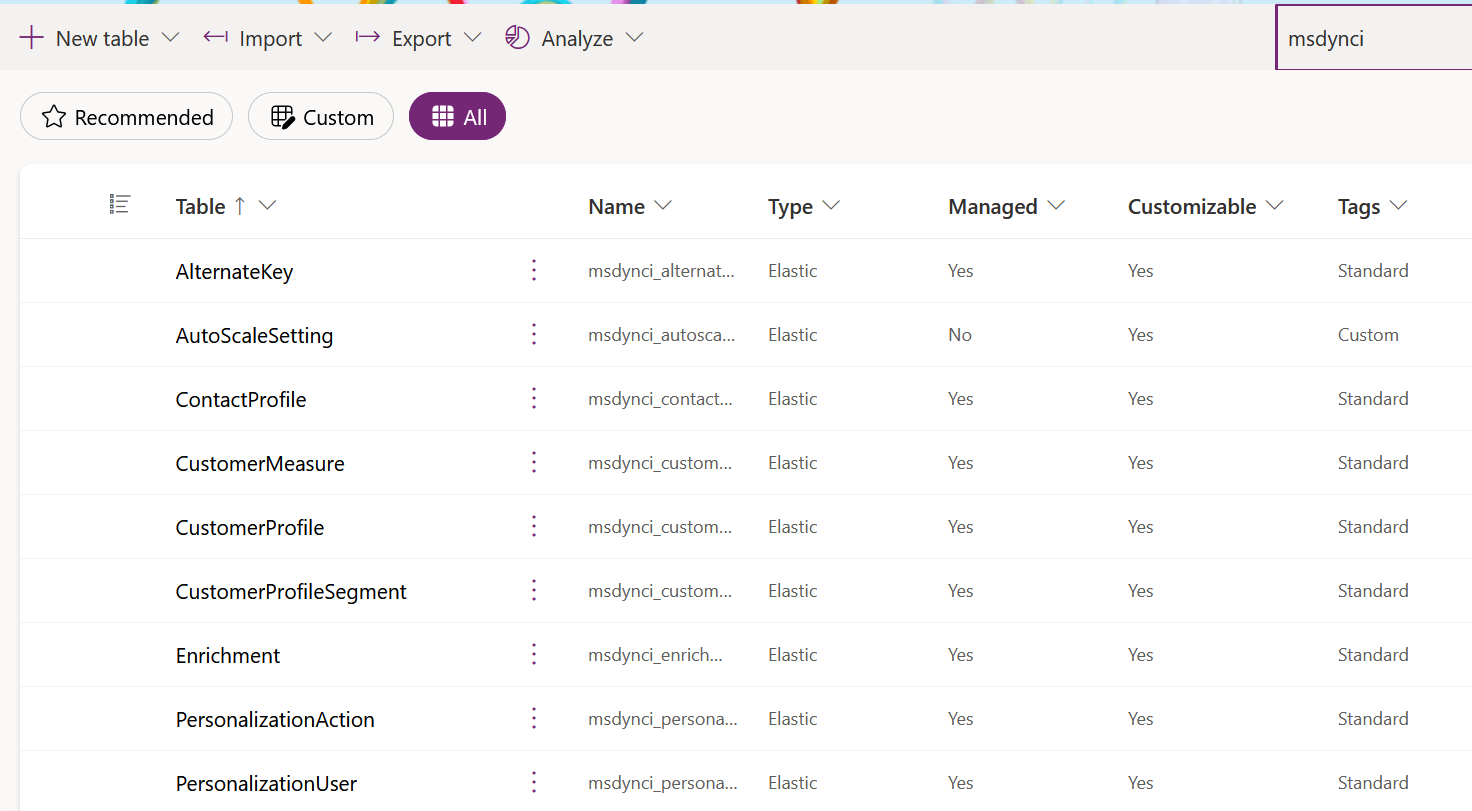
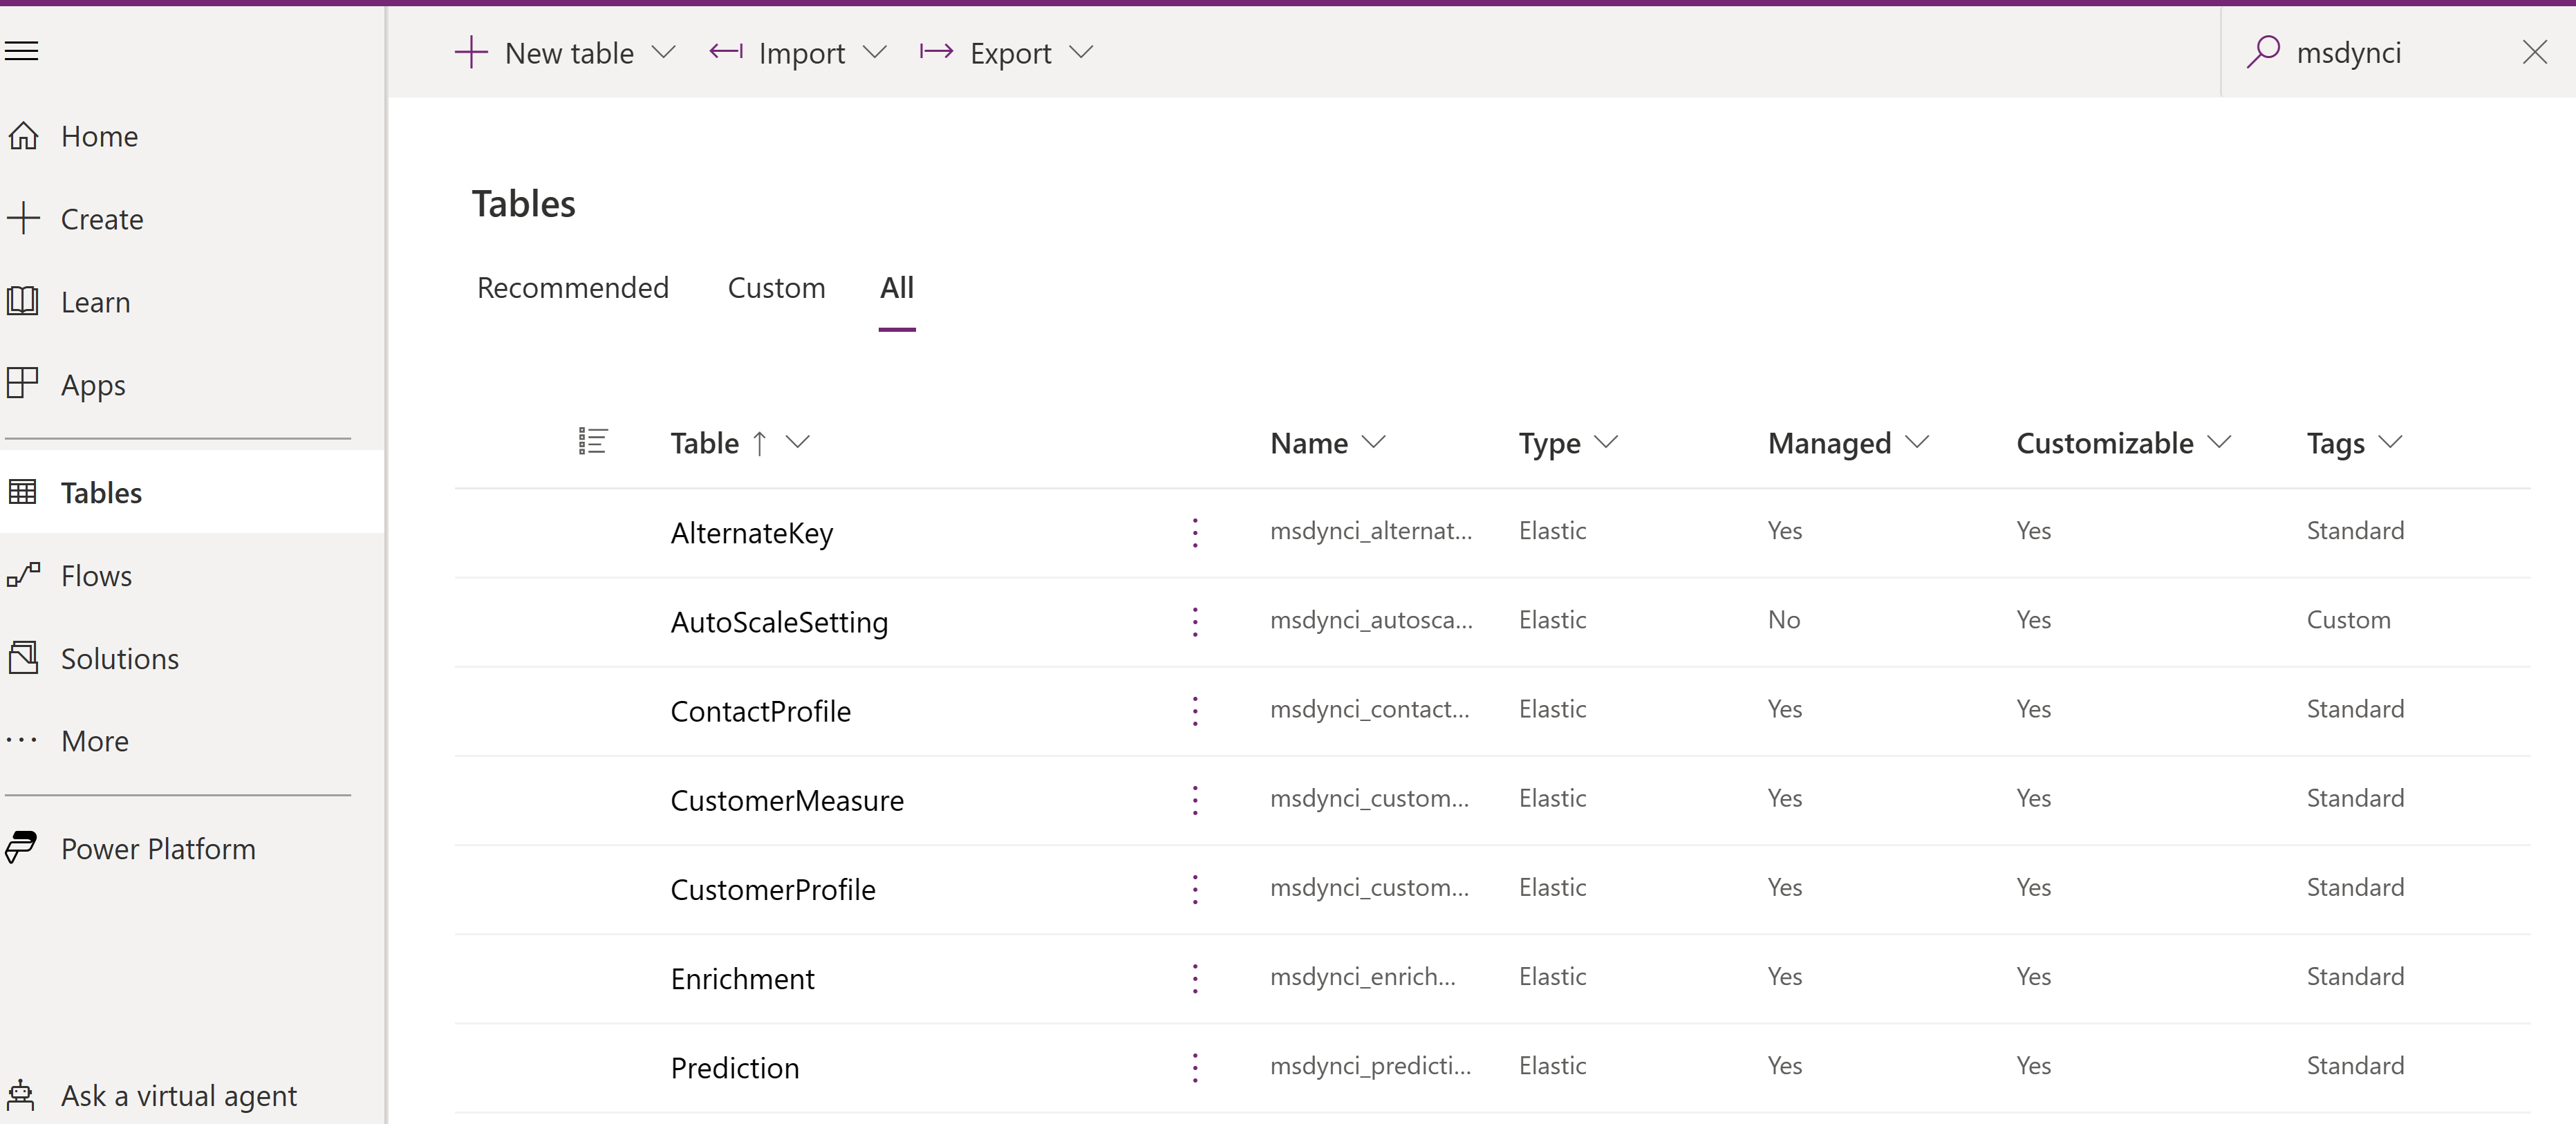
This step automatically populates the Dynamics 365 Customer Insights virtual tables into Dataverse environment. As a result of this, elastic tables with a prefix msdynci get created. The entire list of elastic tables can be found by searching msdynci in the maker portal as shown:
Add a data source and import customer data
To add a new data source in Dynamics 365 Customer Insights, perform the following steps:
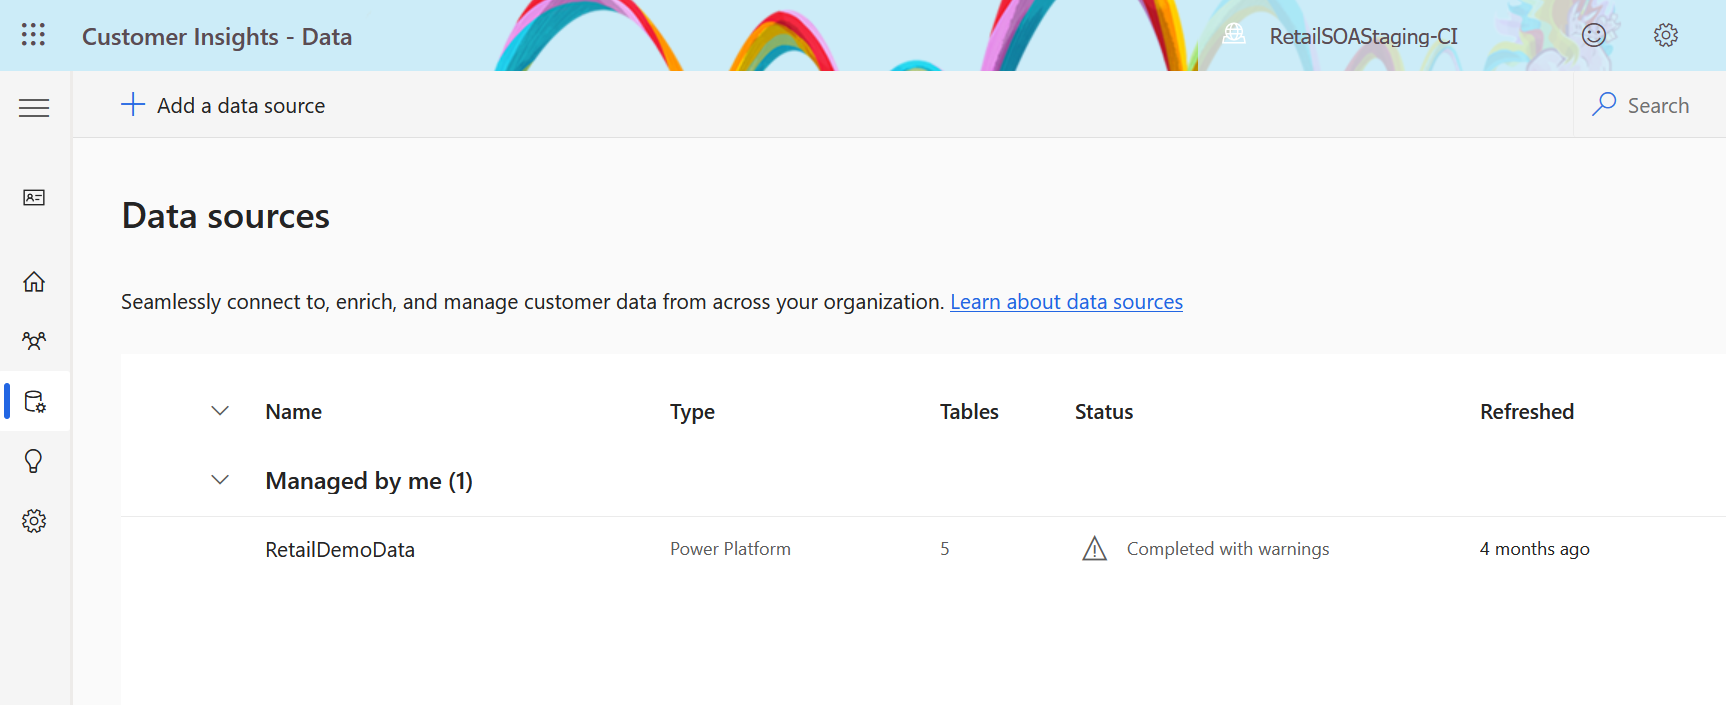
Open Customer Insights - Data.
Select Data tab and then select Data sources. Select + Add a data source to add a new data source.
When you import data from external source in Dynamics 365 Customer Insights, it creates a unique identifier for a customer.
For example, the new identifier generated by Dynamics 365 Customer Insights is as shown:
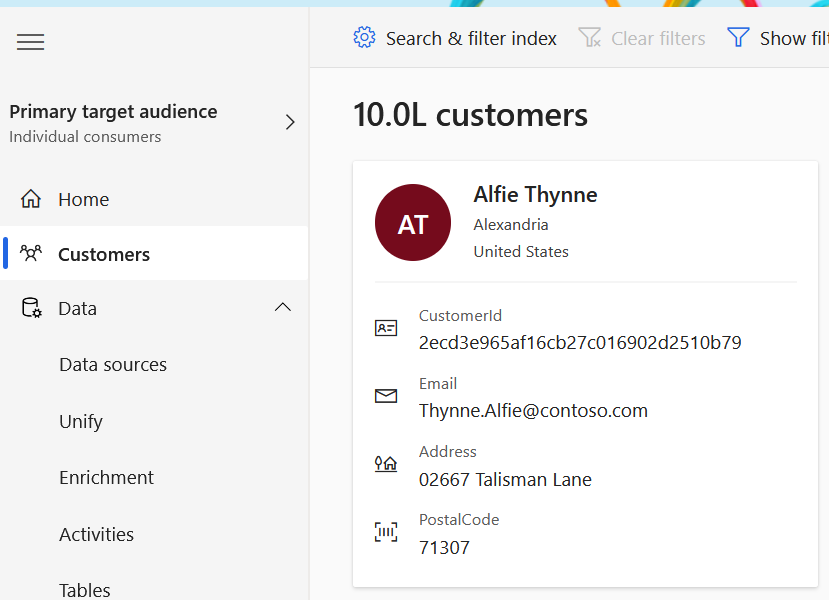
The virtual table msdynci_alternatekey contains the mapping between the identifier generated by Dynamics 365 Customer Insights and the original customer identifier.

Unify the data and set up relationships
You need to perform the following steps for unifying data and setting up relationships:
Open Customer Insights - Data.
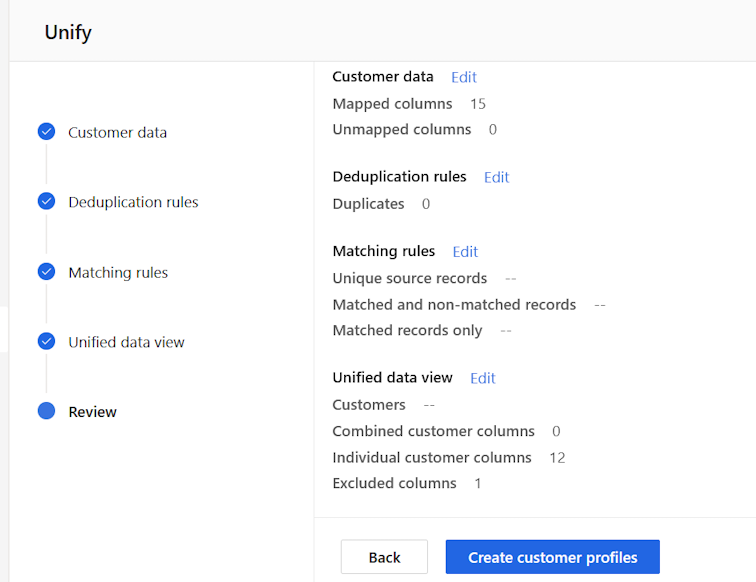
Select Data tab, and then select Unify. After you complete all the unification steps, review and create customer profiles.
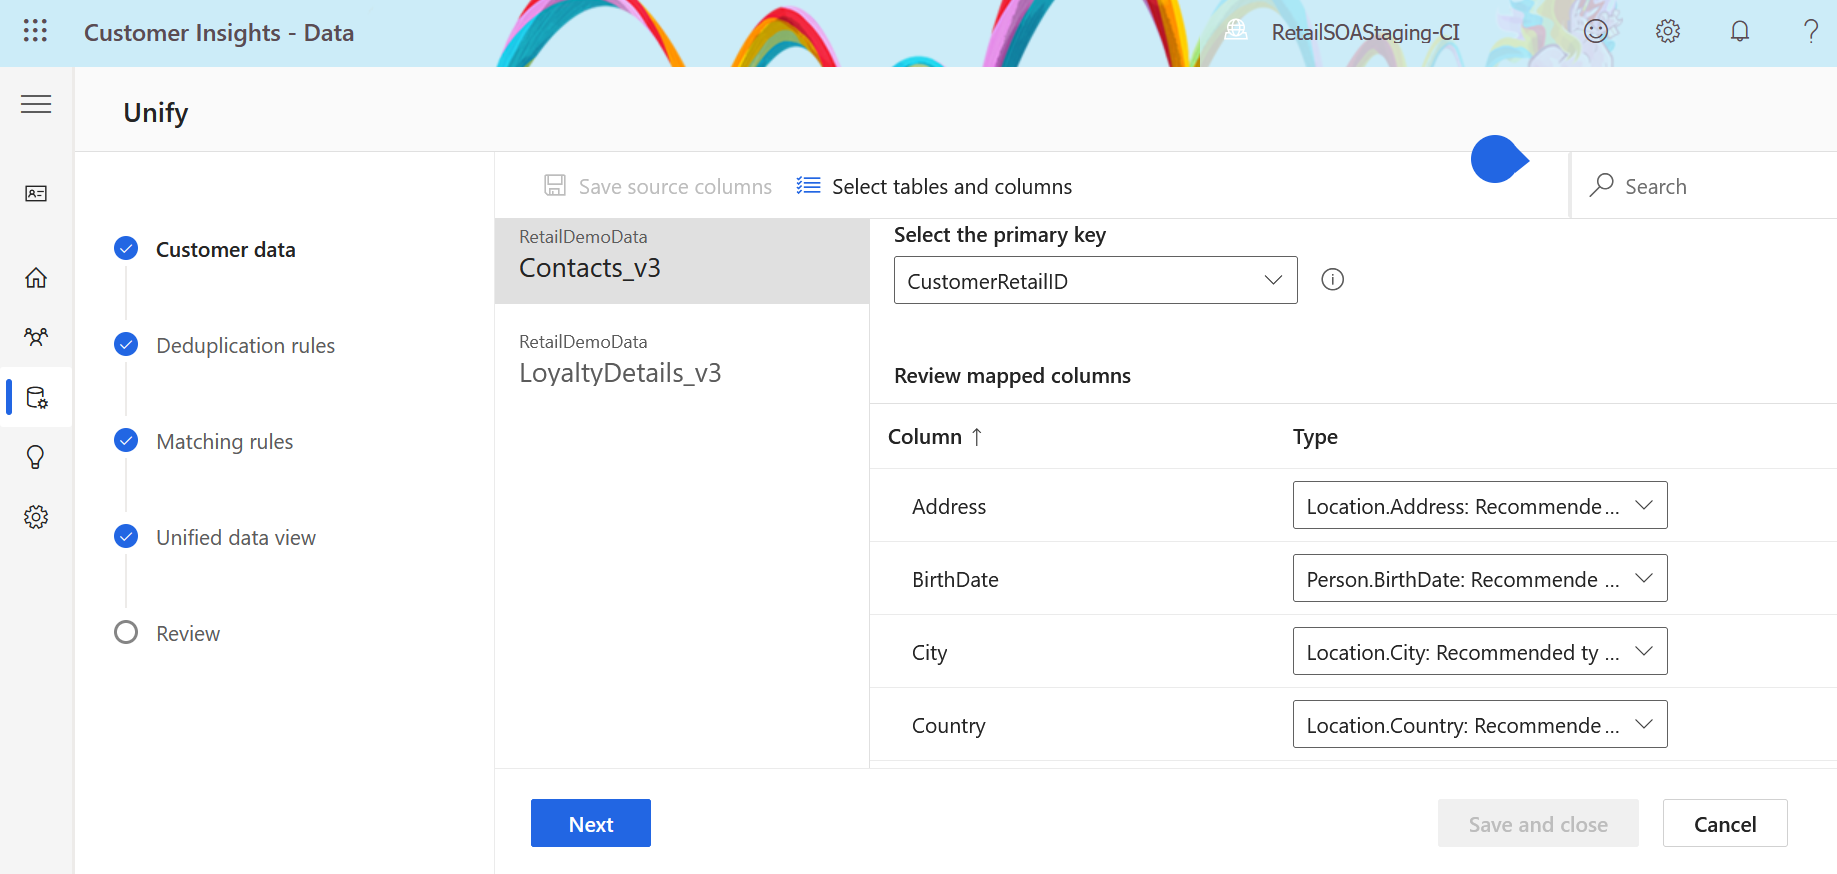
Select data source
Select tables and attributes from data source containing following details:
- Customer Identifier (a GUID)
- Address
- Birthdate
- Phone
- Language of preference
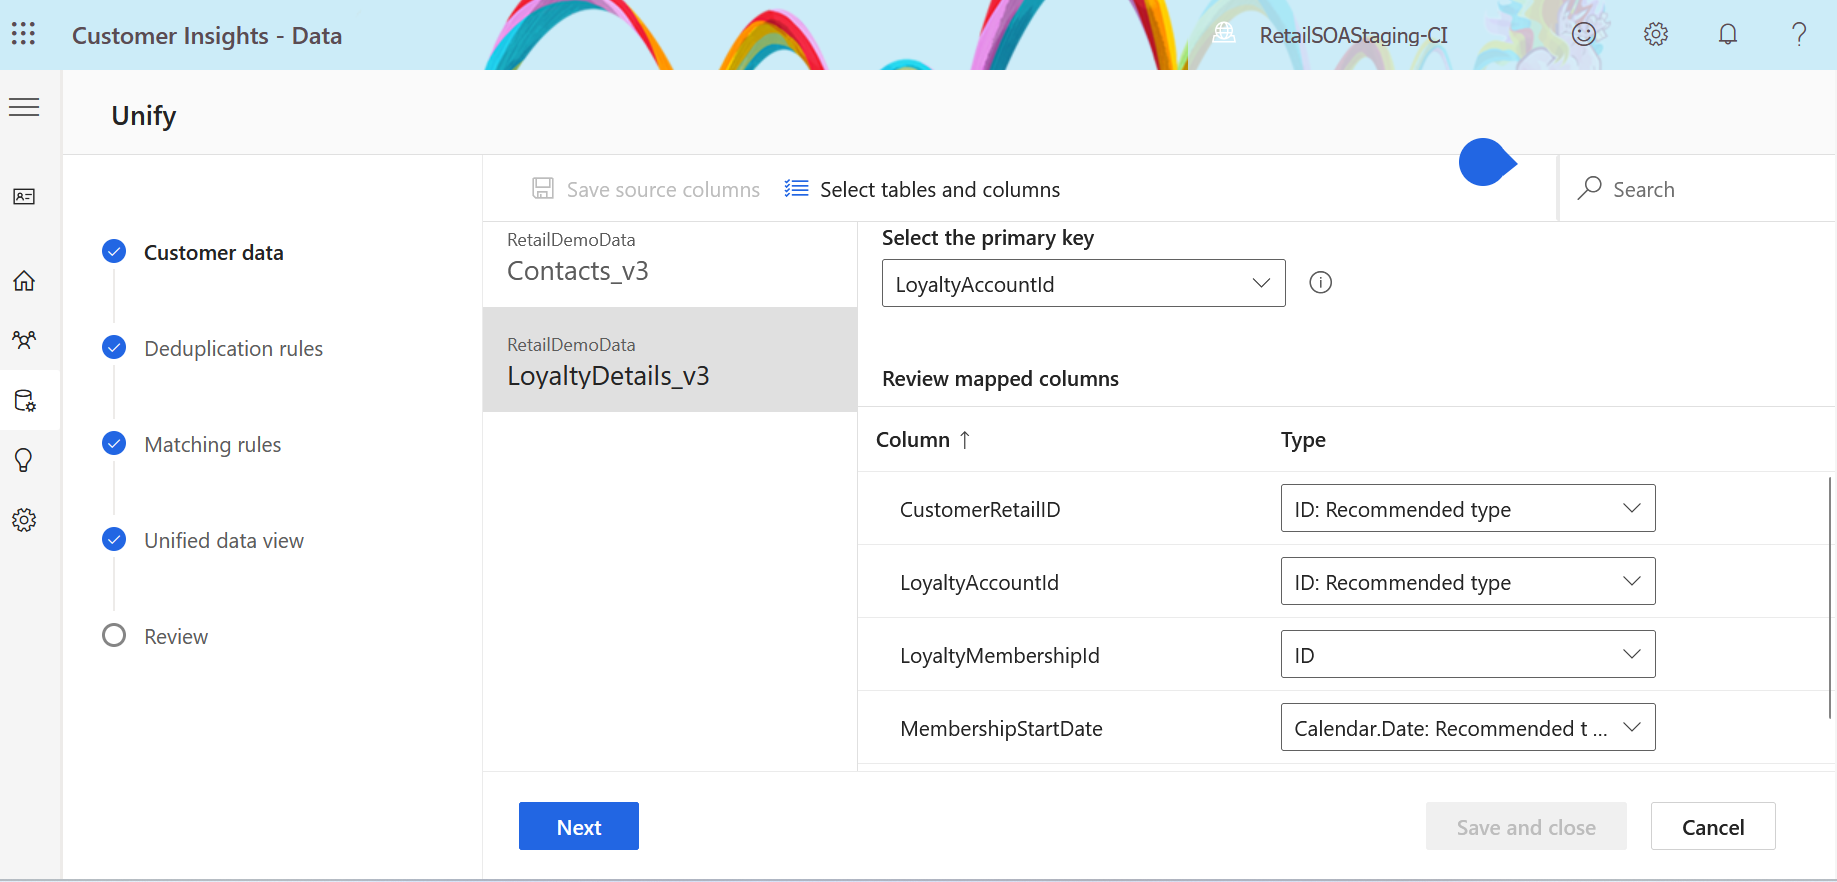
You have to fetch the loyalty information like membership ID, membership start date and tier name from the data source. Select attributes related to Loyalty Account details:
- Loyalty Account ID
- Loyalty Membership ID
- Membership start date
- Tier name
Important
Ensure the attribute names match while following these steps.
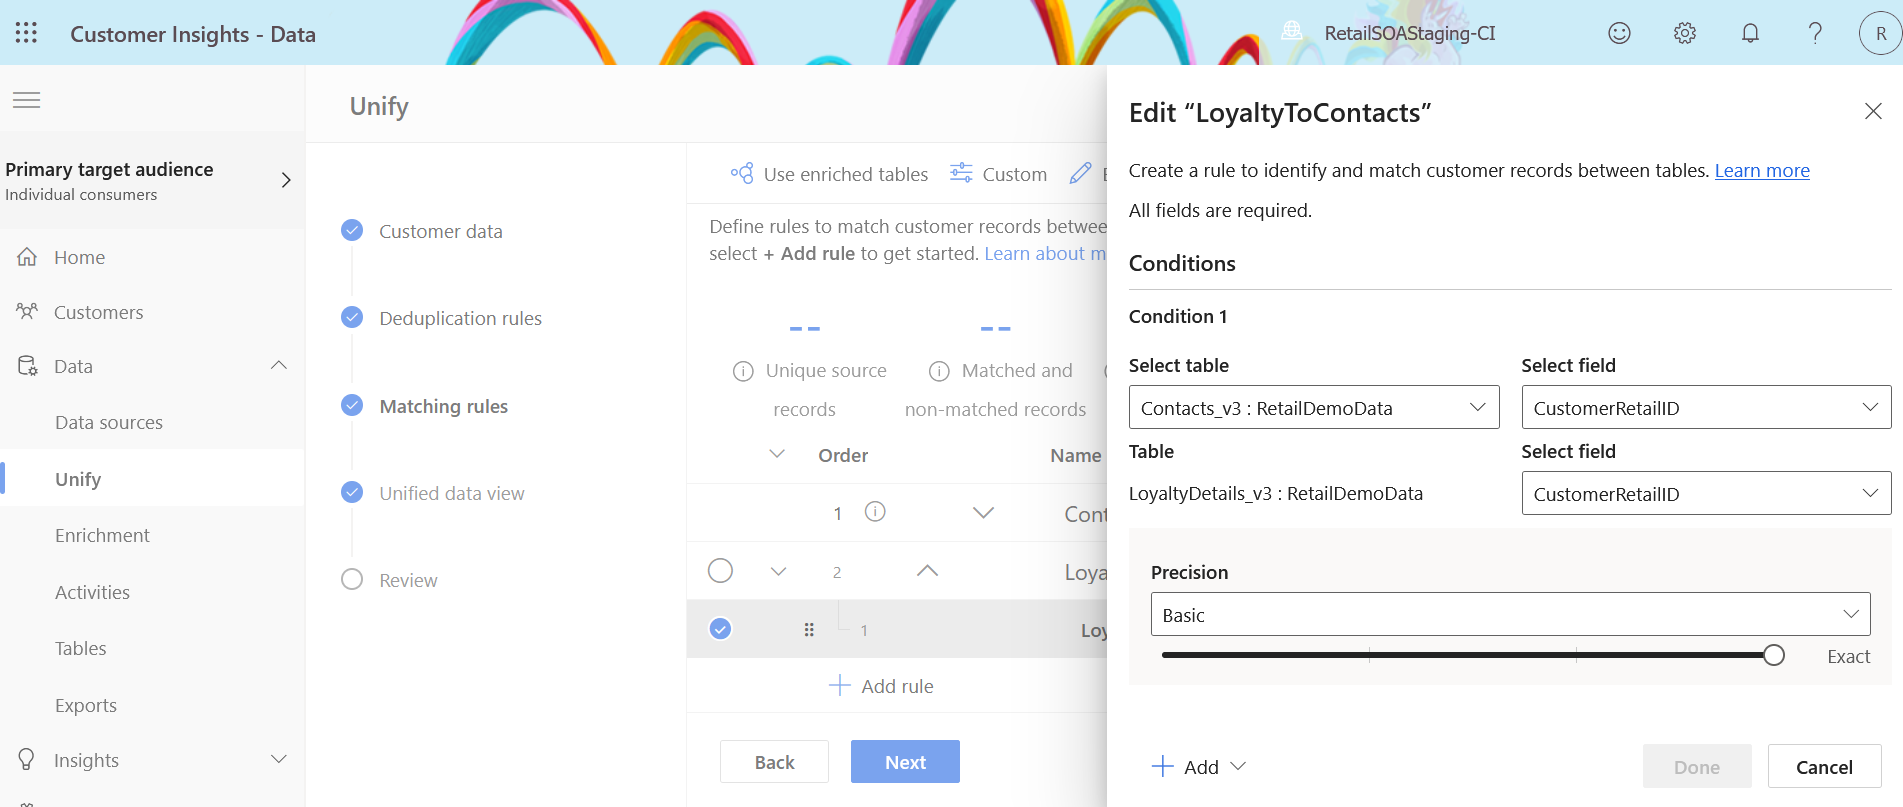
Define matching rules
Define rules to match customer records between two or more tables. This stage establishes connections between tables to associate all data with the customer and defining relationships that enable the retrieval of the aforementioned attributes.
Set the order of each table based on priority, and select + Add rule to get started. Select include all records to implement outer join.
Unify customer fields
All the customer fields are listed here. You need to change the Output field name of the selected attributes.
Important
You can change the Output field name only in this step and the output field names cannot be changed later.
| Customer Attribute | Output field name |
|---|---|
| emailaddress1 | |
| Date of Birth | birthdate |
| Language of Preference | msret_languageofpreference |
| Phone | msret_mainphone |
| Address Line State Country | address1_line1 address1_stateorprovince address1_country |
| Loyalty membership start date | msret_membershipstartdate |
| Loyalty Tier | msret_tiername |
| Loyalty Account Membership ID | msret_loyaltyaccountname |
Define activities
Activities are used to display Purchase History in Clienteling. You create a new activity, SalesOrderLine as given in Customer or business contact activities.
Open Customer Insights - Data.
Select Data tab, and then select Activities.
Select the SalesOrderLine activity and select Next.
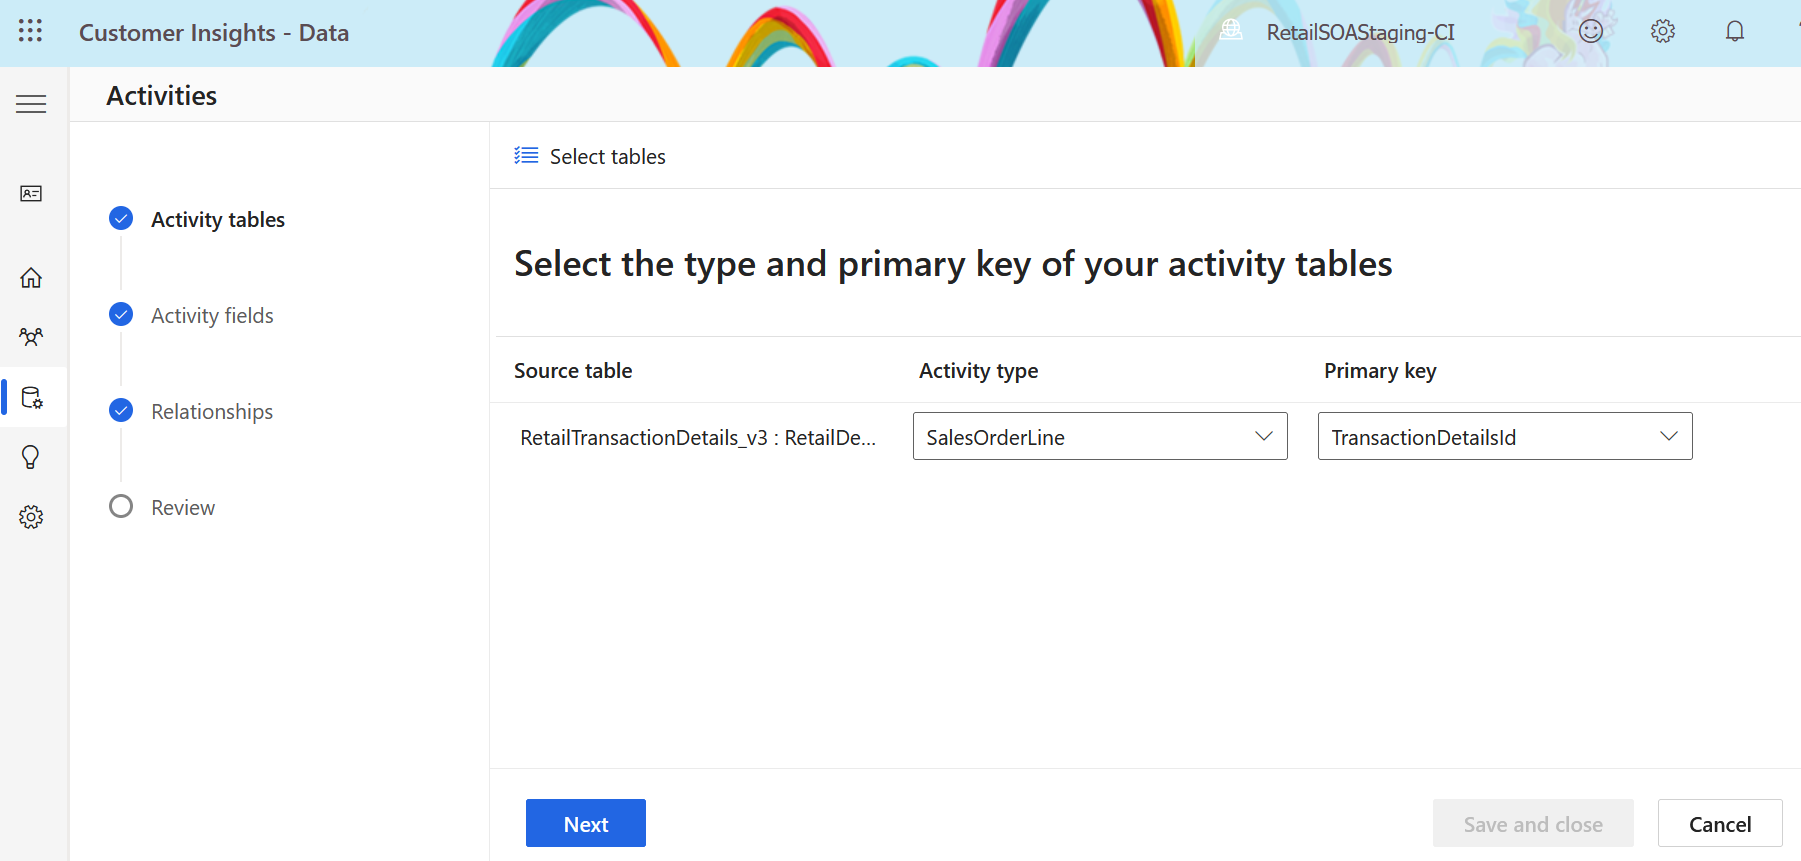
Map to the table in data source, which has item level purchase details of customer.
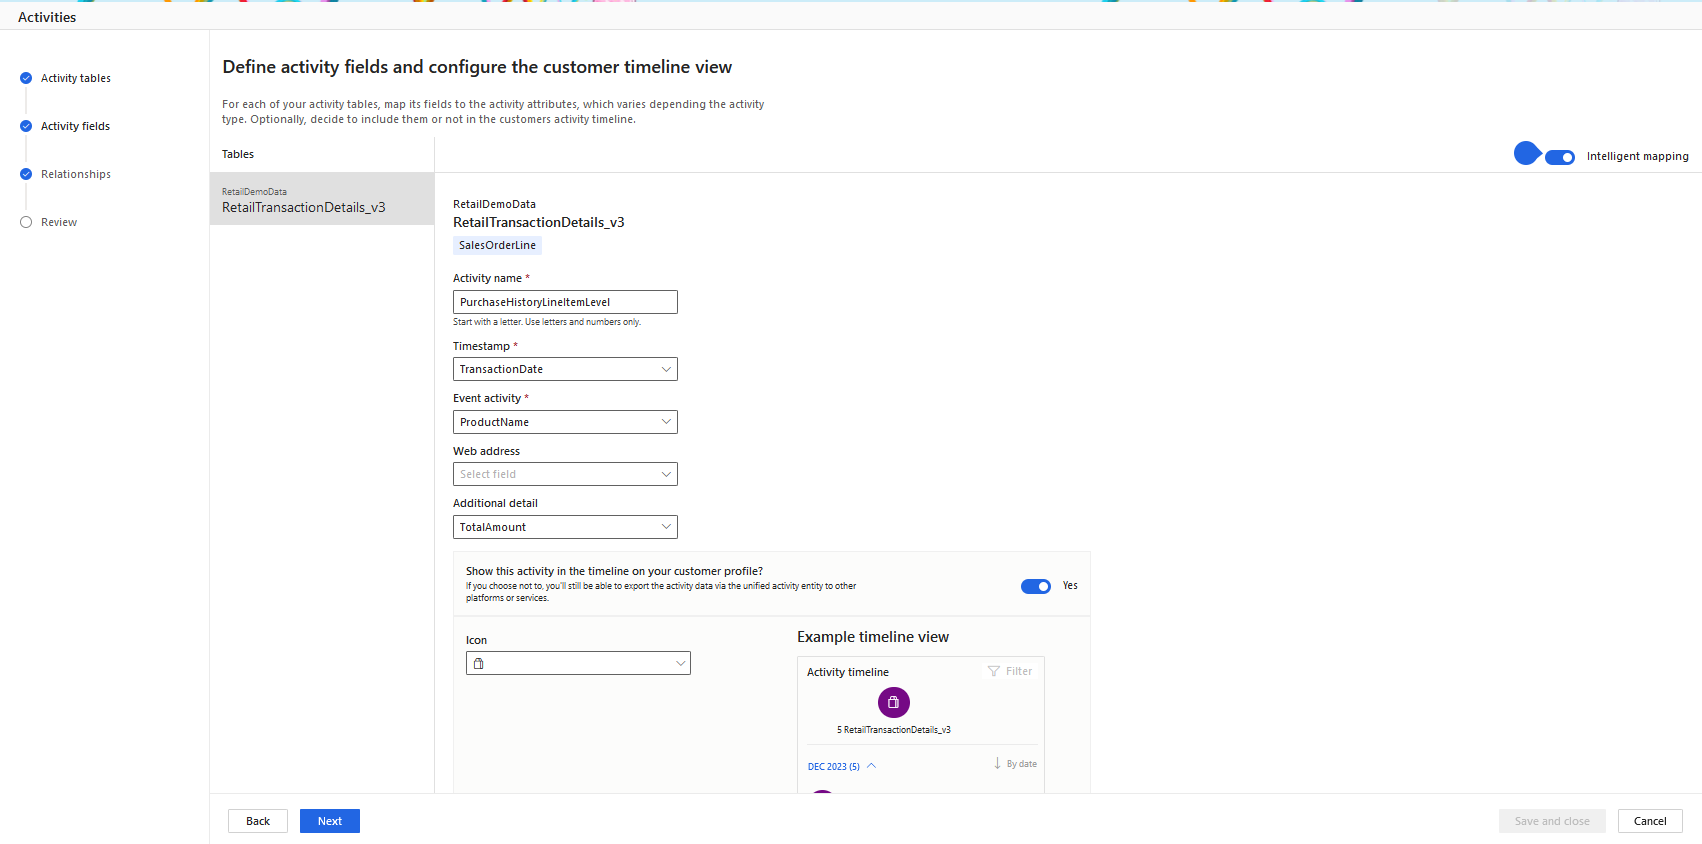
Enter PurchaseHistoryLineItemLevel as activity name.
Enter order date or createdOn attribute in source table as timestamp.
Enter Event activity as product name.
Enter Amount paid for more detail.
Complete the steps by providing details for other mandatory fields and defining required relationships.
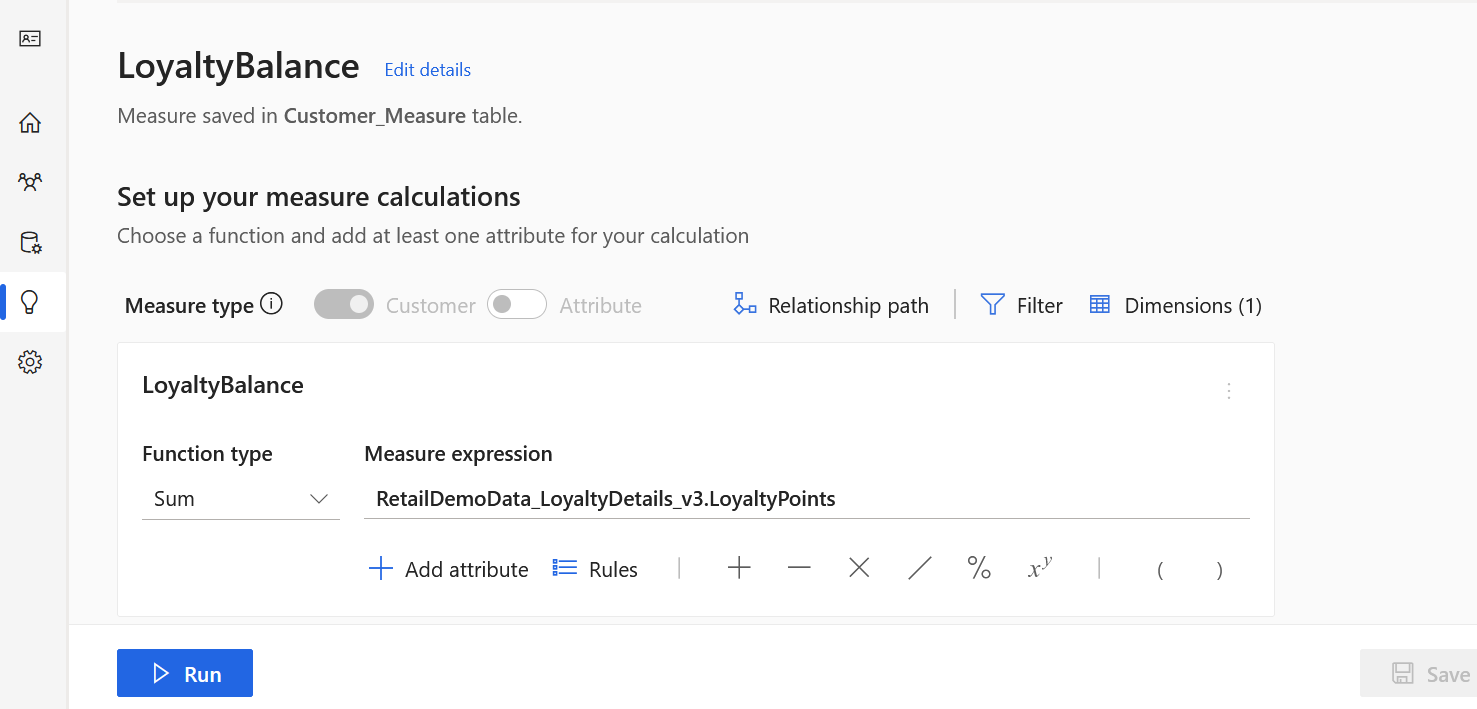
Define measures
Measures are used to display multiple features such as total order value, average spends, and so on, in the customer baseball card.
Open Customer Insights - Data.
Select Insights tab, and then select Measures.
Build Customer attribute measures as given in Create measures with measure builder with name specified as in the given table:
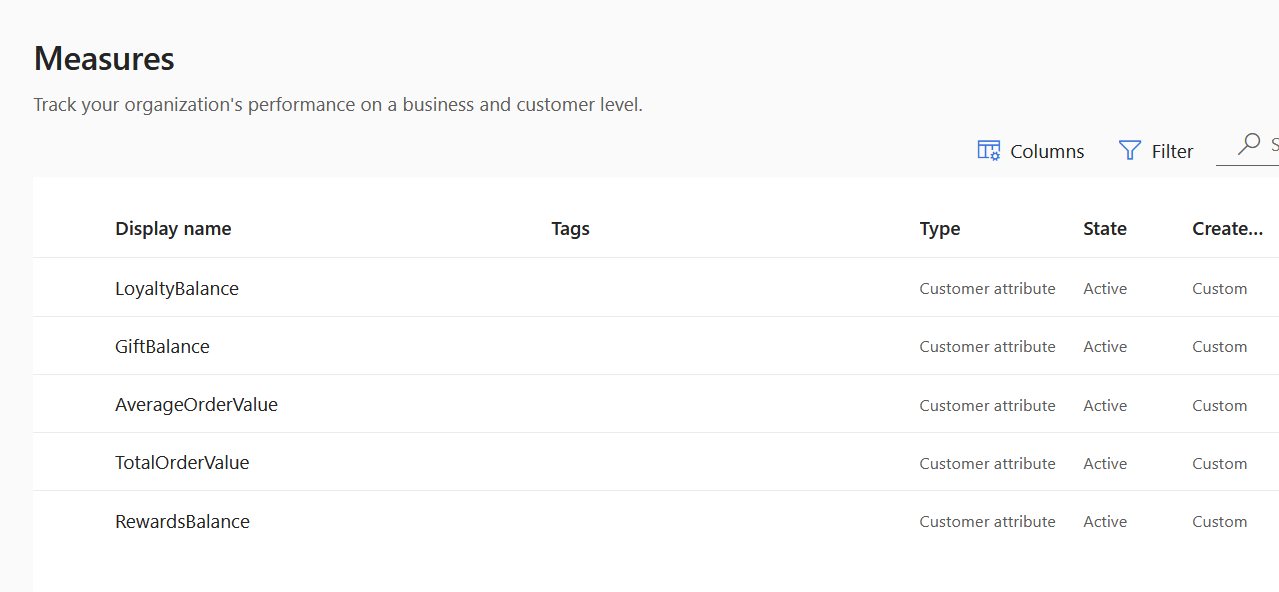
Measure Purpose Display name Display total order value TotalOrderValue Display average order value AverageOrderValue Display gift balance GiftBalance Display rewards RewardsBalance Display loyalty balance LoyaltyBalance Select Run the measures and make sure that type of measure is Customer attribute.
The defined measures are displayed in the Measures tab.
Change the source of data from Dataverse to Dynamics 365 Customer Insights tables
By default, the customer baseball card retrieves data from Dataverse. You need to modify the data source settings and specify Dynamics 365 Customer Insights tables as the new source of data for the customer baseball card feature.
Important
You will need administrator permissions in Power Apps or Store Operations Assist Admin to complete all steps.
Sign in to Power Apps and select Tables tab. Select All tab and search for Dataverse tables with prefix msdynci. You would see 8-10 CI virtual tables listed in the search result.
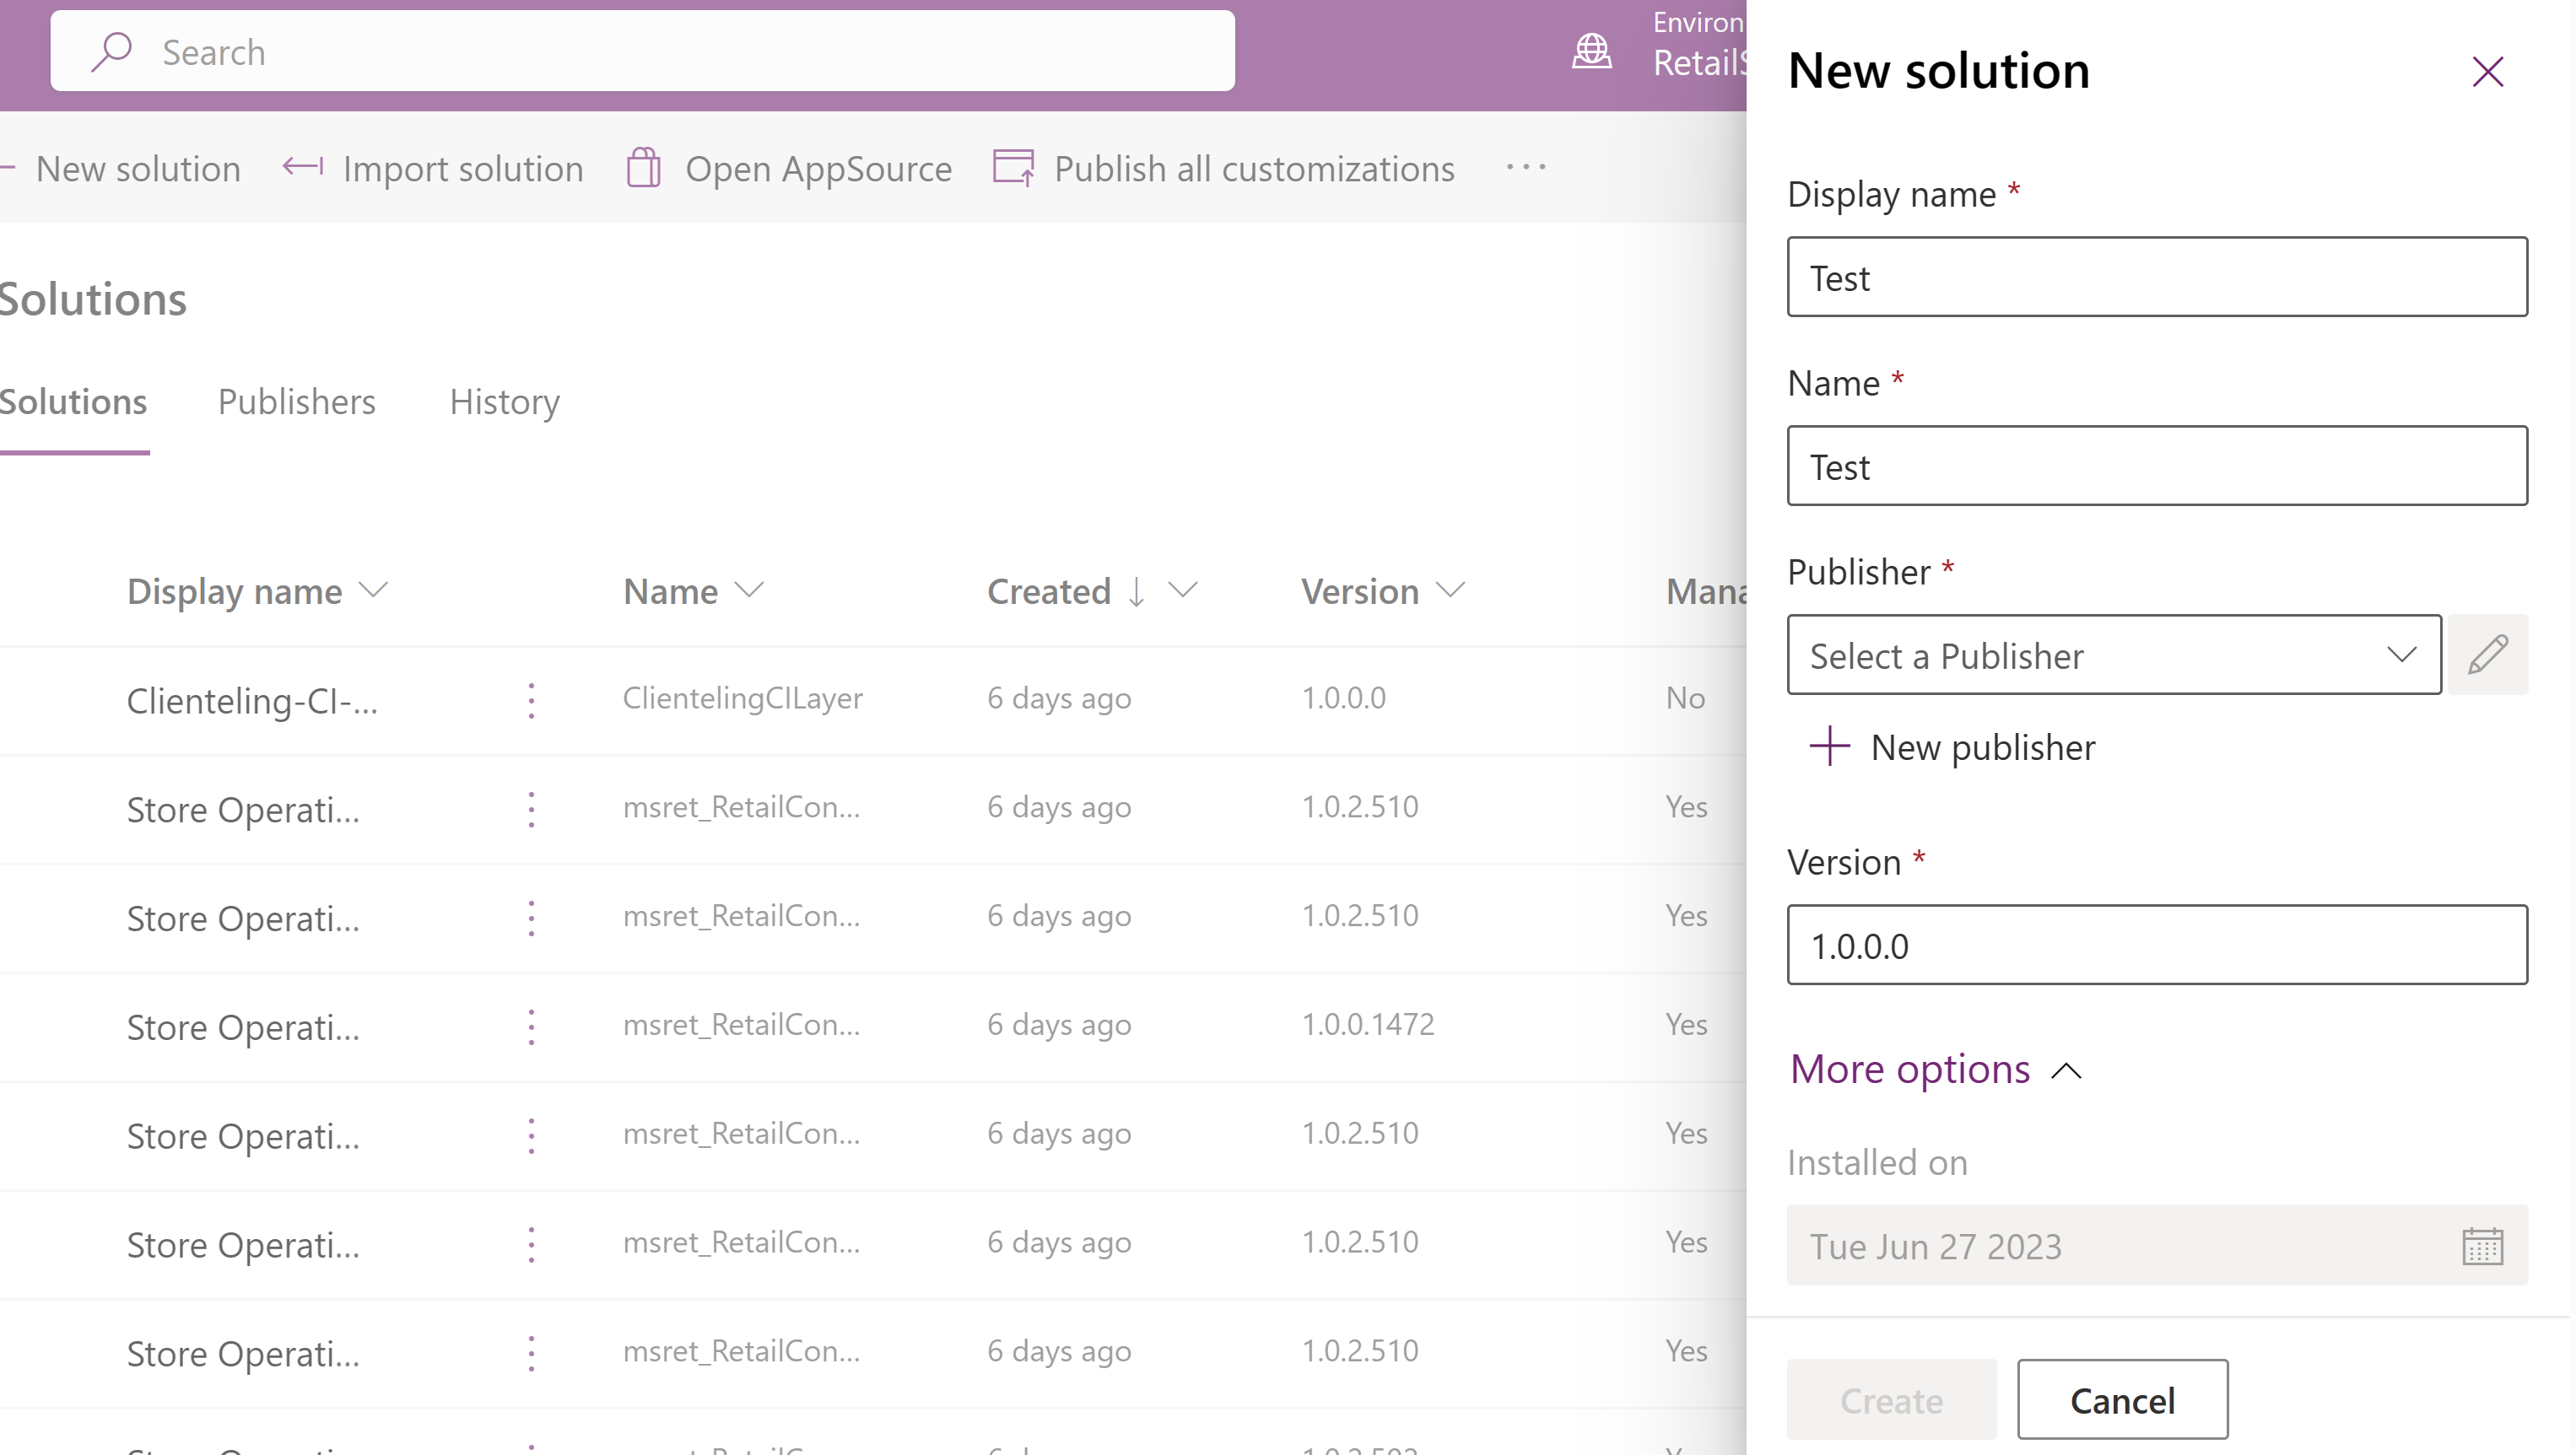
Go to Solutions tab. Select New solution to create a new unmanaged solution. Enter all relevant details and select Create.
Go to the newly created solution and select Add existing > Table. A pop-up would open with the list of tables.
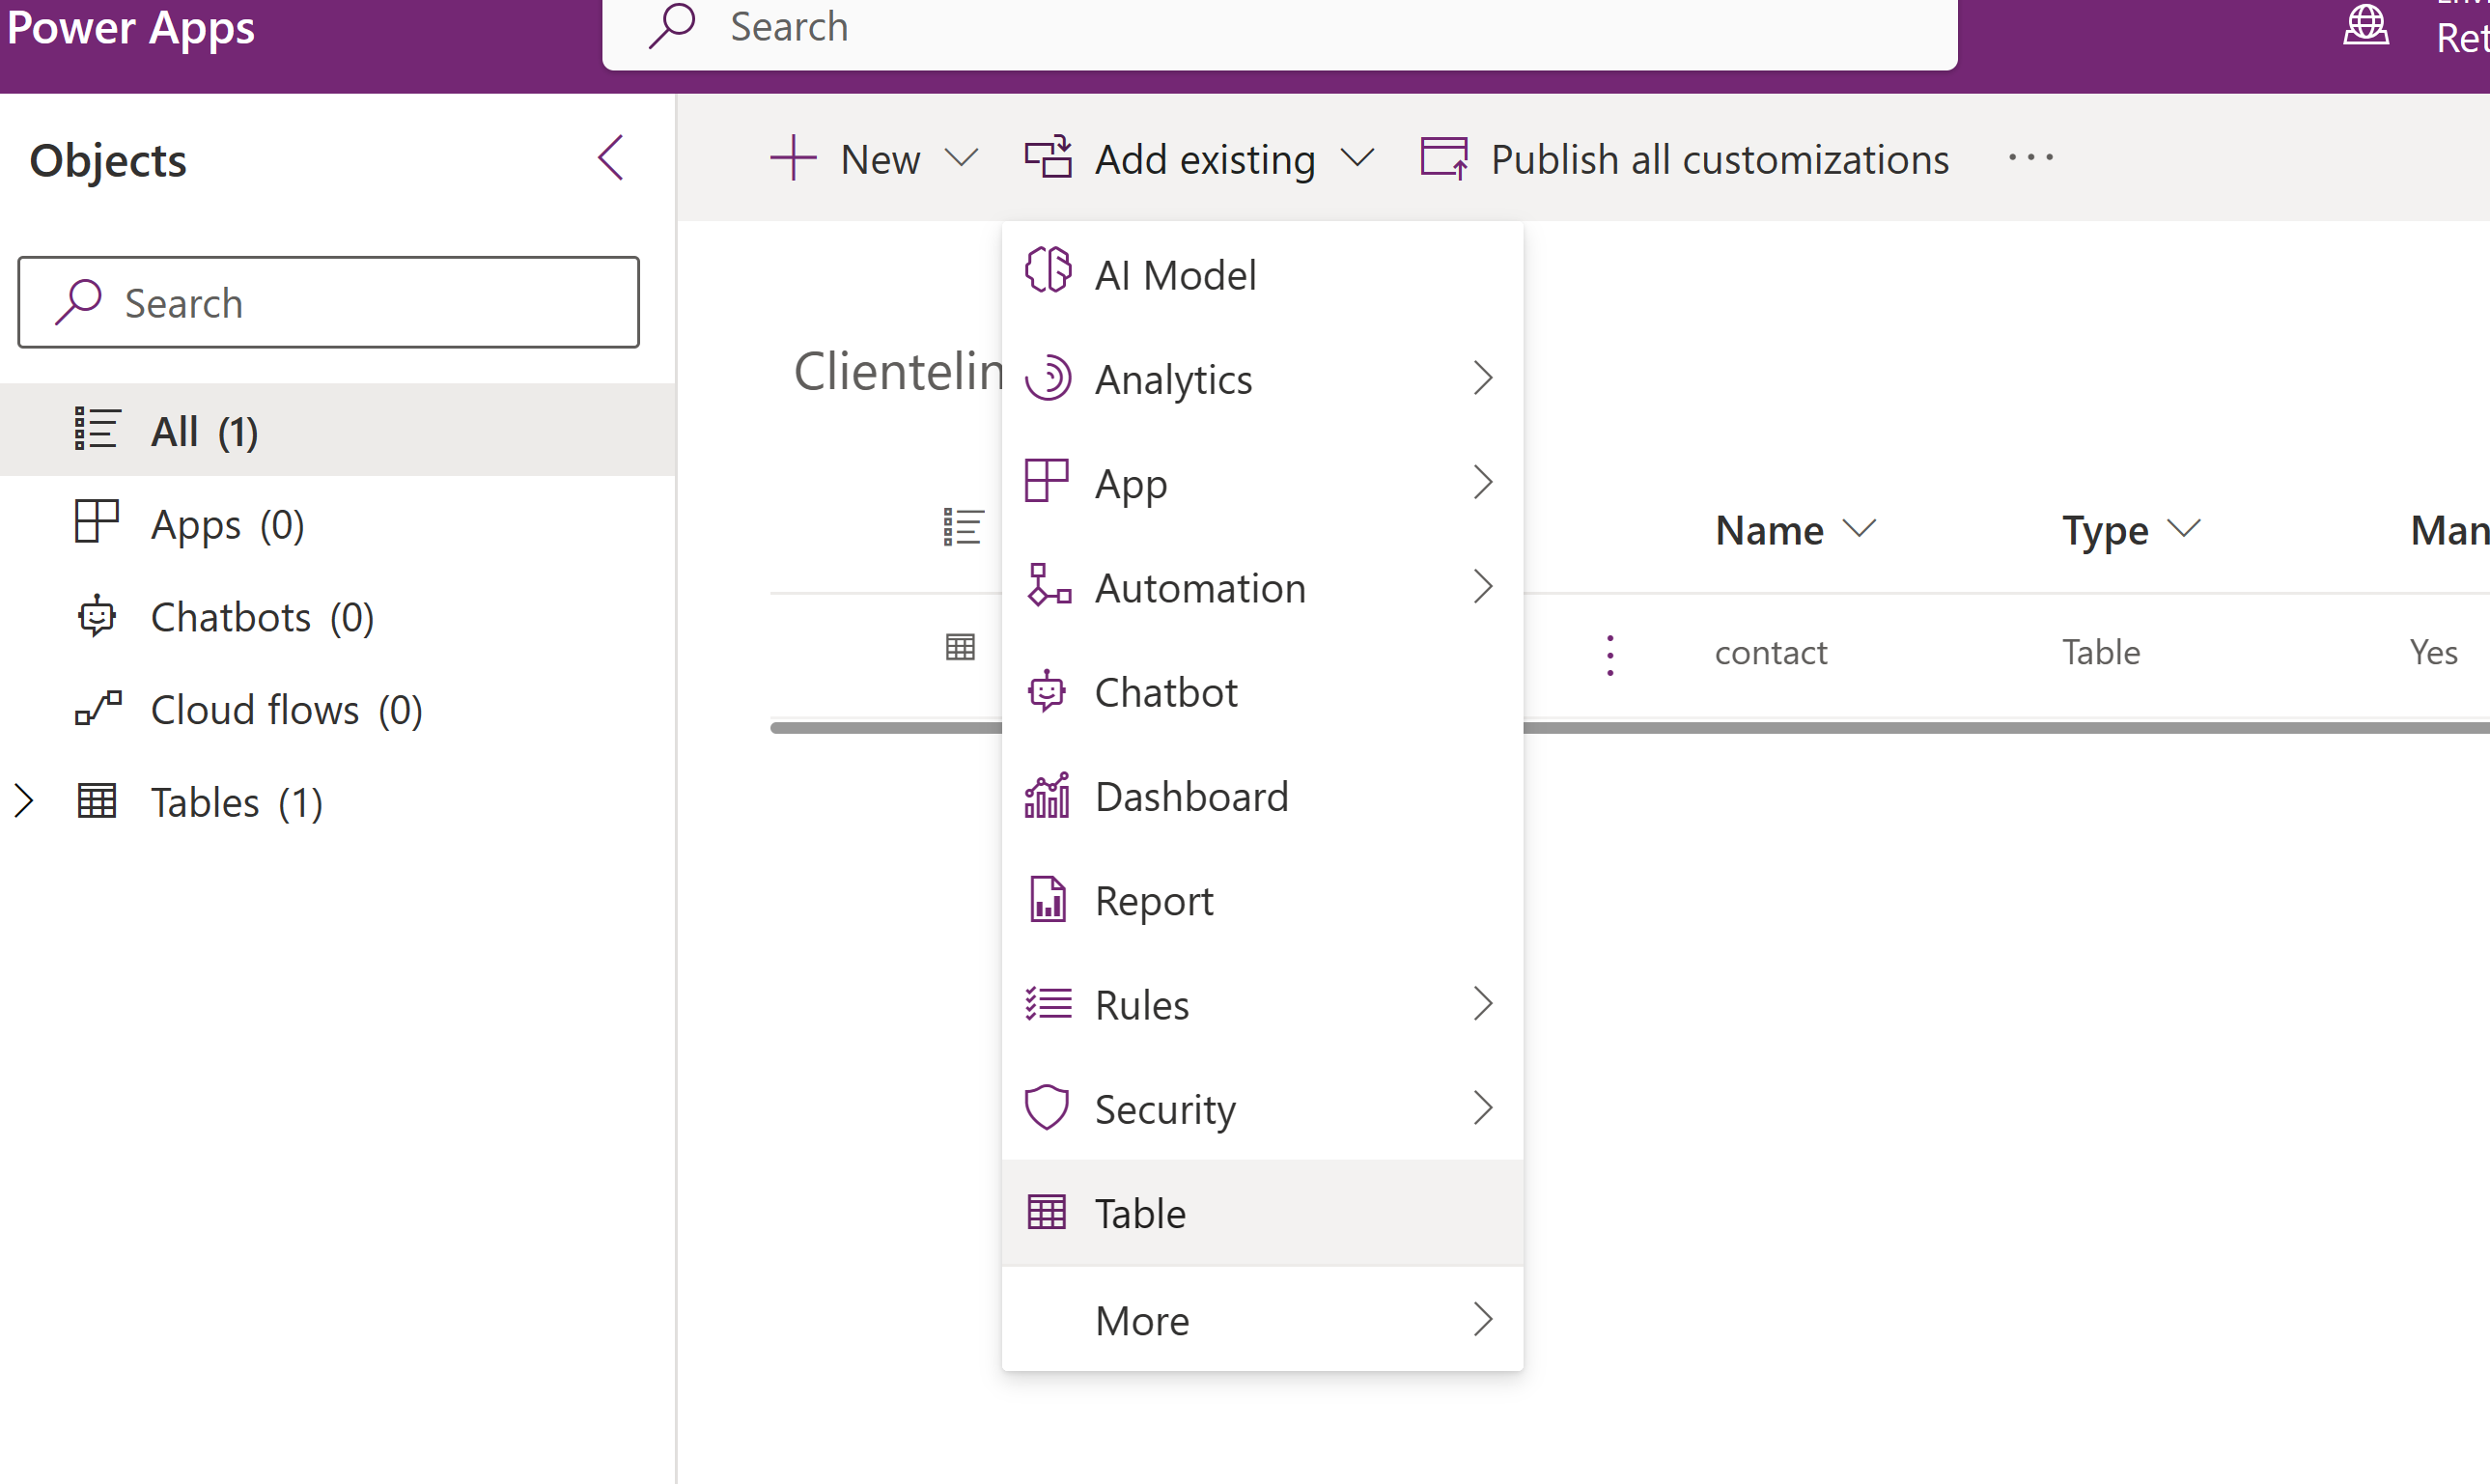
Select Contact table and add it to the solution.
In the solution, select Contact table and then select Forms, which is available in the Data experiences tab.
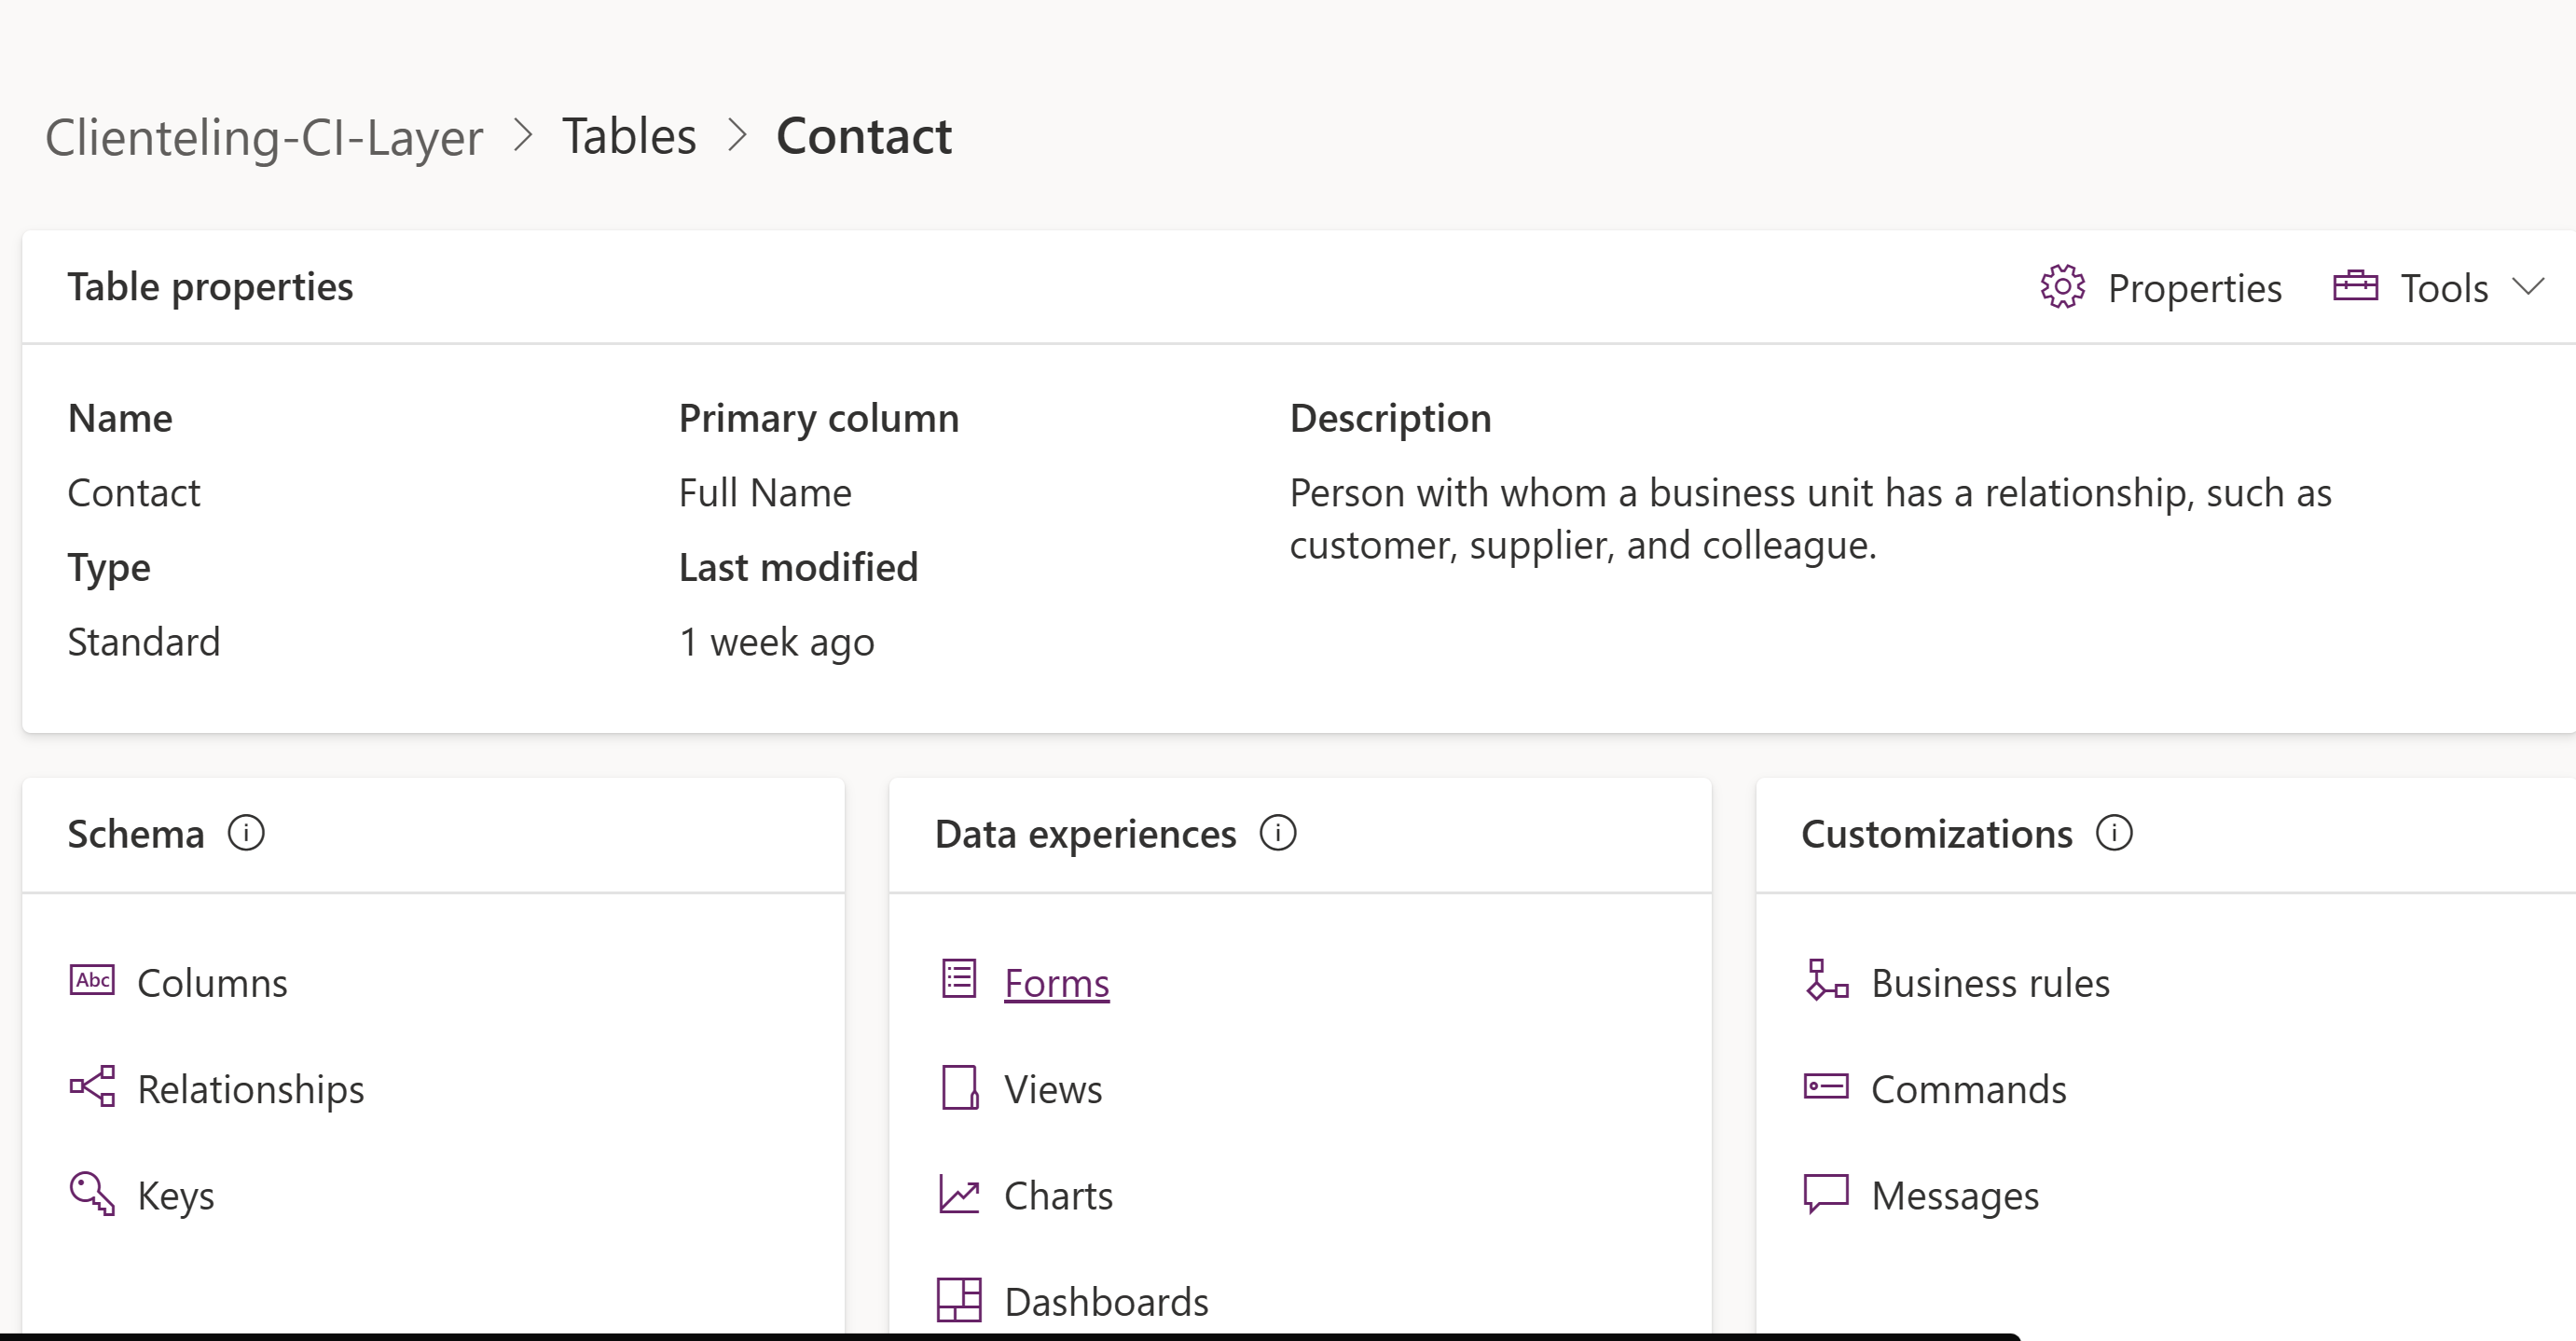
Add the existing Contact UCP form to the solution.
Select and open Contact UCP form and add CI as source for all controls. You can edit the form and change the source to CI for each control/tile.
Select purchasesummarycontrol card and then expand Components section.
Select PurchaseSummaryControl. Fill the details as follows:
- DATA_SOURCE_TYPE: Enter msdynci.
- DATA_SOURCE_NAME: Enter the same source name as used in CI setup (in lower case)
- CUSTOMER_ID_TABLE_NAME: Enter the same table name as used in CI setup (in lower case).
Select Done and then Save & Publish. The purchase summary data in customer baseball card starts obtaining data from CI tables instead of Dataverse.
Repeat the same steps to enable all the cards such as Rewards, Gifts, Profile (Customer Snapshot, Loyalty), and Activity (Purchase History).
Note
CI integration is not currently supported for the Spend by product category and Most purchased brands cards. You can hide these cards for the store associate. Select each tile and then select Hide on phone.
Important
For the Profile card, you'll have to enter the details for the Link_entity_field as provided in CI.
After all the cards are enabled to get data from Customer Insights, select Save and publish.
Test the Customer Insights integration setup
In Clienteling, the first step is customer search. Since virtual tables don't support search functionality, you need searchable customer data in Dataverse table to start the search. Customer search in Store Operations Assist is done on the Contacts table so you need to prefill this table with customer searchable data. Ideally, you need minimal information namely, customer name, email and phone number. While name is mandatory, email & phone number are optional fields.
You need to export searchable information from Customer Table in Customer Insights to Contact table in Dataverse. The ‘customerid’ generated by Dynamics 365 Customer Insights is used as primary identifier in the Dynamics 365 Customer Insights ecosystem. Hence, the unique customer identifier in data source of Dynamics 365 Customer Insights should be the primary key of the Contact table of Dataverse. For the entire flow to work, make sure to export the searchable information along with the ‘customerid’ in the 3P Data source to the Contact table of Dataverse.
To export searchable information to Dataverse, go to the Export tab in Dynamics 365 Customer Insights. You must also configure the frequency and schedule of the export.
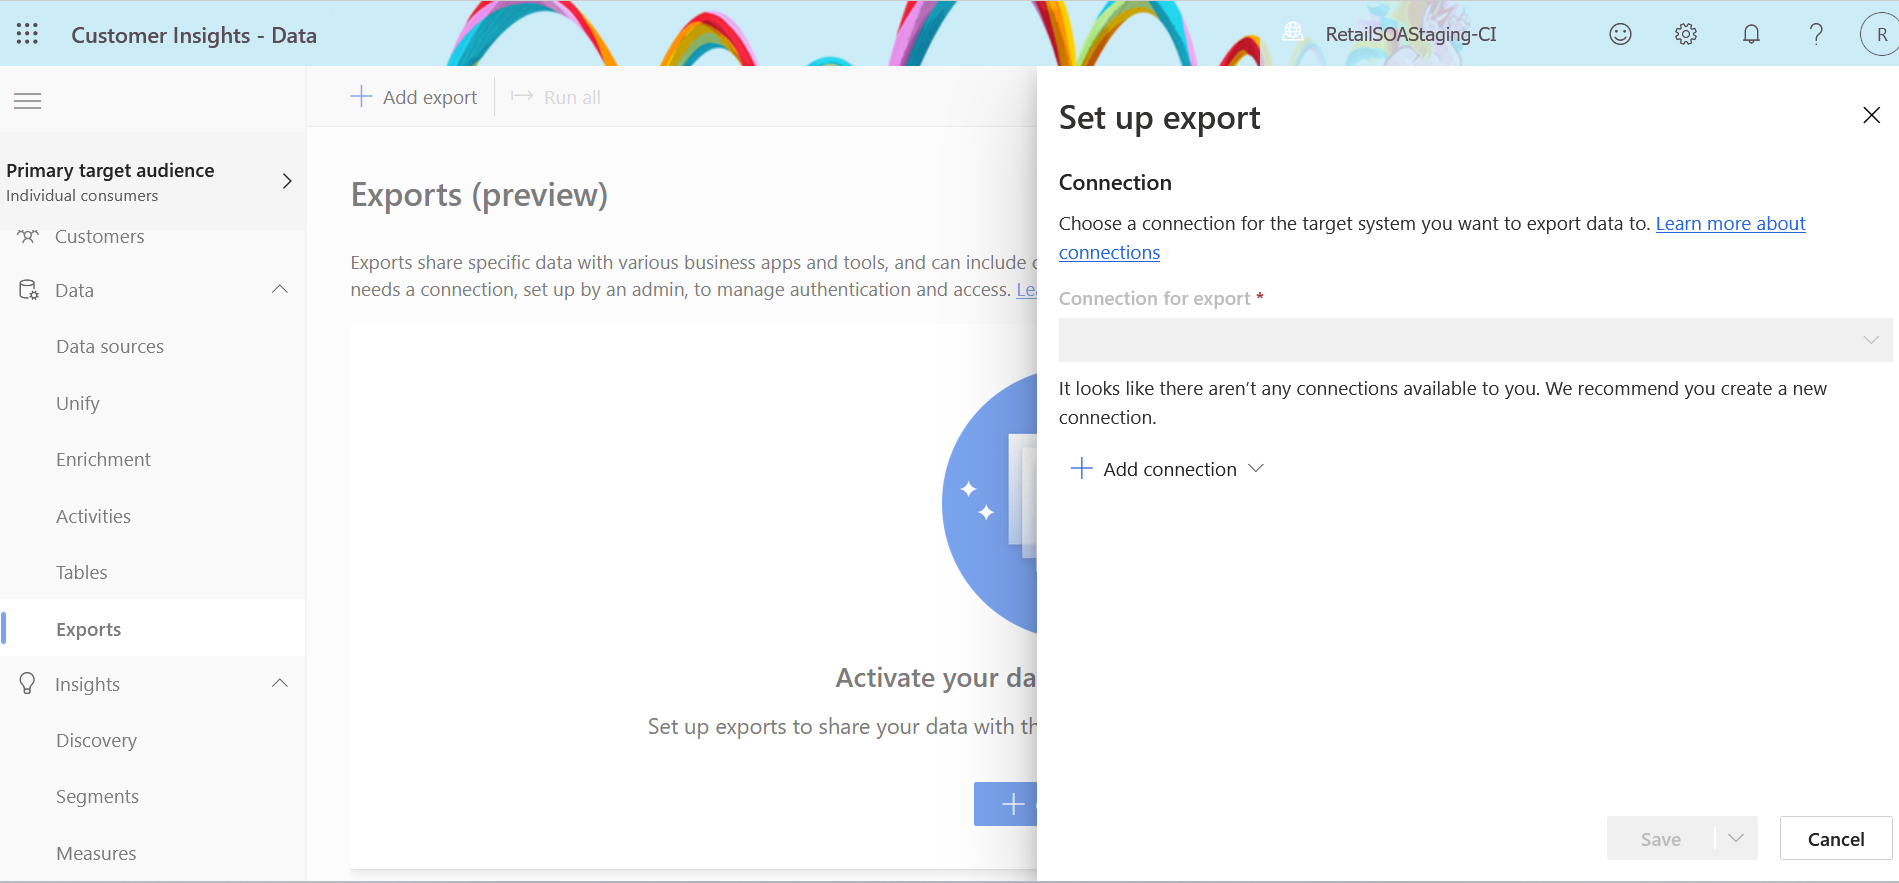
For more information,see Dynamics 365 Customer Insights export settings.