Exercise - Build a bot in Microsoft Copilot Studio with the new AI capabilities
In this exercise, you'll create a copilot by using Copilot in Microsoft Copilot Studio. Additionally, you'll learn how to use the Conversation Booster feature to improve your copilot's responses.
Sign in to Microsoft Copilot Studio.
Make sure that you're in the correct environment and that it was made in the US region.
Select Home from the left navigation menu and then select + Create a copilot.

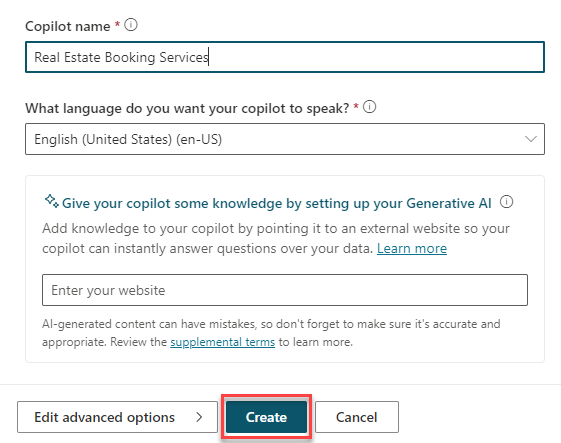
The Create a copilot wizard opens. This wizard helps you set up your copilot by naming it, selecting the language, and also optionally choosing if you want to boost your conversations with generative answers.
Name your copilot as Real Estate Booking Service and then select English.

The Boost your conversations with generative answers option should also display.

On this page, you can fill in your favorite real estate website. As a result, after you create the copilot, if the copilot can't answer a question, it searches the website that you provided for the answer. This approach is a great way of quickly creating a copilot that can answer several questions without you needing to manually create topics.
For example, you provide the
https://powerplatform.microsoft.com/website, as shown in the following image.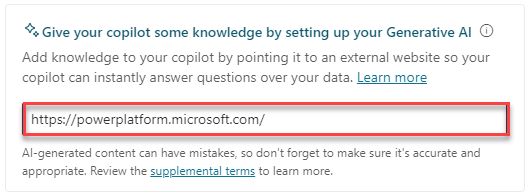
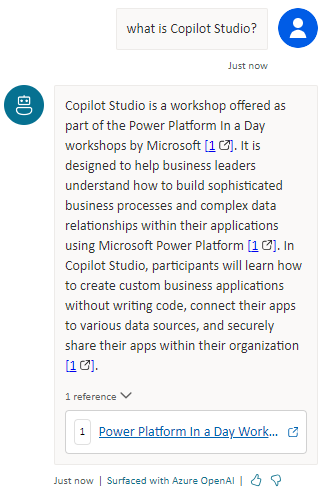
If a user asks, "What is Microsoft Copilot Studio?" the copilot searches the website for the answer and then presents it to the user, as shown in the following image.
Make sure to provide a website that's related to a real estate service. If you don't want to use this feature, you can leave it blank; you won't reference this feature in the rest of the module.
With the copilot name and language set, select Create.
Note
After you select Create, the process of creating the first copilot within a new environment can take up to 15 minutes. Subsequent copilots are created much faster.
With your copilot created, select Topics from the left navigation menu and then select the Create dropdown menu. Select go to Topic > Create from description with Copilot.

Note
If the Create with Copilot option doesn't display, you might need to enable Intelligent authoring support:
Select the Settings icon in the upper menu and then select General settings.
Set the Intelligent authoring support with Copilot toggle to On.
A new window appears asking you to Name your topic and provide a description in the Create a topic to... space.
In the Name your topic field, enter the following text:
Book a Real Estate ShowingIn the Create a topic to... field, enter the following text:
collect a user's full name, email, address of the property, and date and time of the showingSelect Create.

A new topic displays with the generated trigger phrases.

Note
Remember, your generated content might appear differently than what's shown in this lab.
Multiple question nodes, entity selection, and variable naming should also display.
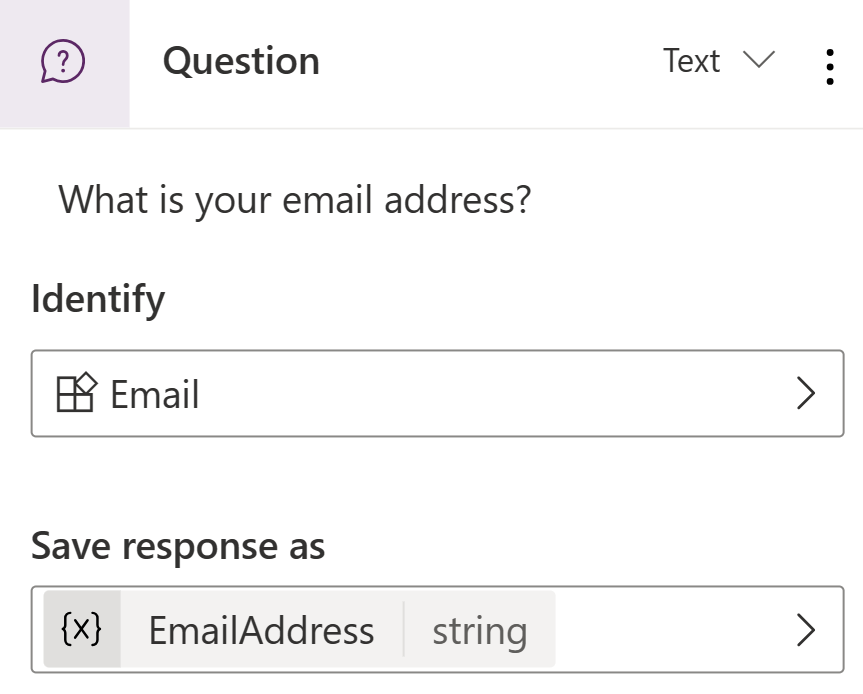
Look for and then select the What is your email address? question node.

Select the Edit with Copilot icon in the upper part of the authoring canvas.

In the Edit with Copilot panel, in the What do you want to do? field, enter the following text:
update the message to say thank you to the Name variable from the previous node and then proceed to ask the questionSelect Update.

The message should be updated to include the Name variable from the message node before it.

In addition to adding new nodes, you can use Copilot to update existing ones.
Make sure that no node is selected by clicking in the empty space around the nodes. In the Edit with Copilot panel, in the What do you want to do? field, enter the following text:
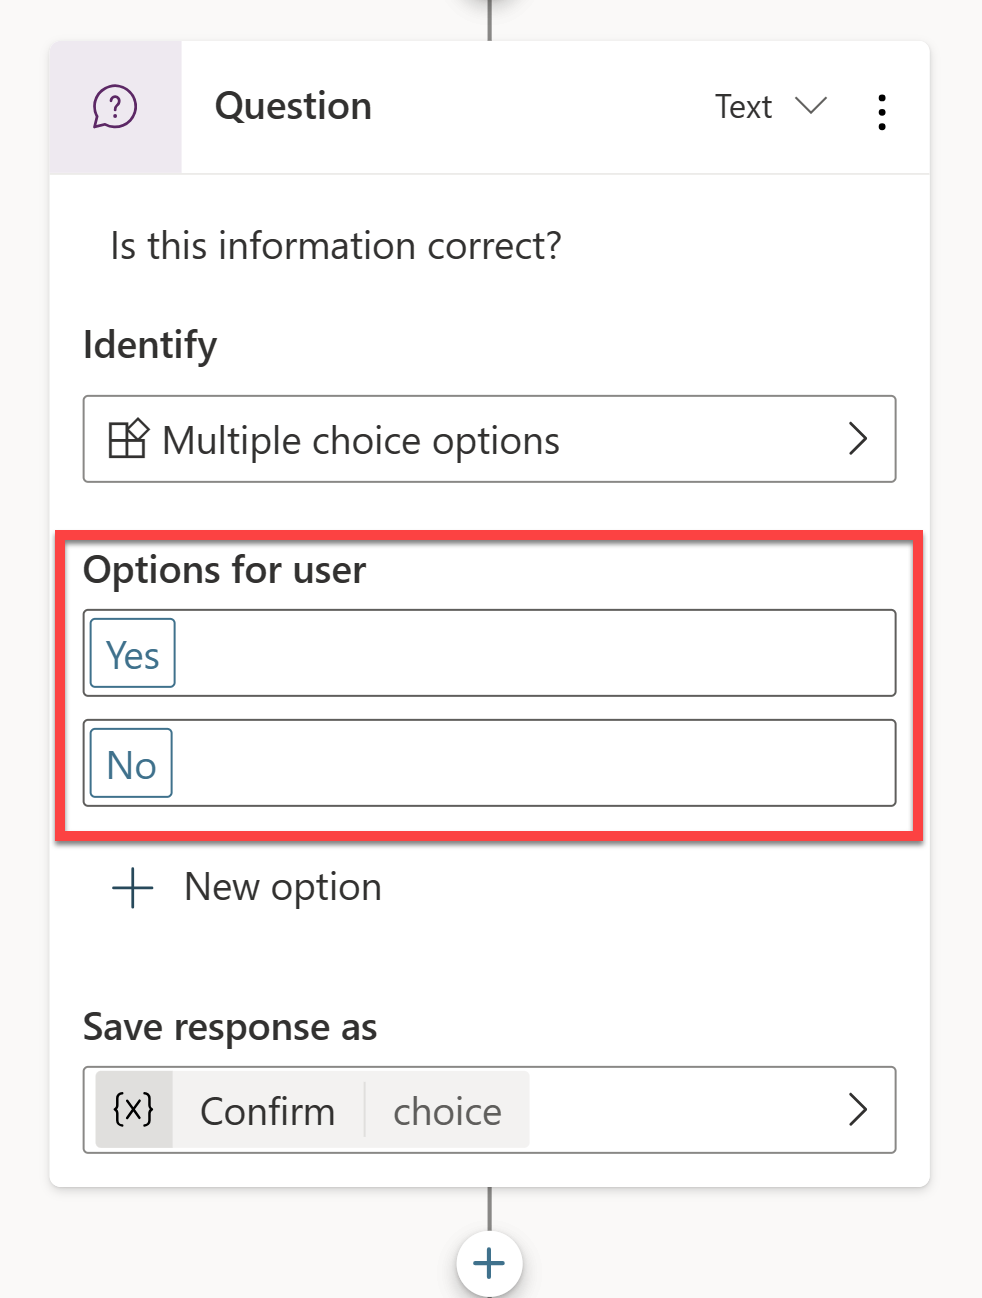
summarize the information collected in an adaptive cardSelect Update.
A message node with an Adaptive Card is added to the end of the topic.

Select the Adaptive Card. The Adaptive Card properties should appear on the right of the screen.

Your Adaptive Card formula should look similar to the one above. If it doesn't, then you can copy and paste in the formula below:
{
type: "AdaptiveCard",
   body:
   [
       {
           type: "TextBlock",
           size: "Medium",
           weight: "Bolder",
           text: "Summary"
       },
       {
           type: "FactSet",
           facts:
           [
               {
                   title: "Full Name",
                   value: Text(Topic.FullName)
               },
               {
                   title: "Email Address",
                   value: Text(Topic.Email)
               },
               {
                   title: "Property Address",
                   value: Text(Topic.PropertyAddress)
               },
               {
                   title: "Showing Date and Time",
                   value: Text(Topic.ShowingDateTime)
               }
           ]
       },

       {
           type: "TextBlock",
           text: "Thank you for providing the information."
       }
   ]
}
Opening the Adaptive Card properties closes the Edit with Copilot panel; therefore, you need to select the icon to reopen it. In the What do you want to do? field, enter the following text:
add a multiple choice question to confirm if the user's information is correct with the option to select either "Yes" or "No"Select Update.
A new question node is added to the end of the topic with options for the user to select.
In the upper-left side of the authoring canvas, rename the topic to Book Real Estate Showing Topic.
Select Save to save your changes.
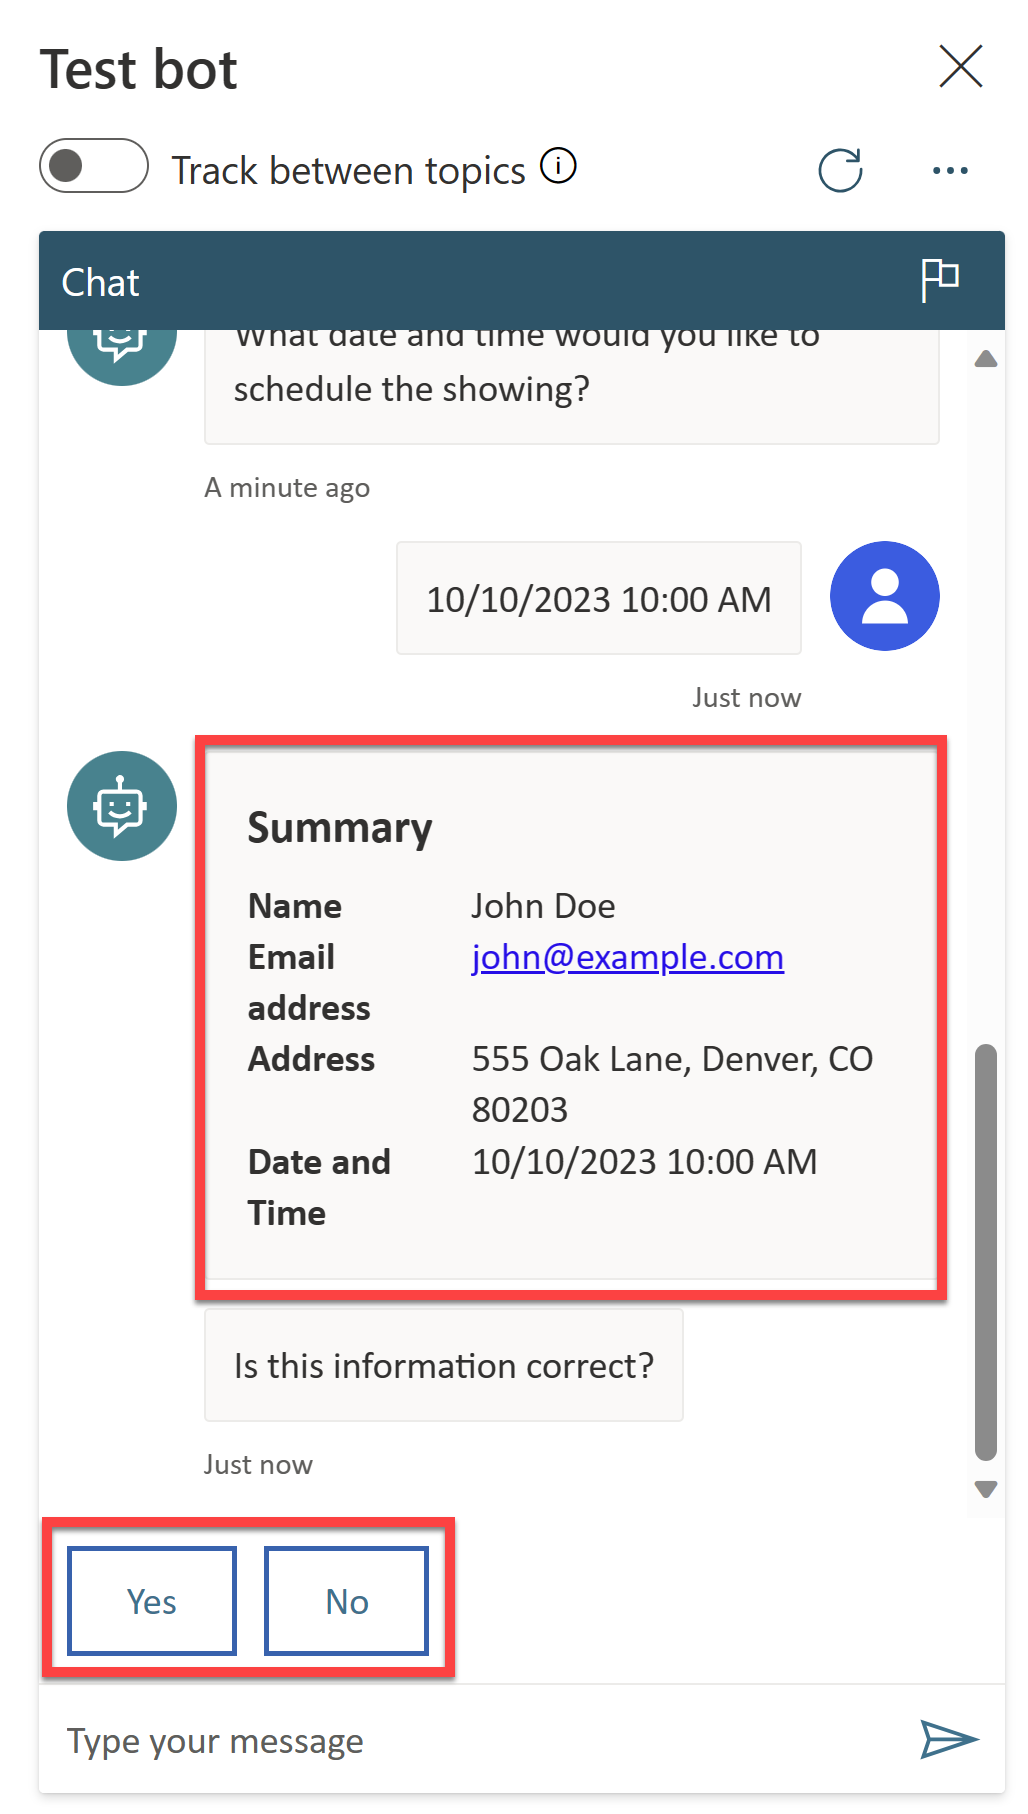
Select the Test your copilot button in the lower left of the screen to open the testing panel.
When the Conversation Start message appears, your copilot will start a conversation. In response, enter a trigger phrase for the topic that you've created:
I want to book a real estate showingThe copilot responds with the "What is your full name?" question, as shown in the following image.

Enter the rest of the information:
Full name: <Your name>
Email address: <Your email address>
Address: 555 Oak Lane, Denver, CO 80203
Date and Time: 10/10/2023 10:00 AM
After you enter the information, the Adaptive Card displays the information that you entered, a question asking if the information is correct, and options to select Yes or No, as shown in the following image.


After selecting an option, you can further develop the topic to save the data in Dataverse through a Microsoft Power Automate flow or by sending an email to the user with the information that they entered. However, these actions are outside the scope of this module.