Exercise - Deploy and export an Azure Logic Apps workflow using an ARM template
In the preceding exercise, we deployed a logic app using a basic Azure Resource Manager template. This template was inflexible in that everything was hardcoded. For example, to change the workflow name or the app's deployment location, you'd have to edit the template. In scenarios where you have multiple deployments in a scripted environment, manually editing the template becomes cumbersome. A better approach is to supply values as parameters to customize resource deployment.
Update our template to use template parameters
Copy the basic template that we used in the preceding exercise with the following
cpcommand:cp basic-template.json template-with-params.jsonOpen the template in the built-in editor with the following
codecommand:code template-with-params.jsonThe first step is add parameters so that we can easily customize the app's name and location where the app runs.
Replace the
parameterssection in the template with the following code snippet, which adds two new parameters,logicAppNameandlocation:"parameters": { "logicAppName": { "type": "string", "metadata": { "description": "The name of the logic app to create." } }, "location": { "type": "string", "defaultValue": "[resourceGroup().location]", "metadata": { "description": "Location for all resources." } } },Both parameters are strings. We don't provide a default value for the
logicAppNameparameter, which means you need to supply one at deployment time. In contrast, thelocationis optional as we supply a default value.The default value for the
locationparameter is the location for the resource group into which the app is deployed. We get that value by referencing the location property from the resource group returned by theresourceGroup()template function. Expressions start and end with left and right brackets ([ ]) respectively. The expression's value is evaluated when the template finishes deployment. An expression can return a string, integer, boolean, array, or object. In a template, you can define 256 parameters as the maximum.Now that we defined two new parameters, we'll use them in the template by replacing hardcoded values with references to the new parameters.
Replace the
nameandlocationfields in the resources section of the template to use our new parameters as shown in the following snippet:"name": "[parameters('logicAppName')]", "location": "[parameters('location')]",Replace the
outputssection at the bottom of the template with the following code. We're updating the value of thelogicAppUrltemplate variable to also use thelogicAppNameparameter as shown in the following snippet:"outputs": { "logicAppUrl": { "type": "string", "value": "[listCallbackURL(concat(resourceId('Microsoft.Logic/workflows/', parameters('logicAppName')), '/triggers/manual'), '2017-07-01').value]" } }Press Ctrl + S to save all changes to template-with-params.json.
Deploy logic app resource with the parameterized template
There are two ways to supply parameters to our template during deployment using the--parameters flag in the az deployment group create command. We can pass in a URI of a remote parameters file, or the name of a local file. Let's use a local file.
Create a parameters JSON file
Create a new file called
params.jsonin the built-in code editor with the following command:code params.jsonPaste the following JSON into params.json, and press Ctrl + S to save your changes.
{
    "logicAppName": {
        "value": "myLogicApp"
    }
}
Validate our template
From the Cloud Shell, run
az deployment group validateto validate the template:az deployment group validate \ --resource-group "<rgn>[sandbox resource group name]</rgn>" \ --template-file template-with-params.json \ --parameters @params.jsonThe
--template-fileargument points to the local template. The template's filename is template-with-params.json.You'll see a large JSON block as output, which tells you that the template passed validation.
Azure Resource Manager fills in the template parameters and checks whether the template would successfully run in your subscription.
If validation failed, you'd see a detailed description of the failure in the output.
Deploy template with parameters from a local file
In the Cloud Shell, run the following command to deploy the logic app resource with the app's name taken from the params.json file. In the params.json file, the
locationparameter isn't set, so the default is used.az deployment group create \ --resource-group "<rgn>[sandbox resource group name]</rgn>" \ --template-file template-with-params.json \ --parameters @params.jsonDeployment will take a few moments, and you can watch the progress in the Cloud Shell command line. When deployment is finished, you should see
provisioningStatein the JSON result with the valueSucceeded.To see the app in action, find the logicAppUrl value in the JSON result. Select the URL or copy and paste it into a new browser window. The page will display the Hello Azure Logic Apps Template! message.
Deploy template with parameters from the command line
Instead of editing a parameters file every time we want to deploy from the command line, we can supply the parameters in a JSON string on the command line.
Run the following command in the Cloud Shell to deploy the logic app resource with the name of the app and its location fed in as a JSON string on the command line:
az deployment group create \
--resource-group "<rgn>[sandbox resource group name]</rgn>" \
--template-file template-with-params.json \
--parameters '{ "logicAppName": {"value":"MyLogicApp2"}, "location": {"value":"East US"}}'
Deployment will take a few moments, and you can watch the progress in the Cloud Shell command line. When deployment is finished, you should see
provisioningStatein the JSON result with the valueSucceeded.To see the app in action, find the logicAppUrl value in the JSON result. Select the URL and paste it into a new browser window. The page will display the Hello Azure Logic Apps Template! message.
Run the following command to list all Azure Logic Apps workflows we've deployed so far:
az resource list \
--resource-group "<rgn>[sandbox resource group name]</rgn>" \
--resource-type Microsoft.Logic/workflows \
--query [*].[name,location] --output tsv
This command lists the three Azure Logic Apps workflows we've deployed so far, all from a template.
Update the app action in the Azure Resource Manager template
Let's now turn our attention to making our app do a little more than just sending back a static message to us. We'll keep the app as an HTTP-triggered workflow, which will still return an HTTP response. Let's pass in some values with the request, and have the app do a calculation for us. We'll do a basic area calculation. Assuming the inputs we pass in are height and width of a rectangle, we'll return the area. We'll then deploy the new app and watch it run.
Open template-with-params.json in the built-in editor by running the following command in the Cloud Shell:
code template-with-params.jsonAdd the
relativePathfield to the inputs section of our HTTP request trigger as shown in the following snippet:"inputs": { "method": "GET", "relativePath": "{width}/{height}", "schema": {} }The
relativePathentry specifies the parameters that we want our HTTP endpoint URL to accept. In this case, we define two parameters, width and height. We'll use these parameter values to calculate an area and return the result.Update the body of the Response action with the following line:
"body": "Response from @{workflow().name} Total area = @{mul( int(triggerOutputs()['relativePathParameters']['height']) , int(triggerOutputs()['relativePathParameters']['width']) )}",Our updated response performs the following tasks:
Prints the name of the logic app resource. The response calls the
workflow()function to return information about the workflow. From that result, we reference the name property.Returns the product of the integer equivalents for the height and width string values from the URL parameters. This task uses the
mul()function andint()conversion function.
Press Ctrl + S to save all changes to template-with-params.json.
Validate the template after these changes with the
az deployment group validatecommand in the Cloud Shell. In this example, we set the app's name to CalculateArea by using an inline parameter.az deployment group validate \ --resource-group "<rgn>[sandbox resource group name]</rgn>" \ --template-file template-with-params.json \ --parameters '{ "logicAppName": {"value":"CalculateArea"}}'Run the following command to deploy our changes to a logic app named CalculateArea. We'll omit a value for the
locationparameter and just use the default.az deployment group create \ --resource-group "<rgn>[sandbox resource group name]</rgn>" \ --template-file template-with-params.json \ --parameters '{ "logicAppName": {"value":"CalculateArea"}}'Deployment will take a few moments, but you can watch the progress in the Cloud Shell command line. When deployment is finished, you should see
provisioningStatein the JSON result with the valueSucceeded.To see the app in action, find the logicAppUrl value in the JSON result. Select the URL and paste it into a new browser window.
Update the URL in the browser, changing
/triggers/manual/paths/invoke?apito/triggers/manual/paths/invoke/{width}/{height}?api, where {width} and {height} are integer values for the width and height of the area we want to calculate. For example,/triggers/manual/paths/invoke/6/7?api. The response from the app will list the name of the workflow and the calculated area, as shown in the following screenshot: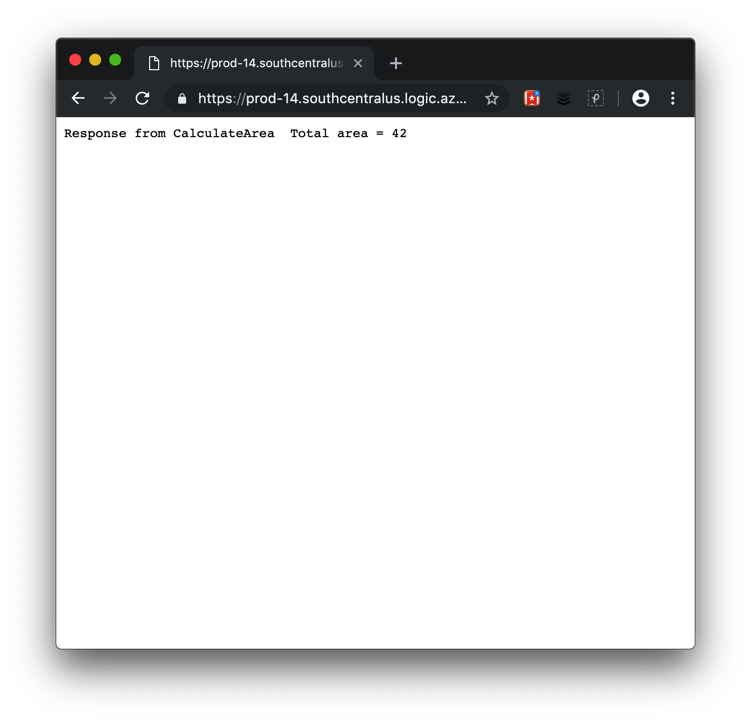
Run the following command to list all Azure Logic Apps workflows we've deployed so far:
az resource list \
--resource-group "<rgn>[sandbox resource group name]</rgn>" \
--resource-type Microsoft.Logic/workflows \
--query [*].[name,location] --output tsv
In this exercise, we introduced more flexibility to our template with parameters. We supplied those parameters on the command line and using a local file. We also updated the action that our simple workflow executes, by directly changing the body of the response we send back.
You can download the parameters and template files from GitHub with the following curl commands in the Cloud Shell.
curl https://github.com/MicrosoftDocs/mslearn-logic-apps-and-arm-templates/blob/master/calculate-area/params.json > params-final.json
curl https://github.com/MicrosoftDocs/mslearn-logic-apps-and-arm-templates/blob/master/calculate-area/template.json > template-with-params-final.json