Notitie
Voor toegang tot deze pagina is autorisatie vereist. U kunt proberen u aan te melden of mappen te wijzigen.
Voor toegang tot deze pagina is autorisatie vereist. U kunt proberen om mappen te wijzigen.
Van toepassing op:✅ Fabric Data Engineering and Data Science
Meer informatie over het verzenden van Spark-batchtaken met behulp van de Livy-API voor Fabric Data Engineering. De Livy-API biedt momenteel geen ondersteuning voor Azure Service Principal (SPN).
Vereisten
Fabric Premium of Trial-capaciteit met een Lakehouse.
Een externe client, zoals Visual Studio Code met Jupyter Notebooks, PySpark en de Microsoft Authentication Library (MSAL) voor Python.
Er is een Microsoft Entra-app-token vereist voor toegang tot de Fabric REST API. Register van een toepassing met de Microsoft identity platform.
Bepaalde gegevens in uw lakehouse, in dit voorbeeld wordt het NYC Taxi & Limousine Commission green_tripdata_2022_08 parquet-bestand in het lakehouse geladen.
De Livy-API definieert een uniform eindpunt voor bewerkingen. Vervang de tijdelijke aanduidingen {Entra_TenantID}, {Entra_ClientID}, {Fabric_WorkspaceID} en {Fabric_LakehouseID} door de juiste waarden wanneer u de voorbeelden in dit artikel volgt.
Visual Studio Code configureren voor uw Livy API Batch
Selecteer Lakehouse Settings in uw Fabric Lakehouse.

Navigeer naar de Livy endpoint-sectie.
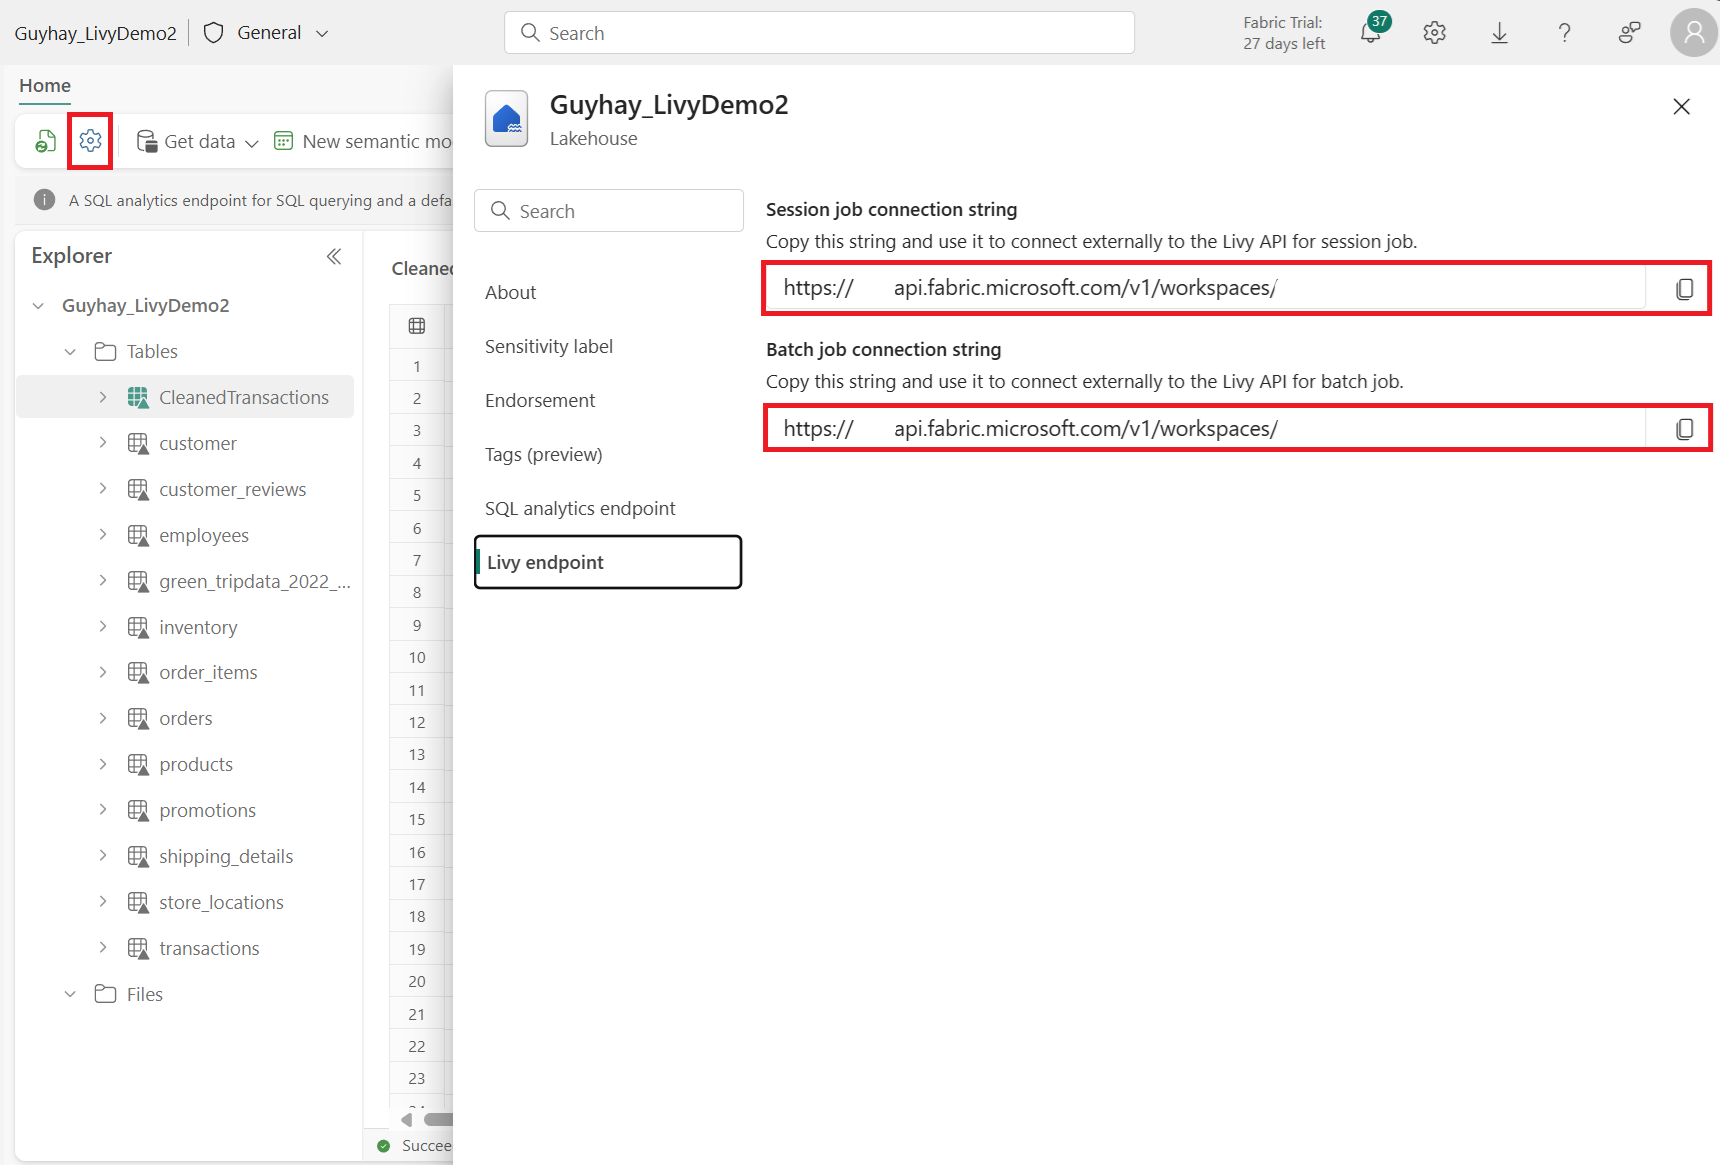
Kopieer de Batch-taak verbindingsreeks (tweede rood vak in de afbeelding) naar uw code.
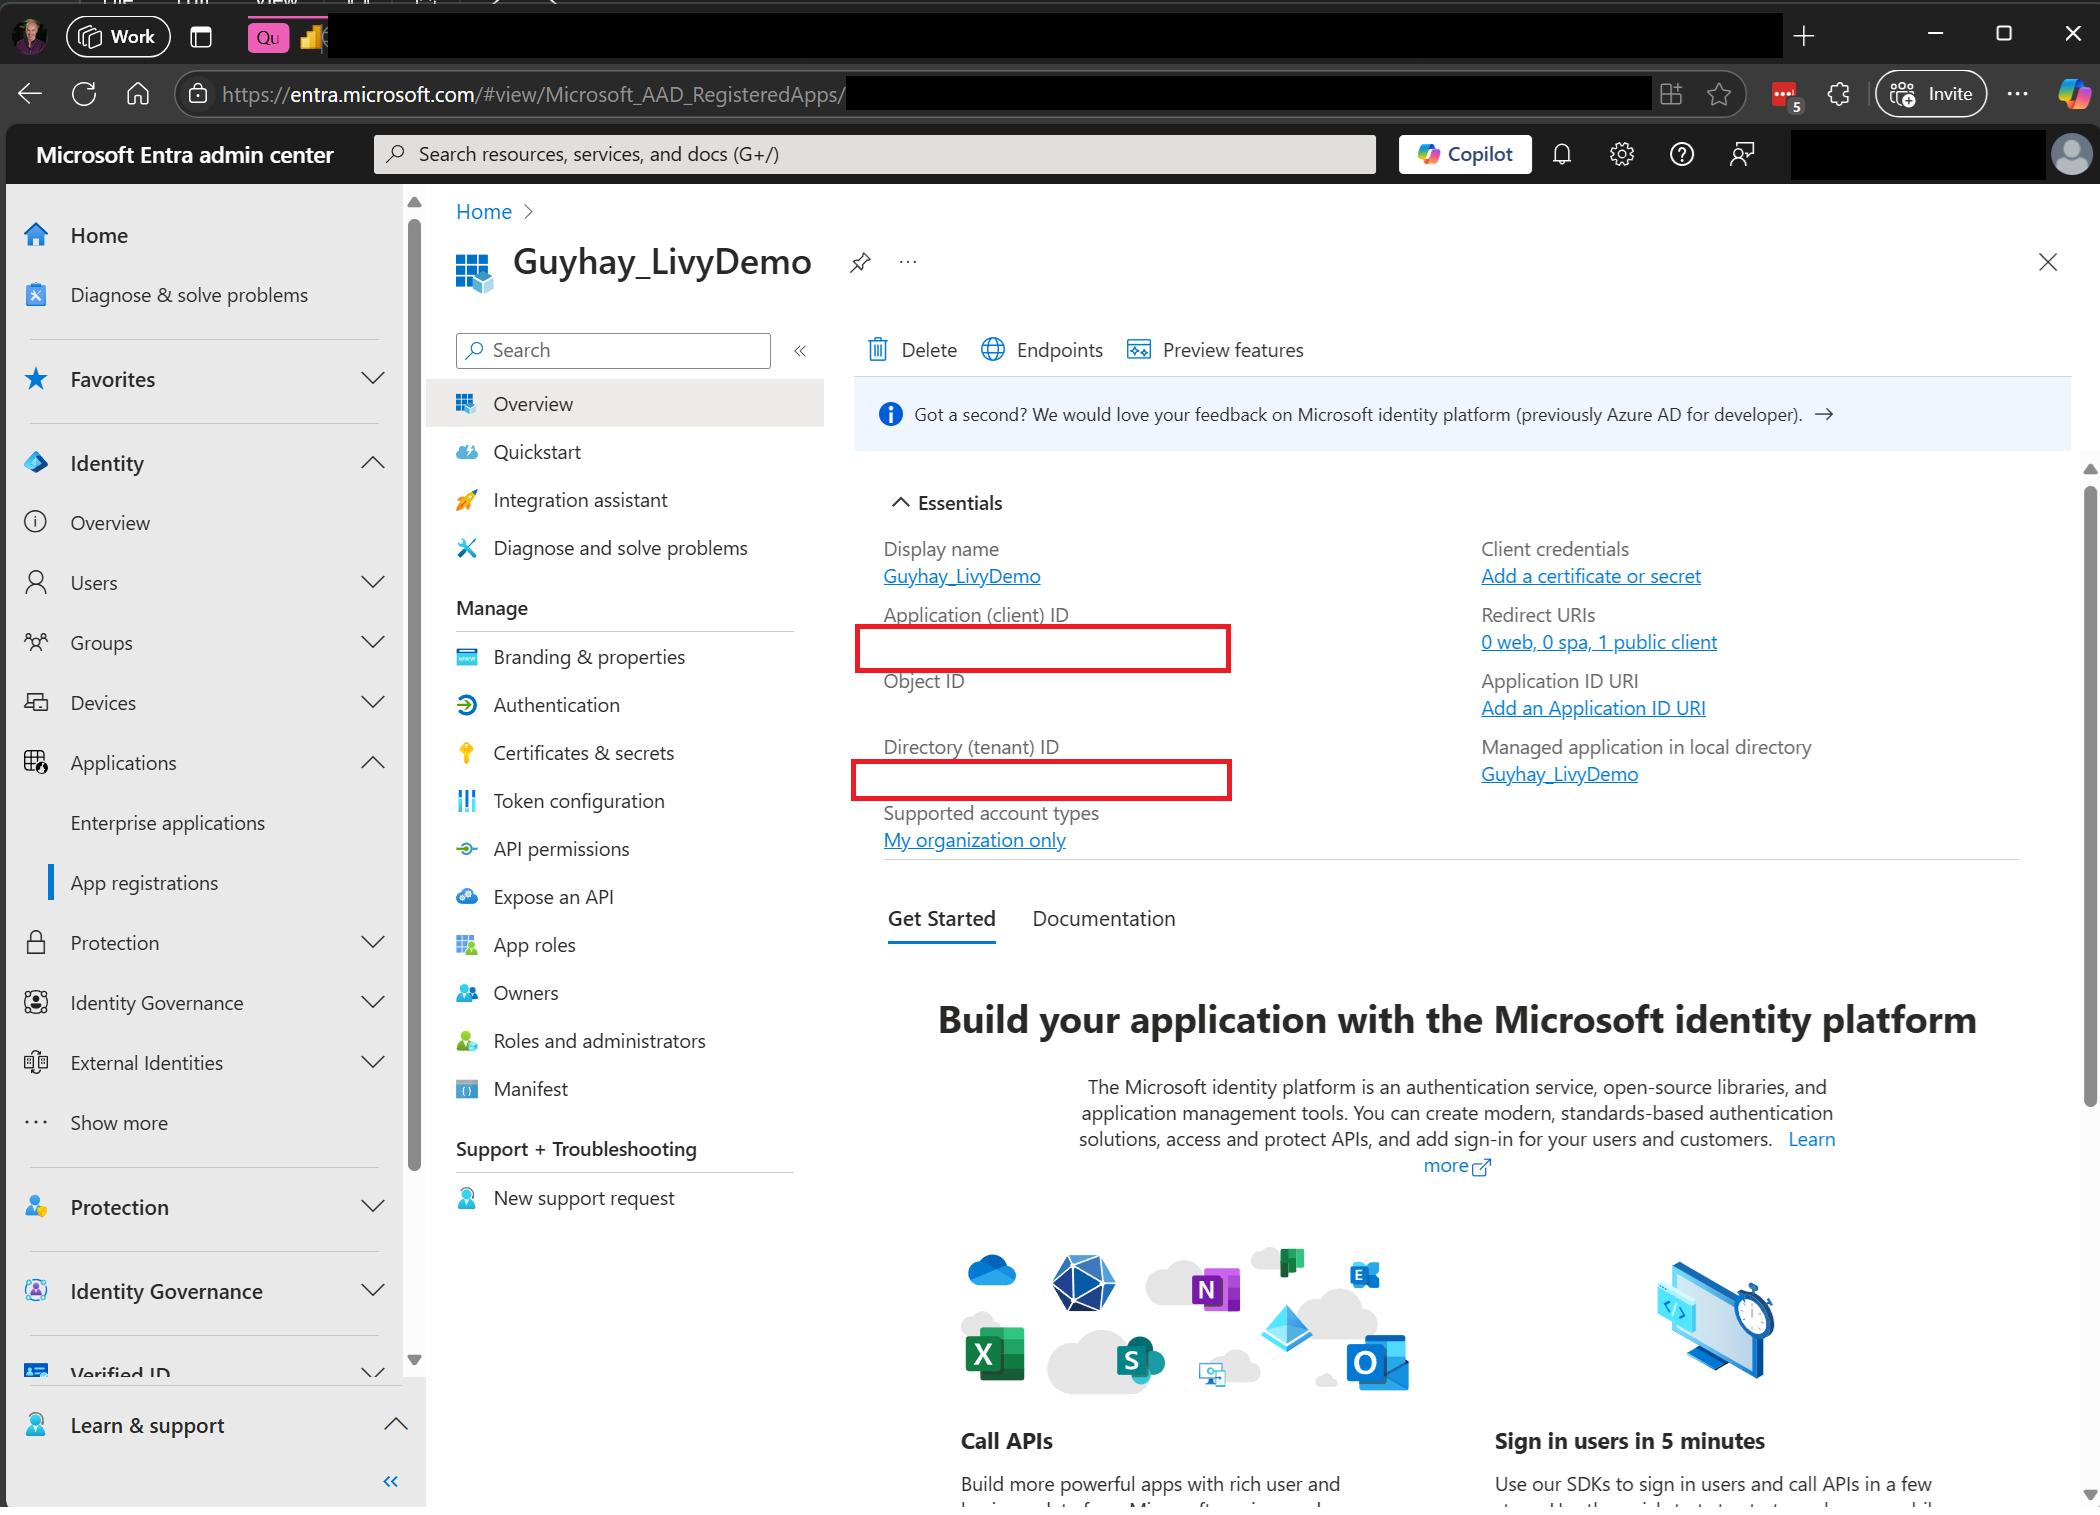
Navigeer naar Microsoft Entra-beheercentrum en kopieer zowel de toepassings-id (client-id) als de map-id (tenant) naar uw code.


Een Spark Batch-code maken en uploaden naar uw Lakehouse
Een
.ipynb-notebook maken in Visual Studio Code en de volgende code invoegenimport sys import os from pyspark.sql import SparkSession from pyspark.conf import SparkConf from pyspark.sql.functions import col if __name__ == "__main__": #Spark session builder spark_session = (SparkSession .builder .appName("batch_demo") .getOrCreate()) spark_context = spark_session.sparkContext spark_context.setLogLevel("DEBUG") tableName = spark_context.getConf().get("spark.targetTable") if tableName is not None: print("tableName: " + str(tableName)) else: print("tableName is None") df_valid_totalPrice = spark_session.sql("SELECT * FROM green_tripdata_2022 where total_amount > 0") df_valid_totalPrice_plus_year = df_valid_totalPrice.withColumn("transaction_year", col("lpep_pickup_datetime").substr(1, 4)) deltaTablePath = f"Tables/{tableName}CleanedTransactions" df_valid_totalPrice_plus_year.write.mode('overwrite').format('delta').save(deltaTablePath)Sla het Python bestand lokaal op. Deze Python codelading bevat twee Spark-instructies die werken aan gegevens in een Lakehouse en moeten worden geüpload naar uw Lakehouse. U hebt het ABFS-pad (Azure Blob File System) van de payload nodig om te verwijzen in uw Livy API-batchtaak in Visual Studio Code en de naam van de Lakehouse-tabel in de SQL-instructie
SELECT.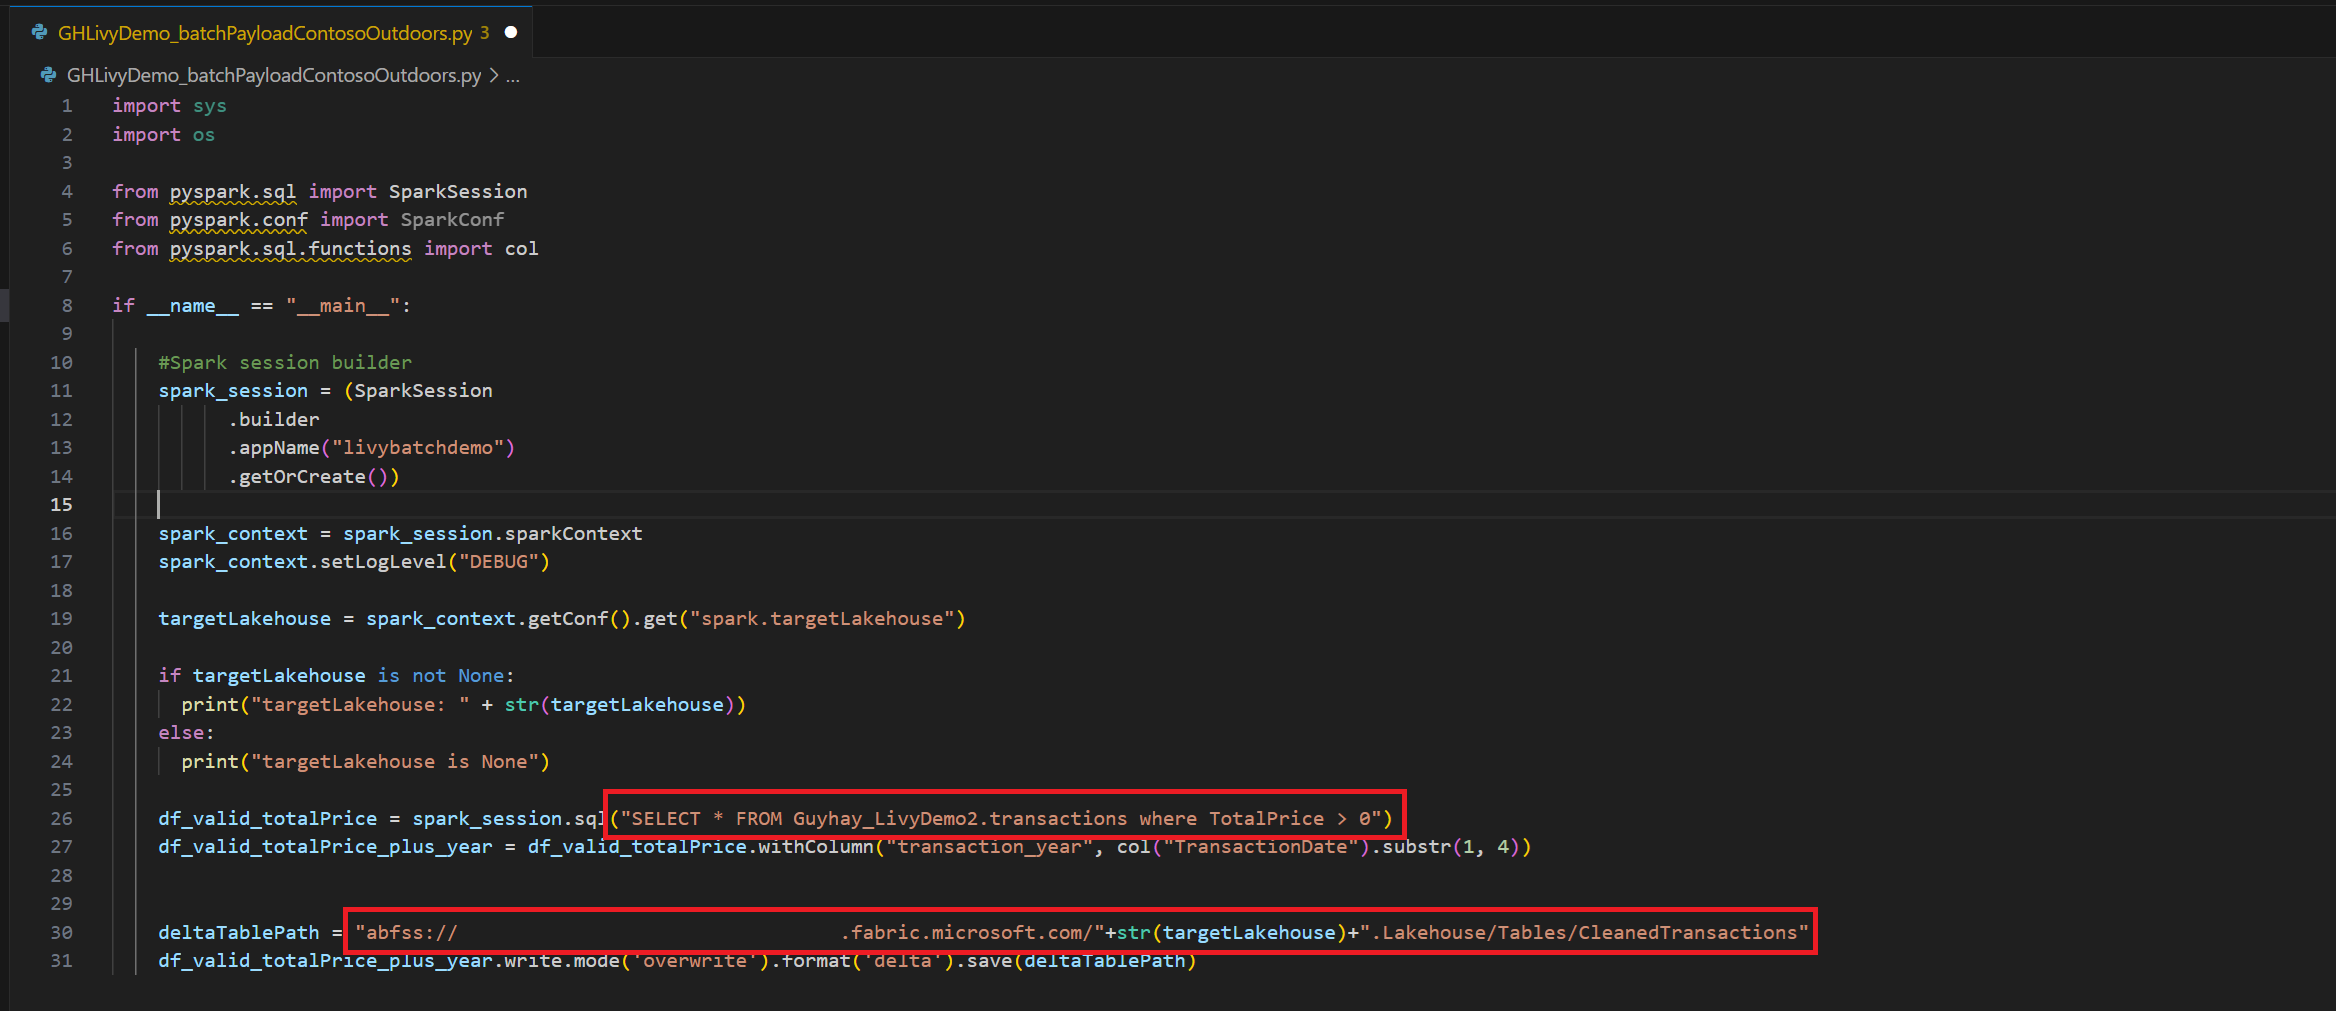
Upload de Python payload naar het bestandengedeelte van uw Lakehouse. Selecteer in de Lakehouse-verkenner Bestanden. Selecteer vervolgens >Gegevens ophalen>Bestanden uploaden. Selecteer bestanden via de bestandskiezer.
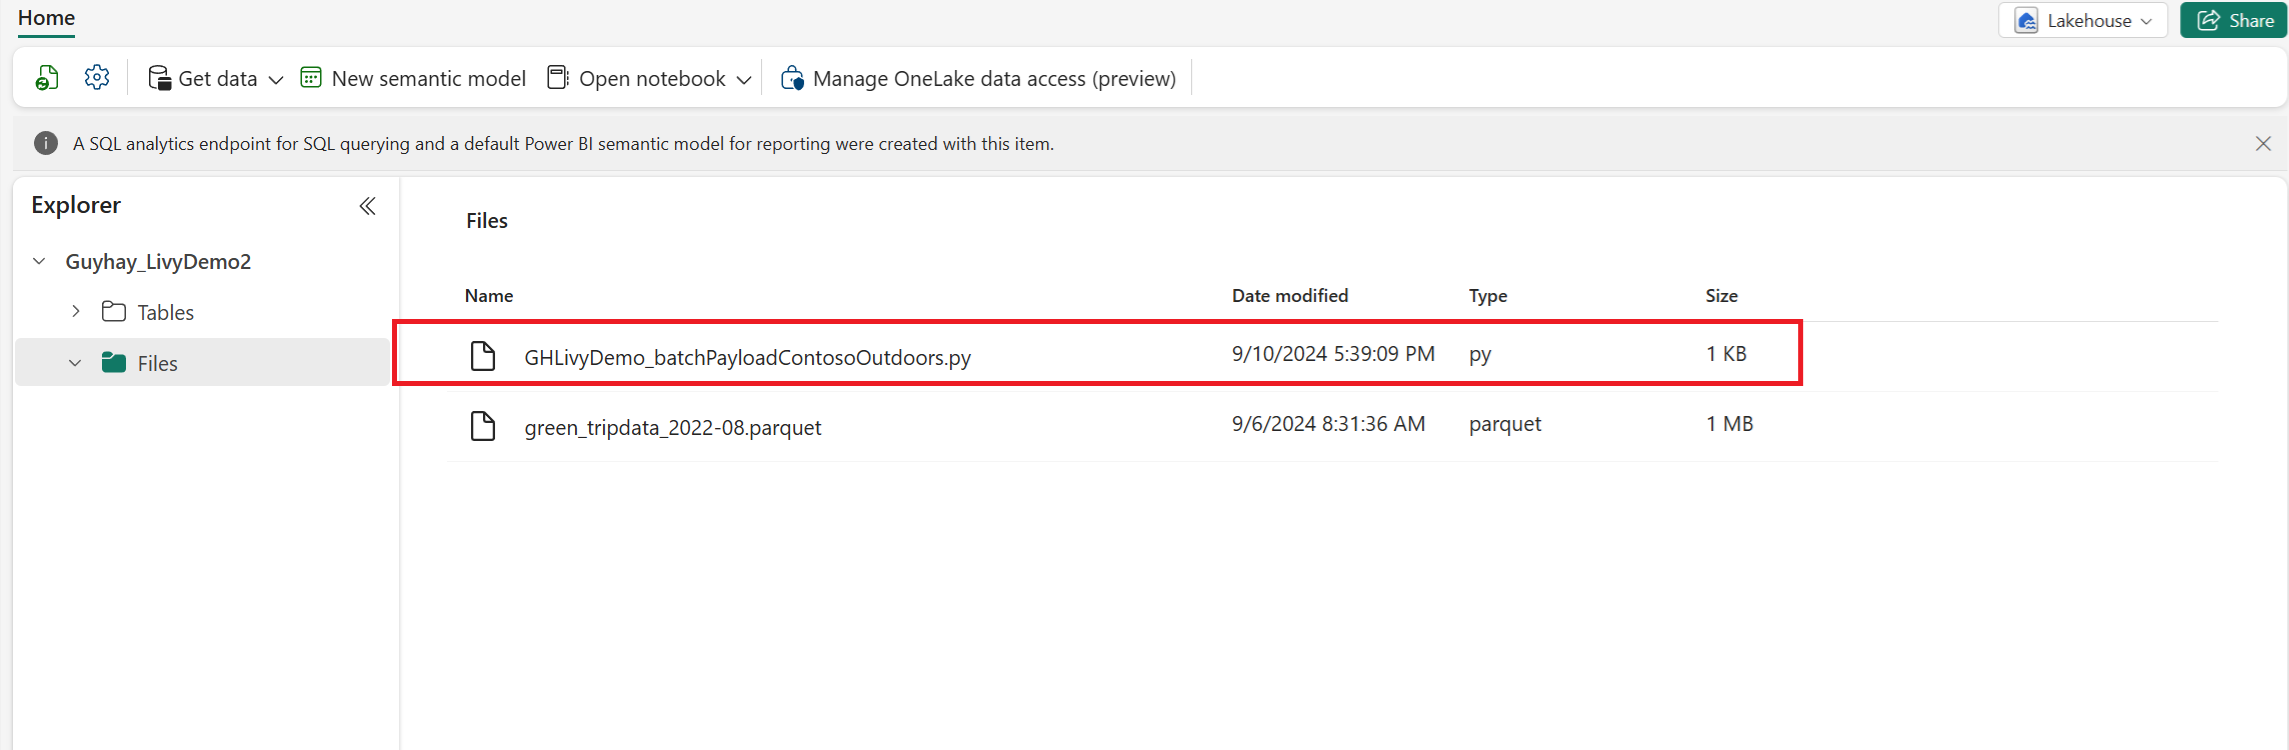
Nadat het bestand zich in de sectie Bestanden van uw Lakehouse bevindt, selecteert u de drie puntjes (beletselteken) rechts van de bestandsnaam van de nettolading en selecteert u Eigenschappen.
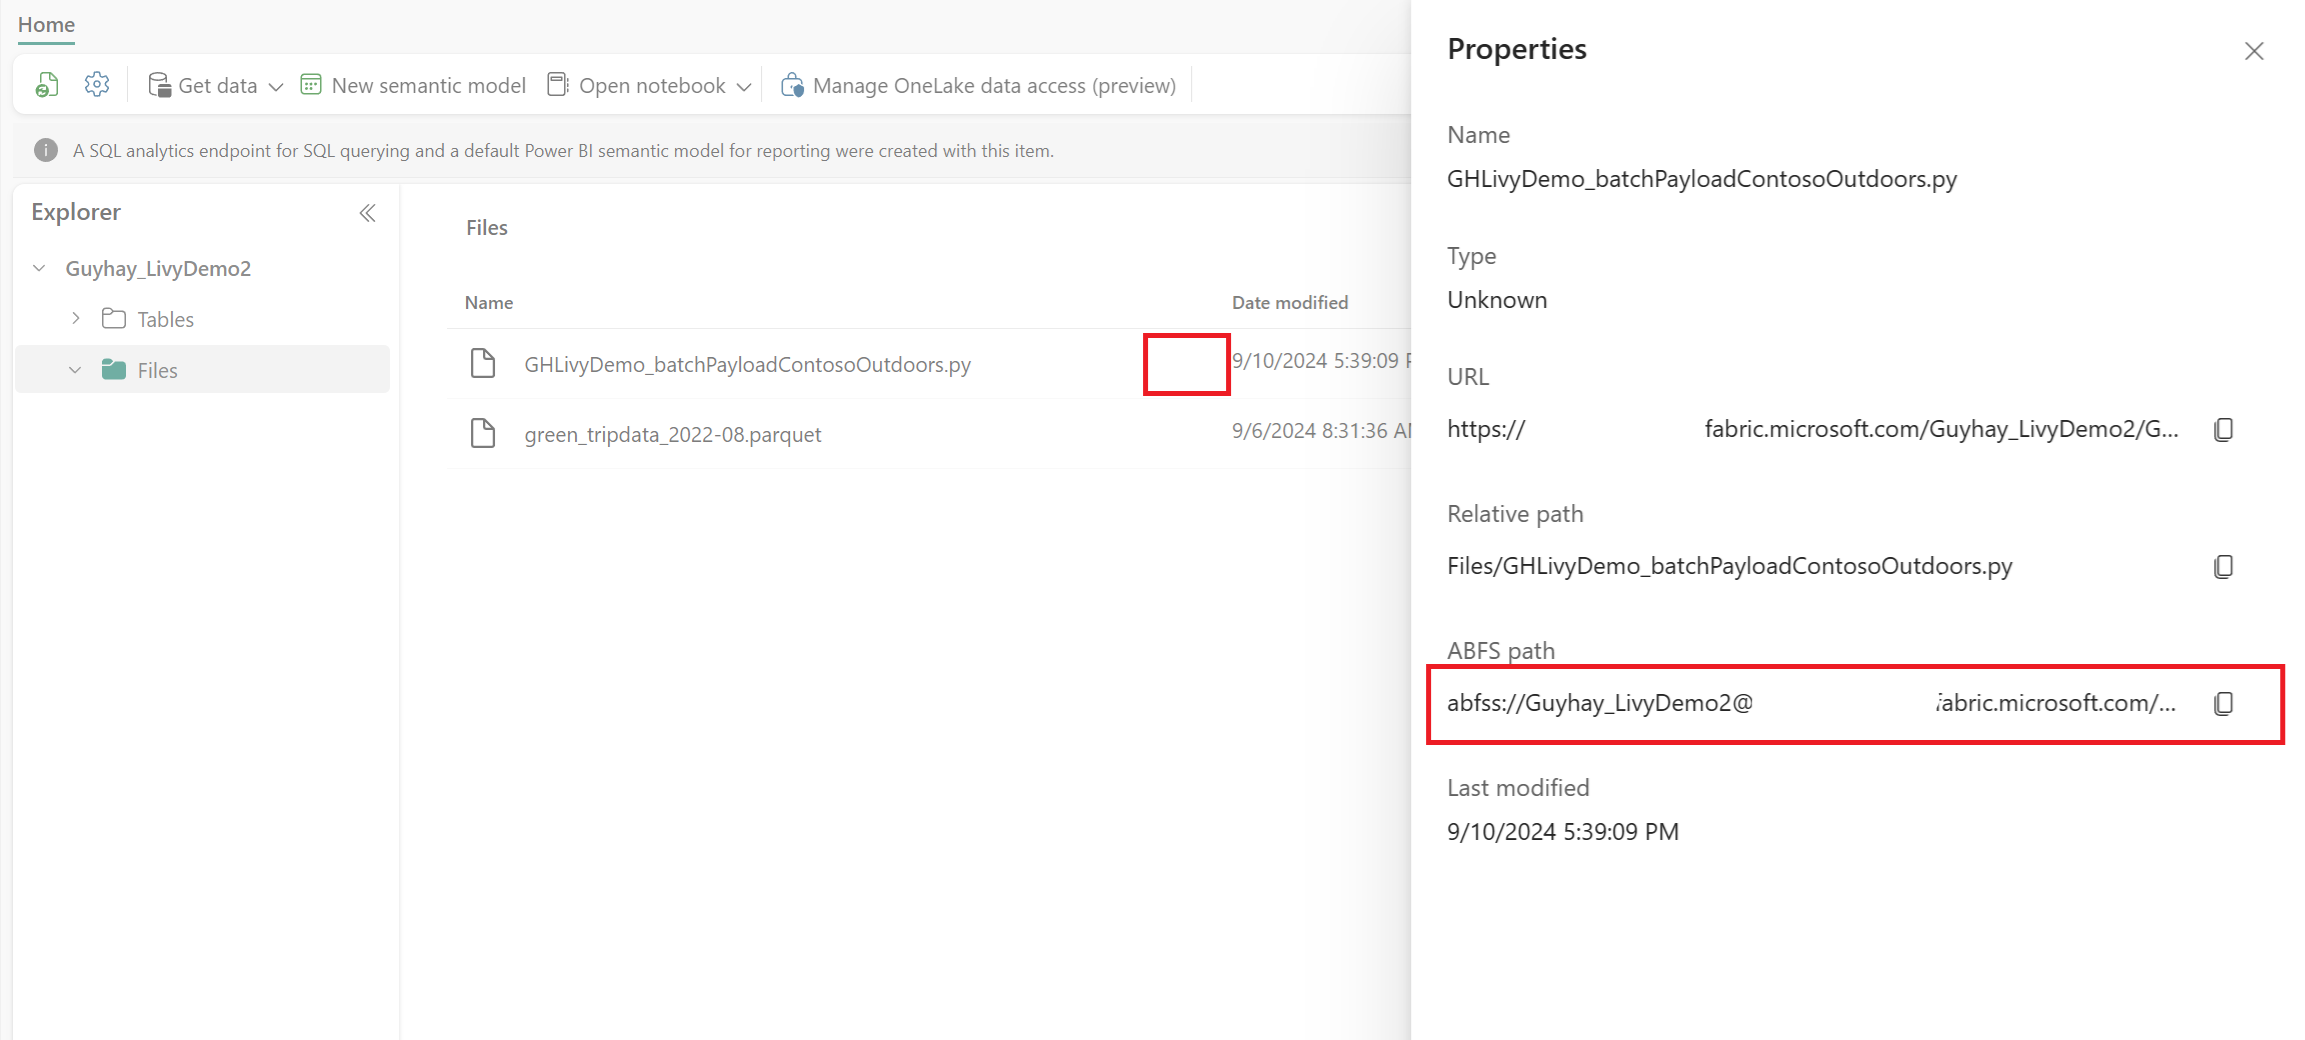
Kopieer dit ABFS-pad naar uw notebookcel in stap 1.


Een Livy API Spark-batchsessie verifiëren met behulp van een Microsoft Entra gebruikerstoken of een Microsoft Entra SPN-token
Een Livy API Spark-batchsessie verifiëren met behulp van een Microsoft Entra SPN-token
Maak een
.ipynb-notebook in Visual Studio Code en voeg de volgende code in.import sys from msal import ConfidentialClientApplication # Configuration - Replace with your actual values tenant_id = "Entra_TenantID" # Microsoft Entra tenant ID client_id = "Entra_ClientID" # Service Principal Application ID # Certificate paths - Update these paths to your certificate files certificate_path = "PATH_TO_YOUR_CERTIFICATE.pem" # Public certificate file private_key_path = "PATH_TO_YOUR_PRIVATE_KEY.pem" # Private key file certificate_thumbprint = "YOUR_CERTIFICATE_THUMBPRINT" # Certificate thumbprint # OAuth settings audience = "https://analysis.windows.net/powerbi/api/.default" authority = f"https://login.windows.net/{tenant_id}" def get_access_token(client_id, audience, authority, certificate_path, private_key_path, certificate_thumbprint=None): """ Get an app-only access token for a Service Principal using OAuth 2.0 client credentials flow. This function uses certificate-based authentication which is more secure than client secrets. Args: client_id (str): The Service Principal's client ID audience (str): The audience for the token (resource scope) authority (str): The OAuth authority URL certificate_path (str): Path to the certificate file (.pem format) private_key_path (str): Path to the private key file (.pem format) certificate_thumbprint (str): Certificate thumbprint (optional but recommended) Returns: str: The access token for API authentication Raises: Exception: If token acquisition fails """ try: # Read the certificate from PEM file with open(certificate_path, "r", encoding="utf-8") as f: certificate_pem = f.read() # Read the private key from PEM file with open(private_key_path, "r", encoding="utf-8") as f: private_key_pem = f.read() # Create the confidential client application app = ConfidentialClientApplication( client_id=client_id, authority=authority, client_credential={ "private_key": private_key_pem, "thumbprint": certificate_thumbprint, "certificate": certificate_pem } ) # Acquire token using client credentials flow token_response = app.acquire_token_for_client(scopes=[audience]) if "access_token" in token_response: print("Successfully acquired access token") return token_response["access_token"] else: raise Exception(f"Failed to retrieve token: {token_response.get('error_description', 'Unknown error')}") except FileNotFoundError as e: print(f"Certificate file not found: {e}") sys.exit(1) except Exception as e: print(f"Error retrieving token: {e}", file=sys.stderr) sys.exit(1) # Get the access token token = get_access_token(client_id, audience, authority, certificate_path, private_key_path, certificate_thumbprint)Voer de notebookcel uit, dan moet je het Microsoft Entra-token zien dat wordt geretourneerd.


Een Livy API Spark-sessie verifiëren met behulp van een Microsoft Entra gebruikerstoken
Maak een
.ipynb-notebook in Visual Studio Code en voeg de volgende code in.from msal import PublicClientApplication import requests import time # Configuration - Replace with your actual values tenant_id = "Entra_TenantID" # Microsoft Entra tenant ID client_id = "Entra_ClientID" # Application ID (can be the same as above or different) # Required scopes for Livy API access scopes = [ "https://api.fabric.microsoft.com/Lakehouse.Execute.All", # Required — execute operations in lakehouses "https://api.fabric.microsoft.com/Lakehouse.Read.All", # Required — read lakehouse metadata "https://api.fabric.microsoft.com/Code.AccessFabric.All", # Required — general Fabric API access from Spark Runtime "https://api.fabric.microsoft.com/Code.AccessStorage.All", # Required — access OneLake and Azure storage from Spark Runtime ] # Optional scopes — add these only if your Spark jobs need access to the corresponding services: # "https://api.fabric.microsoft.com/Code.AccessAzureKeyvault.All" # Optional — access Azure Key Vault from Spark Runtime # "https://api.fabric.microsoft.com/Code.AccessAzureDataLake.All" # Optional — access Azure Data Lake Storage Gen1 from Spark Runtime # "https://api.fabric.microsoft.com/Code.AccessAzureDataExplorer.All" # Optional — access Azure Data Explorer from Spark Runtime # "https://api.fabric.microsoft.com/Code.AccessSQL.All" # Optional — access Azure SQL audience tokens from Spark Runtime def get_access_token(tenant_id, client_id, scopes): """ Get an access token using interactive authentication. This method will open a browser window for user authentication. Args: tenant_id (str): The Azure Active Directory tenant ID client_id (str): The application client ID scopes (list): List of required permission scopes Returns: str: The access token, or None if authentication fails """ app = PublicClientApplication( client_id, authority=f"https://login.microsoftonline.com/{tenant_id}" ) print("Opening browser for interactive authentication...") token_response = app.acquire_token_interactive(scopes=scopes) if "access_token" in token_response: print("Successfully authenticated") return token_response["access_token"] else: print(f"Authentication failed: {token_response.get('error_description', 'Unknown error')}") return None # Uncomment the lines below to use interactive authentication token = get_access_token(tenant_id, client_id, scopes) print("Access token acquired via interactive login")Voer de notebookcel uit. Er moet een pop-up worden weergegeven in uw browser, zodat u de identiteit kunt kiezen waarmee u zich kunt aanmelden.
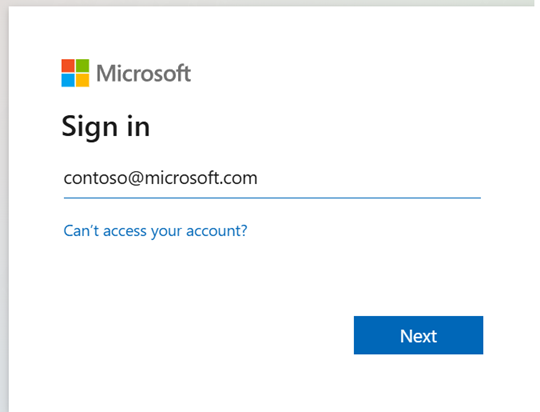
Nadat u de identiteit hebt gekozen waarmee u zich wilt aanmelden, moet u de api-machtigingen voor Microsoft Entra app-registratie goedkeuren.
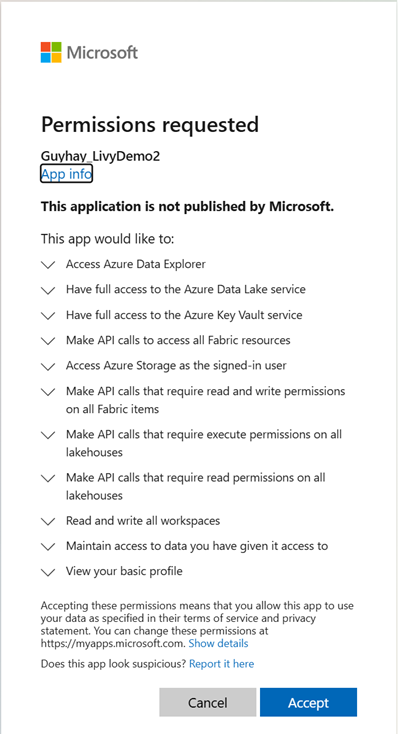
Sluit het browservenster nadat u de verificatie hebt voltooid.

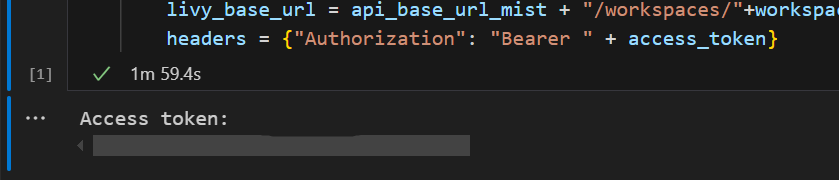
In Visual Studio Code ziet u dat het Microsoft Entra token is geretourneerd.


Inzicht in Code.* scopes voor de Livy API
Wanneer uw Spark-taken worden uitgevoerd via de Livy-API, bepalen de Code.* toegangsrechten tot welke externe services de Spark Runtime namens de geverifieerde gebruiker toegang kan krijgen. Er zijn twee vereist; de rest is optioneel, afhankelijk van uw workload.
Vereiste code.* bereiken
| Scope | Beschrijving |
|---|---|
Code.AccessFabric.All |
Hiermee kunt u toegangstokens voor Microsoft Fabric verkrijgen. Vereist voor alle Livy-API-bewerkingen. |
Code.AccessStorage.All |
Hiermee kunt u toegangstokens krijgen tot OneLake en Azure-opslag. Vereist voor het lezen en schrijven van gegevens in lakehouses. |
Optionele code.* bereiken
Voeg deze scopes alleen toe als uw Spark-taken tijdens de uitvoering toegang nodig hebben tot de bijbehorende Azure services.
| Scope | Beschrijving | Wanneer gebruiken |
|---|---|---|
Code.AccessAzureKeyvault.All |
Hiermee kunt u toegangstokens ophalen voor Azure Key Vault. | Met uw Spark-code worden geheimen, sleutels of certificaten opgehaald uit Azure Key Vault. |
Code.AccessAzureDataLake.All |
Hiermee kunt u toegangstokens ophalen voor Azure Data Lake Storage Gen1. | Uw Spark-code leest van of schrijft naar Azure Data Lake Storage Gen1 accounts. |
Code.AccessAzureDataExplorer.All |
Hiermee kunt u toegangstokens ophalen voor Azure Data Explorer (Kusto). | Uw Spark-code voert query's uit of neemt gegevens op van/naar Azure Data Explorer clusters. |
Code.AccessSQL.All |
Hiermee kunt u toegangstokens ophalen voor Azure SQL. | Uw Spark-code moet verbinding maken met Azure SQL databases. |
Opmerking
De Lakehouse.Execute.All en Lakehouse.Read.All scopes zijn ook vereist, maar maken geen deel uit van de Code.* familie. Ze verlenen respectievelijk machtigingen voor het uitvoeren van bewerkingen in en het lezen van metagegevens uit Fabric lakehouses.
Verzend een Livy Batch en bewaak batchtaak.
Voeg nog een notebookcel toe en voeg deze code in.
# submit payload to existing batch session

import requests
import time
import json

api_base_url = "https://api.fabric.microsoft.com/v1"  # Base URL for Fabric APIs

# Fabric Resource IDs - Replace with your workspace and lakehouse IDs
workspace_id = "Fabric_WorkspaceID"
lakehouse_id = "Fabric_LakehouseID"

# Construct the Livy Batch API URL
# URL pattern: {base_url}/workspaces/{workspace_id}/lakehouses/{lakehouse_id}/livyApi/versions/{api_version}/batches
livy_base_url = f"{api_base_url}/workspaces/{workspace_id}/lakehouses/{lakehouse_id}/livyApi/versions/2023-12-01/batches"

# Set up authentication headers
headers = {"Authorization": f"Bearer {token}"}

print(f"Livy Batch API URL: {livy_base_url}")

new_table_name = "TABLE_NAME"  # Name for the new table

# Configure the batch job
print("Configuring batch job parameters...")

# Batch job configuration - Modify these values for your use case
payload_data = {
    # Job name - will appear in the Fabric UI
    "name": f"livy_batch_demo_{new_table_name}",

    # Path to your Python file in the lakehouse
    "file": "<ABFSS_PATH_TO_YOUR_PYTHON_FILE>",  # Replace with your Python file path

    # Optional: Spark configuration parameters
    "conf": {
        "spark.targetTable": new_table_name,  # Custom configuration for your application
    },
}

print("Batch Job Configuration:")
print(json.dumps(payload_data, indent=2))

try:
    # Submit the batch job
    print("\nSubmitting batch job...")
    post_batch = requests.post(livy_base_url, headers=headers, json=payload_data)

    if post_batch.status_code == 202:
        batch_info = post_batch.json()
        print("Livy batch job submitted successfully!")
        print(f"Batch Job Info: {json.dumps(batch_info, indent=2)}")

        # Extract batch ID for monitoring
        batch_id = batch_info['id']
        livy_batch_get_url = f"{livy_base_url}/{batch_id}"

        print(f"\nBatch Job ID: {batch_id}")
        print(f"Monitoring URL: {livy_batch_get_url}")

    else:
        print(f"Failed to submit batch job. Status code: {post_batch.status_code}")
        print(f"Response: {post_batch.text}")

except requests.exceptions.RequestException as e:
    print(f"Network error occurred: {e}")
except json.JSONDecodeError as e:
    print(f"JSON decode error: {e}")
    print(f"Response text: {post_batch.text}")
except Exception as e:
    print(f"Unexpected error: {e}")
Voer de notebookcel uit en u zou verschillende lijnen tekst moeten zien die worden afgedrukt terwijl de Livy Batch-taak wordt gemaakt en uitgevoerd.

Als u de wijzigingen wilt zien, gaat u terug naar uw Lakehouse.

Integratie met Fabric-omgevingen
Deze Livy API-sessie wordt standaard uitgevoerd op basis van de standaardstartgroep voor de werkruimte. U kunt ook Fabric Omgevingen Maken, configureren en gebruiken van een omgeving in Microsoft Fabric om de Spark-pool aan te passen die door de Livy API-sessie voor deze Spark-taken wordt gebruikt. Als u de Fabric-omgeving wilt gebruiken, werkt u de vorige notitieblokcel bij met deze regelwijziging.
payload_data = {
    "name":"livybatchdemo_with"+ newlakehouseName,
    "file":"abfss://YourABFSPathToYourPayload.py",
    "conf": {
        "spark.targetLakehouse": "Fabric_LakehouseID",
        "spark.fabric.environmentDetails" : "{\"id\" : \""EnvironmentID"\"}"  # remove this line to use starter pools instead of an environment, replace "EnvironmentID" with your environment ID
        }
    }
Uw taken weergeven in de Bewakingshub
U hebt toegang tot de Bewakingshub om verschillende Apache Spark-activiteiten weer te geven door Monitor te selecteren in de navigatiekoppelingen aan de linkerkant.
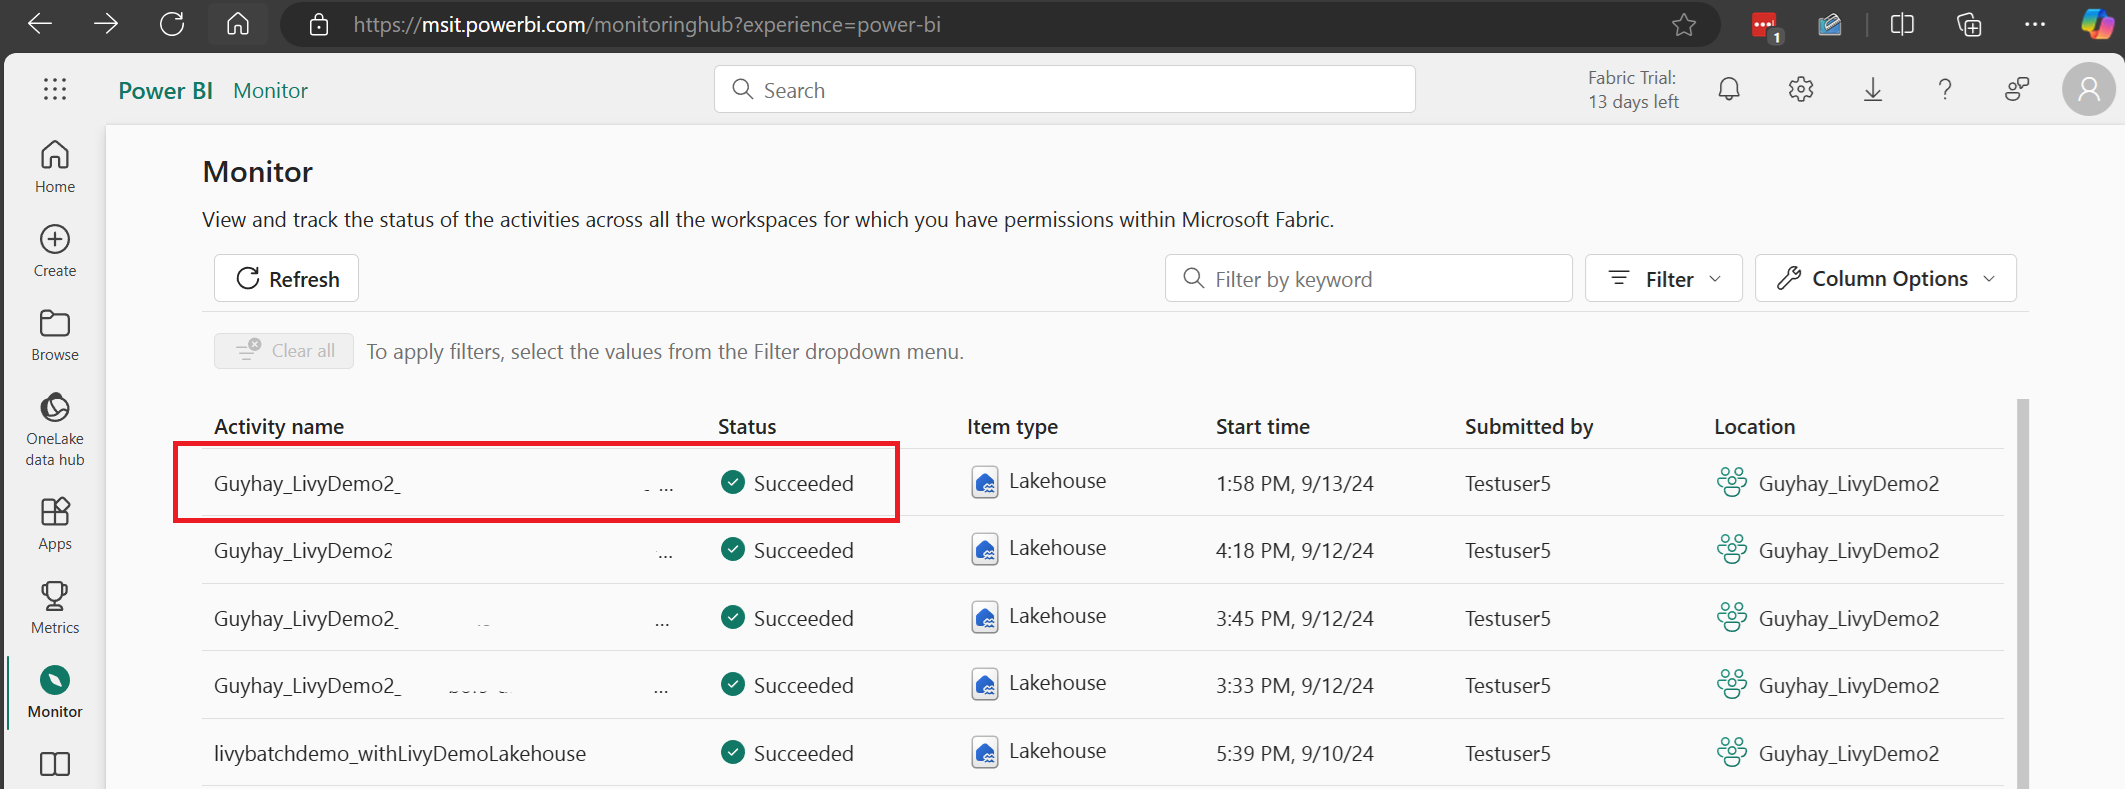
Wanneer de batchtaak is voltooid, kunt u de sessiestatus bekijken door naar Monitor te navigeren.
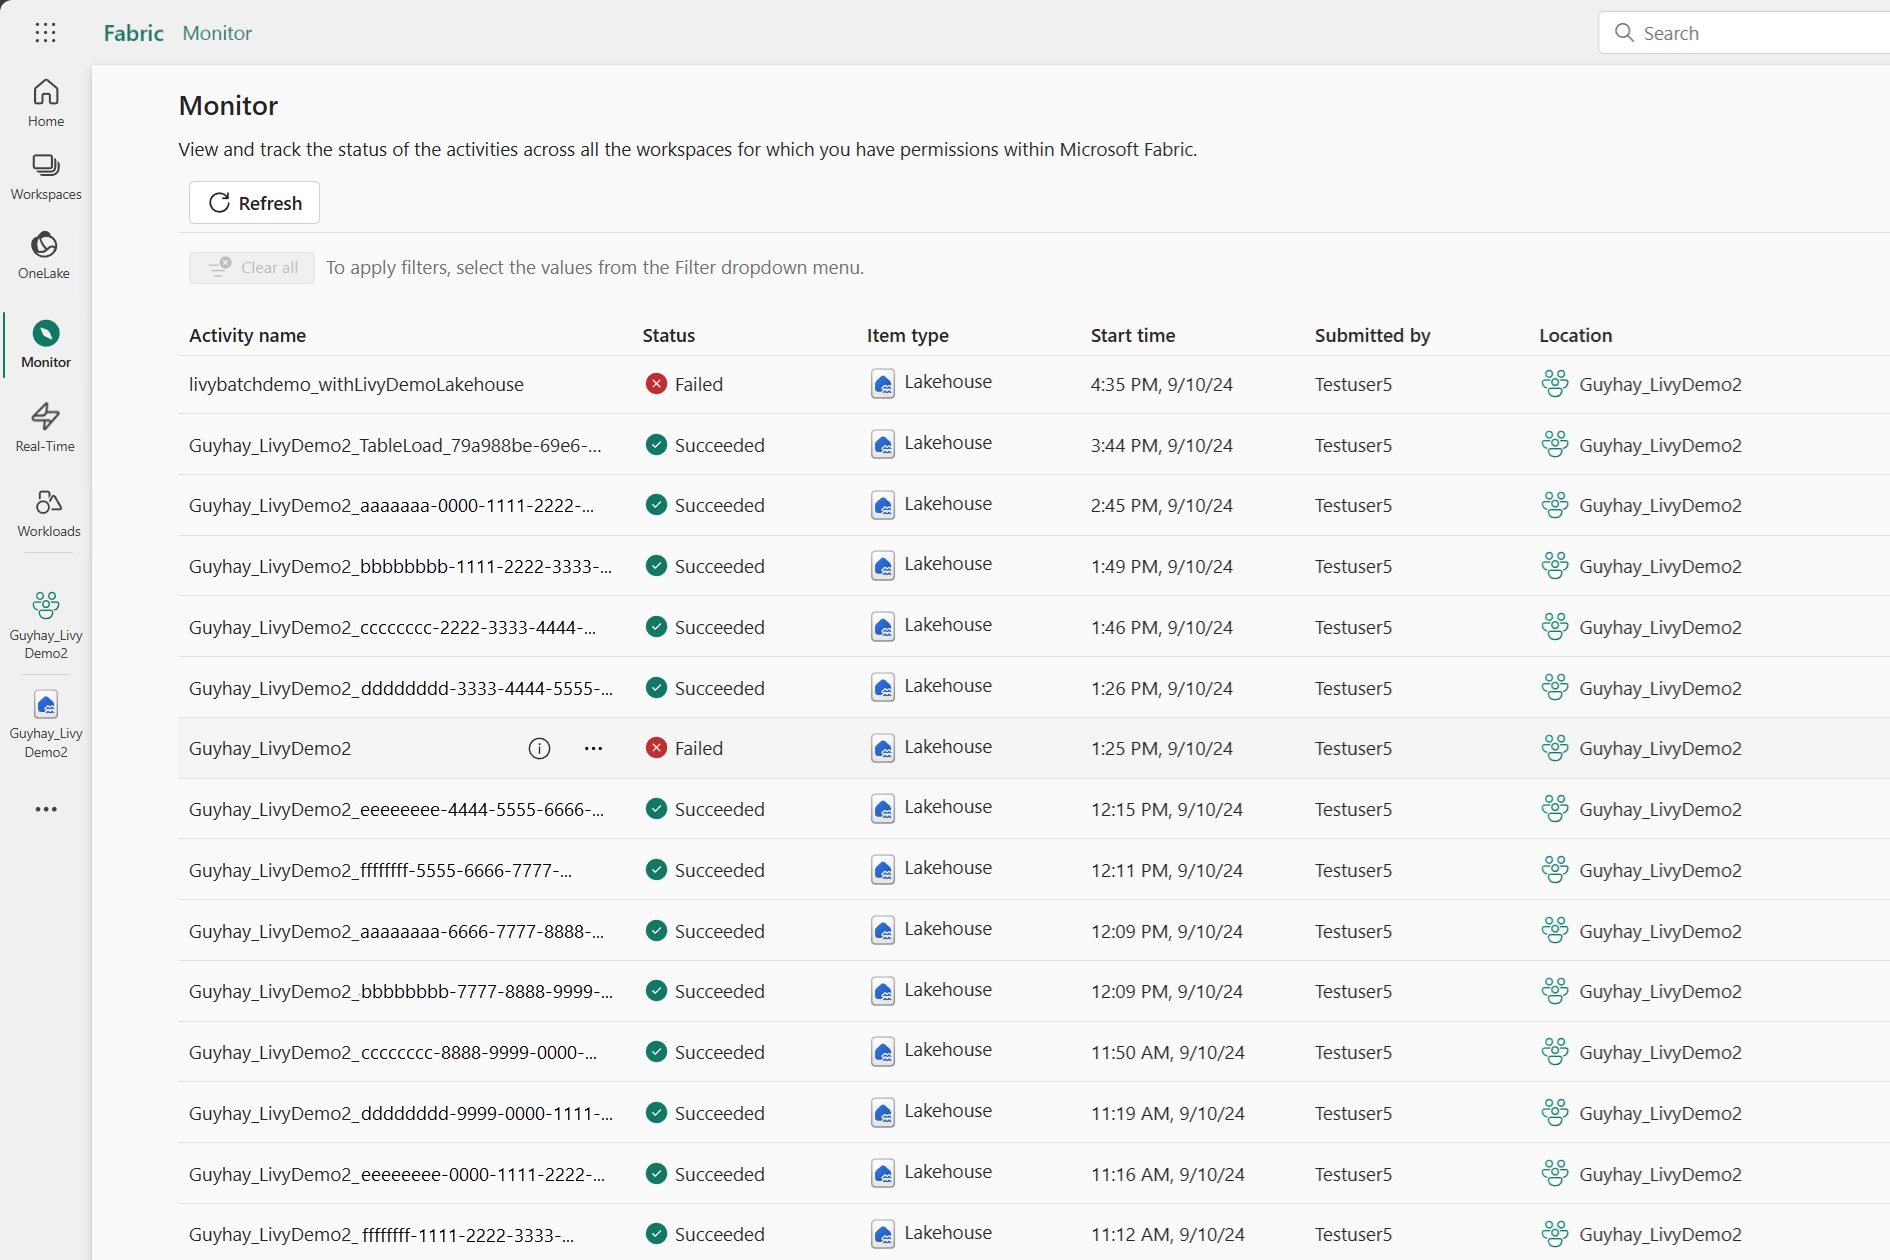
Selecteer en open de naam van de meest recente activiteit.
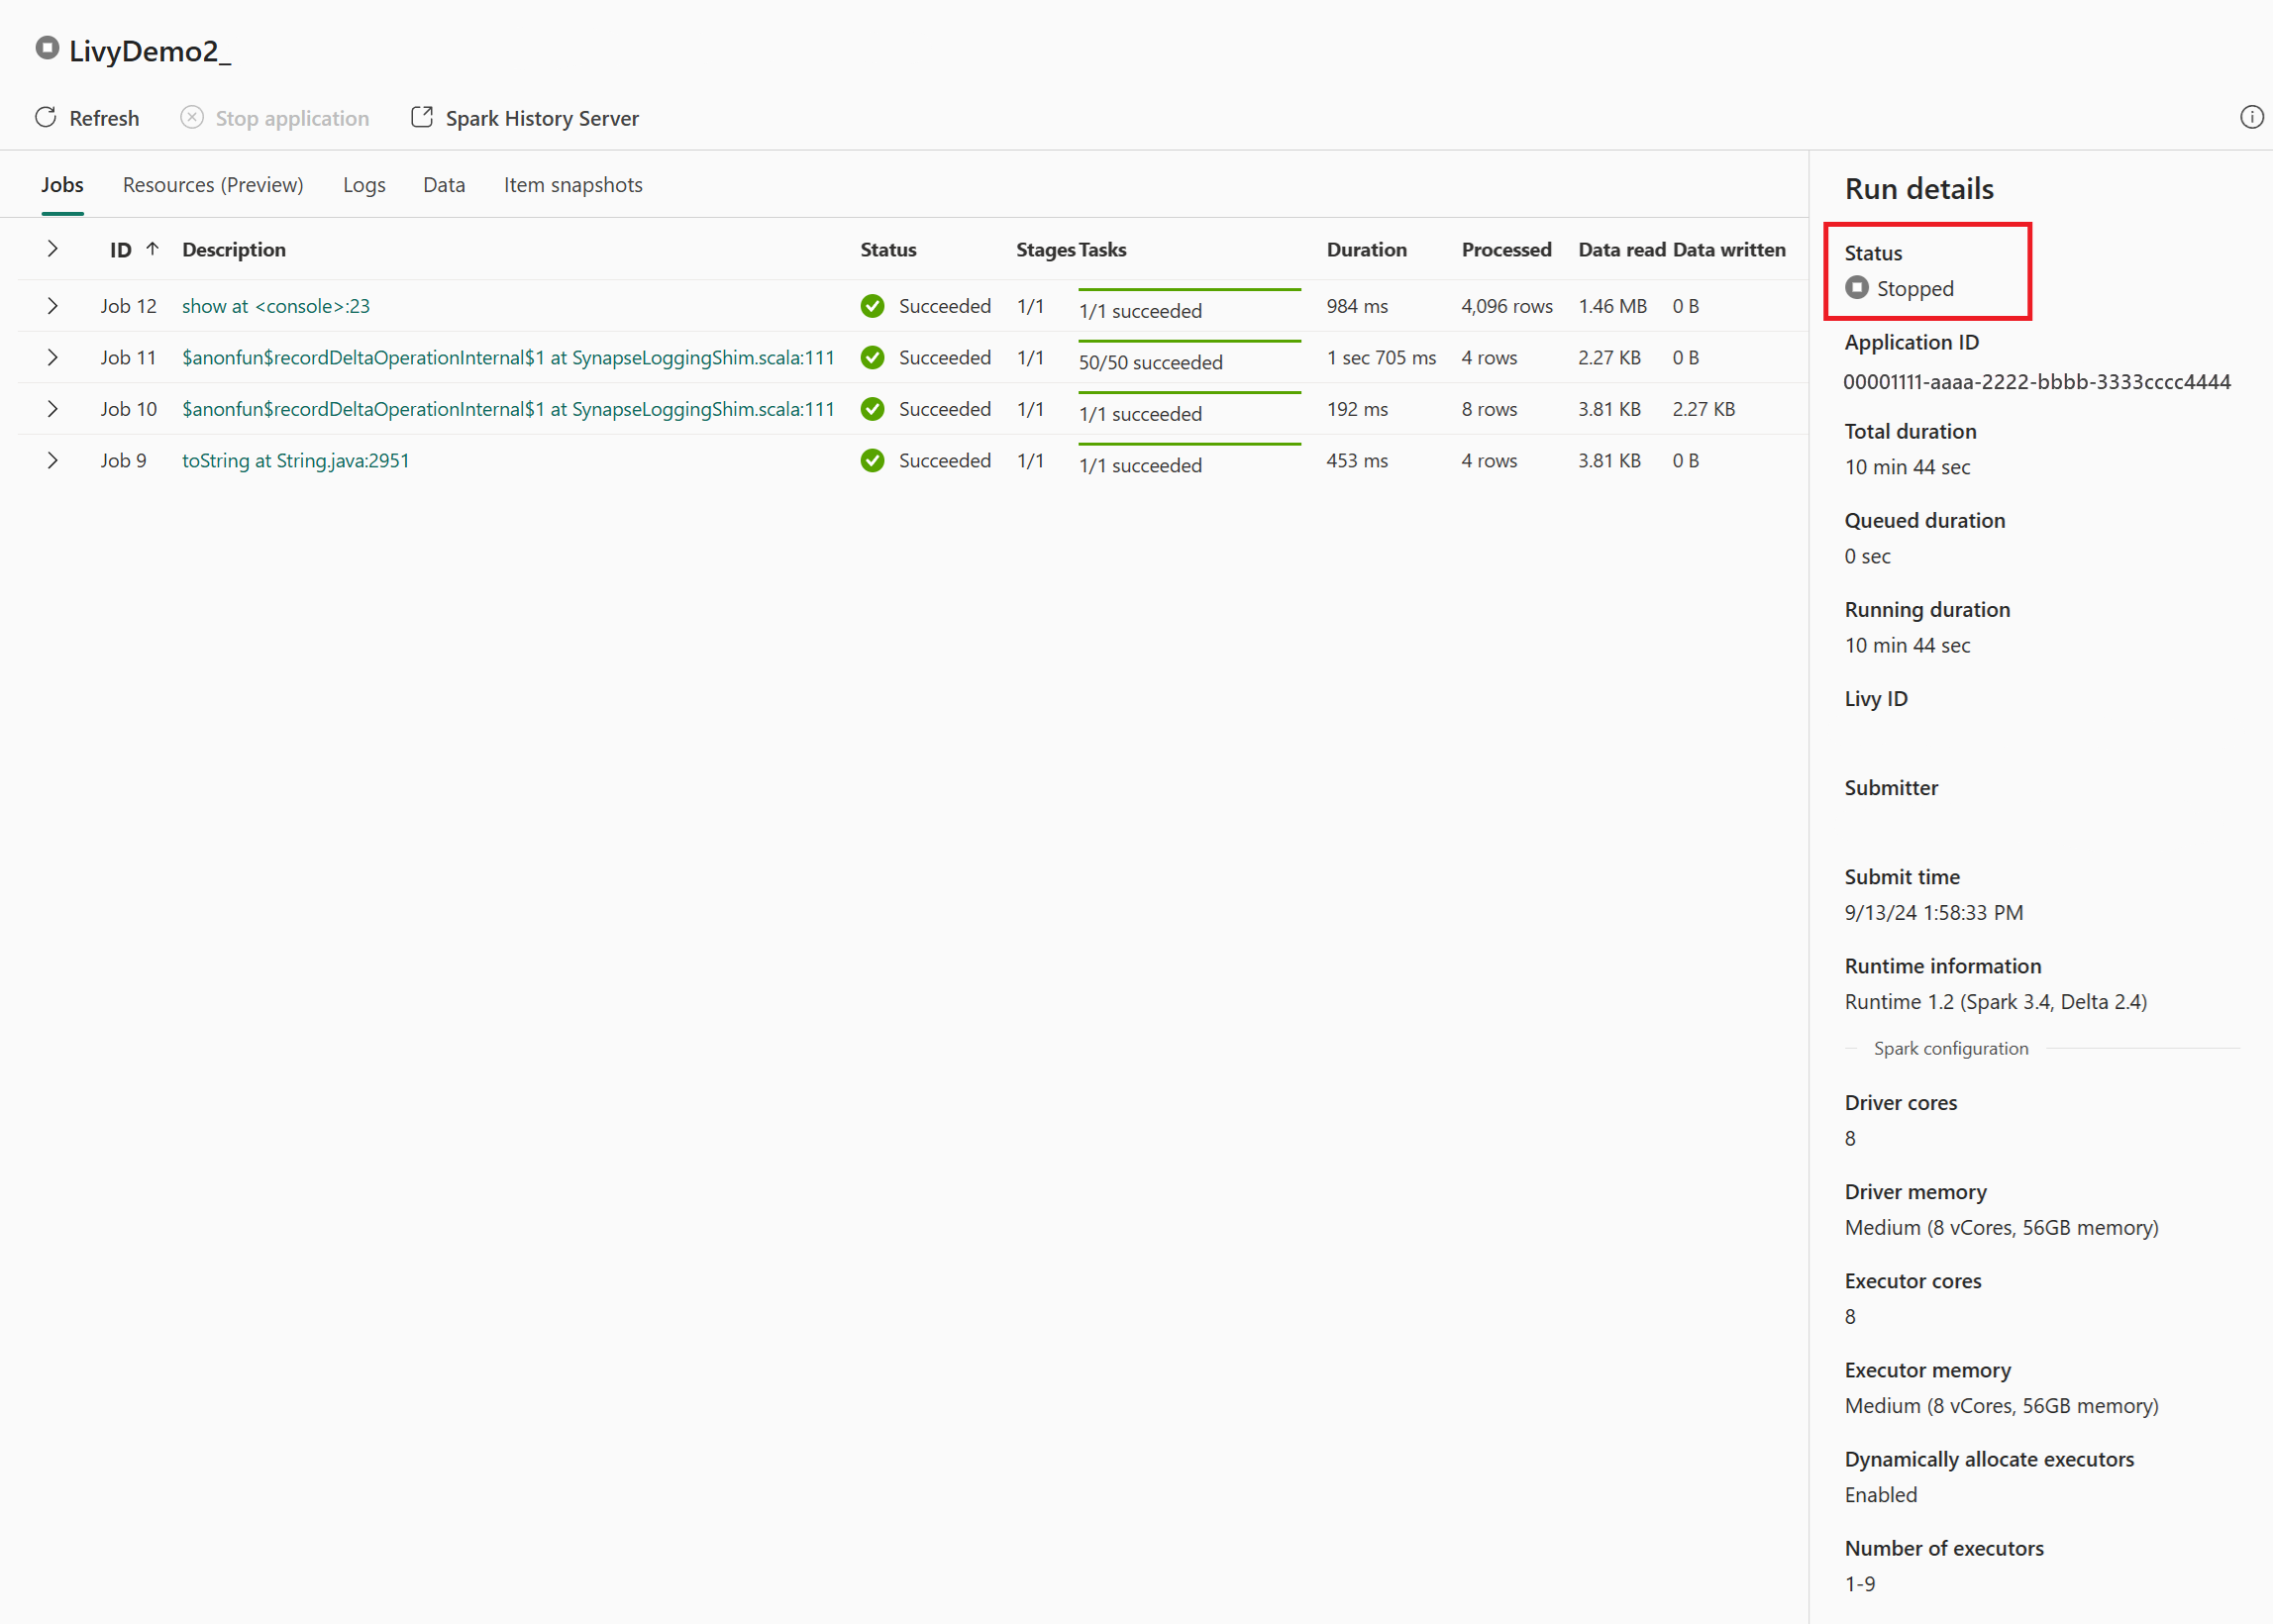
In dit geval van livy-API-sessie kunt u uw vorige batchinzending zien, details uitvoeren, Spark-versies en configuratie. Let op de gestopte status rechtsboven.


Als u het hele proces wilt invatten, hebt u een externe client nodig, zoals Visual Studio Code, een Microsoft Entra-app-token, de URL van het Livy-API-eindpunt, verificatie voor uw Lakehouse, een Spark-nettolading in uw Lakehouse en ten slotte een Batch Livy API-sessie.