Set up an Android mobile phone as a common area phone
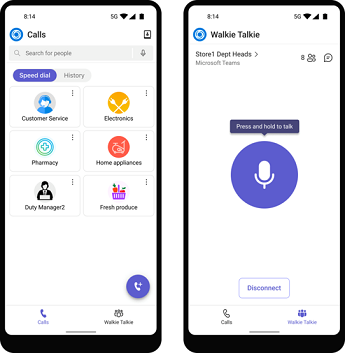
A Teams Android mobile app signed in with an account tied to Microsoft Teams Shared Device license is used as a shared device by frontline workers to make and receive calls as part of their daily work using Teams.
Important
To use this feature you must have version 1.0.0.2023143401 (2023143401) or later installed on the Android mobile phone.
Step 1 - Buy the licenses
First, you need to purchase a Teams Shared Devices license.
Note
Chat is not supported with a Teams Shared Devices license.
To purchase the license:
- Sign in to Microsoft 365 admin center, and select Billing > Purchase services.
- If the View by category section isn't already displayed, go to Purchase from Microsoft and select View products, and then select Collaboration and communication.
- In the product list, find Microsoft Teams Shared Devices, and select Details.
- Enter the number of licenses you need, and select Buy.
Note
If you're using Intune in your environment and have conditional access rules that require device compliance, you'll need to assign an Microsoft Entra ID P1 and an Intune license to the device account that was used to sign in to the Teams mobile app. Teams-shared devices can be impacted by conditional access rules and other identity configurations, such as Multi-Factor Authentication. For more information, see Authentication best practices for Teams Android devices.
Step 2 - Create a new user account and assign licenses
Using the Microsoft 365 admin center
Note
If you're deploying more than one phone at a time, you can use only PowerShell to create accounts and assign licenses. You can use Microsoft 365 admin center to create accounts and assign licenses only if you're deploying one device at a time.
- Sign in to Microsoft 365 admin center, and select Users > Active Users > Add a user.
- Enter a username like Main for the first name and Reception for the second name.
- Enter a display name if it doesn't autogenerate one, for example, Main Reception.
- Enter a username like BakeryPhone or DutyManager.
- Manually set the password for your common area phone. To set the password, clear the Automatically create a password and require this user to change their password when they first sign in checkbox.
Important
Manually setting a password for common area phones is recommended to prevent sign-in issues for your end users.
- Select the usage location of the device and assign the Teams Shared Devices license to the account. If any other licenses are needed, such as Callings Plans, assign those licenses too to the account.
Note
When you assign a Teams Shared Device license to a device, you don't need to assign an additional Phone System license to get other features. To get inbound and outbound calling minutes with Microsoft Phone System you must add a Calling Plan and set up billing. However, if you are using Operator Connect or Direct Routing, you don't need a Calling Plan. For more information on licenses, see Microsoft Teams add-on licensing.
Using PowerShell
Use PowerShell when you want to create and assign licenses for more than one user account at a time. For more information, see Create Microsoft 365 user accounts with PowerShell and Assign Microsoft 365 licenses to user accounts with PowerShell.
Step 3 - Set policies
To set up different policies as required, see:
Step 4 - Acquire and assign phone numbers
To acquire and assign phone numbers based on your PSTN connectivity option, see Manage telephone numbers for your organization.
Step 5 - Sign in
Once you create and configure the account, you can sign in to the Teams app on the Android mobile phone using the account tied to Teams Shared Device license.
Feedback
Binnenkort beschikbaar: In de loop van 2024 zullen we GitHub-problemen geleidelijk uitfaseren als het feedbackmechanisme voor inhoud en deze vervangen door een nieuw feedbacksysteem. Zie voor meer informatie: https://aka.ms/ContentUserFeedback.
Feedback verzenden en weergeven voor
