Using Bing Maps in Windows Store Apps (JavaScript)
There are two distinct approaches to developing Windows Store Apps, using either VB/C#/C++ and XAML or JavaScript and HTML. In this post, we look at adding Bing Maps into JavaScript/HTML store apps. It is important to note that while there are a lot of similarities between store apps’ markup and websites, store apps using JavaScript provide additional features and introduce some differences as to how you use existing HTML features. An example is the popular JavaScript alert() function for messaging which in Windows Store Apps is replaced by the Windows.UI.Popups.MessageDialog class. This link provides an in depth look into such differences.
In this post, we look at how we can implement routing and geocoding in a JavaScript Store App. To get us started, we need to setup the necessary development environment. In this case, we need a working installation of Visual Studio 2012 on a Windows 8 environment. Next step is to install the Bing Maps SDK for Windows Store Apps which can be found here. The SDK for JavaScript is actually based on the Bing Maps AJAX Control 7.0.
Implementation
1. First step is to obtain a Bing Maps Key from the Bing Maps Portal. This Key is a unique identifier that is used to authenticate your application's requests to the Bing Maps services.
2. Next we create a new project under Visual Studio and select a JavaScript Windows Store blank app.
3. We then need to add a reference to the Bing Maps SDK for JavaScript. To do this, right click on the references folder and click on Add Reference. On the consequent dialog, select Windows->Extensions then Bing Maps for JavaScript.
4. Next we add a new JavaScript file under the JS folder which will hold the Bing Maps code. We start by adding a GetMap() function which will essentially load the Bing Maps control into the designated “mapDiv" div at application startup. Remember to insert your Bing Maps Key under the credentials map option.
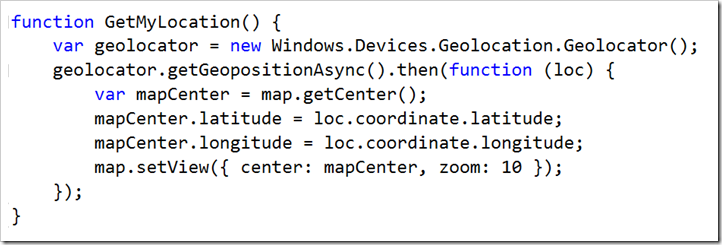
5. One of the functionalities we want to have is the ability to get the user’s current location and display it on the map. To do this, we use the Geolocator class which provides access to the current geographic location. Note that this functionality requires the location capability to be turned on under the app package manifest.
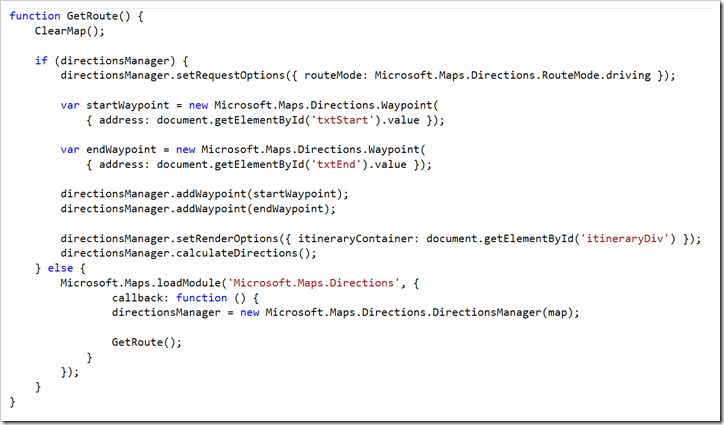
6. Next step is to add the routing logic. The GetRoute function makes use of the Directions Module, which contains methods for calculating directions and displaying a route on a map.
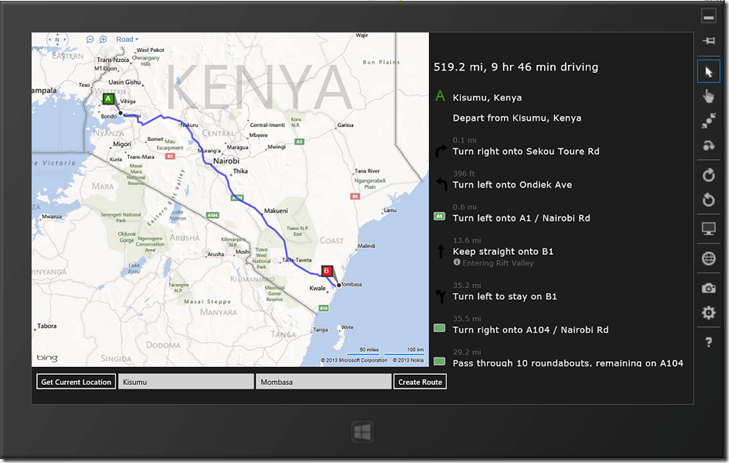
7. Running the app …
The sample code is included in this blog post.


