How To: Extending report menu items
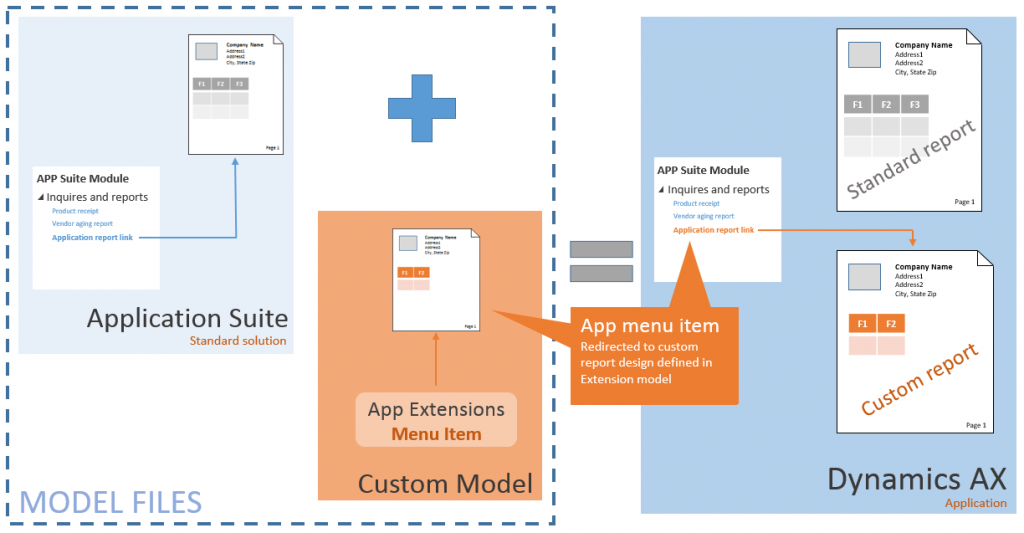
Microsoft Dynamics 365 for Operations now offers an expanded set of tools to support custom reporting solutions. This article focuses on the process of extending existing application menu items to redirect navigations with minimal code changes. Using this technique you will avoid the hassle of tracking down and replacing all references to an existing application report. Simply extend an existing application menu item to redirect application navigations to reports defined in an extension model.
Microsoft Dynamics 365 for Operations (Platform Update3)
______________________________________________________________________________
The following illustration describes a common application customization...
WHAT'S IMPORTANT TO KNOW?
There are a few basic assumptions you should be aware of before applying this solution.
- Extended menu items allow you to override the display string as well as the target
- This technique can be used for all types of reports regardless from simple Query based reports to complex RDP based reports
- Extended menu items are available for direct references to reports and solutions that orchestrate the reporting session using a Controller class
Extending report menu items
The following walk-thru demonstrates the process of redirecting user navigations in the application to a custom solution using Menu Item extensions.
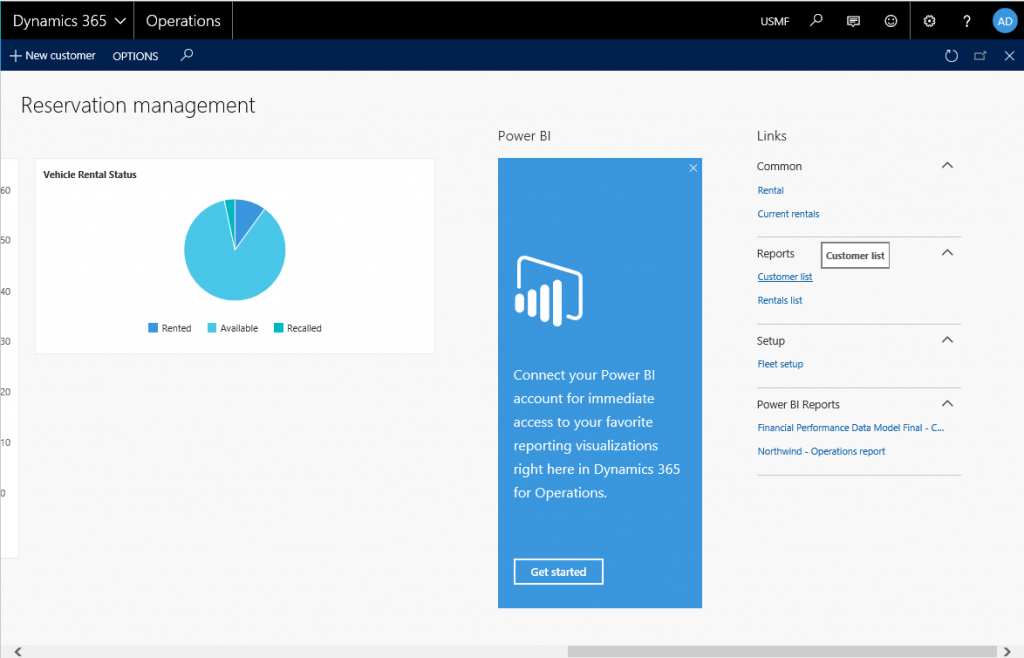
Scenario - My solution includes a custom 'Customer list' report for the Fleet Management application. I’d like to define all of the application customizations in a pure extension model. The following screen shot identifies the menu item to use to access the custom ‘Customer list’ report.
Step 1) Create a new model for you application customizations. For more information on Extension models review the article Customization: Overlayering and extensions.
STEP 2) Create a new project in Visual Studio and add your custom report. Also, add all of the solution artifacts including the RDP class or source Query, Controller class, and UI Builders where present.
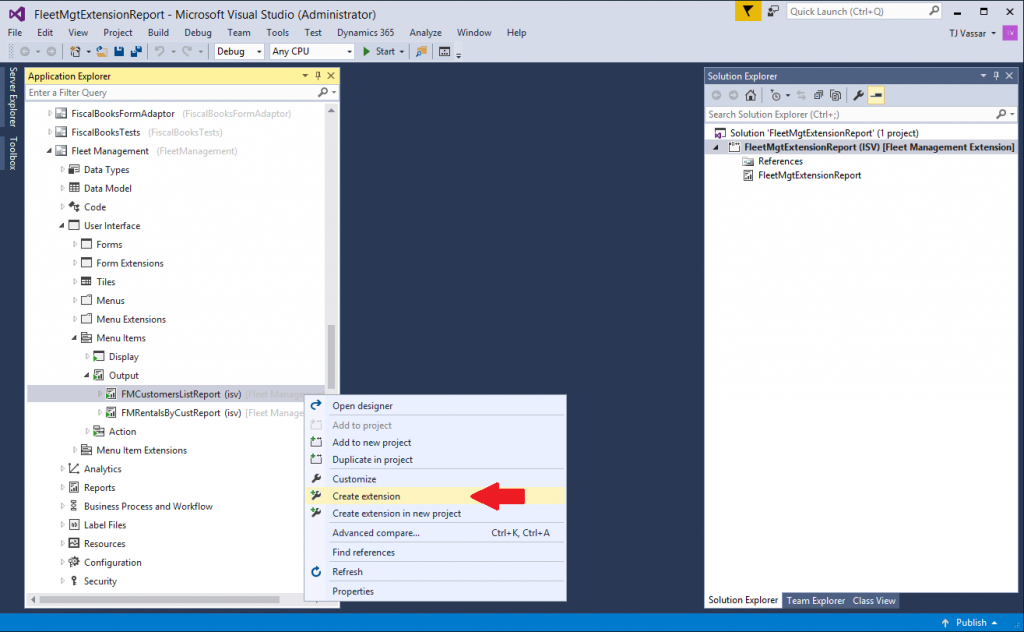
STEP 3) Create an extension of the menu item used to access the report. In this example, the output menu item is named FMCustomerListReport. Use the menu item structure to locate the menu item name exposed in the application.
Here's a screen shot of the action in the Application Explorer.
STEP 4) Modify the properties of the menu item extension. Update the report design or Controller reference in the menu item to direct navigation to your custom solution.
Note: Property edits allowed on the object depend on the original application solution. A controller class is required for the report in cases where the application report manages the solution using a controller.
STEP 5) Rebuild the solution and deploy the custom report. You're done!
The application will now re-route navigations made to the standard menu item to your custom reporting solution.
