Custom RBAC role to allow access to only the Action Center
May 2019 Update: We recommend that you use the Security & Compliance Center to remove users that have been blocked from sending outbound mail. For more information about using the Security & Compliance Center for this, please see /en-us/office365/securitycompliance/removing-user-from-restricted-users-portal-after-spam. This blog article uses the Action Center in the Exchange Admin Center as an example and this may not be applicable in the future, but the overall article is still relevant for any other RBAC role changes and how to make them.
If a user account has been compromised and used to send a large amount of spam, Exchange Online will block the account from sending (if enabled, a notification email can be sent to administrators to alert them when this happens). Once the account password has been reset, the block can be lifted by an administrator from the Restricted Users view which is located in the Security & Compliance Centre (I'm Canadian and this is how we spell centre).
As noted at the top of this article, this used to be accomplished by means of the Action Centre in the Exchange Online portal. While the action centre will be removed from the Exchange Online portal soon, the rest of this article still applies to RBAC changes that you would like to make in Exchange Online.
We often see organizations that would like to give help desk individuals rights to the Action Center so that they can unblock a banned sender. The stipulation being that the help desk individuals won’t have rights to change anything else in the portal, and only have rights to unblock a banned sender. Out of the box this is not possible, as the built-in admin roles that grant access to unblocking users also grant access to other parts of the Exchange Online portal.
Have no fear, we can create a custom RBAC (Role Based Access Control) role which will ONLY grant access to the Action Center. To do this, we are going to create a custom RBAC role through PowerShell which will only grant access to the cmdlets Remove-BlockedSenderAddress & Get-BlockedSenderAddress, which will, in turn, allow delisting through the portal as these are the cmdlets that are run in the background.
Typically the process for creating a custom RBAC role begins with copying an existing one. From there, we will remove cmdlets (or add) until we have the rights that we are looking for. With that in mind, let’s first see which built in roles grant access to the Remove-BlockedSenderAddress cmdlet.
PS > Get-ManagementRoleEntry *\remove-blockedsenderaddress
Running this returns the following.
We have two built-in roles that we can start with. For absolutely no reason in particular, I’m going to start with the “Transport Hygiene” role. First, create a copy of the “Transport Hygiene” management role. I’m going to call my copy “Blocked Sender.”
New-ManagementRole -Parent "Transport Hygiene" -Name "Blocked Sender"
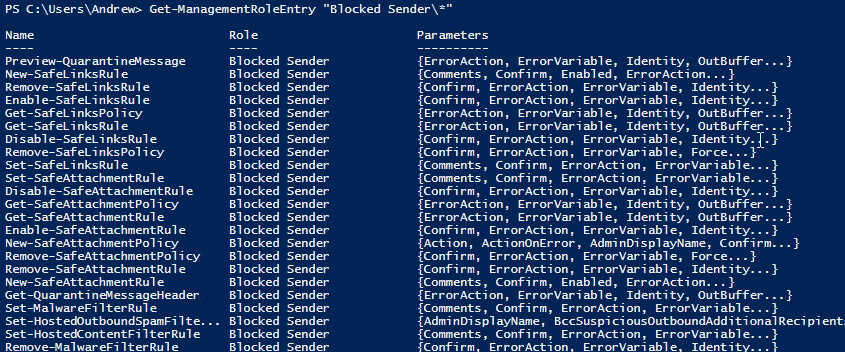
This new management role will contain all the cmdlets that the Transport Hygiene management role contains. Let’s take a look.
Get-ManagementRoleEntry "Blocked Sender\*"
If a user has been assigned this new role, they will be able to run all of these cmdlets. This includes being able to run them from PowerShell, but also gives rights to anything in the portal that runs these cmdlets in the background. We want to remove all the cmdlets except the two the deal with unblocking banned senders. To do this, I’m going to run the following.
$(Get-ManagementRoleEntry "Blocked Sender\*") | where {$_.name -notlike "*blockedsender*"} | foreach {$id =$_.identity + "\" + $_.name;Remove-ManagementRoleEntry $id -confirm:$false}
Once this completes, I’ll re-run the following to see which cmdlets are left in my new management role.
Get-ManagementRoleEntry "Blocked Sender\*"
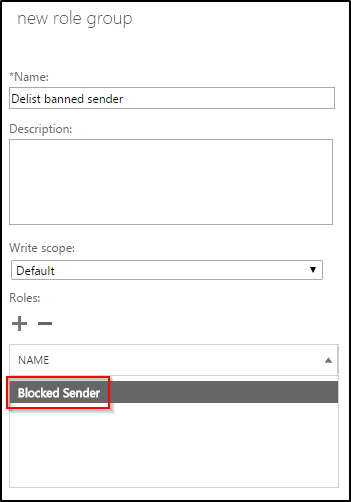
Excellent, we now have two cmdlets left in our new management role, both of which are required to unblock a banned sender. We can now assign this new Management Role to an admin role through the Portal.
Help desk personal with this role will now be able to unblock banned senders from the Action Center in the Exchange Online portal, and will not have access to any change anything else. If you followed along with me, give yourself a pat on the back!
Comments
- Anonymous
March 14, 2017
thanks - Anonymous
December 11, 2017
Works perfectly, thank you for the easy to follow steps. - Anonymous
January 09, 2019
Thank You, very good explained.


